一.MyBatis的基本概念与相关配置.
1.基本概念
- MyBatis是一款优秀的持久层框架,用于简化JDBC的开发。MyBatis本是Apache的一个开源项目iBatis,2010年这个项目由apache迁移到了google code,并且改名为MyBatis. 2013年11月迁移到Github.
- 持久层:指的就是持久化操作的层, 通常指数据访问层(dao), 是用来操作数据库的.

简单来说 MyBatis 是更简单完成程序和数据库交互的框架,也就是更简单的操作和读取数据库工具.
2.相关配置
Maven配置
- SpringBoot与MyBatis之间的对应关系参考官方网址:https://mybatis.org/spring-boot-starter/mybatis-spring-boot-autoconfigure/
- 我MyBatis用的Maven依赖.
java
		<!-- MyBatis依赖包 -->
		<dependency>
			<groupId>org.mybatis.spring.boot</groupId>
			<artifactId>mybatis-spring-boot-starter</artifactId>
			<version>3.0.3</version>
		</dependency>
		<!-- mysql驱动包 -->
		<dependency>
			<groupId>com.mysql</groupId>
			<artifactId>mysql-connector-j</artifactId>
			<scope>runtime</scope>
		</dependency>
配置数据库连接字符串
- 如果是application.yml文件, 配置内容如下:
java
spring:
  datasource:
    url: jdbc:mysql://127.0.0.1:3306/mybatis_test?characterEncoding=utf8&useSSL=false
    username: root
    password: 120348
    driver-class-name: com.mysql.cj.jdbc.Driver
注
如果使用 MySQL 是 5.x 之前的使用的是"com.mysql.jdbc.Driver",如果是大于 5.x 使用的是"com.mysql.cj.jdbc.Driver
- 如果是application.properties文件, 配置内容如下:
java
#驱动类名称
spring.datasource.driver-class-name=com.mysql.cj.jdbc.Driver
#数据库连接的url
spring.datasource.url=jdbc:mysql://127.0.0.1:3306/mybatis_test?
characterEncoding=utf8&useSSL=false
#连接数据库的⽤⼾名
spring.datasource.username=root
#连接数据库的密码
spring.datasource.password=root
打印日志配置
- 该项配置可以看到SQL执行内容, 以及传递参数和执行结果
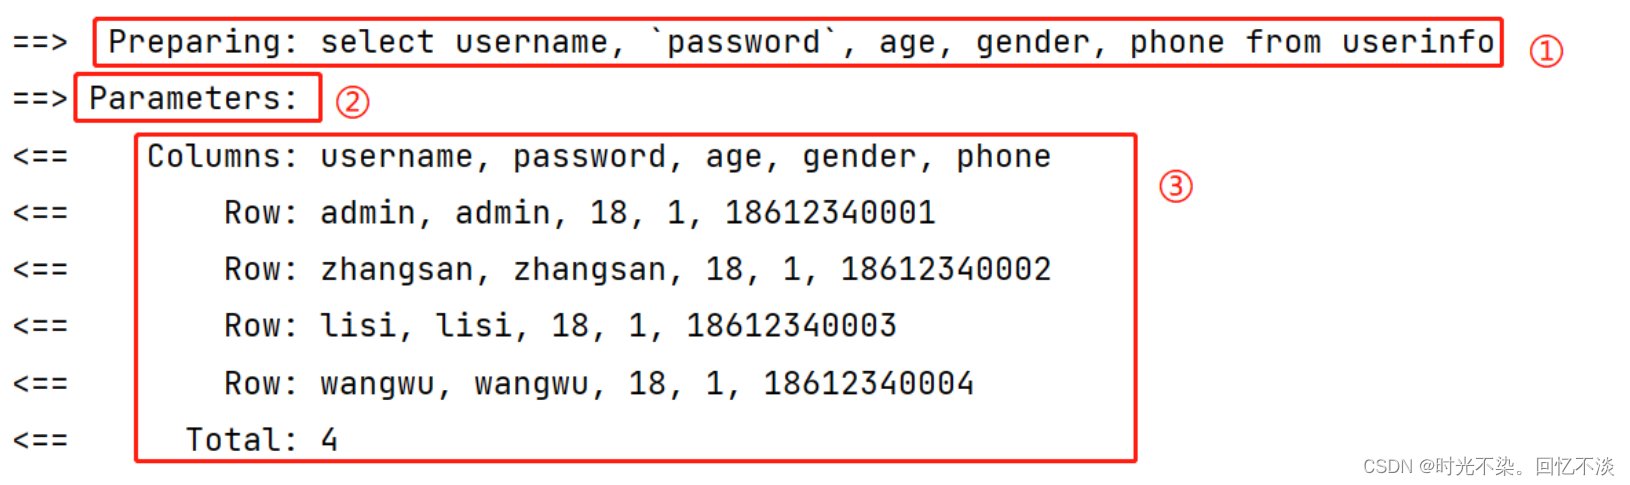
①: 查询语句
②: 传递参数及类型
③: SQL执行结果
java
mybatis:
  configuration: # 配置打印 MyBatis 执行的 SQL
    log-impl: org.apache.ibatis.logging.stdout.StdOutImpl
3.单元测试
- 在Test目录下创建要测试的类的名称, 测试类上添加了注解 @SpringBootTest,该测试类在运行时,就会自动加载Spring的运行环境.我们通过@Autowired这个注解, 注⼊我们要测试的类, 就可以开始进行测试了
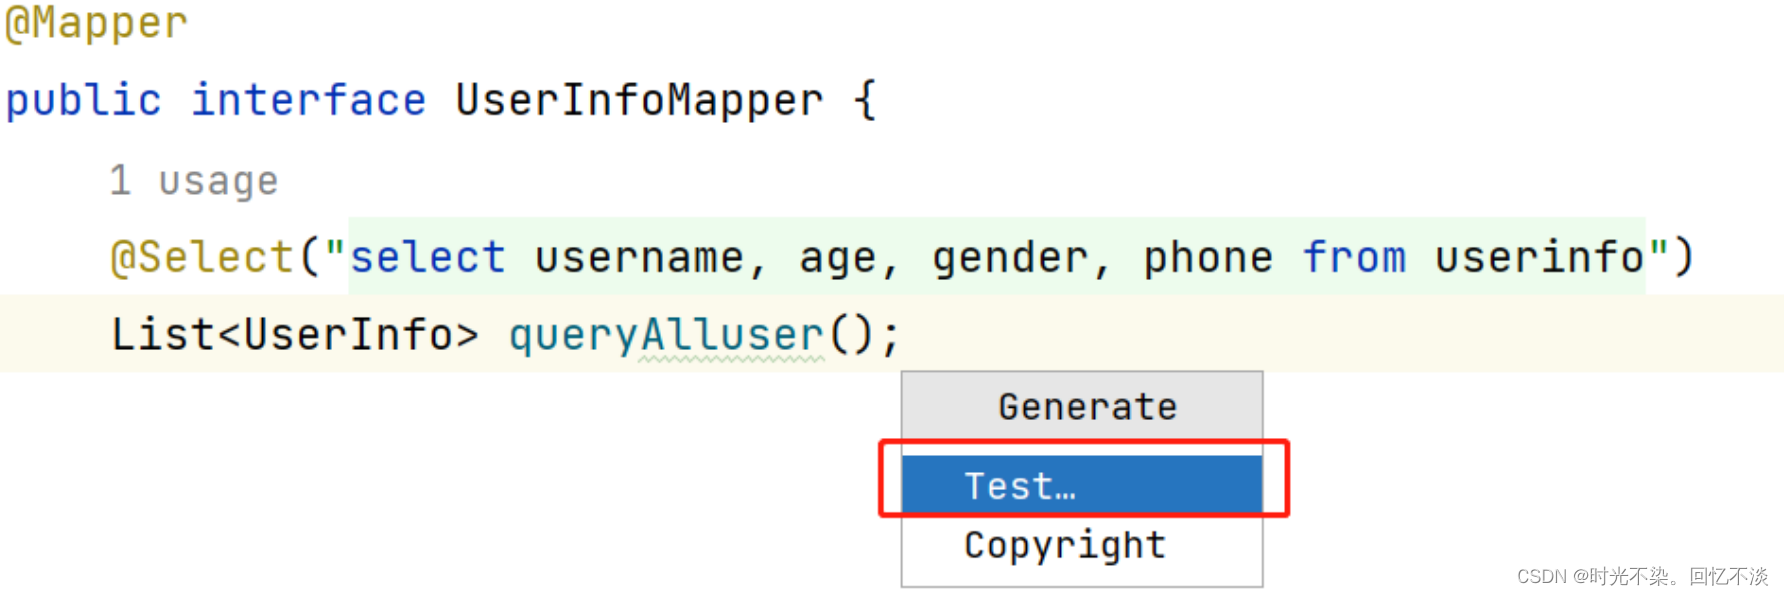
使用 Idea 自动生成测试类
-
在需要测试的Mapper接口中, 右键 -> Generate -> Test
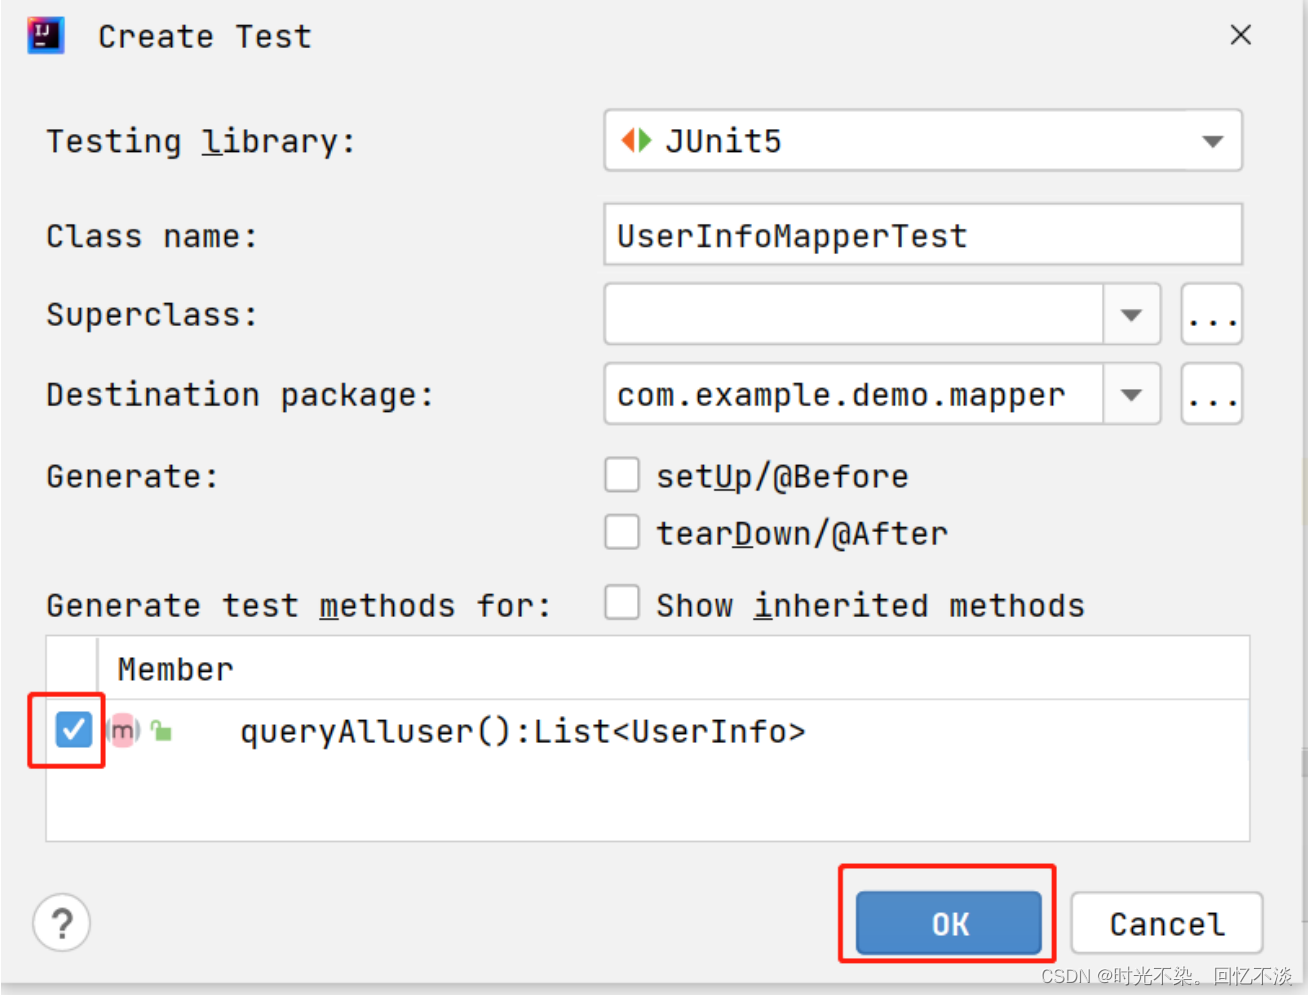
-
选择要测试的方法, 点击 OK
-
书写测试代码
二.MyBatis的注解实现.
2.1.1 传参的细节.
- 先来看两个用注解实现的MyBatis语句:
java
@Insert("insert into userInfo (username,password,age,gender) values (#{username},#{password},#{age},#{gender})")
    Integer insertUserInfo(UserInfo userInfo);
java
@Insert("insert into userInfo (username,password,age,gender) values (#{userInfo.username},#{userInfo.password},#{userInfo.age},#{userInfo.gender})")
Integer insertUserInfo2(@Param("userInfo") UserInfo userInfo);- 在第一种的实现方式中,传参的时候,就可以直接读取userInfo对应的属性来完成赋值.而第二种方法则是将userInfo当作一个整体的对象,需要" . "出所需要的属性.
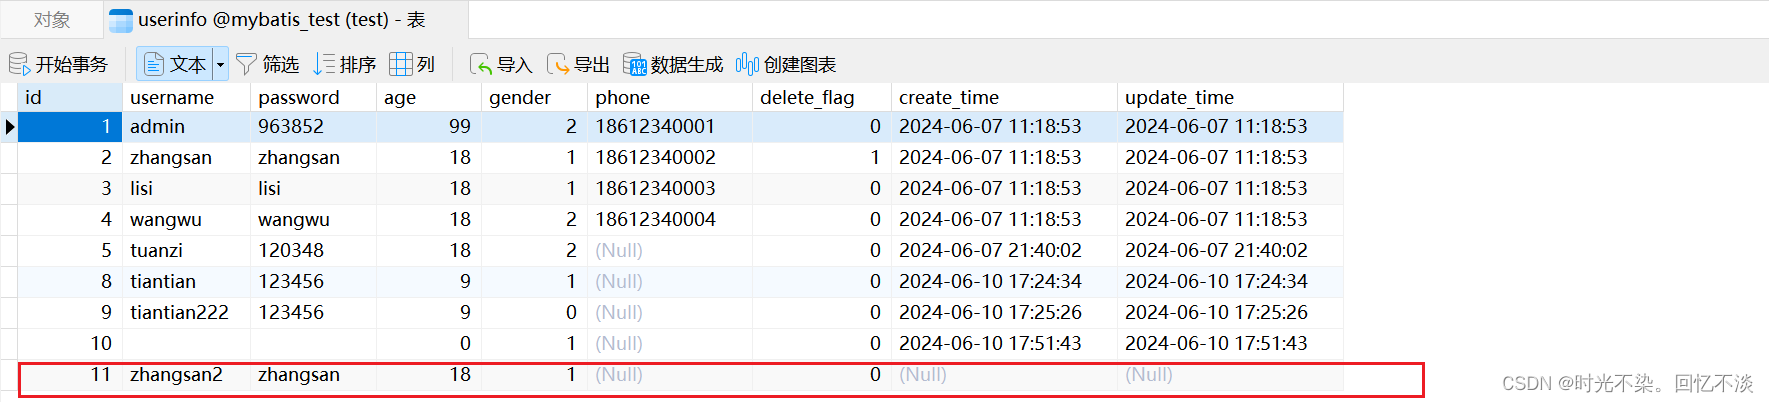
2.2.1增.
- Mapper接口代码:
java
@Insert("insert into userInfo (username,password,age,gender) values (#{username},#{password},#{age},#{gender})")
Integer insertUserInfo(UserInfo userInfo);- 生成对应的测试代码:
java
@Test
    void insertUserInfo() {
        UserInfo userInfo = new UserInfo();
        userInfo.setAge(18);
        userInfo.setGender(1);
        userInfo.setPassword("zhangsan");
        userInfo.setUsername("zhangsan2");
        Integer i = userInfoMapper.insertUserInfo(userInfo);
        System.out.println(i);
}- 运行结果:
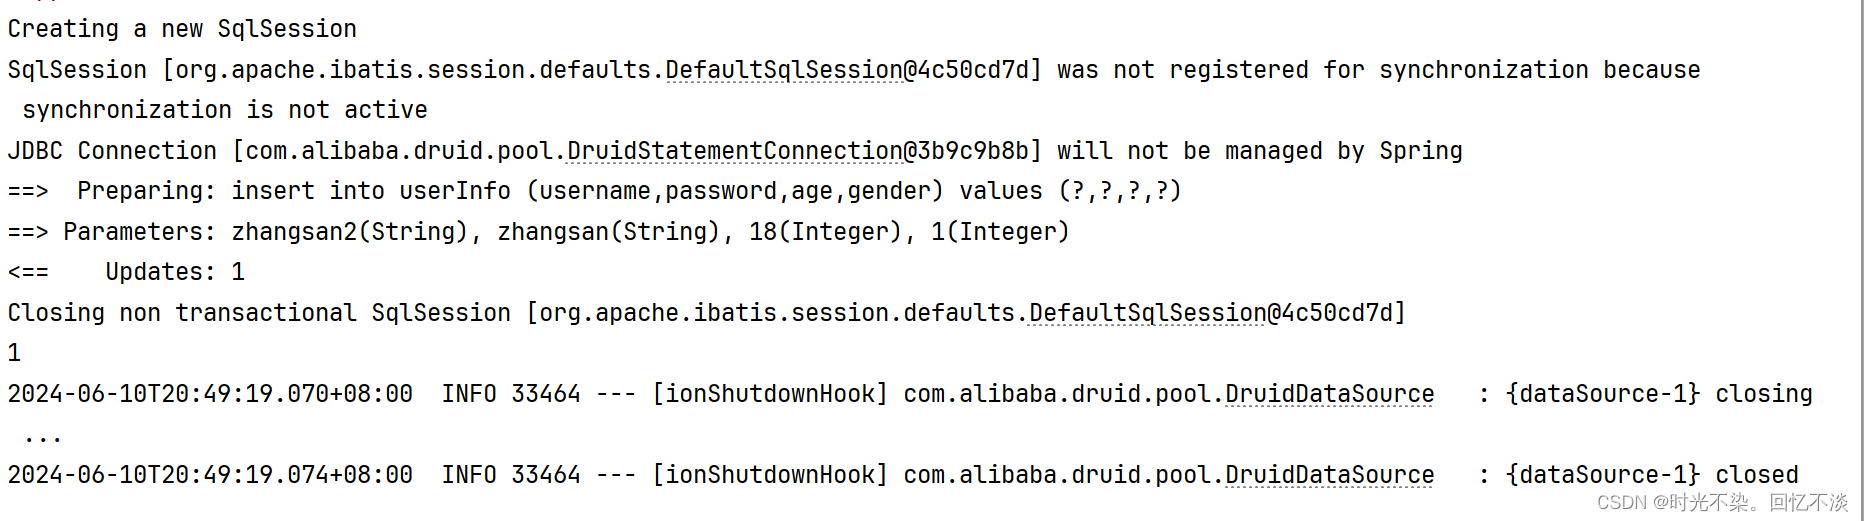
- 对应数据库的变化:
2.2.2删.
- Mapper接口代码:
java
@Delete("delete from userInfo where id = #{id}")
Integer deleteUserInfoById(Integer id);- 生成对应的测试代码:
java
@Test
    void deleteUserInfoById() {
        Integer i = userInfoMapper.deleteUserInfoById(11);
        System.out.println(i);
}- 运行结果:
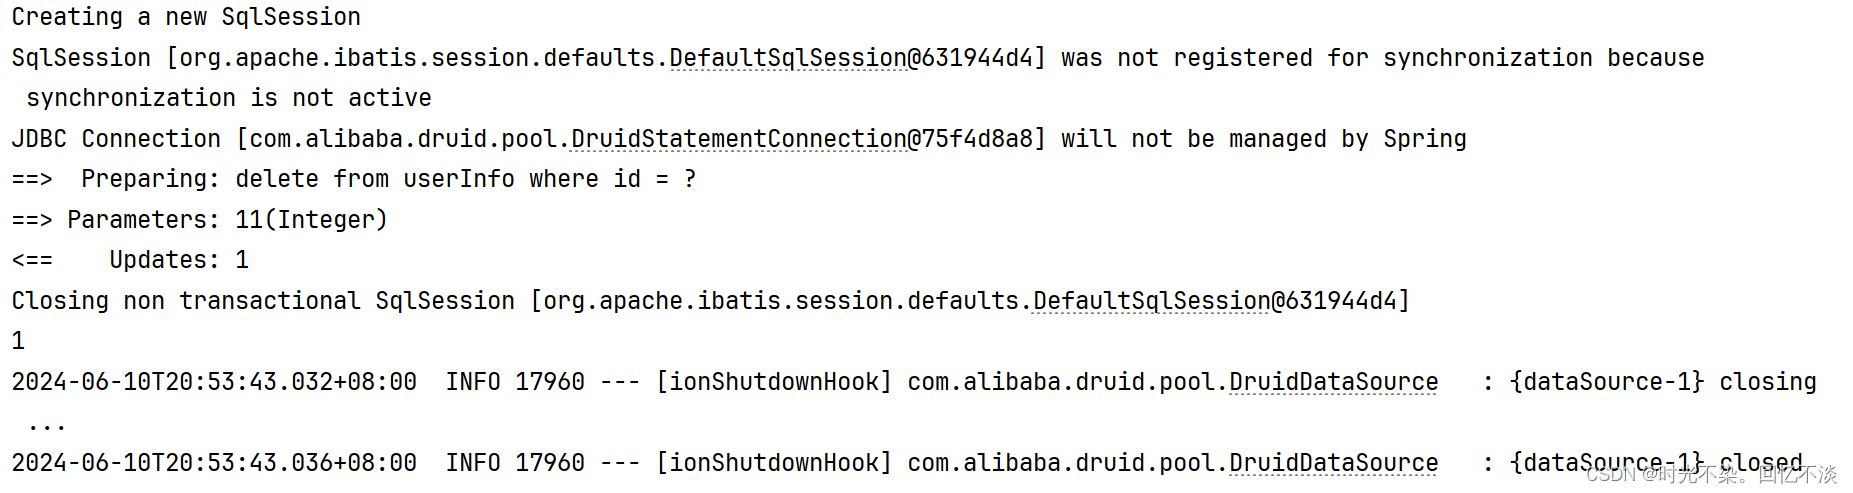
- 对应数据库的变化:
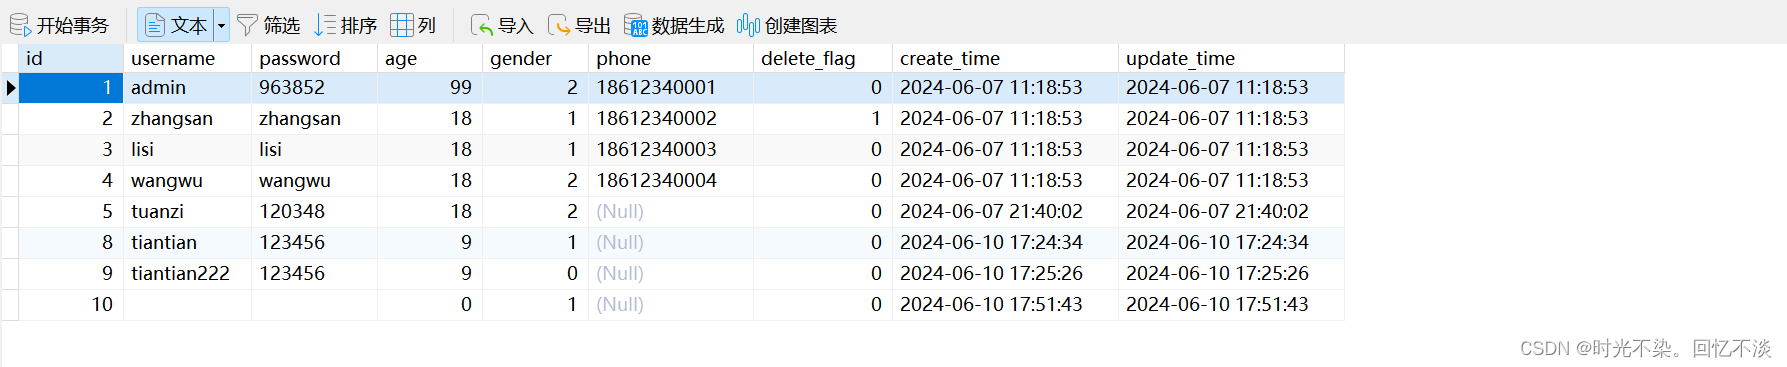
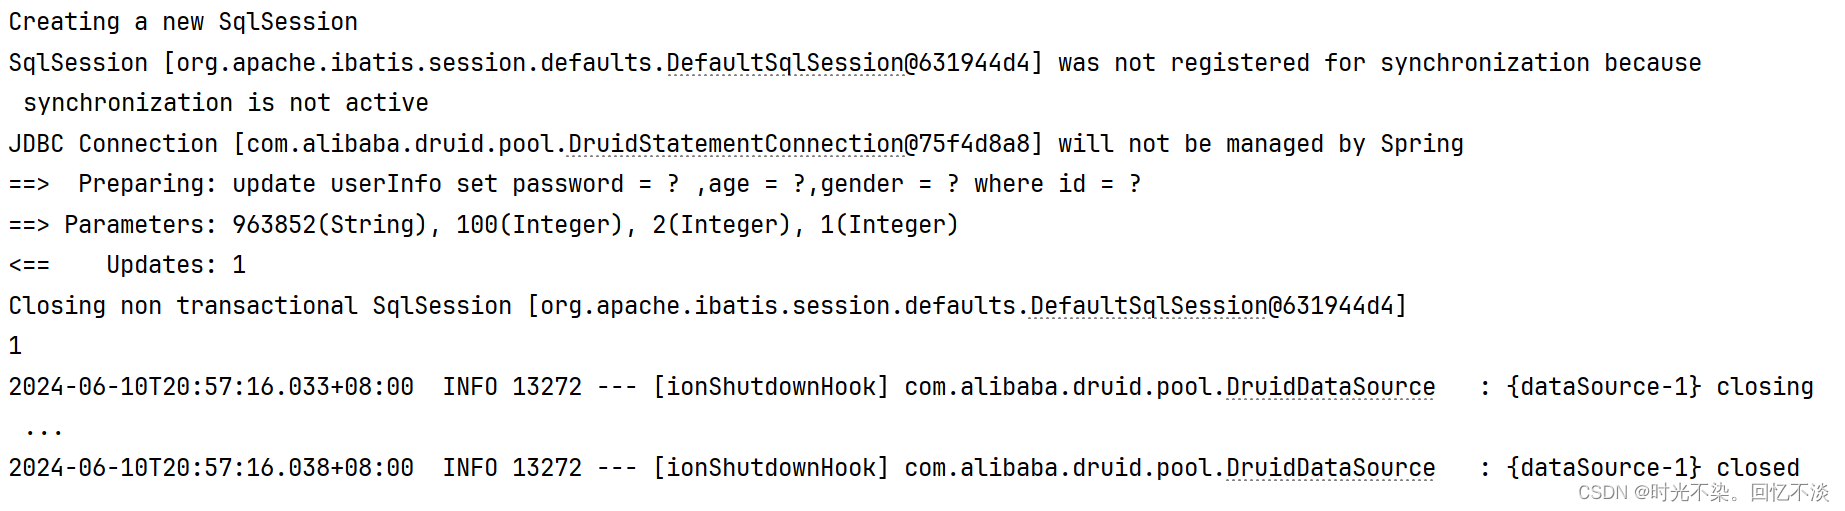
2.2.3改.
- Mapper接口代码:
java
@Update("update userInfo set password = #{password} ,age = #{age},gender = #{gender} where id = #{id}")
Integer updateUserInfo(UserInfo userInfo);- 生成对应的测试代码:
java
@Test
    void updateUserInfo() {
        UserInfo userInfo = new UserInfo();
        userInfo.setId(1);
        userInfo.setAge(100);
        userInfo.setGender(2);
        userInfo.setPassword("963852");
        Integer i = userInfoMapper.updateUserInfo(userInfo);
        System.out.println(i);
}-
运行结果:
-
对应数据库的变化:

2.2.4查.
- Mapper接口代码:
java
@Select("select * from userInfo where delete_flag = #{deleteFlag}")
public List<UserInfo> getUserInfoByDeleteFlag(Integer deleteFlag);- 生成对应的测试代码:
java
@Test
    void getUserInfoByDeleteFlag() {
        List<UserInfo> userInfoByDeleteFlag = userInfoMapper.getUserInfoByDeleteFlag(0);
        System.out.println(userInfoByDeleteFlag);
}- 运行结果:

三.MyBatis的XML配置文件实现.
- 此步骤需要进行两项设置,数据库连接字符串设置和 MyBatis 的 XML 文件配置。
application.yml文件, 配置内容如下:
java
spring:
  datasource:
    url: jdbc:mysql://127.0.0.1:3306/mybatis_test?characterEncoding=utf8&useSSL=false
    username: root
    password: 120348
    driver-class-name: com.mysql.cj.jdbc.Driver
mybatis:
  mapper-locations: classpath:mybatis/**Mapper.xml
  configuration: # 配置打印 MyBatis 执行的 SQL
log-impl: org.apache.ibatis.logging.stdout.StdOutImpl- 写持久层代码, 持久层代码分两部分
- 方法定义 Interface
- 方法实现:XXX.xml

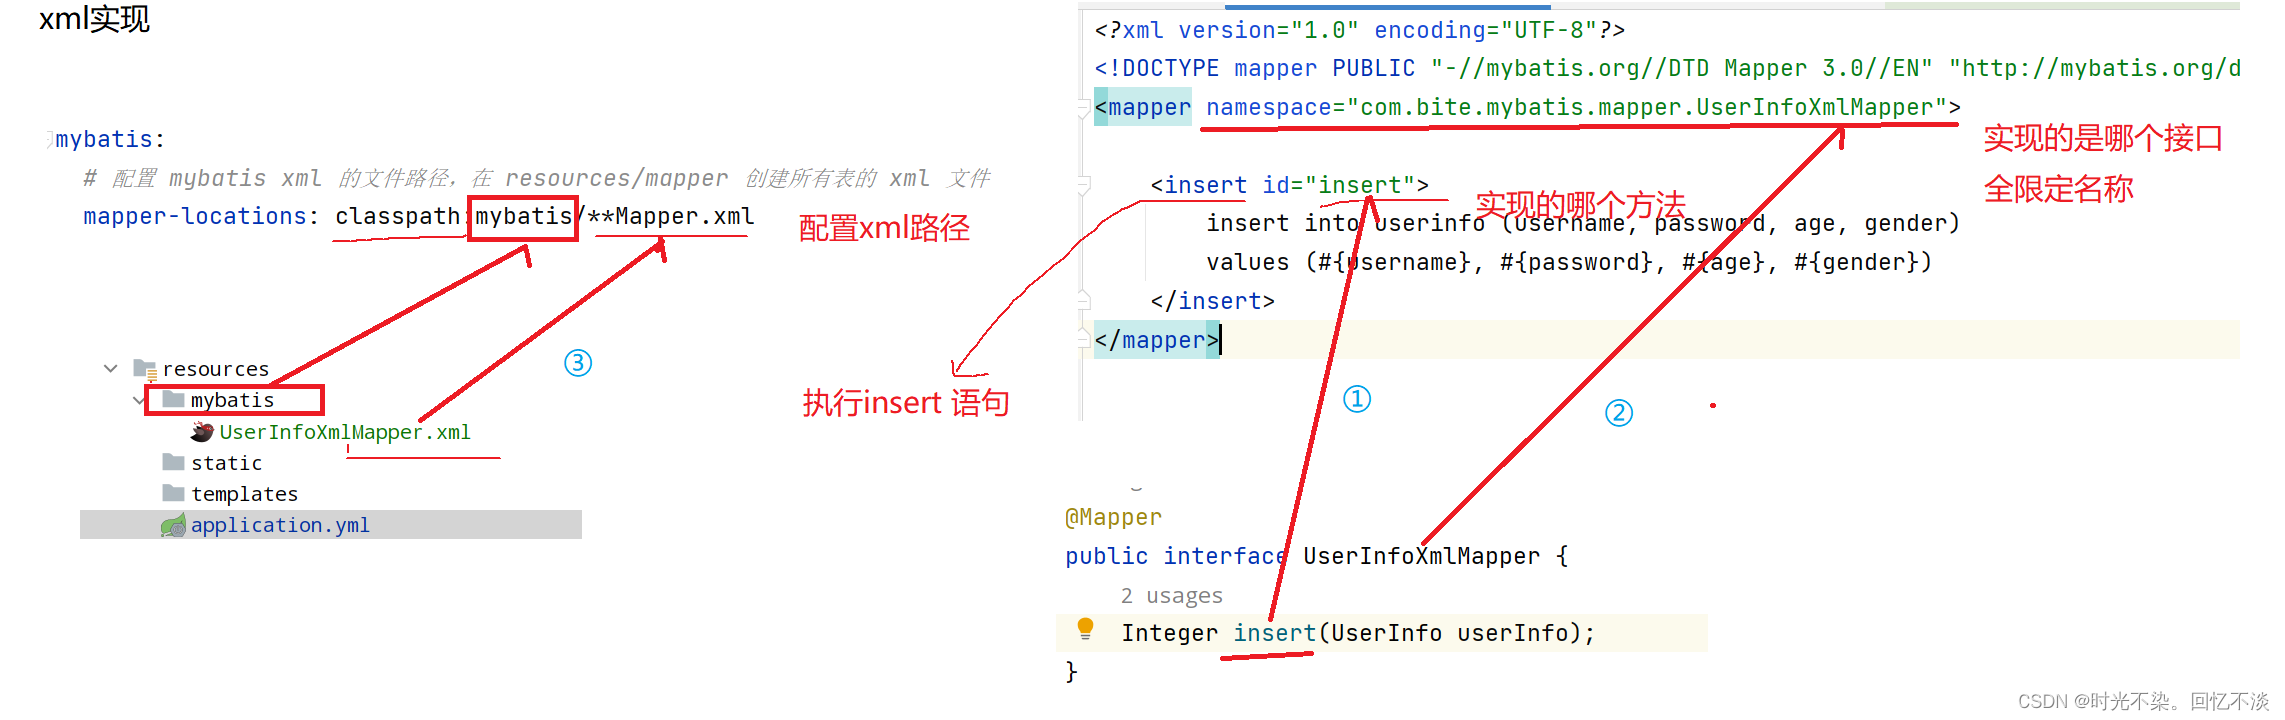
3.1 增.
- Mapper接口代码:
java
Integer insert(UserInfo userInfo);- 对应的实现xml.
java
<insert id="insert">
        insert into userInfo (username,password,age,gender) values (#{username},#{password},#{age},#{gender})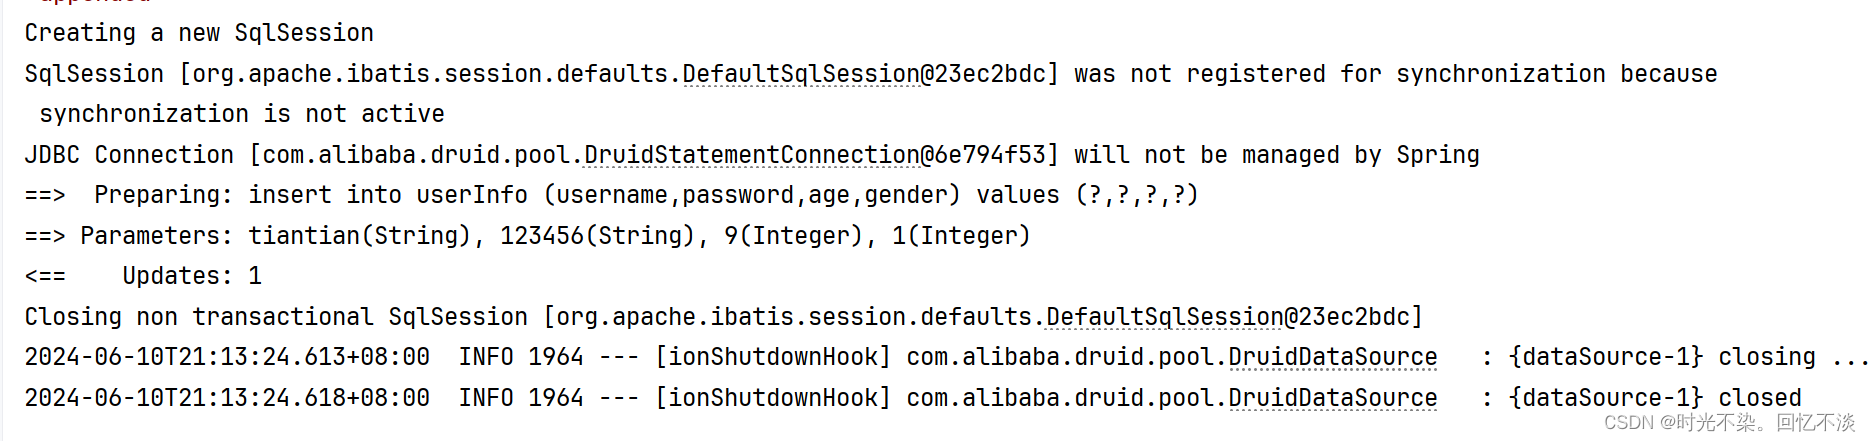
</insert>-
生成对应的测试代码:
@Test
void insert() {
UserInfo userInfo = new UserInfo();
userInfo.setUsername("tiantian");
userInfo.setPassword("123456");
userInfo.setAge(9);
userInfo.setGender(1);
userInfoXmlMapper.insert(userInfo);
}
-
运行结果:
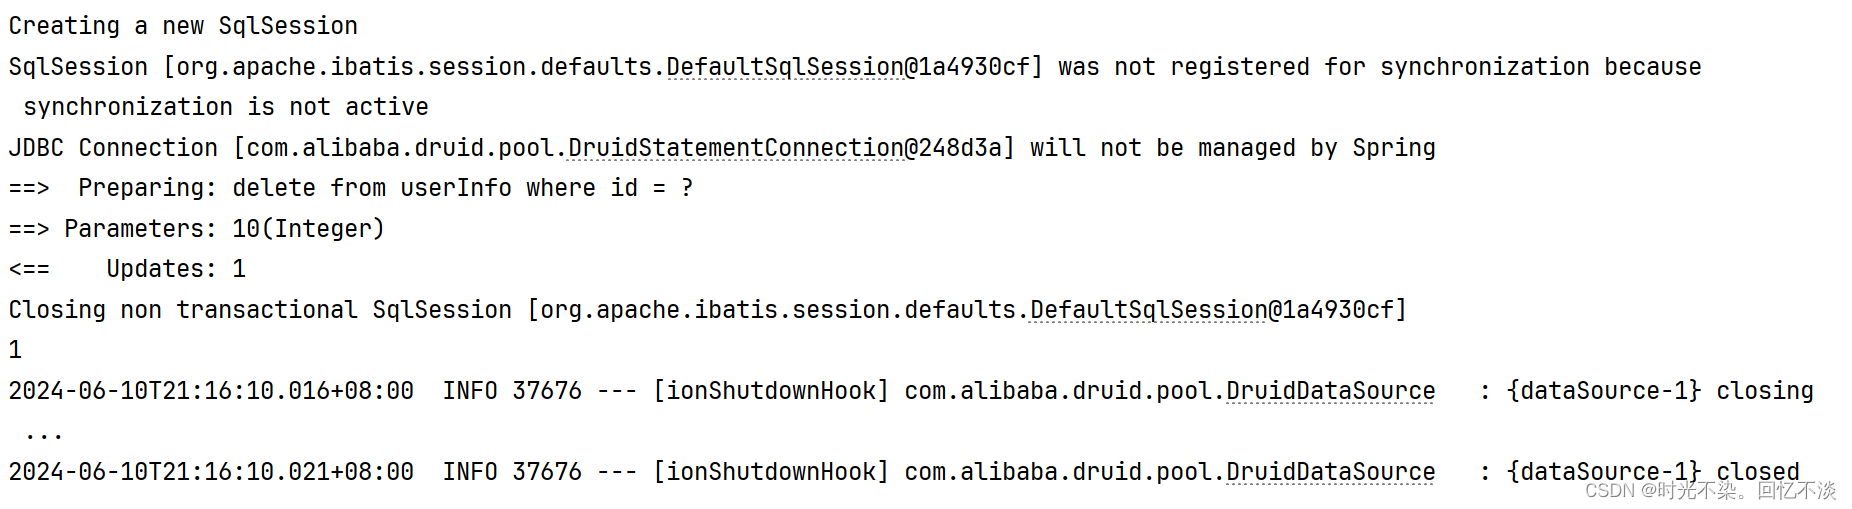
3.2 删.
- Mapper接口代码:
java
Integer deleteById(Integer id);- 对应的实现xml.
java
<delete id="deleteById" parameterType="integer">
        delete from userInfo where id = #{id}
</delete>- 生成对应的测试代码:
java
@Test
    void deleteById() {
        Integer id = 10;
        Integer i = userInfoXmlMapper.deleteById(id);
        System.out.println(i);
}- 运行结果:
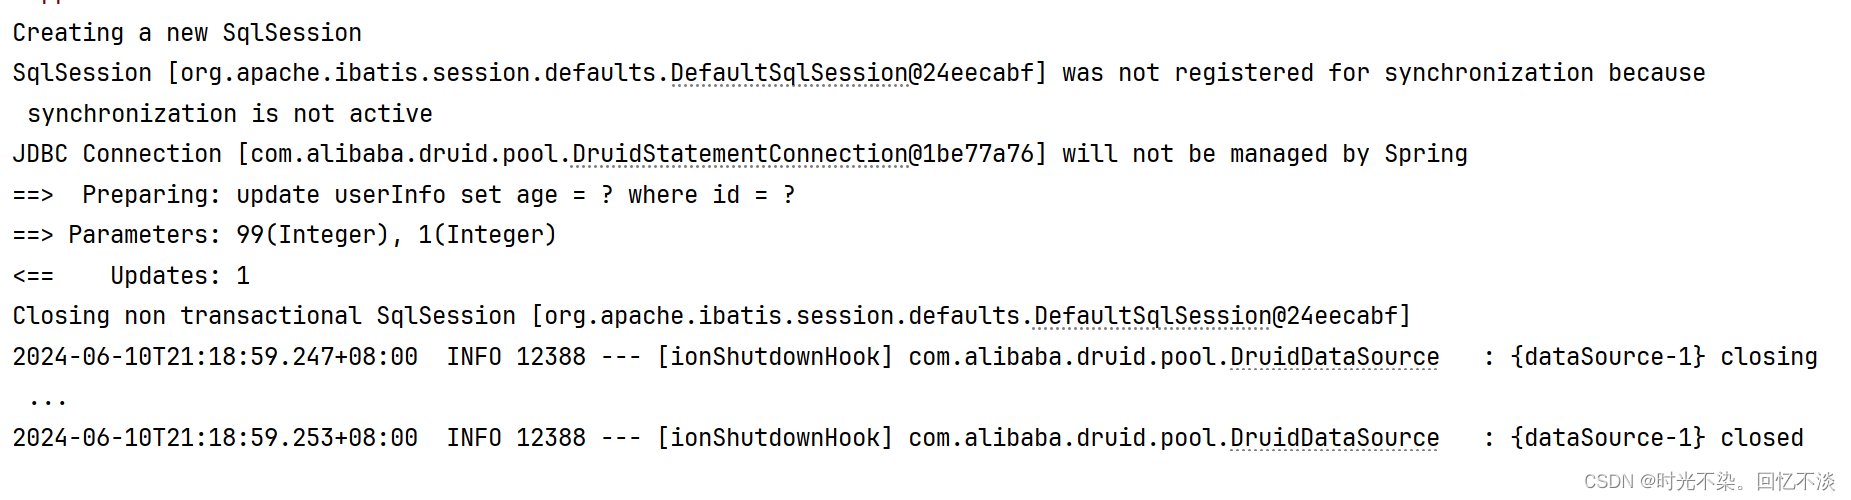
3.1 改.
- Mapper接口代码:
java
Integer updateById(UserInfo userInfo);- 对应的实现xml.
java
<update id="updateById">
        update userInfo set age = #{age} where id = #{id}
</update>- 生成对应的测试代码:
java
@Test
    void updateById() {
        UserInfo userInfo = new UserInfo();
        userInfo.setId(1);
        userInfo.setAge(99);
        userInfoXmlMapper.updateById(userInfo);
}- 运行结果:
3.1 查.
- Mapper接口代码:
java
List<UserInfo> selectAll();- 对应的实现xml.
java
<select id="selectAll" resultType="com.tuanzi.ssm.springmybatis.model.UserInfo">
        select * from userInfo
</select>- 生成对应的测试代码:
java
@Test
    void selectAll() {
        List<UserInfo> list = userInfoXmlMapper.selectAll();
        System.out.println(list);
}- 运行结果:
