
🌈个人主页:前端青山
🔥系列专栏:vue篇
🔖人终将被年少不可得之物困其一生
依旧青山,本期给大家带来vue篇专栏内容:一文精通Vue移动端:从零到一构建高效应用
目录
[5.1 、申请地图平台应用引入地图](#5.1 、申请地图平台应用引入地图)
1、项目创建
npm init vue@latest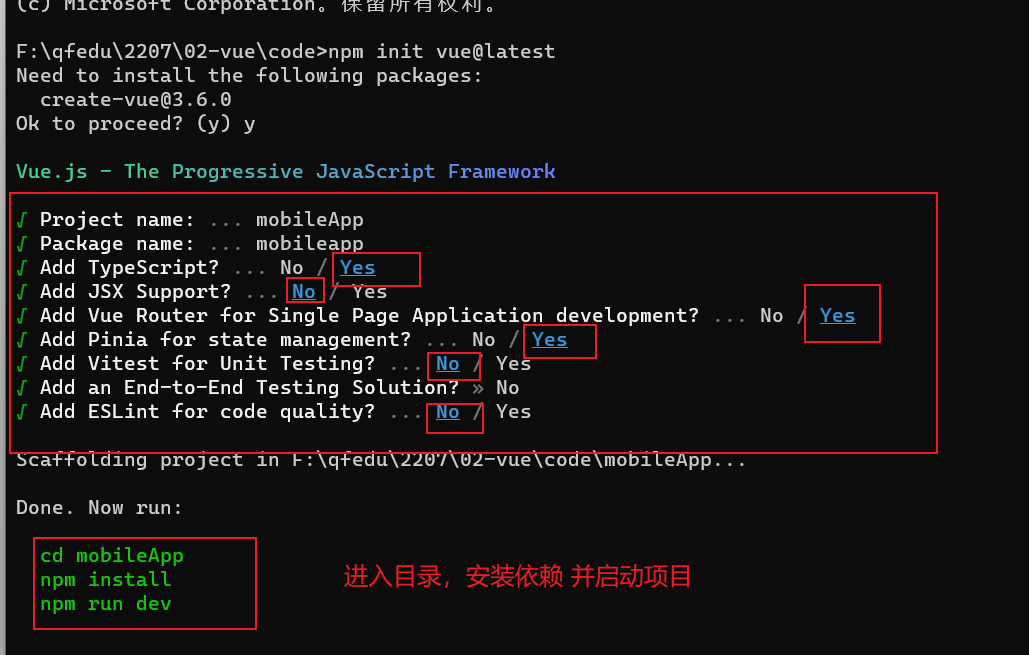
清理无用的项目包文件和引入路径
2、引入组件库
移动端使用组件一般会更加小一些,打包出来的大小也小,为了移动端更快一些。
vue中比较流行使用的就是vantUI,uview
https://vant-contrib.gitee.io/
安装
npm i vant
npm i sass
可以使用pnpm安装
Go
npm i -g pnpm

# 配置pnpm源为国内淘宝源
pnpm config set registry https://registry.npmmirror.com

# 如果项目包之前通过其他包管理工具安装过依赖,需要先删除node_module目录及其对应lock文件,再重新安装依赖
pnpm i
pnpm add vant
pnpm add -D sass
引入方式
方法一:常规用法
全局注册 在main.ts中进行注册,app.use('Button')
局部注册 如果使用的script setup属性,直接引入就可以 不需要注册
方法二:按需引入 css 需要安装的插件和配置 稍微繁琐
①安装
java
npm i vant
npm i unplugin-vue-components -D
# pnpm
pnpm add unplugin-vue-components -D
②配置插件
vite.config.js
javascript
import { fileURLToPath, URL } from 'node:url'

import { defineConfig } from 'vite'
import vue from '@vitejs/plugin-vue'
// 引入插件
import Components from 'unplugin-vue-components/vite'
// 引入路径解析的插件
import { VantResolver } from 'unplugin-vue-components/resolvers'
// https://vitejs.dev/config/
export default defineConfig({
  plugins: [
    vue(),
    // 配置使用按需引入插件
    Components({
      resolvers: [VantResolver()]
    })
  ],
  resolve: {
    alias: {
      '@': fileURLToPath(new URL('./src', import.meta.url))
    }
  }
})
重启一下服务
③测试使用插件
App.vue
javascript
<template>
  <div>
    <van-button type="primary">主要按钮</van-button>
    <van-button type="success">成功按钮</van-button>
    <van-button type="default">默认按钮</van-button>
    <van-button type="warning">警告按钮</van-button>
    <van-button type="danger">危险按钮</van-button>
  </div>
</template>

<script lang="ts">
import { defineComponent } from 'vue'

export default defineComponent({
  setup() {


    return {}
  }
})
</script>

<style scoped></style>
④函数类组件样式引入
javascript
import { createApp } from 'vue'
import { createPinia } from 'pinia'

import App from './App.vue'
import router from './router'
/*** 手动引入函数组件的样式文件  start */
// Toast
import 'vant/es/toast/style';

// Dialog
import 'vant/es/dialog/style';

// Notify
import 'vant/es/notify/style';

// ImagePreview
import 'vant/es/image-preview/style';
/*** 手动引入函数组件的样式文件  end */


const app = createApp(App)

app.use(createPinia())
app.use(router)

app.mount('#app')
二、功能实现
"
错误处理
1、.vue文件报错 文件类型没有声明
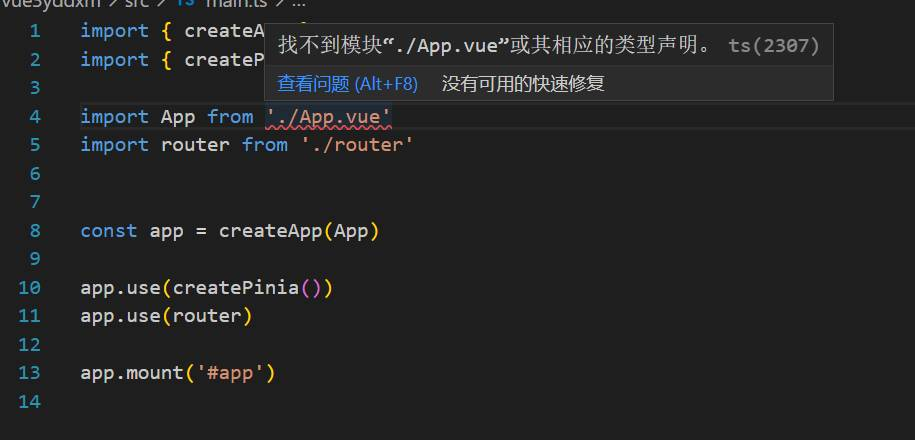
"
在env.d.ts文件中添加以下内容
javascript/// <reference types="vite/client" /> declare module '*.vue' { import type { DefineComponent } from 'vue' const vueComponent: DefineComponent<{}, {}, any> export default vueComponent }
1、配置项目路由
默认底部导航有四个页面,先配置其路由和组件
src\router\index.ts
javascript
import { createRouter, createWebHistory } from 'vue-router'
import Home from '../views/Home.vue'
const router = createRouter({
  history: createWebHistory(import.meta.env.BASE_URL),
  routes: [
    {
      path: '/',
      name: 'home',
      component: Home
    },
    {
      path: '/kuai',
      name: 'kuai',
      component: ()=>import('@/views/Kuai.vue')
    },
    {
      path: '/cart',
      name: 'cart',
      component: ()=>import('@/views/Cart.vue')
    },
    {
      path: '/my',
      name: 'my',
      component: ()=>import('@/views/My.vue')
    }
  ]
})

export default router
根据对应的页面组件路径,创建多个页面组件
例如首页面
src\views\Home.vue
javascript
<template>
    <div>
        home首页
    </div>
</template>

<script lang="ts">
import { defineComponent } from 'vue'

export default defineComponent({
    setup () {


        return {}
    }
})
</script>

<style scoped>

</style>
要在App.vue根据组件,使用路由渲染容器,加载显示对应的页面组件
javascript
<template>
  <div>
    <!-- 路由渲染容器 -->
    <RouterView></RouterView>
  </div>
</template>

<script lang="ts">
import { defineComponent } from 'vue'

export default defineComponent({
  setup () {


    return {}
  }
})
</script>

<style scoped>

</style>可以使用script标签的setup属性写法setup函数的语法糖,不需要使用setup函数,也不需要return返回了
javascript
<template>
    <!-- vb快捷生成 第六个 -->
    <div>
        <button @click="add">{{ num }}</button>
    </div>
</template>

<!-- setup属性写法  没有setup函数了 可以不使用return  vue3.2之后的写法 -->
<script setup lang="ts">
import { ref } from 'vue'
let num = ref(0)
const add = () => {
    num.value++
}
</script>

<style scoped></style>
2、底部导航栏实现
App.vue根组件实现底部导航,通过切换导航,加载对应路由的组件。
"
写 路由渲染容器 如果地址栏的url地址正常切换,但是页面没有显示切换。
1、没有写路由渲染容器
2、路由匹配规则有错误
封装底部导航组件
src\components\Footer.vue
javascript
<template>
    <div>
      <!-- route 开启路由 -->
      <van-tabbar v-model="active" route>
        <van-tabbar-item to="/">
          <span>首页</span>
          <template #icon="props">
            <span class="iconfont icon-shouye"></span>
          </template>
        </van-tabbar-item>
        <van-tabbar-item to="/kuai">
          <span>快省</span>
          <template #icon="props">
            <span class="iconfont icon-taobao"></span>
          </template>
        </van-tabbar-item>
        <van-tabbar-item to="/cart">
          <span>购物车</span>
          <template #icon="props">
            <span class="iconfont icon-gouwuche"></span>
          </template>
        </van-tabbar-item>
        <van-tabbar-item to="/my">
          <span>我的</span>
          <template #icon="props">
            <span class="iconfont icon-wode"></span>
          </template>
        </van-tabbar-item>
      </van-tabbar>

    </div>
  </template>

  <script setup lang="ts">
  import { ref } from 'vue'
  /* 引入字体图库的css文件 */
  import '@/assets/font/iconfont.css'
  const active = ref(0)
  </script>

  <style lang="scss" scoped>
  /* 调整底部菜单icon字体大小 */
  .iconfont {
    font-size: 28px;
  }
  </style>
需要在App.vue根组件引入使用
App.vue
javascript
<template>
  <div>
    <!-- 路由渲染容器 -->
    <RouterView></RouterView>
    <!-- 调用底部导航组件 -->
    <Footer></Footer>
  </div>
</template>

<script setup lang="ts">
</script>

<style lang="scss" scoped></style>
3、底部菜单的显示和隐藏
方法一:通过组件共享状态实现
可以将底部菜单设置一个显示的状态,将其存储到状态共享工具(pinia)中
src\stores\tabbar.ts
javascript
import { ref } from 'vue'
import { defineStore } from 'pinia'

export const useTabbarStore = defineStore('tabbar', () => {
  // 底部显示的状态  true 显示 false不显示
  const show = ref(true)
  // 切换是否显示状态
  function changeShow() {
    // 开关操作  !取反操作
    show.value = !show.value
  }

  return { show, changeShow }
})
src\App.vue
javascript
<template>
  <div>
    <!-- 路由渲染容器 -->
    <RouterView></RouterView>
    <!-- 调用底部导航组件 -->
    <!-- 使用公共状态 确认是否显示底部 -->
    <Footer v-show="store.show"></Footer>
  </div>
</template>

<script setup lang="ts">
// 引入store
import { useTabbarStore } from './stores/tabbar';
// 调用store
const store = useTabbarStore()
</script>

<style lang="scss" scoped></style>
在需要隐藏的界面进行操作
src\views\Cart.vue
javascript
<template>
    <div>
        购物车页面
    </div>
</template>

<script setup lang="ts">
import { onMounted } from 'vue';
import { useTabbarStore } from '../stores/tabbar';
import { onUnmounted } from 'vue';
const store = useTabbarStore()
onMounted(()=>{
    // 进来的时候
    // 调用修改显示底部的状态  隐藏
    store.changeShow()
})
onUnmounted(()=>{
    // 离开的时候
    // 调用修改显示底部的状态  显示
    store.changeShow()
})
</script>

<style scoped></style>
方法二:命名视图实现
将RouterView标签进行命名,在路由配置文件中,对应的路由规则,确定渲染哪几个组件。
①命名视图
src\App.vue
javascript
<template>
  <div>
    <!-- 路由渲染容器 路由视图-->
    <RouterView></RouterView>
    <!-- 调用底部导航组件 -->
    <!-- <Footer></Footer> -->
    <!-- 命名视图 -->
    <RouterView name="footer"></RouterView>
  </div>
</template>

<script setup lang="ts">
</script>

<style lang="scss" scoped></style>
②配置路由
src\router\index.ts
javascript
import { createRouter, createWebHistory } from 'vue-router'
import Home from '@/views/Home.vue'
const router = createRouter({
  history: createWebHistory(import.meta.env.BASE_URL),
  routes: [
    {
      path: '/',
      name: 'home',
      // 多个命名视图渲染 注意使用components
      components: {
        // 默认的
        default: Home,
        // 命名
        footer: () => import('@/components/Footer.vue')
      }
    },
    {
      path: '/kuai',
      name: 'kuai',
      components: {
        default: () => import('@/views/Kuai.vue'),
        footer: () => import('@/components/Footer.vue')
      }
    },
    {
      path: '/cart',
      name: 'cart',
      component: () => import('@/views/Cart.vue')
    },
    {
      path: '/my',
      name: 'my',
      components: {
        default: () => import('@/views/My.vue'),
        footer: () => import('@/components/Footer.vue')
      }
    }
  ]
})

export default router
以上两种方式,选择其一即可。
4、首页布局实现
4.1、导航栏、搜索框、通知栏、轮播图
头部导航栏 文字 订阅 地理位置定位
搜索框 搜索关键字显示对应的商品列表 组件 文本输入框 数据变化 发请求搜索
通知栏 通知信息和打折促销信息 将服务端的通知信息 展示到页面
轮播图 活动海报、品牌的logo 高级广告位 请求数据 显示图片
src\views\Home.vue
javascript
<template>
    <div class="container">
        <!-- 头部 -->
        <div class="header">
            <div><van-icon name="arrow-left" />1小时达</div>
            <div>已订阅</div>
            <div>太原市</div>
        </div>
        <!-- 搜索框 -->
        <van-search v-model="keywords" show-action shape="round" background="#FF9933" placeholder="搜索"
            style="position: relative">
            <template #action>
                <div style="
                      position: absolute;
                      right: 16px;
                      bottom: 10px;
                      background: #FF9933;
                      padding: 0px 20px;
                      border-radius: 999px;
                      color: white;
                      font-size: 14px;
                    ">
                    搜索
                </div>
            </template>
        </van-search>
        <!-- 公共栏 通知栏 -->
        <van-notice-bar scrollable left-icon="volume-o" :text="notice" style="margin:10px" />
        <!-- 轮播图 -->
        <van-swipe class="my-swipe" :autoplay="3000" indicator-color="white">
            <!-- van-swipe-item 轮播元素 -->
            <van-swipe-item v-for="item in banner" :key="item.id">
                <!-- 每一个显示的图片 -->
                <van-image :src="item.url" width="100%" height="100%"/>
            </van-swipe-item>
        </van-swipe>
    </div>
</template>

<script setup lang="ts">
import { ref, reactive } from 'vue';
const keywords = ref('')
const notice = ref('Vue3开发移动端应用')
const banner = reactive([
    {
        id: 1,
        url: '//m15.360buyimg.com/mobilecms/s1062x420_jfs/t1/129594/12/34173/73403/647ee939Fcce8aef3/609ce2c1682c9b02.jpg!cr_1053x420_4_0!q70.jpg'
    },
    {
        id: 2,
        url: '//m15.360buyimg.com/mobilecms/jfs/t1/117817/29/35620/129521/6458e11cFaf8d9483/f9c9ef15220878a9.jpg!cr_1053x420_4_0!q70.jpg'
    },
    {
        id: 3,
        url: '//imgcps.jd.com/ling4/10072507939353/5Lqs6YCJ5aW96LSn/5L2g5YC85b6X5oul5pyJ/p-5c131e9282acdd181da661a1/9c1cb96f/cr_1125x449_0_166/s/q70.jpg'
    }
])
</script>

<style lang="scss" scoped>
.container {
    height: 100vh;
    background: linear-gradient(#FF9933, #FF9966, rgb(243, 248, 250))
}

.header {
    display: flex;
    justify-content: space-between;
    align-items: center;
    height: 55px;
    padding-left: 10px;
    padding-right: 10px;
    color: white;

    >div:first-child {
        font-size: 18px;
    }

    >div:nth-child(2) {
        font-size: 12px;
        background-color: rgba($color: #ffffff, $alpha: 0.4);
        border-radius: 10px;
        padding: 5px;
    }
}

.my-swipe{
    margin: 10px;
    border-radius: 10px;
    ::v-deep(.van-image__img){
        border-radius: 10px;
    }
}
</style>
4.2、宫格导航、分类推荐、商品列表
宫格布局导航
javascript
<template>
    <div class="container">
        <!-- 头部 -->
        <div class="header">
            <div><van-icon name="arrow-left" />1小时达</div>
            <div>已订阅</div>
            <div>太原市</div>
        </div>
        <!-- 搜索框 -->
        <van-search v-model="keywords" show-action shape="round" background="#FF9933" placeholder="搜索"
            style="position: relative">
            <template #action>
                <div style="
                      position: absolute;
                      right: 16px;
                      bottom: 10px;
                      background: #FF9933;
                      padding: 0px 20px;
                      border-radius: 999px;
                      color: white;
                      font-size: 14px;
                    ">
                    搜索
                </div>
            </template>
        </van-search>
        <!-- 公共栏 通知栏 -->
        <van-notice-bar scrollable left-icon="volume-o" :text="notice" style="margin:10px" mode="closeable" />
        <!-- 轮播图 -->
        <van-swipe class="my-swipe" :autoplay="3000" indicator-color="white">
            <!-- van-swipe-item 轮播元素 -->
            <van-swipe-item v-for="item in banner" :key="item.id">
                <!-- 每一个显示的图片 -->
                <van-image :src="item.url" width="100%" height="100%" />
            </van-swipe-item>
        </van-swipe>
        <!-- 宫格导航 -->
        <div style="background:#ffffff;margin:10px">
            <van-grid :border="false" :column-num="5">
                <van-grid-item v-for="item in gridNav" @click="changeCate(item.title)">
                    <van-image :src="item.icon" />
                    <div style="font-size: 12px;">{{ item.title }}</div>
                </van-grid-item>
            </van-grid>
        </div>

    </div>
</template>

<script setup lang="ts">
import { ref, reactive } from 'vue';
// 引入宫格导航图片
import icon1 from '@/assets/image/grid/01.png'
import icon2 from '@/assets/image/grid/02.png'
import icon3 from '@/assets/image/grid/03.png'
import icon4 from '@/assets/image/grid/04.png'
import icon5 from '@/assets/image/grid/05.png'
import icon6 from '@/assets/image/grid/06.png'
import icon7 from '@/assets/image/grid/07.png'
import icon8 from '@/assets/image/grid/08.png'
import icon9 from '@/assets/image/grid/09.png'
import icon10 from '@/assets/image/grid/10.png'
import { showToast } from 'vant';
// 搜索关键字
const keywords = ref('')
// 通知栏
const notice = ref('Vue3开发移动端应用')
// 轮播图
const banner = reactive([
    {
        id: 1,
        url: '//m15.360buyimg.com/mobilecms/s1062x420_jfs/t1/129594/12/34173/73403/647ee939Fcce8aef3/609ce2c1682c9b02.jpg!cr_1053x420_4_0!q70.jpg'
    },
    {
        id: 2,
        url: '//m15.360buyimg.com/mobilecms/jfs/t1/117817/29/35620/129521/6458e11cFaf8d9483/f9c9ef15220878a9.jpg!cr_1053x420_4_0!q70.jpg'
    },
    {
        id: 3,
        url: '//imgcps.jd.com/ling4/10072507939353/5Lqs6YCJ5aW96LSn/5L2g5YC85b6X5oul5pyJ/p-5c131e9282acdd181da661a1/9c1cb96f/cr_1125x449_0_166/s/q70.jpg'
    }
])
// 宫格导航
const gridNav = reactive([
    {
        id: 1,
        title: '热销爆款',
        icon: icon1
    },
    {
        id: 2,
        title: '新鲜果蔬',
        icon: icon2
    },
    {
        id: 3,
        title: '肉蛋水产',
        icon: icon3
    },
    {
        id: 4,
        title: '乳品烘培',
        icon: icon4
    },
    {
        id: 5,
        title: '素食熟食',
        icon: icon5
    },
    {
        id: 6,
        title: '粮油调味',
        icon: icon6
    },
    {
        id: 7,
        title: '休闲零食',
        icon: icon7
    },
    {
        id: 8,
        title: '酒水饮料',
        icon: icon8
    },
    {
        id: 9,
        title: '个护清洁',
        icon: icon9
    },
    {
        id: 10,
        title: '母婴百货',
        icon: icon10
    }
])
const changeCate = (title: string) => {
    showToast(title + '开发中')
}
</script>

<style lang="scss" scoped>
.container {
    height: 100vh;
    background: linear-gradient(#FF9933, #FF9966, rgb(243, 248, 250))
}

.header {
    display: flex;
    justify-content: space-between;
    align-items: center;
    height: 55px;
    padding-left: 10px;
    padding-right: 10px;
    color: white;

    >div:first-child {
        font-size: 18px;
    }

    >div:nth-child(2) {
        font-size: 12px;
        background-color: rgba($color: #ffffff, $alpha: 0.4);
        border-radius: 10px;
        padding: 5px;
    }
}

.my-swipe {
    margin: 10px;
    border-radius: 10px;

    ::v-deep(.van-image__img) {
        border-radius: 10px;
    }
}
</style>
分类推荐商品
需要建立一个模拟数据接口,使用json-server启动该接口
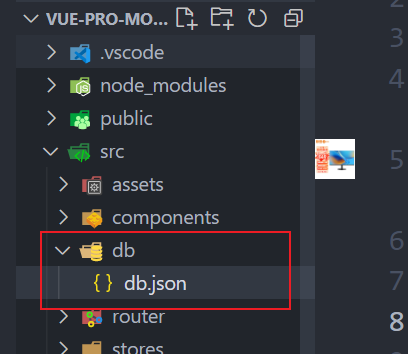
javascript
# 模拟数据启动
cd src/db
json-server -w db.json -p 3001
javascript
<template>
    <div class="container">
        <!-- 头部 -->
        <div class="header">
            <div><van-icon name="arrow-left" />1小时达</div>
            <div>已订阅</div>
            <div>太原市</div>
        </div>
        <!-- 搜索框 -->
        <van-search v-model="keywords" show-action shape="round" background="#FF9933" placeholder="搜索"
            style="position: relative">
            <template #action>
                <div style="
                      position: absolute;
                      right: 16px;
                      bottom: 10px;
                      background: #FF9933;
                      padding: 0px 20px;
                      border-radius: 999px;
                      color: white;
                      font-size: 14px;
                    ">
                    搜索
                </div>
            </template>
        </van-search>
        <!-- 公共栏 通知栏 -->
        <van-notice-bar scrollable left-icon="volume-o" :text="notice" style="margin:10px" mode="closeable" />
        <!-- 轮播图 -->
        <van-swipe class="my-swipe" :autoplay="3000" indicator-color="white">
            <!-- van-swipe-item 轮播元素 -->
            <van-swipe-item v-for="item in banner" :key="item.id">
                <!-- 每一个显示的图片 -->
                <van-image :src="item.url" width="100%" height="100%" />
            </van-swipe-item>
        </van-swipe>
    </div>
    <div style="background-color: rgb(243, 248, 250);">
        <!-- 宫格导航 -->
        <div style="background:#ffffff;">
            <van-grid :border="false" :column-num="5">
                <van-grid-item v-for="item in gridNav" @click="changeCate(item.title)">
                    <van-image :src="item.icon" />
                    <div style="font-size: 12px;">{{ item.title }}</div>
                </van-grid-item>
            </van-grid>
        </div>
        <!-- 推荐分类 -->
        <div style="margin: 10px;background-color:rgb(243, 248, 250) ;">
            <!-- @change事件是tabs切换触发的 -->
            <van-tabs v-model:active="active" @change="changeTab">
                <van-tab v-for="item in category" :title="item">
                    <!-- 推荐分类的商品 -->
                    <div style="display: flex;overflow-x: auto;">
                        <div class="item" v-for="item in currentGoodsList" :key="item.id">
                            <div>
                                <img :src="item.pic" alt="">
                            </div>
                            <!-- vantui 组件库内部类 van-ellipsis显示一行 超出...隐藏 -->
                            <div class="van-ellipsis">
                                {{ item.name }}
                            </div>
                            <div>
                                本周热卖 <span>{{ item.buyCount }}</span>
                            </div>
                            <div>
                                ¥{{ item.price }}
                                <div>
                                    <van-icon name="cart-o" color="white" />
                                </div>
                            </div>
                        </div>
                    </div>
                </van-tab>
            </van-tabs>
        </div>
    </div>
    <div style="height: 55px;"></div>
</template>

<script setup lang="ts">
interface IGoods {
    id: number,
    name: string,
    pic: string,
    price: string,
    buyCount: string,
}
import { ref, reactive } from 'vue';
// 引入宫格导航图片
import icon1 from '@/assets/image/grid/01.png'
import icon2 from '@/assets/image/grid/02.png'
import icon3 from '@/assets/image/grid/03.png'
import icon4 from '@/assets/image/grid/04.png'
import icon5 from '@/assets/image/grid/05.png'
import icon6 from '@/assets/image/grid/06.png'
import icon7 from '@/assets/image/grid/07.png'
import icon8 from '@/assets/image/grid/08.png'
import icon9 from '@/assets/image/grid/09.png'
import icon10 from '@/assets/image/grid/10.png'
import { showToast } from 'vant'
import axios from 'axios'
// 搜索关键字
const keywords = ref('')
// 通知栏
const notice = ref('Vue3开发移动端应用')
// 轮播图
const banner = reactive([
    {
        id: 1,
        url: '//m15.360buyimg.com/mobilecms/s1062x420_jfs/t1/129594/12/34173/73403/647ee939Fcce8aef3/609ce2c1682c9b02.jpg!cr_1053x420_4_0!q70.jpg'
    },
    {
        id: 2,
        url: '//m15.360buyimg.com/mobilecms/jfs/t1/117817/29/35620/129521/6458e11cFaf8d9483/f9c9ef15220878a9.jpg!cr_1053x420_4_0!q70.jpg'
    },
    {
        id: 3,
        url: '//imgcps.jd.com/ling4/10072507939353/5Lqs6YCJ5aW96LSn/5L2g5YC85b6X5oul5pyJ/p-5c131e9282acdd181da661a1/9c1cb96f/cr_1125x449_0_166/s/q70.jpg'
    }
])
// 宫格导航
const gridNav = reactive([
    {
        id: 1,
        title: '热销爆款',
        icon: icon1
    },
    {
        id: 2,
        title: '新鲜果蔬',
        icon: icon2
    },
    {
        id: 3,
        title: '肉蛋水产',
        icon: icon3
    },
    {
        id: 4,
        title: '乳品烘培',
        icon: icon4
    },
    {
        id: 5,
        title: '素食熟食',
        icon: icon5
    },
    {
        id: 6,
        title: '粮油调味',
        icon: icon6
    },
    {
        id: 7,
        title: '休闲零食',
        icon: icon7
    },
    {
        id: 8,
        title: '酒水饮料',
        icon: icon8
    },
    {
        id: 9,
        title: '个护清洁',
        icon: icon9
    },
    {
        id: 10,
        title: '母婴百货',
        icon: icon10
    }
])
const changeCate = (title: string) => {
    showToast(title + '开发中')
}
// 分类推荐默认选中
const active = ref(0)
// 分类的名称
const category = ['推荐',
    '世界杯',
    '水果',
    '肉禽蛋',
    '烘焙',
    '冰品',
    '蔬菜',
    '零食',
    '饮料']
// 当前分类的数据
let currentGoodsList:IGoods[] = reactive([])
// 获取分类分类下对应的数据
const loadGoodsByCategory = (page = 1) => {
    axios.get(`http://localhost:3001/goods?_page=${page}&_limit=4`).then(res => {
        currentGoodsList = res.data
    })
}
loadGoodsByCategory()
// 切换分类
const changeTab = (index: number) => {
    // 通过分页模拟切换分类数据的加载
    loadGoodsByCategory(index)
}
</script>

<style lang="scss" scoped>
.container {
    /* height: 100vh; */
    background: linear-gradient(#FF9933, #FF9966, rgb(243, 248, 250))
}

.header {
    display: flex;
    justify-content: space-between;
    align-items: center;
    height: 55px;
    padding-left: 10px;
    padding-right: 10px;
    color: white;

    >div:first-child {
        font-size: 18px;
    }

    >div:nth-child(2) {
        font-size: 12px;
        background-color: rgba($color: #ffffff, $alpha: 0.4);
        border-radius: 10px;
        padding: 5px;
    }
}

.my-swipe {
    margin: 10px;
    border-radius: 10px;

    ::v-deep(.van-image__img) {
        border-radius: 10px;
    }
}

.item {
    width: 33%;
    /* 防止父元素宽度压缩  导致子元素压缩 设置为flex-shrink:0 */
    flex-shrink: 0;
    padding: 1px;
    background-color: #fff;
    border-radius: 4px;
    margin-bottom: 10px;

    >div:first-child {
        img {
            width: 100%;
        }
    }

    >div:nth-child(2) {
        font-size: 13px;
        font-weight: bold;
    }

    >div:nth-child(3) {
        font-size: 12px;
        color: gold;

        >span {
            color: red;
        }
    }

    >div:nth-child(4) {
        color: red;
        display: flex;
        justify-content: space-between;
        align-items: center;

        >div {
            width: 20px;
            height: 20px;
            padding: 3px;
            border-radius: 50%;
            background-color: #FF9933;
            display: flex;
            justify-content: center;
            align-items: center;
        }
    }
}

/* 设置tabs切换选中字体的颜色 */
::v-deep(.van-tab--active) {
    color: #FF9933
}

/* 设置tabs切换选中下划线颜色 */
::v-deep(.van-tabs__line) {
    background-color: #FF9933;
}

/* 设置tabs文字加粗 */
::v-deep(.van-tab__text) {
    font-weight: bold;
}</style>
商品列表
src\views\Home\components\GoodsList.vue
javascript
<template>
<div style="display: flex;justify-content: space-around;flex-wrap: wrap;background-color:rgb(243, 248, 250)">
<div class="item" v-for="item in data.GoodsList" :key="item.id">
<div>
<img :src="item.pic" alt="">
</div>
<!-- vantui 组件库内部类 van-multi-ellipsis--l2显示两行 超出...隐藏 -->
<div class="van-multi-ellipsis--l2">
{{ item.name }}
</div>
<div>
<!-- 本周热卖 <span>{{ item.buyCount }}</span> -->
</div>
<div>
¥{{ item.price }}
<div>
<van-icon name="cart-o" color="white" />
</div>
</div>
</div>
</div>
</template>
<script setup lang="ts">
interface IData {
GoodsList: IGoods[]
}
interface IGoods {
id: number,
name: string,
pic: string,
price: string,
buyCount: string,
}
import url from '@/config/url';
import req from '@/utils/request';
import { reactive } from 'vue'
let data: IData = reactive({
GoodsList: []
})
const loadGoodsList = (page = 1) => {
req.get(url.GoodsList).then(res => {
data.GoodsList = res.data
console.log(data.GoodsList)
})
}
loadGoodsList()
</script>
<style lang="scss" scoped>
.item {
width: 44%;
/* 防止父元素宽度压缩 导致子元素压缩 设置为flex-shrink:0 */
flex-shrink: 0;
margin: 0px 1px;
padding: 8px;
background-color: #fff;
border-radius: 10px;
margin-bottom: 10px;
>div:first-child {
img {
width: 100%;
}
}
>div:nth-child(2) {
font-size: 13px;
font-weight: bold;
}
>div:nth-child(3) {
font-size: 12px;
color: gold;
>span {
color: red;
}
}
>div:nth-child(4) {
color: red;
display: flex;
justify-content: space-between;
align-items: center;
>div {
margin-right: 5px;
width: 20px;
height: 20px;
padding: 3px;
border-radius: 50%;
background-color: #FF9933;
display: flex;
justify-content: center;
align-items: center;
}
}
}
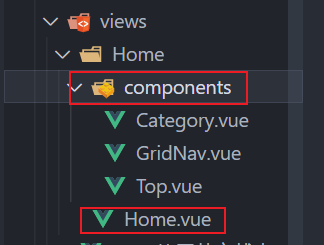
</style>4.3、组件封装思路
可以将首页的每个结构模块,进行组件化
调用封装的组件
src\views\Home\Home.vue
javascript
<template>
    <!-- 头部导航 搜索框  通知栏  轮播图 -->
    <Top></Top>
    <div style="background-color: rgb(243, 248, 250);">
        <!-- 宫格导航 -->
       <GridNav></GridNav>
        <!-- 推荐分类 -->
       <Category></Category>
    </div>
    <div style="height: 55px;"></div>
</template>

<script setup lang="ts">
import Top from './components/Top.vue'
import GridNav from './components/GridNav.vue'
import Category from './components/Category.vue'
</script>

<style lang="scss" scoped>
</style>
各封装组件示例
封装示例
src\views\Home\components\Top.vue
javascript
<template>
    <div class="container">
        <!-- 头部 -->
        <div class="header">
            <div><van-icon name="arrow-left" />1小时达</div>
            <div>已订阅</div>
            <div>太原市</div>
        </div>
        <!-- 搜索框 -->
        <van-search v-model="keywords" show-action shape="round" background="#FF9933" placeholder="搜索"
            style="position: relative">
            <template #action>
                <div style="
                      position: absolute;
                      right: 16px;
                      bottom: 10px;
                      background: #FF9933;
                      padding: 0px 20px;
                      border-radius: 999px;
                      color: white;
                      font-size: 14px;
                    ">
                    搜索
                </div>
            </template>
        </van-search>
        <!-- 公共栏 通知栏 -->
        <van-notice-bar scrollable left-icon="volume-o" :text="notice" mode="closeable" />
        <!-- 轮播图 -->
        <van-swipe class="my-swipe" :autoplay="3000" indicator-color="white">
            <!-- van-swipe-item 轮播元素 -->
            <van-swipe-item v-for="item in banner" :key="item.id">
                <!-- 每一个显示的图片 -->
                <van-image :src="item.url" width="100%" height="100%" />
            </van-swipe-item>
        </van-swipe>
    </div>
</template>

<script setup lang="ts">
import { ref, reactive } from 'vue';
// 搜索关键字
const keywords = ref('')
// 通知栏
const notice = ref('Vue3开发移动端应用')
// 轮播图
const banner = reactive([
    {
        id: 1,
        url: '//m15.360buyimg.com/mobilecms/s1062x420_jfs/t1/129594/12/34173/73403/647ee939Fcce8aef3/609ce2c1682c9b02.jpg!cr_1053x420_4_0!q70.jpg'
    },
    {
        id: 2,
        url: '//m15.360buyimg.com/mobilecms/jfs/t1/117817/29/35620/129521/6458e11cFaf8d9483/f9c9ef15220878a9.jpg!cr_1053x420_4_0!q70.jpg'
    },
    {
        id: 3,
        url: '//imgcps.jd.com/ling4/10072507939353/5Lqs6YCJ5aW96LSn/5L2g5YC85b6X5oul5pyJ/p-5c131e9282acdd181da661a1/9c1cb96f/cr_1125x449_0_166/s/q70.jpg'
    }
])
</script>

<style lang="scss" scoped>
.container {
    /* height: 100vh; */
    background: linear-gradient(#FF9933, #FF9966, rgb(243, 248, 250))
}

.header {
    display: flex;
    justify-content: space-between;
    align-items: center;
    height: 44px;
    padding-left: 10px;
    padding-right: 10px;
    color: white;

    >div:first-child {
        font-size: 18px;
    }

    >div:nth-child(2) {
        font-size: 12px;
        background-color: rgba($color: #ffffff, $alpha: 0.4);
        border-radius: 10px;
        padding: 5px;
    }
}

.my-swipe {
    margin: 10px;
    border-radius: 10px;

    ::v-deep(.van-image__img) {
        border-radius: 10px;
    }
}
</style>
4.4、请求和接口地址封装
项目中使用axios进行ajax请求发送,属于第三方请求库 需要安装
javascript
pnpm add axios方法一:封装请求方法和接口地址配置
src\utils\request.ts
javascript
/***
 * 封装请求方法
 *
 */
import axios from 'axios'
const instance = axios.create({
  // 如果项目中接口地址域名只有一个 可以使用这种方式
  // 如果使用多个域名 不太合适了
  //   baseURL: 'http://localhost:3001'
  // timeout:
})
// 请求拦截器 统一设置请求配置
instance.interceptors.request.use((cfg) => {
  return cfg
})

// 响应拦截器  统一处理响应数据
instance.interceptors.response.use((res) => {
  return res
})
export default instance
src\config\url.ts
javascript
/***
 *  统一管理接口地址
 *  方便维护修改
 *
 *
 */
const prefix = 'http://localhost:3001'
const url = {
  // 分类商品数据
  CatagoryGoods: prefix + '/goods'
}
export default url
使用方式
javascript
import req from '@/utils/request'
import url from '@/config/url'
// 获取分类分类下对应的数据
const loadGoodsByCategory = (page = 1) => {
    req.get(url.CatagoryGoods + `?_page=${page}&_limit=4`).then(res => {
        data.currentGoodsList = res.data
    })
}
方法二:封装api数据层
src\api\Home.ts
javascript
/***
 *  api 接口数据层
 *  由该文件中的方法 调用远程接口获取数据
 *  或者是在该方法中生成数据
 *
 */
import url from '@/config/url'
import req from '@/utils/request'
export function getCatagoryGoods(page = 1) {
  return req.get(url.CatagoryGoods + `?_page=${page}&_limit=4`)
}
使用方式
javascript
// 导入api层的方法 调用远程接口获取数据
import { getCatagoryGoods } from '@/api/Home'

// 获取分类分类下对应的数据
getCatagoryGoods().then(res => {
    data.currentGoodsList = res.data
})
// 切换分类
const changeTab = (index: number) => {
    console.log(index);
    // 通过分页模拟切换分类数据的加载
    // loadGoodsByCategory(index)
    getCatagoryGoods(index).then(res => {
        data.currentGoodsList = res.data
    })
}
4.5、滚动加载数据
商品列表滚动分页
"
pc端,一般使用分页按钮点击翻页
移动端中,分页一般采用的滚动到底部加载新的数据,将新的数据和旧的数据进行合并,旧数据在前,新数据在后
基本原理:是判断距离底部的距离小于多少时,触发加载新的翻页数据
移动组件库中,都有类似的计算方式。
vantUI组件库中可以使用van-list来实现这个过程
src\views\Home\components\GoodsList.vue
javascript
<template>
    <!-- 使用van-list组件实现分页加载 -->
    <!-- List 组件通过 loading 和 finished 两个变量控制加载状态,当组件滚动到底部时,会触发 load 事件并将 loading 设置成 true。此时可以发起异步操作并更新数据,数据更新完毕后,将 loading 设置成 false 即可。若数据已全部加载完毕,则直接将 finished 设置成 true 即可。 -->
    <van-list v-model:loading="loading" :finished="finished" finished-text="没有更多了" @load="onLoad" :immediate-check="false">
        <div style="display: flex;justify-content: space-around;flex-wrap: wrap;background-color:rgb(243, 248, 250)">
            <div class="item" v-for="item in data.GoodsList" :key="item.id">
                <div>
                    <img :src="item.pic" alt="">
                </div>
                <!-- vantui 组件库内部类 van-multi-ellipsis--l2显示两行 超出...隐藏 -->
                <div class="van-multi-ellipsis--l2">
                    {{ item.name }}
                </div>
                <div>
                    <!-- 本周热卖 <span>{{ item.buyCount }}</span> -->
                </div>
                <div>
                    ¥{{ item.price }}
                    <div>
                        <van-icon name="cart-o" color="white" />
                    </div>
                </div>
            </div>
        </div>
    </van-list>
</template>

<script setup lang="ts">
interface IData {
    GoodsList: IGoods[]
}
interface IGoods {
    id: number,
    name: string,
    pic: string,
    price: string,
    buyCount: string,
}
import url from '@/config/url';
import req from '@/utils/request';
import { reactive, ref } from 'vue'
let data: IData = reactive({
    GoodsList: []
})
// 存储当前页码 第几页
const currentPage = ref(1)
// 最大页数
const pageCount = ref(0)

const loadGoodsList = (page = 1) => {
    // 计算总共有几页
    // const pageCount = Math.ceil(20 / 6)
    // // 判断请求的页数大于最大页数 代表没有数据了 返回不请求
    if (pageCount.value !== 0 && currentPage.value > pageCount.value) {
        // 完成状态修改为true
        finished.value = true
        return
    }
    // json-server _page 第几页  _limit 每页显示几条
    req.get(url.GoodsList + `?_page=${page}&_limit=6`).then(res => {
        // console.log(res.headers['x-total-count']);
        // 从服务端获取数据总条数 计算最大页数
        pageCount.value = Math.ceil(res.headers['x-total-count'] / 6)
        // data.GoodsList = res.data
        // console.log(data.GoodsList)
        // 拼接数据  旧数据在前 新数据在后
        data.GoodsList = [...data.GoodsList, ...res.data]
        // 请求完毕后 将加载状态loading 再置为false
        // false=>true=>false
        loading.value = false
        // 当前页数+1
        currentPage.value++
    })
}
loadGoodsList()
// van-list组件状态
// loading 加载状态 默认不加载
let loading = ref(false)
// finished 完成状态  没有数据  加载完了
const finished = ref(false);
// 翻页加载方法
const onLoad = () => {
    loadGoodsList(currentPage.value)
}
</script>

<style lang="scss" scoped>
.item {
    width: 44%;
    /* 防止父元素宽度压缩  导致子元素压缩 设置为flex-shrink:0 */
    flex-shrink: 0;
    margin: 0px 1px;
    padding: 8px;
    background-color: #fff;
    border-radius: 10px;
    margin-bottom: 10px;

    >div:first-child {
        img {
            width: 100%;
        }
    }

    >div:nth-child(2) {
        font-size: 13px;
        font-weight: bold;
    }

    >div:nth-child(3) {
        font-size: 12px;
        color: gold;

        >span {
            color: red;
        }
    }

    >div:nth-child(4) {
        color: red;
        display: flex;
        justify-content: space-between;
        align-items: center;

        >div {
            margin-right: 5px;
            width: 20px;
            height: 20px;
            padding: 3px;
            border-radius: 50%;
            background-color: #FF9933;
            display: flex;
            justify-content: center;
            align-items: center;
        }
    }
}
</style>
4.6、回到顶部
"
1、监听页面滚动的距离,选择在何时显示回到顶部按钮
2、回到顶部 scrollTo
src\views\Home\components\GoodsList.vue
javascript
<template>
    <!-- 回到顶部 -->
    <van-back-top right="5vw" bottom="10vh" immediate/>
</template>

<script setup lang="ts">
</script>

<style lang="scss" scoped>
</style>
src\App.vue
javascript
<template>
</template>

<script setup lang="ts">
</script>

<style lang="scss">
/* App.vue组件的样式是全局都使用的 所以不加scoped */
/* 回到顶部按钮的背景色 */
.van-back-top{
    background-color: #FF9933 !important;
    opacity: 0.7;
}
</style>
4.7、搜索功能实现
在搜索框中输入关键字后,点击搜索按钮,携带参数跳转到搜索页面,并根据关键字发送请求获取到搜索结果。
在搜索结果页面展示搜索到数据。
①路由配置添加搜索页面
javascript
import { createRouter, createWebHistory } from 'vue-router'
import Home from '@/views/Home/Home.vue'
const router = createRouter({
  history: createWebHistory(import.meta.env.BASE_URL),
  routes: [
    //.......................
    {
      path: '/search',
      name: 'search',
      component: () => import('@/views/Search.vue')
    }
    //.....................
  ]
})

export default router
②创建页面组件
③点击搜索按钮跳转搜索页面并传递参数
javascript
<template>
    <div class="container">
        <!-- 头部 -->
        <div class="header">
            <div><van-icon name="arrow-left" />1小时达</div>
            <div>已订阅</div>
            <div>太原市</div>
        </div>
        <!-- 搜索框 -->
        <van-search v-model="keywords" show-action shape="round" background="#FF9933" placeholder="搜索"
            style="position: relative">
            <template #action>
                <!-- 添加点击事件绑定到搜索按钮 携带搜索参数跳转到搜索页面 -->
                <div class="search-button" @click="$router.push('/search?keywords=' + keywords)">
                    搜索
                </div>
            </template>
        </van-search>
 <!--................................  -->
    </div>
</template>

<script setup lang="ts">
</script>

<style lang="scss" scoped>
.search-button {
    position: absolute;
    right: 16px;
    bottom: 10px;
    background: #FF9933;
    padding: 0px 20px;
    border-radius: 999px;
    color: white;
    font-size: 14px;
}
</style>
④在搜索页面获取查询参数请求并渲染结果
src\views\Search.vue
javascript
<template>
    <van-nav-bar :title="keywords" left-text="返回" left-arrow @click-left="$router.back()" />
    <div class="item" v-for="item in data.resultList" :key="item.id">
        <div>
            <img :src="item.pic" alt="" style="width: 100%;">
        </div>
        <div>
            <div>
                {{ item.name }}
            </div>
            <div>
                ¥{{ item.price }}
            </div>
        </div>
    </div>
    <!-- 搜索不到-->
    <van-empty description="暂无搜索结果" v-show="emptyShow" />
</template>

<script setup lang="ts">
interface IData {
    resultList: IGoods[]
}
interface IGoods {
    id: number,
    name: string,
    pic: string,
    price: string,
    buyCount: string,
}
import { useRoute } from 'vue-router';
import { ref, reactive } from 'vue'
import url from '@/config/url';
import req from '@/utils/request'
const route = useRoute()
let keywords = ref('')
keywords = route.query.keywords as any
const data: IData = reactive({
    resultList: []
})
// json-server q 进行全文搜索
req.get(url.SearchGoods + '?q=' + keywords).then(res => {
    console.log(res);
    data.resultList = res.data
    // 如果返回结果长度为0 则显示 否则不显示
    emptyShow.value = data.resultList.length === 0
})
// 显示空状态
let emptyShow = ref(false)
</script>

<style lang="scss" scoped>
.item {
    display: flex;
    justify-content: space-between;
    padding: 10px;

    >div:nth-child(1) {
        width: 28%;
    }

    >div:nth-child(2) {
        width: 68%;
        display: flex;
        flex-direction: column;
        justify-content: space-between;

        /* >div:nth-child(1) {} */

        >div:nth-child(2) {
            color: red;
        }
    }
}
</style>
5、地图API定位
地图目前在国内比较流行使用
**高德地图(AMap)**https://lbs.amap.com/
**百度地图(BMap)**https://lbsyun.baidu.com/
**腾讯地图(WeMap)**https://lbs.qq.com/
5.1 、申请地图平台应用引入地图
使用地图显示和调用地图功能,需要先注册一个对应的应用获取到key和私钥,才可以正常使用
高德地图 web端开发文档:https://lbs.amap.com/api/javascript-api/summary
①注册账号和应用
https://lbs.amap.com/api/javascript-api/guide/abc/prepare

image-20230609162314296
②引入地图
jsAPI引入方式:https://lbs.amap.com/api/javascript-api-v2/guide/abc/load
index.html
java
<!DOCTYPE html>
<html lang="en">

<head>
  <meta charset="UTF-8">
  <link rel="icon" href="/favicon.ico">
  <meta name="viewport" content="width=device-width, initial-scale=1.0">
  <title>Vite App</title>
</head>

<body>
  <div id="app"></div>
  <script type="module" src="/src/main.ts"></script>
  <!-- 高德地图API  引入  开始 -->
  <script src="https://webapi.amap.com/loader.js"></script>
  <script type="text/javascript">
    window._AMapSecurityConfig = {
      // 安全密钥
      securityJsCode: '92496445ebd26bb7bd0f3ec8c4ed343a',
    }
    AMapLoader.load({
      // key
      "key": "895d55effd6f89967c7f62eefa799f93",              // 申请好的Web端开发者Key,首次调用 load 时必填
      "version": "2.0",   // 指定要加载的 JS API 的版本,缺省时默认为 1.4.15
      "plugins": ['AMap.ToolBar'],           // 需要使用的的插件列表,如比例尺'AMap.Scale'等
      "AMapUI": {             // 是否加载 AMapUI,缺省不加载
        "version": '1.1',   // AMapUI 版本
        "plugins": ['overlay/SimpleMarker'],       // 需要加载的 AMapUI ui插件
      },
      "Loca": {                // 是否加载 Loca, 缺省不加载
        "version": '2.0'  // Loca 版本
      },
    }).then((AMap) => {

    }).catch((e) => {
      // console.error(e);  //加载错误提示
    });
    // 高德地图API 引入  结束
  </script>
</body>

</html>
5.2、调用地图API显示地图
src\views\Map.vue
javascript
<template>
    <div>
        <van-nav-bar title="地图" left-text="返回" left-arrow @click-left="$router.back()" />
        <!-- 地图渲染容器 容器需要被设置固定大小 -->
        <div id='container'></div>
    </div>
</template>

<script setup lang="ts">
// 导入高德地图types类型
import "@amap/amap-jsapi-types";
import { onMounted } from 'vue';

onMounted(() => {
    // 实例化地图对象
    const options: AMap.MapOptions = {
        //初始化地图中心点
        center: [112.562364, 37.804547],
        // 缩放比例
        zoom: 18,
        // 3D模式地图
        viewMode: '3D',
    }
    const map = new AMap.Map('container', options);
    // 添加缩放控件工具条
    const toolBar = new AMap.ToolBar({
        visible: true,
    })
    map.addControl(toolBar);
    // 地图标记点
    // 创建一个 Marker 实例:
    const marker: AMap.Marker = new AMap.Marker({
        // 经纬度对象,也可以是经纬度构成的一维数组[116.39, 39.9]
        position: new AMap.LngLat(112.562364, 37.804547),
        // title: '太原',
        label: {
            content: '能源互联网大厦',
            offset: [],
            direction: ''
        },
        // 标注点图标自定义
        icon: '//a.amap.com/jsapi_demos/static/demo-center/icons/poi-marker-red.png'
    });

    // 将创建的点标记添加到已有的地图实例:
    map.add(marker);
    const marker1 = new AMap.Marker({
        // 经纬度对象,也可以是经纬度构成的一维数组[116.39, 39.9]
        position: new AMap.LngLat(112.562445, 37.805208),
        label: {
            content: '高新动力港',
            offset: [],
            direction: ''
        }
    });
    map.add(marker1)

})

</script>

<style lang="scss" scoped>
#container {
    width: 100vw;
    height: 90vh;
}
</style>
"
解决ts环境,AMAP提示找不到的问题,使用amap-jsapi-types解决
javascriptnpm i -S @amap/amap-jsapi-types # pnpm pnpm add @amap/amap-jsapi-types注意插件库相关类型声明还不够完善
5.3、调用地图API定位城市
①创建store方便组件间共享定位数据
src\stores\location.ts
javascript
import { ref } from 'vue'
import { defineStore } from 'pinia'

export const useLocationStore = defineStore('location', () => {
  // 当前所在城市
  const city = ref(localStorage.getItem('city') ?? '')
  //  获取城市之后进行保存
  function saveCity(cityName: string) {
    city.value = cityName
    // 数据持久化
    localStorage.setItem('city', cityName)
  }

  return { city, saveCity }
})
②在需要定位的页面引入插件方法定位
src\views\Home\Home.vue
javascript
<template>
</template>

<script setup lang="ts">
import { onMounted} from 'vue';
import Top from './components/Top.vue'
import GridNav from './components/GridNav.vue'
import Category from './components/Category.vue'
import GoodsList from './components/GoodsList.vue';
// 使用store
import { useLocationStore } from '@/stores/location'
const store = useLocationStore()
onMounted(() => {
    // 调用高德地图API 获取当前所在城市名称
    AMap.plugin('AMap.CitySearch', function () {
        var citySearch = new AMap.CitySearch()
        citySearch.getLocalCity(function (status:string, result:any) {
            // console.log(status);
            console.log(result);
            if (status === 'complete' && result.info === 'OK') {
                // 查询成功,result即为当前所在城市信息
                // 城市数据是在当前显示的
                // 存储到pinia创建的store中
               store.saveCity(result.city)
            } else {
                // 查询失败
                console.log(result);
            }
        })
    })
})
</script>

<style lang="scss" scoped></style>
③在头部组件调用使用
src\views\Home\components\Top.vue
javascript
<template>
    <div class="container">
        <!-- 头部 -->
        <div class="header">
            <div><van-icon name="arrow-left" />1小时达</div>
            <div>已订阅</div>
            <div>{{store.city}}</div>
        </div>
    </div>
</template>

<script setup lang="ts">
import { useLocationStore } from '@/stores/location'
// 调用store
const store = useLocationStore()
</script>

<style lang="scss" scoped>
</style>
6、通过城市列表手动选择城市
①创建一个城市列表
能够点击,存储对应城市
router\index.ts
javascript
import { createRouter, createWebHistory } from 'vue-router'
import Home from '@/views/Home/Home.vue'
const router = createRouter({
  history: createWebHistory(import.meta.env.BASE_URL),
  routes: [
    //...........................
    {
      path: '/city',
      name: 'city',
      component: () => import('@/views/City.vue')
    }
    //...........................
  ]
})

export default router
src\views\City.vue
javascript
<template>
    <van-index-bar :index-list="indexList">
        <template v-for="item in cities">
            <van-index-anchor :index="item.letter" />
            <van-cell :title="item1.name" v-for="item1 in item.data" @click="changeCity(item1.name)" />
        </template>
    </van-index-bar>
</template>

<script setup lang="ts">
import { computed } from 'vue'
import { useLocationStore } from '@/stores/location'
import { useRouter } from 'vue-router';
const store = useLocationStore()
const router = useRouter()
// 引入城市数据
import cities from '@/config/city'
const indexList = computed(() => {
    return cities.map(item => item.letter)
})
// 存储城市并跳转回首页
const changeCity = (name: string) => {
    store.saveCity(name)
    router.push('/')
}
</script>

<style scoped></style>
②处理手动选择后,定位不再刷新覆盖
src\stores\location.ts
获取城市名称判断时间,如果超时则返回空字符串,存储城市名称设置过期时间
javascript
import { ref } from 'vue'
import { defineStore } from 'pinia'

//从localstorge中获取当前城市,如果超时就移除并返回空字符串
const getCity = () => {
  // console.log('过期时间:', Number(localStorage.getItem('cityExpire')))
  // console.log('当前时间:', new Date().getTime())
  const cityExpire = Number(localStorage.getItem('cityExpire'))
  // 获取时间大于设置的超时时间 过期了
  if (cityExpire < new Date().getTime()) {
    // 获取时,检测其数据过期,一定要将数据清除掉,否则还会被读取到
    localStorage.removeItem('cityExpire')
    localStorage.removeItem('city')
    return ''
  } else {
    return localStorage.getItem('city')
  }
}

export const useLocationStore = defineStore('location', () => {
  // 当前所在城市
  const city = ref(getCity())
  //  获取城市之后进行保存
  function saveCity(cityName: string) {
    city.value = cityName
    console.log(city.value)
    // 数据持久化
    localStorage.setItem('city', cityName)
    // 过期时间  10秒之后过期  一般是一个小时
    localStorage.setItem('cityExpire', String(new Date().getTime() + 3600 * 1000))
  }

  return { city, saveCity }
})
src\views\Home\Home.vue
javascript
<template>
    <!-- 头部导航 搜索框  通知栏  轮播图 -->
    <Top></Top>
    <div style="background-color: rgb(243, 248, 250);padding: 10px;">
        <!-- 宫格导航 -->
        <GridNav></GridNav>
        <!-- 推荐分类 -->
        <Category></Category>
        <!-- 商品列表 -->
        <GoodsList></GoodsList>
    </div>
    <div style="height: 35px;"></div>
</template>

<script setup lang="ts">
import { onMounted, ref } from 'vue';
import Top from './components/Top.vue'
import GridNav from './components/GridNav.vue'
import Category from './components/Category.vue'
import GoodsList from './components/GoodsList.vue';
// 使用store
import { useLocationStore } from '@/stores/location'
// 导入确认框
import { showConfirmDialog, showToast } from 'vant';
import router from '@/router';
const store = useLocationStore()
onMounted(() => {
    // 判断如果有值,就不再定位了
    if (store.city) {
        return
    } else {
        // 获取用户隐私权限的操作 都应该让用户授权确认
        showConfirmDialog({
            title: '城市定位获取',
            message:
                '为了提供更好的服务,需要获取您所在城市位置,点击确认定位,取消手动选择所在城市',
        })
            .then(() => {
                // 确认
                // on confirm
                // 调用高德地图API 获取当前所在城市名称
                AMap.plugin('AMap.CitySearch', function () {
                    var citySearch = new AMap.CitySearch()
                    citySearch.getLocalCity(function (status: string, result: any) {
                        // console.log(status);
                        console.log(result);
                        if (status === 'complete' && result.info === 'OK') {
                            // 查询成功,result即为当前所在城市信息
                            // 城市数据是在当前显示的
                            // 存储到pinia创建的store中
                            store.saveCity(result.city)
                        } else {
                            // 查询失败
                            console.log(result);
                        }
                    })
                })
            })
            .catch(() => {
                // on cancel
                // showToast({
                //     message: '手动选择城市',
                //     duration: 1000,
                //     onClose: () => {
                // 跳转到手动选择城市列表
                router.push('/city')
                // }
                // })

            });

    }

})
</script>

<style lang="scss" scoped></style>
7、分类页面实现
7.1、分类
分类页面实现思路:
1、获取到分类数据,并将分类显示页面上
遇到跨域问题

"
跨域问题解决方案:
1、在服务器端配置cors 通过设置响应header头信息,告知浏览器允许哪些域名和请求类型跨域
2、jsonp 需要服务器端配合 标签的src属性
3、开发环境中可以使用浏览器插件或者开发者服务器中的proxy代理方式
①通过vite脚手架的开发者服务器配置proxy跨域
vite.config.ts
javascript
import { fileURLToPath, URL } from 'node:url'

import { defineConfig } from 'vite'
import vue from '@vitejs/plugin-vue'
// 引入插件
import Components from 'unplugin-vue-components/vite'
// 引入路径解析的插件
import { VantResolver } from 'unplugin-vue-components/resolvers'
// https://vitejs.dev/config/
export default defineConfig({
  plugins: [
    vue(),
    // 配置使用按需引入插件
    Components({
      resolvers: [VantResolver()]
    })
  ],
  resolve: {
    alias: {
      '@': fileURLToPath(new URL('./src', import.meta.url))
    }
  },
  // 开发者服务器配置
  server:{
    // 端口号
    // port:8088
    // 代理proxy
    proxy:{
      // '/douyu' 代理标识  以/api开头的地址都需要进行代理请求
      '/api': {
        // 代理请求的接口地址 域名部分  或者公共部分
        target: 'https://m.douyu.com',
        // 是否改变了Origin  一般都为true 域名不同
        changeOrigin: true,
        // 拼接接口地址:'https://m.douyu.com/api/cate/recList
        // 源接口地址:'https://m.douyu.com/api/cate/recList
        // 重写地址  将/douyu这个标识信息 替换为空 转为真实的请求地址
        // rewrite: (path) => path.replace(/^\/api/, ''),
      },
    }
  }
})
注意配置完成后,进行重启vite服务
2、点击分类,加载对应的分类下的数据显示页面上
src\views\Kuai.vue
java
<template>
    <!-- <van-tree-select v-model:main-active-index="activeIndex" :items="parseCates" height="100vh" @click-nav="changeCate">
        <template #content>
            111
            <div v-for="item in currentList" :key="item.rid">
                <img :src="item.roomSrc" alt="">
            </div>
        </template>
    </van-tree-select> -->
    <div style="display: flex;justify-content:space-between;width: 100%;height: calc(100vh - 55px);">
        <!-- 左侧菜单 -->
        <van-sidebar v-model="activeIndex" @change="changeCate">
            <van-sidebar-item :title="item" v-for="item in parseCates" />
        </van-sidebar>
        <!-- 切换过渡动态 -->
        <transition name="van-fade">
            <div v-show="visible" style="width: 75%;overflow-y:auto;">
                <!-- 右侧对应分类内容 -->
                <div v-for="item in currentList" :key="item.rid">
                    <img :src="item.roomSrc" alt="" style="width: 100%;">
                </div>
            </div>
        </transition>


    </div>
</template>

<script setup lang="ts">
interface ICate {
    cate1Id: number,
    cate2Id: number,
    name: string,
    shortName: string
}
import { ref, computed } from 'vue'
// vue3中ref类型标注
import type { Ref } from 'vue'
import axios from 'axios'
const activeIndex = ref(0);
// 默认右侧不显示
const visible = ref(false)
const cates: Ref<ICate[]> = ref([])
// 使用/api 进行标识代表此请求需要进行代理请求
axios.get('/api/cate/recList').then(res => {
    // console.log(res.data);
    cates.value = res.data.data
    // 默认调用第一个分类
    changeCate(0)
})
// 根据返回数据 计算出需要的分类名称数组结构
const parseCates = computed(() => {
    return cates.value.map((item: ICate) => item.name)
})
interface IRoom {
    avatar: string
    cate1Id: number
    cate2Id: number
    hn: string
    isLive: number
    isVertical: number
    liveCity: string
    nickname: string
    rid: number
    roomName: string
    roomSrc: string
    verticalSrc: string
    vipId: string
}
const currentList: Ref<IRoom[]> = ref([])
// 切换分类
const changeCate = (index: number) => {
    // 切换时 先隐藏不显示
    visible.value = false
    // console.log(index);
    const type = cates.value[index].shortName
    console.log(type);
    axios.get('/api/room/list?page=1&type=' + type).then(res => {
        currentList.value = res.data.data.list
        // 数据返回后 再显示  这样就可以通过v-show触发transtion组件实现过渡动画效果
        visible.value = true
    })
}
</script>

<style scoped></style>7.2、翻页实现
src\views\Kuai.vue
java
<template>
    <!-- <van-tree-select v-model:main-active-index="activeIndex" :items="parseCates" height="100vh" @click-nav="changeCate">
        <template #content>
            111
            <div v-for="item in currentList" :key="item.rid">
                <img :src="item.roomSrc" alt="">
            </div>
        </template>
    </van-tree-select> -->
    <div style="display: flex;justify-content:space-between;width: 100%;height: calc(100vh - 55px);">
        <!-- 左侧菜单 -->
        <van-sidebar v-model="activeIndex" @change="changeCate">
            <van-sidebar-item :title="item" v-for="item in parseCates" />
        </van-sidebar>
        <!-- 通过van-list 实现触底 并加载翻页数据 -->
        <div style="width: 78%;overflow-y: auto;">
            <van-list v-model:loading="loading" :finished="finished" finished-text="没有更多了" @load="onLoad"
                :immediate-check="false">
                <!-- 切换过渡动态 -->
                <transition name="van-fade">
                    <div v-show="visible">
                        <!-- 右侧对应分类内容 -->
                        <div v-for="item in currentList" :key="item.rid" class="item">
                            <img :src="item.roomSrc" alt="" style="width: 100%;">
                        </div>
                    </div>
                </transition>
            </van-list>
        </div>

    </div>
</template>

<script setup lang="ts">
interface ICate {
    cate1Id: number,
    cate2Id: number,
    name: string,
    shortName: string
}
import { ref, computed } from 'vue'
// vue3中ref类型标注
import type { Ref } from 'vue'
import axios from 'axios'
interface IRoom {
    avatar: string
    cate1Id: number
    cate2Id: number
    hn: string
    isLive: number
    isVertical: number
    liveCity: string
    nickname: string
    rid: number
    roomName: string
    roomSrc: string
    verticalSrc: string
    vipId: string
}
const activeIndex = ref(0);
// 默认右侧不显示
const visible = ref(false)
const cates: Ref<ICate[]> = ref([])
// 使用/api 进行标识代表此请求需要进行代理请求
axios.get('/api/cate/recList').then(res => {
    // console.log(res.data);
    cates.value = res.data.data
    // 默认调用第一个分类
    changeCate(0)
})
// 根据返回数据 计算出需要的分类名称数组结构
const parseCates = computed(() => {
    return cates.value.map((item: ICate) => item.name)
})
// 当前分类下的列表数据
const currentList: Ref<IRoom[]> = ref([])
// 当前分类的缩写名称
const currentType = ref('')
// 切换分类
const changeCate = (index: number) => {
    // 清空其他分类原数据
    currentList.value = []
    // 当前页重置和最大页重置
    nowPage.value = 1
    pageCount.value = 0
    // 将翻页完成状态重置
    finished.value = false
    // 切换时 先隐藏不显示
    visible.value = false
    // console.log(index);
    // 存储type分类缩写名称为公共部分
    currentType.value = cates.value[index].shortName
    // 切换分类之后 加载一次数据
    loadList()
}
// 加载分类下的数据
const loadList = (page = 1) => {
    // 判断当前页已经是最大页 后续就没有数据了 就不请求了 finish 为true
    if (nowPage.value === pageCount.value) {
        console.log('当前页', nowPage.value);
        console.log('最大页', pageCount.value);
        finished.value = true
        return
    }
    console.log(currentType.value, '数据加载');
    axios.get('/api/room/list?page=' + page + '&type=' + currentType.value).then(res => {
        // 将加载状态重置为false
        loading.value = false
        // 拼接新旧数据
        // currentList.value = res.data.data.list
        currentList.value = [...currentList.value, ...res.data.data.list]
        // 数据返回后 再显示  这样就可以通过v-show触发transtion组件实现过渡动画效果
        visible.value = true
        // 将当前页码和最大页码存储
        nowPage.value = res.data.data.nowPage
        pageCount.value = res.data.data.pageCount
    })
}

// van-list组件状态
// loading 加载状态 默认不加载
let loading = ref(false)
// finished 完成状态  没有数据  加载完了
const finished = ref(false);
// onLoad默认加载列表数据
const onLoad = () => {
    // 取下一页 当前页加+
    loadList(nowPage.value + 1)
}
// 记录当前页和最大页
const nowPage = ref(1)
const pageCount = ref(0)
</script>

<style lang="scss" scoped>
.item {
    margin-bottom: 10px;
    border-radius: 4px;
}
</style>
8、购物车页面
用户购买多个商品时,可以将商品添加购物车,统一进行下单购买
购物车功能:
购物车一般具备的功能,商品信息,添加商品,删除商品,商品数量调整,总结价格和件数
购物车业务流程:
加入购物车 商品列表页或者商品详情页,点击按钮添加到购物车
后续进行购物车页面显示添加商品信息 并计算价格 后续可以下单
"
问:购物车数据存储在什么地方?
远程数据库存储 每次操作购物车需要加载远程数据
本地存储 localStorage 只有本地才可以获取 更换客户端就没有了
src\views\Cart.vue
8.1、购物车商品列表显示和购物车商品删除
java
<template>
    <div style="height: 100vh;">
        <van-nav-bar title="购物车" left-text="返回" left-arrow @click-left="$router.back()" />
    <van-swipe-cell v-for="item in cartList" :key="item.id">
        <!-- 每一个商品信息 -->
        <div class="item">
            <div>
                <img :src="item.pic" alt="" style="width: 100%;">
            </div>
            <div>
                <div>
                    {{ item.name }}
                </div>
                <div>
                    <div> ¥{{ item.price }}</div>
                    <div>
                        <van-stepper v-model="item.buyCount" />
                    </div>
                </div>
            </div>
        </div>
        <!-- 右侧插槽 删除按钮 -->
        <template #right>
            <van-button square text="删除" type="danger" style=" height: 100%;" @click="del(item.id)" />
        </template>
    </van-swipe-cell>

    <!-- 搜索不到-->
    <van-empty description="空空如也,买点儿东西吧" v-show="emptyShow" />
    <van-submit-bar :price="3050" button-text="提交订单" @submit="onSubmit">
        <van-checkbox v-model="allChecked">全选</van-checkbox>
    </van-submit-bar>
    <!-- 加一个空div高度 将底部菜单覆盖的商品信息 顶出来 -->
    <div style="height: 50px;"></div>
    </div>
</template>

<script setup lang="ts">
import url from '@/config/url';
import type { IGoods } from '@/types/Goods';
import req from '@/utils/request'
import { showToast } from 'vant';
import { ref } from 'vue'
import type { Ref } from 'vue';
/***
 *  加载购物车数据 并渲染显示到页面
 */
// 购物车列表数据
const cartList: Ref<IGoods[]> = ref([])
// 加载购物车列表数据
const loadCartList = () => {
    req.get(url.CartList).then(res => {
        cartList.value = res.data
        emptyShow.value = res.data.length === 0
    })
}
// 调用加载数据
loadCartList()
// 显示空状态
let emptyShow = ref(false)
// 全选状态
const allChecked = ref(false)
// 提交方法
const onSubmit = () => {
    showToast('提交订单维护中')
}

// 删除购物车商品数据
const del = (id: number) => {
    req.delete(url.CartList + '/' + id).then(res => {
        showToast({
            message: '删除成功',
            duration: 700,
            onClose: () => {
                // 成功后重载数据
                loadCartList()
            }
        })
    })
}
</script>

<style lang="scss" scoped>
.item {
    display: flex;
    justify-content: space-between;
    padding: 10px;
    background-color: white;
    border-radius: 10px;
    margin: 5px;
    margin-bottom: 10px;

    >div:nth-child(1) {
        width: 28%;
    }

    >div:nth-child(2) {
        width: 68%;
        display: flex;
        flex-direction: column;
        justify-content: space-between;

        /* >div:nth-child(1) {} */

        >div:nth-child(2) {
            display: flex;
            justify-content: space-between;

            /* color: red; */
            >div:nth-child(1) {
                color: red;
                font-size: 1.2em
            }
        }
    }
}
</style>
8.2、添加商品信息到购物车中
①将购物车的数据和加载数据方法及其添加方法统一共享存储到pinia中
src\stores\cart.ts
javascript
import { defineStore } from 'pinia'
import url from '@/config/url'
import req from '@/utils/request'
import type { IGoods } from '@/types/Goods'
import { showToast } from 'vant'
import type { Ref } from 'vue'
import { ref } from 'vue'
export const useCartStore = defineStore('cart', () => {
  // 购物车列表数据
  const cartList: Ref<IGoods[]> = ref([])
  // 加载购物车列表数据
  const loadCartList = () => {
    req.get(url.CartList).then((res) => {
      cartList.value = res.data
    })
  }
  //  添加商品信息到购物车中
  function addCart(item: IGoods) {
    // item为需要添加的商品数据信息
    // 处理默认购买数量为1
    item.buyCount = '1'
    req.post(url.CartList, item).then((res) => {
      showToast({
        message: '添加购物车成功',
        duration: 1000,
        onClose: () => {
          //添加成功后调用获取新购物车列表
          loadCartList()
        }
      })
    })
  }

  return { cartList, loadCartList, addCart }
})
②获取购物车数据并渲染显示
src\views\Cart.vue
javascript
<template>
    <div style="height: 100vh;">
        <van-nav-bar title="购物车" left-text="返回" left-arrow @click-left="$router.back()" />
        <van-swipe-cell v-for="item in cartList" :key="item.id">
            <!-- 每一个商品信息 -->
            <div class="item">
                <div>
                    <img :src="item.pic" alt="" style="width: 100%;">
                </div>
                <div>
                    <div>
                        {{ item.name }}
                    </div>
                    <div>
                        <div> ¥{{ item.price }}</div>
                        <div>
                            <van-stepper v-model="item.buyCount" />
                        </div>
                    </div>
                </div>
            </div>
            <!-- 右侧插槽 删除按钮 -->
            <template #right>
                <van-button square text="删除" type="danger" style=" height: 100%;" @click="del(item.id)" />
            </template>
        </van-swipe-cell>

        <!-- 搜索不到-->
        <van-empty description="空空如也,买点儿东西吧" v-show="emptyShow" />
        <van-submit-bar :price="3050" button-text="提交订单" @submit="onSubmit">
            <van-checkbox v-model="allChecked">全选</van-checkbox>
        </van-submit-bar>
        <!-- 加一个空div高度 将底部菜单覆盖的商品信息 顶出来 -->
        <div style="height: 50px;"></div>
    </div>
</template>

<script setup lang="ts">
import url from '@/config/url';
import req from '@/utils/request'
import { showToast } from 'vant';
import { ref } from 'vue'
import { useCartStore } from '@/stores/cart'
// pinia中将状态数据转为响应式数据的方法
import { storeToRefs } from 'pinia';
import { computed } from 'vue';
/***
 *  加载购物车数据 并渲染显示到页面
 */
const store = useCartStore()
// 解构store中的方法和属性 并使其具有响应式
const { cartList } = storeToRefs(store)
// 调用购物车数据
store.loadCartList()
// 显示空状态 计算属性
let emptyShow = computed(() => {
    return cartList.value.length === 0
})
// 全选状态
const allChecked = ref(false)
// 提交方法
const onSubmit = () => {
    showToast('提交订单维护中')
}
// 删除购物车商品数据
const del = (id: number) => {
    req.delete(url.CartList + '/' + id).then(res => {
        showToast({
            message: '删除成功',
            duration: 700,
            onClose: () => {
                // 成功后重载数据
                store.loadCartList()
            }
        })
    })
}
</script>

<style lang="scss" scoped>
.item {
    display: flex;
    justify-content: space-between;
    padding: 10px;
    background-color: white;
    border-radius: 10px;
    margin: 5px;
    margin-bottom: 10px;

    >div:nth-child(1) {
        width: 28%;
    }

    >div:nth-child(2) {
        width: 68%;
        display: flex;
        flex-direction: column;
        justify-content: space-between;

        /* >div:nth-child(1) {} */

        >div:nth-child(2) {
            display: flex;
            justify-content: space-between;

            /* color: red; */
            >div:nth-child(1) {
                color: red;
                font-size: 1.2em
            }
        }
    }
}
</style>
在首页分类和商品列表组件中调用添加商品到购物车功能
src\views\Home\components\Category.vue
javascript
<template>
                        <div>
                            ¥{{ item.price }}
                            <div @click="store.addCart(item)">
                                <van-icon name="cart-o" color="white" />
                            </div>
                        </div>
</template>

<script setup lang="ts">
import { useCartStore } from '@/stores/cart';
const store = useCartStore()
const { currentGoodsList } = toRefs(data)
</script>

<style lang="scss" scoped>
</style>
src\views\Home\components\GoodsList.vue
javascript
<template>
                <div>
                    ¥ {{ item.price }}
                    <!-- 购物车添加按钮 -->
                    <div @click="store.addCart(item)">
                        <van-icon name="cart-o" color="white" />
                    </div>
                </div>
</template>

<script setup lang="ts">
import { useCartStore } from '@/stores/cart';
const store = useCartStore()
</script>

<style lang="scss" scoped>
</style>
8.3、在底部导航购物车显示数量角标
src\components\Footer.vue
javascript
<template>
  <div>
    <!-- route 开启路由 -->
    <!-- placeholder  底部导航栏固定到底部时  显示一个同等高度的容器  将被挡住的内容显示出来 -->
    <van-tabbar v-model="active" route active-color="#ff6e01" placeholder>
      <!-- 添加一个购物车商品种类数量的  数字提示 -->
      <van-tabbar-item to="/cart" :badge="store.cartList.length">
        <span>购物车</span>
        <template #icon="props">
          <span class="iconfont icon-gouwuche"></span>
        </template>
      </van-tabbar-item>
    </van-tabbar>

  </div>
</template>

<script setup lang="ts">
// 调用store获取购物车数据
import { useCartStore } from '@/stores/cart';
const store = useCartStore()
store.loadCartList()
</script>

<style lang="scss" scoped>
</style>
8.4、单选和汇总
src\views\Cart.vue
java
<template>
    <div style="height: 100vh;">
        <van-checkbox-group v-model="checked">
            <van-swipe-cell v-for="item in cartList" :key="item.id">
                <!-- 每一个商品信息 -->
                <div class="item">
                    <!-- 选中后使用商品id作为识别属性 -->
                    <van-checkbox :name="item.id"></van-checkbox>
                    <div>
                        <img :src="item.pic" alt="" style="width: 100%;">
                    </div>
                    <div>
                        <div>
                            {{ item.name }}
                        </div>
                        <div>
                            <div> ¥{{ item.price }}</div>
                            <div>
                                <van-stepper v-model="item.buyCount" />
                            </div>
                        </div>
                    </div>
                </div>
                <!-- 右侧插槽 删除按钮 -->
                <template #right>
                    <van-button square text="删除" type="danger" style=" height: 100%;" @click="del(item.id)" />
                </template>
            </van-swipe-cell>
        </van-checkbox-group>
</template>

<script setup lang="ts">
import { ref } from 'vue'
import type { Ref } from 'vue'
import { computed } from 'vue';
// 选中的商品记录
const checked: Ref<number[]> = ref([])

// 总价
const total = computed(() => {
    // console.log('选中的商品id为:', checked.value);
    let total = 0
    // 遍历购物车的所有商品数
    cartList.value.forEach(item => {
        // 购车每一条数据里的id如果是在被选中的商品id中
        if (checked.value.includes(item.id)) {
            // 就通过商品数量*商品单价  汇总获得商品总价
            total += Number(item.buyCount) * Number(item.price) * 100
        }
    })
    return total
})
</script>

<style lang="scss" scoped>
</style>
8.5、全选
当点击全选按钮后,所有的复选框被选中
src\views\Cart.vue
java
<template>
    <div style="height: 100vh;">
        <van-nav-bar title="购物车" left-text="返回" left-arrow @click-left="$router.back()" />
        <van-checkbox-group v-model="checked">
            <van-swipe-cell v-for="item in cartList" :key="item.id">
                <!-- 每一个商品信息 -->
                <div class="item">
                    <!-- 选中后使用商品id作为识别属性 -->
                    <van-checkbox :name="item.id"></van-checkbox>
                    <div>
                        <img :src="item.pic" alt="" style="width: 100%;">
                    </div>
                    <div>
                        <div class="van-multi-ellipsis--l2">
                            {{ item.name }}
                        </div>
                        <div>
                            <div> ¥{{ item.price }}</div>
                            <div>
                                <van-stepper v-model="item.buyCount" />
                            </div>
                        </div>
                    </div>
                </div>
                <!-- 右侧插槽 删除按钮 -->
                <template #right>
                    <van-button square text="删除" type="danger" style=" height: 100%;" @click="del(item.id)" />
                </template>
            </van-swipe-cell>
        </van-checkbox-group>

        <!-- 搜索不到-->
        <van-empty description="空空如也,买点儿东西吧" v-show="emptyShow" />
        <!-- placeholder	是否在标签位置生成一个等高的占位元素 -->
        <van-submit-bar :price="total" button-text="提交订单" @submit="onSubmit" placeholder>
            <van-checkbox v-model="allChecked" @change="changeAll">全选</van-checkbox>
        </van-submit-bar>
        <!-- 加一个空div高度 将底部菜单覆盖的商品信息 顶出来 -->
        <!-- <div style="height: 50px;"></div> -->
    </div>
</template>

<script setup lang="ts">
import url from '@/config/url';
import req from '@/utils/request'
import { showToast } from 'vant'
import { ref } from 'vue'
import type { Ref } from 'vue'
import { useCartStore } from '@/stores/cart'
// pinia中将状态数据转为响应式数据的方法
import { storeToRefs } from 'pinia'
import { computed, watch } from 'vue'
/***
 *  加载购物车数据 并渲染显示到页面
 */
const store = useCartStore()
// 解构store中的方法和属性 并使其具有响应式
const { cartList } = storeToRefs(store)
// 调用购物车数据
store.loadCartList()
// 显示空状态 计算属性
let emptyShow = computed(() => {
    return cartList.value.length === 0
})
// 全选状态
const allChecked = ref(false)
// 提交方法
const onSubmit = () => {
    showToast('提交订单维护中')
}
// 删除购物车商品数据
const del = (id: number) => {
    req.delete(url.CartList + '/' + id).then(res => {
        showToast({
            message: '删除成功',
            duration: 700,
            onClose: () => {
                // 成功后重载数据
                store.loadCartList()
            }
        })
    })
}

// 选中的商品记录
const checked: Ref<number[]> = ref([])

// 总价
const total = computed(() => {
    // console.log('选中的商品id为:', checked.value);
    let total = 0
    // 遍历购物车的所有商品数
    cartList.value.forEach(item => {
        // 购车每一条数据里的id如果是在被选中的商品id中
        if (checked.value.includes(item.id)) {
            // 就通过商品数量*商品单价  汇总获得商品总价
            total += Number(item.buyCount) * Number(item.price) * 100
        }
    })
    return total
})

// 监听全选按钮 确定是否选中多个复选框
// watch(allChecked, (newValue, oldValue) => {
//     // console.log(newValue, oldValue);
//     // allChecked为true时,代表所有商品被选中
//     // 返回所有商品的id数组给选中的参数
//     if (allChecked.value === true) {
//         checked.value = cartList.value.map(item => item.id)
//     }
// })
// 全选复选框事件触发
const changeAll = (value: boolean) => {
    console.log(value);
    // 全部选中
    if (value === true) {
        checked.value = cartList.value.map(item => item.id)
    } else {
        // 全部不选
        // 购物车全部商品 如果等于所有选中的商品 才将数据清空
        if (cartList.value.length === checked.value.length) {
            checked.value = []
        }
    }
}
// 监听选中的数量 是否为全选
watch(checked, (newValue, oldValue) => {
    // 选中的数组长度和购物车商品的数组长度一样 代表被全部选中了
    allChecked.value = checked.value.length === cartList.value.length
})
</script>
<style lang="scss" scoped>
.item {
    display: flex;
    justify-content: space-around;
    align-items: center;
    padding: 10px;
    background-color: white;
    border-radius: 10px;
    margin: 5px;
    margin-bottom: 10px;
    >div:nth-child(1){
        width: 10%;
    }
    >div:nth-child(2) {
        width: 20%;
        img{
            border-radius: 4px;
        }
    }

    >div:nth-child(3) {
        width: 70%;
        display: flex;
        flex-direction: column;
        justify-content: space-around;
        padding: 5px;
        >div:nth-child(1) {
            font-size: 0.9em;
        }
        >div:nth-child(2) {
            display: flex;
            justify-content: space-between;
            align-items: center;
            /* color: red; */
            >div:nth-child(1) {
                color: red;
                font-size: 1.2em
            }
        }
    }
}
</style>
9、个人中心
9.1、个人中心页面
页面布局
src\views\My.vue
javascript
<template>
    <div class="container">
        <!-- 头部导航 -->
        <div style="display: flex;justify-content: space-between;padding: 10px;">
            <div><van-icon name="arrow-left" /></div>
            <div style="font-weight: bold;">我的</div>
            <div></div>
        </div>
        <!-- 登录情况下显示  用户头像和用户名 -->
        <div style="display: flex;align-items: center;" v-if="username">
            <van-image width="3rem" height="3rem" round fit="cover" position="left"
                src="https://fastly.jsdelivr.net/npm/@vant/assets/cat.jpeg" />
            <div style="margin-left: 10px;font-size: 1.1em;font-weight: bold;">html2301</div>
        </div>
        <!-- 未登录 显示点击登录 -->
        <div style="display: flex;align-items: center;" v-else>
            <van-image width="3rem" height="3rem" round fit="cover" position="left"
                src="https://img1.baidu.com/it/u=1979995456,824823943&fm=253&fmt=auto&app=138&f=JPEG?w=500&h=500" />
            <div style="margin-left: 10px;font-size: 1.1em;font-weight: bold;" @click="$router.push('/login')">点击登录</div>
        </div>
        <!-- 我的资产 -->
        <div class="card">
            <div>
                <div>我的资产</div>
            </div>
            <div>
                <div>
                    <div>0</div>
                    <div>红包(元)</div>
                </div>
                <div>
                    <div>0</div>
                    <div>优惠券(元)</div>
                </div>
                <div>
                    <div>0</div>
                    <div>购物金(元)</div>
                </div>
            </div>
        </div>
        <!-- 我的订单 -->
        <div class="card">
            <div style="display: flex;justify-content: space-between;">
                <div>我的订单</div>
                <div style="font-size: 0.8em;color: #ccc;">更多<van-icon name="arrow" /></div>
            </div>
            <div>
                <div>
                    <div>
                        <van-icon name="paid" size="28" color="#FF9933" />
                    </div>
                    <div>待付款</div>
                </div>
                <div>
                    <div>
                        <van-icon name="paid" size="28" color="#FF9933" />
                    </div>
                    <div>备货中</div>
                </div>
                <div>
                    <div>
                        <van-icon name="paid" size="28" color="#FF9933" />
                    </div>
                    <div>待收货</div>
                </div>
                <div>
                    <div>
                        <van-icon name="paid" size="28" color="#FF9933" />
                    </div>
                    <div>待收货</div>
                </div>
            </div>
        </div>
        <!-- 常用工具 -->
        <div class="card">
            <div style="display: flex;justify-content: space-between;">
                <div>常用工具</div>
            </div>
            <div style="justify-content: start;" class="tools">
                <div>
                    <div>
                        <van-icon name="paid" size="28" color="#FF9933" />
                    </div>
                    <div>收货地址</div>
                </div>
                <div>
                    <div>
                        <van-icon name="paid" size="28" color="#FF9933" />
                    </div>
                    <div>我的评价</div>
                </div>
                <div>
                    <div>
                        <van-icon name="paid" size="28" color="#FF9933" />
                    </div>
                    <div>会员中心</div>
                </div>
                <div>
                    <div>
                        <van-icon name="paid" size="28" color="#FF9933" />
                    </div>
                    <div>体验反馈</div>
                </div>
                <div>
                    <div>
                        <van-icon name="paid" size="28" color="#FF9933" />
                    </div>
                    <div>商家资质</div>
                </div>
                <div>
                    <div>
                        <van-icon name="paid" size="28" color="#FF9933" />
                    </div>
                    <div>消消乐</div>
                </div>
            </div>
        </div>
    </div>
</template>

<script setup lang="ts">
const username = localStorage.getItem('username')
</script>

<style lang="scss" scoped>
.container {
    height: calc(100vh - 50px);
    background: linear-gradient(#FF9933, #FF9966, rgb(243, 248, 250));
    padding-left: 10px;
    padding-right: 10px;
}

.card {
    background-color: #fff;
    border-radius: 10px;
    display: flex;
    flex-direction: column;
    padding: 15px;
    margin-top: 10px;

    >div:nth-child(1) {
        font-weight: bold;
    }

    >div:nth-child(2) {
        margin-top: 20px;
        margin-bottom: 10px;
        display: flex;
        justify-content: space-around;
        flex-wrap: wrap;
        text-align: center;
        font-size: 0.9em;

        >div {
            margin-left: 10px;
            margin-right: 10px;
        }
    }
}

.tools {
    >div {
        margin-bottom: 20px;
    }
}
</style>
9.2、用户注册页面
注册页面和登录页面结构基本类似
src\views\Ucenter\Register.vue
javascript
<template>
    <div class="container">
        <!-- logo -->
        <div style="margin-top: 100px;">
            <img :src="logo" style="width: 200px" alt="logo" />
        </div>
        <!-- 表单部分 -->
        <div style="margin-top: 60px;">
            <div class="myInput">
                <van-icon name="contact" size="24" />
                <input type="text" placeholder="请输入用户名" v-model="username" @blur="checkInput" />
            </div>
            <div class="myInput">
                <van-icon name="bag-o" size="24" />
                <input :type="showPassword ? 'text' : 'password'" placeholder="请输入密码" v-model="password"
                    @blur="checkInput" />
                <van-icon :name="showPassword ? 'eye-o' : 'closed-eye'" size="24" @click="showPassword = !showPassword" />
            </div>
            <div class="register" @click="register">注册</div>
        </div>
    </div>
</template>

<script setup lang="ts">
import logo from '@/assets/logo.png'
import { ref } from 'vue'
import url from '@/config/url';
import req from '@/utils/request'
import { showToast } from 'vant';
import { useRouter } from 'vue-router'
const router = useRouter()
const username = ref('')
const password = ref('')
const showPassword = ref(false)
// vue原生事件对象的标注
const checkInput = (event: any) => {
    // console.log([event.target.placeholder]);
    if (event.target.value === '') {
        showToast(event.target.placeholder.replace('请输入', '') + '不能为空')
    }
}
// 注册
const register = () => {
    req.post(url.Register, { username: username.value, password: password.value }).then(res => {
        if (res.data.code === 0) {
            showToast({
                message: '注册成功,请登录',
                onClose: () => {
                    router.push('/login')
                }
            })
        } else {
            showToast({
                message: '注册失败,请联系客服',
            })
        }
    })
}
</script>

<style lang="scss" scoped>
.container {
    height: 100vh;
    background: url('@/assets/register.webp');
    background-size: cover;
    display: flex;
    flex-direction: column;
    /* justify-content: space-around; */
    align-items: center;

    .myInput {
        color: white;
        display: flex;
        align-items: center;

        input {
            margin-left: 15px;
            background: transparent;
            border: 0px;
            border-bottom: 1px solid white;
            height: 60px;
            color: white;

            /* & 当前选择器  就是input */
            &::-webkit-input-placeholder {
                color: white
            }
        }
    }
}

.register {
    margin-top: 40px;
    background-color: #FF9933;
    color: white;
    font-size: 20px;
    text-align: center;
    padding: 10px 20px;
    border-radius: 10px;

    &:active {
        opacity: 0.7;
    }
}
</style>
9.3、用户登录界面
配置对应的/login路由
src\views\Ucenter\Login.vue
javascript
<template>
    <div class="container">
        <!-- 登录表单 -->
        <van-form @submit="onSubmit">
            <van-cell-group inset>
                <van-field v-model="username" name="username" label="用户名" placeholder="用户名"
                    :rules="[{ required: true, message: '请填写用户名' }]" />
                <van-field v-model="password" type="password" name="password" label="密码" placeholder="密码"
                    :rules="[{ required: true, message: '请填写密码' }]" />
            </van-cell-group>
            <div style="margin: 16px">
                <van-button round block type="primary" native-type="submit">
                    登录
                </van-button>
            </div>
        </van-form>
    </div>
</template>

<script setup lang="ts">
import { ref } from 'vue'
const username = ref('')
const password = ref('')
const onSubmit = () => {

}
</script>

<style lang="scss" scoped>
.cantainer {
    height: 100vh;
    background-color: #fff;
    display: flex;
    flex-direction: column;
    justify-content: center;
    align-items: center;
    margin-bottom: -40px;
}
</style>
登录实现
javascript
<template>
    <div class="container">
        <!-- 登录表单 -->
        <van-form @submit="onSubmit">
            <van-cell-group inset>
                <van-field v-model="username" name="username" label="用户名" placeholder="用户名"
                    :rules="[{ required: true, message: '请填写用户名' }]" />
                <van-field v-model="password" type="password" name="password" label="密码" placeholder="密码"
                    :rules="[{ required: true, message: '请填写密码' }]" />
            </van-cell-group>
            <div style="margin: 16px">
                <van-button round block type="primary" native-type="submit">
                    登录
                </van-button>
            </div>
        </van-form>
    </div>
</template>

<script setup lang="ts">
import { ref } from 'vue'
import url from '@/config/url'
import req from '@/utils/request'
import { showToast } from 'vant';
import { useRouter } from 'vue-router';
const router = useRouter()
const username = ref('')
const password = ref('')
const onSubmit = () => {
    req.post(url.Login, { username:username.value, password:password.value }).then(res => {
        console.log(res);
        if (res.data.code === 0) {
            showToast({
                message: '登录成功',
                duration: 1000,
                onClose: () => {
                    // 存储token和用户名到localStorage
                    localStorage.setItem('token',res.data.token)
                    localStorage.setItem('username',res.data.data.username)
                    router.push('/my')
                }
            })
        } else {
            showToast({
                message: '用户名或者密码错误',
                duration: 1000
            })
        }
    })
}
</script>

<style lang="scss" scoped>
.container {
    height: 100vh;
    background-color: #fff;
    display: flex;
    flex-direction: column;
    justify-content: center;
    align-items: center;
    margin-bottom: -40px;
}
</style>
注销登录
src\views\Ucenter\My.vue
javascript
<template>
    <div class="container">
        <!-- 头部导航 -->
        <div style="display: flex;justify-content: space-between;padding: 10px;">
            <div><van-icon name="arrow-left" /></div>
            <div style="font-weight: bold;">我的</div>
            <div></div>
        </div>
        <!-- 登录情况下显示  用户头像和用户名 -->
        <div style="display: flex;align-items: center;" v-if="username">
            <van-image width="3rem" height="3rem" round fit="cover" position="left"
                src="https://fastly.jsdelivr.net/npm/@vant/assets/cat.jpeg" />
            <div style="margin-left: 10px;font-size: 1.1em;font-weight: bold;">html2301</div>
        </div>
        <!-- 未登录 显示点击登录 -->
        <div style="display: flex;align-items: center;" v-else>
            <van-image width="3rem" height="3rem" round fit="cover" position="left"
                src="https://img1.baidu.com/it/u=1979995456,824823943&fm=253&fmt=auto&app=138&f=JPEG?w=500&h=500" />
            <div style="margin-left: 10px;font-size: 1.1em;font-weight: bold;" @click="$router.push('/login')">点击登录</div>
        </div>
        <!-- 我的资产 -->
        <div class="card">
            <div>
                <div>我的资产</div>
            </div>
            <div>
                <div>
                    <div>0</div>
                    <div>红包(元)</div>
                </div>
                <div>
                    <div>0</div>
                    <div>优惠券(元)</div>
                </div>
                <div>
                    <div>0</div>
                    <div>购物金(元)</div>
                </div>
            </div>
        </div>
        <!-- 我的订单 -->
        <div class="card">
            <div style="display: flex;justify-content: space-between;">
                <div>我的订单</div>
                <div style="font-size: 0.8em;color: #ccc;">更多<van-icon name="arrow" /></div>
            </div>
            <div>
                <div>
                    <div>
                        <van-icon name="paid" size="28" color="#FF9933" />
                    </div>
                    <div>待付款</div>
                </div>
                <div>
                    <div>
                        <van-icon name="paid" size="28" color="#FF9933" />
                    </div>
                    <div>备货中</div>
                </div>
                <div>
                    <div>
                        <van-icon name="paid" size="28" color="#FF9933" />
                    </div>
                    <div>待收货</div>
                </div>
                <div>
                    <div>
                        <van-icon name="paid" size="28" color="#FF9933" />
                    </div>
                    <div>待收货</div>
                </div>
            </div>
        </div>
        <!-- 常用工具 -->
        <div class="card">
            <div style="display: flex;justify-content: space-between;">
                <div>常用工具</div>
            </div>
            <div style="justify-content: start;" class="tools">
                <div>
                    <div>
                        <van-icon name="paid" size="28" color="#FF9933" />
                    </div>
                    <div>收货地址</div>
                </div>
                <div>
                    <div>
                        <van-icon name="paid" size="28" color="#FF9933" />
                    </div>
                    <div>我的评价</div>
                </div>
                <div>
                    <div>
                        <van-icon name="paid" size="28" color="#FF9933" />
                    </div>
                    <div>会员中心</div>
                </div>
                <div>
                    <div>
                        <van-icon name="paid" size="28" color="#FF9933" />
                    </div>
                    <div>体验反馈</div>
                </div>
                <div>
                    <div>
                        <van-icon name="paid" size="28" color="#FF9933" />
                    </div>
                    <div>商家资质</div>
                </div>
                <div>
                    <div>
                        <van-icon name="paid" size="28" color="#FF9933" />
                    </div>
                    <div>消消乐</div>
                </div>
            </div>
        </div>
        <van-button type="danger" @click="logout" block style="margin-top: 20px;margin-bottom: 20px;">注销</van-button>
    </div>
</template>

<script setup lang="ts">
import { useRouter } from 'vue-router';
import { showToast } from 'vant';
const username = localStorage.getItem('username')
const router = useRouter()
// 注销登录
const logout = () => {
    showToast({
        message: '注销成功',
        duration: 1000,
        onClose: () => {
            localStorage.removeItem('token')
            localStorage.removeItem('username')
            router.push('/')
        }
    })
}
</script>

<style lang="scss" scoped>
.container {
    /* height: calc(100vh - 50px); */
    background: linear-gradient(#FF9933, #FF9966, rgb(243, 248, 250));
    padding-left: 10px;
    padding-right: 10px;
}

.card {
    background-color: #fff;
    border-radius: 10px;
    display: flex;
    flex-direction: column;
    padding: 15px;
    margin-top: 10px;

    >div:nth-child(1) {
        font-weight: bold;
    }

    >div:nth-child(2) {
        margin-top: 20px;
        margin-bottom: 10px;
        display: flex;
        justify-content: space-around;
        flex-wrap: wrap;
        text-align: center;
        font-size: 0.9em;

        >div {
            margin-left: 10px;
            margin-right: 10px;
        }
    }
}

.tools {
    >div {
        margin-bottom: 20px;
    }
}
</style>
9.4、提交订单判断是否登录
javascript
<template>
    <div style="height: 100vh;">
        <van-nav-bar title="购物车" left-text="返回" left-arrow @click-left="$router.back()" />
        <van-checkbox-group v-model="checked">
            <van-swipe-cell v-for="item in cartList" :key="item.id">
                <!-- 每一个商品信息 -->
                <div class="item">
                    <!-- 选中后使用商品id作为识别属性 -->
                    <van-checkbox :name="item.id"></van-checkbox>
                    <div>
                        <img :src="item.pic" alt="" style="width: 100%;">
                    </div>
                    <div>
                        <div class="van-multi-ellipsis--l2">
                            {{ item.name }}
                        </div>
                        <div>
                            <div> ¥{{ item.price }}</div>
                            <div>
                                <van-stepper v-model="item.buyCount" />
                            </div>
                        </div>
                    </div>
                </div>
                <!-- 右侧插槽 删除按钮 -->
                <template #right>
                    <van-button square text="删除" type="danger" style=" height: 100%;" @click="del(item.id)" />
                </template>
            </van-swipe-cell>
        </van-checkbox-group>

        <!-- 搜索不到-->
        <van-empty description="空空如也,买点儿东西吧" v-show="emptyShow" />
        <!-- placeholder	是否在标签位置生成一个等高的占位元素 -->
        <van-submit-bar :price="total" button-text="提交订单" @submit="onSubmit" placeholder>
            <van-checkbox v-model="allChecked">全选</van-checkbox>
            <!-- <van-checkbox v-model="allChecked" @change="changeAll">全选</van-checkbox> -->
        </van-submit-bar>
        <!-- 加一个空div高度 将底部菜单覆盖的商品信息 顶出来 -->
        <!-- <div style="height: 50px;"></div> -->
    </div>
</template>

<script setup lang="ts">
import url from '@/config/url';
import req from '@/utils/request'
import { showToast } from 'vant'
import { ref } from 'vue'
import type { Ref } from 'vue'
import { useCartStore } from '@/stores/cart'
// pinia中将状态数据转为响应式数据的方法
import { storeToRefs } from 'pinia'
import { computed, watch } from 'vue'
import { useRouter } from 'vue-router';
const router = useRouter()
/***
 *  加载购物车数据 并渲染显示到页面
 */
const store = useCartStore()
// 解构store中的方法和属性 并使其具有响应式
const { cartList } = storeToRefs(store)
// 调用购物车数据
store.loadCartList()
// 显示空状态 计算属性
let emptyShow = computed(() => {
    return cartList.value.length === 0
})
// 全选状态
const allChecked = ref(false)
// 提交方法
const onSubmit = () => {
    // 判断是否选中了商品
    if (total.value === 0) {
        showToast('请选择要购买的商品')
        return
    }
    // 判断是否登录
    if (localStorage.getItem('token')) {
        showToast('提交订单维护中')
    } else {
        showToast({
            message: '请先登录',
            onClose: () => {
                router.push('/login')
            }
        })
    }

}
// 删除购物车商品数据
const del = (id: number) => {
    req.delete(url.CartList + '/' + id).then(res => {
        showToast({
            message: '删除成功',
            duration: 700,
            onClose: () => {
                // 成功后重载数据
                store.loadCartList()
            }
        })
    })
}

// 选中的商品记录
const checked: Ref<number[]> = ref([])

// 总价
const total = computed(() => {
    // console.log('选中的商品id为:', checked.value);
    let total = 0
    // 遍历购物车的所有商品数
    cartList.value.forEach(item => {
        // 购车每一条数据里的id如果是在被选中的商品id中
        if (checked.value.includes(item.id)) {
            // 就通过商品数量*商品单价  汇总获得商品总价
            total += Number(item.buyCount) * Number(item.price) * 100
        }
    })
    return total
})

// 监听全选按钮 确定是否选中多个复选框
watch(allChecked, (newValue, oldValue) => {
    // console.log(newValue, oldValue);
    // allChecked为true时,代表所有商品被选中
    // 返回所有商品的id数组给选中的参数
    if (allChecked.value === true) {
        checked.value = cartList.value.map(item => item.id)
    } else {
        // 全部不选
        // 购物车全部商品 如果等于所有选中的商品 才将数据清空
        if (cartList.value.length === checked.value.length) {
            checked.value = []
        }
    }
})
// })
// 全选复选框事件触发
// const changeAll = (value: boolean) => {
//     console.log(value);
//     // 全部选中
//     if (value === true) {
//         checked.value = cartList.value.map(item => item.id)
//     } else {
//         // 全部不选
//         // 购物车全部商品 如果等于所有选中的商品 才将数据清空
//         if (cartList.value.length === checked.value.length) {
//             checked.value = []
//         }
//     }
// }
// 监听选中的数量 是否为全选
watch(checked, (newValue, oldValue) => {
    // 选中的数组长度和购物车商品的数组长度一样 代表被全部选中了
    allChecked.value = checked.value.length === cartList.value.length
})
</script>
<style lang="scss" scoped>
.item {
    display: flex;
    justify-content: space-around;
    align-items: center;
    padding: 10px;
    background-color: white;
    border-radius: 10px;
    margin: 5px;
    margin-bottom: 10px;

    >div:nth-child(1) {
        width: 10%;
    }

    >div:nth-child(2) {
        width: 20%;

        img {
            border-radius: 4px;
        }
    }

    >div:nth-child(3) {
        width: 70%;
        display: flex;
        flex-direction: column;
        justify-content: space-around;
        padding: 5px;

        >div:nth-child(1) {
            font-size: 0.9em;
        }

        >div:nth-child(2) {
            display: flex;
            justify-content: space-between;
            align-items: center;

            /* color: red; */
            >div:nth-child(1) {
                color: red;
                font-size: 1.2em
            }
        }
    }
}
</style>
三、移动端适配
1、屏幕适配
"
不同分辨率的屏幕和大小,能够显示相近的效果和使用体验。缩放 使用响应式单位
postcss-px-to-viewport 是一款 PostCSS 插件,用于将 px 单位转化为 vw/vh 单位。
①安装
pnpm add -D postcss-px-to-viewport②配置
vite.config.js
javascript
import { fileURLToPath, URL } from 'node:url'

import { defineConfig } from 'vite'
import vue from '@vitejs/plugin-vue'
import vueJsx from '@vitejs/plugin-vue-jsx'
// 引入vant相关配置文件
import Components from 'unplugin-vue-components/vite'
import { VantResolver } from 'unplugin-vue-components/resolvers'

import pxtovw from 'postcss-px-to-viewport'
const loder_pxtovw = pxtovw({
  //这里是设计稿宽度 自己修改
  unitToConvert: 'px', // 需要转换的单位,默认为"px"
  viewportWidth: 375, // 设计稿的视口宽度
  unitPrecision: 5, // 单位转换后保留的精度
  propList: ['*'], // 能转化为vw的属性列表
  viewportUnit: 'vw', // 希望使用的视口单位
  fontViewportUnit: 'vw', // 字体使用的视口单位
  selectorBlackList: [], // 需要忽略的CSS选择器,不会转为视口单位,使用原有的px等单位。
  minPixelValue: 1, // 设置最小的转换数值,如果为1的话,只有大于1的值会被转换
  mediaQuery: false, // 媒体查询里的单位是否需要转换单位
  replace: true, //  是否直接更换属性值,而不添加备用属性
  exclude: [/node_modules/], // 忽略某些文件夹下的文件或特定文件,例如 'node_modules' 下的文件
  include: undefined, // 如果设置了include,那将只有匹配到的文件才会被转换
  landscape: false, // 是否添加根据 landscapeWidth 生成的媒体查询条件 @media (orientation: landscape)
  landscapeUnit: 'vw', // 横屏时使用的单位
  landscapeWidth: 667 // 横屏时使用的视口宽度
})
// https://vitejs.dev/config/
export default defineConfig({
  plugins: [
    vue(),
    vueJsx(),
    // 配置引入规则
    Components({
      resolvers: [VantResolver()]
    })
  ],
  css: {
    postcss: {
      plugins: [loder_pxtovw] //加载插件
    }
  },
  resolve: {
    alias: {
      '@': fileURLToPath(new URL('./src', import.meta.url))
    }
  },
  // 配置服务器
  server: {
    // port: 5175,
    // open:true,
    proxy: {
      '/api': {
        target: 'https://m.douyu.com',
        changeOrigin: true,
      }
    }
  }
})
2、兼容性语法适配
"
不同浏览器内核,css语法写法不同。开发者自行写多种语法,影响开发效率。不写又可能会导致有的浏览器,不能够实现对应效果。
①安装
Go
pnpm add -D postcss postcss-preset-env ②配置
postcss.config.js
javascript
// postcss.config.js
module.exports = {
  plugins: [require('postcss-preset-env')]
}