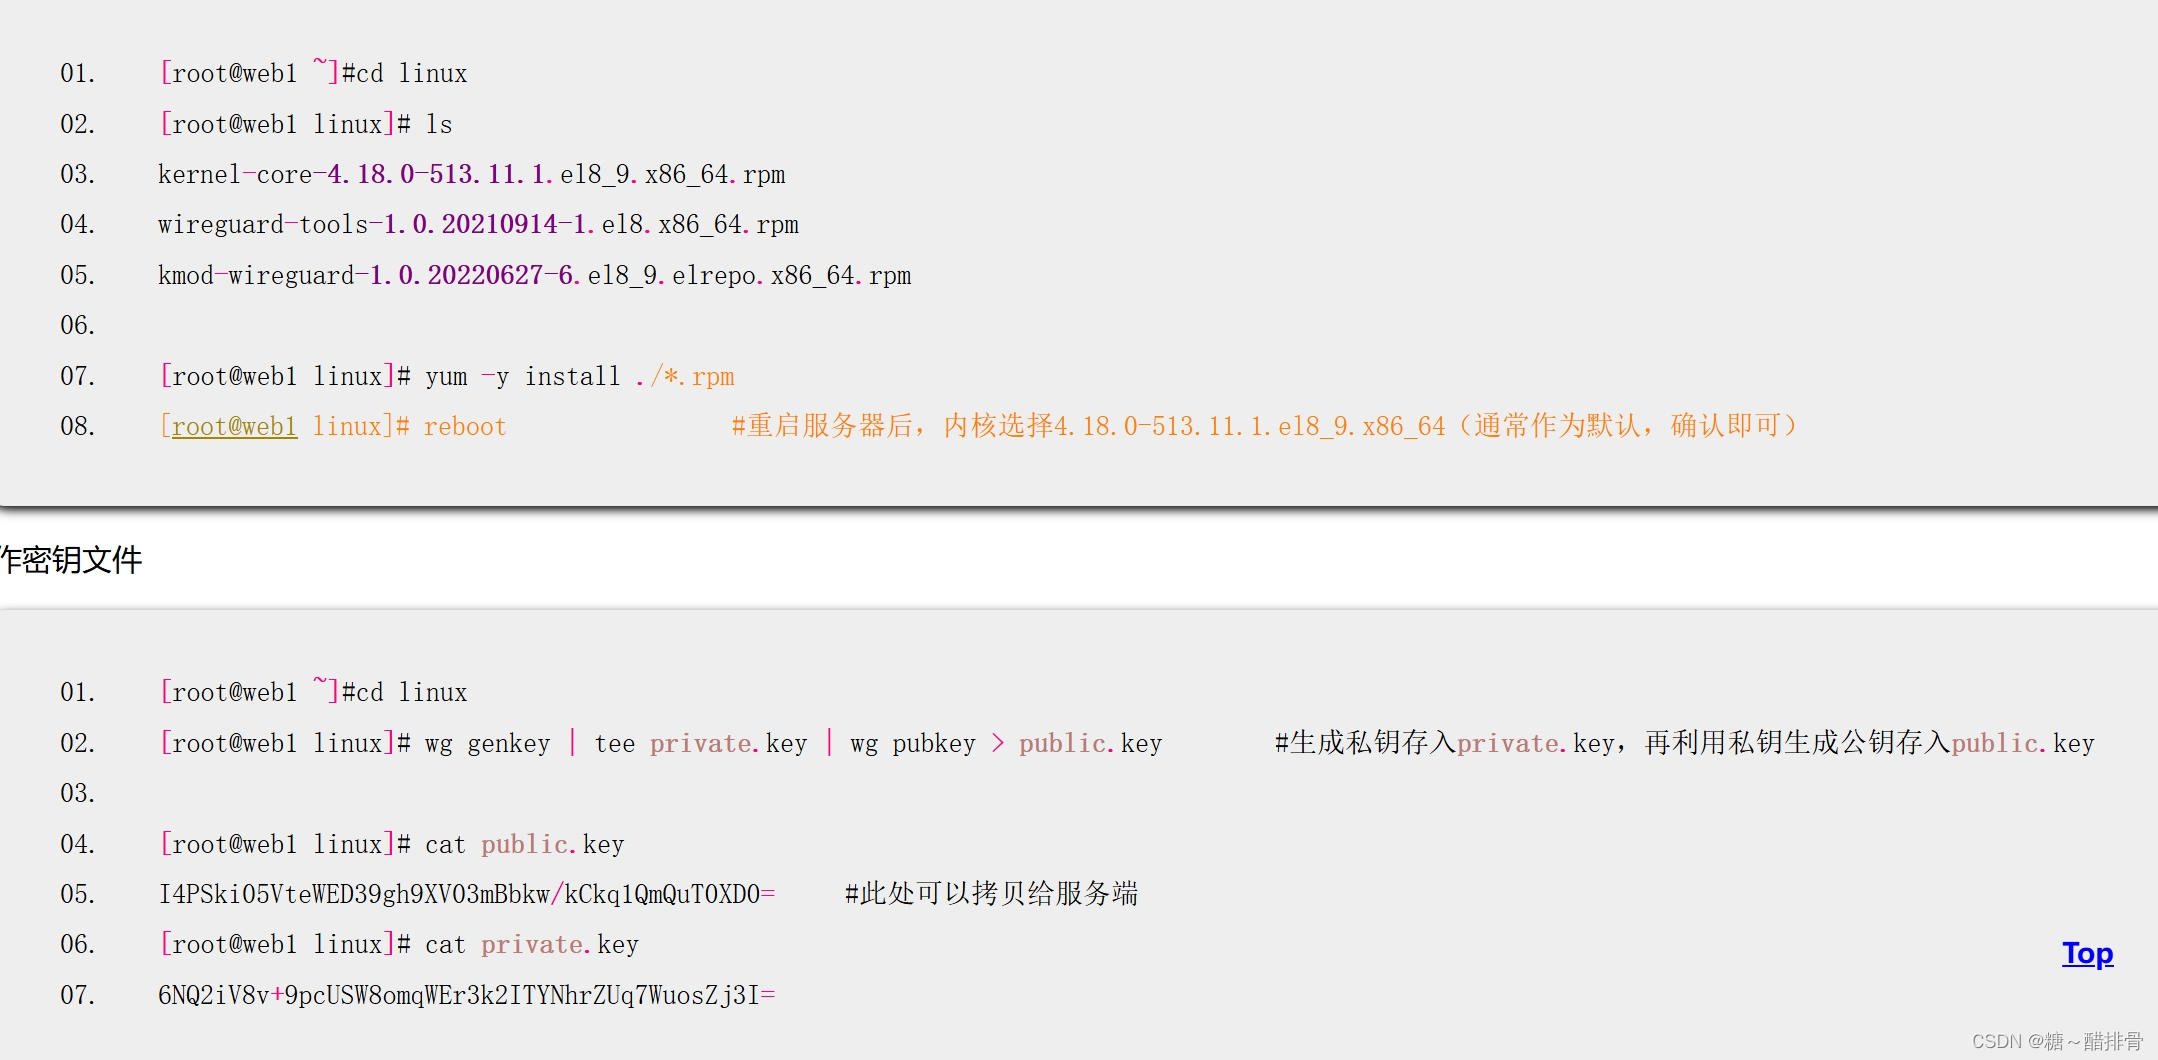
- root@web1 \~# yum -y install rpm-build
- root@web1 \~# rpmbuild -ba nginx.spec #会报错,没有文件或目录
- root@web1 \~# ls /root/rpmbuild #自动生成的目录结构
- BUILD BUILDROOT RPMS SOURCES SPECS SRPMS
- 将源码软件复制到SOURCES目录 root@web1 \~# cp nginx-1.22.1.tar.gz /root/rpmbuild/SOURCES/
rpmbuild创建RPM软件包
-
- root@web1 \~# rpmbuild -ba /root/rpmbuild/SPECS/nginx.spec
- root@web1 \~# ls /root/rpmbuild/RPMS/x86_64/nginx-1.22.1-1.x86_64.rpm
- root@web1 \~# yum install /root/rpmbuild/RPMS/x86_64/nginx-1.22.1-1.x86_64.rpm
- root@web1 \~# rpm -qa |grep nginx
- root@web1 \~# ls /usr/local/nginx/
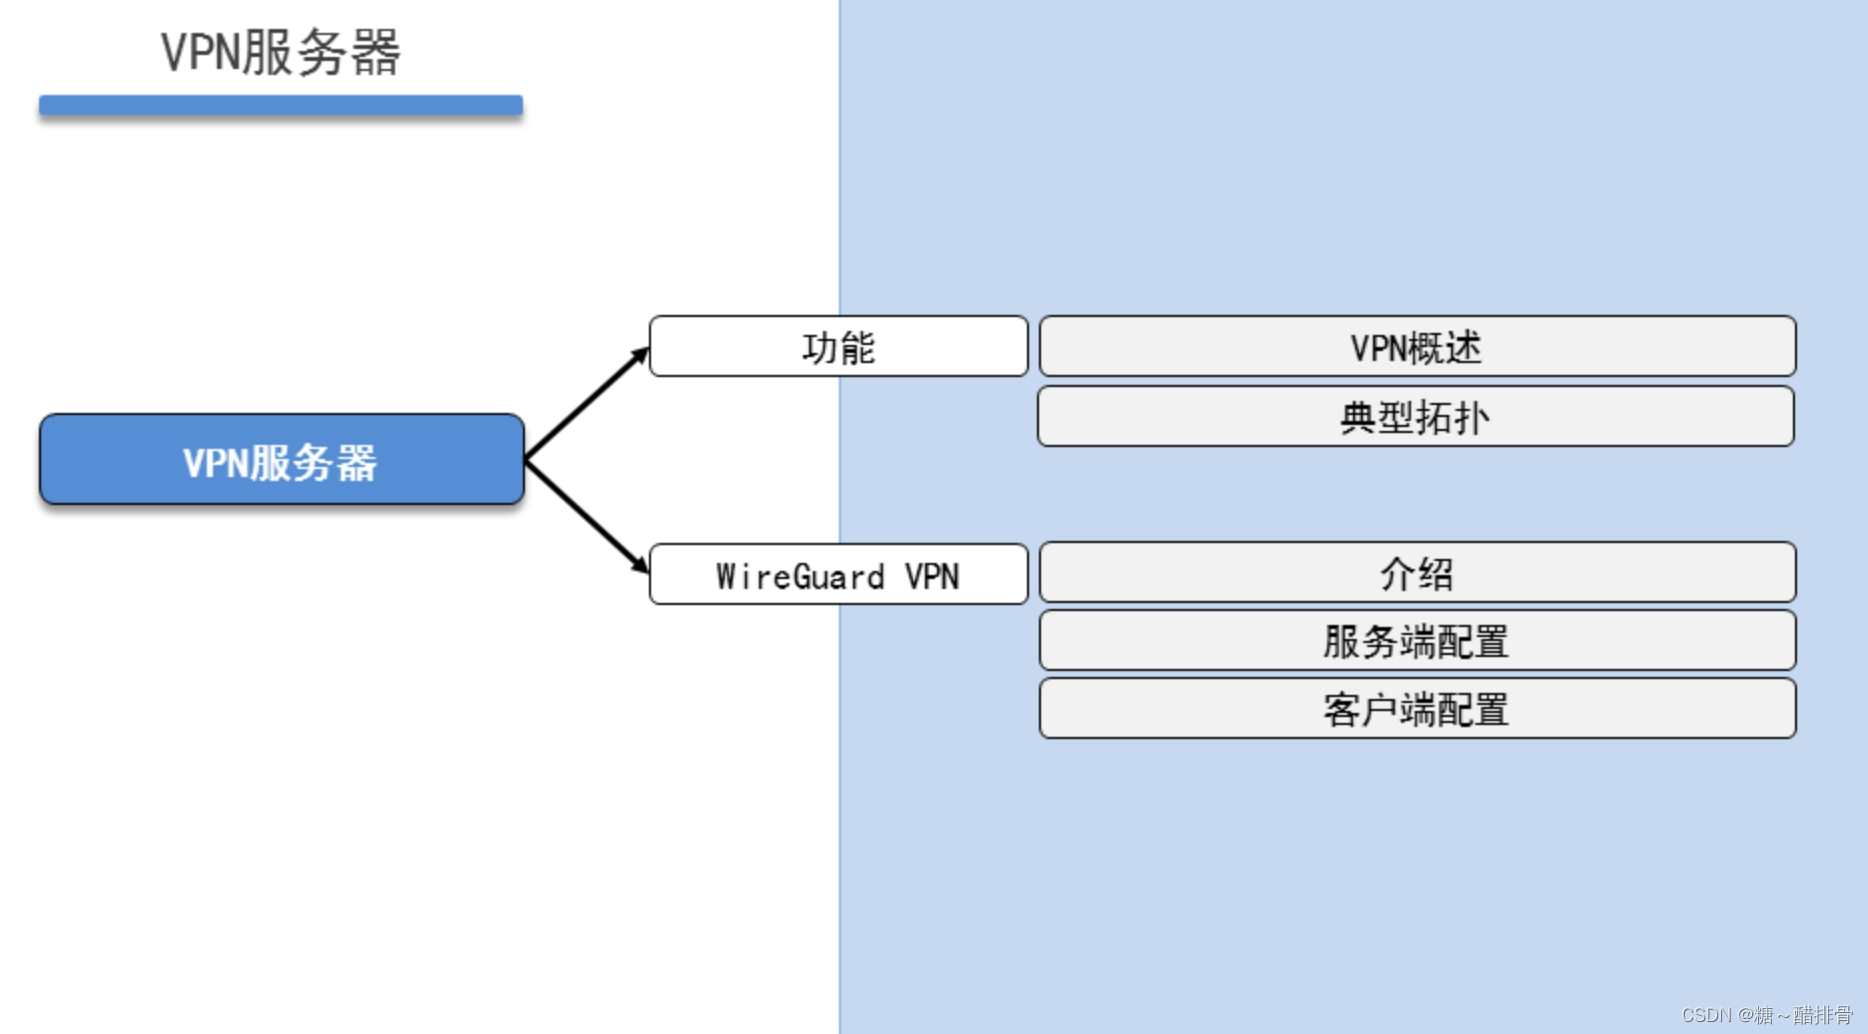
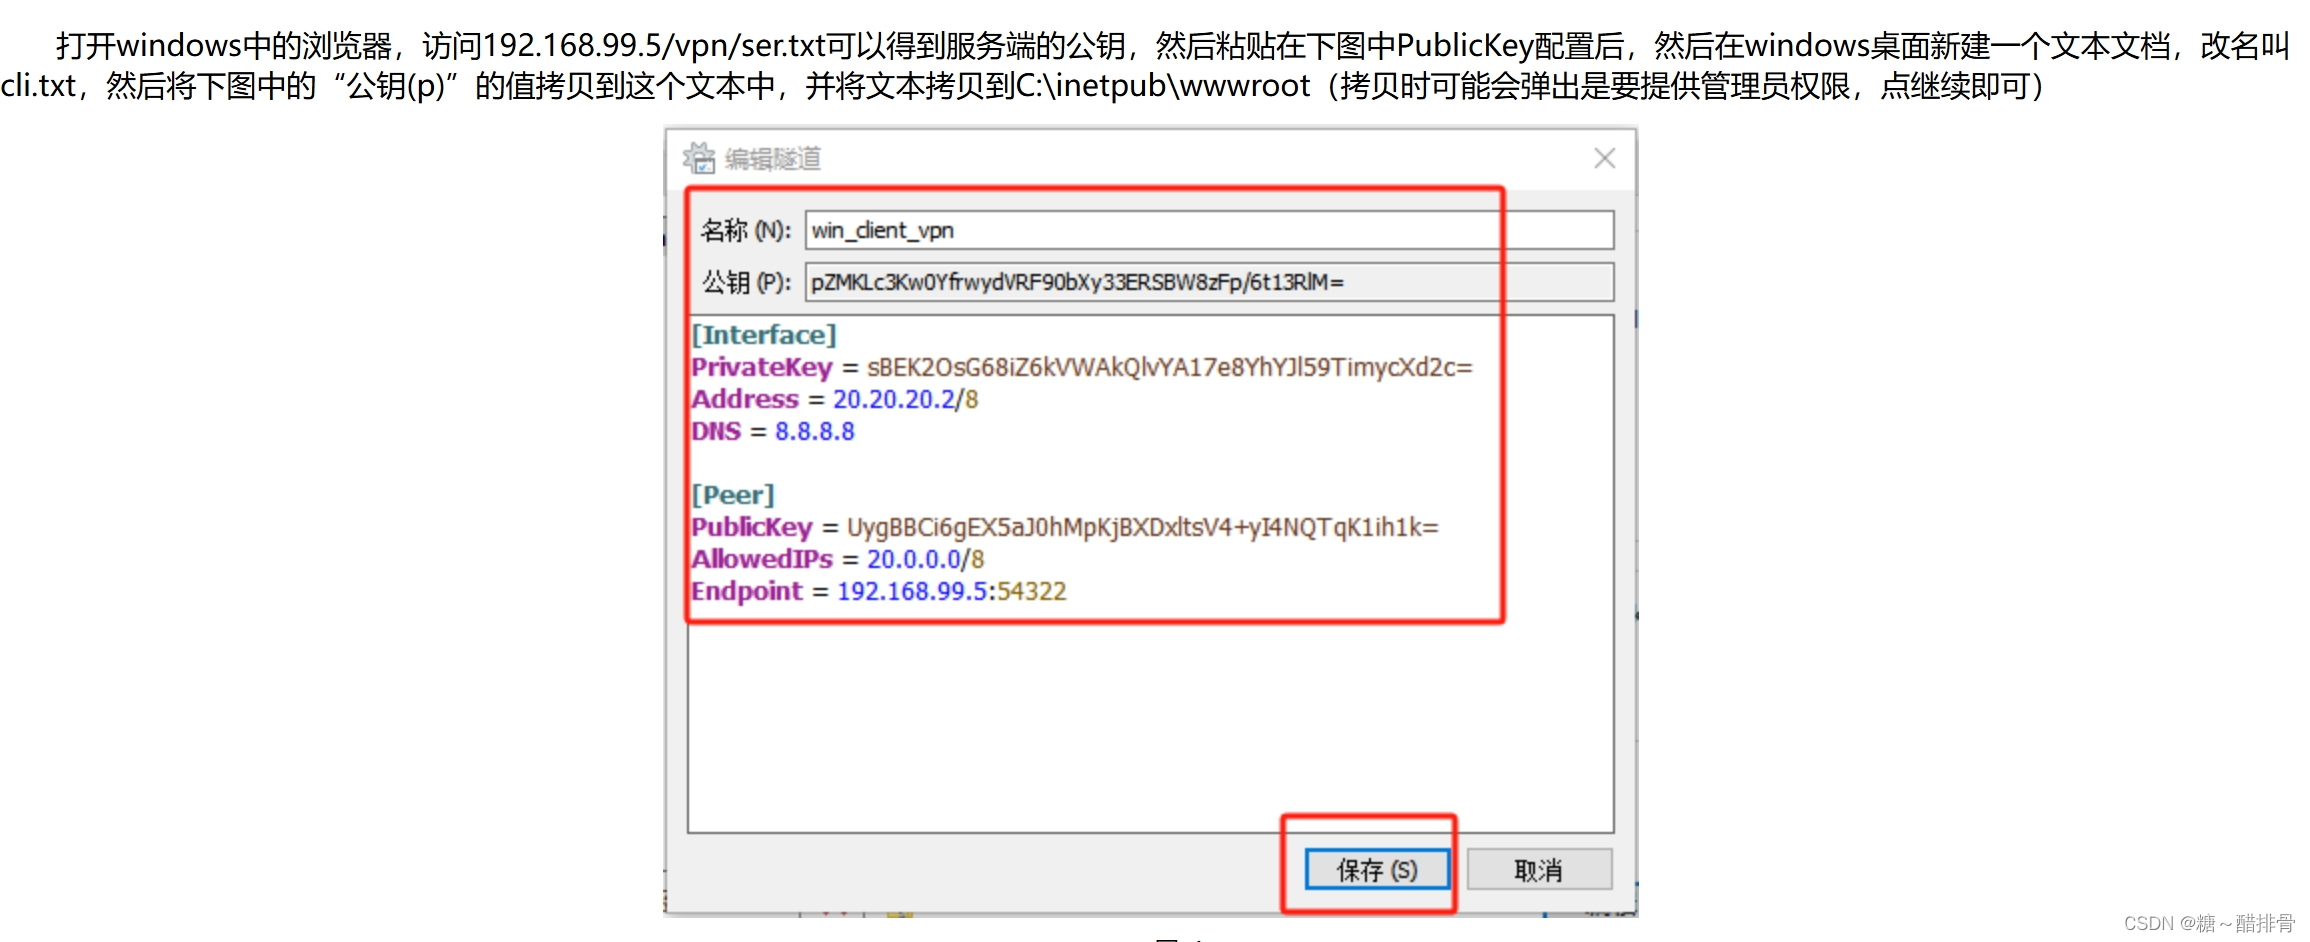
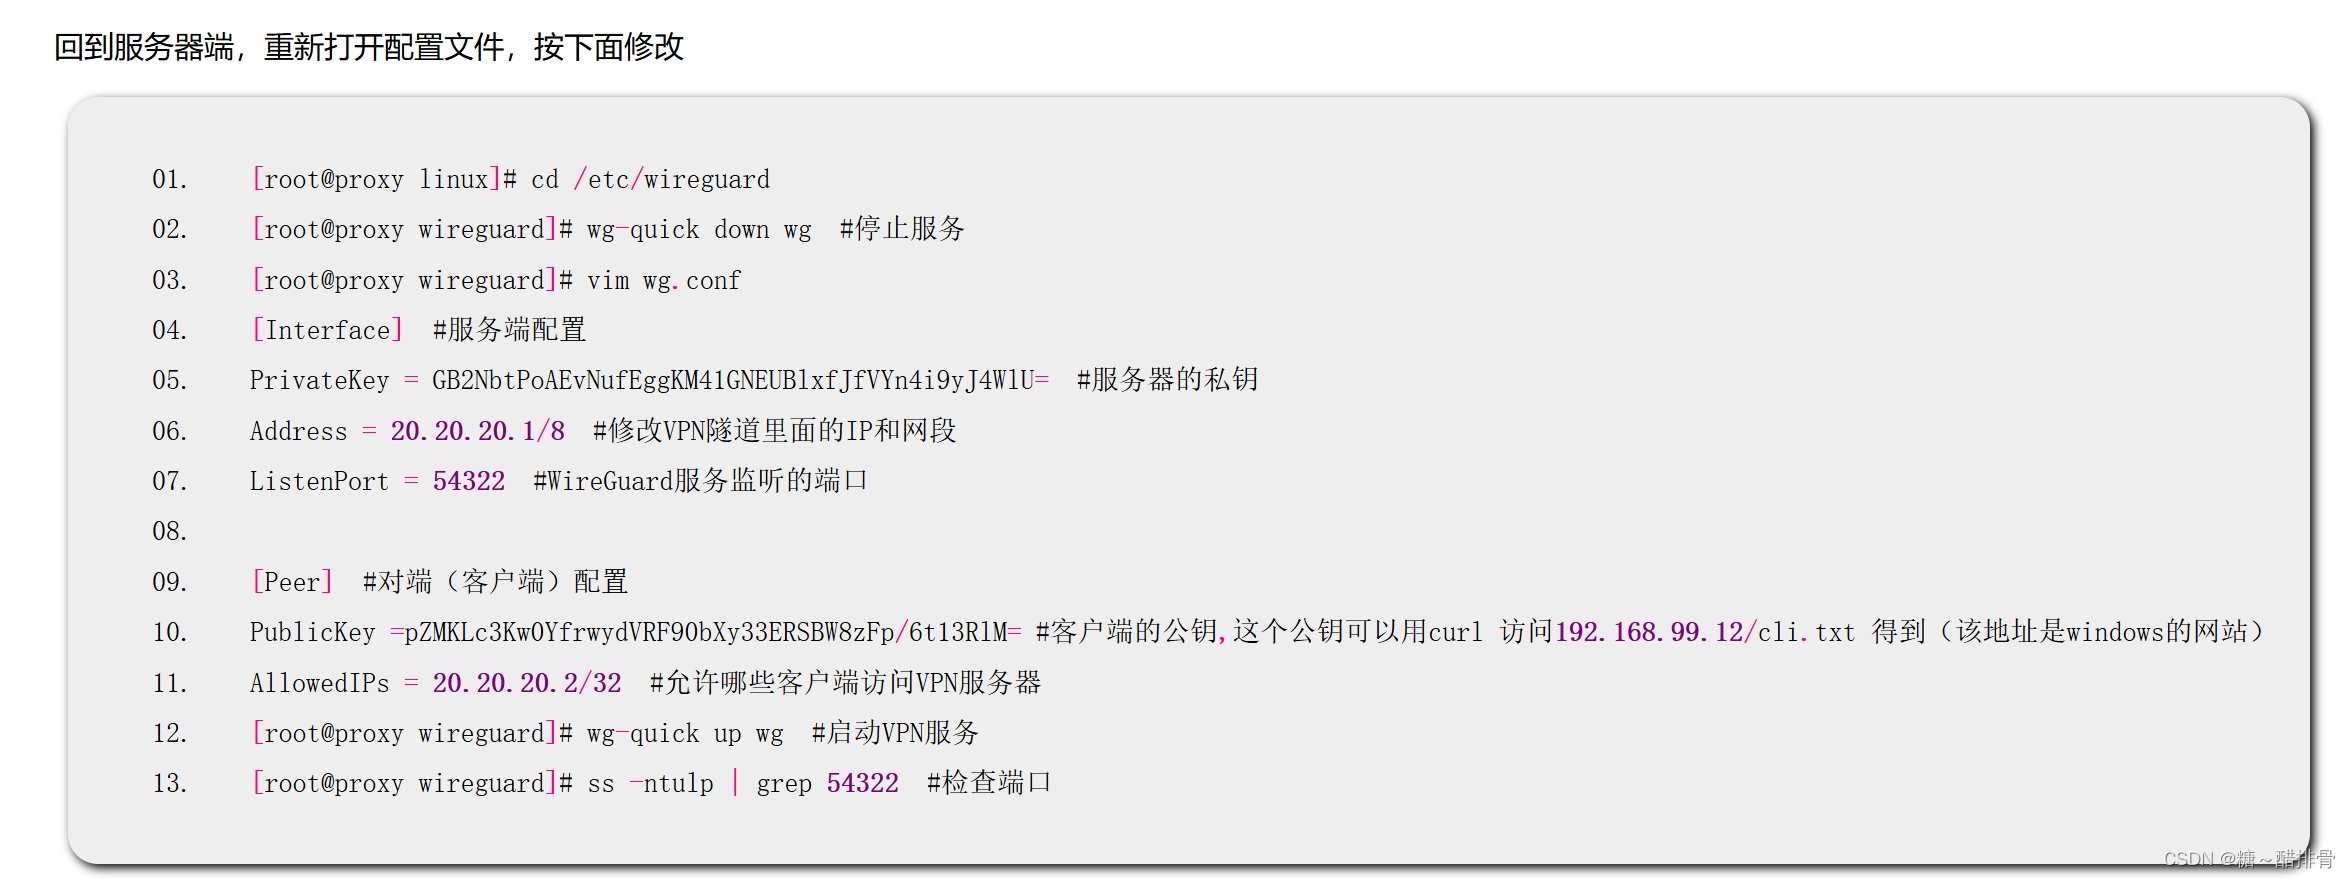
VPN服务器 Linux客户端连接WireGuard
制作密钥文件
- root@proxy \~#cd /usr/local/nginx/html/vpn/linux
- root@proxy linux# wg genkey | tee private.key | wg pubkey > public.key #生成私钥存入private.key,再利用私钥生成公钥存入public.key
- root@proxy linux# cp public.key ../ser.txt #拷贝一份方便客户端通过浏览器查看
- root@proxy linux# cat public.key UygBBCi6gEX5aJ0hMpKjBXDxltsV4+yI4NQTqK1ih1k=
- root@proxy linux# cat private.key
- GB2NbtPoAEvNufEggKM41GNEUBlxfJfVYn4i9yJ4WlU=
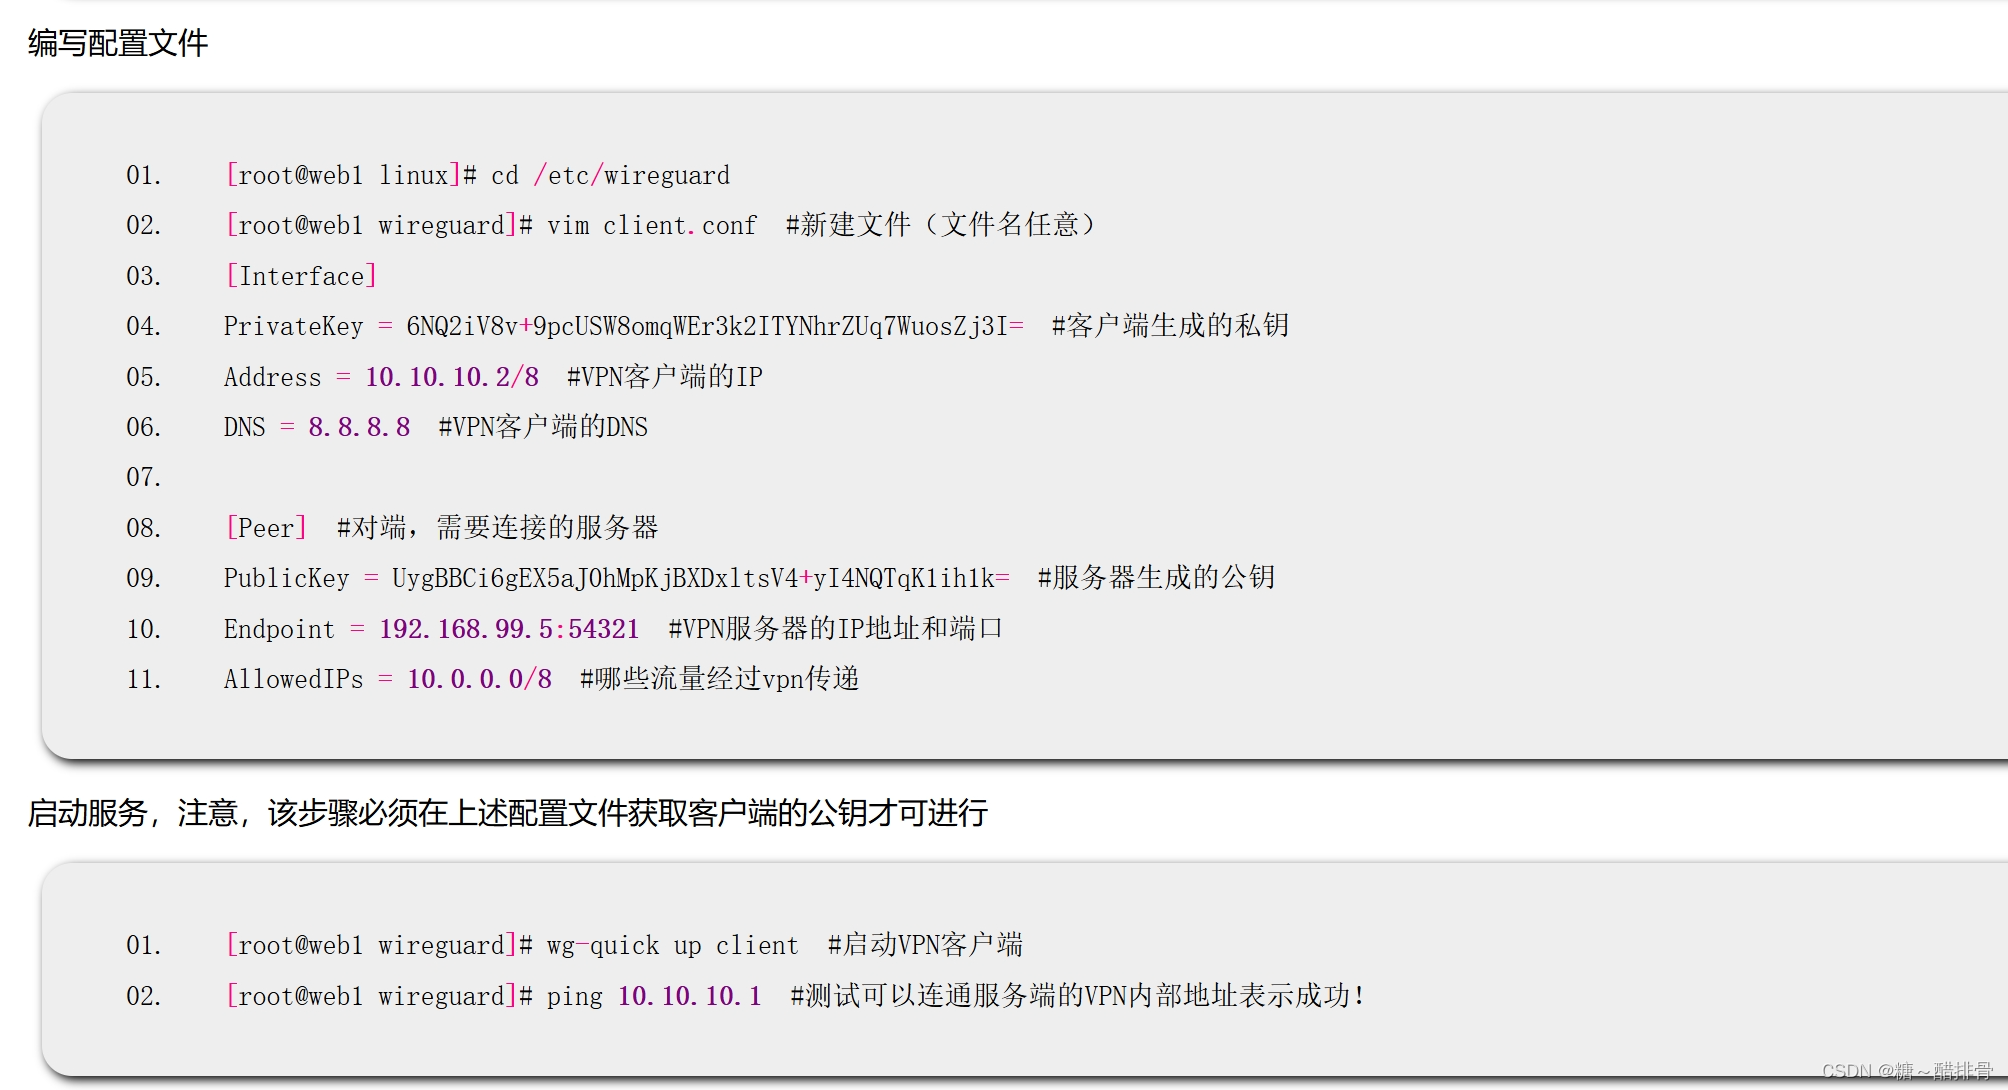
编写配置文件
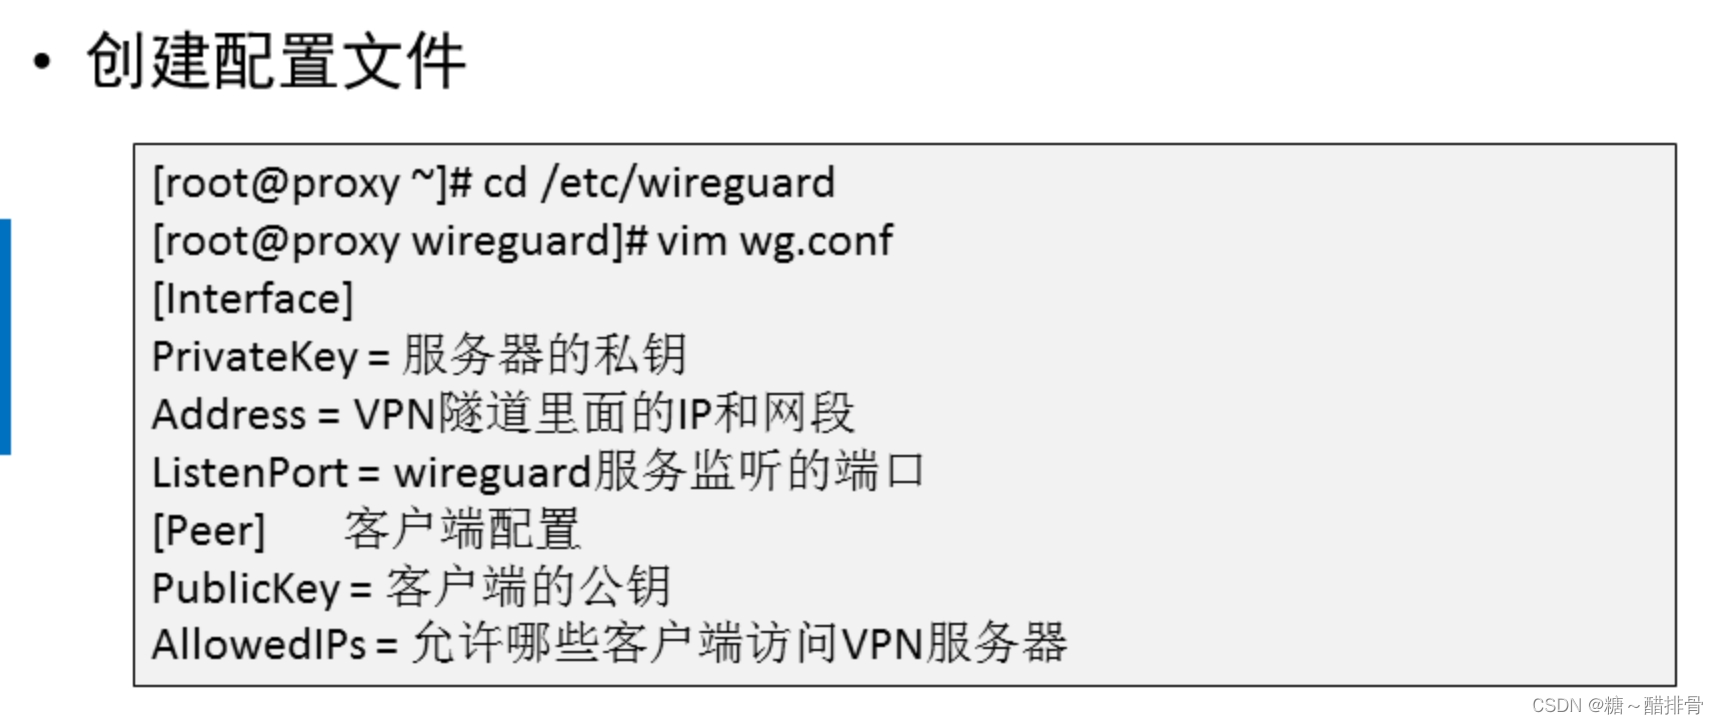
- root@proxy linux# cd /etc/wireguard
- root@proxy wireguard# vim wg.conf
- Interface #服务端配置
- PrivateKey = GB2NbtPoAEvNufEggKM41GNEUBlxfJfVYn4i9yJ4WlU= #服务器的私钥
- Address = 10.10.10.1/8 #VPN隧道里面的IP和网段
- ListenPort = 54321 #WireGuard服务监听的端口
- Peer #对端(客户端)配置
- PublicKey = #客户端的公钥,稍后获取
- AllowedIPs = 10.10.10.2/32 #允许哪些客户端访问VPN服务器 ,32代表ip的二进制32位必须和10.10.10.2一样,也就是ip必须为10.10.10.2的客户才能访问
启动服务,注意,该步骤必须在上述配置文件获取客户端的公钥才可进行
- root@proxy wireguard# wg-quick up wg #启动VPN服务,wg是之前配置文件的名称
- root@proxy wireguard# ss -ntulp | grep 54321 #检查端口
- root@proxy wireguard# systemctl stop firewalld
- root@proxy wireguard# ifconfig #查看
步骤二:配置客户端
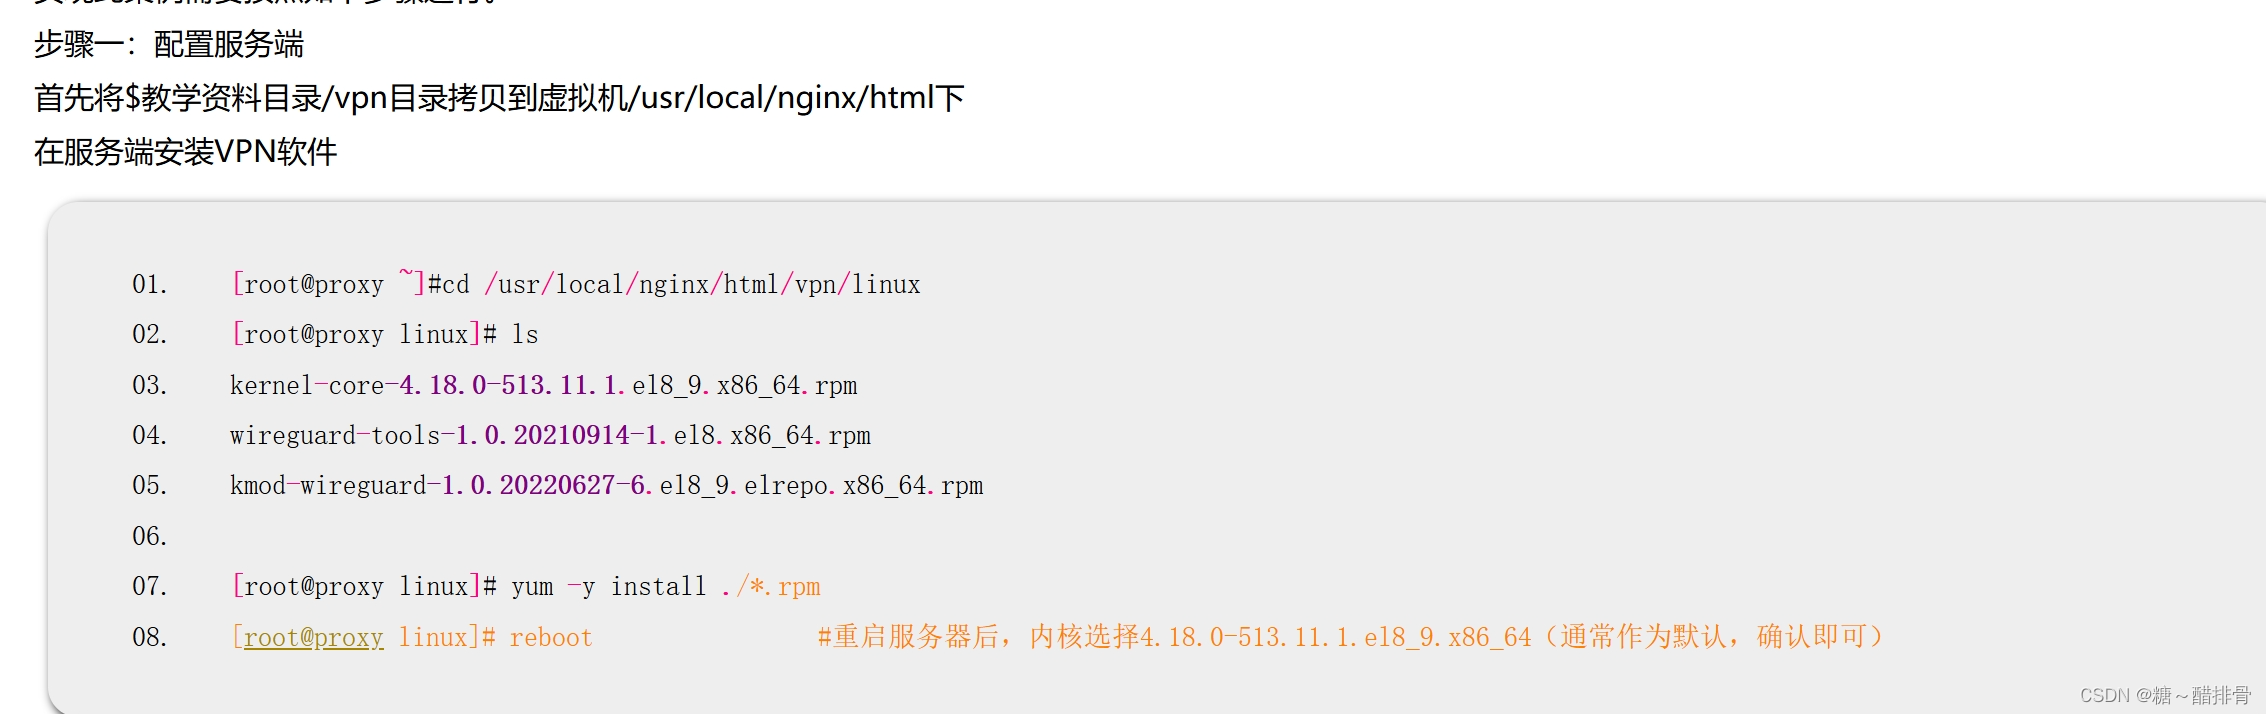
首先将$教学资料目录/vpn/linux目录拷贝到虚拟机/root下
在客户端安装VPN软件
Windows客户端连接WireGuard

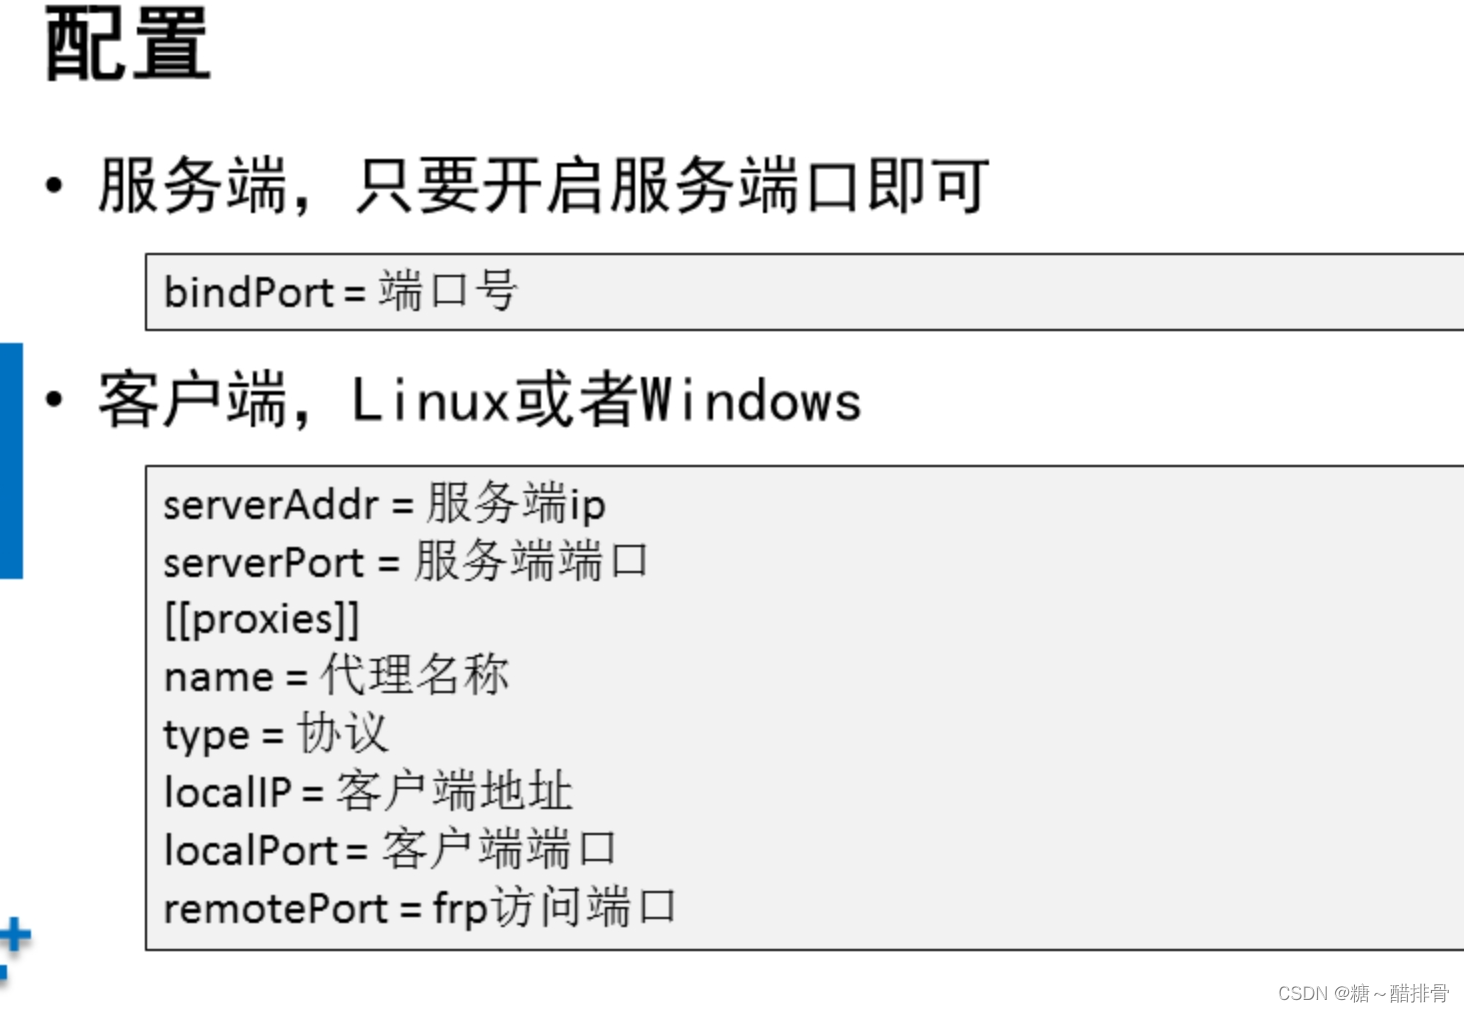
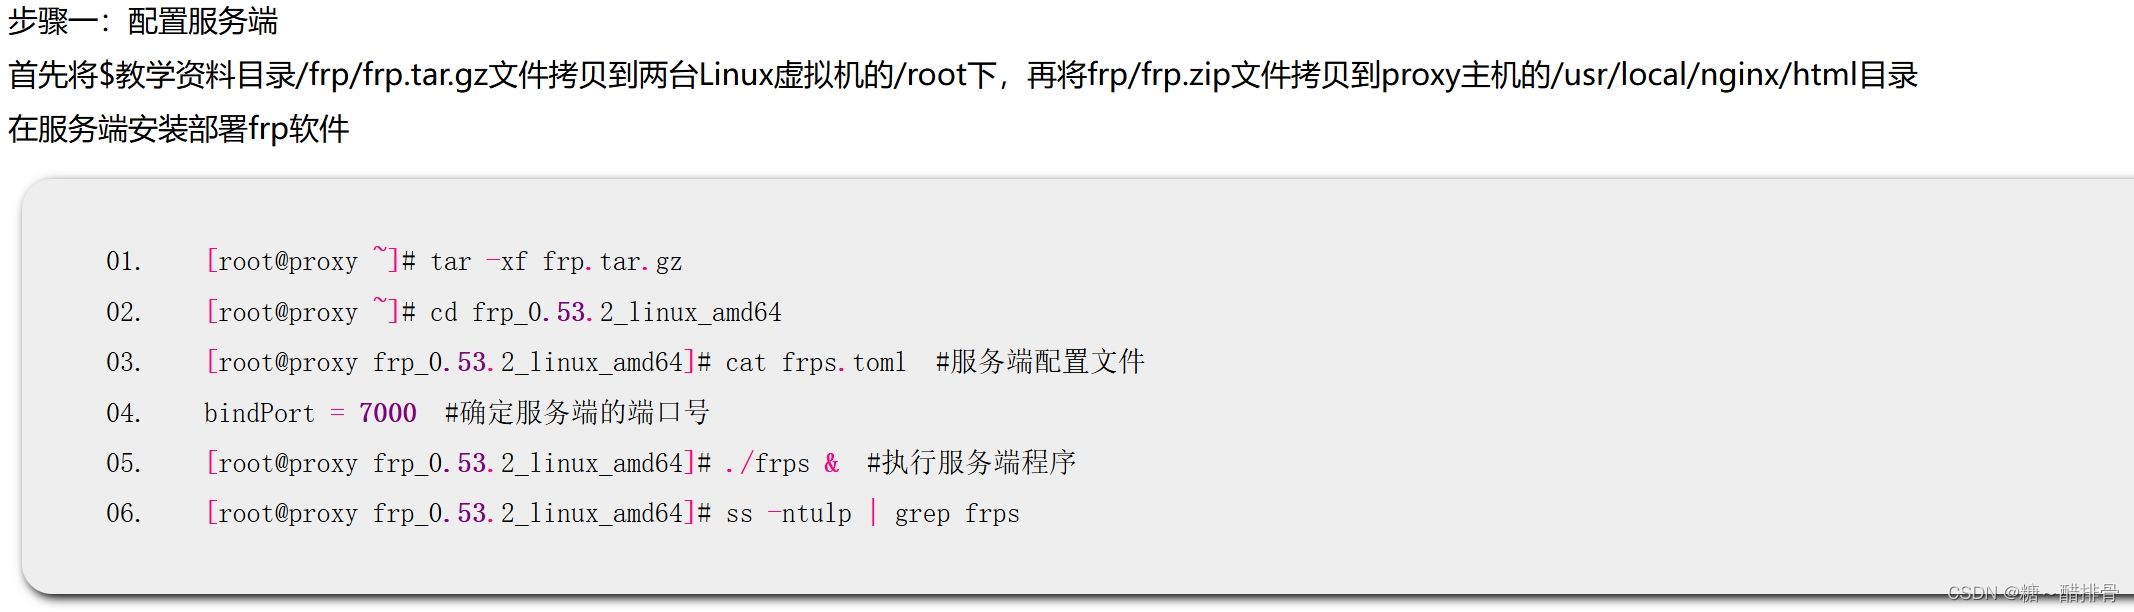
frp连接Linux系统实现内网穿透


- 熟悉systemctl常用命令