文章目录
- 1、启动类
- [2、mapper 接口](#2、mapper 接口)
- 3、控制类
- 4、补充:返回数据时的封装
- 5、补充
1、启动类
在启动类上加入@MapperScan扫描自己所写的mapper接口
java
package com.example.bilili_springboot_study;

import org.mybatis.spring.annotation.MapperScan;
import org.springframework.boot.SpringApplication;
import org.springframework.boot.autoconfigure.SpringBootApplication;

@SpringBootApplication
@MapperScan("com.example.bilili_springboot_study.mapper")
public class BililiSpringBootStudyApplication {

    public static void main(String[] args) {
        SpringApplication.run(BililiSpringBootStudyApplication.class, args);
    }

}
2、mapper 接口
注意加上@Mapper注解
java
package com.example.bilili_springboot_study.mapper;

import com.example.bilili_springboot_study.entity.User;
import org.apache.ibatis.annotations.Mapper;
import org.apache.ibatis.annotations.Select;

import java.util.List;

@Mapper
public interface UserMapper {

    @Select("SELECT * FROM user")
    public List<User> selectAll();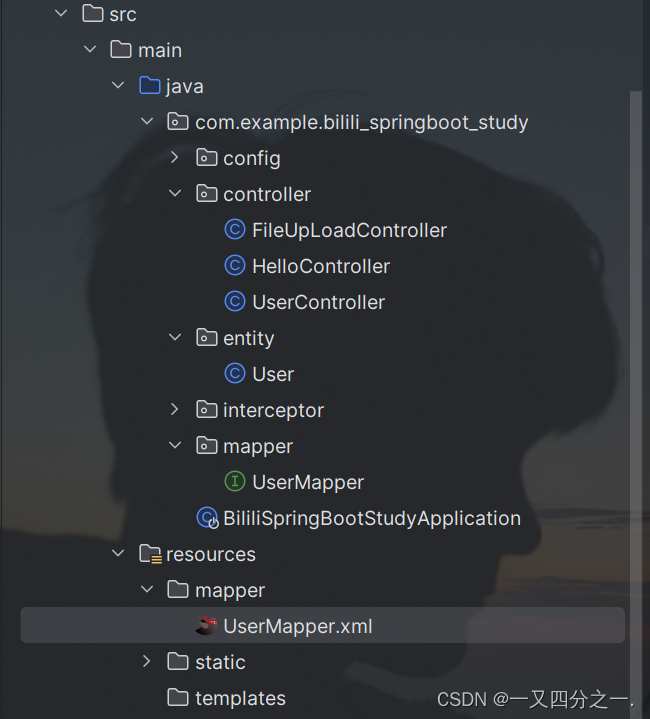
}如果接口中的sql语句比较麻烦,也可在resources目录下,新建mapper/UserMapper.xml文件,通过该文件控制sql语句例如:
<mapper namespace="com.whd.system.mapper.SysUserMapper"> 对应所绑定的接口的位置
xml
<?xml version="1.0" encoding="UTF-8"?>
<!DOCTYPE mapper PUBLIC "-//mybatis.org//DTD Mapper 3.0//EN"
        "http://mybatis.org/dtd/mybatis-3-mapper.dtd">
<mapper namespace="com.whd.system.mapper.SysUserMapper">
    <select id="getUserById" resultType="com.example.bilili_springboot_study.entity.User">
        select *
        from user
        where id = #{id}

    </select>

</mapper> 在该文件中,select语句要加上返回值的类型,使用resultType=" " 进行设置,他指定了返回的结果类型为什么,id为接口中的方法名
insert update 一般都是int ,因为返回的是影响的结果数
在接口的方法中,如果要进行传参,在sql中使用 #{ } 来进行引用,注意变量和形参一样
完整事例:
UserMapper.xml中
xml
<?xml version="1.0" encoding="UTF-8"?>
<!DOCTYPE mapper PUBLIC "-//mybatis.org//DTD Mapper 3.0//EN"
        "http://mybatis.org/dtd/mybatis-3-mapper.dtd">
<mapper namespace="com.example.bilili_springboot_study.mapper.UserMapper">
<select id="getUserById" resultType="com.example.bilili_springboot_study.entity.User">
    select * from user where id = #{id}

</select>

</mapper>
mapper 接口中
UserMapper.java
java
package com.example.bilili_springboot_study.mapper;

import com.example.bilili_springboot_study.entity.User;
import org.apache.ibatis.annotations.Mapper;
import org.apache.ibatis.annotations.Select;

import java.util.List;

@Mapper
public interface UserMapper {

    @Select("SELECT * FROM user")
    public List<User> selectAll();

    User getUserById(int id);
}控制器中
UserController.java
java
package com.example.bilili_springboot_study.controller;

import com.example.bilili_springboot_study.entity.User;
import com.example.bilili_springboot_study.mapper.UserMapper;
import org.springframework.beans.factory.annotation.Autowired;
import org.springframework.web.bind.annotation.*;

import java.util.List;

@RestController
public class UserController {

    @Autowired
    private UserMapper userMapper;

    @GetMapping("/select/userAll")
    public List<User> getAllUser() {
        return userMapper.selectAll();
    }

    @GetMapping("/find/user/{id}")
    public User findUserById(@PathVariable int id) {
        return userMapper.getUserById(id);
    }

}
3、控制类
注意要引入所写的接口
java
 @Autowired
private UserMapper userMapper; 在使用接口查询数据库中的信息后,直接return即可返回json格式的数据,也可以将查询到的数据在此进行处理然后再return给前端
java
package com.example.bilili_springboot_study.controller;

import com.example.bilili_springboot_study.entity.User;
import com.example.bilili_springboot_study.mapper.UserMapper;
import org.springframework.beans.factory.annotation.Autowired;
import org.springframework.web.bind.annotation.*;

import java.util.List;

@RestController
public class UserController {

    @Autowired
    private UserMapper userMapper;


    @GetMapping("/select/userAll")
    public List<User> getAllUser() {
        return userMapper.selectAll();
    }

<--   ---------   以上方法通过接口实现  -->

    @GetMapping("/user/{id}")
    public String getUserById(@PathVariable int id) {
        System.out.println(id);
        return " 根据用户id获取用户信息";
    }

    @PostMapping("/user")
    public String saveUser() {
        return "添加用户信息";
    }

    @PutMapping("/user")
    public String updateUser() {
        return "更新用户信息";
    }

    @DeleteMapping("/user/{id}")
    public String deleteUser(@PathVariable int id) {
        System.out.println(id);
        return "根据用户id删除用户";
    }

}
4、补充:返回数据时的封装
创建有着泛型的类,和一个枚举类型(设置状态码),以后在返回数据的时候,不仅仅是直接返回接口返回的数据,而是通过AxiosResult<T>实现,
java
package com.whd.system.common;

import lombok.Getter;
import lombok.Setter;

@Getter
@Setter
public class AxiosResult<T> {
    private int code;
    private String msg;
    private T data;

    private AxiosResult(CodeEnum codeEnum, T data) {
        this.code = codeEnum.getCode();
        this.msg = codeEnum.getMsg();
        this.data = data;
    }

    private AxiosResult(CodeEnum codeEnum) {
        this.code = codeEnum.getCode();
        this.msg = codeEnum.getMsg();
    }

    //方法重载
    //成功
    public static <T> AxiosResult<T> success(T data){
        return new AxiosResult<T>(CodeEnum.SUCCESS,data);
    }

    public static <T> AxiosResult<T> success(CodeEnum codeEnum,T data){
        return new AxiosResult<T>(codeEnum,data);
    }
    //失败
    public static <T> AxiosResult<T> error(){
        return new AxiosResult<T>(CodeEnum.ERROR);
    }

    public static <T> AxiosResult<T> error(CodeEnum codeEnum){
        return new AxiosResult<T>(codeEnum);
    }
}
java
package com.whd.system.common;

import lombok.AllArgsConstructor;
import lombok.Getter;

@Getter
@AllArgsConstructor
public enum CodeEnum {
    SUCCESS(200, "success"),
    ERROR(500, "error"),
    UNKNOWN_ERROR(100, "未知错误"),
    USER_LOGIN_ERROR(501, "用户名或者密码有误"),
    USER_INVALID_ERROR(502, "用户已被禁用");

    private final int code;
    private final String msg;
}
例如以下例子:
java
package com.whd.system.controller;

import com.whd.system.common.AxiosResult;
import com.whd.system.common.CodeEnum;
import com.whd.system.domain.SysUser;
import com.whd.system.domain.vo.SysRoleVo;
import com.whd.system.domain.vo.SysUserVo;
import com.whd.system.mapper.SysUserMapper;
import lombok.Getter;
import org.springframework.beans.factory.annotation.Autowired;
import org.springframework.web.bind.annotation.*;

import java.util.HashMap;
import java.util.List;
import java.util.Map;

@RestController
@RequestMapping("/user")
//@CrossOrigin // 允许类跨域请求
public class SysUserController {

    private static final String PAO_PATH = "http://127.0.0.1:8080";
    @Autowired
    private SysUserMapper SysUserMapper;

    @PostMapping("/login")
    public AxiosResult<Integer> login(@RequestBody Map<String, String> params) {
        String username = params.get("username");
        String password = params.get("password");

        SysUser user = SysUserMapper.selectByUser(username, password);
        if (user == null) {
            return AxiosResult.error(CodeEnum.USER_LOGIN_ERROR);
        }
        return AxiosResult.success(user.getId());
    }
//查找用户信息
    @GetMapping("/find/{id}")
    public AxiosResult<Map<String, Object>> findUserAndRoleInfo(@PathVariable("id") Integer id) {
        Map<String, Object> map = SysUserMapper.findUserAndeRole(id);
        return AxiosResult.success(map);
    }

    // 查找角色信息
    @GetMapping("/find/getRoleList")
    public AxiosResult<List<SysRoleVo>> findRoleInfo() {
        List<SysRoleVo> list = SysUserMapper.findRoleInfo();
        return AxiosResult.success(list);
    }

// 修改管理/用户信息 状态 0/1
    @GetMapping("/update/status/{id}/{status}")
    public AxiosResult<Integer> updateStatus(@PathVariable("id") Integer id, @PathVariable("status") Integer status) {
        int i = SysUserMapper.updateStatus(id, status);
        return AxiosResult.success(i);
    }

// 修改管理员信息
    @PostMapping("/update/adminInfo")
    public AxiosResult<Integer> updateAdminInfo(@RequestBody Map<String, Object> params) {

        String id = (String) params.get("id");
        String username = (String) params.get("username");
        String phone = (String) params.get("phone");
        String sex = (String) params.get("sex");
        String password = (String) params.get("pass");
        int roleId = (int) params.get("role");

        Map<String, Object> map=new HashMap<>();
        map.put("id", id);
        map.put("username", username);
        map.put("phone", phone);
        map.put("sex", sex);
        map.put("password", password);
        map.put("roleId", roleId);

        int i = SysUserMapper.updateAdminInfo(map);

        return AxiosResult.success(1);
    }

}注意本例子中的这个方法:他传进.xml中的是一个map类型的数据,那么在使用的时候,还要指定他的类型
java
// 修改管理员信息
    @PostMapping("/update/adminInfo")
    public AxiosResult<Integer> updateAdminInfo(@RequestBody Map<String, Object> params) {

        String id = (String) params.get("id");
        String username = (String) params.get("username");
        String phone = (String) params.get("phone");
        String sex = (String) params.get("sex");
        String password = (String) params.get("pass");
        int roleId = (int) params.get("role");

        Map<String, Object> map=new HashMap<>();
        map.put("id", id);
        map.put("username", username);
        map.put("phone", phone);
        map.put("sex", sex);
        map.put("password", password);
        map.put("roleId", roleId);

        int i = SysUserMapper.updateAdminInfo(map);

        return AxiosResult.success(1);
    }
xml
    <update id="updateAdminInfo" parameterType="map">
        UPDATE sys_user
        SET
            username = #{username, jdbcType=VARCHAR},
            phone = #{phone, jdbcType=VARCHAR},
            gender = #{sex, jdbcType=VARCHAR},
            password = #{password, jdbcType=VARCHAR},
            role_uid = #{roleId, jdbcType=INTEGER}
        WHERE id = #{id, jdbcType=VARCHAR}
    </update>
5、补充
a、mybatisplus
在mapper 接口中,通过继承BaseMapper<T>类,可以实现所有的增删改查,复杂的可能还是要手敲的
1、由于我们写的实体类的名字可能和表的名字有很大差异,所以在继承后,所用的实体类添加@TableName("表名")注解,用户确定该实体类所对应的表的名字
2、实体类的名字不一定要和表中字段的名字一致,但是,不一致的要添加@Result(column = "db_column_name", property = "propertyName")用于映射,不然怎么实现智能化对应了,但是还是建议直接用一样的就行了
对于 mybatisplus 还有很多用法,自行查找吧 >_<