目录
[4.web服务器部署(20.0.0.20 20.0.0.30配置相同)](#4.web服务器部署(20.0.0.20 20.0.0.30配置相同))
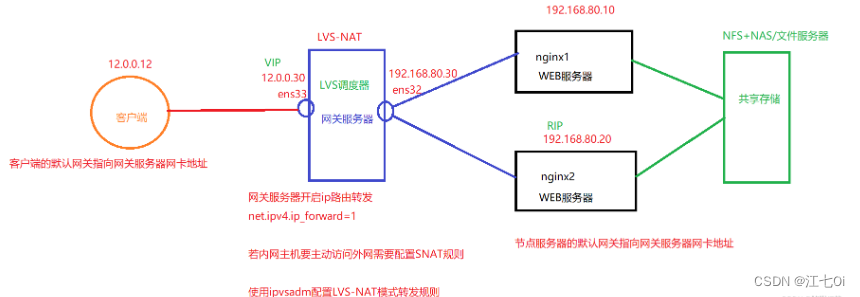
LVS-NAT模式部署
 1.准备工具
4台虚拟机
- LVS调度器(20.0.0.10)
- web1服务器(20.0.0.20)
- web2服务器(20.0.0.30)
- NFS共享存储(20.0.0.40)
2.所有虚拟机初始化
systemctl disable --now firewalld #关闭防火墙并且设置开机不启动
setenforce 0 #放空selinux
mount /dev/sr0 /mnt #挂载到/mnt
vim /etc/selinux/config #编辑linux配置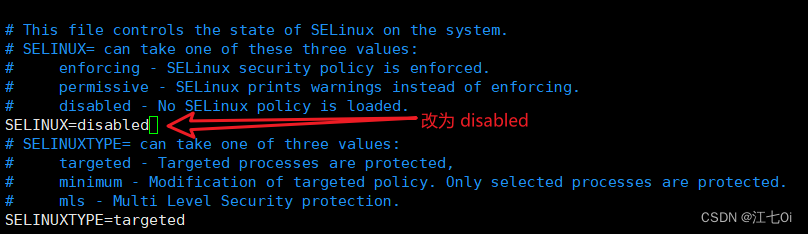
3.配置NFS共享存储(20.0.0.40)
3.1安装软件包
yum -y install nfs-untils rpcbind #本地yum安装软件3.2创建共享目录和测试文件
mkdir /share /share2                                #创建共享目录

#输入内容并且创建test.html文件
echo 'this is nignx1 test page' > /share/test.html
echo 'this is nignx2 test page' > /share2/test.html

vim /etc/exports                                    #编辑测试文件
systemctl enable --now rpcbind nfs #启动服务并设置开机自启动 
4.web服务器部署(20.0.0.20 20.0.0.30配置相同)
4.1yum安装nginx服务
cd /etc/yum.repos.d/              #切换目录
rz -E                             #上传文件
yum install -y nginx              #安装nginx
systemctl start nginx             #启动nginx
4.2测试nfs共享服务
systemctl start rpcbind      #启动rpcbind服务
showmount -e 20.0.0.40       #测试nfs共享服务
4.3分别挂载共享目录
20.0.0.20
cd /usr/share/nginx/html/                   #切换目录
mkdir xy101                                 #创建挂载点目录
vim /etc/fstab                              #编辑永久挂载
20.0.0.40:/share /usr/share/nginx/html/xy101 nfs defaults,_netdev 0 0
mount -a                               #对fstab里配置进行挂载
df                                     #查看挂载情况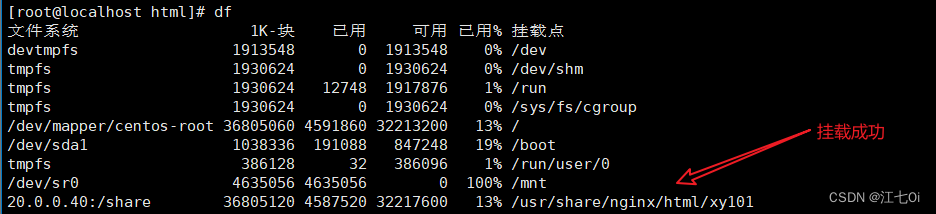
20.0.0.30
cd /usr/share/nginx/html/                   #切换目录
mkdir xy101                                 #创建挂载点目录
vim /etc/fstab                              #编辑永久挂载
20.0.0.40:/share2 /usr/share/nginx/html/xy101 nfs defaults,_netdev 0 0
mount -a                               #对fstab里配置进行挂载
df                                     #查看挂载情况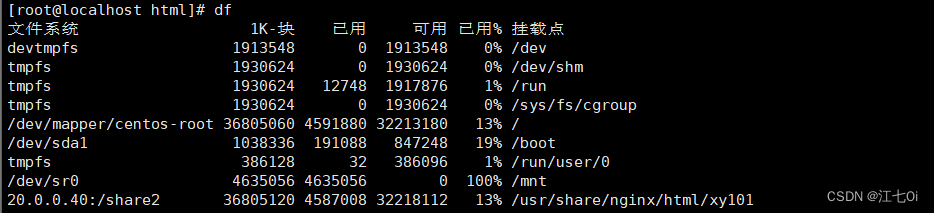
4.4关闭nginx长连接方便验证
vim /etc/nginx/nginx.conf          #编辑nginx.conf配置
systemctl restart nginx            #重启nginx服务
4.5修改网卡配置
vim /etc/sysconfig/network-scripts/ifcfg-ens33   #编辑ens33网卡配置
systemctl restart network                        #重启network服务
5.配置LVS调度器(20.0.0.10)
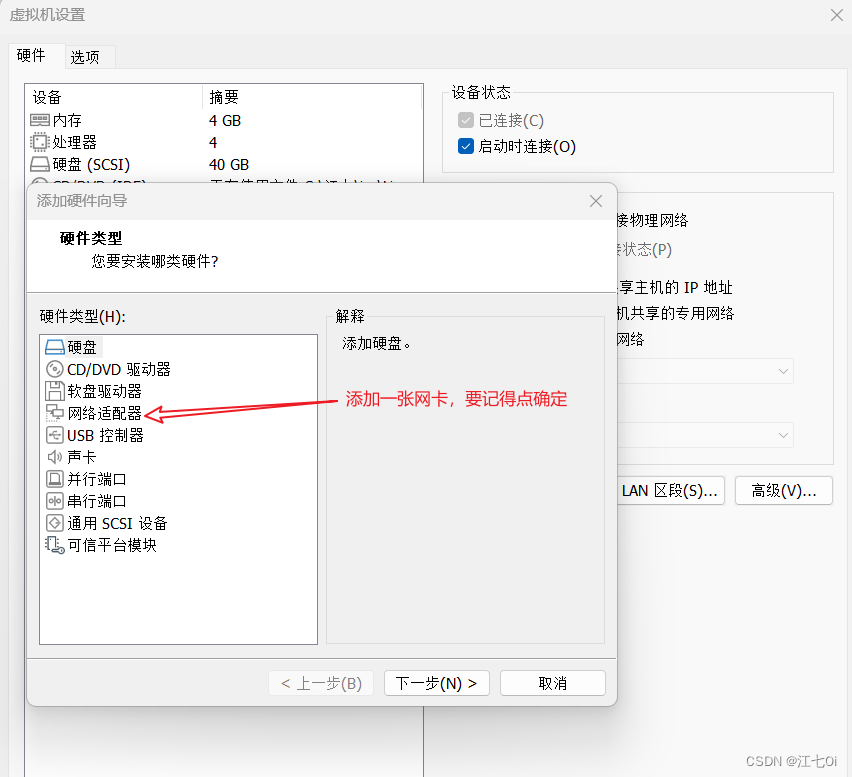
5.1添加一张新的网卡
5.2修改新网卡配置
cd /etc/sysconfig/network-scripts/              #切换目录
cp ifcfg-ens33 ifcfg-ens36                      #复制
vim ifcfg-ens36                                 #编辑ens35配置
systemctl restart network #重启network服务
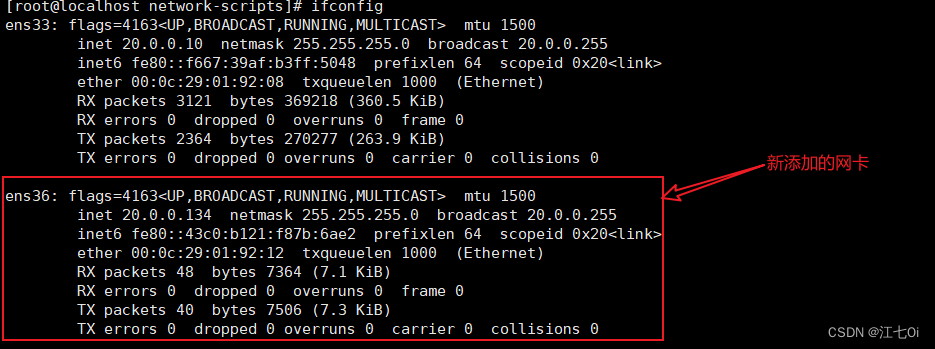
ifconfig #查看网卡信息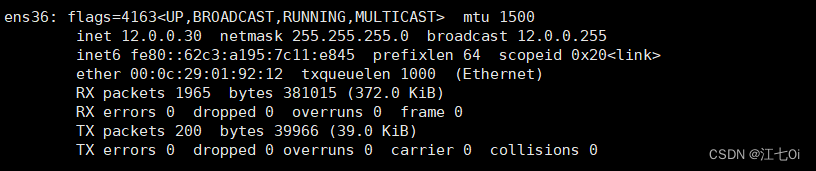
5.3开启路由转发功能
vim /etc/sysctl.conf          #编辑文件
sysctl -p                     #查看配置信息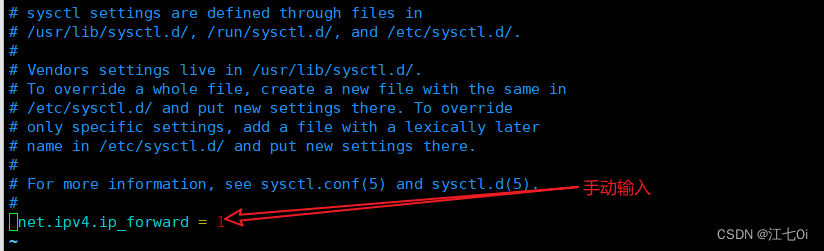
net.ipv4.ip_forward = 1
5.4设置SNAT规则
iptables -t nat -A POSTROUTING -s 20.0.0.0/24 -o ens36 -j SNAT --to 12.0.0.30
iptables -nL -t nat #查看snat规则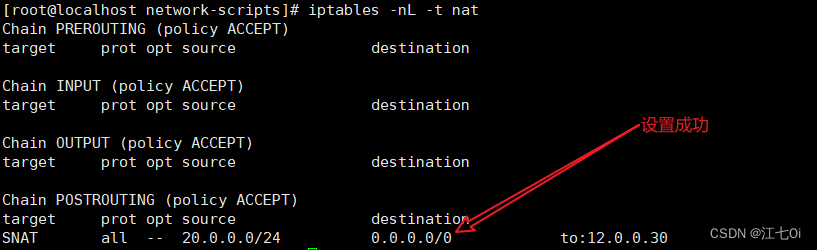
5.5加载模块
cd /usr/lib/modules/$(uname -r)/kernel/net/netfilter/ipvs
for i in $(ls | awk -F. '{print $1}'); do modprobe $i; done
lsmod #查看模块信息5.6使用ipvsadm配置LVS-NAT模式转发规则
yum install -y ipvsadm             #本地yum安装
touch /etc/sysconfig/ipvsadm       #创建文件
systemctl enable --now ipvsadm     #开启服务并且设置开机自启动

#配置lvs-nat模式转发规则
ipvsadm -A -t 12.0.0.30:80 -s rr
ipvsadm -a -t 12.0.0.30:80 -r 20.0.0.20:80 -m
ipvsadm -a -t 12.0.0.30:80 -r 20.0.0.30:80 -m

ipvsadm                            #加载规则
ipvsadm -ln                        #显示规则信息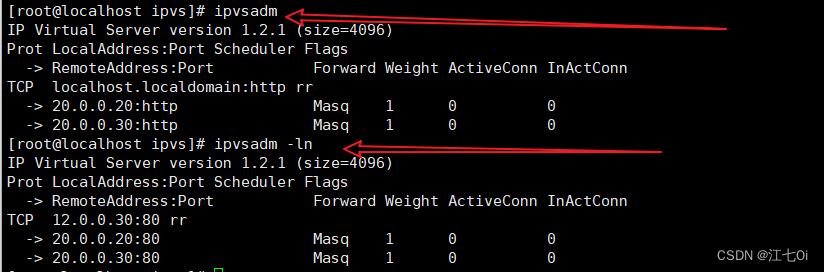
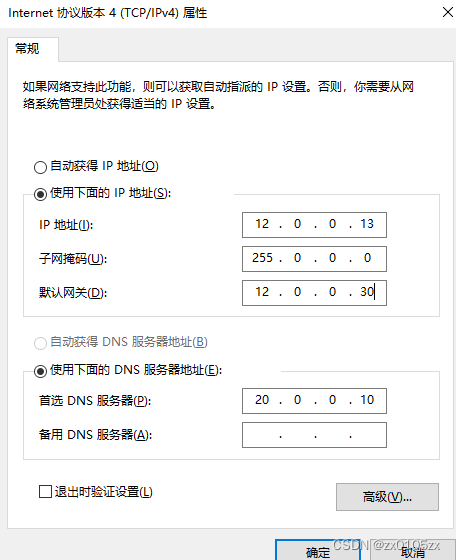
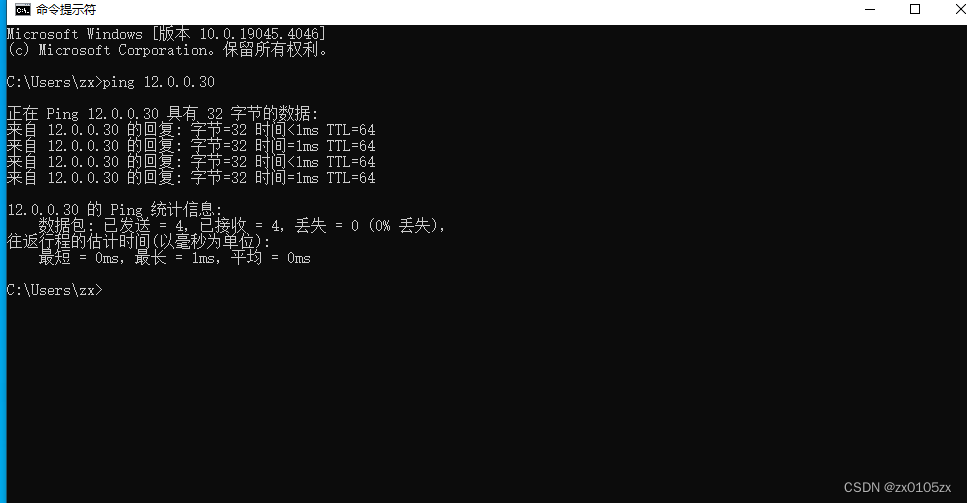
6.Windows测试
6.1修改默认网关
6.2命令验证
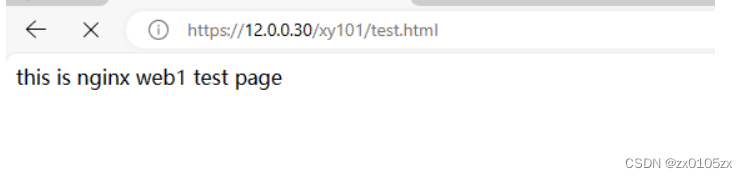
6.3网页验证