集群部署GitLab
前言
题目是这样的:
在Kubernetes集群中新建命名空间gitlab-ci,将GitLab部署到该命名空间下,Deployment和Service名称均为gitlab,以NodePort方式将80端口对外暴露为30880,设置GitLab服务root用户的密码为admin@123,将项目包demo-2048.tar.gz导入到GitLab中并命名为demo-2048。
GitLab是一个功能强大且灵活的 DevOps 平台,为开发团队和企业提供了从代码管理到持续集成、交付和部署的一整套解决方案。无论是小型团队还是大型企业,都可以从中受益,提高开发效率和软件质量。
使用的环境是之前搭建的容器云平台:2024广东省职业技能大赛云计算赛项实战------容器云平台搭建-CSDN博客
不过我嫌麻烦搭了台allinone的,只有master节点,使用的IP是192.168.200.15/24
操作过程
环境准备
shell
#解压需要用到的软件包
[root@k8s-master-node1 ~]# tar -zxf CICD-Runners-demo2048.tar.gz
[root@k8s-master-node1 ~]# ls
anaconda-ks.cfg  chinaskills_cloud_paas_v2.0.2.iso  CICD-Runners-demo2048.tar.gz  gitlab-ci
#使用ctr命令将镜像导入到当前使用的容器运行时的镜像存储中
[root@k8s-master-node1 ~]# docker load -i gitlab-ci/images/images.tar
#根据题目要求创建命名空间gitlab-ci
[root@k8s-master-node1 ~]# kubectl create ns gitlab-ci
namespace/gitlab-ci created
#切换到到gitlab-ci目录
[root@k8s-master-node1 ~]# cd gitlab-ci/
#编写部署gitlab的yaml文件
[root@k8s-master-node1 gitlab-ci]# vi gitlab-deploy.yaml
yaml
apiVersion: apps/v1
kind: Deployment
metadata:
  name: gitlab			#根据题目要求定义名称为gitlab
  namespace: gitlab-ci	#根据题目要求部署于gitlab-ci命名空间内
  labels:
    app: gitlab
spec:
  selector:
    matchLabels:
      app: gitlab
  template:
    metadata:
      name: gitlab
      labels:
        app: gitlab
    spec:
      containers:
      - name: gitlab
        image: gitlab/gitlab-ce:latest
        imagePullPolicy: IfNotPresent
        env:
        - name: GITLAB_ROOT_PASSWORD
          value: "admin@123"	#根据题目要求,设置root用户密码为admin@123
        - name: GITLAB_ROOT_EMAIL
          value: "1234567890@qq.com"
        ports:
        - name: http
          containerPort: 80
        volumeMounts:
        - name: gitlab-config
          mountPath: /etc/gitlab
        - name: gitlab-logs
          mountPath: /var/log/gitlab
        - name: gitlab-data
          mountPath: /var/opt/gitlab
      volumes:
      - name: gitlab-config
        hostPath:
          path: /home/gitlab/conf
      - name: gitlab-logs
        hostPath:
          path: /home/gitlab/logs
      - name: gitlab-data
        hostPath:
          path: /home/gitlab/data
部署GitLab
shell
#部署gitlab
[root@k8s-master-node1 gitlab-ci]# kubectl apply -f gitlab-deploy.yaml
deployment.apps/gitlab created
#创建一个NodePort类型的Service,根据题目要求,定义名称为gitlab,部署于gitlab-ci命名空间,且将80端口对外暴露为30880
[root@k8s-master-node1 gitlab-ci]# kubectl create svc nodeport gitlab --tcp=80 --node-port=30880 -n gitlab-ci
service/gitlab created
#查看Pod的名字和IP
[root@k8s-master-node1 gitlab-ci]# kubectl get pods -n gitlab-ci -owide
NAME                      READY   STATUS    RESTARTS   AGE     IP           NODE               NOMINATED NODE   READINESS GATES
gitlab-755b55bf96-2xffp   1/1     Running   0          5m54s   10.244.0.12  k8s-master-node1   <none>           <none>
#查看Service的信息,着重注意Endpoints得关联到pod的地址,否则我们无法访问GitLab的web界面
[root@k8s-master-node1 gitlab-cicd]# kubectl describe service gitlab -n gitlab-ci
Name:                     gitlab
Namespace:                gitlab-ci
Labels:                   app=gitlab
Annotations:              <none>
Selector:                 app=gitlab
Type:                     NodePort
IP Family Policy:         SingleStack
IP Families:              IPv4
IP:                       10.96.125.173
IPs:                      10.96.125.173
Port:                     80  80/TCP
TargetPort:               80/TCP
NodePort:                 80  30880/TCP
Endpoints:                10.244.0.12:80
Session Affinity:         None
External Traffic Policy:  Cluster
Events:                   <none>
配置环境
shell
#进入CoreDNS的ConfigMap并添加以下段落
[root@k8s-master-node1 gitlab-ci]# kubectl edit configmap coredns -n kube-system
#添加一条静态的DNS解析规则,无法匹配时,再继续查询其他配置
...
        hosts {
            10.244.0.12 gitlab-755b55bf96-2xffp
            fallthrough
        }
        prometheus :9153
...
#重新启动集群中CoreDNS的部署,使得CoreDNS的Deployment重新加载配置
[root@k8s-master-node1 gitlab-ci]# kubectl -n kube-system rollout restart deploy coredns
deployment.apps/coredns restarted
#进入gitlab的shell中
[root@k8s-master-node1 gitlab-ci]# kubectl exec -ti -n gitlab-ci gitlab-755b55bf96-2xffp bash
#修改gitlab的外部访问URL
root@gitlab-755b55bf96-2xffp:/# vi /etc/gitlab/gitlab.rb
external_url 'http://10.244.0.16:80'
#重启让配置生效
root@gitlab-755b55bf96-2xffp:/# reboot
root@gitlab-755b55bf96-2xffp:/# exit
上传项目包
这题要求将项目包demo-2048.tar.gz导入到GitLab中并命名为demo-2048。但我在提供的软件包里并没有找到demo-2048.tar.gz,只有demo-2048的目录,应该是提前给我们解压好了,指的就是这个目录。
我们打开浏览器,输入192.168.200.15:30880访问gitlab的web界面,使用用户名/密码:root/admin@123进行登录
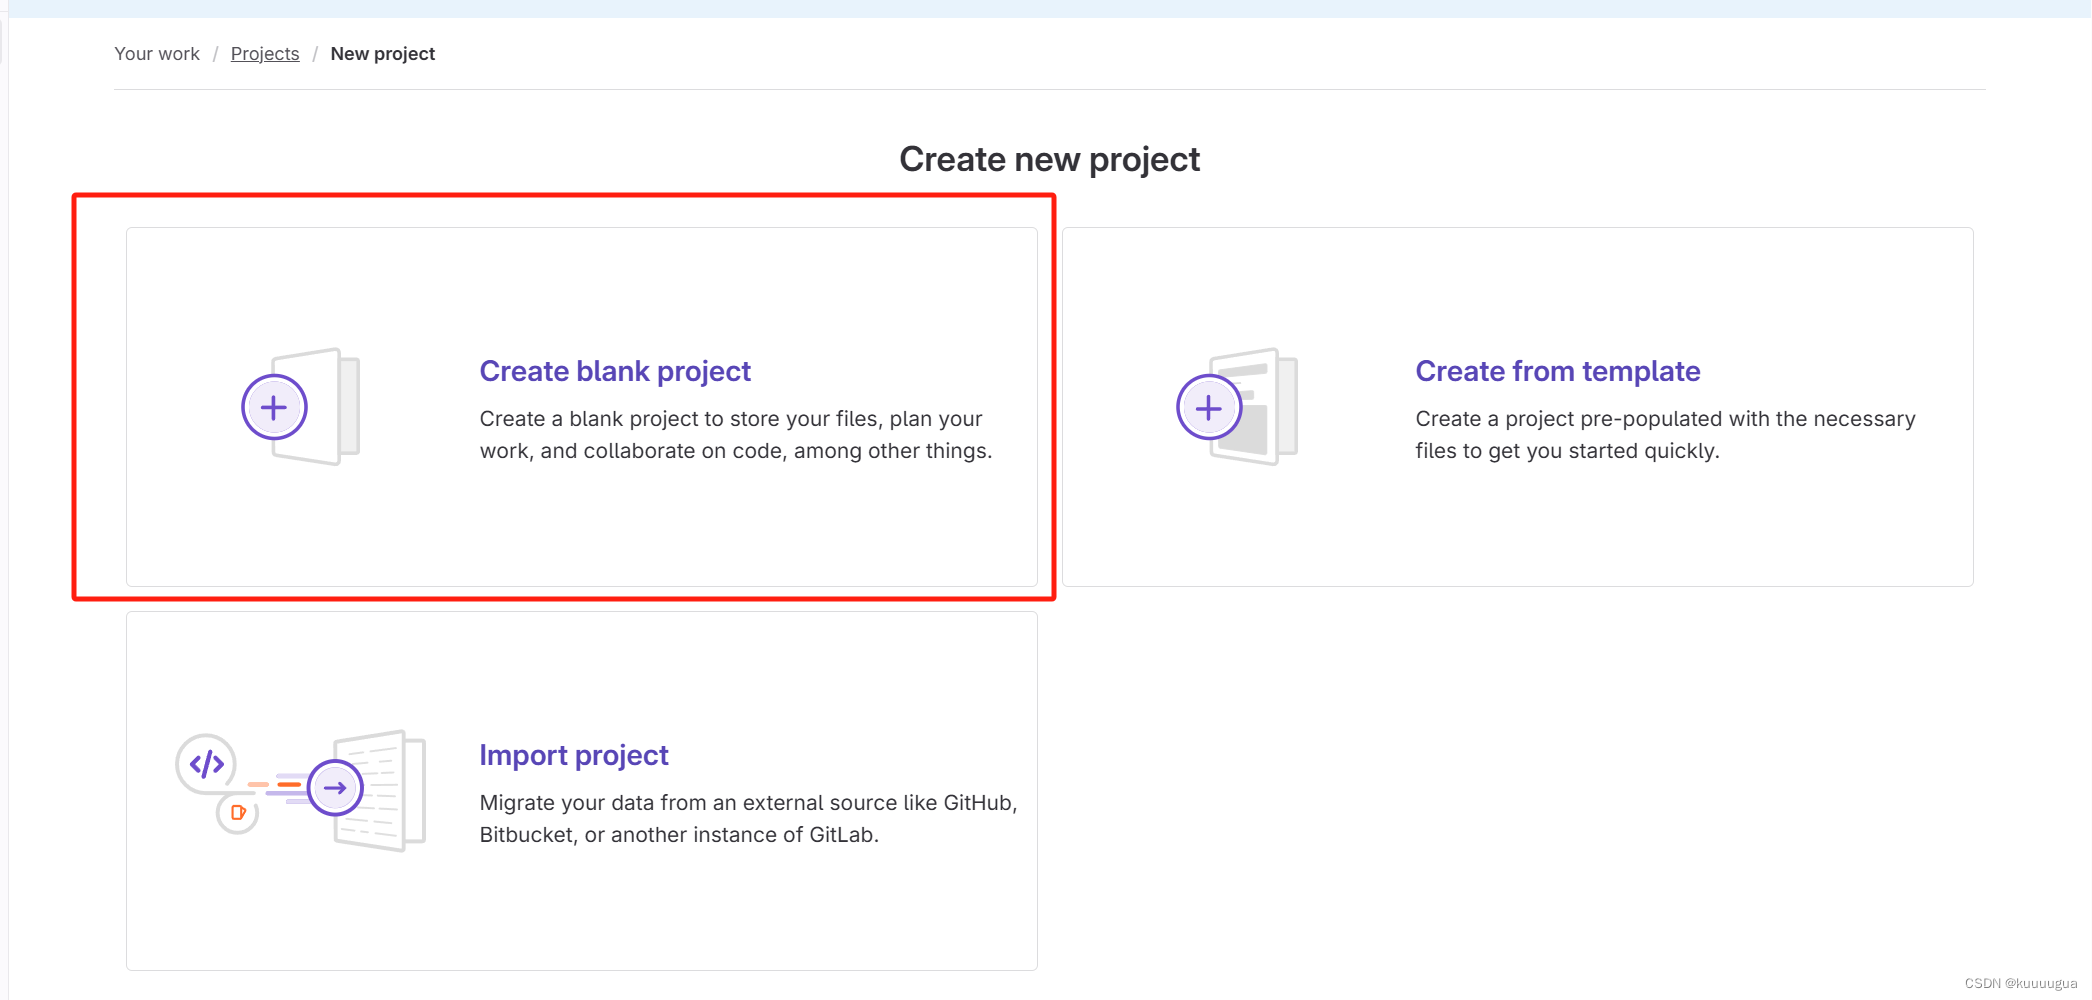
进入主页,点击Create blank project创建项目

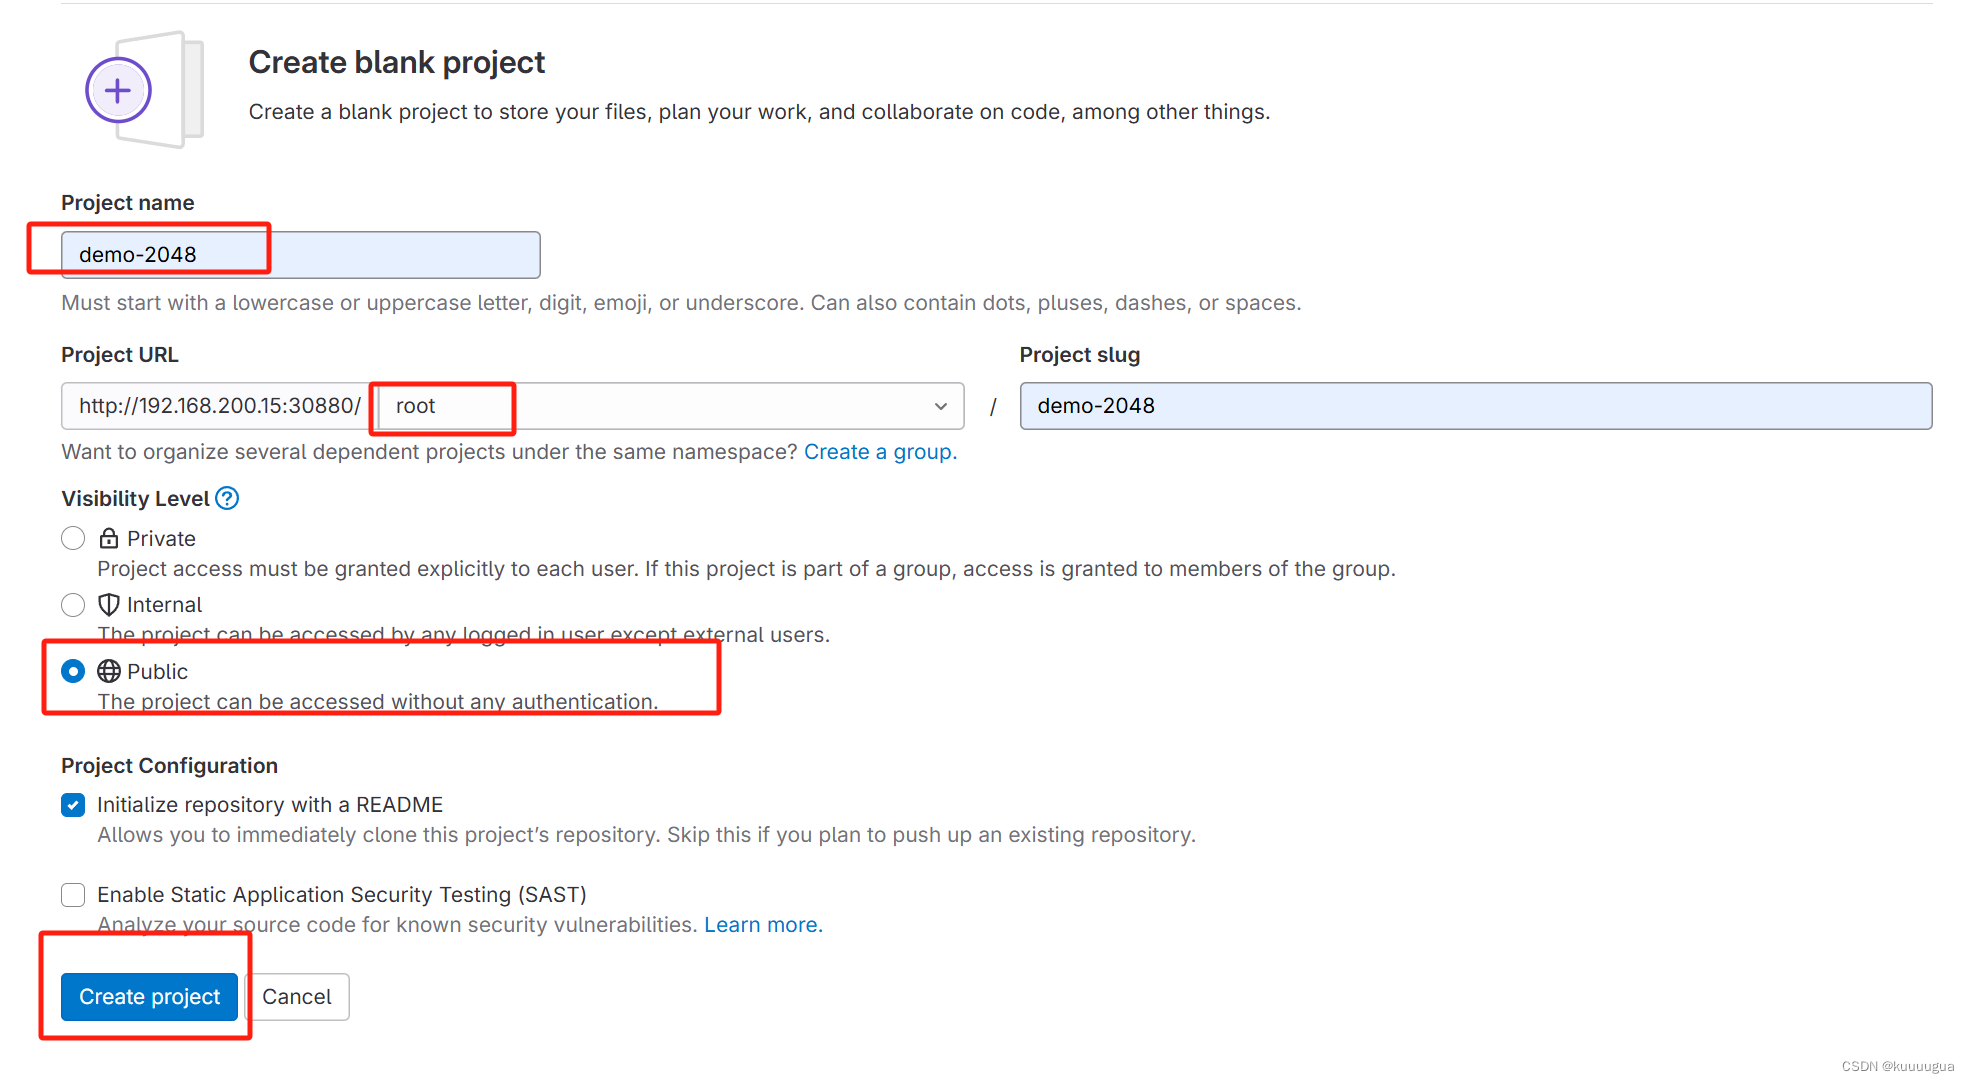
根据题目要求,设置项目名称为demo-2048。位置放在/root目录,并将项目设为公开
这样就创建好了

回到宿主机进行操作
shell
#切换至项目包目录
[root@k8s-master-node1 gitlab-ci]# cd demo-2048/
[root@k8s-master-node1 demo-2048]# ls
Dockerfile  pom.xml  README.md  src  template
#设置全局用户信息,待会我们提交代码的时候会使用这些信息
[root@k8s-master-node1 demo-2048]# git config --global user.name "administrator"
[root@k8s-master-node1 demo-2048]# git config --global user.email "admin@example.com"
#删除旧的远程仓库配置
[root@k8s-master-node1 demo-2048]# git remote remove origin
#添加新的远程仓库配置
[root@k8s-master-node1 demo-2048]# git remote add origin http://192.168.200.15:30880/root/demo-2048.git
#将当前目录下所有修改过的文件添加到Git的暂存区
[root@k8s-master-node1 demo-2048]# git add .
#将暂存区的文件提交到本地仓库,并附加提交信息
[root@k8s-master-node1 demo-2048]# git commit -m "initial commit"
#将本地仓库的代码推送给远程仓库的drone分支
[root@k8s-master-node1 demo-2048]# git push -u origin drone
Username for 'http://192.168.200.15:30880': root
Password for 'http://root@192.168.200.15:30880': #输入设置的密码admin@123
Counting objects: 585, done.
Delta compression using up to 6 threads.
Compressing objects: 100% (257/257), done.
Writing objects: 100% (585/585), 140.39 KiB | 0 bytes/s, done.
Total 585 (delta 303), reused 576 (delta 295)
remote: Resolving deltas: 100% (303/303), done.
remote:
remote: To create a merge request for drone, visit:
remote:   http://10.244.0.12/root/demo-2048/-/merge_requests/new?merge_request%5Bsource_branch%5D=drone
remote:
To http://192.168.200.15:30880/root/demo-2048.git
 * [new branch]      drone -> drone
分支 drone 设置为跟踪来自 origin 的远程分支 drone。
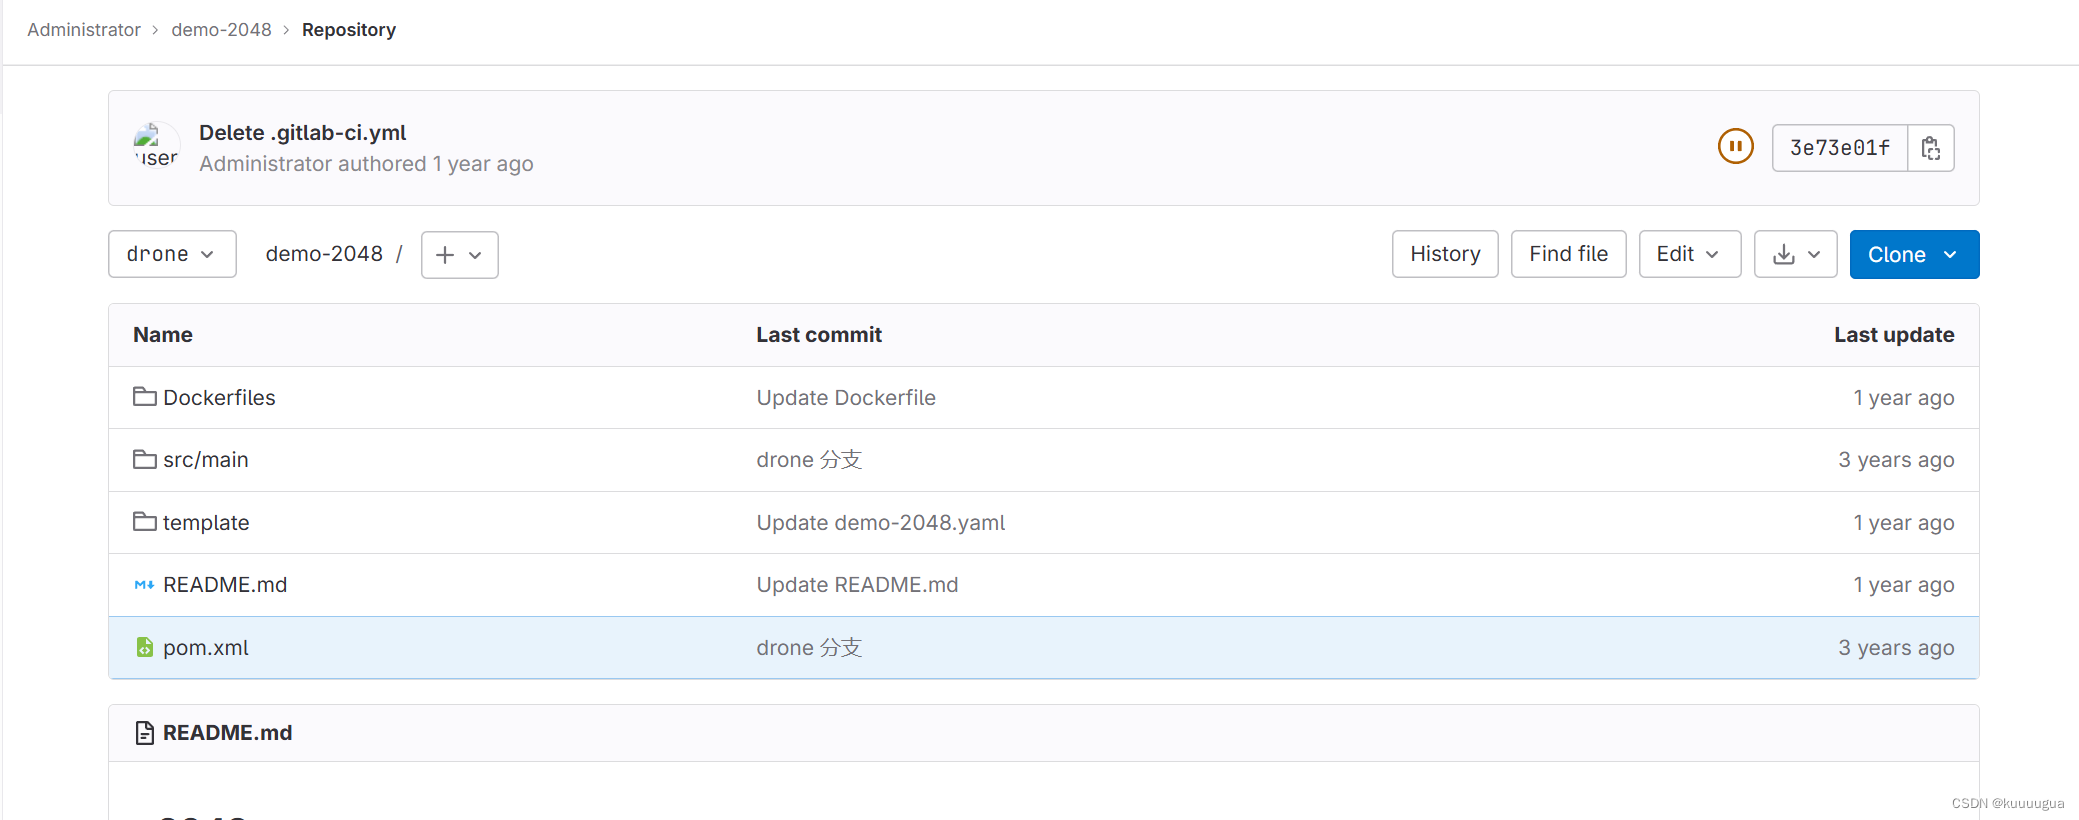
重新刷新一下页面,我们就可以看到上传成功了

后语
就这样,这道题的要求都满足了,算做完了。但它后面还有连着的几道题,包括部署GitLab-Runner、部署GitLab-Agent(实际上是连接k8s集群)还有编写流水线脚本构建2048。也就是说这道题不过是整个项目的一部分。后续的那些我也会继续写的。