
🎈个人主页:靓仔很忙i
💻B 站主页:👉B站👈
🎉欢迎 👍点赞✍评论⭐收藏
🤗收录专栏:C#
🤝希望本文对您有所裨益,如有不足之处,欢迎在评论区提出指正,让我们共同学习、交流进步!
本文基于WebSocketSharp实现了websocket双向通信,除基本的客户端向服务端发送消息外,也支持客户端向指定的客户端发送消息、群发消息,其他协议可自定义。废话不多说,直接上干货。
一.服务端
新建一个.net项目,如websocket.server
-
安装包
Install-Package WebSocketSharp -Pre
-
定义WebSocketHelper
using CaseAuto.helper.websocket;
using System.Collections.Generic;
using WebSocketSharp.Server;namespace CaseAuto.helper
{
public class WebSocketHelper
{
static WebSocketServer wssv = new WebSocketServer("ws://127.0.0.1");
private static Dictionary<string,CaseInfoBehavior> clients = new Dictionary<string,CaseInfoBehavior>();
public static void Init()
{
wssv.AddWebSocketService("/caseInfo",()=>new CaseInfoBehavior(clients));
wssv.Start();
}public static void End() { wssv.Stop(); } }}
-
创建CaseInfoBehavior
using Newtonsoft.Json;
using System;
using System.Collections.Generic;
using WebSocketSharp;
using WebSocketSharp.Server;namespace CaseAuto.helper.websocket
{public class CaseInfoBehavior : WebSocketBehavior { private string _username; private Dictionary<string, CaseInfoBehavior> _clients = new Dictionary<string, CaseInfoBehavior>(); public CaseInfoBehavior(Dictionary<string,CaseInfoBehavior> clients) { _clients = clients; } protected override void OnMessage(MessageEventArgs e) { var data=JsonConvert.DeserializeObject<WebSocketMsgModel>(e.Data); switch (data.msgType){ case MsgType.NORMAL: var msg = $"This msg from serve,I recive msg:{data.content}"; Send(msg); break; case MsgType.GROUP: SendMessageToAll(data.content); //Sessions.Broadcast(data.content); break; case MsgType.TO_RECIVER: SendMessageToReciver(data.reciver, data.content); break; default: break; } } protected override void OnOpen() { _username = Context.QueryString["name"]; if (string.IsNullOrEmpty(_username)) { _username = this.ID; return; } _clients.Add(_username, this); Console.WriteLine("Client connected: " + _username); } protected override void OnClose(CloseEventArgs e) { _clients.Remove(_username); Console.WriteLine("Client connected: " + _username); } protected void SendMessageToReciver(string reciver,string message) { foreach (var client in _clients) { if (client.Key == reciver) { client.Value.Send(message); break; } } } protected void SendMessageToAll(string message) { foreach (var client in _clients) { client.Value.Send(message); } } }}
-
创建WebSocketMsgModel
namespace CaseAuto.helper.websocket
{
public class WebSocketMsgModel
{
public MsgType msgType { get; set; }
public string content{ get; set; }
public string sender { get; set; }
public string reciver { get; set; }
}public enum MsgType { NORMAL=0, GROUP=1, TO_RECIVER = 2, }}
-
使用
WebSocketHelper.Init();
二.客户端
新建一个.net项目,如websocket.client
-
安装包
Install-Package WebSocketSharp -Pre
-
使用
     static void Main(string[] args)
     {
         using (var ws = new WebSocket("ws://127.0.0.1/caseInfo?name=c1"))
         {
             string? response = string.Empty;
             ws.OnMessage += (sender, e) =>
             {
                 response = e.Data;
                 Console.WriteLine("Response: " + response);
             };
             ws.Connect();
             while (true)
             {
                 string? request = Console.ReadLine();

                 ws.Send(request);
                 Console.ReadKey(true);
             }
         }
     }
三.调试
-
启动分别启动服务端、客户端
-
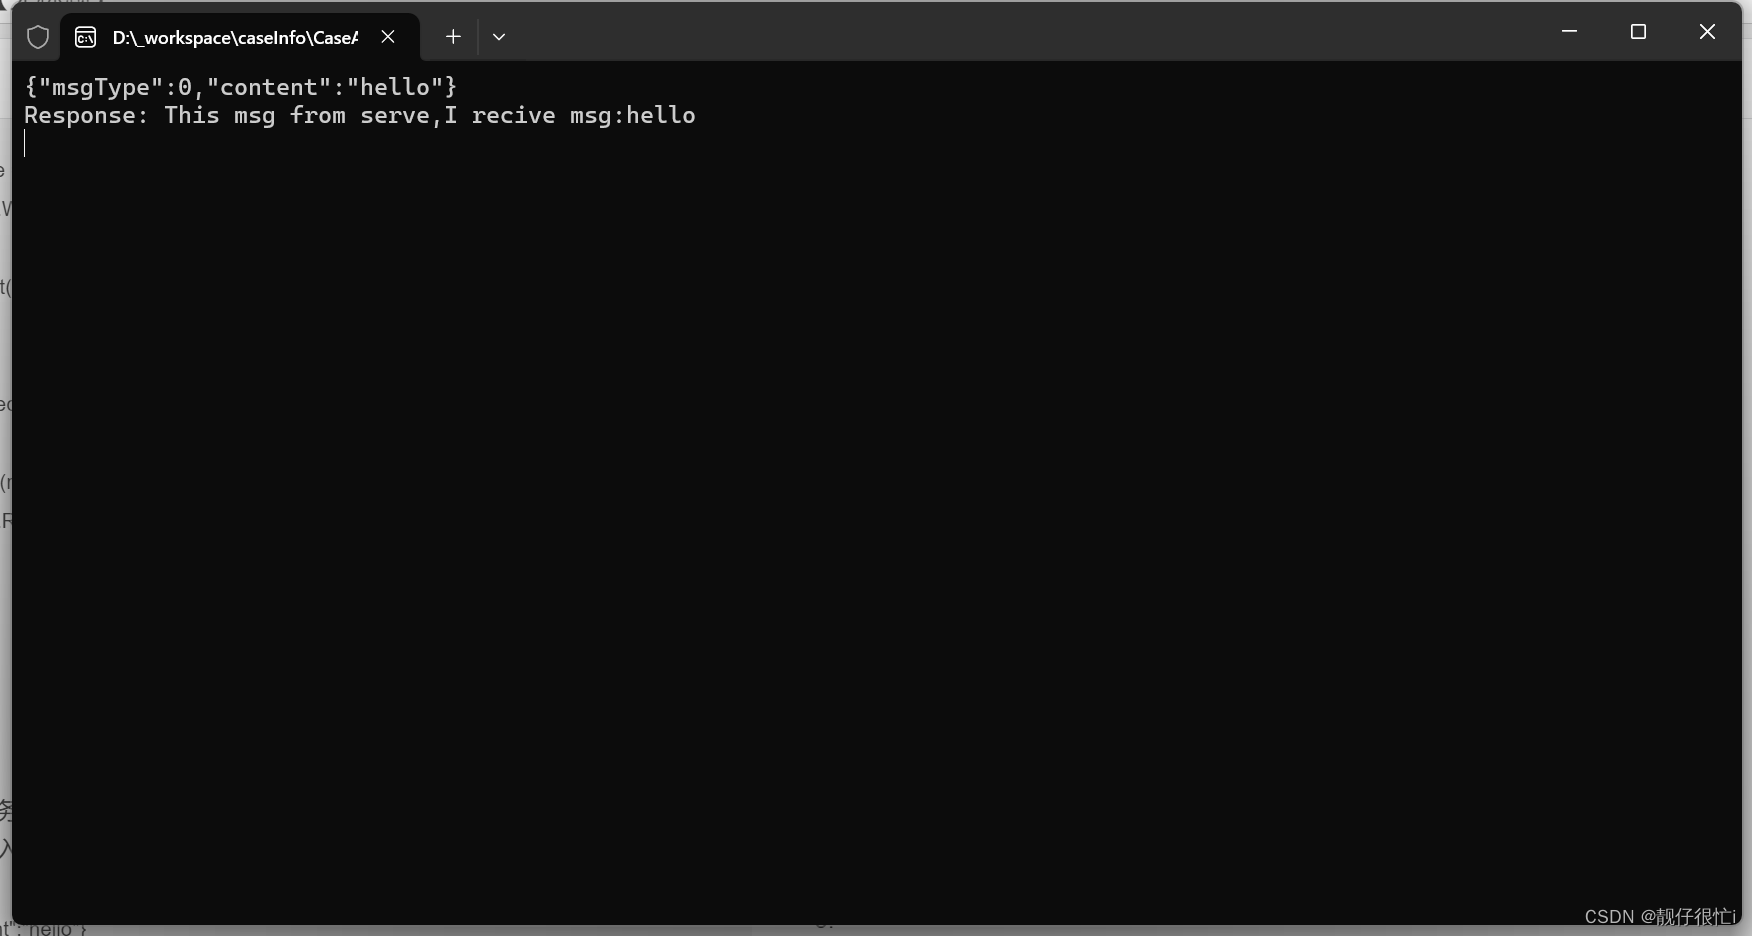
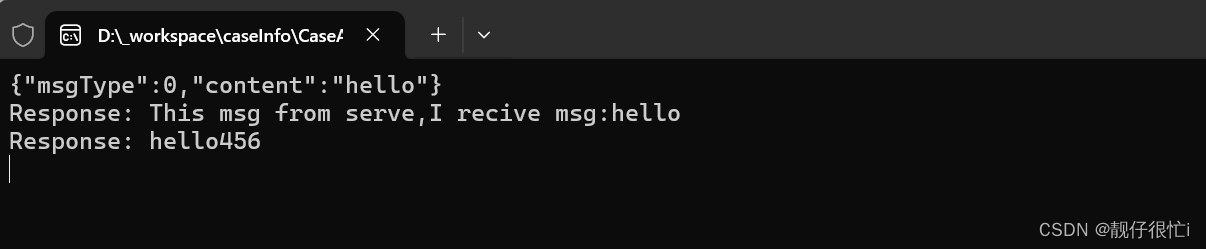
客户端控制台输入【常规通讯测试】
{"msgType":0,"content":"hello"}
输入后,回车,服务端返回
-
启动apipost,新建websocket,输入以下内容【群发】
ws://127.0.0.1/caseInfo?name=c2
{"msgType":1,"content":"hello456","reciver":"c1"}
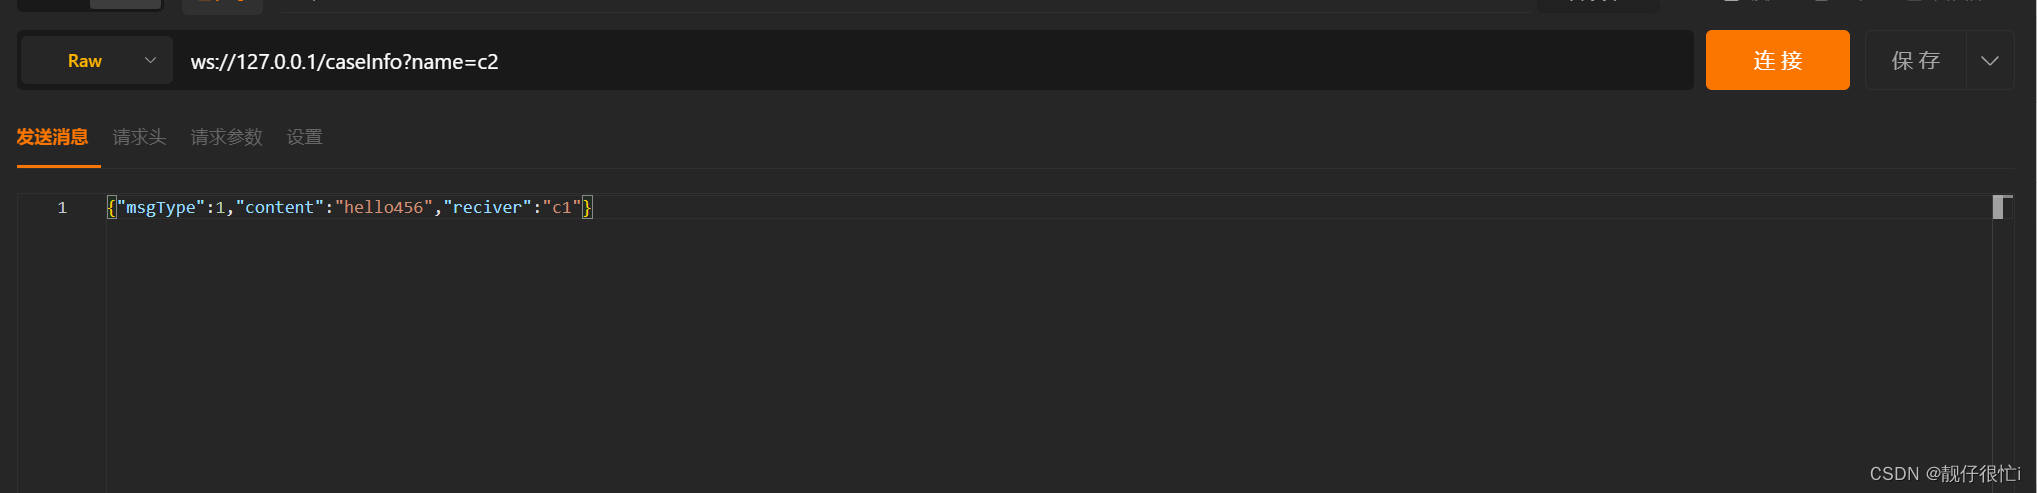
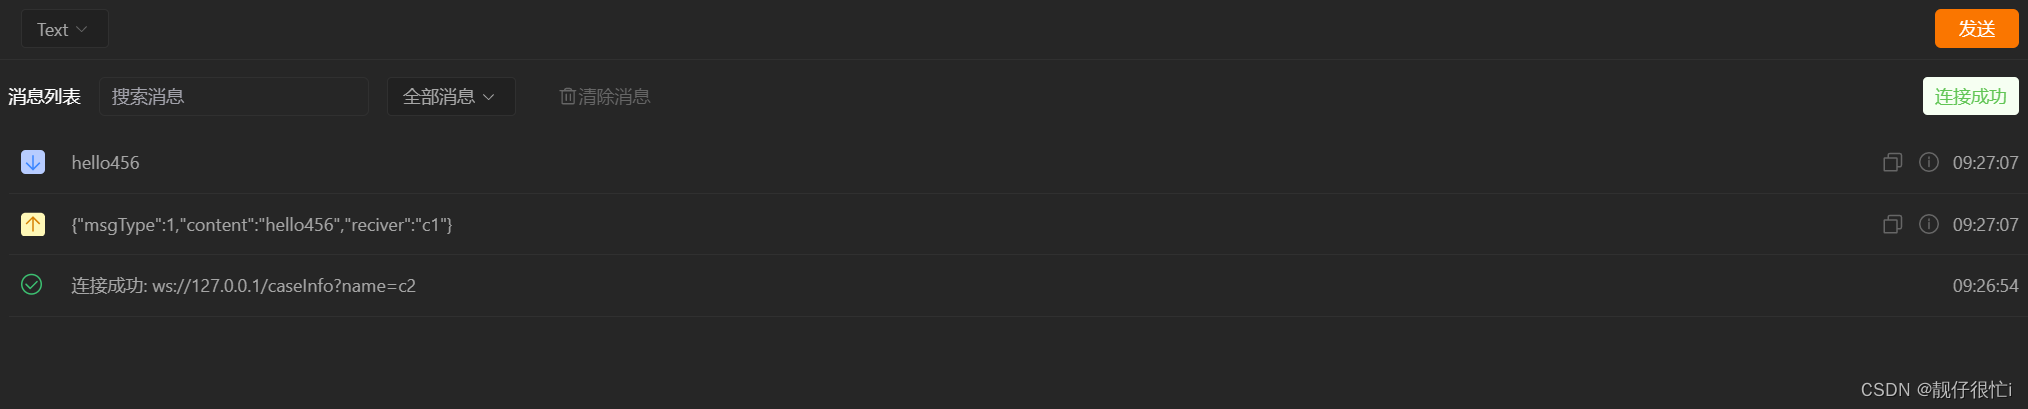
点击连接:

点击发送:
- 指定人发送
将apipost中发送的消息变为下面内容,重新观察apipost和自定义客户端
{"msgType":2,"content":"hello c1","reciver":"c1"}