
📍**当前部署情况:**DolphinScheduler V2.0.6 已经在三台服务器上安装完毕,具体如下:
|------------|---------------|
| 角色 | 服务器IP |
| master | 192.168.1.247 |
| master | 192.168.1.248 |
| worker | 192.168.1.249 |📂 具体搭建过程: Springboot 整合 DolphinScheduler(一):初识海豚调度-CSDN博客
💻 UI登录地址: http://{海豚调度所在的服务器IP}:12345/dolphinscheduler/#/home
🙍🏻♂️ **默认的用户名/密码:**admin/dolphinscheduler123
目录
[一、租户 & 用户](#一、租户 & 用户)
[二、创建工作流(以调用 HTTP接口为例)](#二、创建工作流(以调用 HTTP接口为例))
[三、告警功能(以发送 feishu 为例)](#三、告警功能(以发送 feishu 为例))
[2、在DolphinScheduler 中新增告警实例](#2、在DolphinScheduler 中新增告警实例)
一、租户 & 用户
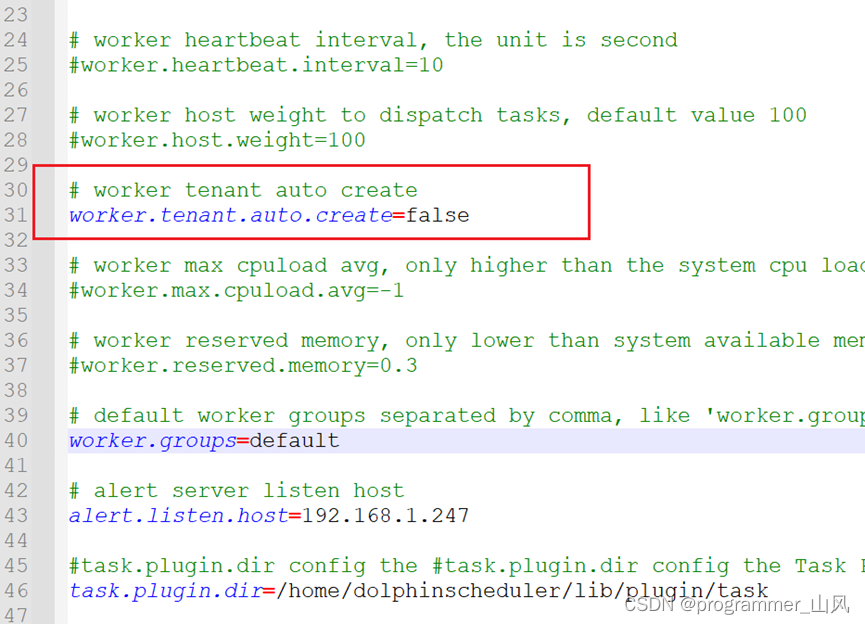
1、租户
租户对应的是Linux的用户,用于worker提交作业所使用的用户。如果linux没有这个用户,则会导致任务运行失败。可以通过修改 worker.properties 配置文件中参数 worker.tenant.auto.create=true 实现当 linux 用户不存在时自动创建该用户。worker.tenant.auto.create=true 参数会要求 worker 可以免密运行 sudo 命令。

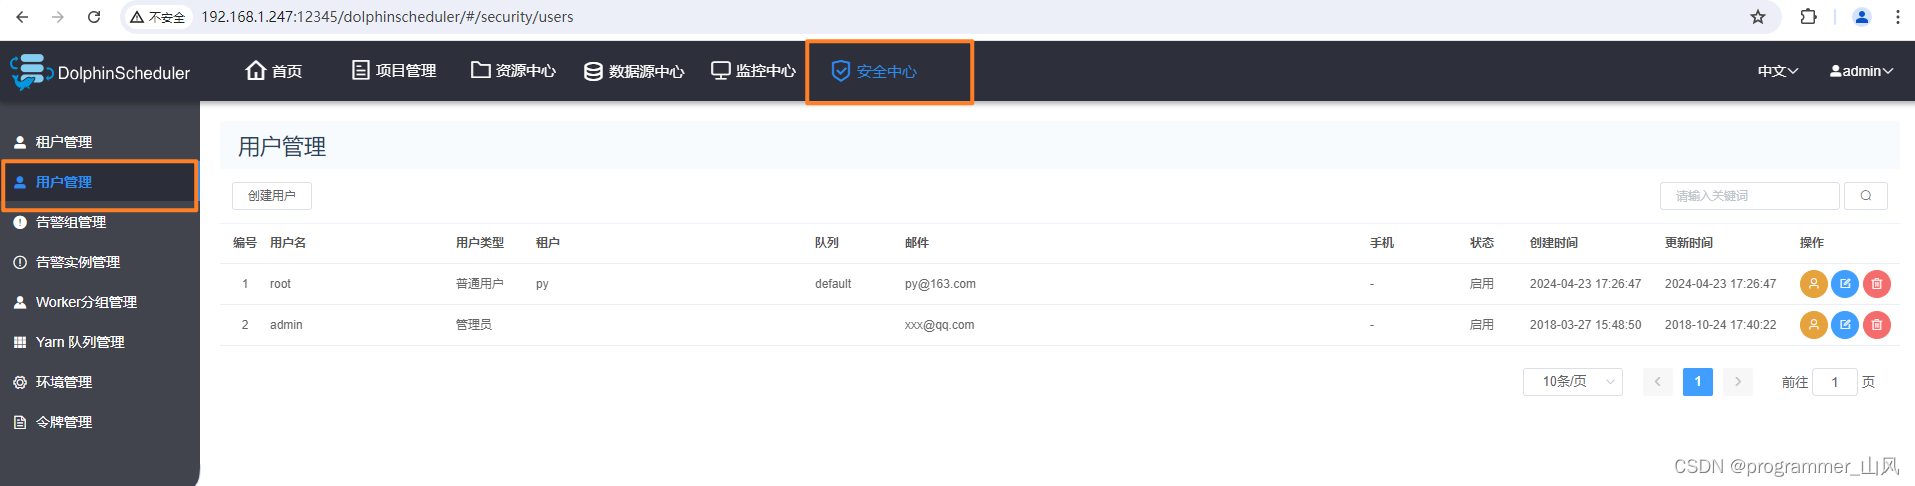
2、用户
- 用户分为管理员用户和普通用户
- 管理员有授权和用户管理等权限,没有创建项目和工作流定义的操作的权限。
- 普通用户可以创建项目和对工作流定义的创建,编辑,执行等操作。
**【注】**如果该用户切换了租户,则该用户所在租户下所有资源将复制到切换的新租户下。
二、创建工作流(以调用 HTTP接口为例)
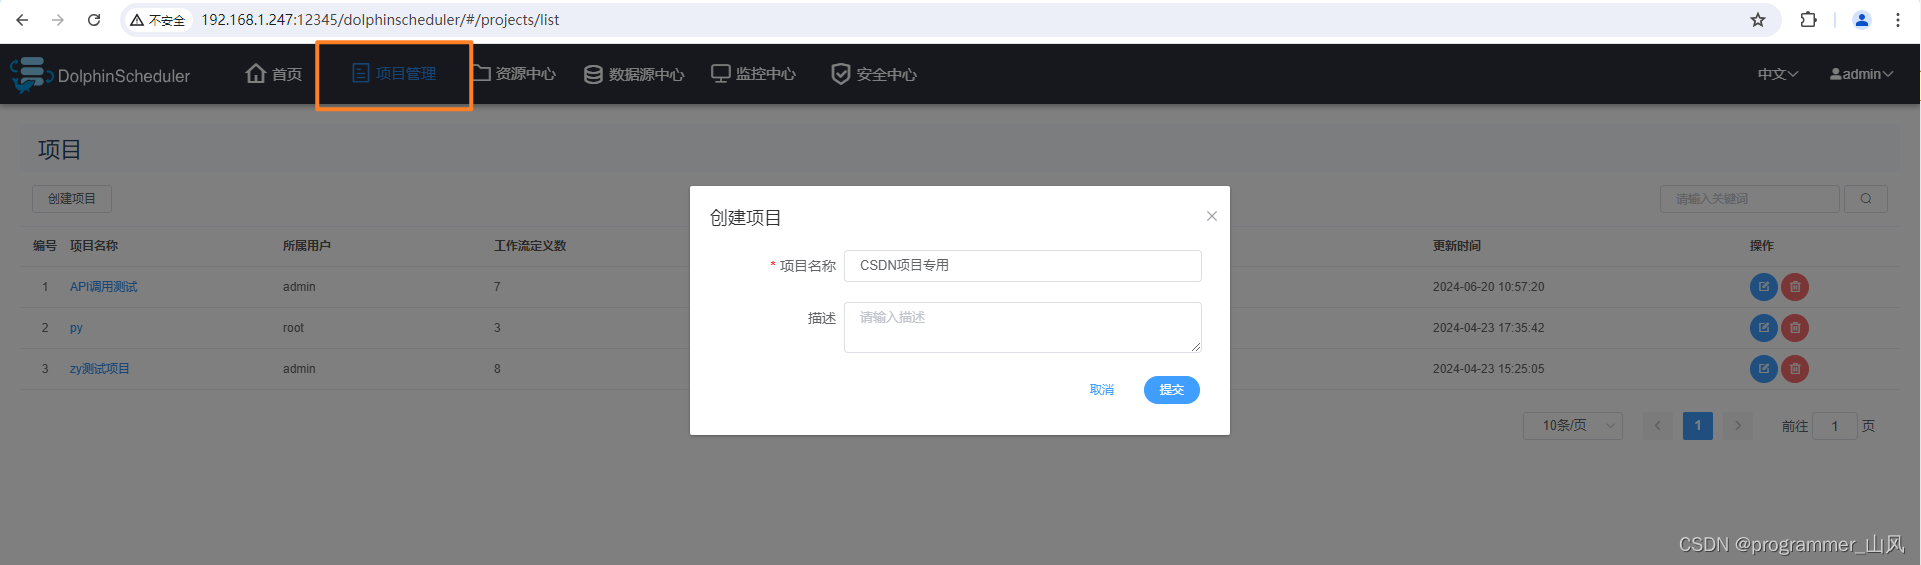
1、创建项目
工作流需要挂在某一项目下
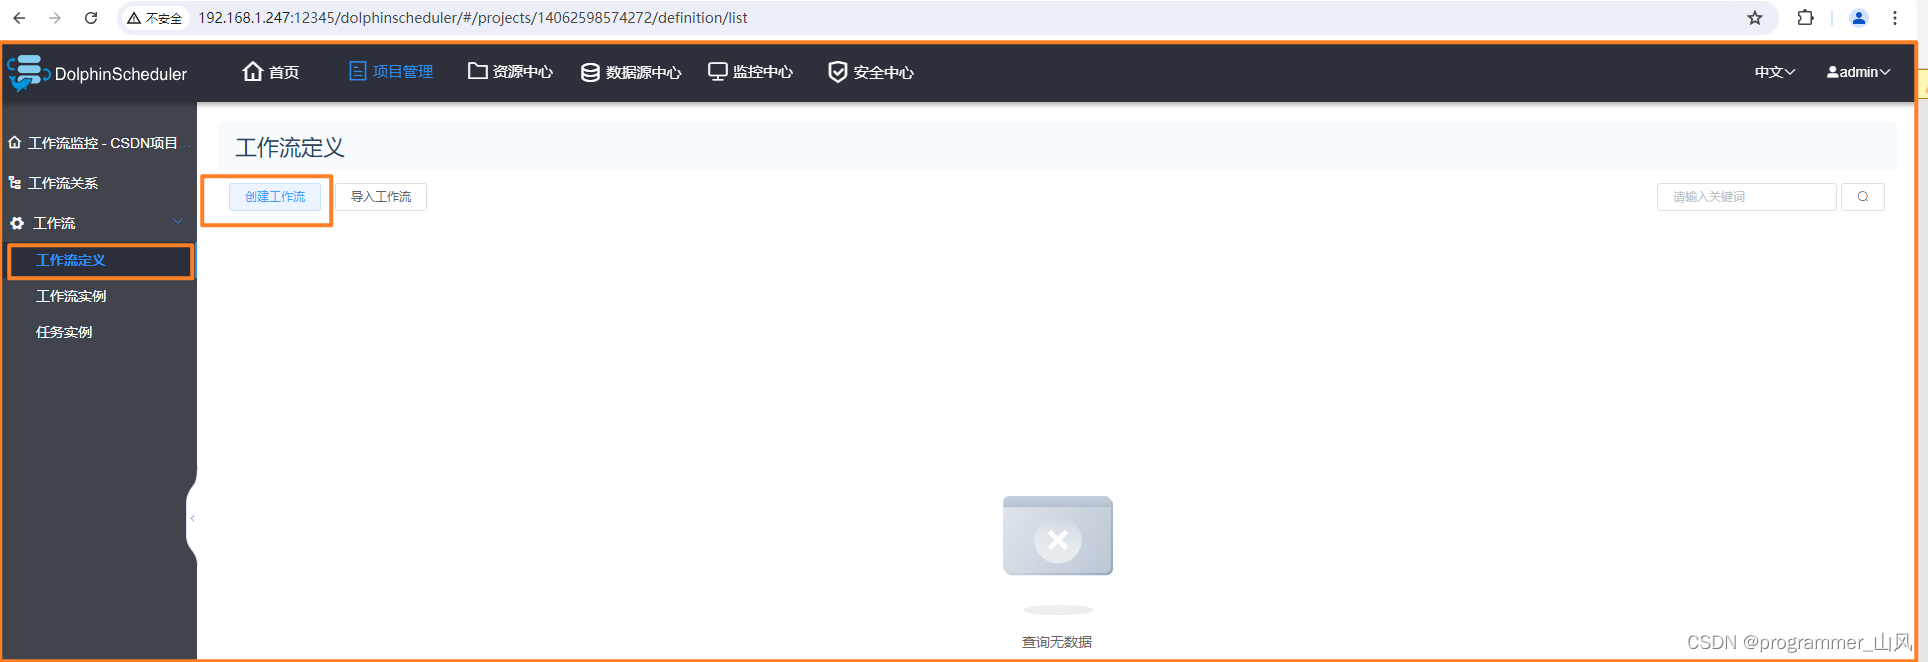
2、创建工作流
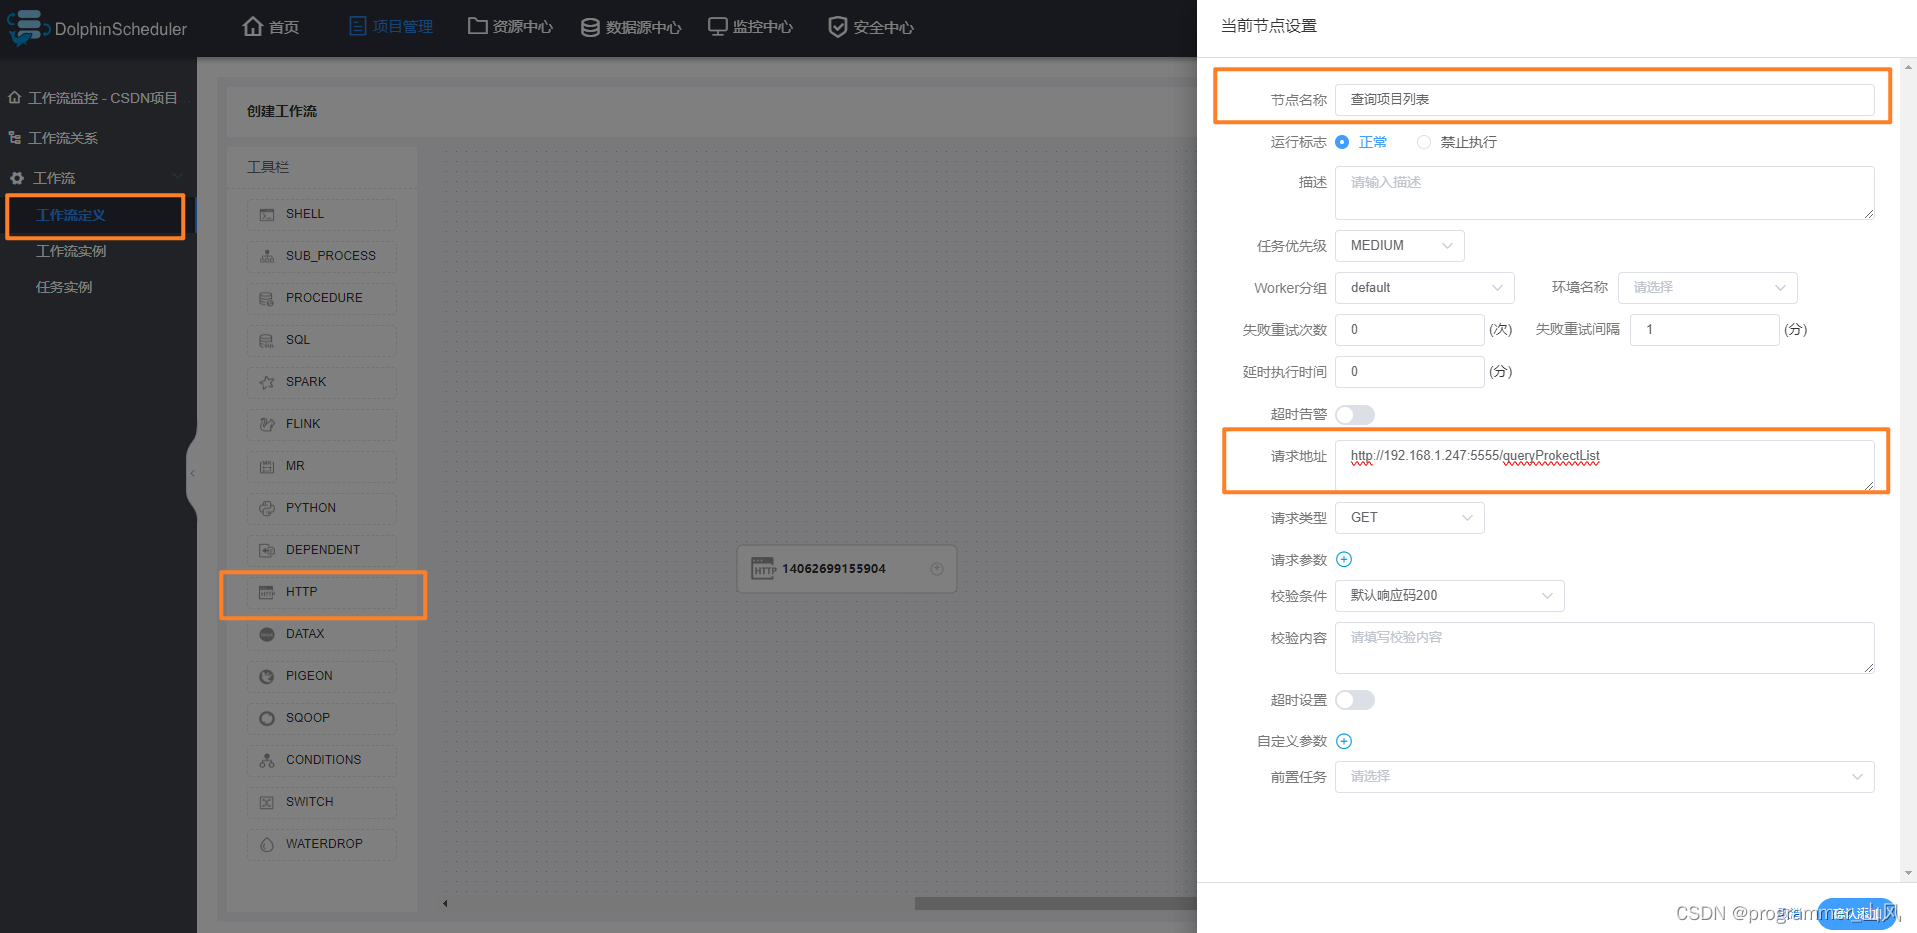

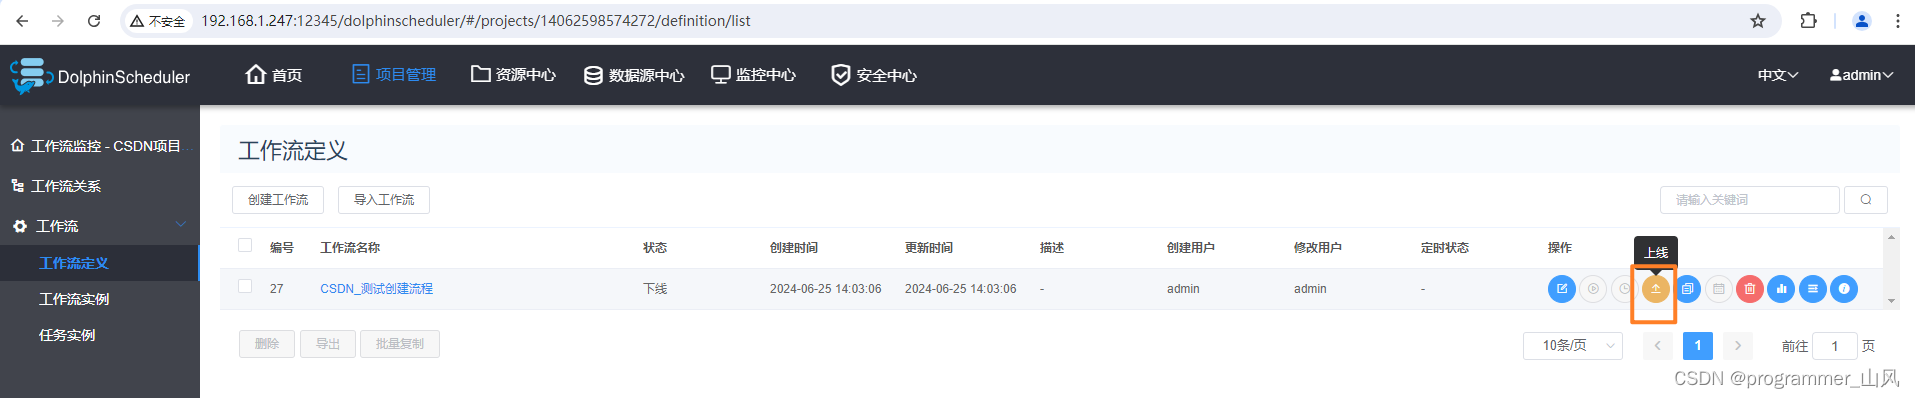
3、上线
只有处于上线状态,才能被运行。
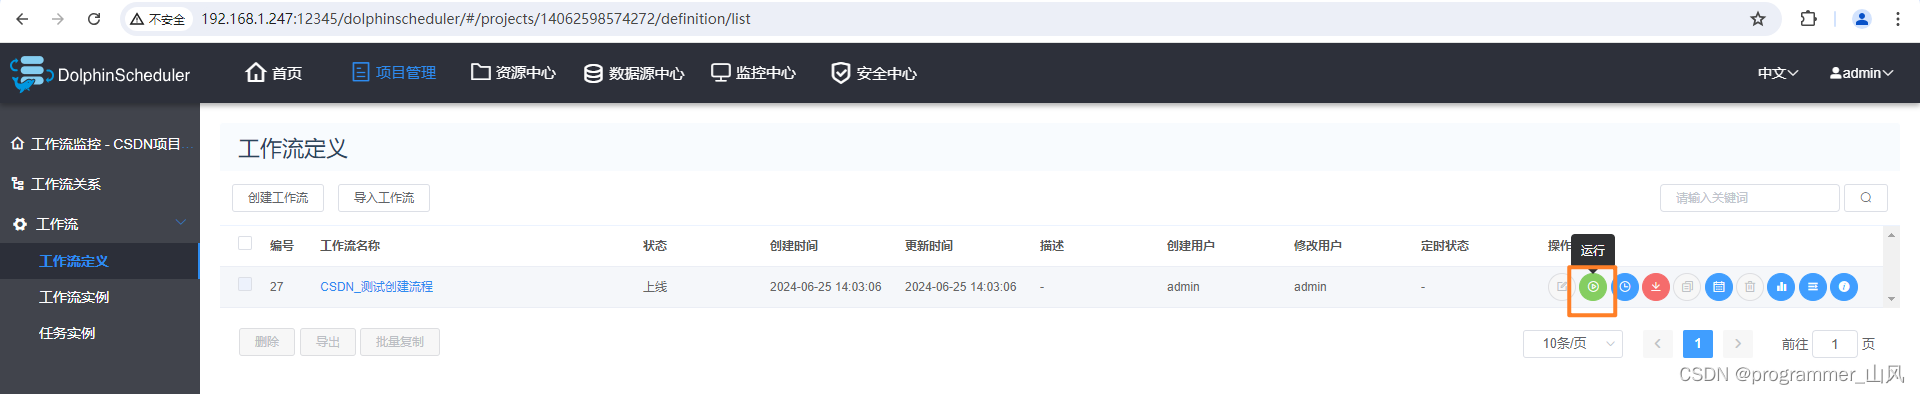
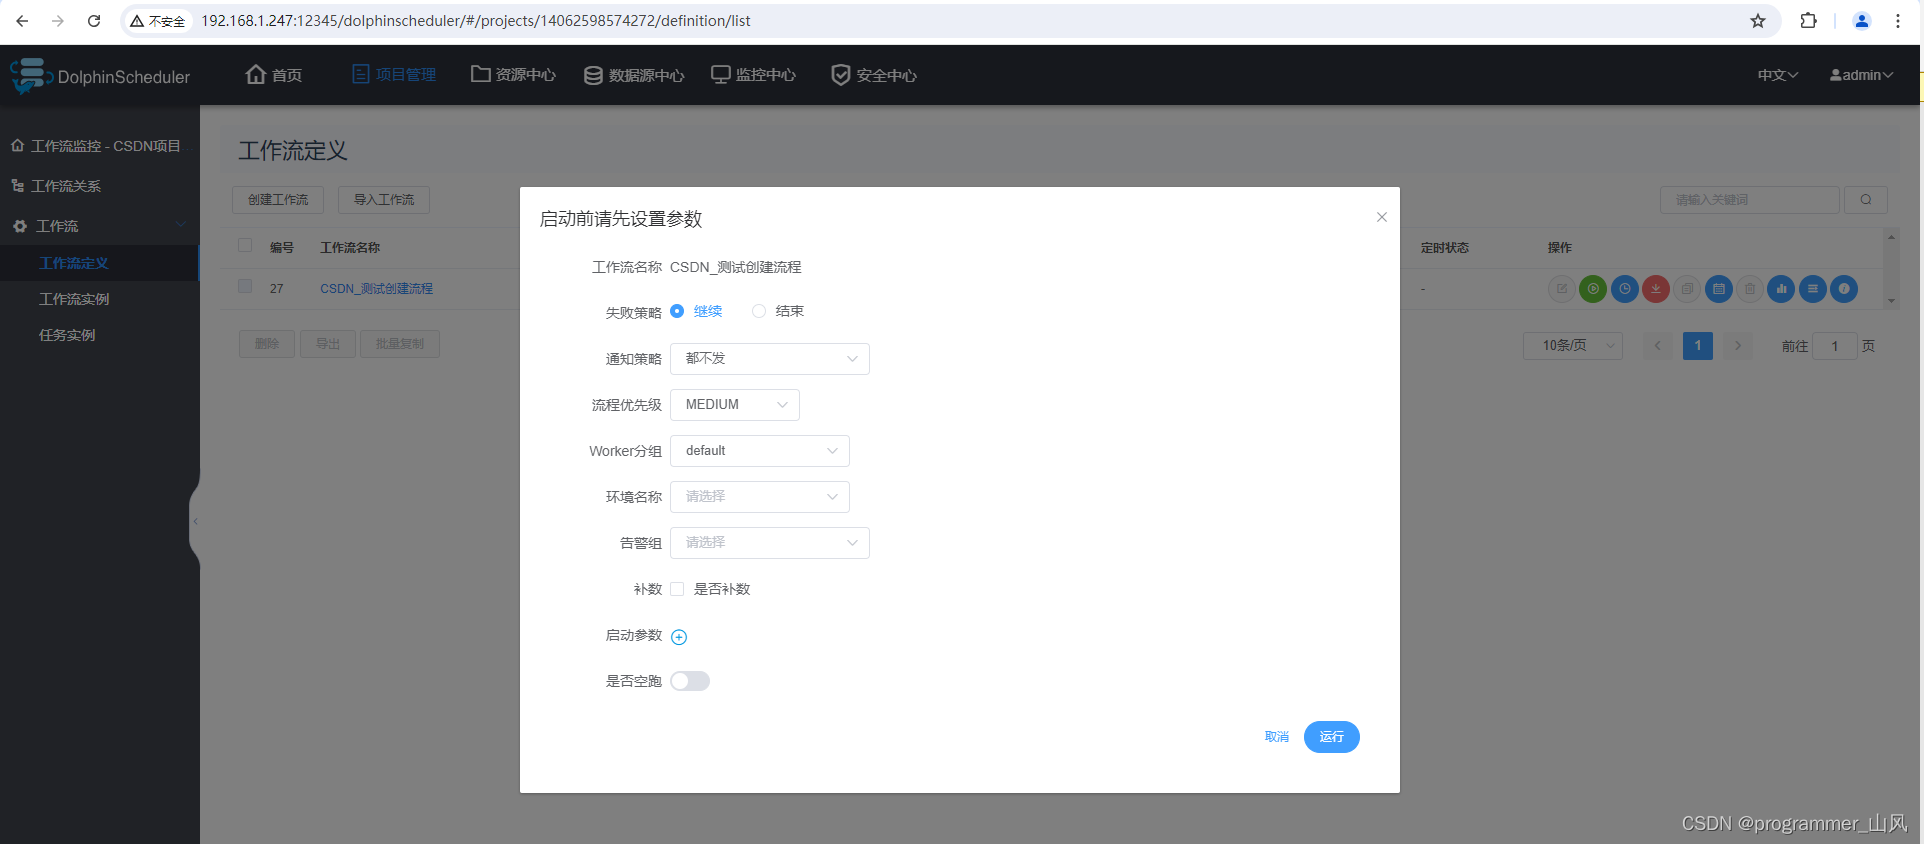
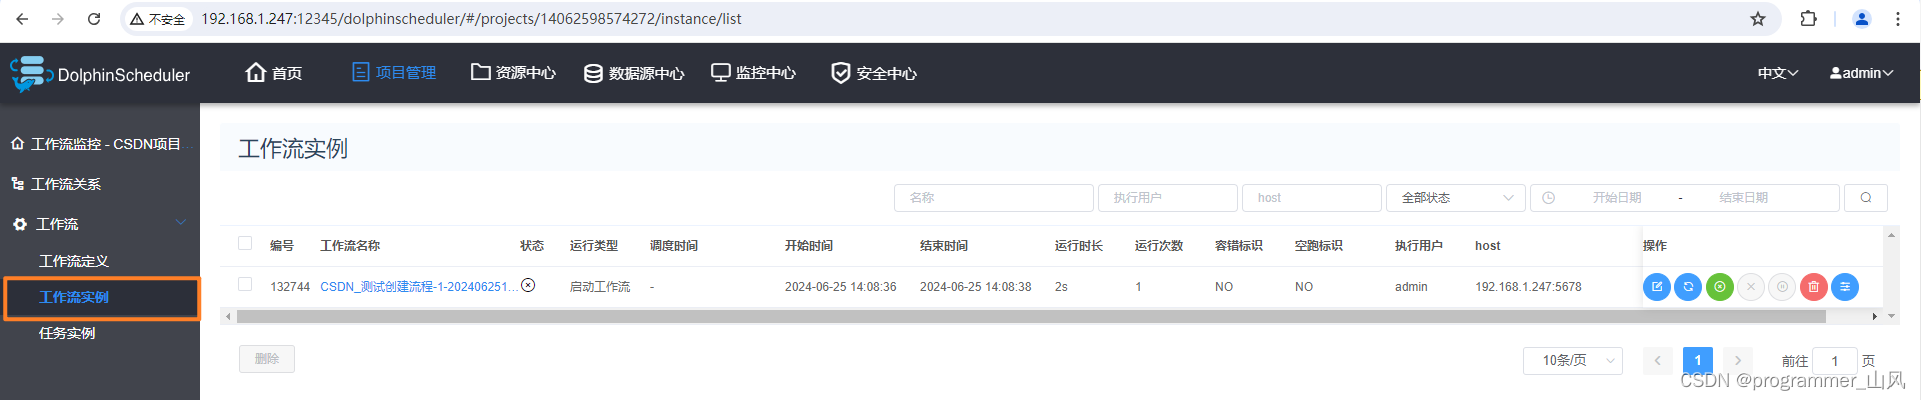
4、运行
查看实例运行状态:
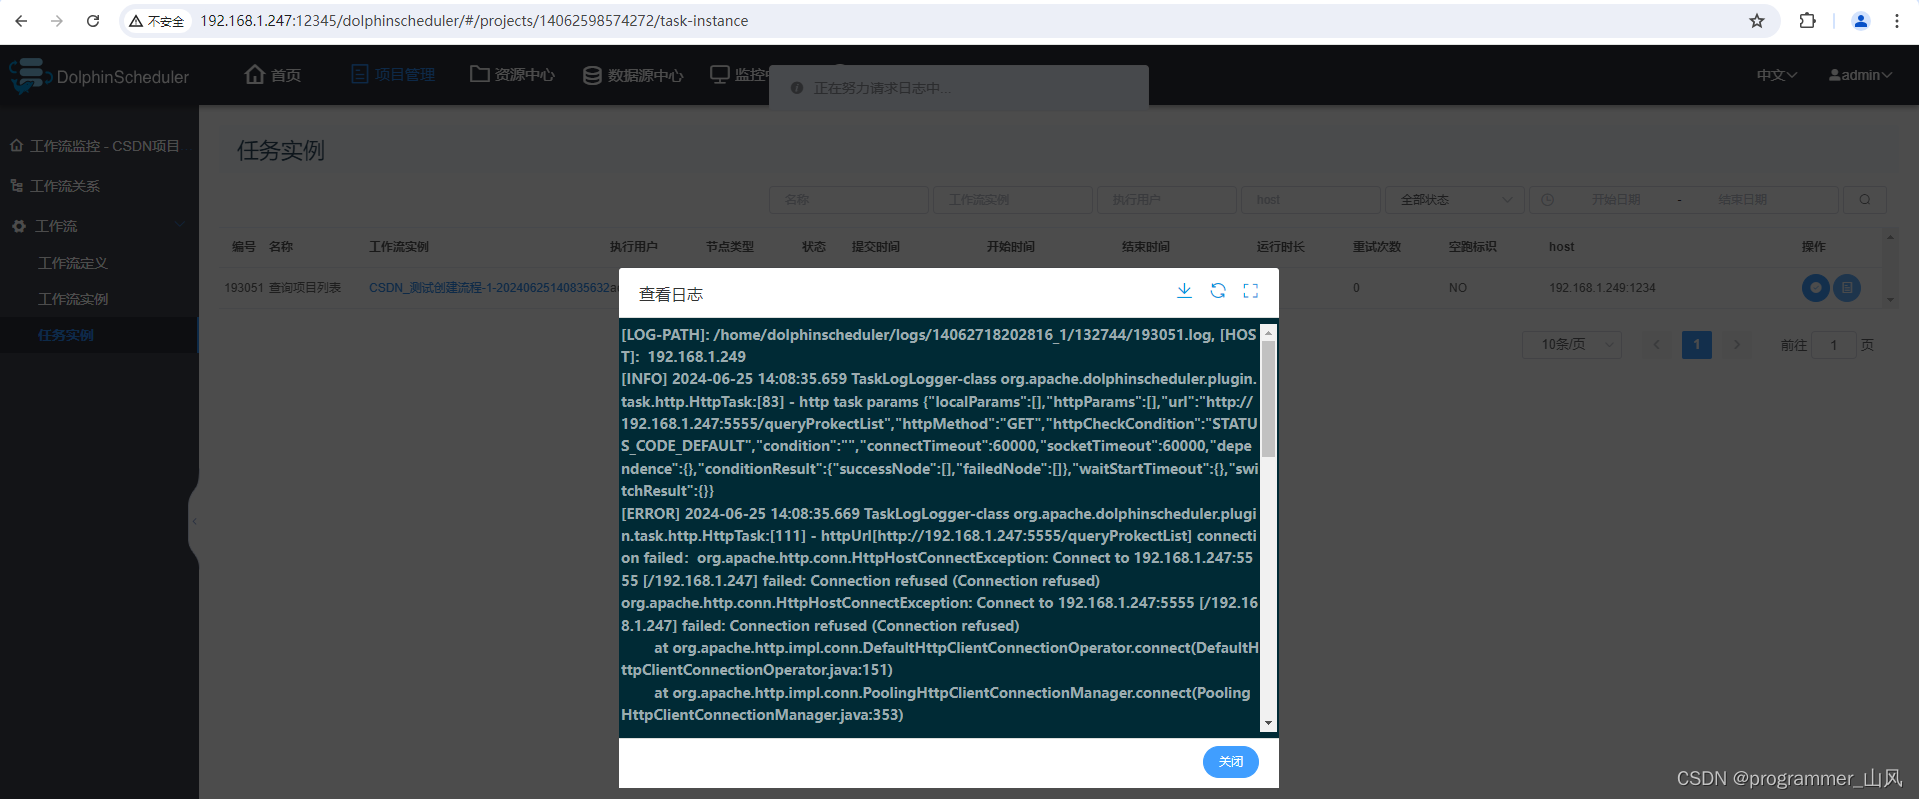
查看运行日志: 
5、为工作流添加定时器
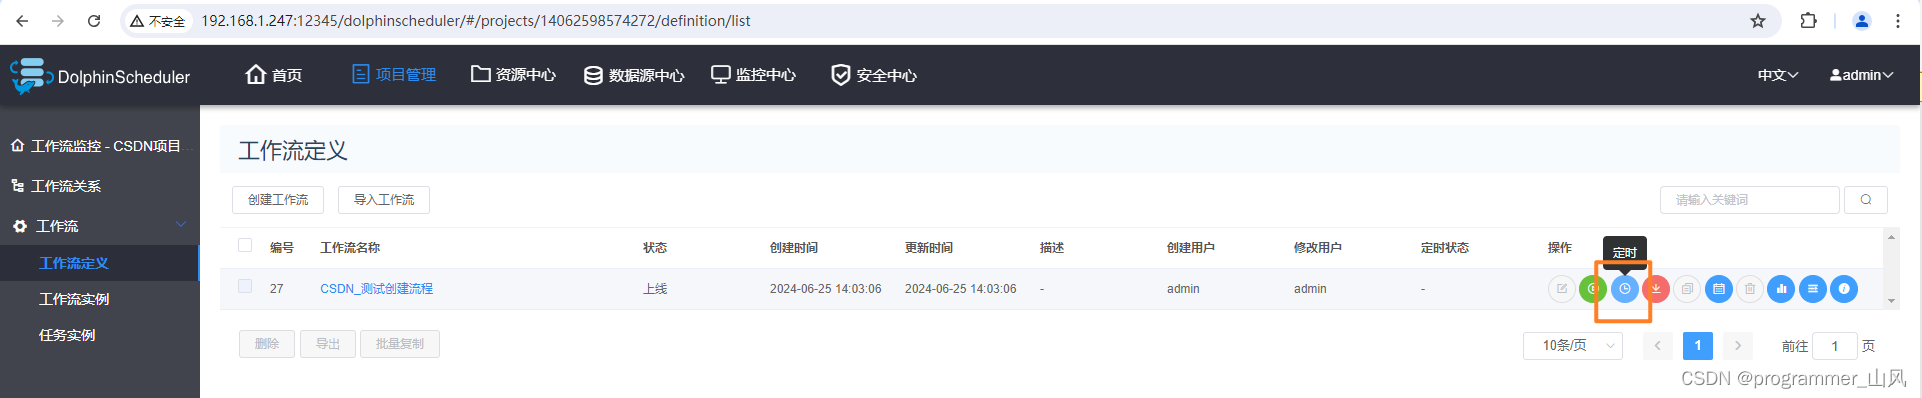
可以自定义 cron 表达式
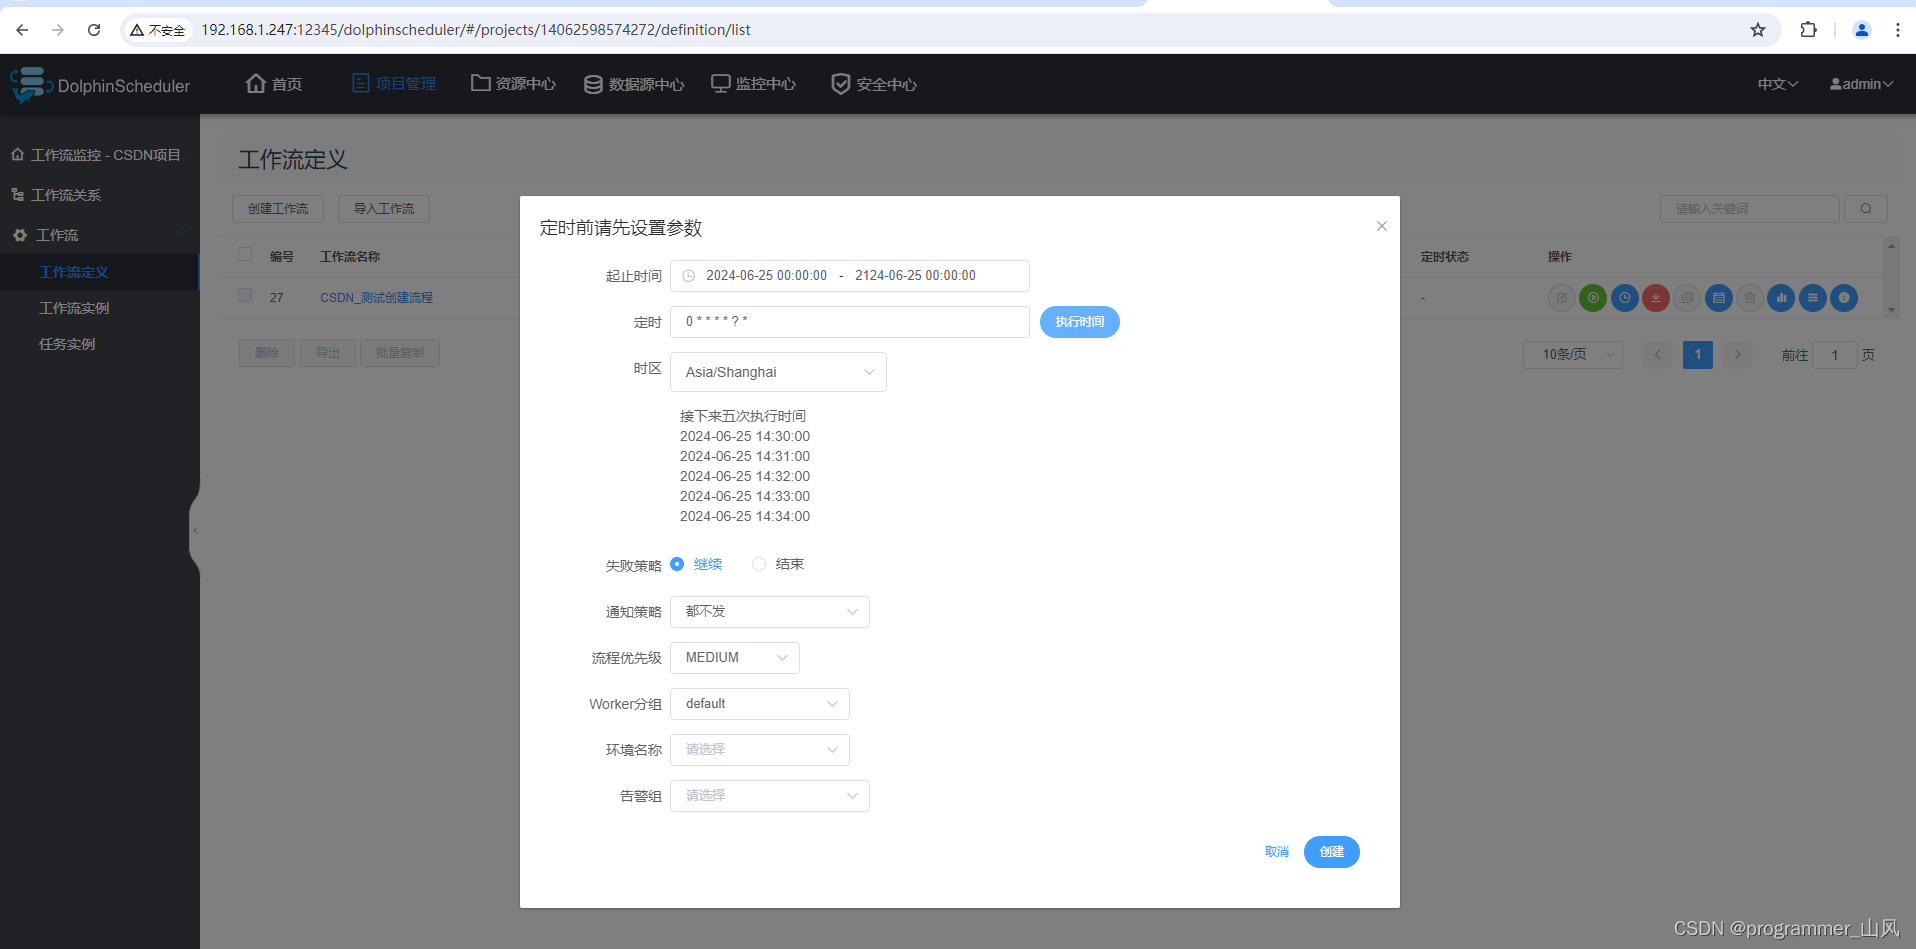
创建之后,定时器处于"下线"状态,要想生效,同样需要"上线"。

在"定时管理"中

三、告警功能(以发送 feishu 为例)
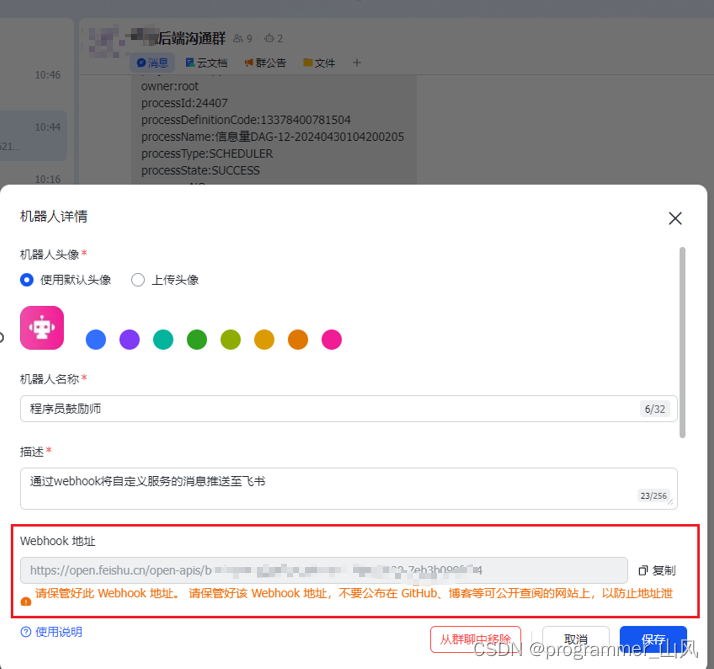
1、在飞书的群中添加通知机器人
2、在DolphinScheduler 中新增告警实例
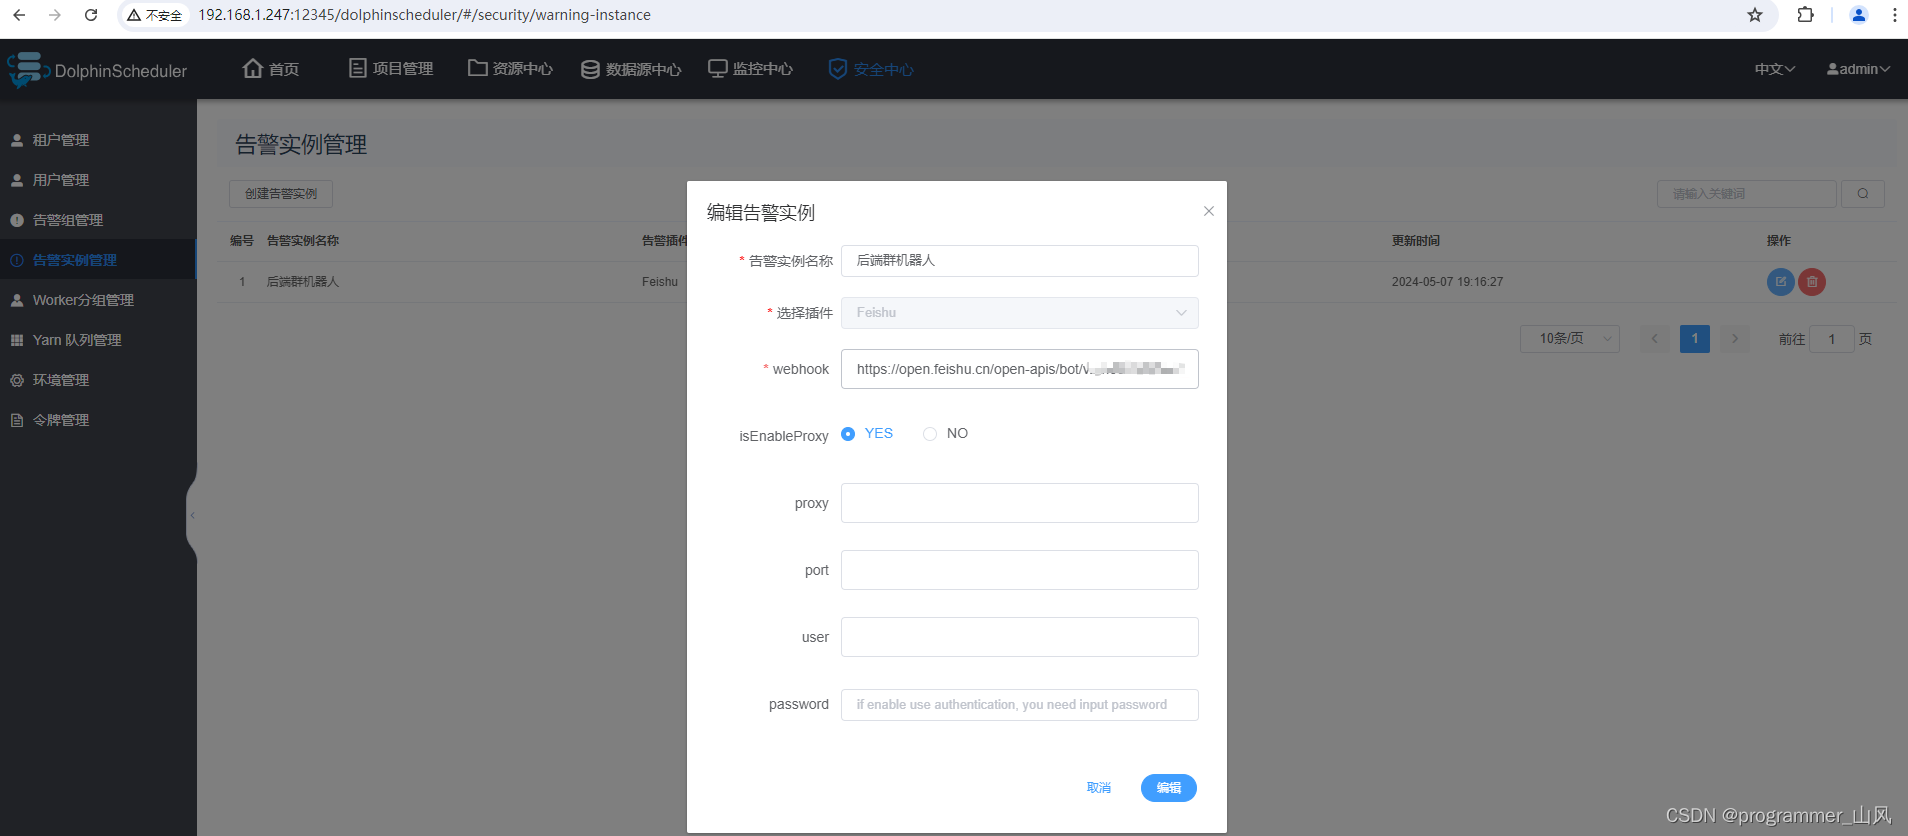
插件选择:Feishu
webhook:粘贴飞书机器人的webhook地址
isEnableProxy:选择No
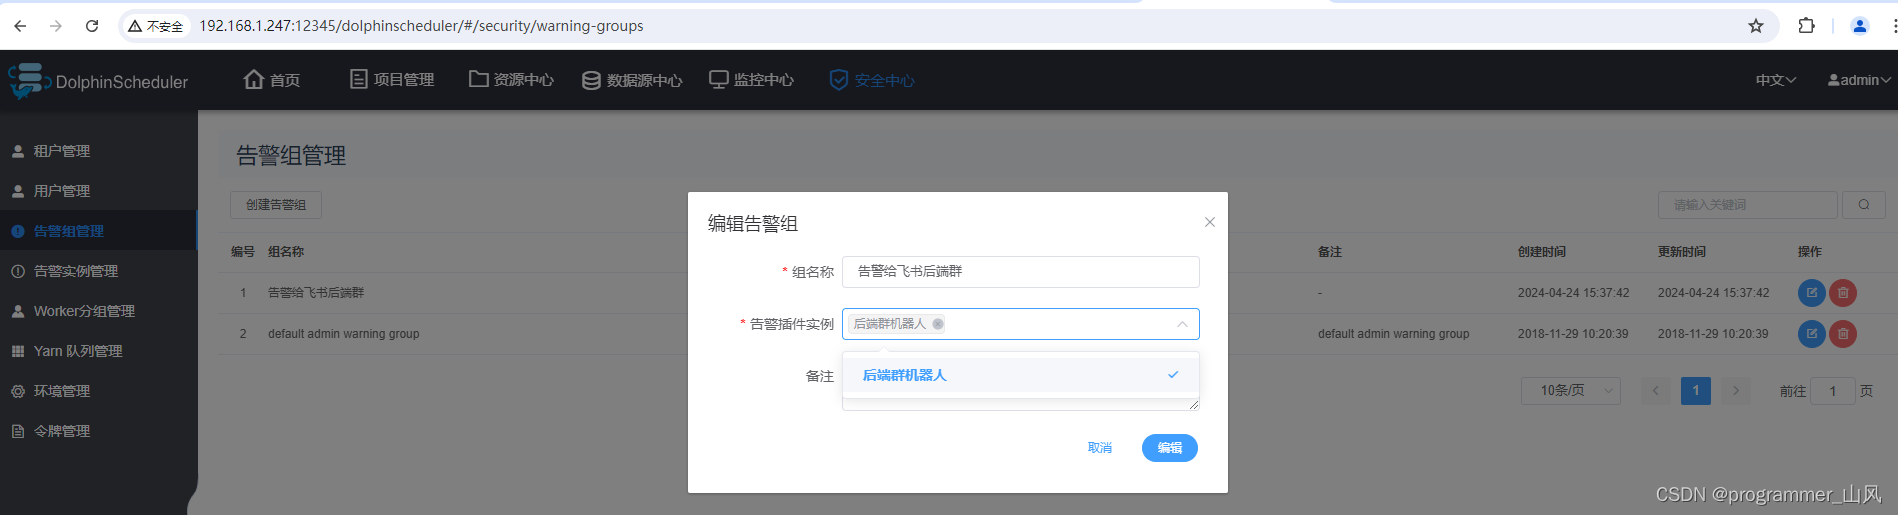
3、创建告警组管理
选择新创建的告警实例
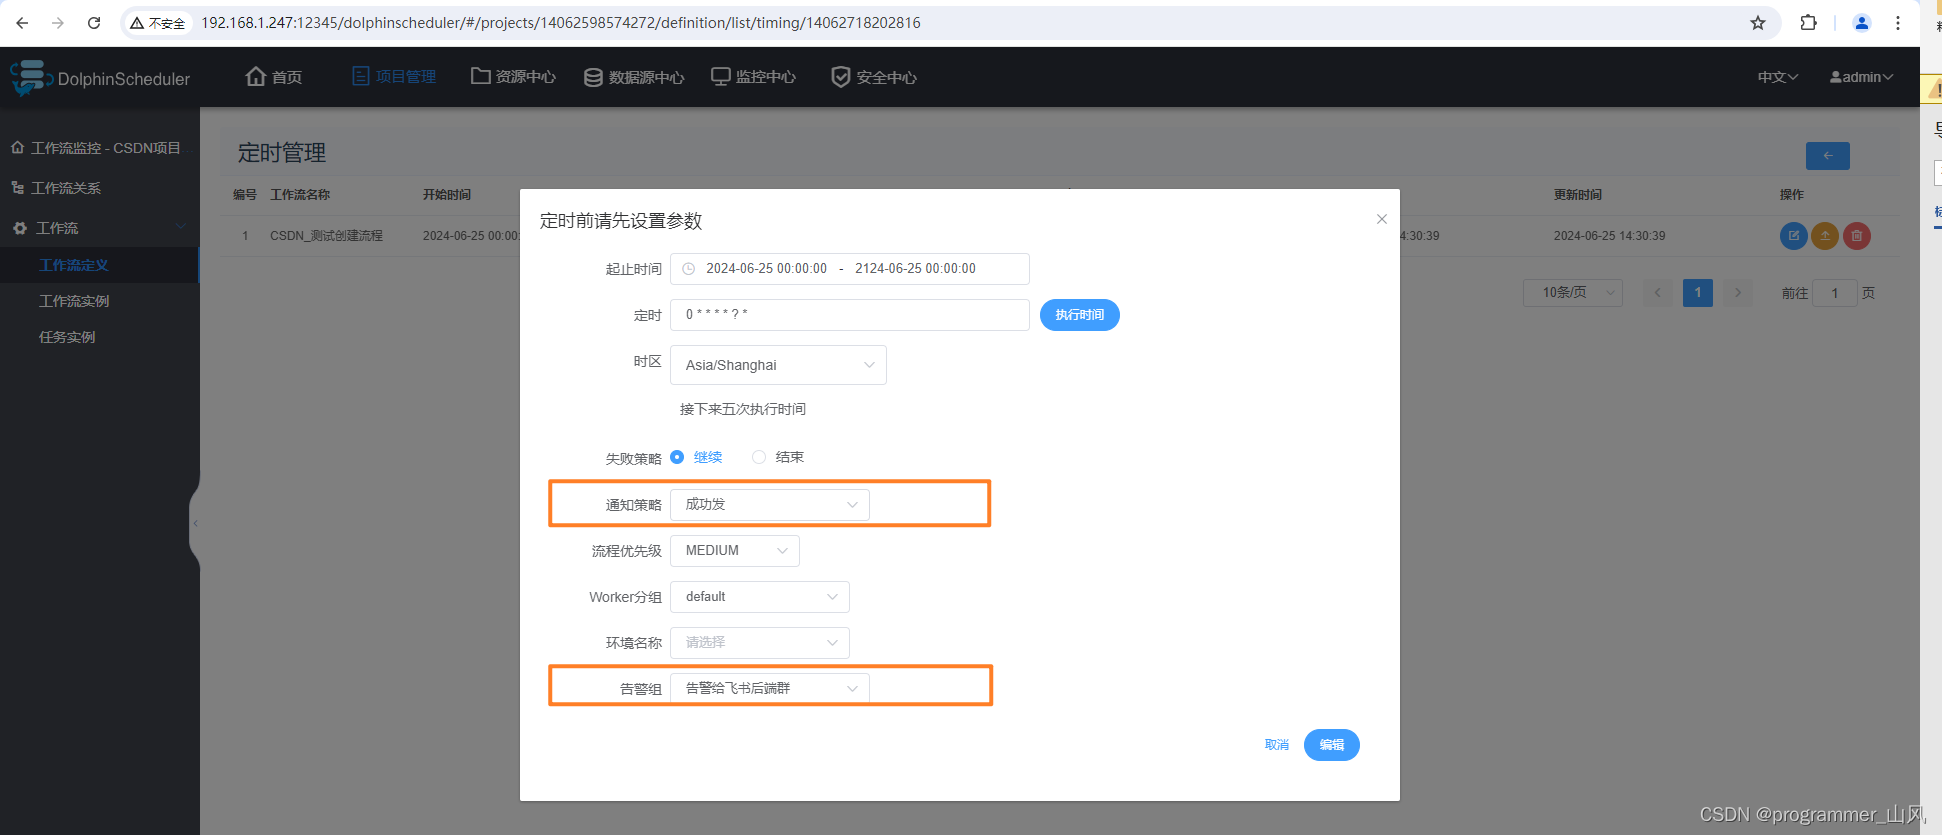
4、为工作流添加告警实例

配置上"通知策略"和"告警组"
主要功能就介绍这几个吧,其他的功能自己操作看看也挺容易掌握的。下一篇我会分享如何将DolphinScheduler 整合到 Spingboot 中,通过调用 API 接口的方式创建工作流。