官方文档:通过用户首选项实现数据持久化
目录标题
使用场景
- Preferences会将该数据缓存在内存中,当用户读取的时候,能够快速从内存中获取数据,当需要持久化时可以使用flush接口将内存中的数据写入持久化文件中。
- Preferences会随着存放的数据量越多而导致应用占用的内存越大,因此,Preferences不适合存放过多的数据,也不支持通过配置加密,适用的场景一般为应用保存用户的个性化设置(字体大小,是否开启夜间模式)等。
第1步:源码
cpp
import { common } from '@kit.AbilityKit';
import dataPreferences from '@ohos.data.preferences';

@Entry
@Component
struct Index {
  @State changeFontSize: number = 16;
  // 上下文
  private context: common.UIAbilityContext = getContext(this) as common.UIAbilityContext
  //1. 获取preference
  private preferencesInstance: dataPreferences.Preferences = dataPreferences.getPreferencesSync(this.context, { name: 'myStore' });

  aboutToAppear(): void {
    //4. 页面打开后,直接从preference中获取上一次的数据
    let result = this.preferencesInstance.getSync("fontSizeKey", 16)
    this.changeFontSize = Number(result)
  }

  build() {
    Column() {
      Row({ space: 10 }) {
        Text('当前进度一览').fontSize(this.changeFontSize)
      }.margin(20)

      Slider({
        value: this.changeFontSize,
        min: 14,
        max: 22,
        step: 2,
        style: SliderStyle.InSet
      })
        .showSteps(true)
        .width('75%')
        .onChange(async (value: number) => {
          this.changeFontSize = value
          //2. 保存数据
          this.preferencesInstance.putSync('fontSizeKey', this.changeFontSize);
          //3. 持久化数据
          this.preferencesInstance.flush()
        })

    }.backgroundColor('#f2f3f5').width('100%').height('100%')
  }
}
第2步:启动模拟器

第3步:启动entry
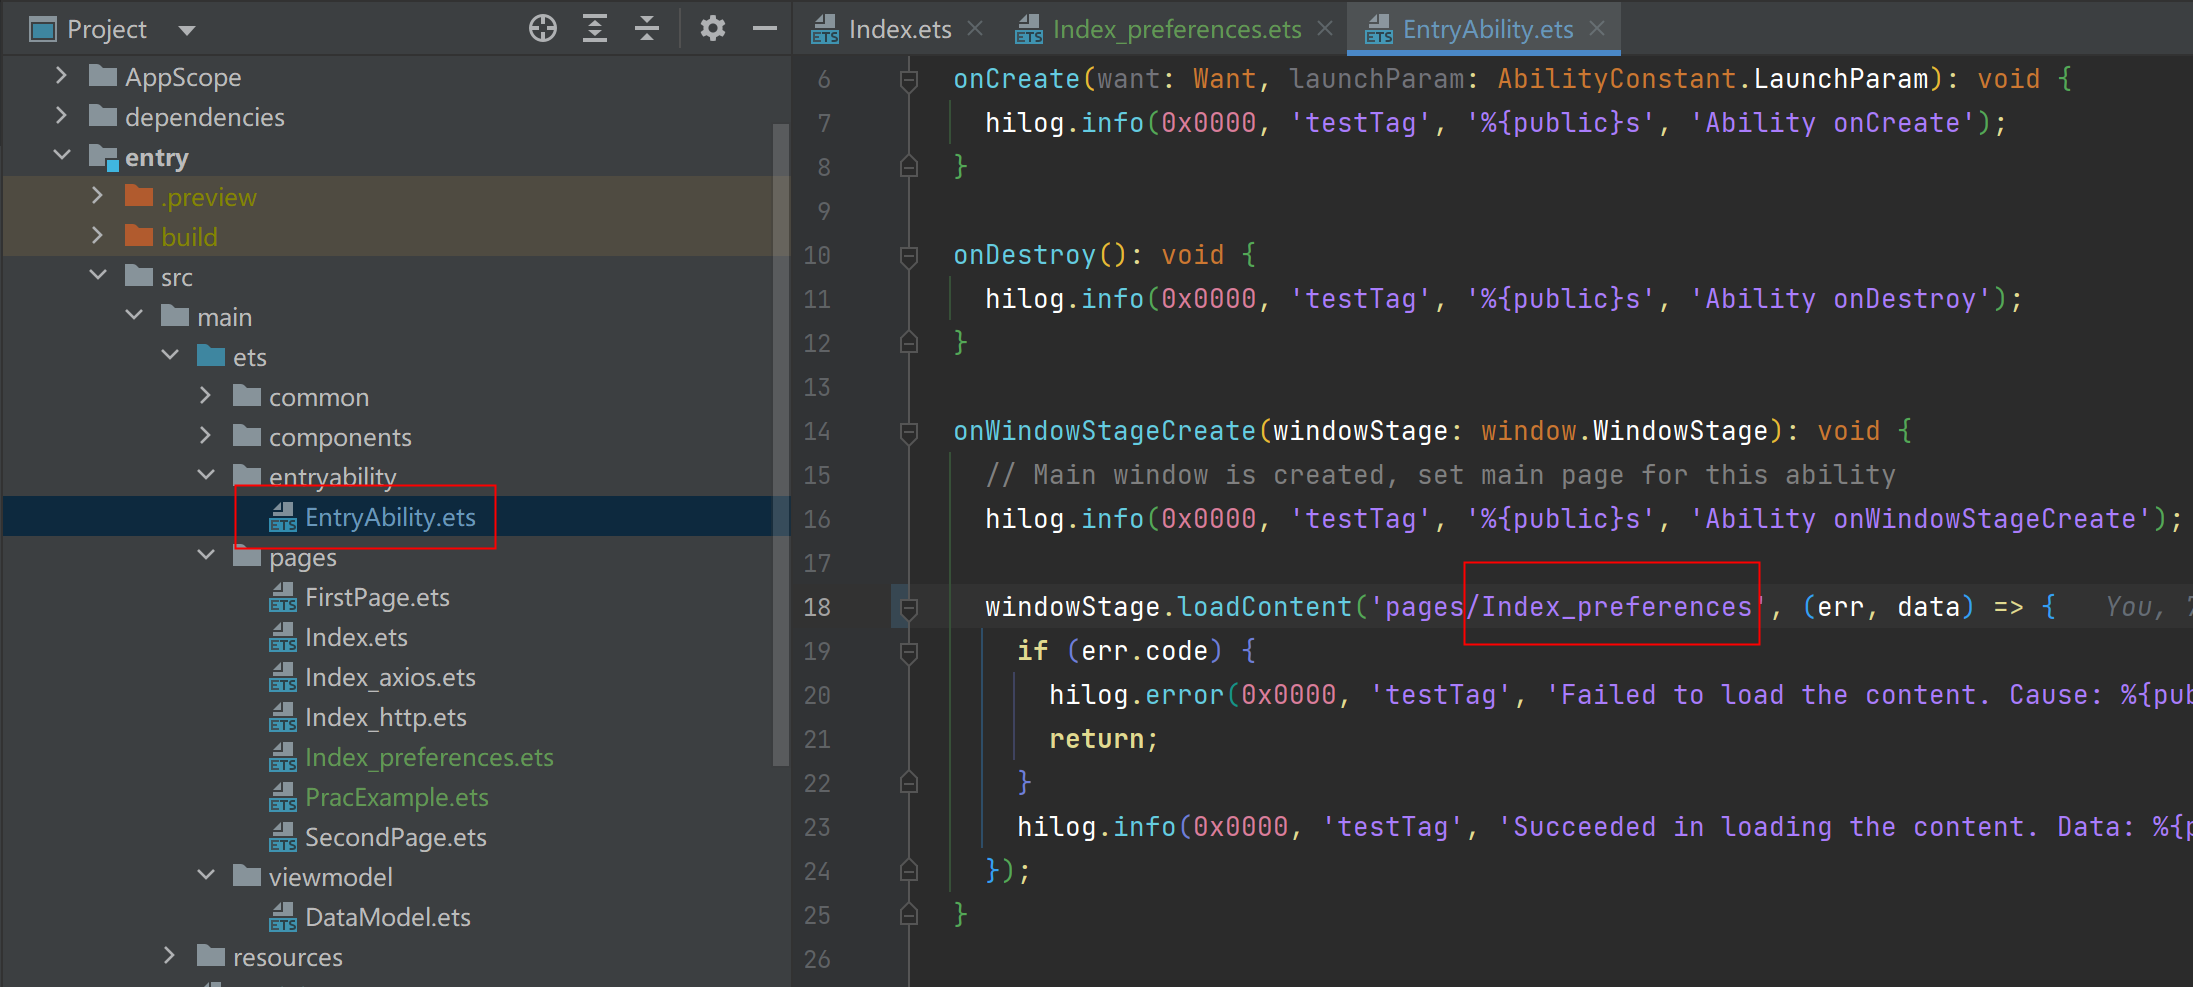
第6步:操作
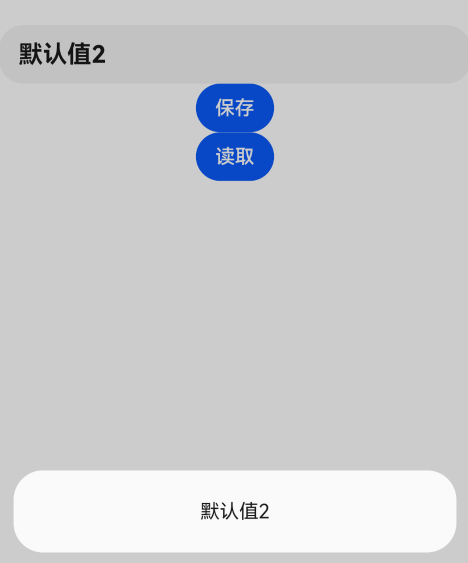
样例2
cpp
import dataPreferences from '@ohos.data.preferences';
import { common } from '@kit.AbilityKit';

@Entry
@Component
struct Index_preferences2 {
  @State message: string = 'Hello World';
  private context:common.UIAbilityContext = getContext(this) as common.UIAbilityContext
  private preferencesInstance: dataPreferences.Preferences =  dataPreferences.getPreferencesSync(this.context, { name: 'myStore' });

  aboutToAppear(): void {
    let result = this.preferencesInstance.getSync("messageKey","默认值1")
    this.message = String(result)
  }

  build() {
    Row() {
      Column() {
        TextInput({text:this.message}).fontSize(20).fontWeight(FontWeight.Bold)
          .onChange((value)=>{
            this.message = value
          })
        Button("保存")
          .onClick(()=>{
            this.preferencesInstance.putSync('message', this.message);
            this.preferencesInstance.flush()
            AlertDialog.show({message:"保存成功"})
          })

        Button("读取").onClick(() => {
          let result = this.preferencesInstance.getSync("messageKey","默认值2")
          this.message = String(result)//获取到的数据不是String,需要转换一下
          AlertDialog.show({message:this.message})
          console.log("test",result)
        })
      }
      .width('100%')
    }
    .height('100%')
  }
}