一个图片标注工具:使用Python和Tkinter
在机器学习和深度学习中,构建高质量的数据集是非常重要的一步。为了帮助标注神经网络训练数据集中的图片,我开发了一个简单而功能强大的图片标注工具,使用了Python编程语言和Tkinter图形用户界面库。
1. 简介
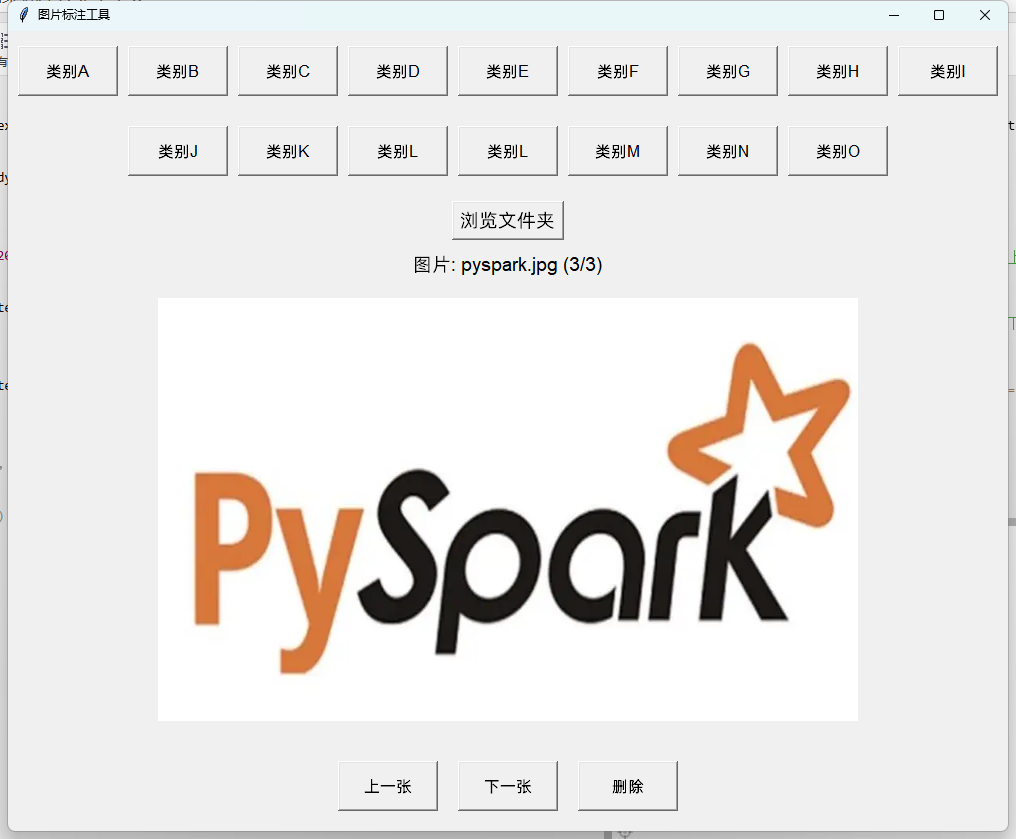
图片标注工具的设计初衷是简化神经网络数据集的标注过程。用户可以通过该工具预览、分类和删除图片,将其分别存储到不同的目录中,以便后续训练和验证模型。
2. 技术栈
- Python: 使用Python作为主要编程语言,利用其丰富的库和工具生态系统。
- Tkinter: Python标准库中的GUI工具包,用于构建用户友好的图形界面。
- PIL: Python Imaging Library,用于图片的加载、显示和处理。
3. 功能特性
图片加载与预览
工具可以从指定的文件夹加载图片,用户可以逐张预览图片。
分类和移动图片
工具支持26种分类选项(如破裂、变形等),用户点击相应的按钮将图片移动到对应的分类目录中。用户还可以选择将图片标记为"管道良好"。
删除图片
工具提供删除功能,用户可以选择删除当前显示的图片,被删除的图片会移动到指定的"删除"目录中。
上一张和下一张图片切换
用户可以通过按钮切换到上一张或下一张图片,方便快速浏览和标注数据集。
4. 代码实现
以下是主要代码:
python
import os
import shutil
import tkinter as tk
from tkinter import filedialog, messagebox
from PIL import Image, ImageTk

# 初始化窗口
root = tk.Tk()
root.title("图片标注工具")
root.geometry("1000x800")

# 全局变量
image_files = []
current_image_index = 0
image_label = None
image_panel = None

# 设置分类目录和删除按钮
categories = ["类别A", "类别B", "类别C", "类别D",
			  "类别E", "类别F", "类别G", "类别H",
			  "类别I", "类别J", "类别K", "类别L",
			  "类别L", "类别M", "类别N", "类别O"
			]
output_dir = r'你的分类文件夹'
delete_dir = r'删除图片文件夹'

if not os.path.exists(output_dir):
    os.makedirs(output_dir)
if not os.path.exists(delete_dir):
    os.makedirs(delete_dir)
for category in categories:
    category_path = os.path.join(output_dir, category)
    if not os.path.exists(category_path):
        os.makedirs(category_path)

# 浏览文件夹按钮
def browse_folder():
    global image_files
    folder_path = filedialog.askdirectory()
    if folder_path:
        image_files = [os.path.join(folder_path, f) for f in os.listdir(folder_path) if f.lower().endswith(('.png', '.jpg', '.jpeg', '.bmp', '.gif'))]
        if image_files:
            load_image(0)
        else:
            messagebox.showinfo("提示", "该文件夹中没有图片文件。")

# 加载图片
def load_image(index):
    global current_image_index, image_label, image_panel
    current_image_index = index
    image_path = image_files[current_image_index]

    img = Image.open(image_path)
    img = img.resize((700, 500), Image.LANCZOS)
    img_tk = ImageTk.PhotoImage(img)

    if image_panel is None:
        image_panel = tk.Label(root, image=img_tk)
        image_panel.image = img_tk
        image_panel.pack(side="top", pady=20)
    else:
        image_panel.config(image=img_tk)
        image_panel.image = img_tk

    image_label.config(text=f"图片: {os.path.basename(image_path)} ({current_image_index + 1}/{len(image_files)})")

# 移动图片
def move_image(category):
    global current_image_index
    src = image_files[current_image_index]
    dst = os.path.join(output_dir, category, os.path.basename(src))
    shutil.move(src, dst)
    update_image_list()

# 删除图片
def delete_image():
    global current_image_index
    src = image_files[current_image_index]
    dst = os.path.join(delete_dir, os.path.basename(src))
    shutil.move(src, dst)
    update_image_list()

# 更新图片列表
def update_image_list():
    global image_files, current_image_index
    del image_files[current_image_index]
    if image_files:
        if current_image_index >= len(image_files):
            current_image_index = len(image_files) - 1
        load_image(current_image_index)
    else:
        image_label.config(text="没有更多的图片。")
        image_panel.config(image='')

# 显示下一张图片
def next_image():
    global current_image_index
    if current_image_index < len(image_files) - 1:
        current_image_index += 1
        load_image(current_image_index)

# 显示上一张图片
def prev_image():
    global current_image_index
    if current_image_index > 0:
        current_image_index -= 1
        load_image(current_image_index)

# 设置GUI布局
button_frame1 = tk.Frame(root)
button_frame1.pack(side="top", pady=10)

button_frame2 = tk.Frame(root)
button_frame2.pack(side="top", pady=10)

browse_button = tk.Button(root, text="浏览文件夹", command=browse_folder, font=("Helvetica", 14))
browse_button.pack(side="top", pady=10)

image_label = tk.Label(root, text="", font=("Helvetica", 14))
image_label.pack(side="top")

# 将按钮分成两排
half = len(categories) // 2 + 1

for category in categories[:half]:
    button = tk.Button(button_frame1, text=category, command=lambda c=category: move_image(c), font=("Helvetica", 12), width=10, height=2)
    button.pack(side="left", padx=5, pady=5)

for category in categories[half:]:
    button = tk.Button(button_frame2, text=category, command=lambda c=category: move_image(c), font=("Helvetica", 12), width=10, height=2)
    button.pack(side="left", padx=5, pady=5)

control_frame = tk.Frame(root)
control_frame.pack(side="bottom", pady=20)

prev_button = tk.Button(control_frame, text="上一张", command=prev_image, font=("Helvetica", 12), width=10, height=2)
prev_button.pack(side="left", padx=10)

next_button = tk.Button(control_frame, text="下一张", command=next_image, font=("Helvetica", 12), width=10, height=2)
next_button.pack(side="left", padx=10)

delete_button = tk.Button(control_frame, text="删除", command=delete_image, font=("Helvetica", 12), width=10, height=2)
delete_button.pack(side="left", padx=10)

# 运行主循环
root.mainloop()
示例: