前言
在WPF中使用导航功能可以使用Frame控件,这是比较基础的一种方法。前几天分享了wpfui中NavigationView的基本用法,但是如果真正在项目中使用起来,基础的用法是无法满足的。今天通过wpfui中的mvvm例子来说明在wpfui中如何通过依赖注入与MVVM模式使用导航功能。实践起来,我个人觉得这个例子中实现导航功能还是有点麻烦的,但我也不知道怎么能更优雅,也是学到了一些东西吧。
wpfui中MVVM例子的地址在:https://github.com/lepoco/wpfui/tree/main/src/Wpf.Ui.Demo.Mvvm
实现效果如下所示:
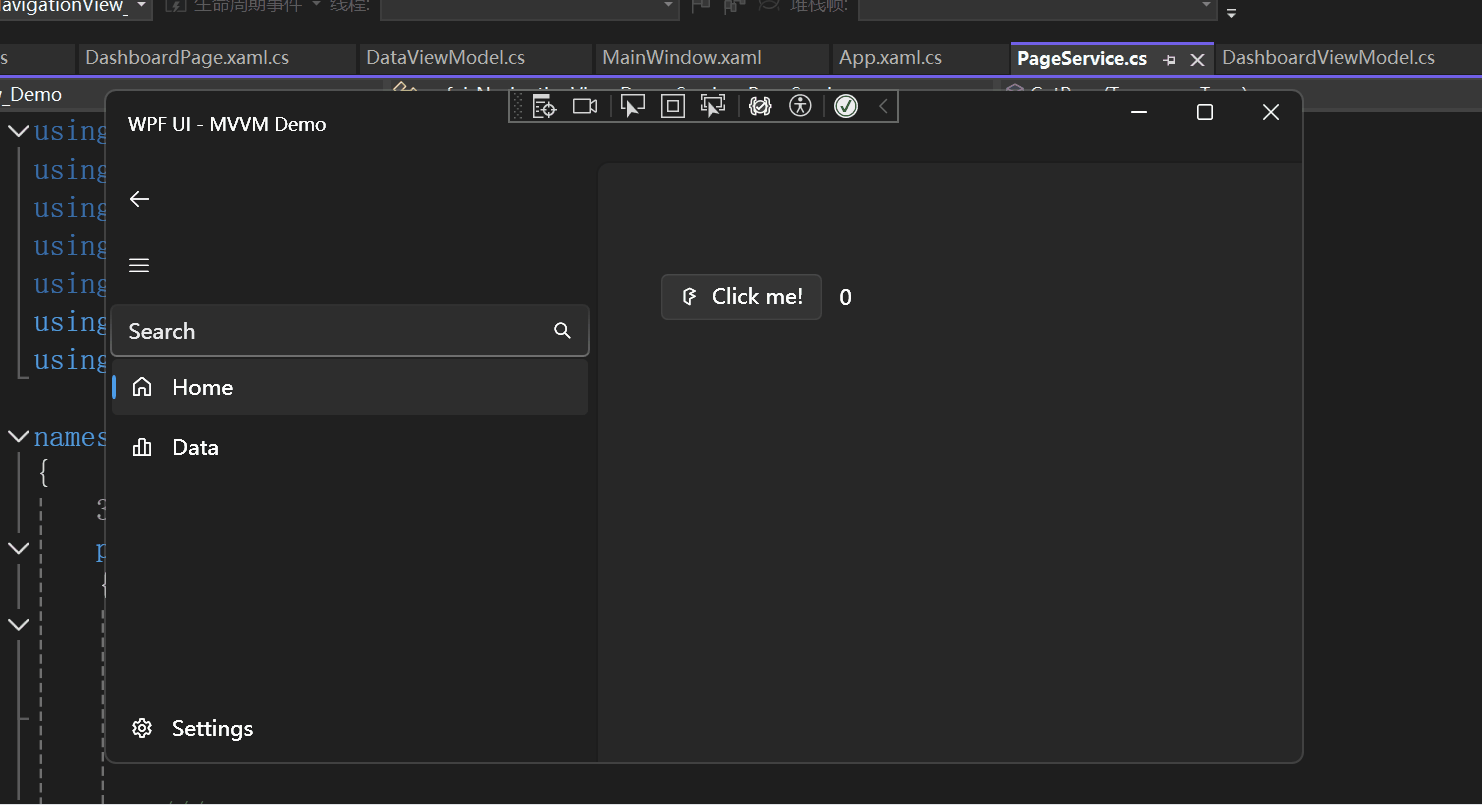
如果你对此感兴趣,可以继续阅读。
实践
使用依赖注入
将主窗体与主窗体的ViewModel与每个页面与每个页面的ViewModel都存入依赖注入容器中:

当然不只是窗体页面与ViewModel,也需要注册一些服务。
为了实现导航功能,使用了两个服务分别是NavigationService与PageService。
NavigationService在wpfui库中已经自带了,直接使用即可:
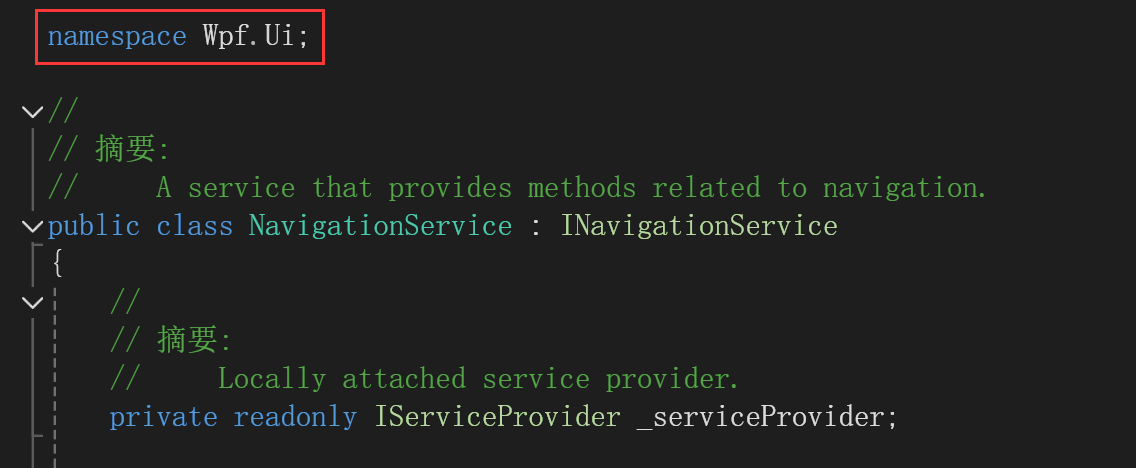
具体代码可自行研究,这里就不放了。
而PageService在wpfui中没有自带,需要自己定义,MVVM例子中的定义如下所示:
csharp
 public class PageService : IPageService
 {
     /// <summary>
     /// Service which provides the instances of pages.
     /// </summary>
     private readonly IServiceProvider _serviceProvider;

     /// <summary>
     /// Initializes a new instance of the <see cref="PageService"/> class and attaches the <see cref="IServiceProvider"/>.
     /// </summary>
     public PageService(IServiceProvider serviceProvider)
     {
         _serviceProvider = serviceProvider;
     }

     /// <inheritdoc />
     public T? GetPage<T>()
         where T : class
     {
         if (!typeof(FrameworkElement).IsAssignableFrom(typeof(T)))
         {
             throw new InvalidOperationException("The page should be a WPF control.");
         }

         return (T?)_serviceProvider.GetService(typeof(T));
     }

     /// <inheritdoc />
     public FrameworkElement? GetPage(Type pageType)
     {
         if (!typeof(FrameworkElement).IsAssignableFrom(pageType))
         {
             throw new InvalidOperationException("The page should be a WPF control.");
         }

         return _serviceProvider.GetService(pageType) as FrameworkElement;
     }
 }
现在已经将所有窗体、页面、ViewModels与相关服务都注册到容器中了。
ViewModel
在MainWindowViewModel中将页面存入一个属性中:

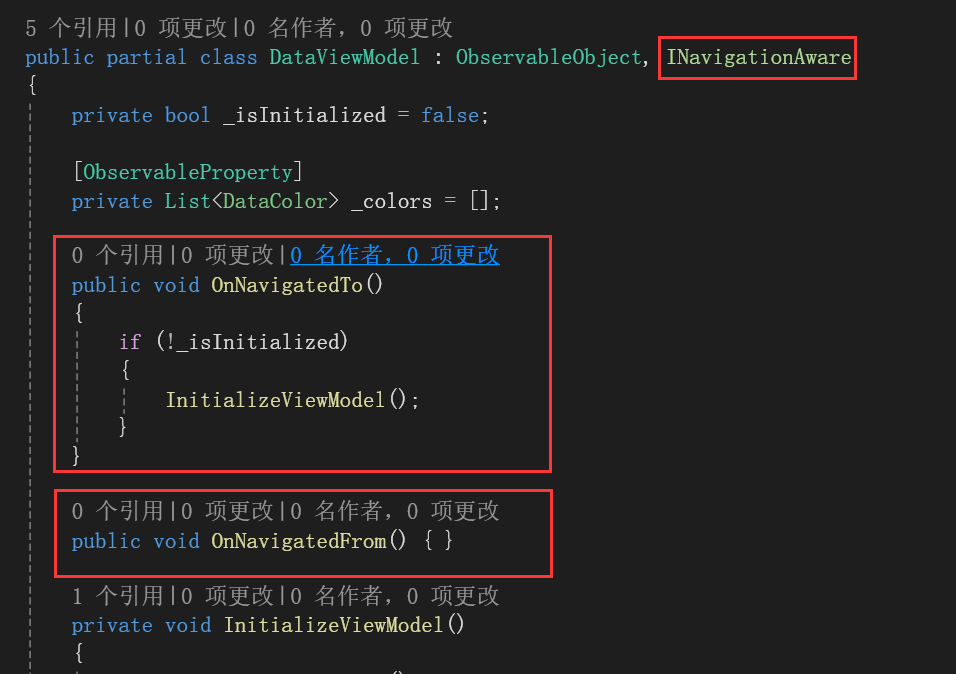
在非首页的ViewModel中实现INavigationAware接口:
View
MainWindow.cs如下所示:
csharp
 public partial class MainWindow : INavigationWindow
 {
     public ViewModels.MainWindowViewModel ViewModel { get; }

     public MainWindow(
         ViewModels.MainWindowViewModel viewModel,
         IPageService pageService,
         INavigationService navigationService
     )
     {
         ViewModel = viewModel;
         DataContext = this;

         Wpf.Ui.Appearance.SystemThemeWatcher.Watch(this);

         InitializeComponent();
         SetPageService(pageService);

         navigationService.SetNavigationControl(RootNavigation);
     }

     public INavigationView GetNavigation() => RootNavigation;

     public bool Navigate(Type pageType) => RootNavigation.Navigate(pageType);

     public void SetPageService(IPageService pageService) => RootNavigation.SetPageService(pageService);

     public void ShowWindow() => Show();

     public void CloseWindow() => Close();

     /// <summary>
     /// Raises the closed event.
     /// </summary>
     protected override void OnClosed(EventArgs e)
     {
         base.OnClosed(e);

         // Make sure that closing this window will begin the process of closing the application.
         Application.Current.Shutdown();
     }

     INavigationView INavigationWindow.GetNavigation()
     {
         throw new NotImplementedException();
     }

     public void SetServiceProvider(IServiceProvider serviceProvider)
     {
         throw new NotImplementedException();
     }
 }
首先实现了INavigationWindow接口。在构造函数中注入所需的依赖类。注意这里的RootNavigation其实就是页面中NavigationView的名称:
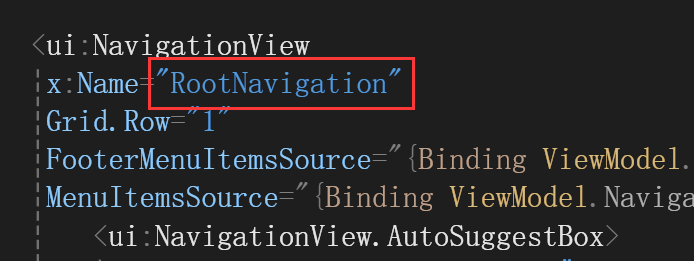
刚开始看这里没注意到,卡壳了很久。
因为你在代码中查看定义,它会转到这个地方:
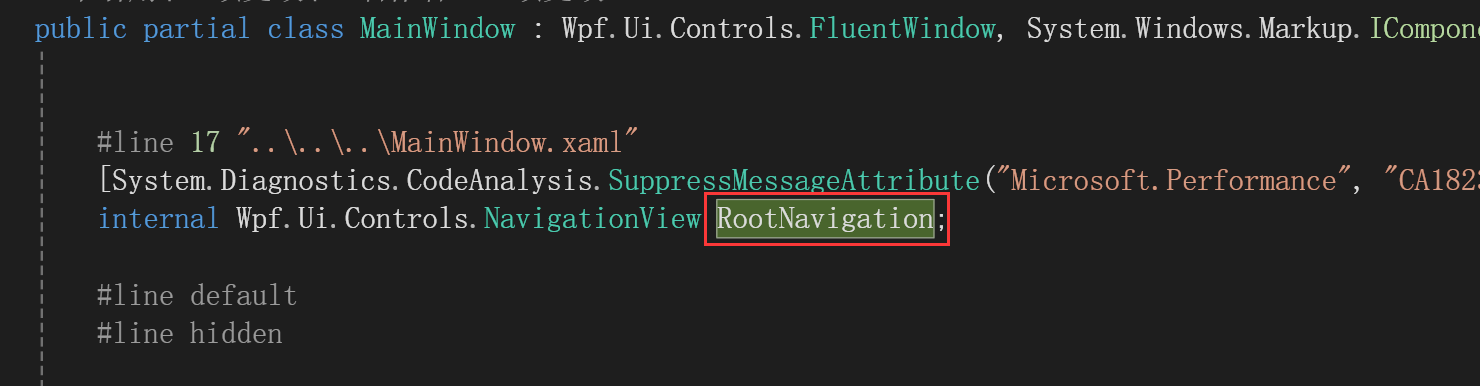
没经验不知道是什么,但是这次过后,知道这是在Xaml中定义,由工具自动生成的代码了。
其他的页面改成了这样的写法:
csharp
 public partial class DashboardPage : INavigableView<DashboardViewModel>
 {
     public DashboardViewModel ViewModel { get; }
     public DashboardPage(DashboardViewModel  viewModel)
     {
         ViewModel = viewModel;
         this.DataContext = this;
         InitializeComponent();
     }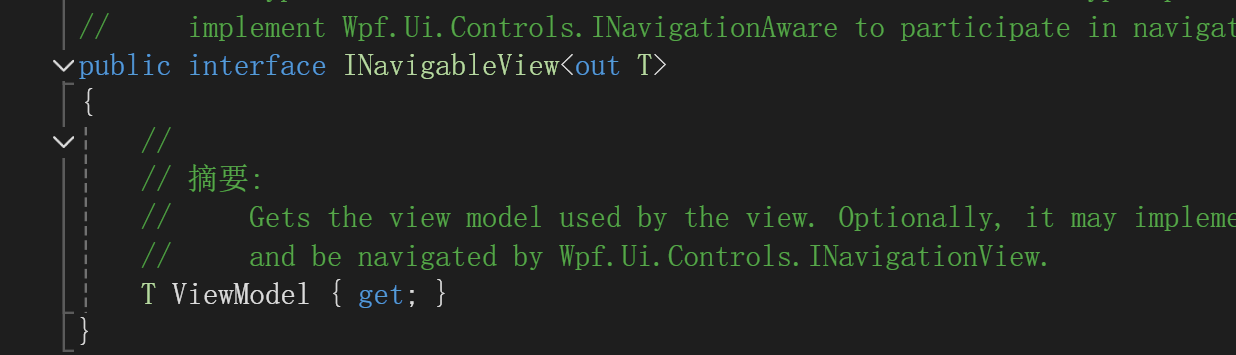
}都实现了INavigableView<out T>接口:
显示主窗体与主页面
现在准备工作都做好了,下一步就是显示主窗体与主页面了。
在容器中我们也注入了这个:
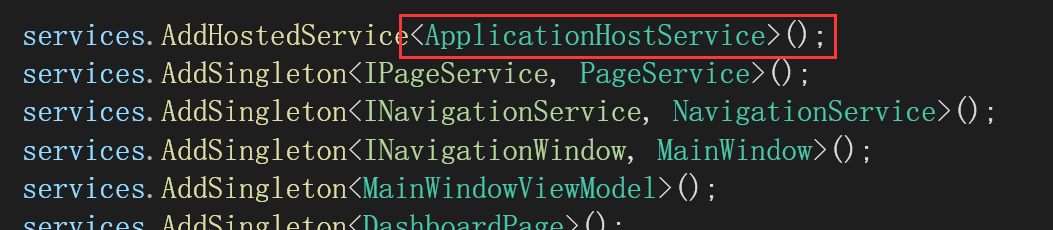
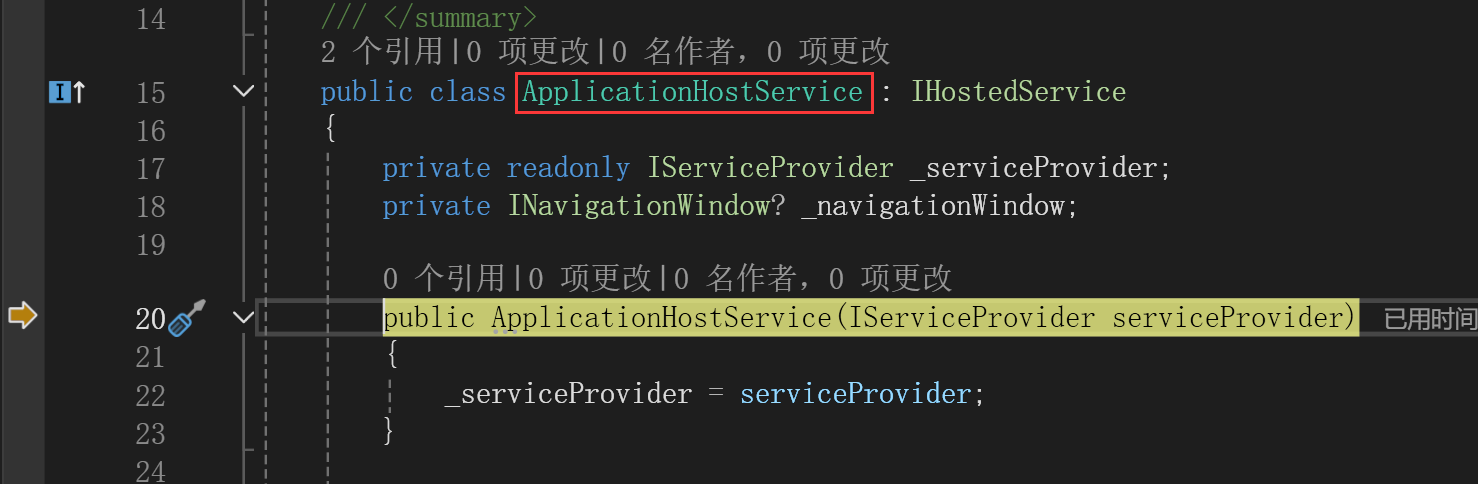
ApplicationHostService如下所示:
csharp
/// <summary>
/// Managed host of the application.
/// </summary>
public class ApplicationHostService : IHostedService
{
private readonly IServiceProvider _serviceProvider;
private INavigationWindow? _navigationWindow;
public ApplicationHostService(IServiceProvider serviceProvider)
{
_serviceProvider = serviceProvider;
}
/// <summary>
/// Triggered when the application host is ready to start the service.
/// </summary>
/// <param name="cancellationToken">Indicates that the start process has been aborted.</param>
public async Task StartAsync(CancellationToken cancellationToken)
{
await HandleActivationAsync();
}
/// <summary>
/// Triggered when the application host is performing a graceful shutdown.
/// </summary>
/// <param name="cancellationToken">Indicates that the shutdown process should no longer be graceful.</param>
public async Task StopAsync(CancellationToken cancellationToken)
{
await Task.CompletedTask;
}
/// <summary>
/// Creates main window during activation.
/// </summary>
private async Task HandleActivationAsync()
{
await Task.CompletedTask;
if (!System.Windows.Application.Current.Windows.OfType<MainWindow>().Any())
{
_navigationWindow = (
_serviceProvider.GetService(typeof(INavigationWindow)) as INavigationWindow
)!;
_navigationWindow!.ShowWindow();
_ = _navigationWindow.Navigate(typeof(DashboardPage));
}
await Task.CompletedTask;
}
}
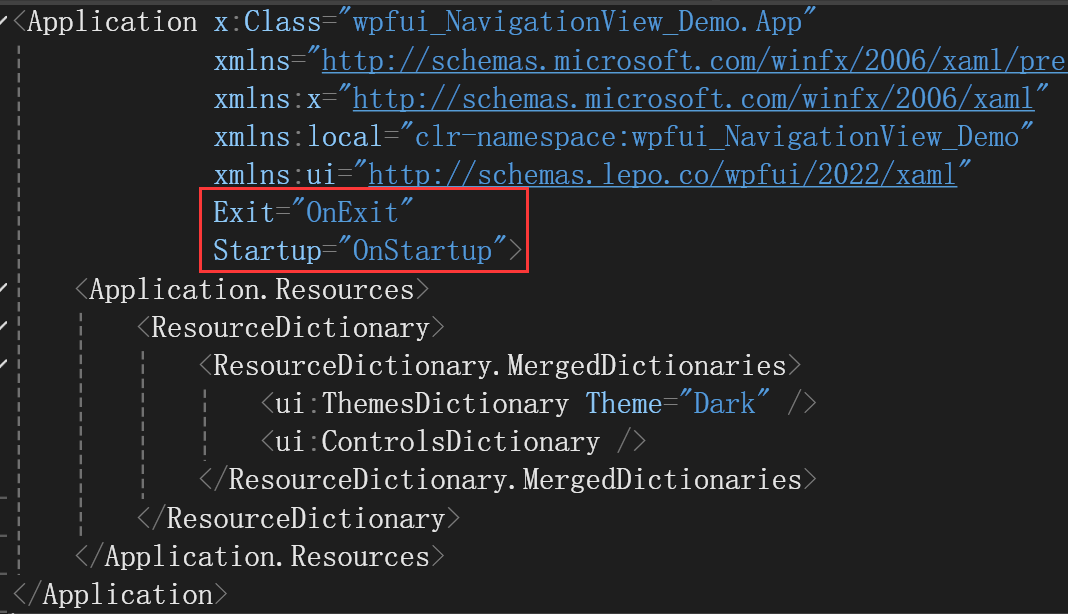
}在app.xaml中定义了程序启动与退出事件的处理程序:
csharp
/// <summary>
/// Occurs when the application is loading.
/// </summary>
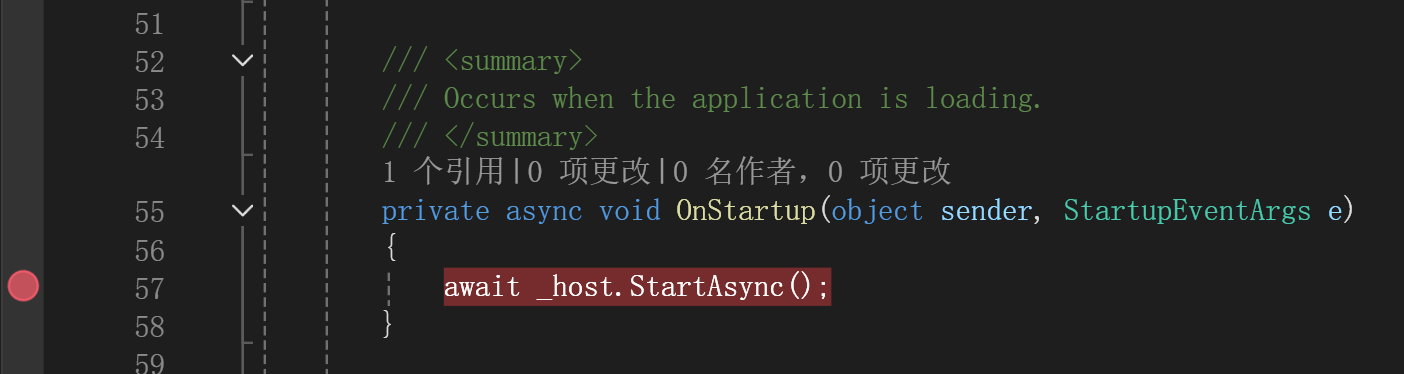
private async void OnStartup(object sender, StartupEventArgs e)
{
await _host.StartAsync();
}
/// <summary>
/// Occurs when the application is closing.
/// </summary>
private async void OnExit(object sender, ExitEventArgs e)
{
await _host.StopAsync();
_host.Dispose();
}整个过程回顾
在OnStartup方法中打个断点,理解这个过程:
点击下一步:
到ApplicationHostService中了,一步一步调试,注意这个地方:
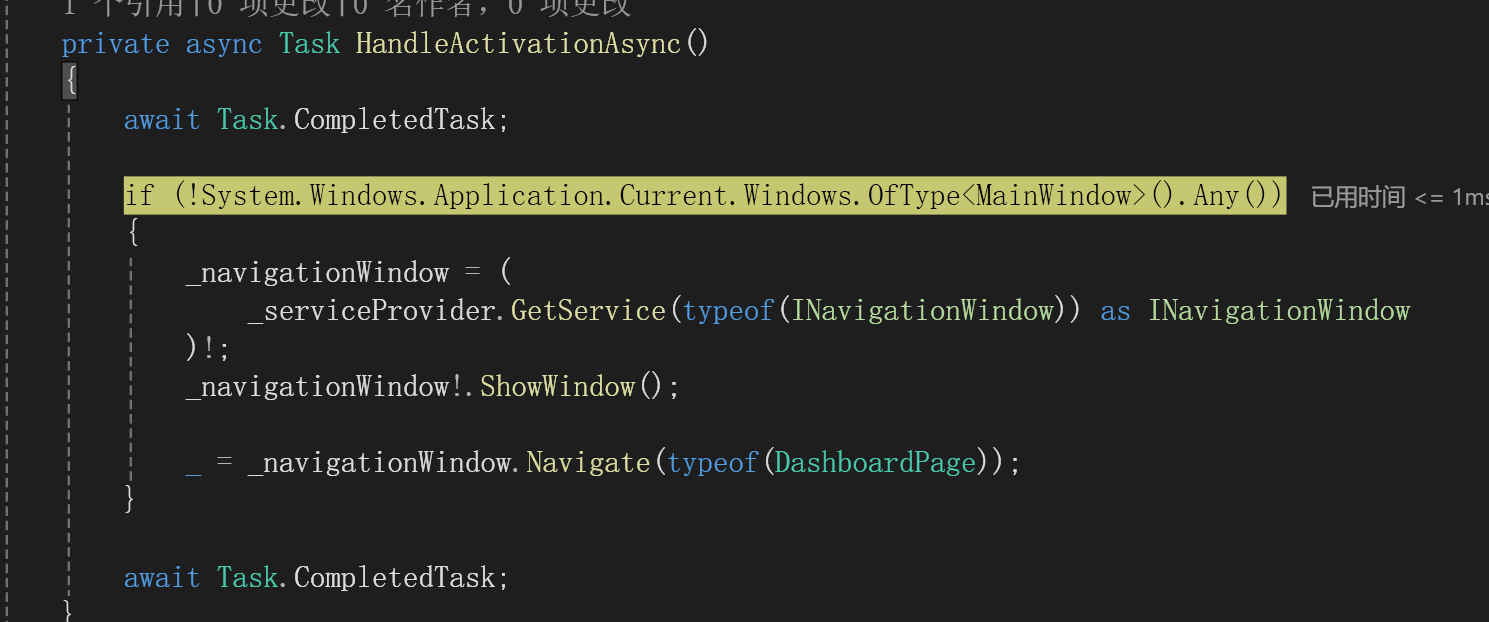
因为主窗体实现了INavigationWindow接口,这里获取了主窗体并将主窗体显示,然后调用主窗体中的Navigate方法,导航到DashPage页面,之后点继续,结果如下所示:

最后
以上就是自己最近学习wpfui中导航功能实现的笔记,在自己的项目中也成功使用,对于可能会经常修改代码增加功能的程序这样做感觉挺好的,但是如果你只是使用WPF做一个简单的小工具,感觉这样做增加了复杂度,不用依赖注入,不用做这么复杂的导航,甚至不使用MVVM模式都可以。