Microsoft Edge WebView2
Microsoft Edge WebView2 控件允许在本机应用中嵌入 web 技术(HTML、CSS 以及 JavaScript )。 WebView2 控件使用 Microsoft Edge 作为绘制引擎,以在本机应用中显示 web 内容。
使用 WebView2 可以在本机应用的不同部分嵌入 Web 代码,或在单个 WebView2 实例中生成所有本机应用。
现在使用混合技术开发桌面客户端已经变得越来越常见了,如网易云音乐、QQ音乐等,因为可以嵌入现有的网页端页面,开发成本是比较低的,而且还可以实现跨平台。
使用混合技术开发的桌面客户端占用资源相对较多,反应速度也会慢点,如果需要对操作系统有较多的功能交互,推荐使用原生API开发。
WebView2 已经出来好几年了,我一直没怎么使用过,前面一直使用的是CEFSharp ,CEF 是基于Google Chromium 项目的开源Web browser控件,和CEFSharp 一样,WebView2 也支持winform 和wpf。
简单来说,WebView2 就是一个浏览器控件,类似WPF 里自带的WebBrowser ,只是WebView2 的内核Chrome ,WebBrowser 的内核是IE ,而且WebView2提供的可编程接口更多。
对于桌面开发开说,我们可以使用WebView2来实现以下功能
1、爬虫
对于动态网页,可以嵌入WebView2来进行抓取。
2、自制浏览器
使用WebView2可以自己开发简单的浏览器
3、嵌入本地网页
有时候要展示一些简单的网页内容,如报告、图表等,都可以使用WebView2进行加载显示
4、开发混合应用
借助WebView2的本机和Web互操作功能,开发混合应用,例如:网易云音乐。
最近我们有一个需求是需要绘制大量的图表,使用WPF的免费控件都不能很好的满足需求,后面就选择使用Echarts(Echarts是一款基于JavaScript的数据可视化图表库,提供直观,生动,可交互,可个性化定制的数据可视化图表),然后嵌入网页到WPF中来实现。
本来是准备使用CEF的,同事在前期使用了WebView2 ,所以就继续使用WebView2。
这里我写篇文章做个记录,以便以后需要时查看。注意:本文仅介绍了WebView2中的常用功能,全部功能的使用和介绍可以访问WebView2的官方文档。
WebView2的优点
-
本机功能。 访问完整的本机 API 集。
-
代码共享。 向代码库添加 web 代码可以增加跨多个平台的重用。
-
Microsoft 支持。 Microsoft 在受支持的平台上提供支持并添加新功能请求。
-
定期发布更新和安全修补的最新版 Chromium。
-
已修复版本分布。 也可以在应用中打包特定版本的 Chromium 位。
-
支持Windows10/11
WebView2支持的平台
编程语言
操作系统
- Windows 11
- Windows 10
- Windows 10 IoT Enterprise LTSC x32 2019
- Windows 10 IoT Enterprise LTSC x64 2019
- Windows 10 IoT Enterprise 21h1 x64
- Windows Server 2022
- Windows Server 2019
- Windows Server 2016
安装WebView2运行时
如果电脑中没有安装新版本Microsoft Edge(基于Chrome内核),就需要安装WebView2运行时。
分发应用时,最好带上WebView2运行时的安装包,因为不确定用户电脑上是否会有WebView2运行时。
下载地址:
https://go.microsoft.com/fwlink/p/?LinkId=2124703
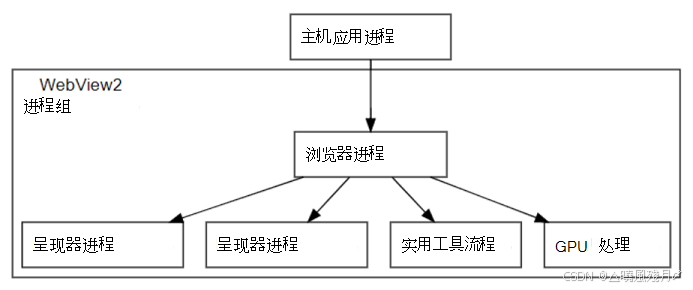
WebView2 运行时中的进程
WebView2 进程组 是 WebView2 运行时进程的集合。 WebView2 进程组包括以下内容:
- 单个浏览器进程。
- 一个或多个呈现器进程。
- 其他帮助程序进程,例如 GPU 进程和音频服务进程。
WebView2 进程组中的进程数和状态可能会随着 WebView2 应用程序使用 WebView2 功能而更改。 (但是,WebView2 进程组中只有一个特定的浏览器进程。) 例如,从同 CoreWebView2Environment一个 创建新的 WebView2 实例,但属性中 Source 具有不同的域,通常会启动新的呈现器进程。
呈现器进程的数量可能因以下条件而异:
-
在 WebView2 运行时中使用 站点隔离 功能。
-
在使用相同用户数据文件夹的 WebView2 实例中呈现的不同断开连接源的数目。
控制何时创建这些额外进程的逻辑取决于Chromium体系结构,并且超出了 WebView2 运行时的范围。
WebView2 运行时进程和用户数据文件夹
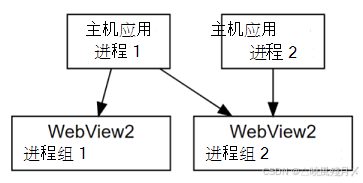
WebView2 运行时进程集合中的所有进程都与浏览器进程相关联,浏览器进程又与单个用户数据文件夹相关联。 如果应用程序使用多个用户数据文件夹,将为其中每个用户数据文件夹创建一组 WebView2 运行时进程。
用户数据文件夹可由多个应用程序共享,但请务必考虑对性能和管理的影响,如 管理用户数据文件夹中所述。
若要使用多个用户数据文件夹,WebView2 应用程序需要创建不同的 CoreWebView2Environment 对象。 WebView2通过配置的 CoreWebView2Environment 对象为给定的用户数据文件夹创建实例。 每个 CoreWebView2Environment 对象都需要配置不同的用户数据文件夹值。
为给定的用户数据文件夹创建第一 WebView2 个实例时,将启动与该用户数据文件夹关联的 WebView2 运行时进程集合的浏览器进程。 所有其他进程将由该浏览器进程的生存期管理。
多个环境对象
如果创建以相同方式配置的多个 CoreWebView2Environment 对象, (包括共享同一用户数据文件夹) ,则它们将表示相同的用户数据文件夹和相同的关联进程集合。 使用这些对象中的任何 CoreWebView2Environment 一个创建具有一个 CoreWebView2 共享用户数据文件夹和关联的进程集合的 。
如果尝试使用另CoreWebView2Environment一个已使用的用户数据文件夹创建 CoreWebView2Environment ,并且未将两个CoreWebView2Environment对象配置为相同(例如,如果它们使用不同的值创建CoreWebView2EnvironmentOptions.Language),则第二CoreWebView2Environment个对象将无法创建WebView2对象。
在WPF中使用WebView2
这里以Visual Studio 2022 和**.NET6**进行演示
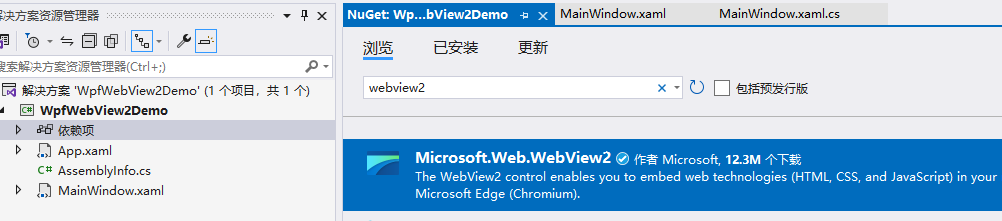
1、使用Visual Studio 创建一个WPF工程
2、使用nuget 引入包Microsoft.Web.WebView2
3、在XAML中引入命名空间
1 xmlns:webview2="clr-namespace:Microsoft.Web.WebView2.Wpf;assembly=Microsoft.Web.WebView2.Wpf"4、放置一个WebView2控件
1 <Window x:Class="WpfWebView2Demo.MainWindow"
2 xmlns="http://schemas.microsoft.com/winfx/2006/xaml/presentation"
3 xmlns:x="http://schemas.microsoft.com/winfx/2006/xaml"
4 xmlns:d="http://schemas.microsoft.com/expression/blend/2008"
5 xmlns:mc="http://schemas.openxmlformats.org/markup-compatibility/2006"
6 xmlns:webview2="clr-namespace:Microsoft.Web.WebView2.Wpf;assembly=Microsoft.Web.WebView2.Wpf"
7 xmlns:local="clr-namespace:WpfWebView2Demo"
8 mc:Ignorable="d"
9 Title="MainWindow" Height="720" Width="1280">
10 <Grid>
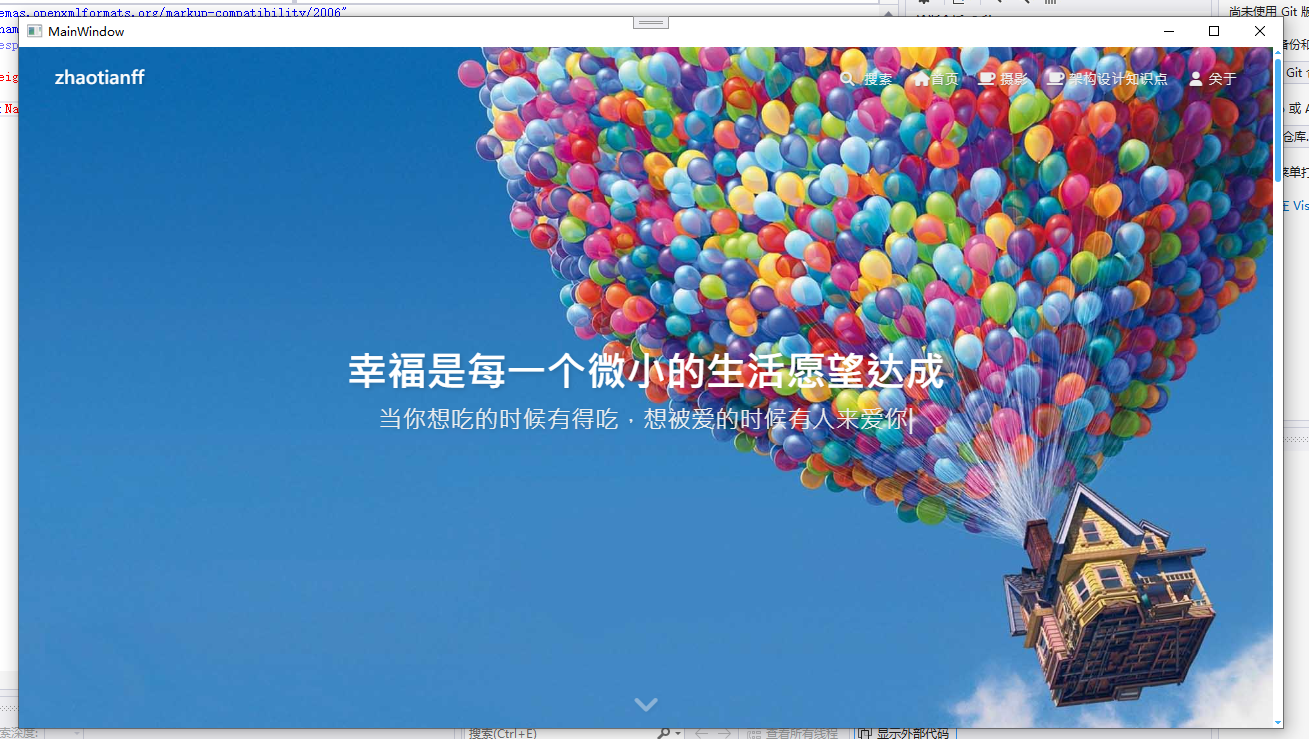
11 <webview2:WebView2 x:Name="webview2" Source="https://myfreetime.cn"></webview2:WebView2>
12 </Grid>
13 </Window>5、运行效果
注意事项:
请将项目平台设置成x64而不是Any CPU。
以前在使用CEF时,如果使用Any CPU,在XAML设计器会无法实时预览CEF控件,WebView2虽然没有这个问题,但是也会也现IntelliSense无法正常工作的问题。
基本导航功能
1、通过Source 属性,可以设置初始URI(支持网址、本地文件等)
2、导航到指定内容
调用WebView2.CoreWebView2.Navigate函数即可执行导航,如
1 webView2.CoreWebView2.Navigate("https://www.bing.com");1 webView2.CoreWebView2.Navigate("C:\Users\xxx\Documents\说明书.pdf");1 webView2.CoreWebView2.Navigate("file:///C:/Users/username/Documents/GitHub/Demos/demo-to-do/index.html");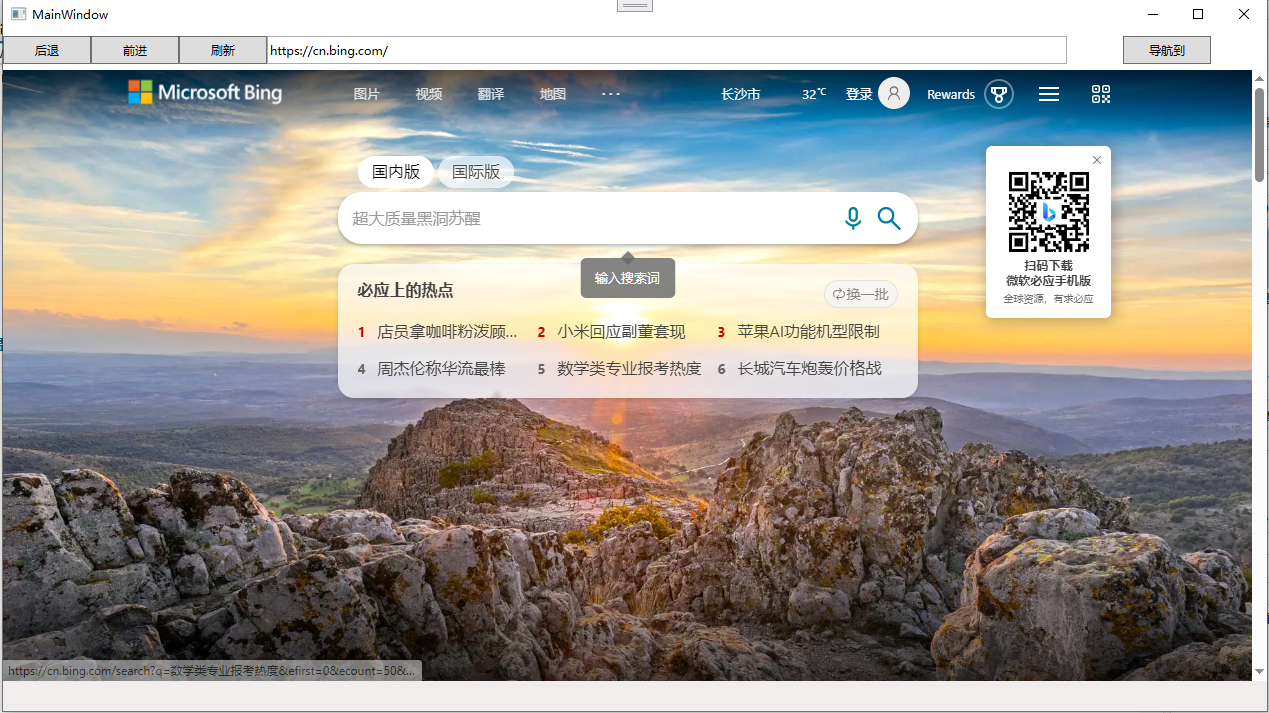
3、后退
调用WebView2.CoreWebView2.GoBack函数即可后退
1 webview2.CoreWebView2.GoBack();4、前进
调用WebView2.CoreWebView2.GoForward函数即可前进
1 webview2.CoreWebView2.GoForward();导航到本地内容
WebView2提供了几种方式,可以导航到本地内容。
通过不同的方式加载本地内容时会有一些区别 ,如下所示
| Scenario | 导航到文件路径 | 导航到HTML字符串 | 使用虚拟主机名称映射 | 使用WebResourceRequested |
|---|---|---|---|---|
| Origin-based DOM APIs | ✔️ | ❌ | ✔️ | ✔️ |
| DOM APIs requiring secure context | ❌ | ❌ | ✔️ | ✔️ |
| Dynamic content | ❌ | ✔️ | ❌ | ✔️ |
| Additional web resources | ✔️ | ❌ | ✔️ | ✔️ |
| Additional web resources resolved in WebView2 process | ✔️ | ❌ | ✔️ | ❌ |
下面我们依次介绍各种方法
1、直接导航到本地文件
1 this.webview2.CoreWebView2.Navigate("D:\\demo.html");通过文件路径方式加载的一些限制:
- 指定文件URL时,应用程序会导航到磁盘上的文件,而不是网络上的域。因此,无法在生成的文档中使用跨源资源。
- 从不同文件URL加载的不同文档不被视为来自同一来源,并且无法访问相同的存储数据。
- 某些web API仅限于安全的HTTPS URL,不适用于文件URL加载的文档。
- 不能使用相对路径,必须使用绝对路径
- 要允许从文件URI引用其他本地文件,或显示应用了XSL转换的XML文件,可以设置--allow file access from files浏览器参数。
方法如下:
1  //允许从文件URI引用其他本地文件
2  var options = new CoreWebView2EnvironmentOptions("--allow-file-access-from-files");
3  var environment = await CoreWebView2Environment.CreateAsync(options: options);
4 await webview2.EnsureCoreWebView2Async(environment);- 当通过文件URL加载文档时,文档的内容来自磁盘上的静态文件。这意味着无法动态修改此本地内容。这与从web服务器加载文档不同,在web服务器中,每个响应都可以动态生成。
- 通过文件URL加载的文档,可以引用其他web资源,如CSS、脚本或图像文件,这些文件也通过文件URL提供。
在Windows平台下,可以指定文件的绝对路径进行访问,如
1 D:\demo.html如果想独立于各个平台,应该使用标准的方式指定文件路径,如
1 file:///D:/demo.html1 file:///C:/Users/username/Documents/GitHub/Demos/demo-to-do/index.html2、导航到HTML字符串
1 var html = System.IO.File.ReadAllText("D:\\demo.html");
2
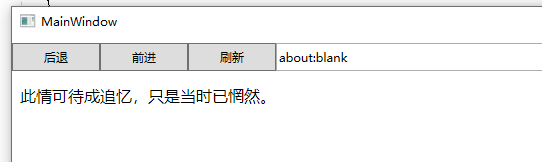
3 this.webview2.CoreWebView2.NavigateToString(html);通过HTML字符串加载时,会有一些限制:
- 使用NavigateToString方法加载的文档的位置设置为about:black,原点设置为null。这意味着不能使用依赖于所定义的源的web API,如localStorage或indexedDB。
- 某些web API仅限于安全的HTTPS URL,并且不可用于通过NavigateToString方法加载的文档,因为它们的位置设置为about:black。
- 通过NavigateToString方法加载本地内容时,直接将内容作为参数提供给该方法。这也就意味着可以动态显示内容。
- 使用NavigateToString方法加载本地内容不会使生成的文档引用其他web资源,如CSS、图像或脚本文件。该方法只允许您指定HTML文档的字符串内容,可以在HTML文档中内联表示这些(或者使用下面的两种方法)。
3、使用虚拟主机映射
1 //将demo映射到D:\demohtml\preview文件夹
2 this.webview2.CoreWebView2.SetVirtualHostNameToFolderMapping("demo", @"D:\demohtml\preview", CoreWebView2HostResourceAccessKind.DenyCors);
4 //可以通过https的方式访问,实际映射到D:\demohtml\preview\index.html
5 this.webview2.CoreWebView2.Navigate("https://demo/index.html");
使用虚拟主机映射时,会有一些限制:
- 通过虚拟主机名映射加载的本地内容会生成一个具有HTTP或HTTPS URL和相应来源的文档。这意味着,需要localStorage或indexedDB等来源的web API将起作用,并且属于同一来源的其他文档将能够使用存储的数据。
- 支持HTTPS的Web API
- 通过虚拟主机名映射加载本地内容时,将虚拟主机名映像到磁盘上包含静态文件的本地文件夹。这意味着无法动态修改此本地内容。这与从web服务器加载文档不同,在web服务器中,每个响应都可以动态生成。
- 通过虚拟主机名映射加载的本地内容具有支持相对URL解析的HTTP或HTTPS URL。这意味着加载的文档可以引用其他web资源,如CSS、脚本或图像文件,这些文件也通过虚拟主机名映射提供。
4、处理WebResourceRequested 事件
当WebView2尝试加载资源时,会触发WebResourceRequested 事件,我们可以使用此事件拦截请求并提供本地内容。在WebResourceRequested事件处理函数中,可以根据每个请求自定义本地内容的行为。
 1  private void btn_handleWebResourceRequested_Click(object sender, RoutedEventArgs e)
 2  {
 3      //为WebResourceRequested事件添加Uri和资源上下文过滤器
 4      this.webview2.CoreWebView2.AddWebResourceRequestedFilter("https://demo/*", CoreWebView2WebResourceContext.All);
 5      this.webview2.CoreWebView2.WebResourceRequested += CoreWebView2_WebResourceRequested;
 6  }
 7
 8  private void CoreWebView2_WebResourceRequested(object? sender, CoreWebView2WebResourceRequestedEventArgs e)
 9  {
10      //获取本地文件路径
11      //注意:资源文件要放在一个路径下
12      string assetsFilePath = @"D:\demohtml\preview" + e.Request.Uri.Substring("https://demo/*".Length - 1);
13      try
14      {
15          FileStream fs = File.OpenRead(assetsFilePath);
16          ManagedStream ms = new ManagedStream(fs);
17          string headers = "";
18          if (assetsFilePath.EndsWith(".html"))
19          {
20              headers = "Content-Type: text/html";
21          }
22          else if (assetsFilePath.EndsWith(".jpg"))
23          {
24              headers = "Content-Type: image/jpeg";
25          }
26          else if (assetsFilePath.EndsWith(".png"))
27          {
28              headers = "Content-Type: image/png";
29          }
30          else if (assetsFilePath.EndsWith(".css"))
31          {
32              headers = "Content-Type: text/css";
33          }
34          else if (assetsFilePath.EndsWith(".js"))
35          {
36              headers = "Content-Type: application/javascript";
37          }
38
39          e.Response = this.webview2.CoreWebView2.Environment.CreateWebResourceResponse(ms, 200, "OK", headers);
40      }
41      catch (Exception)
42      {
43          e.Response = this.webview2.CoreWebView2.Environment.CreateWebResourceResponse(null, 404, "Not found", "");
44      }
45
46  }
ManagedStream.cs
 1 public class ManagedStream : Stream
 2 {
 3     public ManagedStream(Stream s)
 4     {
 5         steam = s;
 6     }
 7
 8     public override bool CanRead => steam.CanRead;
 9
10     public override bool CanSeek => steam.CanSeek;
11
12     public override bool CanWrite => steam.CanWrite;
13
14     public override long Length => steam.Length;
15
16     public override long Position { get => steam.Position; set => steam.Position = value; }
17
18     public override void Flush()
19     {
20
21     }
22
23     public override long Seek(long offset, SeekOrigin origin)
24     {
25         return steam.Seek(offset, origin);
26     }
27
28     public override void SetLength(long value)
29     {
30
31     }
32
33     public override int Read(byte[] buffer, int offset, int count)
34     {
35         int read = 0;
36         try
37         {
38             read = steam.Read(buffer, offset, count);
39             if (read == 0)
40             {
41                 steam.Dispose();
42             }
43         }
44         catch
45         {
46             steam.Dispose();
47             throw;
48         }
49         return read;
50     }
51
52     public override void Write(byte[] buffer, int offset, int count)
53     {
54
55     }
56
57     private Stream steam;
58 }
处理WebResourceRequested事件来加载本地内容时,也会有一些限制:
- 通过WebResourceRequested加载的本地内容会生成一个具有HTTP或HTTPS URL和相应来源的文档。这意味着,需要localStorage或indexedDB等来源的web API将起作用,并且属于同一来源的其他文档将能够使用存储的数据。
- 某些web API仅限于安全的HTTPS URL。使用WebResourceRequested可以将HTTPS URL web资源请求替换为我们自己的本地内容。
- 通过WebResourceRequested加载本地内容时,我们在事件处理程序中指定要加载的本地内容,也就是可以动态生成内容。
- WebResourceRequested修改通过支持相对URL解析的HTTP或HTTPS URL加载的内容。这意味着生成的文档可以引用其他web资源,如CSS、脚本或图像文件,这些文件也通过WebResourceRequested提供。
- 通过文件URL或虚拟主机名映射加载内容时,解析发生在WebView2进程中。但是,WebResourceRequested事件是在宿主应用程序进程的WebView2 UI线程上引发的,这可能会导致结果文档的加载速度减慢。(如果加载的文件过多,过大,会出现界面假死的情况)
导航事件
在WebView2导航到指定URI期间,会按顺序引发以下事件
NavigationStartingSourceChangedContentLoadingHistoryChangedNavigationCompleted

如果导航失败,会按顺序引发以下事件
SourceChangedContentLoadingHistoryChanged
说明:
在NavigationStarting事件中,可以通过设置args.Cancel=true来取消导航
本机端和 Web 端代码的互操作
Microsoft Edge WebView2 控件允许将 Web 内容嵌入本机应用程序。 可以根据需要完成的任务,以不同的方式使用 WebView2。
所以就需要本机与Web端进行互操作,例如:
- 导航到其他网站后,更新本机主机窗口标题。
- 从 Web 应用发送本机相机对象并使用其方法。
- 在应用程序的 Web 端运行专用 JavaScript 文件。
WebView2支持以下几种互操作方式
执行JS脚本
这个功能对于混合开发很重要。以前我在CEFSharp 中嵌入Echarts时,就是调用类似的函数将数据传到页面上。
WebView2提供了两种方式执行JS脚本,这两种方式都可以执行JS脚本,只是执行时机不一样
| API | 说明 |
|---|---|
| ExecuteScriptAsync | 在 WebView2 控件中运行 JavaScript。 在页面 文档对象模型 (DOM) 加载内容 或 完成导航后调用此方法。 |
| AddScriptToExecuteOnDocumentCreatedAsync | 创建 DOM 时,在每个页面上运行。 在初始化 CoreWebView2 后调用此方法。 |
ExecuteScriptAsync
例如下面在浏览器弹框输出HelloWorld
1 await this.webview2.CoreWebView2.ExecuteScriptAsync("alert('HelloWorld')");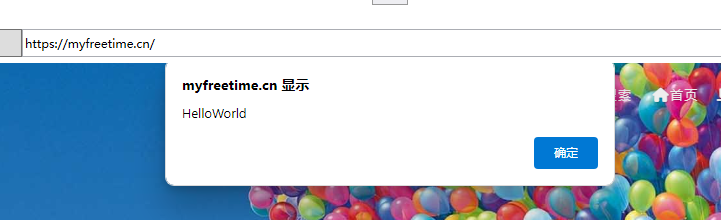
ExecuteScriptAsync 会返回执行结果值的JSON串。
同时ExecuteScriptAsync也支持执行本地的js文件
例如我在运行路径下创建了一个changecolor.js
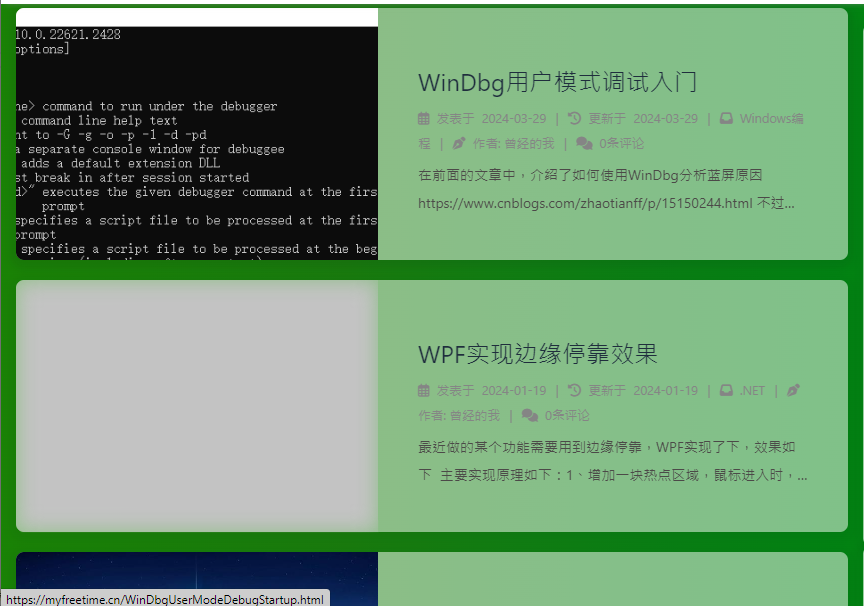
1 document.getElementsByTagName("body")[0].style.backgroundColor = "green";然后加载执行:
var text = System.IO.File.ReadAllText(@"changecolor.js");
await webView2.CoreWebView2.ExecuteScriptAsync(text);
可以看到网页背景变成了绿色
AddScriptToExecuteOnDocumentCreatedAsync
这个会增加一个在DOM加载但是未创建之前调用的脚本,所以可以进行一些初始始工作。
例如,禁用右键菜单
1 private async void webview2_Loaded(object sender, RoutedEventArgs e)
2 {
3 await webview2.EnsureCoreWebView2Async();
4
5 if(this.webview2.IsLoaded)
6 {
7 //禁用右键菜单
8 await this.webview2.CoreWebView2.ExecuteScriptAsync("window.addEventListener('contextmenu', window => {window.preventDefault();});");
9 }
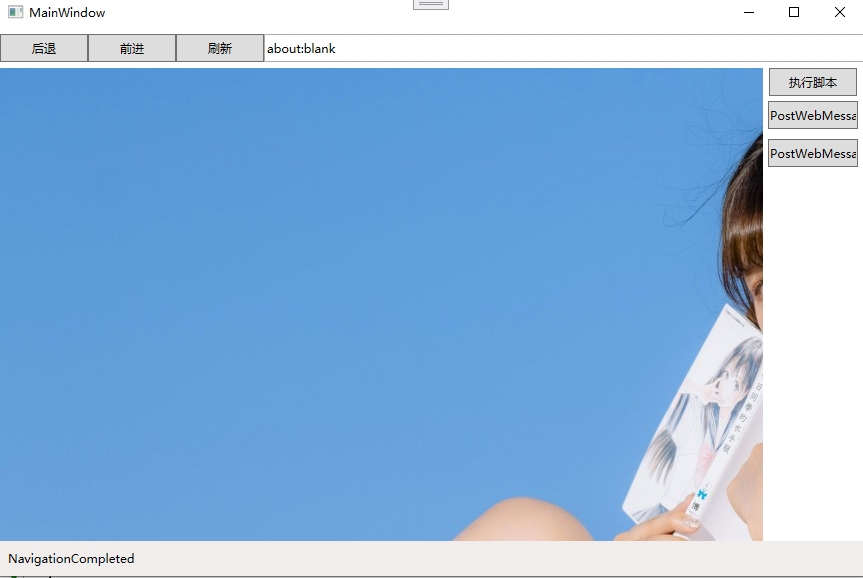
10 }主机(应用程序)和Web页面通信
WebView2提供了两种方式和Web页面通信
- 主机使用
CoreWebView2.PostWebMessageAsString或CoreWebView2.PostWebMessageAsJSON将消息发布到 WebView2 控件中的 Web 内容。 消息由添加到window.chrome.webview.addEventListener的处理程序捕获。
- WebView2 控件中的 Web 内容可以使用 将消息发布到主机
window.chrome.webview.postMessage。 主机使用主机上注册WebMessageReceived的任何内容处理消息。
使用PostWebMessageAsString
首先我们创建一个简单的网页(因为我不会前端 ,所以这真的是一个非常简单的页面)
这个页面会在收到字符串时进行打印
html
 1 <!DOCTYPE html>
 2 <html>
 3 <head>
 4     <title>ScenarioWebMessage</title>
 5     <script>
 6         window.chrome.webview.addEventListener('message', arg => {
 7             document.writeln(arg.data)
 8         });
 9     </script>
10 </head>
11 <body>
12
13 </body>
14 </html>
cs
1 this.webview2.CoreWebView2.PostWebMessageAsString(inputWindow.Input);然后调用PostWebMessageAsString函数发送字符串到Web端,页面会进行打印
PostWebMessageAsJson
这里发送一个简单的json串来指定页面的背景图片,依旧是一个非常简单的页面
html
 1 <!DOCTYPE html>
 2 <html>
 3 <head>
 4     <title>ScenarioWebMessage</title>
 5     <script>
 6         window.chrome.webview.addEventListener('message', arg => {
 7              document.body.style.backgroundImage = "url('" + arg.data.background + "')";
 8         });
 9     </script>
10 </head>
11 <body>
12
13 </body>
14 </html>
cs
1 var json = "{\"background\":\"https://myfreetime.cn/usr/uploads/2024/4/%E6%B8%85%E5%B9%B3%E8%B0%83%C2%B7%E5%90%8D%E8%8A%B1%E5%80%BE%E5%9B%BD%E4%B8%A4%E7%9B%B8%E6%AC%A2/jk3.jpg\"}";
2
3 this.webview2.CoreWebView2.PostWebMessageAsJson(json);
执行以后可以看到网页的背景换了
将消息发送到主机
在页面中,调用window.chrome.webview.postMessage可以将消息发送到主机
首先我们创建一个html页面,在这个页面中增加一个按钮和文本框,当点击按钮时,将消息发送到主机
html
 1 <!DOCTYPE html>
 2 <html>
 3 <head>
 4     <title>ScenarioWebMessage</title>
 5     <script>
 6         function SetTitleText() {
 7             let titleText = document.getElementById("title-text");
 8             window.chrome.webview.postMessage(`${titleText.value}`);
 9         }
10     </script>
11 </head>
12 <body>
13     <div id="colorable">
14         <h2>Receiving Messages</h2>
15         <p>
16             The host app can receive messages by registering an event handler
17             with <code>ICoreWebView2::add_WebMessageReceived</code>. If you
18             enter text and click "Send", this page will send a message to the
19             host app which will change the text of the title bar.
20         </p>
21         <input type="text" id="title-text" />
22         <button οnclick="SetTitleText()">Send</button>
23     </div>
24 </body>
25 </html>在WebView2.CoreWebView2.WebMessageReceived事件中处理接收的消息
1   private void CoreWebView2_WebMessageReceived(object? sender, CoreWebView2WebMessageReceivedEventArgs e)
2   {
3       this.lbl_status.Content = "从网页接收到:" + e.TryGetWebMessageAsString();
4   }
运行后在网页输入内容,在主机可以收到相应的内容
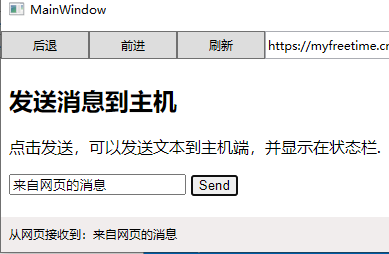
借助以上方法,可以做到消息的闭环,可以很好地将主机和Web交互起来。
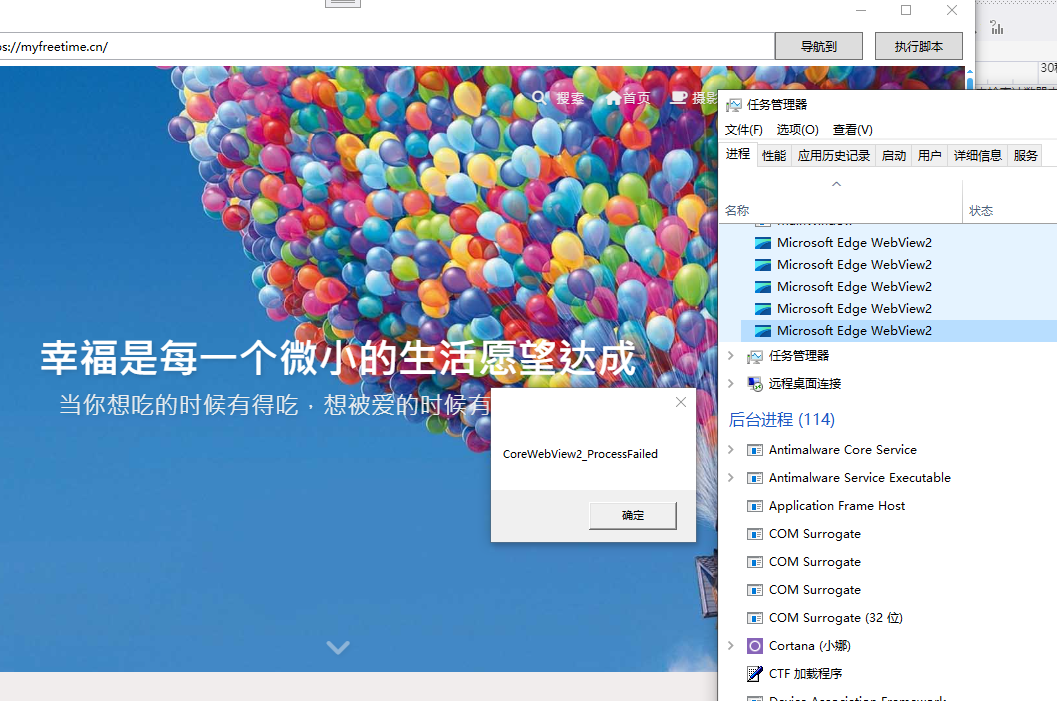
处理与进程相关的事件
WebView2 使用多个进程来支持应用程序中的 WebView2 控件。 由于这些进程可以在使用过程中退出,因此WebView2增加了一些事件通知。
通俗来说,当WebView2控件初始化完成后,WebView2控件将开始监视这些进程并报告以下事件:
-
任何进程失败。 当 WebView2 运行时中的任何 进程 失败时,CoreWebView2 将引发 事件
ProcessFailed。 -
主浏览器进程退出。 如果main浏览器进程出于任何原因 退出,
CoreWebView2Environment则会引发 事件**BrowserProcessExited**。 -
主浏览器进程崩溃。 当main浏览器进程崩溃时,它将同时生成**
ProcessFailed** 事件和**BrowserProcessExited** 事件,因为main浏览器进程因失败而退出。
这里我们做一个测试,
xaml
1  <webview2:WebView2 x:Name="webview2" Source="https://myfreetime.cn"
2                     Loaded="webview2_Loaded"></webview2:WebView2>
cs
 1  private async  void webview2_Loaded(object sender, RoutedEventArgs e)
 2  {
 3      await webview2.EnsureCoreWebView2Async();
 4
 5      if(this.webview2.IsLoaded)
 6      {
 7          this.webview2.CoreWebView2.ProcessFailed += CoreWebView2_ProcessFailed;
 8          this.webview2.CoreWebView2.Environment.BrowserProcessExited += Environment_BrowserProcessExited;
 9      }
10  }
11
12  private void Environment_BrowserProcessExited(object? sender, CoreWebView2BrowserProcessExitedEventArgs e)
13  {
14      MessageBox.Show("Environment_BrowserProcessExited");
15  }
16
17  private void CoreWebView2_ProcessFailed(object? sender, Microsoft.Web.WebView2.Core.CoreWebView2ProcessFailedEventArgs e)
18  {
19      MessageBox.Show("CoreWebView2_ProcessFailed");
20  }
然后我们用任务管理器关闭WebView2的一个进程,可以看到会引发 ProcessFailed 事件
打印
WebView2提供了以下打印函数
|--------------------|-------------------------------------------------------------------------|
| ShowPrintUI | 打开"WebView2 打印预览 "对话框或操作系统的" 打印 "对话框。 易于实现,对自定义的支持最少。 |
| Print | 使用可选的以编程方式指定的打印设置将 WebView2 中的当前顶级文档打印到打印机。 可以使用此功能生成自己的"打印预览"对话框或打印体验。 |
| PrintToPdf | 以无提示方式将 WebView2 中的当前顶级文档打印为 PDF 文件。 可以使用它生成自己的代码来打印 PDF 文件。 |
| PrintToPdfStream | 以无提示方式将 WebView2 中的当前顶级文档打印到 PDF 流。 可以使用它来生成自己的代码来打印 PDF。 |
例如我们可以将当前网页打印为PDF
1 var filePath = Environment.CurrentDirectory + "\\output.pdf";
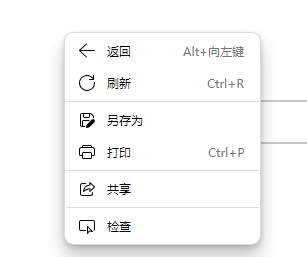
2 await this.webview2.CoreWebView2.PrintToPdfAsync(filePath);自定义上下文菜单
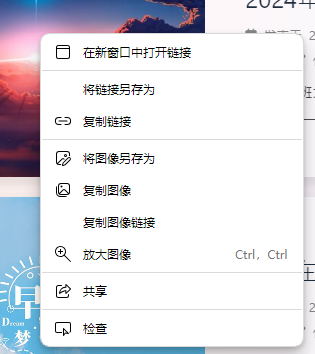
WebView2提供了一个默认的上下文菜单,像下面这样
如果想自定义上下文菜单,WebView2 提供了一个ContextMenuRequested 事件,在事件处理函数中可以自定义上下文菜单。
像下面这样
 1  private void btn_addcontextmenu_Click(object sender, RoutedEventArgs e)
 2  {
 3      this.webview2.CoreWebView2.ContextMenuRequested += CoreWebView2_ContextMenuRequested;
 4  }
 5
 6  private void CoreWebView2_ContextMenuRequested(object? sender, CoreWebView2ContextMenuRequestedEventArgs e)
 7  {
 8
 9      IList<CoreWebView2ContextMenuItem> menuList = e.MenuItems;
10      CoreWebView2Deferral deferral = e.GetDeferral();
11      e.Handled = true;
12      ContextMenu cm = new ContextMenu();
13      cm.Closed += (s, ex) => deferral.Complete();
14
15      //添加上下文菜单
16      AddContextMenu();
17
18      cm.IsOpen = true;
19  }
属性 AreDefaultContextMenusEnabled 控制是否可以打开任何上下文菜单。 如果 WebView2 AreDefaultContextMenusEnabled 设置设置为 False,则会禁用上下文菜单,并且 ContextMenuRequested 不会引发事件(例如用户右键单击时)。
当AreDefaultContextMenusEnabled 属性为True时且当前网页允许显示上下文菜单时,WebView2 控件才会引发 ContextMenuRequested 事件。
AreDefaultContextMenusEnabled 默认值为True。
在添加自定义上下文菜单之前,我们还需要了解两个类型:
1、System.Windows.Controls.ContextMenu类型
自定义上下文菜单时,需要用到ContextMenu类做为上下文菜单容器。ContextMenu是WPF自带的上下文菜单类,如果你还没有接触过,可以访问下面的链接
ContextMenu Class (System.Windows.Controls) | Microsoft Learn
2、Microsoft.Web.WebView2.Core.CoreWebView2ContextMenuItem类型
CoreWebView2ContextMenuItem 是上下文菜单容器项,WebView2 没有直接使用WPF的MenuItem类型,而是新增加了一个类型
CoreWebView2ContextMenuItem定义的属性如下:
|------------------------------------------------------------------------------------------------------------------------------------------------------------------------------------------------------------------------------------------------------------------------------------------------|---------------------------------------------------------------------------------------------------------------------------------------------------------------------------------------------------------------------------|
| Children | 当菜单项类型是子菜单时,获取菜单项的子菜单 |
| CommandId | 获取CoreWebView2ContextMenuItem的命令Id |
| Icon | 获取图标,图标的来源是PNG, Bitmap 或SVG 格式的数据流(IStream) |
| IsChecked | 获取或设置菜单项是否被选中。 |
| IsEnabled | 获取或设置菜单项是否启用(仅适用于自定义菜单). |
| Kind | 获取菜单项类型( CoreWebView2ContextMenuItemKind.) |
| Label | 获取菜单项的文本,支持快捷键(使用&开头) |
| Name | 获取菜单项未本地化的名字 |
| ShortcutKeyDescription | 获取菜单项本地化键盘快捷键 |
CoreWebView2ContextMenuItem定义的事件如下
|--------------------------------------------------------------------------------------------------------------------------------------------------------------------------------------------------------------------------------------------------------------------------------|-----------------------------------------------------------|
| CustomItemSelected | 当用户选择了CoreWebView2ContextMenuItem,会引发CustomItemSelected事件 |
菜单项类型
对于不同的元素,上下文菜单项的显示会不一样,例如,对于图片,显示的是
可以通过ContextMenuRequested 事件的参数CoreWebView2ContextMenuRequestedEventArgs.ContextMenuTarget.Kind来判断。
CoreWebView2ContextMenuRequestedEventArgs.ContextMenuTarget.Kind 是一个CoreWebView2ContextMenuTargetKind枚举类型
取值如下:
|--------------|---|-------------------------|
| Audio | 3 | 指示 这是为音频元素创建的上下文菜单 |
| Image | 1 | 指示 这是为图像元素创建的上下文菜单 |
| Page | 0 | 指示为页面创建的上下文菜单不包含任何其他内容。 |
| SelectedText | 2 | 指示是为选择的文本创建的上下文菜单 |
| Video | 4 | 指示是为视频 元素创建的上下文菜单 |
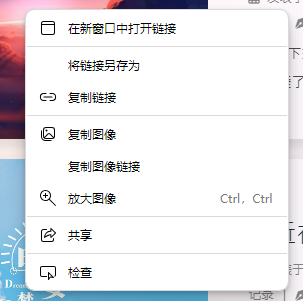
如何移除默认上下文菜单项
 1  private void btn_removeimagecontextmenu_Click(object sender, RoutedEventArgs e)
 2  {
 3      this.webview2.CoreWebView2.ContextMenuRequested += CoreWebView2_ContextMenuRequested1;
 4  }
 5
 6  private void CoreWebView2_ContextMenuRequested1(object? sender, CoreWebView2ContextMenuRequestedEventArgs e)
 7  {
 8      CoreWebView2ContextMenuTargetKind context = e.ContextMenuTarget.Kind;
 9      if (context == CoreWebView2ContextMenuTargetKind.Image)
10      {
11          for (int index = 0; index < e.MenuItems.Count; index++)
12          {
13              if (e.MenuItems[index].Name == "saveImageAs")
14              {
15                  //移除另存为菜单项
16                  e.MenuItems.RemoveAt(index);
17                  break;
18              }
19          }
20      }
21  }
移除前
移除后
如何插入菜单项到默认菜单中
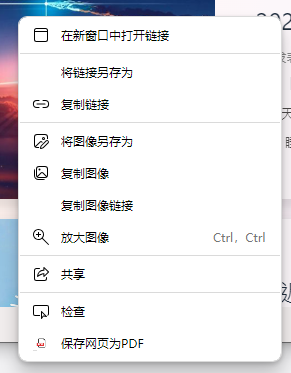
这里我们插入一个保存网页内容为PDF的菜单项
1 private void CoreWebView2_ContextMenuRequested(object? sender, CoreWebView2ContextMenuRequestedEventArgs e)
2 {
3 iconStream = new MemoryStream(Properties.Resources.pdf);
4 //创建新上下文菜单项
5 CoreWebView2ContextMenuItem newItem = this.webview2.CoreWebView2.Environment.CreateContextMenuItem(
6 "保存网页为PDF", iconStream, CoreWebView2ContextMenuItemKind.Command);
7 //菜单项选中事件
8 newItem.CustomItemSelected += NewItem_CustomItemSelected;
9 //插入到当前菜单项最后
10 e.MenuItems.Insert(e.MenuItems.Count, newItem);
11 }
12
13 private void NewItem_CustomItemSelected(object? sender, object e)
14 {
15 var path = Environment.CurrentDirectory + "\\output.pdf";
16 this.webview2.CoreWebView2.PrintToPdfAsync(path);
17 System.Diagnostics.Process.Start("explorer.exe", $"/select, {path}");
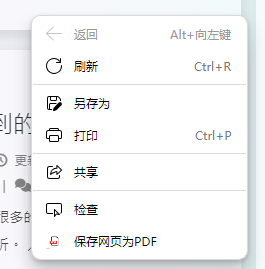
18 }运行效果
添加自定义上下文菜单
通过下面的方式可以替换默认的上下文菜单,并创建自己的上下文菜单。
通过这种方式创建的上下文菜单没有WebView2默认上下文菜单的外观样式,需要自己创建MenuItem的样式。
 1 private void CoreWebView2_ContextMenuRequested2(object? sender, CoreWebView2ContextMenuRequestedEventArgs e)
 2 {
 3     IList<CoreWebView2ContextMenuItem> menuList = e.MenuItems;
 4     CoreWebView2Deferral deferral = e.GetDeferral();
 5     e.Handled = true;
 6     ContextMenu cm = new ContextMenu();
 7     cm.Closed += (s, ex) => deferral.Complete();
 8     ReplaceContextMenu(e, menuList, cm);
 9     cm.IsOpen = true;
10 }
11
12 void ReplaceContextMenu(CoreWebView2ContextMenuRequestedEventArgs args, IList<CoreWebView2ContextMenuItem> menuList, ItemsControl cm)
13 {
14     MenuItem menuItem = new MenuItem();
15     menuItem.Header = "HelloWorld";
16     menuItem.IsEnabled = true;
17     menuItem.Click += MenuItem_Click;
18     //自定义样式
19     menuItem.Style = this.FindResource("StyleMenuItem") as Style;
20     cm.Items.Add(menuItem);
21 }
22
23 private void MenuItem_Click(object sender, RoutedEventArgs e)
24 {
25     MessageBox.Show("HelloWorld");
26 }
显示效果如下: