函数视图
1.全局环境的urls.py引入映入应用的urls,避免后期开发路由过多而导致杂乱
python
from django.contrib import admin
from django.urls import path, include

urlpatterns = [
 path('account/', include('account.urls')),#使用include函数引入,表示account应用下的路由(urls)文件
 path('admin/', admin.site.urls
]2.找到对应的应用下创建urls.py,并进行路由配置
python
from django.urls import path, re_path
from . import views #表示当前路径下进行配置

urlpatterns = [
 path('login/', views.login),  #表找到视图里面的login函数
]
3.视图配置
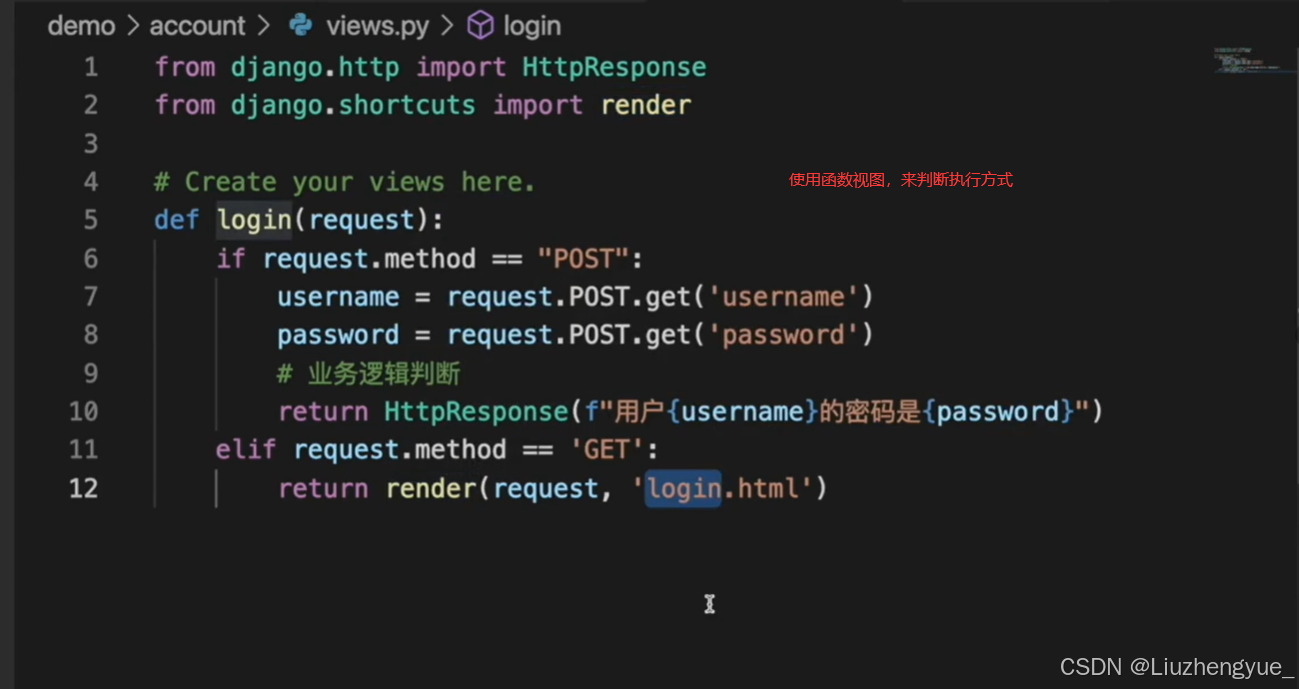
把需要呈现的视图展示柜到views.py里面,就可以通过相应的路由进行访问
python
from django.shortcuts import HttpResponse
from django.shortcuts import render
def login(request):
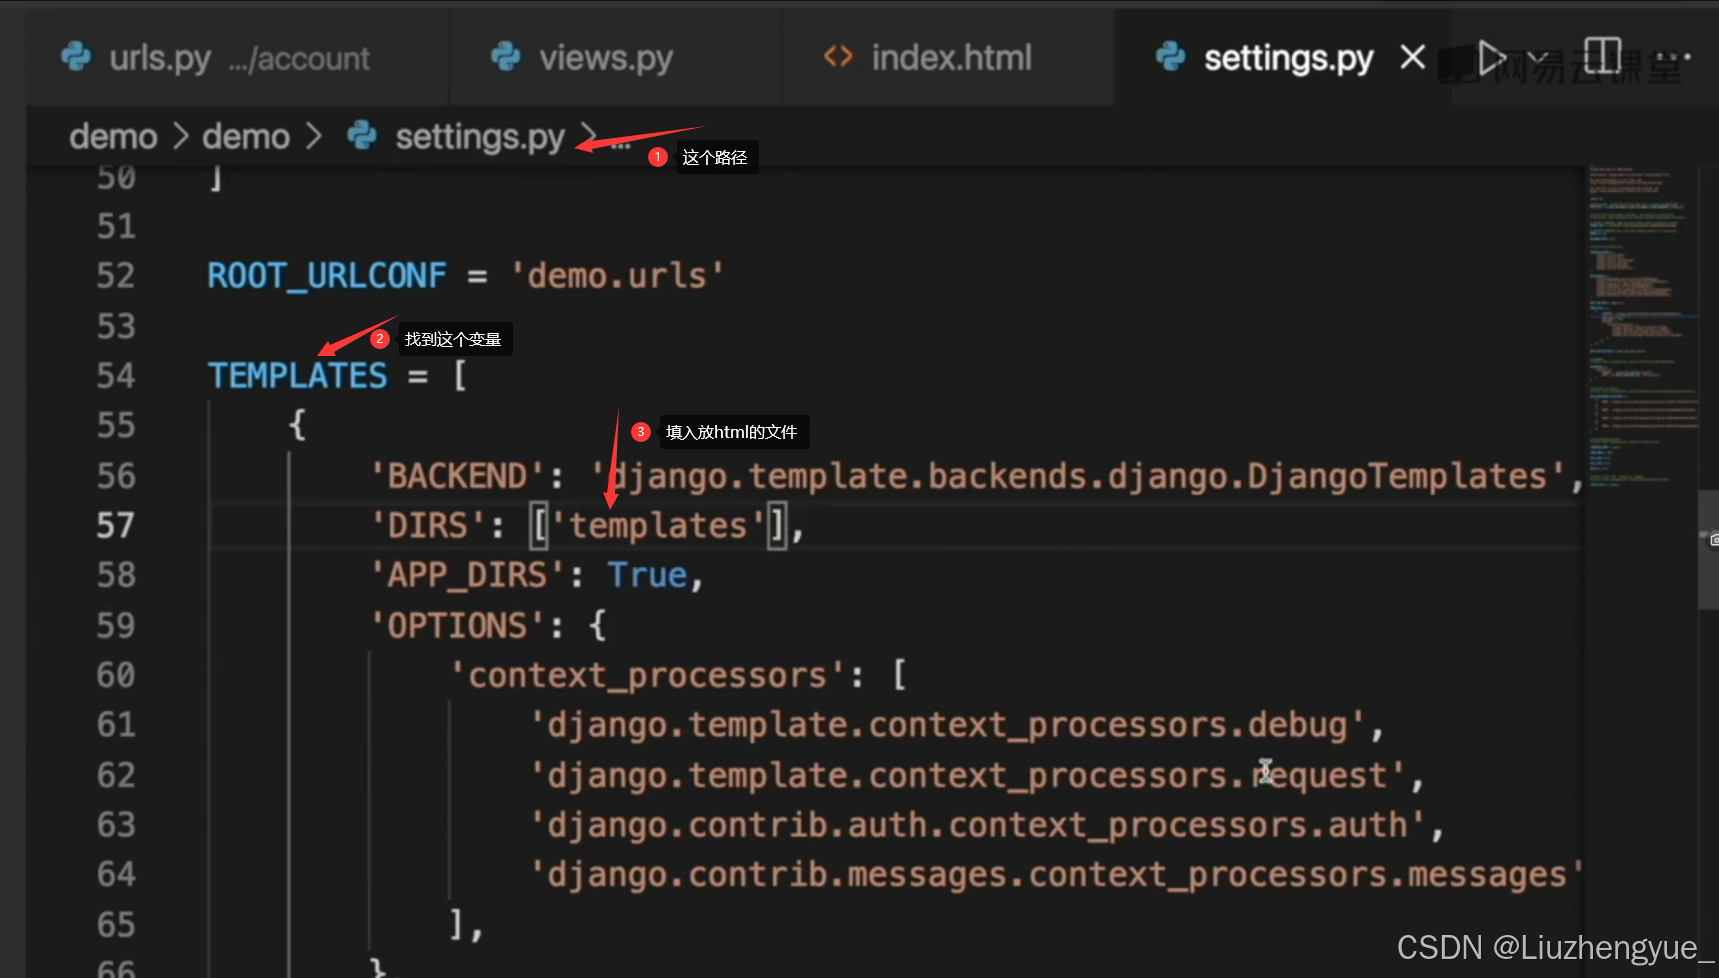
return render(request, 'login.html') #表示导入的html文件注意:这里我们要将所有的html文件全部放在templates文件夹里面,并且在全局的文件setting.py里面
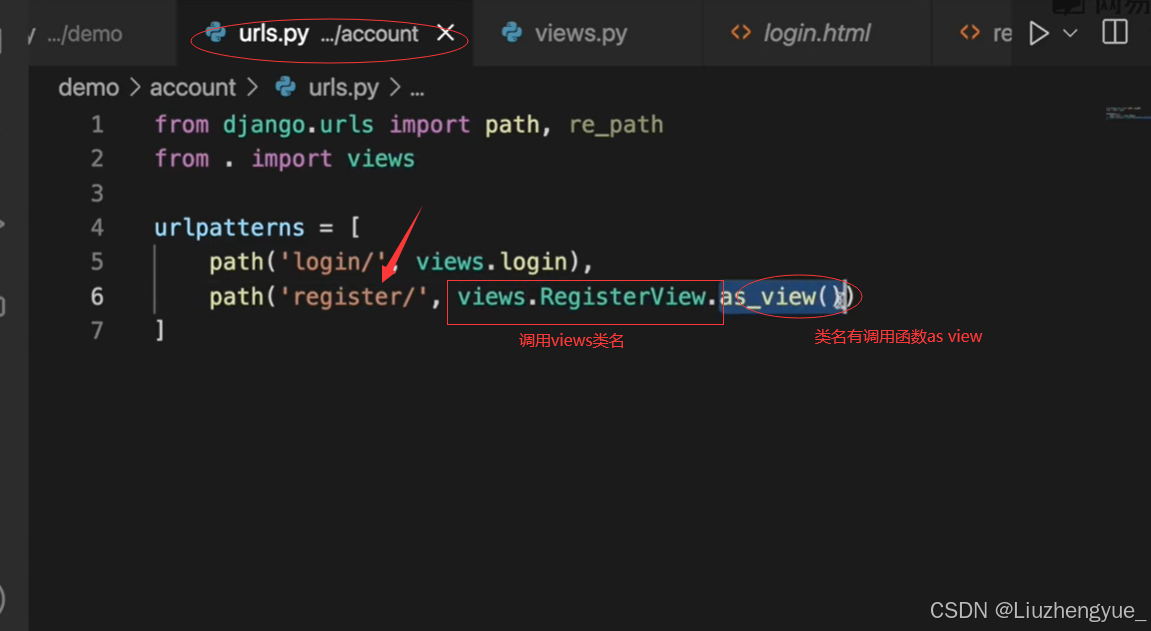
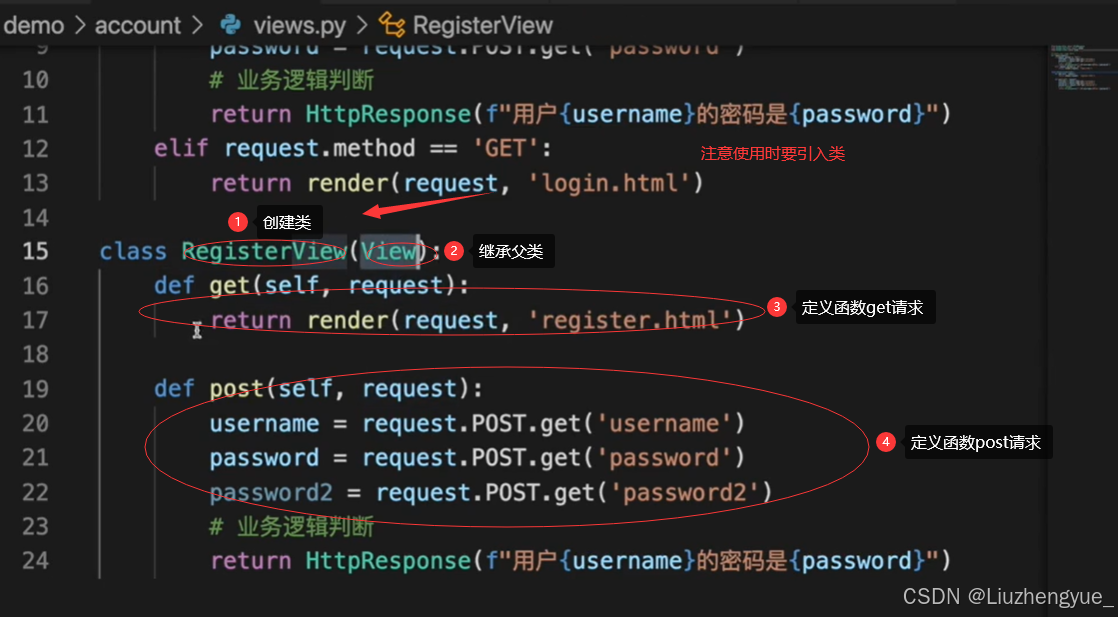
类视图
在views里面定义类
转到应用下的urls.py里面配置路由