在上篇文章中,介绍了如何安装typecho博客系统,默认是没有启用https访问的,这篇文章介绍如何 在IIS中开启 https访问。
开启https访问需要两个步骤:
1、申请 一个ssl证书,我这里以阿里云上面的申请流程为例。其它云服务器应该也是差不多的。
2、安装IIS Rewrite模块,并添加http跳转到https的重写规则。
申请证书:
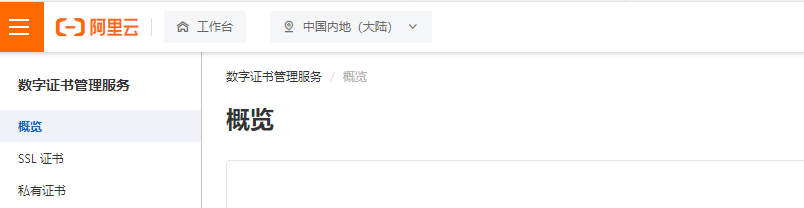
打开阿里云控制台,打开数字证书管理服务。选择SSL证书,在免费证书下找到创建证书。
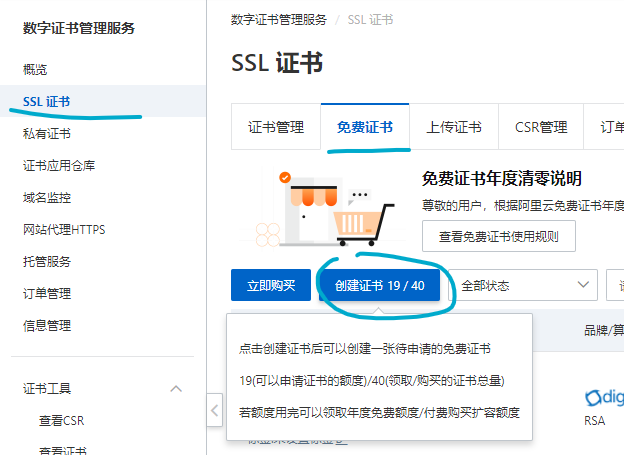
创建后,可以在下面的列表看到一个待申请 的证书。点击证书申请

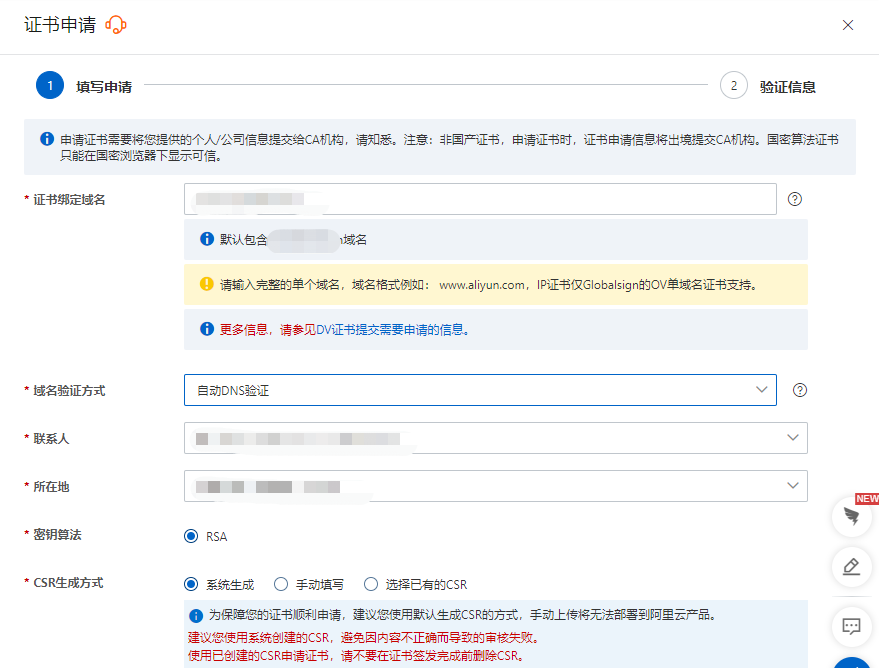
填写相关信息,
域名这里填写你的域名,类似 www.xxx.com www.xxx.cn这样。
域名验证方式选择自动DNS验证
CSR生成方式选自动
注意:免费证书只能绑定一个域名,所以这里不能用通配符 * ,如 *.server.com这种是不行的。
单击提交申请
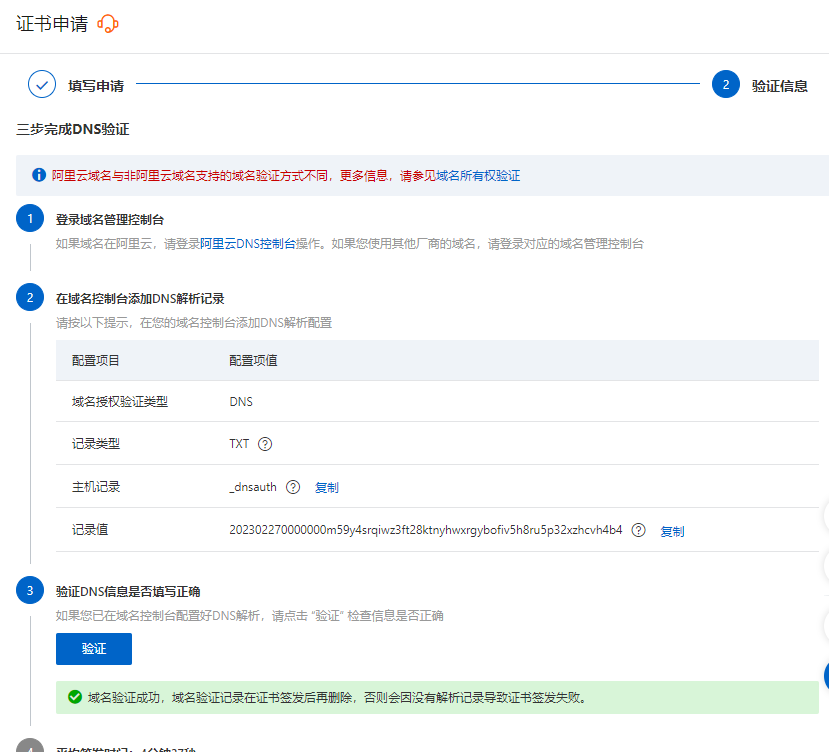
需要进行DNS验证,需要我们在域名解析里加上如下的解析记录。
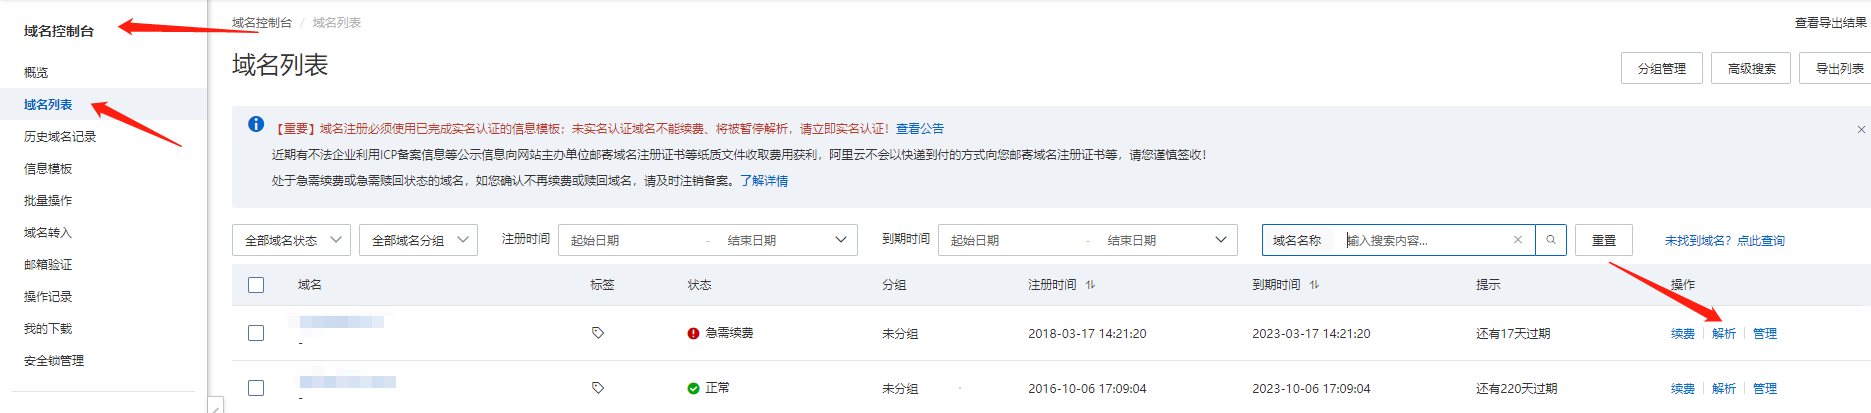
新开一个浏览器标签,切换到域名控制台,找到自己的域名,单击解析
添加一条TXT解析记录,内容就是申请 证书时验证DNS需要添加的记录内容,如下:

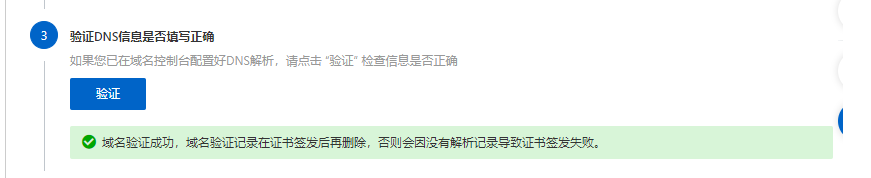
增加后,我们再回到证书申请 那个界面,单击验证,验证成功。
等待几分钟,可以看到证书已经签发,然后点击 下载
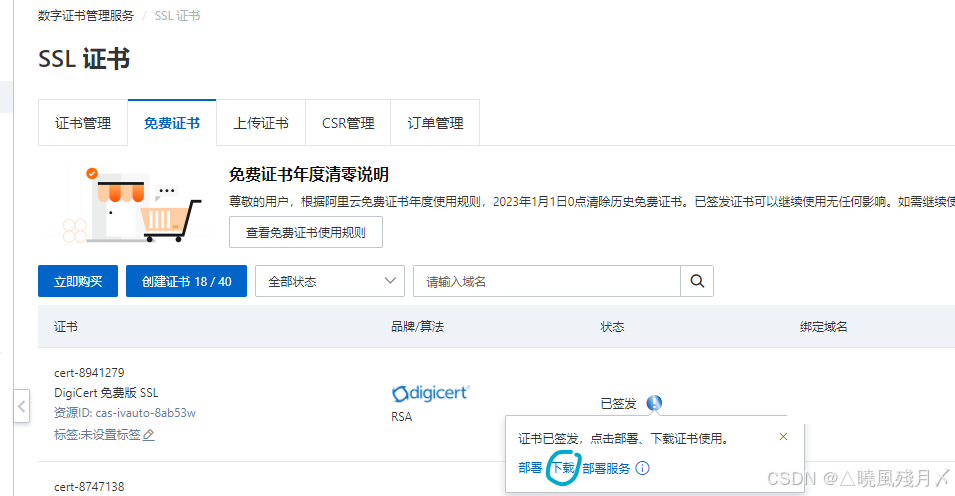
选择IIS
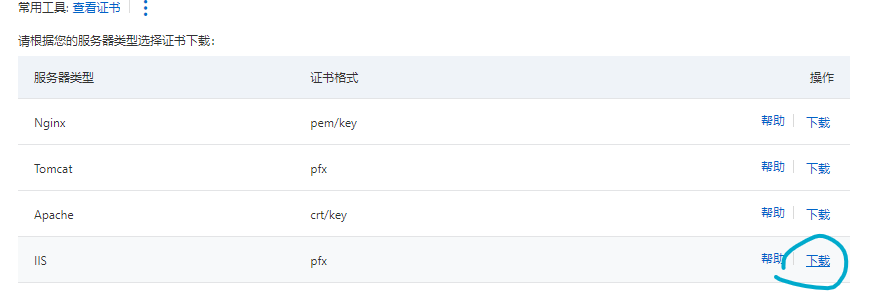
下载证书并解压到任意位置,可以看到下面两个文件

布署证书到IIS
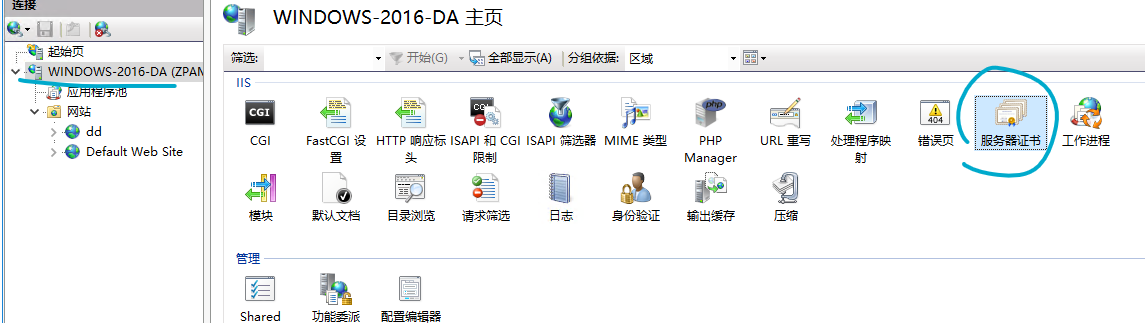
运行输入 inetmgr,打开IIS控制台,选择服务器,再选择服务器证书
单击导入,证书文件选择前面解压 出来的.pfx文件,密码就是pfx-password.txt中的文本,证书存储选择Web宿主
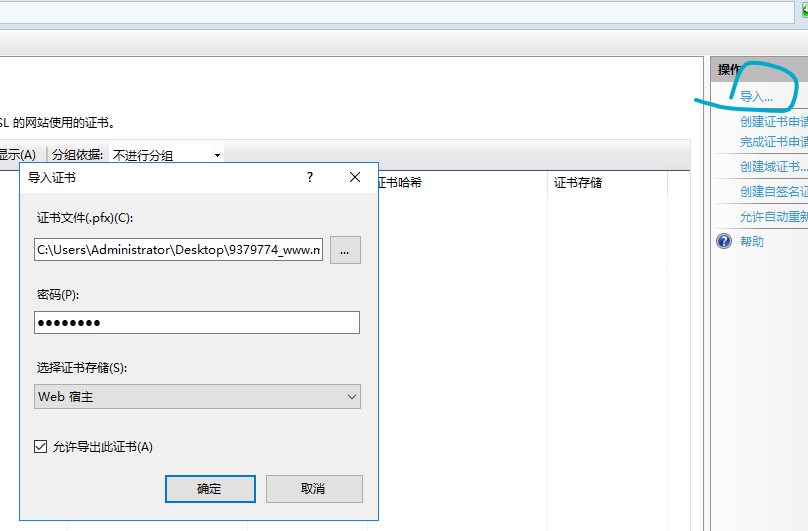
导入成功后,可以在证书列表里看到证书

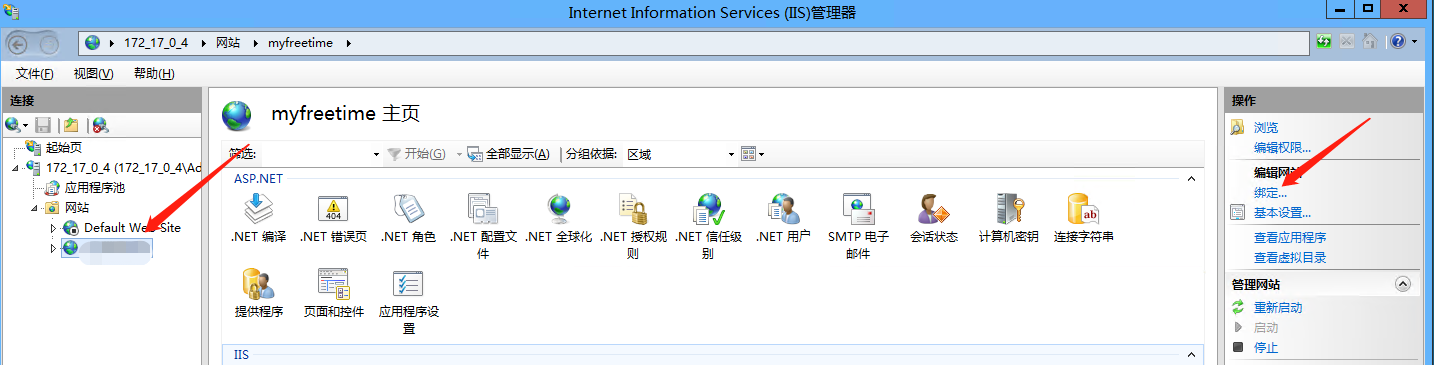
将证书绑定到网站上
打开自己的网站,选择绑定
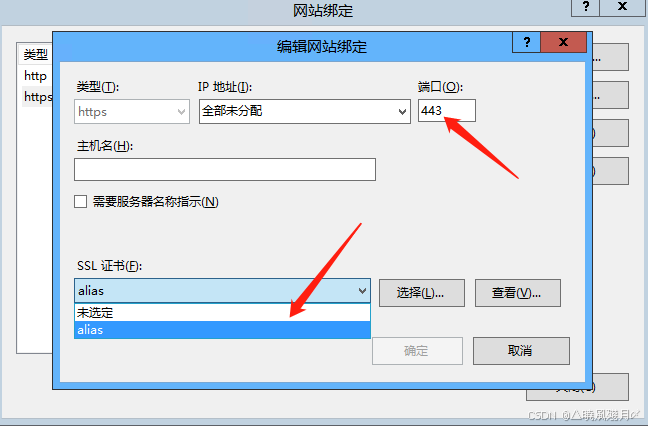
端口填入443,证书选择前面导入的证书。
注意:如果443端口被占用了,如SVN Server之类的。请将其它应用程序占用的端口切换到8443端口,保证在IIS中443端口可用。
到这里其实已经可以 https 访问网站了,但是存在一个问题,就是需要在输入网址的时候 自己加上 https ,这个操作肯定 是不方便的,所以我们需要自动跳转到https。就是Url Rewrite模块的功劳了。
下载并安装IIS Rewrite模块。
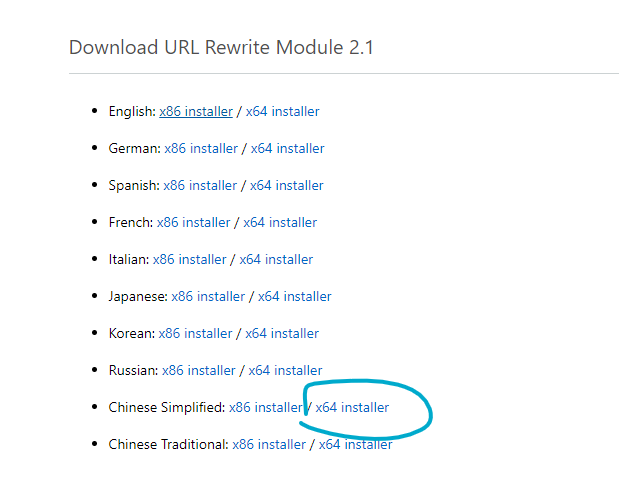
打开URL Rewrite : The Official Microsoft IIS Site,滑到下面 ,选择对应 的版本,我这里选的是Chinese Simplified x64 installer,如果你的系统是32位,就选x86。
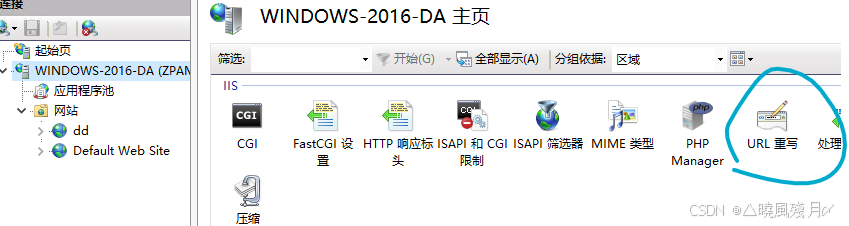
下载完成后进行安装,打开IIS控制台,可以看到 Url重写模块
选择自己的网站,打开URL重写,添加规则 ,选择空白规则 (觉得对照图片添加麻烦的,可以直接使用后面的参数添加到web.config中)。
填入如下 的内容
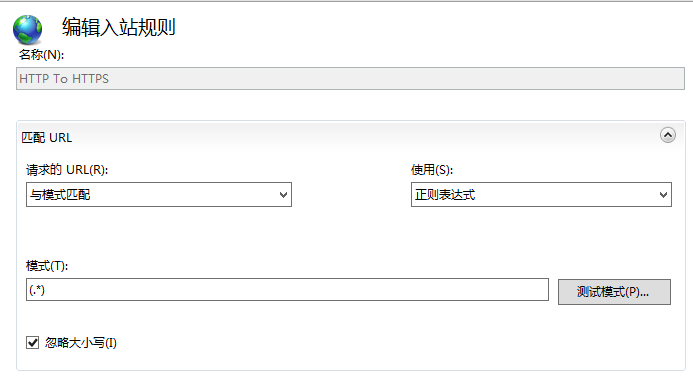
添加一个新的条件,如下图所示:

操作的参数如下:
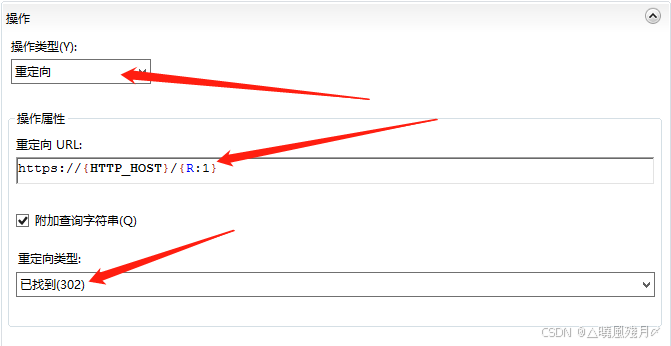
配置完成后,就可以自动跳转到https。
也可以直接复制如下内容到你网站目录下 web.config文件中
 1 <?xml version="1.0" encoding="utf-8"?>
 8 <configuration>
10   <system.webServer>
11     <rewrite>
12       <rules>
13         <rule name="HTTP To HTTPS" stopProcessing="true">
14           <match url="(.*)" />
15           <conditions>
16             <add input="{HTTPS}" pattern="^OFF$" />
17           </conditions>
18           <action type="Redirect" url="https://{HTTP_HOST}/{R:1}" redirectType="Found" />
19         </rule>
20       </rules>
21     </rewrite>
28   </system.webServer>
39 </configuration>
这样就可以为 typecho博客开启 https 访问了