ansible
一、ansible:
远程自动化运维
ansible是基于python开发的配置管理和应用部署工具。
也是自动化运维的重要工具。
可以批量配置,部署,管理上千台主机。
只需要在一台主机ansible就可以完成其他主机的操作。
1.1、操作模式:
1、模块化操作,命令行执行。
2、playbook,脚本,也是把命令行脚本化,脚本的格式是yaml格式。
1.2、ansible的特性:幂等性
幂等性:多次操作或者多次执行,对系统的影响不会发生变化,无论执行多少次结果都是一样的。
ansible什么都不会做。
例子1:systemctl restart mysqld
先stop,再start,发生变化
例子2、http get--------幂等性
post-------上传数据,发生变化
二、ansible四大组件:
1、lnventory:主机清单 主机组
必须是要声明管理主机的地址或者是其他配置,不声明ansible无法对目标主机进行操作
2、mudules 模块 学习的核心
ansible的功能是靠模块来实现的
3、插件
4、playbooks 剧本 ------ 脚本(复用)
2.1、模块和语法的学习:
192.168.168.21 ansible
192.168.168.22 被管理端
192.168.168.23 被管理端
2.2、安装release,并部署配置
root@test1 ~]# systemctl stop firewalld
[root@test1 ~]# setenforce 0
[root@test1 ~]# yum -y install epel-release

[root@test1 ~]# yum -y install ansible   ##yum源安装ansible

[root@test1 ~]# cd /etc/ansible/
[root@test1 ansible]# ls
ansible.cfg  hosts  roles
[root@test1 ansible]# vim hosts
[web]

## alpha.example.org

## beta.example.org

192.168.168.22

[xy102]
##

## db01.intranet.mydomain.net

## db02.intranet.mydomain.net

192.168.168.23

[root@test1 ansible]# ssh-keygen -t rsa  ##生成密钥
[root@test1 ansible]# sshpass -p '123' ssh-copy-id root@192.168.168.22     ##传输密钥到被管理端192.168.168.22,执行免密登录
[root@test1 ansible]# sshpass -p '123' ssh-copy-id root@192.168.168.23

[root@test1 ansible]# ansible-doc -l ##列出ansible已安装所有的模块
三、模块操作
1、command
1、command模块 基础模块,也是ansible的默认模块,不支持管道符和重定向操作。执行一般的linux命令。
2、ansible <组名/ip地址> -m指定模块,不加-m,默认使用command -a <参数或者命令>
1.1、远程操作被管理端
[root@test1 ansible]# ansible 192.168.168.22 -m command -a 'date'

[root@test1 ansible]# sshpass -p '123' ssh-copy-id root@192.168.168.22 ##重新传免密密钥

[root@test1 ansible]# ansible 192.168.168.22 -m command -a 'date'  ##指定主机

[root@test1 ansible]# ansible web -m command -a 'date'   ##组内所有主机

[root@test1 ansible]# ansible xy102 -m command -a 'date'
192.168.168.23 | CHANGED | rc=0 >>
2024年 08月 21日 星期三 10:01:14 CST

[root@test1 ansible]# ansible all -m command -a 'date'   ##所有组内所有主机执行命令
192.168.168.23 | CHANGED | rc=0 >>
2024年 08月 21日 星期三 10:02:18 CST
192.168.168.22 | CHANGED | rc=0 >>
2024年 08月 21日 星期三 10:02:18 CST

[root@test1 ansible]# ansible all -a 'ls /opt'
##默认是-m command操作
-f 动态查看也看不了,静态可以---------发生环境变化,动态的执行不了,静态可以查看。
chdir 在目标主机提前进入目录,然后执行指令--相当于cd。
[root@test1 ansible]# ansible 192.168.168.23 -m command -a 'chdir=/home ls'   ##chdir相当于cd
192.168.168.23 | CHANGED | rc=0 >>
dn
zhang
creates 判断文件是否存在,如果存在,不执行后面的命令,不存在,就执行
[root@test1 ansible]# ansible 192.168.168.23 -m command -a 'creates=/opt/123 ls'
192.168.168.23 | CHANGED | rc=0 >>
anaconda-ks.cfg
initial-setup-ks.cfg
公共
模板
视频
图片
文档
下载
音乐
桌面


[root@test1 ansible]# ansible 192.168.168.23 -m command -a 'creates=/opt/123 ls'  ##存在123文件夹,不执行
192.168.168.23 | SUCCESS | rc=0 >>
skipped, since /opt/123 exists
remove 判断文件是否存在,如果存在,执行后面的命令
[root@test1 ansible]# ansible 192.168.168.23 -m command -a 'removes=/opt/123 ls'
192.168.168.23 | CHANGED | rc=0 >>
anaconda-ks.cfg
initial-setup-ks.cfg
公共
模板
视频
图片
文档
下载
音乐
桌面

[root@test3 opt]# rm -rf 123
[root@test3 opt]# ls
jenkins-2.396-1.1.noarch.rpm  test

[root@test1 ansible]# ansible 192.168.168.23 -m command -a 'removes=/opt/123 ls'
192.168.168.23 | SUCCESS | rc=0 >>
skipped, since /opt/123 does not exist
解压------需要指定解压的路径
[root@test1 opt]# ansible 192.168.168.23 -a 'tar -xf /opt/nginx-1.22.0.tar.gz -C /opt/'

[root@test1 opt]# ansible 192.168.168.23 -a 'chdir=/opt tar -xf nginx-1.22.0.tar.gz'
2、shell模块
支持管道符和重定向,也可以用逻辑表达式 &&且 ;逻辑或
[root@test1 ansible]# ansible 192.168.168.23 -m shell -a 'useradd test'  ##创建用户
192.168.168.23 | CHANGED | rc=0 >>

[root@test1 ansible]# ansible 192.168.168.23 -m shell -a 'echo 123456 | passwd --stdin test' ##管道符设置密码
192.168.168.23 | CHANGED | rc=0 >>
更改用户 test 的密码 。
passwd:所有的身份验证令牌已经成功更新。


[root@test1 ansible]# ansible 192.168.168.23 -m shell -a 'echo 123 > /opt/123'   ##重定向写内容到文件
192.168.168.23 | CHANGED | rc=0 >>


[root@test3 opt]# ls
123  jenkins-2.396-1.1.noarch.rpm  test
[root@test3 opt]# cat 123
123
[root@test1 ansible]# ansible 192.168.168.23 -m shell -a 'cat /opt/123'
192.168.168.23 | CHANGED | rc=0 >>
123

[root@test1 ansible]# ansible 192.168.168.23 -m shell -a 'touch /opt/123.txt && echo 123 > /opt/123.txt && cat /opt/123.txt'  ##逻辑且创建文件,写文件,查看文件
[WARNING]: Consider using the file module with state=touch rather than running
'touch'.  If you need to use command because file is insufficient you can add
'warn: false' to this command task or set 'command_warnings=False' in
ansible.cfg to get rid of this message.
192.168.168.23 | CHANGED | rc=0 >>
123

[root@test1 ansible]# ansible 192.168.168.23 -m shell -a 'ls /opt'  ##展示opt
192.168.168.23 | CHANGED | rc=0 >>
123
123.txt
jenkins-2.396-1.1.noarch.rpm
test

[root@test1 ansible]# ansible 192.168.168.23 -m shell -a 'ls /opt ; cat /etc/pasdsa'##逻辑或
192.168.168.23 | FAILED | rc=1 >>
123
123.txt
jenkins-2.396-1.1.noarch.rpm
testcat: /etc/pasdsa: 没有那个文件或目录non-zero return code
小试牛刀:目标主机创建一个脚本,在脚本内写ifconfig,然后运行脚本,在一条命令完成
第一种
[root@test1 ansible]# ansible 192.168.168.23 -m shell -a 'echo -e "#!/bin/bash\nifconfig" > /opt/test.sh && sh /opt/test.sh' ##echo -e 使用转义符,\n形成换行第二种
[root@test1 ansible]# ansible 192.168.168.23 -m shell -a 'echo "#!/bin/bash" >> /opt/test1.sh && echo "ifconfig" >> /opt/test1.sh && sh /opt/test1.sh' ##>>追加执行,形成换行复习eof
[root@test1 ansible]# cat <<eof>>test2.sh
> #!/bin/bash
> ifconfig
> eof
[root@test1 ansible]# cat test2.sh
#!/bin/bash
ifconfig
3、cron模块
定时任务模块minute、hour、day、month、weekday 分、时、日、月、周
[root@test1 ansible]# ansible 192.168.168.23 -m cron -a 'minute=30 hour=8 day=* job="ls /opt"'  ##创建定时任务,未指定名称,job=表示定时任务执行的
[root@test1 ansible]# ansible 192.168.168.23 -a 'crontab -l'##查看定时任务

[root@test1 ansible]# ansible 192.168.168.23 -m cron -a 'minute=30 hour=8 day=* job="ls /opt" name="test1"'##指定名称创建任务
删除定时任务
[root@test1 ansible]# ansible 192.168.168.23 -m cron -a 'name="test1" state=absent' ##删除指定test1
[root@test1 ansible]# ansible 192.168.168.23 -m cron -a 'name="none" state=absent' ##删除none
4、user模块
用户管理模块
-
name 就是用户名 必选参数
-
state=present | absent
-
present创建,默认就是创建,absent删除
-
system=yes | no
-
system=no 普通用户,=yes,程序用户/系统用户
-
UID为1-999的用户在Linux系统中被称为系统用户 (也称为伪用户)。这些用户主要是用于运行系统上的服务和守护进程,以确保系统的正常运作。系统用户并非用于日常登录和交互式操作,因此它们通常没有登录shell(如设置为
/sbin/nologin),并且其主目录也可能不存在或仅包含系统相关的文件和配置。 -
在Linux系统中,UID(用户标识符)为1000及以上的用户通常被称为普通用户。这些用户是由系统管理员创建的,用于执行日常任务,如浏览网页、编程、文档编辑等。与UID小于1000的系统用户不同,普通用户具有登录系统的能力,并且可以执行各种操作,但其权限受到一定的限制,以防止对系统造成不必要的损害。
-
uid:指定用户的uid
-
group:指定用户组
-
shell 默认时系统用户可以不加/bin/bash
-
create_home==yes | no bu不是默认的家目录/home,指定家目录,/opt/test1家目录,create_home创建,no就是不创建。
-
password :用户添加密码
-
remove=yes | no:state=absent 删除用户,删除用户时是否删除家目录。
[root@test1 ansible]# ansible 192.168.168.23 -m user -a 'user=xy66 shell=/sbin/nologin system=yes'
[root@test1 ansible]# ansible 192.168.168.23 -m user -a 'user=xy77 uid=900 shell=/sbin/nologin system=yes'
/sbin/nologin这个账户的用户名和密码,他们也无法登录系统,声明解释器
/bin/bash 是 Unix 和类 Unix 系统中的一个命令行界面和脚本语言,它允许用户与操作系统交互并执行命令,声明解释器为shell
[root@test1 opt]# ansible 192.168.168.23 -m user -a 'user=xy99 system=yes'
192.168.168.23 | CHANGED => {
    "ansible_facts": {
        "discovered_interpreter_python": "/usr/bin/python"
    },
    "changed": true,
    "comment": "",
    "create_home": true,
    "group": 978,
    "home": "/home/xy99",
    "name": "xy99",
    "shell": "/bin/bash",
    "state": "present",
    "system": true,
    "uid": 984
}

[root@test1 opt]# ansible 192.168.168.23 -m user -a 'user=xy100 system=no'
192.168.168.23 | CHANGED => {
    "ansible_facts": {
        "discovered_interpreter_python": "/usr/bin/python"
    },
    "changed": true,
    "comment": "",
    "create_home": true,
    "group": 1004,
    "home": "/home/xy100",
    "name": "xy100",
    "shell": "/bin/bash",
    "state": "present",
    "system": false,
    "uid": 1004
}
创建家目录,指定家目录,创建密码
[root@test1 ansible]# ansible 192.168.168.23 -m user -a 'name=xy77 home=/opt/xy77 create_home=yes password=123456'删除用户--删除家目录
[root@test1 ansible]# ansible 192.168.168.23 -m user -a 'name=xy77 remove=yes state=absent'5、copy复制模块
当前主机的文件复制到目标主机。
本地主机的opt目录下的345复制到192.168.168.23的opt目录下
[root@test1 opt]# ansible 192.168.168.23 -m copy -a 'src=/opt/345 dest=/opt/'##src表示源主机文件,dest目标主机保存的路径
mode复制文件时,表示权限
ower文件的所有者,属主
group 文件的所在组 属组
content 指定复制的内容,就不能用src
本地主机的opt目录下的345复制到192.168.168.23的opt目录下,并授权640
[root@test1 opt]# ansible 192.168.168.23 -m copy -a 'src=/opt/345 dest=/opt/ mode=640'本地主机的opt目录下的345复制到192.168.168.23的opt目录下,并授权640,chown改变所有者,和所在组
[root@test1 opt]# ansible 192.168.168.23 -m copy -a 'src=/opt/345 dest=/opt/ mode=640 owner=dn group=xy66'指定content文本内容写入到192.168.168.23的/opt/houzi 文件中
[root@test1 opt]# ansible 192.168.168.23 -m copy -a 'content="黑神话:悟空,真好 玩" dest=/opt/houzi mode=777 owner=dn group=dn'文件重命名
[root@test1 opt]# ansible 192.168.168.23 -a 'mv /opt/houzi /opt/孙悟空.txt'   ##文件重命名
192.168.168.23 | CHANGED | rc=0 >>

[root@test1 opt]# ansible 192.168.168.23 -m shell -a 'mv /opt/孙悟空.txt /opt/ 孙悟空1.txt'  ##文件重命名
2.9、file模块
设置文件属性
mode owner group state=touch|absent
touch 创建
absent删除
指定路径,创建文件,并规定文件的权限以及所有者,所在组
[root@test1 opt]# ansible 192.168.168.23 -m file -a 'path=/opt/abc.txt state=touch mode=777 owner=dn group=dn'创建链接文件
[root@test1 opt]# ansible 192.168.168.23 -m file -a 'path=/opt/abc.txt.link src=/opt/abc.txt state=link'删除link
[root@test1 opt]# ansible 192.168.168.23 -m file -a 'path=/opt/abc.txt.link src=/opt/abc.txt state=absent'2.10、hostname模块,设置远程主机的主机名
root@test1 opt# ansible 192.168.168.23 -m hostname -a "name=test3"
2.11、ping模块,看success
[root@test1 opt]# ansible all -m ping
192.168.168.22 | SUCCESS => {
    "ansible_facts": {
        "discovered_interpreter_python": "/usr/bin/python"
    },
    "changed": false,
    "ping": "pong"
}
192.168.168.23 | SUCCESS => {
    "ansible_facts": {
        "discovered_interpreter_python": "/usr/bin/python"
    },
    "changed": false,
    "ping": "pong"
2.12、yum模块
在目标主机安装软件,只能安装和卸载软件
[root@test1 opt]# ansible 192.168.168.23 -m yum -a 'name=httpd'  ##安装httpd
192.168.168.23 | SUCCESS => {
    "ansible_facts": {
        "discovered_interpreter_python": "/usr/bin/python"
    },
    "changed": false,
    "msg": "",
    "rc": 0,
    "results": [
        "httpd-2.4.6-99.el7.centos.1.x86_64 providing httpd is already installed"
    ]
}

[root@test3 ~]# systemctl status httpd
卸载软件
[root@test1 opt]# ansible 192.168.168.23 -m yum -a 'name=httpd state=absent' ##卸载httpd2.13、service模块
用来管理目标主机上的软件的运行状态
name 服务名称
state=started|stopped|restarted
enabled=true
runlevel=40 ##如果设置开机自启,就需要声明运行级别。
[root@test1 opt]# ansible 192.168.168.23 -m yum -a 'name=nginx'     ##安装nginx

[root@test1 opt]# ansible 192.168.168.23 -m service -a 'name=nginx enabled=true state=started runlevel=60'       ##设置服务启动项
2.14、小实验
1、安装nginx

[root@test1 opt]#  ansible 192.168.168.23 -m yum -a 'name=nginx'

2、开启nginx,开机自启动

[root@test1 opt]# ansible 192.168.168.23 -m service -a 'name=nginx enabled=true state=started runlevel=60'ansible 192.168.168.23 -m service -a 'name=nginx enabled=true state=started runlevel=60'

3、访问的内容是this is nginx1!

[root@test1 opt]# ansible 192.168.168.23 -m shell -a 'echo "this is nginx1" > /usr/share/nginx/html/index.html'
yum模块卸载
[root@test1 opt]# ansible 192.168.168.23 -m yum -a 'name=nginx state=absent'1、安装nginx;2、开启nginx,开机自启动;3、访问的内容是this is nginx1!
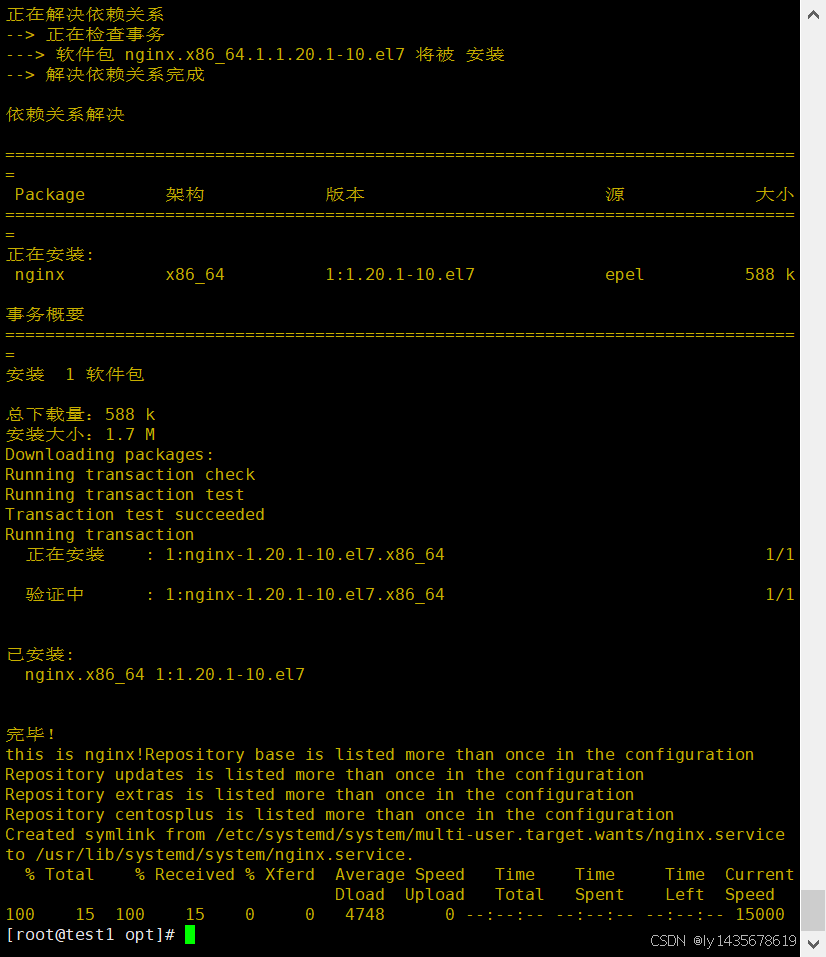
ansible 192.168.168.23 -m shell -a 'yum -y install nginx && systemctl start nginx && systemctl enable nginx && echo "this is nginx!" > /usr/share/nginx/html/index.html && curl 192.168.168.23'