1、初识selenium
概述:
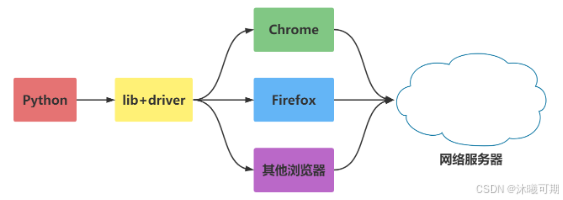
Selenium是一个Web的自动化测试工具,最初是为网站自动化测试而开发的,类型像我们玩游戏用的按键精灵,可以按指定的命令自动操作,不同是Selenium 可以直接运行在浏览器上,它支持所有主流的浏览器(包括PhantomJS这些无界面的浏览器)。
Selenium 可以根据我们的指令,让浏览器自动加载页面,获取需要的数据,甚至页面截屏,或者判断网站上某些动作是否发生。
Selenium 自己不带浏览器,不支持浏览器的功能,它需要与第三方浏览器结合在一起才能使用。但是我们有时候需要让它内嵌在代码中运行,所以我们可以用一个叫 PhantomJS 的工具代替真实的浏览器。
下载与参考网址:
PyPI网站下载 Selenium库 Links for selenium ,也可以用 第三方管理器
Selenium 官方参考文档:Selenium with Python --- Selenium Python Bindings 2 documentation
实操:本实操演示利用edge浏览器从零开始完成selenium访问百度首页并将返回的结果打印。
①、准备edge浏览器:下载 Microsoft Edge
②、下载edge驱动:Microsoft Edge WebDriver | Microsoft Edge Developer
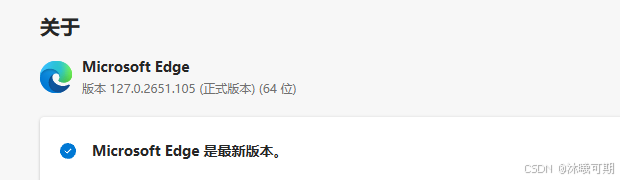
注意:下载的驱动一定要和自己的浏览器大版本对应,下面是我的edge版本:
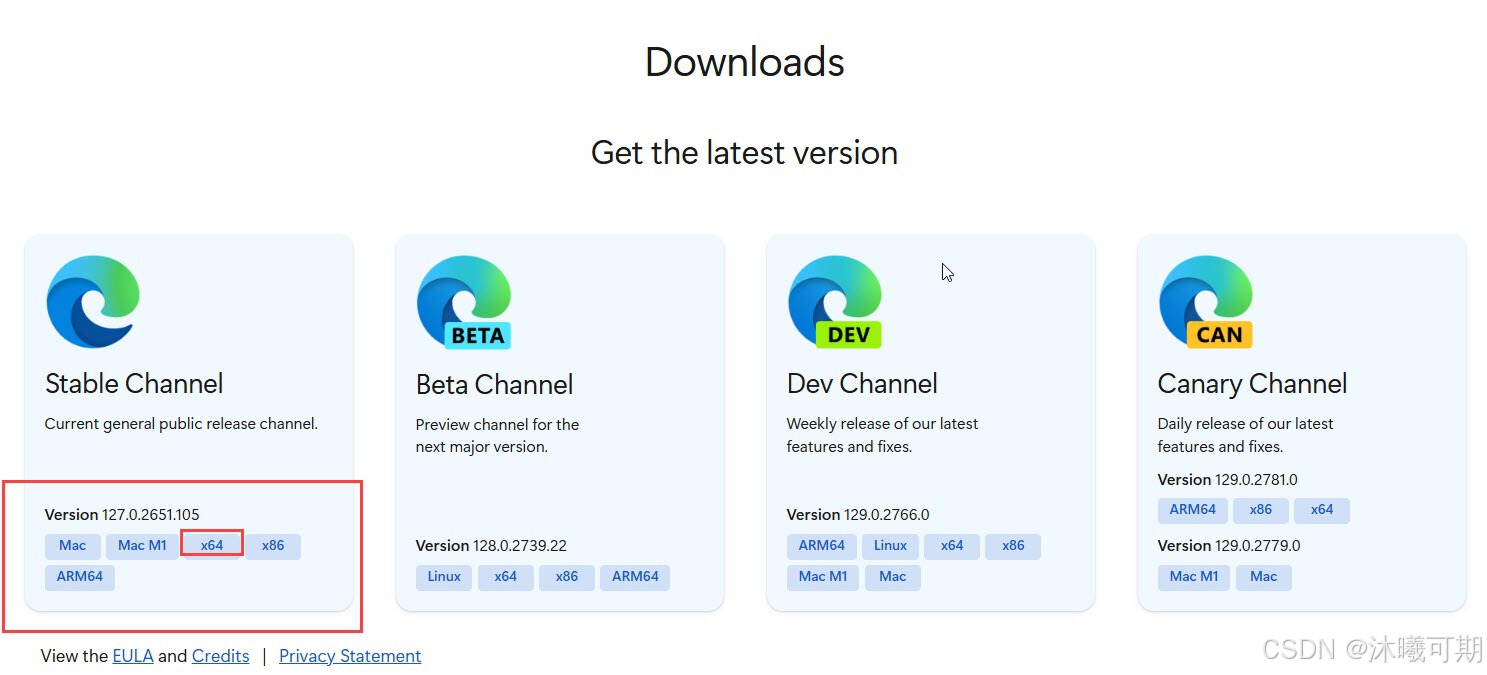
下面是我下载的驱动(下载的驱动是127版本,浏览器版本也是127):
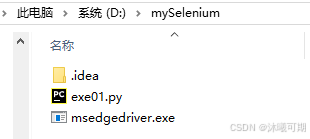
将解压后的msedgedriver.exe解压到本课程的目录下(D:\mySelenium),本课程的所有实操都将在该目录中:
③、在pycharm中下载selenium:
python
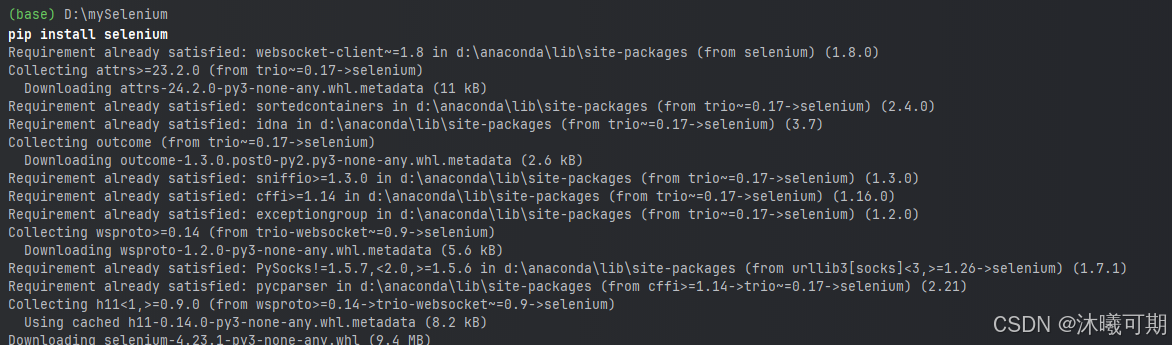
# 终端中运行如下代码(Alt+F12)
pip install selenium
运行结果如下:
④、编辑爬虫文件exe01.py(文件名可自定义):
以下是pycharm中的文件结构供参考:

python
from selenium import  webdriver
from selenium.webdriver.edge.service import Service
# 设置edge的驱动程序
service = Service('./msedgedriver.exe')
# 创建一个浏览器
edge = webdriver.Edge(service=service)
# 发送请求
edge.get('http://www.baidu.com')
# 获取html
page_info = edge.page_source
# 打印获取的html
print(page_info)
# 关闭浏览器
edge. Quit()
运行结果如下:

2、selenium控制浏览器
2.1、最大窗口化
概述:调用启动的浏览器默认不是全屏的,这样不会影响脚本的执行,但是有时候会影响我们"观看"脚本的执行。
python
# 设置edge的驱动程序
service = Service('./msedgedriver.exe')
# 创建一个浏览器
edge = webdriver.Edge(service=service)
# 发送请求
edge.get('目标网址')
# 最大化窗口
edge.maximize_window()
2.2、设置窗口的宽高
概述:通过设置窗口的宽高可以更加灵活的设置窗口的显示效果。
python
# 设置edge的驱动程序
service = Service('./msedgedriver.exe')
# 创建一个浏览器
edge = webdriver.Edge(service=service)
# 发送请求
edge.get('目标网址')
# 将窗口大小设置为指定的宽高
edge.set_window_size(1000,700)
2.3、浏览器页面的前进与后退
概述:浏览器上有一个后退、前进按钮,可以通过这两个按钮实现页面的前进与回退。
python
import time
from selenium import  webdriver
from selenium.webdriver.edge.service import Service
# 设置edge的驱动程序
service = Service('./msedgedriver.exe')
# 创建一个浏览器
edge = webdriver.Edge(service=service)
# 发送请求
edge.get('http://www.baidu.com')
time.sleep(2)
edge.get('https://news.baidu.com/')
time.sleep(2)
# 页面回退
edge.back()
time.sleep(2)
# 页面前进
edge.forward()
time.sleep(2)
# 关闭浏览器
edge. Quit()
3、元素的定位与操作
概述:对象的定位应该是自动化的核心,要想操作一个对象,首先应该识别这个对象。 一个对象就是一个人一样,他会有各种的特征(属性),例如我们可以通过一个人的身份证号,姓名,或者他住在哪个街道、楼层、门牌找到这个人。
元素定位
webdriver提供了对象定位方法:
- find_element(type,value)
- find_elements(type,value)
利用 By 类来确定哪种选择方式
python
from selenium.webdriver.common.by import By
edge.find_element(by=By.ID,value='su')
By 类的一些属性如下
- ID = "id"
- NAME = "name"
- XPATH = "xpath"
- LINK_TEXT = "link text"
- PARTIAL_LINK_TEXT = "partial link text"
- TAG_NAME = "tag name"
- CLASS_NAME = "class name"
- CSS_SELECTOR = "css selector"
元素操作
前面讲到了不少知识都是定位元素,定位只是第一步,定位之后需要对这个原素进行操作。
鼠标点击呢还是键盘输入,这要取决于我们定位的是按钮还输入框。
一般来说,webdriver中比较常用的操作对象的方法有下面几个
- click 点击对象
- send_keys 在对象上模拟按键输入
- clear 清除对象的内容,如果可以的话
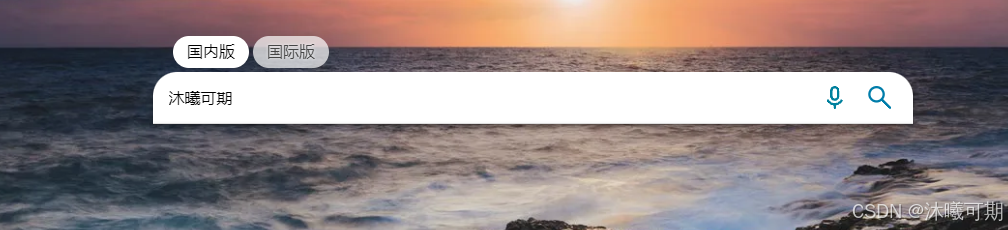
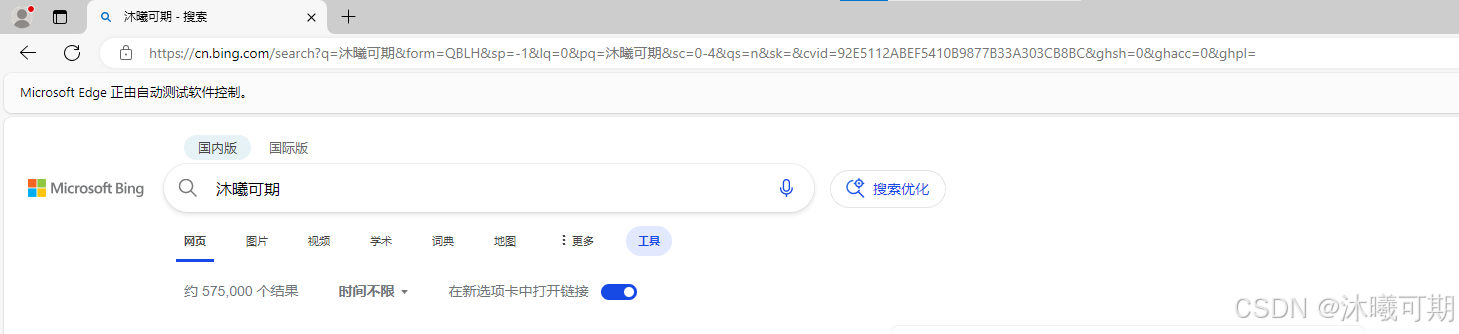
实操:本实操通过定位必应的搜索框并输入内容和定位搜索按钮并点击搜索按钮的操作巩固利用selenium定位并操作元素。
python
import time
from selenium import webdriver
from selenium.webdriver.edge.service import Service
from selenium.webdriver.common.by import By
def findelement(url):
# 创建浏览器驱动
service = Service('./msedgedriver.exe')
# 创建浏览器
edge = webdriver.Edge(service=service)
# 全屏显示
edge.maximize_window()
# 发送请求
edge.get(url)
# 定位搜索框并输入内容
search_box = edge.find_element(by=By.ID,value='sb_form_q')
search_box.send_keys('沐曦可期')
time. Sleep(2)
# 定位搜索按钮并点击
search_bt = edge.find_element(by=By.ID,value='search_icon')
search_bt.click()
time.sleep(5)
# 关闭浏览器
edge.close()
if __name__ == '__main__':
url = 'https://cn.bing.com/'
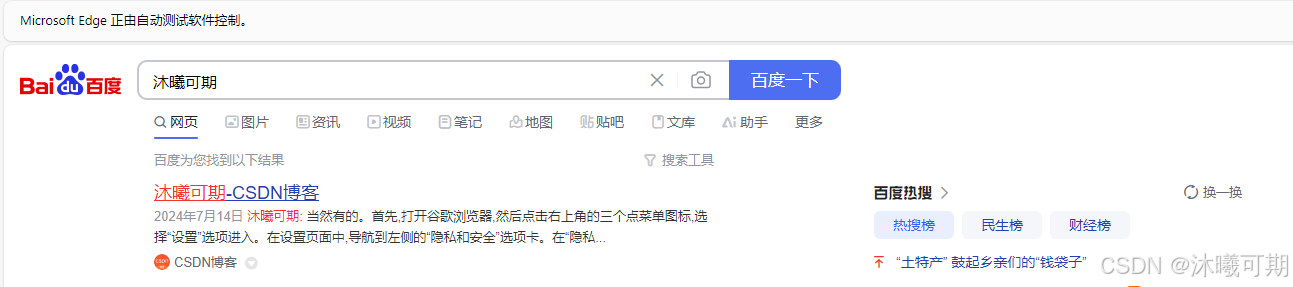
findelement(url)运行结果如下:
4、定位下拉菜单
概述:本小节没有新增的知识点,是对第3节中所学知识在特定场景的使用练习。
实操:本实操通过点击下拉菜单中指定按钮的实操巩固元素的定位与操作。
python
from selenium import webdriver
from selenium.webdriver.edge.service import Service
from selenium.webdriver.common.by import By
from time import sleep
def menu_element():
# 创建浏览器
edge = webdriver.Edge(service=Service('msedgedriver.exe'))
# 向目标地址发送请求
edge.get('https://www.bootstrap.cn/doc/book/3')
edge.maximize_window()
sleep(2)
# 定位下拉菜单并点击(定位父级元素)
edge.find_element(by=By.ID,value='btn21').click()
sleep(2)
# 定位菜单中的特定项并点击(定位子级元素)
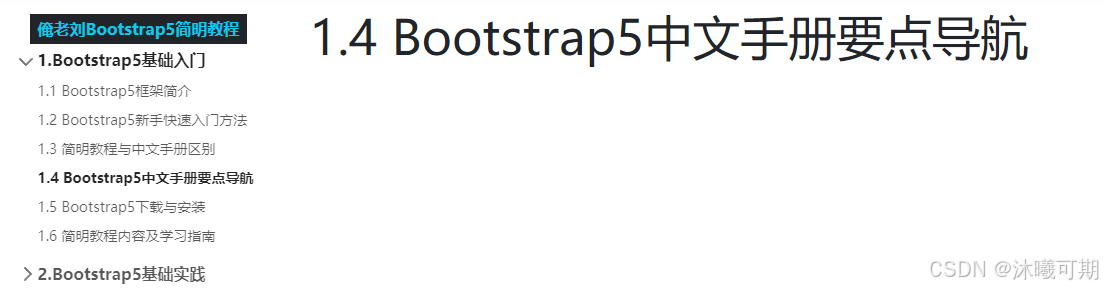
element = edge.find_element(by=By.LINK_TEXT,value='1.4 Bootstrap5中文手册要点导航').click()
sleep(2)
# 关闭浏览器
edge.close()
if __name__ == '__main__':
menu_element()运行结果如下:
为了达到反爬的效果,下面为上述代码添加一个滑动光标的操作(上面的代码是立即定位到指定元素并点击,会被部分网站反爬,因此下面尝试添加一个滑动光标的动作)
python
from selenium import webdriver
from selenium.webdriver.edge.service import Service
from selenium.webdriver.common.by import By
from time import sleep
def menu_element():
    # 创建浏览器
    edge = webdriver.Edge(service=Service('msedgedriver.exe'))
    # 向目标地址发送请求
    edge.get('https://www.bootstrap.cn/doc/book/3')
    edge.maximize_window()
    sleep(2)
    # 定位下拉菜单并点击(定位父级元素)
    edge.find_element(by=By.ID,value='btn21').click()
    sleep(2)
    # 获取子级元素的位置
    element = edge.find_element(by=By.LINK_TEXT,value='1.4 Bootstrap5中文手册要点导航')
    # 做一个移动光标的操作(为浏览器定义一个动作,移动到指定元素,最后执行该动作)
    # 下面通过pause()指定了拖动光标移动花费了2秒
    webdriver.ActionChains(edge).move_to_element(element).pause(2).perform()
    sleep(5)
    # 点击目标子元素
    element.click()
    # 关闭浏览器
    edge.close()

if __name__ == '__main__':
    menu_element()
实现效果与上面的代码一样。
5、层级定位
概述:
对于一个现代的web应用,经常会出现框架(frame) 或窗口(window)的应用,这也就给我们的定位带来了一个难题。
有时候我们定位一个元素,定位器没有问题,但一直定位不了,这时候就要检查这个元素是否在一个frame中,seelnium webdriver 提供了一个switch_to_frame方法,可以很轻松的来解决这个问题
多层框架或窗口的定位:
- edge.switch_to.frame()
实操前准备:在python文件的同级目录创建如下两个html文件一遍测试:
inner.html
html
<!DOCTYPE html>
<html>
<head>
    <meta http-equiv="content-type" content="text/html;charset=utf-8"/>
    <title>inner</title>
</head>
<body>
    <div class="row-fluid">
        <div class="span6 well">
            <h3>inner</h3>
            <iframe id="f2" src="https://www.hao123.com/" width="1400" height="600"></iframe>
        </div>
    </div>
</body>
</html>
frame.html
html
<!DOCTYPE html>
<html>
<head>
<meta http-equiv="content-type" content="text/html;charset=utf-8"/>
<title>frame</title>
<script type="text/javascript" src="https://cdn.jsdelivr.net/npm/jquery@1.12.4/dist/jquery.min.js"></script>
<link href="http://netdna.bootstrapcdn.com/twitter-bootstrap/2.3.2/css/bootstrap-combined.min.css"
rel="stylesheet"/>
</head>
<body>
<div class="row-fluid">
<div class="span10 well">
<h3>frame</h3>
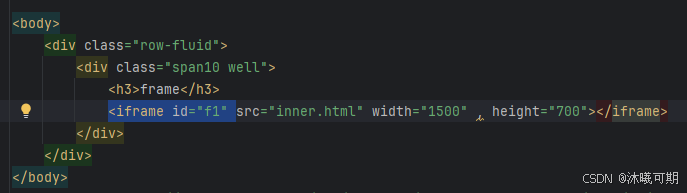
<iframe id="f1" src="inner.html" width="1500" , height="700"></iframe>
</div>
</div>
</body>
<script src="https://cdn.jsdelivr.net/npm/@bootcss/v3.bootcss.com@1.0.8/dist/js/bootstrap.min.js"></script>
</html>实操:尝试利用selenium访问frame.html文件,并在frame.html文件中包含的inner.html文件的搜索框内搜索沐曦可期。
按照前面学习的经验,我写了如下代码:
python
from selenium import webdriver
from selenium.webdriver.edge.service import Service
from selenium.webdriver.common.by import By
from time import sleep
import os

def frame():
    # 创建浏览器和驱动
    edge = webdriver.Edge(service=Service('msedgedriver.exe'))
    # 设置为全屏显示
    edge.maximize_window()
    # 发送请求
    edge.get(os.path.abspath('./frame.html'))
    sleep(2)
    # 定位搜索框
    edge.find_element(by=By.CLASS_NAME,value='textInput input-hook').send_keys('沐曦可期')
    sleep(2)
    # 定位搜索按钮
    edge.find_element(by=By.CLASS_NAME,value='g-cp submitInput button-hook s_btn').click()
    sleep(2)
    # 关闭连接
    edge.quit()

if __name__ == '__main__':
    frame()
运行结果如下:该错误说明根本就没有定位到对应的元素。

分析:产生这个结果的原因其实就是html代码分为两个层级,我们一直在frame.html文件中定位,但内容却在inner.html文件中,如果想要定位到inner.html文件中的内容就需要切换到inner.html文件所在的层级。
下图是frame文件中的代码,由高亮处的代码可知inner.html文件所在的层级id为f1:
如果只切换一次还不够,下图是inner.html文件的代码,由高亮代码可知,该界面里还包含了一个外站的界面,而且我们要定位的元素就在这个外站界面中,因此切换到inner.html文件中后,还要再切换到外站链接中。

修改代码如下:
python
from selenium import webdriver
from selenium.webdriver.edge.service import Service
from selenium.webdriver.common.by import By
from time import sleep
import os

def frame():
    # 创建浏览器和驱动
    edge = webdriver.Edge(service=Service('msedgedriver.exe'))
    # 设置为全屏显示
    edge.maximize_window()
    # 发送请求
    edge.get(os.path.abspath('./frame.html'))
    sleep(2)
    # 切换到inner.html文件所在的层级
    edge.switch_to.frame('f1')
    # 切换到外站链接界面www.hao123.com
    edge.switch_to.frame('f2')
    # 定位搜索框
    edge.find_element(by=By.CLASS_NAME,value='textInput').send_keys('沐曦可期')
    sleep(2)
    # 定位搜索按钮
    edge.find_element(by=By.CLASS_NAME,value='s_btn').click()
    sleep(5)
    # 关闭连接
    edge.quit()

if __name__ == '__main__':
    frame()
运行结果如下:
6、定位选择框
概述:在爬取数据时,有时数据太多不方便精准选择,此时就可以考虑使用具有筛选功能的xpath进行筛选,只需要定位元素,然后点击即可。
实操前准备:提取在python同级目录创建一个html文件,内容如下(我取名为meniu.html):
html
<!DOCTYPE html>
<html>
<body>
<select id="ShippingMethod1" onchange="updateShipping(options[selectedIndex]);" name="ShippingMethod">
    <option value="12.51">UPS Next Day Air ==> $12.51</option>
    <option value="11.61">UPS Next Day Air Saver ==> $11.61</option>
    <option value="10.69">UPS 3 Day Select ==> $10.69</option>
    <option value="9.03">UPS 2nd Day Air ==> $9.03</option>
    <option value="8.34">UPS Ground ==> $8.34</option>
    <option value="9.25">USPS Priority Mail Insured ==> $9.25</option>
    <option value="7.45">USPS Priority Mail ==> $7.45</option>
    <option value="3.20" selected="">USPS First Class ==> $3.20</option>
</select>
<select id="ShippingMethod2" onchange="updateShipping(options[selectedIndex]);" name="ShippingMethod">
    <option value="13.51">UPS Next Day Air ==> $13.51</option>
    <option value="14.61">UPS Next Day Air Saver ==> $14.61</option>
    <option value="15.69">UPS 3 Day Select ==> $15.69</option>
    <option value="19.03">UPS 2nd Day Air ==> $19.03</option>
    <option value="18.34">UPS Ground ==> $18.34</option>
    <option value="19.25">USPS Priority Mail Insured ==> $19.25</option>
    <option value="17.45">USPS Priority Mail ==> $17.45</option>
    <option value="13.20" selected="">USPS First Class ==> $13.20</option>
</select>
</body>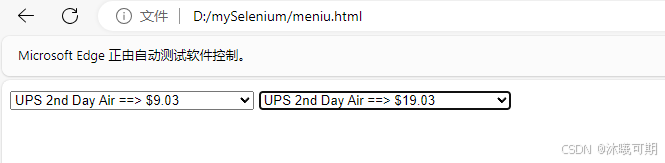
</html>实操:通过xpath定位meniu.html文件中的两个选择框,第一个选择框选择9.25,第二个选择框选择19.03。
python
from selenium import webdriver
from selenium.webdriver.edge.service import Service
from selenium.webdriver.common.by import By
from time import sleep
import os

# 创建浏览器和驱动
edge = webdriver.Edge(service=Service('./msedgedriver.exe'))
# 发送请求
edge.get(os.path.abspath('./meniu.html'))
# 设置全屏
edge.maximize_window()
sleep(2)
# 定位第一个选择框并选择
edge.find_element(by=By.XPATH,value='//select[@id="ShippingMethod1"]/option[@value=9.03]').click()
sleep(2)
# 定位第二个选择框并选择
edge.find_element(by=By.XPATH,value='//select[@id="ShippingMethod2"]/option[@value=19.03]').click()
sleep(5)
# 关闭连接
edge.quit()
运行结果如下:
7、处理弹出窗
概述:有时页面可能会弹窗口。只需要去定位弹窗上的"确定"按钮即可。
-
switch_to
焦点集中到页面上的一个警告(提示)
-
accept()
接受警告提示
切换至弹窗:
python
chrome.switch_to.alert.accept() # 推荐
chrome.switch_to_alert().accept() # 过期实操前准备:在python文件的同级目录创建close_window.html文件:
html
<!DOCTYPE html>
<html lang="en">
<head>
<meta charset="UTF-8">
<title>This is a page</title>
</head>
<body>
<div id = "container">
<div style="font: size 30px;">Hello,Python Spider</div>
</div>
</body>
<script>
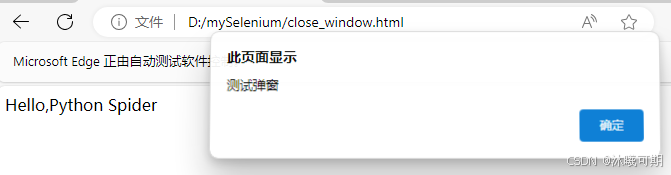
alert('测试弹窗')
</script>
</html>实操:关闭close_window.html文件中的弹窗。
python
from selenium import webdriver
from selenium.webdriver.edge.service import Service
from selenium.webdriver.common.by import By
from time import sleep
import os

def close_window():
    # 创建浏览器和驱动
    edge = webdriver.Edge(service=Service('./msedgedriver.exe'))
    # 发送请求
    edge.get(os.path.abspath('./close_window.html'))
    sleep(2)
    # 定位弹窗并点击
    edge.switch_to.alert.accept()
    sleep(5)
    # 关闭连接
    edge.quit()

if __name__ == '__main__':
    close_window()
运行结果如下:
8、拖拽元素
概述:要完成元素的拖拽,首先需要指定被拖动的元素和拖动目标元素,然后利用 ActionChains 类来实现,ActionChains用于定制动作。通过ActionChains对象中的perform()执行动作。
实操前准备:在python文件同级目录创建一个名为drag.html的文件,内容如下:
html
<!doctype html>
<html lang="en">
<head>
    <meta charset="utf-8">
    <meta name="viewport" content="width=device-width, initial-scale=1">
    <title>jQuery UI Draggable - Auto-scroll</title>
    <link rel="stylesheet" href="http://code.jquery.com/ui/1.12.1/themes/base/jquery-ui.css">
    <style>
    #draggable, #draggable2, #draggable3 { width: 100px; height: 100px; padding: 0.5em; float: left; margin: 0 10px 10px 0; }
  body {font-family: Arial, Helvetica, sans-serif;}
  table {font-size: 1em;}
  .ui-draggable, .ui-droppable {background-position: top;}
    </style>
    <script src="https://code.jquery.com/jquery-1.12.4.js"></script>
    <script src="https://code.jquery.com/ui/1.12.1/jquery-ui.js"></script>
    <script>
    $( function() {
        $( "#draggable" ).draggable({ scroll: true });
        $( "#draggable2" ).draggable({ scroll: true, scrollSensitivity: 100 });
        $( "#draggable3" ).draggable({ scroll: true, scrollSpeed: 100 });
    } );
    </script>
</head>
<body>
<div id="draggable" class="ui-widget-content">
    <p>Scroll set to true, default settings</p>
</div>


<div id="draggable2" class="ui-widget-content">
    <p>scrollSensitivity set to 100</p>
</div>


<div id="draggable3" class="ui-widget-content">
    <p>scrollSpeed set to 100</p>
</div>
<div style="height: 5000px; width: 1px;"></div>
</body>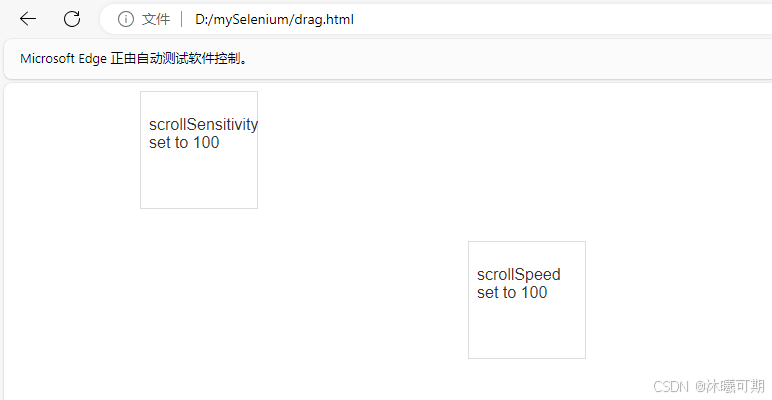
</html>实操:通过本实操了解selenium拖拽元素的方法。
python
from selenium import webdriver
from selenium.webdriver.edge.service import Service
from selenium.webdriver.common.by import By
from time import sleep
import os
def drag_and_drop():
    # 创建浏览器和驱动
    edge = webdriver.Edge(service=Service('./msedgedriver.exe'))
    # 发送请求
    edge.get(os.path.abspath('./drag.html'))
    # 设置全屏
    edge.maximize_window()
    sleep(2)
    # 定位元素
    div1 = edge.find_element(by=By.ID,value='draggable')
    div2 = edge.find_element(by=By.ID,value='draggable2')
    div3 = edge.find_element(by=By.ID,value='draggable3')
    # 设置拖拽事件
    # 将div1拖拽到div2的位置
    webdriver.ActionChains(edge).drag_and_drop(div1,div2).perform()
    sleep(2)
    # div3每次向右移动20像素,向下移动15像素,共移动10次
    for i in range(10):
        webdriver.ActionChains(edge).drag_and_drop_by_offset(div3,20,15).perform()
        sleep(0.5)
    sleep(6)
    # 关闭连接
    edge.quit()

if __name__ == '__main__':
    drag_and_drop()
运行结果如下:
9、调用JS
概述:有时候我们需要控制页面滚动条上的滚动条,但滚动条并非页面上的元素,这个时候就需要借助js是来进行操作。
一般用到操作滚动条的会两个场景:
- 要操作的页面元素不在当前页面范围,无法进行操作,需要拖动滚动条
- 注册时的法律条文需要阅读,判断用户是否阅读的标准是:滚动条是否拉到最下方
调用js的方法:
javascript
execute_script(script, *args)滚动条回到顶部:
javascript
js="document.getElementById('id').scrollTop=0"
driver.execute_script(js)滚动条拉到底部:
javascript
js="document.documentElement.scrollTop=10000"
driver.execute_script(js)提示:可以修改scrollTop 的值,来定位右侧滚动条的位置,0是最上面,10000是最底部
以上方法在Firefox和IE浏览器(Edge)上是可以的,但是在Chrome浏览器中是不管用的。解决办法:
javascript
js = "document.body.scrollTop=0"
driver.execute_script(js) 移动横向滚动条:
javascript
js = "window.scrollTo(100,400)"
driver.execute_script(js)实操:在前面的学习中我们了解到某扑的官网是一个动态页面,通过下拉页面获取数据,这里利用该网站验证我们下拉滚动条的作用。
python
from selenium import webdriver
from selenium.webdriver.edge.service import Service
from selenium.webdriver.common.by import By
from time import sleep
from lxml import etree
def scroll_bar():
# 创建浏览器和驱动
edge = webdriver.Edge(service=Service('./msedgedriver.exe'))
# 发送请求
edge.get('https://www.hupu.com/')
# 设置全屏显示
edge.maximize_window()
# 打印获取的所有标题
sleep(2)
e = etree.HTML(edge.page_source)
title = e.xpath('//div[@class="item-title-conent"]/text()')
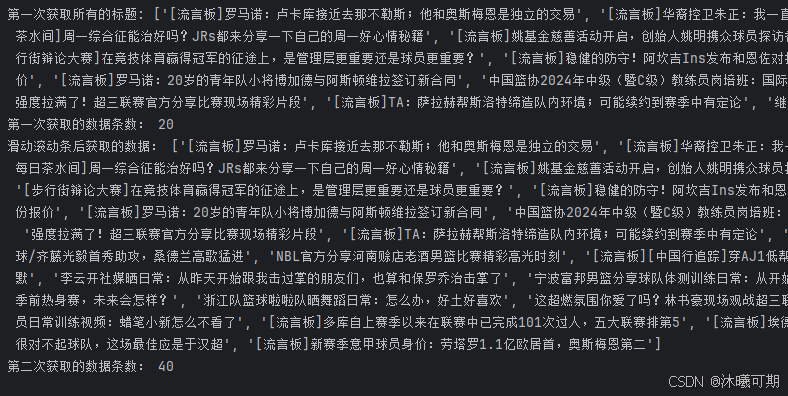
print("第一次获取所有的标题:",[t for t in title])
print('第一次获取的数据条数:',len(title))
sleep(2)
# 滑动滚动条
js = 'document.documentElement.scrollTop=10000'
edge.execute_script(js)
sleep(3)
# 创建一个etree对象解析数据
e = etree.HTML(edge.page_source)
title = e.xpath('//div[@class="item-title-conent"]/text()')
# 再次打印获取的所有标题
print('滑动滚动条后获取的数据:',[t for t in title])
print('第二次获取的数据条数:',len(title))
sleep(5)
edge.quit()
if __name__ == '__main__':
scroll_bar()运行结果如下:
10、等待元素
需要等待元素的场景:
- 网速慢
- AJAX请求数据
- 调试
10.1、强制等待
概述:使用 time.sleep()指定等待时间;
作用:当代码运行到强制等待这一行的时候,无论出于什么原因,都强制等待指定的时间,需要通过time模块实现;
优点:简单;
缺点:无法做有效的判断,会浪费时间。
10.2、隐式等待
概述:到了一定的时间发现元素还没有加载,则继续等待我们指定的时间,如果超过了我们指定的时间还没有加载就会抛出异常,如果没有需要等待的时候就已经加载完毕就会立即执行;
javascript
edge.implicitly_wait(time_num)优点: 设置一次即可;
缺点:必须等待加载完成才能到后续的操作,或者等待超时才能进入后续的操作。
示例:
python
from selenium import webdriver

url = 'https://www.baidu.com/'
edge = webdriver.Edge()
edge.get(url)
edge.implicitly_wait(10)
print(edge.find_element_by_class_name('next'))
print(edge.page_source)
10.3、显式等待
概述:指定一个等待条件,并且指定一个最长等待时间,会在这个时间内进行判断是否满足等待条件,如果成立就会立即返回,如果不成立,就会一直等待,直到等待你指定的最长等待时间,如果还是不满足,就会抛出异常,如果满足了就会正常返回;
python
from selenium.webdriver.support.wait import WebDriverWait优点:专门用于对指定一个元素等待,加载完即可运行后续代码;
缺点:多个元素都需要要单独设置等待。
示例:
python
from selenium.webdriver.support.wait import WebDriverWait

url = 'https://www.guazi.com/nj/buy/'
edge = webdriver.Edge()
edge.get(url)
# 共等待10秒,每0.5秒检测一次
wait = WebDriverWait(edge,10,0.5)
# until用于指定等待的元素
wait.until(EC.presence_of_element_located((By.CLASS_NAME, 'next')))
print(edge.page_source)
11、参数的使用
11.1、设置无头浏览器
概述:无头浏览器就是在程序运行过程中不再显示浏览器。
实操:将浏览器设置为无头浏览器访问百度,并打印响应结果。
python
from selenium import webdriver
from selenium.webdriver.edge.service import Service
from selenium.webdriver import EdgeOptions

def headerless():
    # 通过参数将浏览器设置成无头浏览器(如果是chrome浏览器就需要将参数修改为--headless)
    # 创建 EdgeOptions 对象并设置为无头模式
    # 注意:以下两条语句要分开写,写成一条语句就不会生效
    options = EdgeOptions()
    options.add_argument('headless')
    # 启动一个Edge浏览器并创建驱动
    edge = webdriver.Edge(service=Service('./msedgedriver.exe'),options=options)
    # 访问目标地址
    edge.get('https://www.baidu.com')
    # 打印响应信息
    print(edge.page_source)
    # 关闭浏览器
    edge.quit()

if __name__ == '__main__':
    headerless()
运行结果如下:

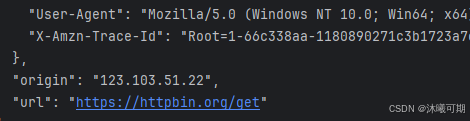
11.2、设置代理
python
from selenium import webdriver
from selenium.webdriver.edge.service import Service
from selenium.webdriver import EdgeOptions

def proxy():
    # 创建 EdgeOptions 对象并设置代理
    # 注意:以下两条语句要分开写,写成一条语句就不会生效
    options = EdgeOptions()
    # 标准格式:options.add_argument('--proxy-server=http://ip:port')
    options.add_argument('--proxy-server=http://123.103.51.22:3128')
    # 启动一个Edge浏览器并创建驱动
    edge = webdriver.Edge(service=Service('./msedgedriver.exe'),options=options)
    # 访问目标地址
    edge.get('https://httpbin.org/get')
    # 打印响应信息
    print(edge.page_source)
    # 关闭浏览器
    edge.quit()

if __name__ == '__main__':
    proxy()
运行结果如下:
11.3、防检测设置
python
from selenium import webdriver
from selenium.webdriver.edge.service import Service
from selenium.webdriver import EdgeOptions
def detection_proof():
option = EdgeOptions()
option.add_experimental_option('excludeSwitches', ['enable-automation'])
edge = webdriver.Edge(service=Service('./msedgedriver.exe'), options=option)
edge.execute_cdp_cmd("Page.addScriptToEvaluateOnNewDocument", {
"source": """
Object.defineProperty(navigator, 'webdriver', {
get: () => false
})
"""
})
edge.get('https://www.httpbin.org/get')
print(edge.page_source)
edge.quit()
if __name__ == '__main__':
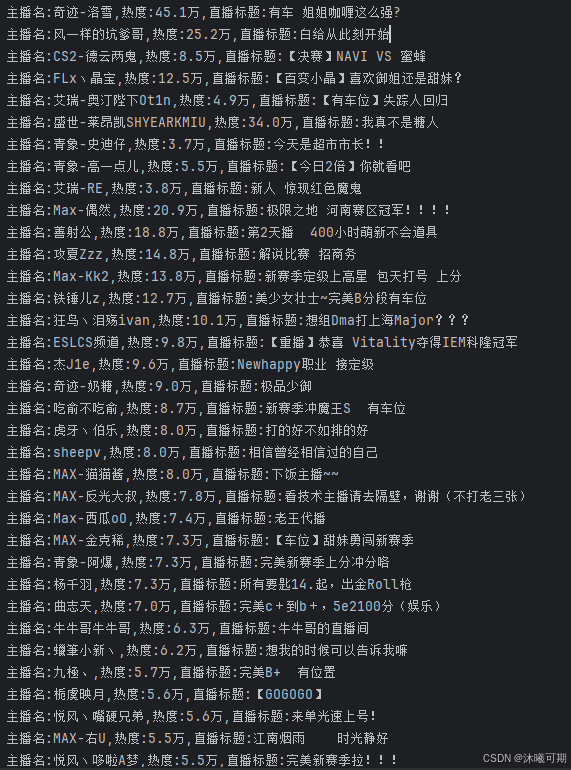
detection_proof()12、实战
要求:利用selenium获取某牙的直播间的标题,主播名和直播间热度。
python
from selenium import webdriver
from selenium.webdriver.edge.service import Service
from selenium.webdriver.common.by import By
from lxml import etree
from time import sleep

def get_data():
    # 创建驱动并启动浏览器
    edge = webdriver.Edge(service=Service('./msedgedriver.exe'))
    # 发送请求
    edge.get('https://www.huya.com/g/862')
    while True:
        sleep(6)
        # 提取数据
        e = etree.HTML(edge.page_source)

        names = e.xpath('//i[@class="nick"]/text()')
        heats = e.xpath('//i[@class="js-num"]/text()')
        titles = e.xpath('//a[@class="title"]/text()')
        sleep(2)
        # 打印数据
        for name,heat,title in zip(names,heats,titles):
            print(f"主播名:{name},热度:{heat},直播标题:{title}")

        try:
            # 定位下一页的按钮并点击
            edge.find_element(by=By.CLASS_NAME,value='laypage_next').click()
            sleep(2)
        except:
            break

    # 关闭浏览器
    edge.quit()

if __name__ == '__main__':
    get_data()
运行结果如下: