1.bridge-utils
一个用于Linux系统的网络桥接工具集。它提供了一些命令行工具,帮助用户创建、管理和配置网络桥接。网络桥接是一种将多个网络接口连接在一起,以使它们能够作为单个网络段进行通信的技术。
bridge-utils 常用的命令包括:
brctl: 用于创建和管理网络桥接。
brctl show: 显示当前系统中的桥接和相关接口的信息。
root@localhost \~\]# docker run -d -p80:80 centos:nginx //没有命名,使用id来管理容器
03554f581adcfaea5c82e28d8ed1c45bc8b1b2f9f1d5a82fc3fb1c49470dad8c
\[root@localhost \~\]# docker ps
CONTAINER ID IMAGE COMMAND CREATED STATUS PORTS NAMES
03554f581adc centos:nginx "/bin/sh -c /usr/sbi..." 25 seconds ago Up 25 seconds 0.0.0.0:80-\>80/tcp, :::80-\>80/tcp heuristic_hawking
\[root@localhost \~\]# docker inspect 03554\|grep IPAdd //查看IP
"SecondaryIPAddresses": null,
"IPAddress": "172.17.0.3",
"IPAddress": "172.17.0.3",
\[root@localhost \~\]# systemctl stop docker
Warning: Stopping docker.service, but it can still be activated by:
docker.socket
\[root@localhost \~\]# yum -y install bridge-utils //下载bridge-utils
## 2.bridge:
所有容器连接到桥就可以使⽤外⽹,使⽤nat让容器可以访问外⽹
使⽤ ip a s指令查看桥,所有容器连接到此桥,ip地址都是172.17.0.0/16⽹段,桥是启动docker服务后出现
\[root@localhost \~\]# brctl show //显示当前系统中的桥接和相关接口的信息
bridge name bridge id STP enabled interfaces
docker0 8000.0242189f6a83 no
\[root@localhost \~\]# systemctl start docker //启动docker
\[root@localhost \~\]# docker start heuristic_hawking //启动容器
\[root@localhost \~\]# brctl show //显示当前系统中的桥接和相关接口的信息
bridge name bridge id STP enabled interfaces
docker0 8000.0242189f6a83 no veth3054cc4
\[root@localhost \~\]# docker network ls //查看桥
NETWORK ID NAME DRIVER SCOPE
96680ca9ecd6 bridge bridge local
8380e18cdd2a host host local
d8a046f15d90 none null local
多创建几个镜像,发现他们默认都是桥接模式的
\[root@localhost \~\]# docker run -d centos:nginx
\[root@localhost \~\]# docker inspect 9c9c\|grep IPAdd
"SecondaryIPAddresses": null,
"IPAddress": "172.17.0.3",
"IPAddress": "172.17.0.3",
\[root@localhost \~\]# docker run -d centos:nginx
\[root@localhost \~\]# docker inspect 1806\|grep IPAdd
"SecondaryIPAddresses": null,
"IPAddress": "172.17.0.4",
"IPAddress": "172.17.0.4",
\[root@localhost \~\]# brctl show
bridge name bridge id STP enabled interfaces
docker0 8000.0242189f6a83 no veth1061d46
veth3054cc4
veth3c9ea62
每⼀台dcoker主机上的docker0所在⽹段完全⼀样,但是会造成跨主机的容器⽆法通信
## 3.host:
与主机共享⽹络,可让容器连接外⽹
所有容器与docker主机在同⼀个⽹络中,容器和外⽹相互访问
优点:可以直接访问容器
缺点:端⼝占⽤,多容器同时运⾏⼀个服务,不建议,在测试环境使⽤
\[root@localhost \~\]# docker run -it --network host centos:nginx /bin/bash //绑定host主机网络,容器和宿主机共用一个IP
\[root@localhost /\]# //注意:这里是在容器的家目录里,而不是宿主机的家目录里
\[root@localhost /\]# ls
bin etc lib lost+found mnt proc run srv tmp var
dev home lib64 media opt root sbin sys usr
发现在容器内部访问ip是宿主机的IP
在外部查看不到IP
## 4.none:
容器仅仅有lo⽹卡,不能与外界链接,在⾼级应⽤中使⽤,lo⽹卡,⽆法链接外⽹
## 5.联盟⽹络 容器⽹络
跨主机容器之间通讯
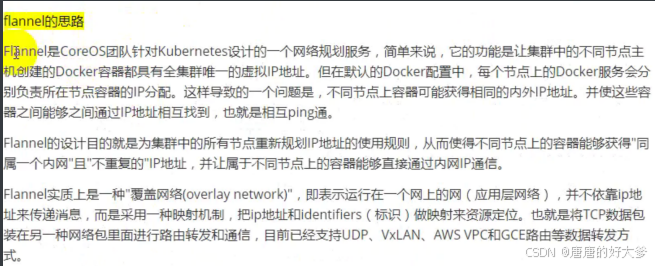
### (1)flannel介绍
### 
(2)原理
### 
(3)搭建
#### 1)环境准备:
新建两台主机:
node1主控 192.168.1.78
node2被控 192.168.1.79
#### 2)node1主控主机
\[root@localhost \~\]# yum -y install etcd flannel //安装etcd数据库,flannel
\[root@localhost \~\]# vim /etc/etcd/etcd.conf //修改etcd配置文件


\[root@localhost \~\]# systemctl start etcd.service //启动服务
\[root@localhost \~\]# systemctl enable etcd.service //开机自启
\[root@localhost \~\]# netstat -lntup\|grep 2379 //查看两个端口是否打开
tcp6 0 0 :::2379 :::\* LISTEN 1661/etcd
\[root@localhost \~\]# netstat -lntup\|grep 4001
tcp6 0 0 :::4001 :::\* LISTEN 1661/etcd
\[root@localhost \~\]# etcdctl set a 100 //测试数据库功能
100
\[root@localhost \~\]# etcdctl get a //访问数据
100
\[root@localhost \~\]# etcdctl -C http://192.168.1.78:4001 cluster-health //查看集群是否健康
member 8e9e05c52164694d is healthy: got healthy result from http://192.168.1.78:2379
cluster is healthy
\[root@localhost \~\]# etcdctl -C http://192.168.1.78:2379 cluster-health
member 8e9e05c52164694d is healthy: got healthy result from http://192.168.1.78:2379
cluster is healthy
\[root@localhost \~\]# vim /etc/sysconfig/flanneld //修改flannel的配置文件

\[root@localhost \~\]# etcdctl mk /atomic.io/network/config '{ "Network" : "172.20.0.0/16" }' //指定容器IP地址的分配
{ "Network" : "172.20.0.0/16" }
\[root@localhost \~\]# etcdctl get /atomic.io/network/config //查看是否存入成功
{ "Network" : "172.20.0.0/16" }
\[root@localhost \~\]# systemctl start flanneld.service //启动
\[root@localhost \~\]# systemctl enable flanneld.service //开机自启
\[root@localhost \~\]# ip a s //这里看到分配:172.20.59.0
3: flannel0: \ mtu 1472 qdisc pfifo_fast state UNKNOWN group default qlen 500
link/none
inet 172.20.59.0/16 scope global flannel0
安装docker
运行脚本source docker.sh
\[root@localhost \~\]# systemctl start docker.service //启动docker
\[root@localhost \~\]# ip a s
1: lo: \ mtu 65536 qdisc noqueue state UNKNOWN group default qlen 1000
link/loopback 00:00:00:00:00:00 brd 00:00:00:00:00:00
inet 127.0.0.1/8 scope host lo
2: ens33: \ mtu 1500 qdisc pfifo_fast state UNKNOWN group default qlen 1000
link/ether 00:0c:29:6e:0c:3f brd ff:ff:ff:ff:ff:ff
inet 192.168.1.78/24 brd 192.168.1.255 scope global noprefixroute ens33
3: flannel0: \ mtu 1472 qdisc pfifo_fast state UNKNOWN group default qlen 500
link/none
inet 172.20.59.0/16 scope global flannel0
4: docker0: \ mtu 1500 qdisc noqueue state DOWN group default
link/ether 02:42:1e:73:65:22 brd ff:ff:ff:ff:ff:ff
inet 172.17.0.1/16 brd 172.17.255.255 scope global docker0
valid_lft forever preferred_lft forever
\[root@localhost \~\]# cat /run/flannel/subnet.env //查看flannel子网ip
FLANNEL_NETWORK=172.20.0.0/16
FLANNEL_SUBNET=172.20.59.1/24 //待会要用
FLANNEL_MTU=1472 //待会要用
FLANNEL_IPMASQ=false
\[root@localhost \~\]# vim /etc/docker/daemon.json //编辑docker.json文件
{
"registry-mirrors": \[
"https://do.nark.eu.org",
"https://dc.j8.work",
"https://docker.m.daocloud.io",
"https://dockerproxy.com",
"https://docker.mirrors.ustc.edu.cn",
"https://docker.nju.edu.cn"
\],
"hosts": \[
"tcp://0.0.0.0:2375",
"unix:///var/run/docker.sock"
\],
"bip" : "172.20.59.1/24",
"mtu" : 1472
}
\[root@localhost \~\]# vim /usr/lib/systemd/system/docker.service //修改docker配置文件

\[root@localhost \~\]# systemctl daemon-reload //加载配置
\[root@localhost \~\]# systemctl restart docker //重启服务
\[root@localhost \~\]# ip a s //这里看到docker网卡已经与flannel属于同一网段了
1: lo: \ mtu 65536 qdisc noqueue state UNKNOWN group default qlen 1000
link/loopback 00:00:00:00:00:00 brd 00:00:00:00:00:00
inet 127.0.0.1/8 scope host lo
2: ens33: \ mtu 1500 qdisc pfifo_fast state UNKNOWN group default qlen 1000
link/ether 00:0c:29:6e:0c:3f brd ff:ff:ff:ff:ff:ff
inet 192.168.1.78/24 brd 192.168.1.255 scope global noprefixroute ens33
3: flannel0: \ mtu 1472 qdisc pfifo_fast state UNKNOWN group default qlen 500
link/none
inet 172.20.59.0/16 scope global flannel0
4: docker0: \ mtu 1472 qdisc noqueue state DOWN group default
link/ether 02:42:1e:73:65:22 brd ff:ff:ff:ff:ff:ff
inet 172.20.59.1/24 brd 172.20.59.255 scope global docker0
测试IP地址:
\[root@localhost \~\]# docker pull centos //下载镜像
\[root@localhost \~\]# docker run -it centos:latest /bin/bash //创建容器
\[root@80ff4428d236 /\]#
ctrl+p+q退出
\[root@localhost \~\]# docker inspect 80f\|grep IPAdd //这里看到容器的IP地址已经是flannel分配的了
"SecondaryIPAddresses": null,
"IPAddress": "172.20.59.2",
"IPAddress": "172.20.59.2",
#### 3)node2被控主机
\[root@localhost \~\]# yum -y install flannel
\[root@localhost \~\]# vim /etc/sysconfig/flanneld

\[root@localhost \~\]# systemctl start flanneld.service
\[root@localhost \~\]# ip a s //可以看到flannel为我们分配了IP地址
1: lo: \ mtu 65536 qdisc noqueue state UNKNOWN group default qlen 1000
link/loopback 00:00:00:00:00:00 brd 00:00:00:00:00:00
inet 127.0.0.1/8 scope host lo
2: ens33: \ mtu 1500 qdisc pfifo_fast state UNKNOWN group default qlen 1000
link/ether 00:0c:29:56:9e:63 brd ff:ff:ff:ff:ff:ff
inet 192.168.1.79/24 brd 192.168.1.255 scope global noprefixroute ens33
3: flannel0: \ mtu 1472 qdisc pfifo_fast state UNKNOWN group default qlen 500
link/none
inet 172.20.93.0/16 scope global flannel0
\[root@localhost \~\]# cat /run/flannel/subnet.env
FLANNEL_NETWORK=172.20.0.0/16
FLANNEL_SUBNET=172.20.93.1/24
FLANNEL_MTU=1472
FLANNEL_IPMASQ=false
\[root@localhost \~\]# source docker.sh //安装docker
\[root@localhost \~\]# vim /etc/docker/daemon.json //编辑daemon.json文件
{
"registry-mirrors": \[
"https://do.nark.eu.org",
"https://dc.j8.work",
"https://docker.m.daocloud.io",
"https://dockerproxy.com",
"https://docker.mirrors.ustc.edu.cn",
"https://docker.nju.edu.cn"
\],
"hosts": \[
"tcp://0.0.0.0:2375",
"unix:///var/run/docker.sock"
\],
"bip" : "172.20.93.1/24",
"mtu" : 1472
}
\[root@localhost \~\]# vim /usr/lib/systemd/system/docker.service //修改docker配置文件

\[root@localhost \~\]# systemctl daemon-reload //加载配置
\[root@localhost \~\]# systemctl restart docker //重启服务
\[root@localhost \~\]# ip a s //这里看到docker网卡已经与flannel属于同一网段了
1: lo: \ mtu 65536 qdisc noqueue state UNKNOWN group default qlen 1000
link/loopback 00:00:00:00:00:00 brd 00:00:00:00:00:00
inet 127.0.0.1/8 scope host lo
2: ens33: \ mtu 1500 qdisc pfifo_fast state UNKNOWN group default qlen 1000
link/ether 00:0c:29:56:9e:63 brd ff:ff:ff:ff:ff:ff
inet 192.168.1.79/24 brd 192.168.1.255 scope global noprefixroute ens33
3: flannel0: \ mtu 1472 qdisc pfifo_fast state UNKNOWN group default qlen 500
link/none
inet 172.20.93.0/16 scope global flannel0
4: docker0: \ mtu 1472 qdisc noqueue state DOWN group default
link/ether 02:42:d4:f3:5c:66 brd ff:ff:ff:ff:ff:ff
inet 172.20.93.1/24 brd 172.20.93.255 scope global docker0
测试IP地址:
1.下载一个镜像
2.创建容器
3.查看该容器IP