文章目录
- 0、测试接口
- 1、JDK的HttpURLConnection
- 2、Apache的HttpClient
- 3、SpringBoot的RestTemplate
-
- [3.1 GET](#3.1 GET)
- [3.2 POST](#3.2 POST)
- 4、SpringCloud的Feign
- 5、Hutool的HttpUtil
- 6、失败后重试
0、测试接口
写两个测试接口,一个GET,一个POST
java
@RestController
@RequestMapping("/svc1")
public class Controller {


    @GetMapping("/t1")
    public String doGet(@RequestParam(required = false) String name) {
        return "test" + name;
    }

    @PostMapping("/t2")
    public ResultVo doPost(@RequestBody RequestBodyDto dto, @RequestParam String key) {
        return new ResultVo(200, "操作成功", dto.getName() + dto.getChoose() + key);
    }

}
1、JDK的HttpURLConnection
原生版,主要依靠JDK的 java.net包,GET请求:
java
import java.net.HttpURLConnection;
import java.io.BufferedReader;
import java.io.IOException;
import java.io.InputStreamReader;
import java.net.URL;

@Slf4j
public class TestDemo {

    public static void main(String[] args) {
        BufferedReader reader = null;
        try {
            // 创建URL对象
            URL url = new URL("http://localhost:8080/svc1/t1");
            // 打开连接
            HttpURLConnection connection = (HttpURLConnection) url.openConnection();
            connection.setRequestMethod("GET");
            // 读取响应
            reader = new BufferedReader(new InputStreamReader(connection.getInputStream()));
            // 处理响应
            String inputLine;
            StringBuilder response = new StringBuilder();
            while ((inputLine = reader.readLine()) != null) {
                response.append(inputLine);
            }
            System.out.println(response);

        } catch (Exception e) {
            log.error("调用失败");
            e.printStackTrace();
        } finally {
            if (reader != null) {
                try {
                    reader.close();
                } catch (IOException e) {
                    e.printStackTrace();
                }
            }
        }

    }
}
URL类是JDK java.net包下的一个类,表示一个统一资源标识符(Uniform Resource Identifier)引用
POST请求:
java
import java.io.*;
import java.net.HttpURLConnection;
import java.net.URL;
import java.nio.charset.StandardCharsets;
import com.alibaba.fastjson.JSON;

@Slf4j
public class TestDemo {

    public static void main(String[] args) {

        try {
            // 创建URL对象
            URL url = new URL("http://localhost:8080/svc1/t2?key=abc");
            // 打开连接
            HttpURLConnection connection = (HttpURLConnection) url.openConnection();
            connection.setRequestMethod("POST");
            // 设置请求头与数据格式
            connection.setRequestProperty("Content-Type", "application/json; utf-8");
            connection.setRequestProperty("Accept", "application/json");
            // 允许向服务器写入数据
            connection.setDoOutput(true);
            RequestBodyDto dto = new RequestBodyDto("Tom", "A");
            String json = JSON.toJSONString(dto);
            // 写入JSON到请求体
            try (OutputStream os = connection.getOutputStream()) {
                BufferedOutputStream bos = new BufferedOutputStream(os);
                bos.write(json.getBytes(StandardCharsets.UTF_8));
                bos.flush();
            }

            // 读取响应
            try (BufferedReader br = new BufferedReader(new InputStreamReader(connection.getInputStream(), "UTF-8"))) {
                StringBuilder response = new StringBuilder();
                String responseLine;
                while ((responseLine = br.readLine()) != null) {
                    response.append(responseLine.trim());
                }
                System.out.println("Response: " + response.toString());
            }

        } catch (Exception e) {
            e.printStackTrace();
        }


    }
}
2、Apache的HttpClient
后续这些方式,本质上就是对java.net包的一个封装了。先引入Apache做http请求的依赖坐标:
xml
<dependency>
    <groupId>org.apache.httpcomponents</groupId>
    <artifactId>httpclient</artifactId>
    <version>4.5.13</version>
</dependency>
<dependency>
    <groupId>org.apache.httpcomponents</groupId>
    <artifactId>httpcore</artifactId>
    <version>4.4.16</version>
</dependency>
java
public class TestDemo {

    public static void main(String[] args) {
        try (CloseableHttpClient httpClient = HttpClients.createDefault()) {
            // 创建POST请求对象
            HttpPost httpPost = new HttpPost("http://localhost:8080/svc1/t2?key=abc");
            // 设置请求头
            httpPost.setHeader("Content-Type", "application/json; utf-8");
            httpPost.setHeader("Accept", "application/json");
            // 设置请求体
            RequestBodyDto dto = new RequestBodyDto("Tom", "A");
            String json = JSON.toJSONString(dto);
            StringEntity entity = new StringEntity(json);
            httpPost.setEntity(entity);
            // 执行请求并获取响应
            CloseableHttpResponse response = httpClient.execute(httpPost);
            HttpEntity responseEntity = response.getEntity();
            // 处理响应
            if (null != responseEntity) {
                String responseStr = EntityUtils.toString(responseEntity);
                System.out.println(responseStr);
                // 也可按需把json串反序列化成Java对象,略
            }
        } catch (IOException e) {
            e.printStackTrace();
        }

    }
}
3、SpringBoot的RestTemplate
使用SpringBoot封装的RestTemplate,依赖写web的:
xml
<dependency>
    <groupId>org.springframework.boot</groupId>
    <artifactId>spring-boot-starter-web</artifactId>
</dependency>
把RestTemplate的Bean放到IoC容器中:
java
@Configuration
public class RestTemplateConfig {

    @Bean
    public RestTemplate restTemplate() {
        return new RestTemplate();
    }
}
3.1 GET
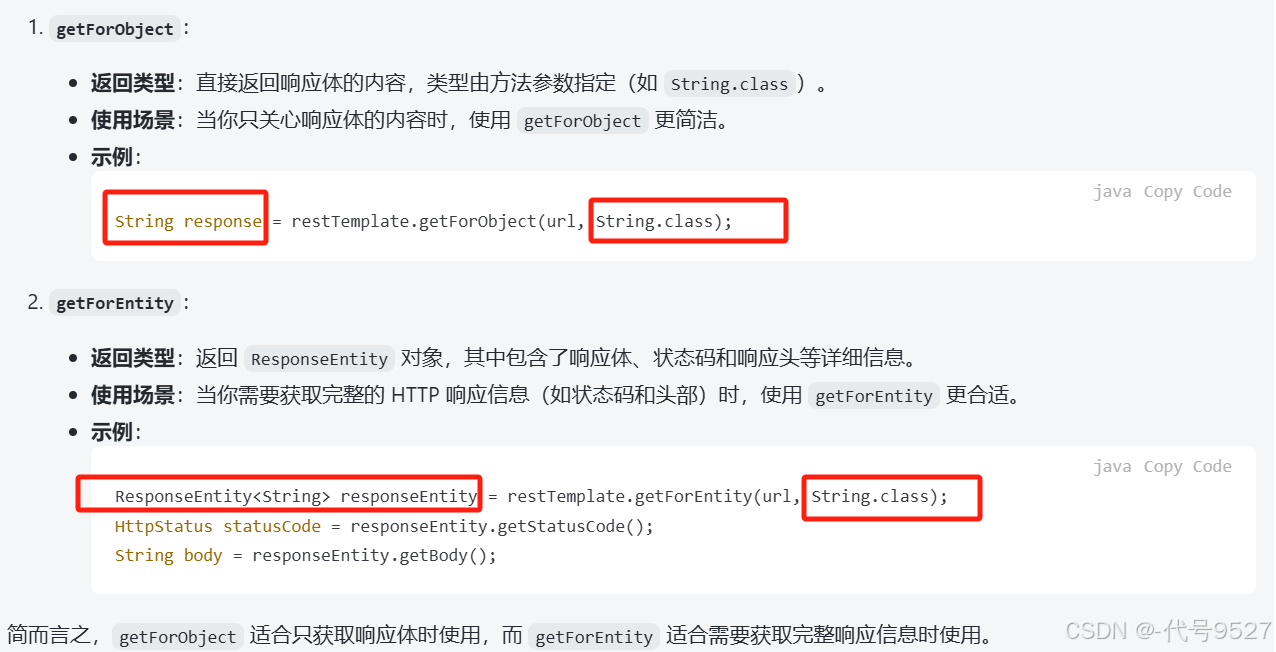
发送Get请求,常用方法:
- getForObject
- getForEntity
java
/**
* url为请求的地址
* responseType为请求响应body的类型
* urlVariables为url中的参数绑定
*
*/
getForEntity(Stringurl,Class responseType,Object...urlVariables)

/**
* URI对象来替代之前getForEntity的url和urlVariables参数来指定访问地址和参数绑定
* URI是JDK java.net包下的一个类
*
*/
getForEntity(URI url,Class responseType)
示例:
java
@SpringBootTest
class LearningApplicationTests {

    @Resource
    private RestTemplate restTemplate;

    @Test
    void contextLoads() {
        String url = "http://localhost:8080/svc1/t1?name={name}";
        // 参数
        Map<String, String> paramMap = new HashMap<>();
        paramMap.put("name", "Tom");
        ResponseEntity<String> responseEntity = restTemplate.getForEntity(url, String.class, paramMap);
        // 状态码
        HttpStatus statusCode = responseEntity.getStatusCode();
        // 响应
        String body = responseEntity.getBody();
        System.out.println(statusCode + body);

    }

}
接口路径不用字符串,改为URI对象:
java
@Test
 void testTemplate() {
     String url = "http://localhost:8080/svc1/t1";
     String name = "Tom";
     // 使用 UriComponentsBuilder 构建 URL
     URI uri = UriComponentsBuilder.fromHttpUrl(url)
             .queryParam("name", name)
             .build()
             .toUri();
     ResponseEntity<String> responseEntity = restTemplate.getForEntity(uri, String.class);
     // 状态码
     HttpStatus statusCode = responseEntity.getStatusCode();
     // 响应
     String body = responseEntity.getBody();
     System.out.println(statusCode + body);

 }
最后,getForObject:
java
getForObject(String url,Class responseType,Object...urlVariables)
getForObject(String url,Class responseType,Map urlVariables)
getForObject(URI url,Class responseType)
和getForEntity的区别是,getForObject只有一个响应的内容,响应码、响应头等没有
3.2 POST
常用方法:
- postForEntity
- postForObject
- postForLocation
以postForEntity为例,其参数可选:(重载)
java
postForEntity(String url,Object request,Class responseType,Object...  uriVariables)
postForEntity(String url,Object request,Class responseType,Map  uriVariables)
postForEntity(URI url,Object request,Class responseType)
示例:
java
 @Test
void testTemplate2() {
    String url = "http://localhost:8080/svc1/t2?key=Tom";
    RestTemplate restTemplate = new RestTemplate();
    // 请求头
    HttpHeaders headers = new HttpHeaders();
    headers.add(HttpHeaders.AUTHORIZATION, "Bear xx");
    // headers.set("Content-Type", "application/x-www-form-urlencoded");
    headers.add(HttpHeaders.CONTENT_TYPE, "application/json");
    // 创建请求体对象并放入数据
    HttpEntity<RequestBodyDto> requestData = new HttpEntity<>(new RequestBodyDto("Tom", "A"), headers);
    // 和postForEntity一个意思
    ResponseEntity<String> responseEntity = restTemplate.exchange(
            url,
            HttpMethod.POST,
            requestData,
            String.class
    );
    // 获取响应状态码和响应体
    HttpStatus statusCode = responseEntity.getStatusCode();
    String responseBody = responseEntity.getBody();
    System.out.println(statusCode + " " + responseBody);
}
4、SpringCloud的Feign
上面的RestTemplate,在调三方接口时挺好用的,但微服务架构下,各个微服务之间调用时,url就不好写,由此,用Feign:一个声明式的http客户端
核心思路是声明出:
- 你调谁
- 用什么方式
- 请求参数是啥
- 返回类型是啥
引入依赖:
xml
<dependency>
	<groupId>org.springframework.cloud</groupId>
	<artifactId>spring-cloud-starter-openfeign</artifactId>
</dependency>
启动类上加上@EnableFeignClients
java
//在order的启动类中开启Feign
@EnableFeignClients
@MapperScan("com.llg.order.mapper")
@SpringBootApplication
public class OrderApplication{

	public static void main(String[] args){
		SpringApplication.run(OrderApplication.class,args);
	}
}- 以order服务调用user服务为例,编写调用方:
java
// 远程调用userservice服务
@FeignClient("userservice")
public interface UserClient {
	@GetMapping("/user/{id}")
	User findById(@PathVariable("id") Long id);
	// 后续接口自行添加
}


!!findById这个方法名随便起
!!调用的接口路径、调用的服务名、请求参数、返回类型声明正确就行
java
主要是基于SpringMVC的注解来声明远程调用的信息,比如:

➢服务名称:userservice

➢请求方式:GET

➢请求路径:/user/{id}

➢请求参数:Long id

➢返回值类型:User- 注入上面定义的FeignClient类,也就是UserClient,直接调用声明的那个方法
java
@Autowired
private UserClient userClient;

public Order queryOrderById(Long orderId){
	//查询订单
	Order order = orderMapper.findById(orderId);
	//利用feign发起http请求,查用户
	User user = userClient.findById(order.getUserId());
	//封装,对象的某个属性也是个对象,即引用类型
	order.setUser(user);
	return order;
} - 被调用方有多个实例时,负载均衡也不用考虑,Feign用了Ribbon做负载均衡
- 关于Feign请求头的添加,可重写RequestInterceptor的apply方法:
java
@Configuration
public class FeignConfig implements RequestInterceptor {
    @Override
    public void apply(RequestTemplate requestTemplate) {
        //添加token
        requestTemplate.header("token", "eyJ0eXAiOiJKV1QiLCJhbGciOiJIUzUxMiJ9.eyJ4ZGFwYXBwaWQiOiIzNDgxMjU4ODk2OTI2OTY1NzYiLCJleHAiOjE2NjEyMjY5MDgsImlhdCI6MTY2MTIxOTcwOCwieGRhcHRlbmFudGlkIjoiMzAwOTgxNjA1MTE0MDUyNjA5IiwieGRhcHVzZXJpZCI6IjEwMDM0NzY2MzU4MzM1OTc5NTIwMCJ9.fZAO4kJSv2rSH0RBiL1zghdko8Npmu_9ufo6Wex_TI2q9gsiLp7XaW7U9Cu7uewEOaX4DTdpbFmMPvLUtcj_sQ");
    }
}- 要做降级逻辑的话:如下,调用消息中心服务
java
// @FeignClient的fallbackFactory指定下降级逻辑的类
@Component
@FeignClient(contextId = "remoteMessageService", value = ServiceNameConstants.MESSAGE_SERVICE, fallbackFactory = RemoteMessageFallbackFactory.class)
public interface RemoteMessageService {

    /**
     * 发送定时消息任务:每分钟扫描发送消息
     *
     * @return 结果
     */
    @GetMapping("/inner/message/sendTimingMessage")
    public R<Void> sendTimingMessage();

    /**
     * 发送系统消息
     *
     * @return 结果
     */
    @PostMapping("/inner/message/sendSystemMessage")
    public R<Void> sendSystemMessage(@RequestBody MessageSendSystemDto messageSendSystemDto);
}
java
// 降级逻辑
@Component
public class RemoteMessageFallbackFactory implements FallbackFactory<RemoteMessageService>{
    private static final Logger log = LoggerFactory.getLogger(RemoteMessageFallbackFactory.class);

    @Override
    public RemoteMessageService create(Throwable throwable) {
        throwable.printStackTrace();
        log.error("消息服务调用失败:{}", throwable.getMessage());
        return new RemoteMessageService() {
            @Override
            public R<Void> sendTimingMessage() {
                return R.fail("调用发送定时消息接口失败:" + throwable.getMessage());
            }

            @Override
            public R<Void> sendSystemMessage(MessageSendSystemDto messageSendSystemDto) {
                return R.fail("调用发送消息接口失败:" + throwable.getMessage());
            }

        };
    }
}
5、Hutool的HttpUtil
还是对 java.net的封装,引入依赖:
xml
<dependency>
    <groupId>cn.hutool</groupId>
    <artifactId>hutool-all</artifactId>
    <version>5.8.16</version> <!-- 请检查最新版本 -->
</dependency>
处理GET和POST:
java
/**
 * @param url           baseUrl
 * @param requestMethod 请求方式
 * @param headerMap     请求头参数key-value
 * @param paramMap      路径参数key-value,形如?name=Tom&country=Chain
 * @param bodyJsonStr   post的body传参,json字符串
 * @return 响应体
 */
public static String sendRequest(String url, Method requestMethod, Map<String, String> headerMap, Map<String, Object> paramMap, String bodyJsonStr) {
    // 路径参数不为空时,拼接URL
    if (paramMap != null) {
        UrlBuilder urlBuilder = UrlBuilder.of(url);
        paramMap.forEach((k, v) -> urlBuilder.addQuery(k, v));
        url = urlBuilder.toString();
    }
    //发送请求
    HttpResponse httpResponse = HttpUtil.createRequest(requestMethod, url)
            .addHeaders(headerMap)
            .body(bodyJsonStr)
            .execute();

    return httpResponse.body();

}
测试下:
java
@Test
void testHuTool() {
    String url = "http://localhost:8080/svc1/t1";
    Map<String, Object> paramMap = new HashMap<>();
    paramMap.put("name", "Tom");
    Map<String, String> headerMap = new HashMap<>();
    headerMap.put("Authorization", "Bear xx");
    String response = sendRequest(url, Method.GET, headerMap, paramMap, null);
    System.out.println(response);
}

@Test
void testHuTool2() {
    String url = "http://localhost:8080/svc1/t2";
    Map<String, Object> paramMap = new HashMap<>();
    paramMap.put("key", "Tom");
    Map<String, String> headerMap = new HashMap<>();
    headerMap.put("Authorization", "Bear xx");
    RequestBodyDto dto = new RequestBodyDto("Tom", "A");
    String bodyJsonStr = JSON.toJSONString(dto);
    String response = sendRequest(url, Method.POST, headerMap, paramMap, bodyJsonStr);
    System.out.println(response);
}
6、失败后重试
考虑到远程调用可能失败,失败后重试三次,以上面的hutool为例来实现,其余的都一样,主要还是一个是否成功标记位 + 一个计数,successFlag不用voilate,并发安全也不用考虑,线程内部调用的,用到的数存栈里了都。
java
/**
  * @param url           baseUrl
  * @param requestMethod 请求方式
  * @param headerMap     请求头参数key-value
  * @param paramMap      路径参数key-value,形如?name=Tom&country=Chain
  * @param bodyJsonStr   post的body传参,json字符串
  * @return 响应体
  */
 public static String sendRequest(String url, Method requestMethod, Map<String, String> headerMap, Map<String, Object> paramMap, String bodyJsonStr) {
     // 是否成功标记位
     boolean successFlag = false;
     // 重试次数累计
     int retryCount = 1;
     HttpResponse httpResponse = null;
     while (!successFlag && retryCount <= 3) {
         try {
             // 路径参数不为空时,拼接URL
             if (paramMap != null) {
                 UrlBuilder urlBuilder = UrlBuilder.of(url);
                 paramMap.forEach((k, v) -> urlBuilder.addQuery(k, v));
                 url = urlBuilder.toString();
             }
             // 发送请求
             httpResponse = HttpUtil.createRequest(requestMethod, url)
                     .addHeaders(headerMap)
                     .body(bodyJsonStr)
                     .execute();
             if (httpResponse.getStatus() != 200) {
                 retryCount++;
             } else {
                 successFlag = true;
             }
         } catch (Exception e) {
             e.printStackTrace();
             retryCount++;
         }
     }

     return httpResponse == null ? null : httpResponse.body();

 }