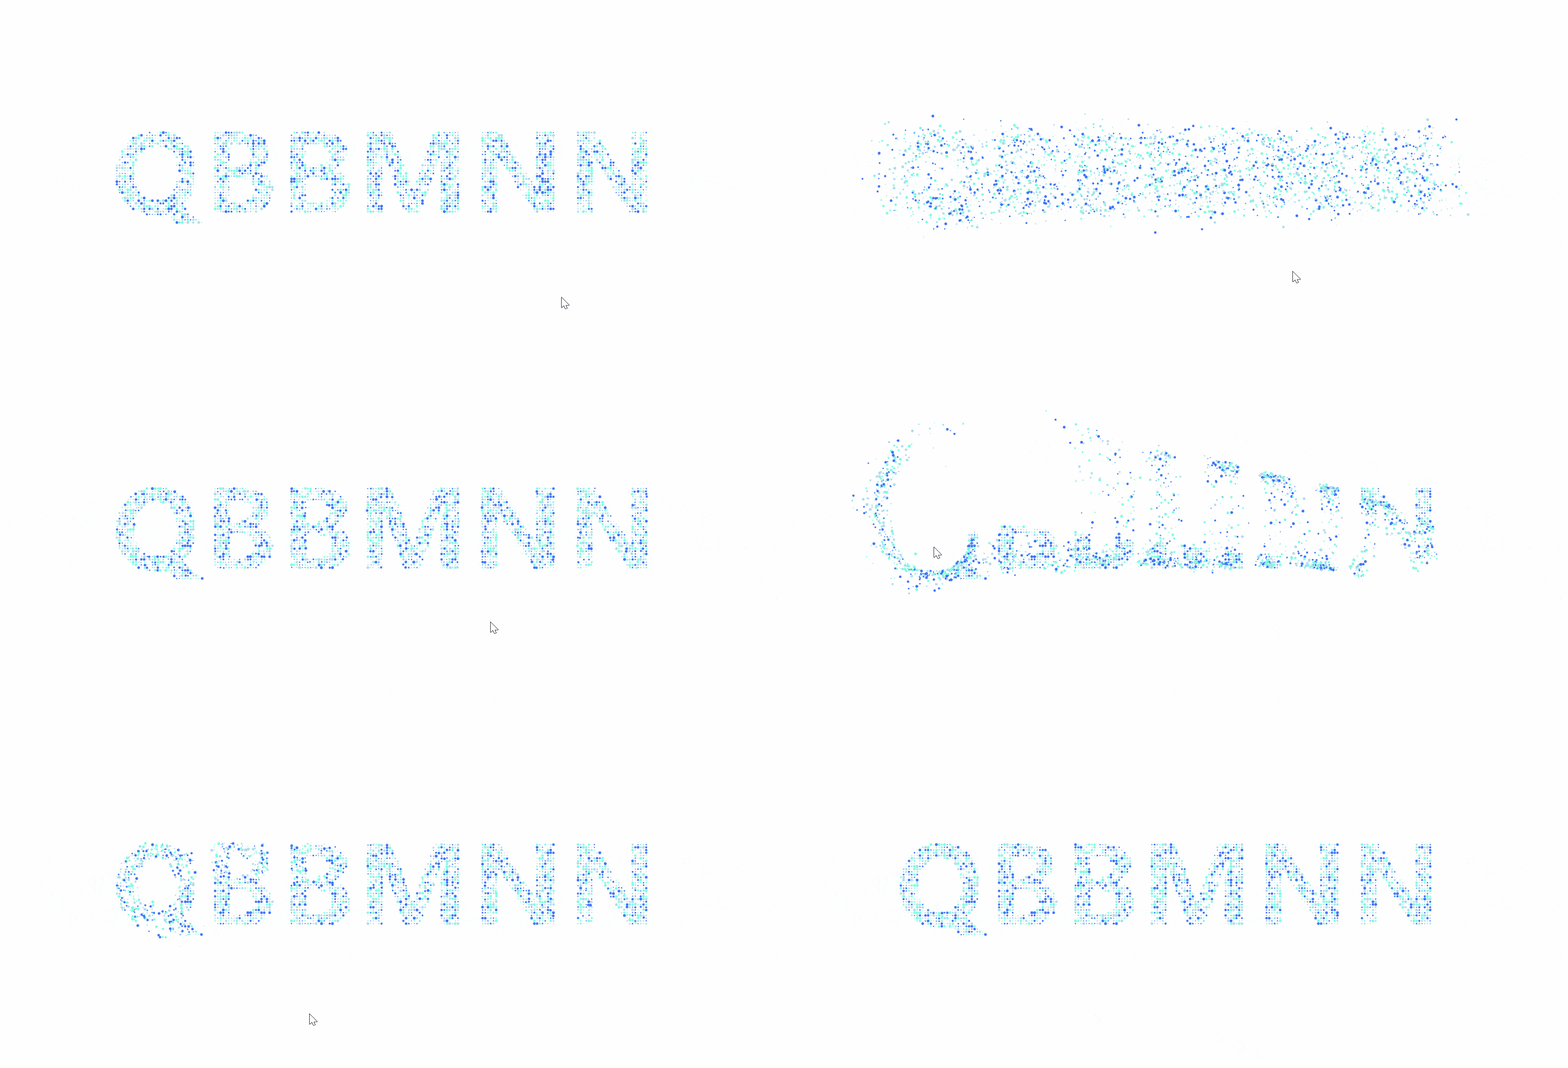
效果展示

代码展示
html
<!DOCTYPE html>
<html lang="en">
  <head>
    <meta charset="UTF-8" />
    <meta name="viewport" content="width=device-width, initial-scale=1.0" />
    <title>粒子效果Logo</title>
    <style>
      body,
      html {
        margin: 0;
        padding: 0;
        overflow: hidden;
      }
    </style>
  </head>
  <body>
    <canvas id="canvas"></canvas>
    <script>
      class Particle {
        constructor(x, y) {
          this.x = Math.random() * canvas.width;
          this.y = Math.random() * canvas.height;
          this.dest = { x, y };
          this.r = Math.random() * 1 * Math.PI;
          this.vx = (Math.random() - 0.5) * 25;
          this.vy = (Math.random() - 0.5) * 25;
          this.accX = 0;
          this.accY = 0;
          this.friction = Math.random() * 0.025 + 0.94;
          this.color = colors[Math.floor(Math.random() * colors.length)];
        }

        render() {
          this.accX = (this.dest.x - this.x) / 1000;
          this.accY = (this.dest.y - this.y) / 1000;
          this.vx += this.accX;
          this.vy += this.accY;
          this.vx *= this.friction;
          this.vy *= this.friction;
          this.x += this.vx;
          this.y += this.vy;

          ctx.fillStyle = this.color;
          ctx.beginPath();
          ctx.arc(this.x, this.y, this.r, Math.PI * 2, false);
          ctx.fill();

          const a = this.x - mouse.x;
          const b = this.y - mouse.y;
          const distance = Math.sqrt(a * a + b * b);
          if (distance < radius * 75) {
            this.accX = (this.x - mouse.x) / 50;
            this.accY = (this.y - mouse.y) / 50;
            this.vx += this.accX;
            this.vy += this.accY;
          }
        }
      }

      const canvas = document.getElementById("canvas");
      const ctx = canvas.getContext("2d");
      let particles = [];
      let mouse = { x: -9999, y: -9999 };
      const colors = ["#3f73fa", "#7ffde1", "#aedce9"];
      let radius = 1.5;

      function onMouseMove(e) {
        mouse.x = e.clientX;
        mouse.y = e.clientY;
      }

      function onTouchMove(e) {
        if (e.touches.length > 0) {
          mouse.x = e.touches[0].clientX;
          mouse.y = e.touches[0].clientY;
        }
      }

      function onTouchEnd(e) {
        mouse.x = -9999;
        mouse.y = -9999;
      }

      function initScene() {
        particles = [];
        const imgData = ctx.getImageData(0, 0, canvas.width, canvas.height);
        for (let x = 0; x < imgData.width; x += 6) {
          for (let y = 0; y < imgData.height; y += 6) {
            const i = (y * imgData.width + x) * 4;
            if (imgData.data[i + 3] > 200) {
              particles.push(new Particle(x, y));
            }
          }
        }
      }

      function render() {
        requestAnimationFrame(render);
        ctx.clearRect(0, 0, canvas.width, canvas.height);
        particles.forEach((particle) => particle.render());
      }

      window.addEventListener("resize", () => {
        canvas.width = window.innerWidth;
        canvas.height = window.innerHeight;
        initScene();
      });
      window.addEventListener("mousemove", onMouseMove);
      window.addEventListener("touchmove", onTouchMove);
      window.addEventListener("touchend", onTouchEnd);

      canvas.width = window.innerWidth;
      canvas.height = window.innerHeight;
      const img = new Image();
      img.onload = () => {
        ctx.drawImage(
          img,
          canvas.width / 2 - img.width / 2,
          canvas.height / 2 - img.height / 2
        );
        initScene();
        render();
      };
      img.src = "./qbbmnn.png";
    </script>
  </body>
</html>
代码注解
代码的主要部分包括粒子类的定义、初始化过程、事件监听和动画循环。
粒子类(Particle)
每个粒子对象都有以下属性:
x和y:粒子的当前位置。dest.x和dest.y:粒子的目标位置。r:粒子随机的大小。vx和vy:粒子的水平和垂直速度。accX和accY:粒子的水平和垂直加速度。friction:粒子的摩擦系数,影响其减速。color:粒子的颜色。
render方法,用于更新粒子的位置并绘制它们。这个方法执行以下操作:
- 计算粒子到目标位置的加速度。
- 更新粒子的速度,考虑加速度和摩擦力。
- 根据速度更新粒子的位置。
- 绘制粒子。
初始化过程
初始化过程包括以下步骤:
- 设置画布的宽度和高度以匹配窗口的尺寸。
- 创建一个图像对象并设置
src属性,以便加载图像。 - 当图像加载完成后,绘制到画布上。
- 调用
initScene函数来创建粒子数组。
initScene函数执行以下操作: - 清空粒子数组。
- 获取画布上图像的数据。
- 遍历图像的每个像素,根据像素的透明度决定是否在该位置创建一个粒子。
事件监听
代码监听了以下事件:
resize:当窗口大小变化时,调整画布的大小并重新初始化场景。mousemove:当鼠标移动时,更新mouse对象的x和y属性。touchmove:适配移动端,当触摸移动时,更新mouse对象的x和y属性。touchend:模拟手离开屏幕后,将mouse对象的x和y属性重置为初始值。
动画循环
使用requestAnimationFrame根据屏幕刷新率去更新画面:
- 清空画布。
- 遍历粒子数组,调用每个粒子的
render方法。
可以自定义的部分
radius:通过调整这个变量的值,控制鼠标弹开粒子的范围。colors:根据自己喜好去填写多个颜色,最少两个。img:可以准备一张透明底白色字的图片,粒子效果会吸附到白色字的笔触上。例如(因为是白色字透明底,所以需要在夜间模式下app才能看清):
