目录
- 引言
- 自己整一个UI设计稿
- 代码编写
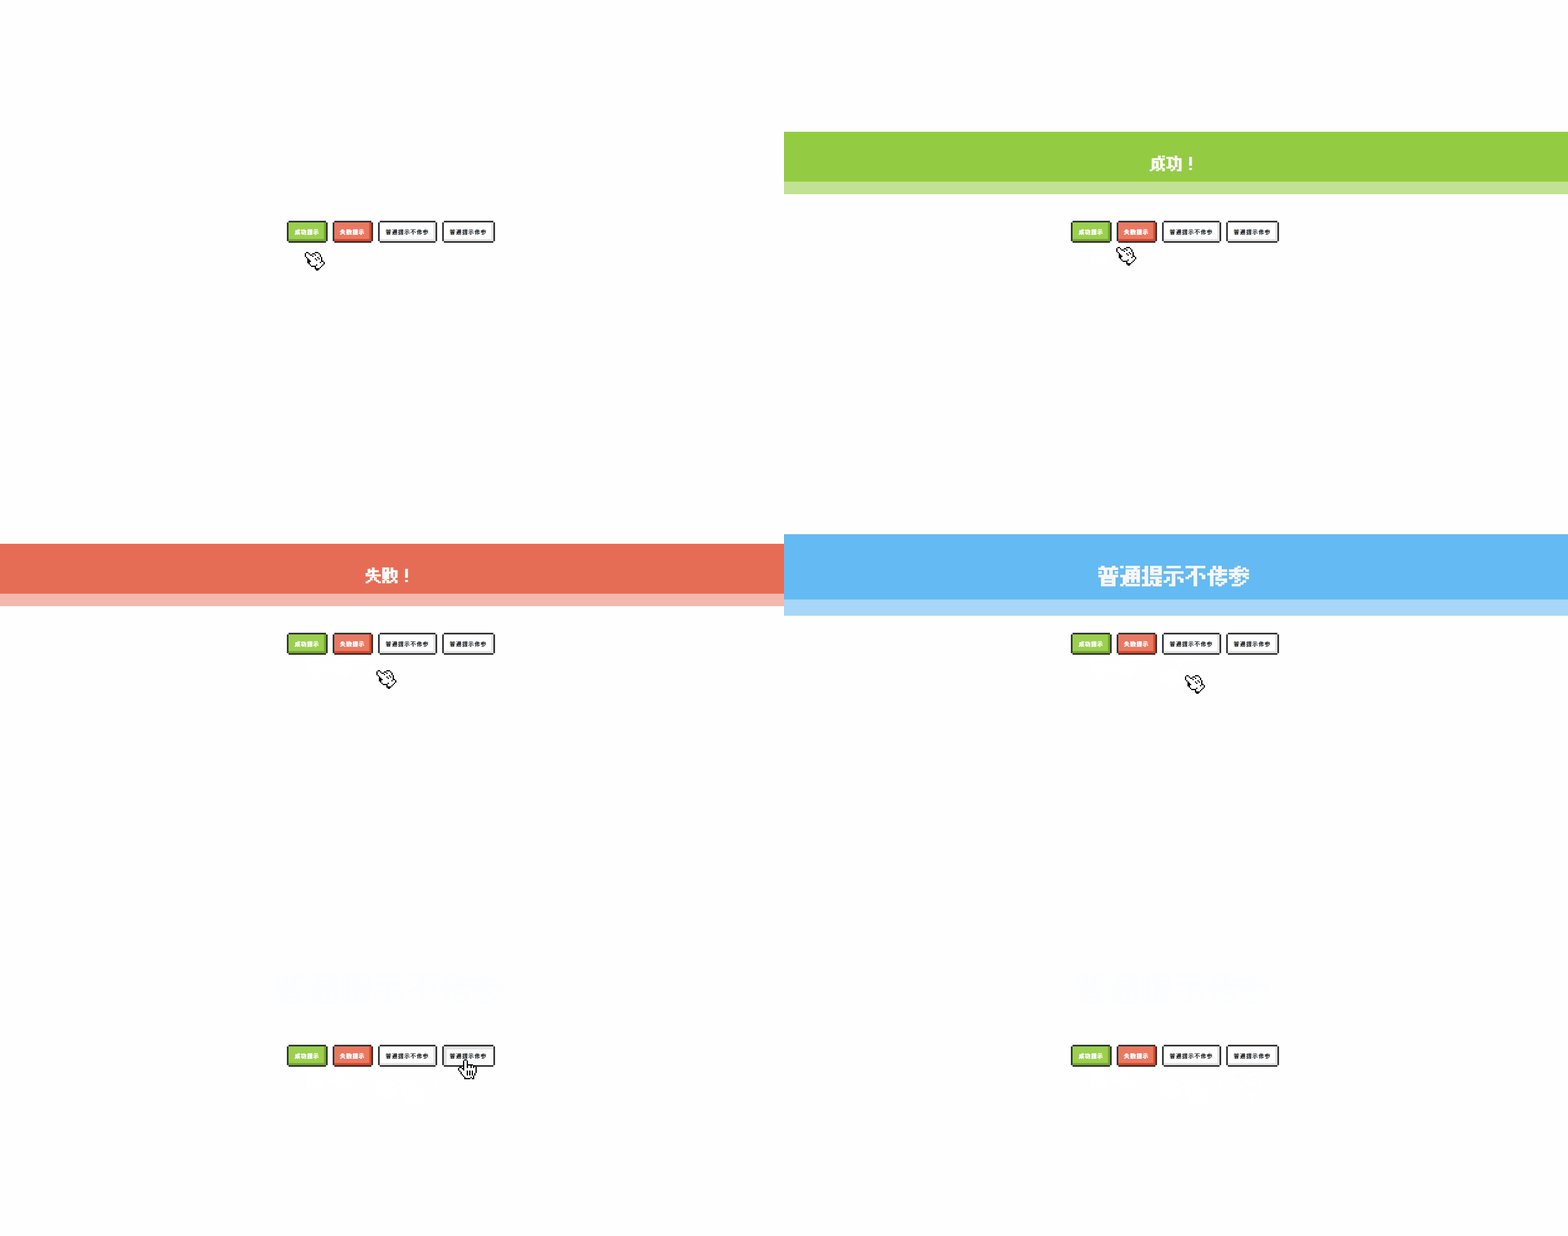
-
- [1. 设计信息窗口基础样式](#1. 设计信息窗口基础样式)
- [2. 设置打开和关闭的方法](#2. 设置打开和关闭的方法)
- [3. 编写实例化组件的js文件](#3. 编写实例化组件的js文件)
- [4. 看下最终效果](#4. 看下最终效果)
- [5. 组件完整代码](#5. 组件完整代码)
- [6. 组件调用方式](#6. 组件调用方式)
- 总结
引言
本教程基于前端UI样式库 NES.css 的UI设计,自行研究复现。欢迎大家交流优化实现方法~
此次组件库开发基于vue3框架,框架基础搭建过程以及基础素材准备参考:【VUE3.0】动手做一套像素风的前端UI组件库---先导篇
本篇完成的组件为Message,日常项目中较为常见的组件,主要涉及到的内容有:
- 这次没得 抄 借鉴了,NES.css没有提供这个组件的样式模板。
- 参考按钮的高光和阴影设计一个具有特色的信息弹窗。
- 利用vue的
transition组件给弹窗一些动画效果。 - 采用单例模式将信息弹窗放置在全局避免重复。
- 参考组件库
Element Plus的设计使用方式,采用js的方式调用组件并传参。
自己整一个UI设计稿
结合以前玩的一款掌机游戏的提示框
- 我希望这里的message提示框可以像横幅一样打在公屏上,样式要夸张一些。
- 提示框在消失的时候可以有一个渐变放大透明的效果,视觉上比较有张力。
大概长这样:

功能上我需要:
- 支持传入字符串或对象去调用信息弹窗。
- 支持
success,error,warning,info四个子方法去调用信息弹窗。
代码编写
1. 设计信息窗口基础样式
- 利用box-shadow的内部阴影,结合hsl颜色模型增加背景色20%的亮度来凸显高光部分的样式。
- 利用vue的transition组件给弹窗设置渐变放大透明度为0的过度效果。
- 利用hsl颜色模型和vue的css变量,根据传入type类型转换组件颜色的色相、饱和度、亮度,为弹窗的背景绑定参数。
编写vue文件,设置基础的组件布局、颜色以及过度效果:
html
<template>
  <transition name="scale">
    <div v-show="state.showMessage" class="pMessage">
      {{ state.content }}
    </div>
  </transition>
</template>
<script setup>
import { reactive, ref } from "vue";
const state = reactive({
  content: "这是一个 message",
  duration: 1500,
  type: "primary",
  showMessage: false,
});
let hue = ref("");
let saturation = ref("");
let light = ref("");
const handleColor = (type) => {
  switch (type) {
    case "primary":
      hue.value = "204";
      saturation.value = "86%";
      light.value = "53%";
      break;
    case "success":
      hue.value = "85";
      saturation.value = "58%";
      light.value = "53%";
      break;
    case "error":
      hue.value = "10";
      saturation.value = "75%";
      light.value = "62%";
      break;
    case "warning":
      hue.value = "51";
      saturation.value = "93%";
      light.value = "54%";
      break;
    case "info":
      hue.value = "0";
      saturation.value = "0%";
      light.value = "83%";
      break;
  }
};
</script>
<style scoped>
.pMessage {
  --base_hue: v-bind(hue);
  --base_saturation: v-bind(saturation);
  --base_light: v-bind(light);
  color: #f3f3f3;
  font-size: 40px;
  font-weight: bold;
  width: 100%;
  height: 150px;
  display: flex;
  justify-content: center;
  align-items: center;
  position: fixed;
  top: 35%;
  z-index: 999;
  background: hsl(var(--base_hue), var(--base_saturation), var(--base_light));
  box-shadow: inset 0px -30px hsl(var(--base_hue), var(--base_saturation), calc(var(
            --base_light
          ) + 20%));
}
.scale-enter-active,
.scale-leave-active {
  transition: 0.2s ease-out;
}
.scale-enter,
.scale-leave-to {
  transform: scale(2);
  opacity: 0;
}
</style>
2. 设置打开和关闭的方法
- 因为是通过js方法去调用组件渲染,那么肯定要对外暴露一个open方法。
- 为了代码的健壮性,也需要提供一个关闭方法。
- 信息弹窗打开后需要通过定时器是延时关闭,需要操作好定时器,做一个简易的防抖,保证多次触发弹窗时,只在最后一次触发的延时时间后关闭弹窗。
- 最后记得将写好的方法以及组件内部的state对象暴露出去,这样在外部js代码中实例化这个组件后,才可以读取到这个方法。
补充第一步vue文件的js内容:
javascript
let messageTimer = null;
const open = () => {
  if (messageTimer) {
    clearTimeout(messageTimer);
    messageTimer = null;
  }
  handleColor(state.type);
  state.showMessage = true;
  messageTimer = setTimeout(() => {
    state.showMessage = false;
  }, state.duration);
};
const close = () => {
  if (messageTimer) {
    clearTimeout(messageTimer);
    messageTimer = null;
  }
  state.showMessage = false;
};
// 导出这state、open、close,保证外部js可以读取到组件内部方法,这很重要!
defineExpose({ state, open, close });
3. 编写实例化组件的js文件
在vue文件的同级目录下创建对应的js文件。
- 这里需要使用vue的createApp方法创建一个组件,并挂接在一个新建的dom上,然后将dom挂载在body中。
- 为了避免多次触发信息弹窗,导致产生dom过多造成卡顿。我们采用单例模式去更新唯一的那个组件实例,而不是一直创建新的组件。
- 通过initInstance 方法初始化组件。
- 对外导出pMessage方法,用于更新信息弹窗实例的内容及状态。
- 在pMessage方法中校验传入的信息:
- 纯字符串就按默认的参数去渲染。
- 对象则按照传入的信息结合默认参数去渲染。
- 最后通过open方法去打开信息弹窗,展示dom。
以下是js内容:
javascript
import { createApp } from "vue";
import Message from "./index.vue";

let instance;

const initInstance = () => {
  const messageInstance = createApp(Message);
  // 需要一个容器
  const container = document.createElement("div");
  // 再进行挂载 - 挂载之后返回实例上下文
  instance = messageInstance.mount(container);
  document.body.appendChild(container);
};

function pMessage(option) {
  if (!instance) initInstance();
  if (!option) {
    option = {};
  }
  option = typeof option === "string" ? { content: option } : option;

  instance.state.content = option.content || "这是一个 message";
  instance.state.duration = option.duration || 1500;
  instance.state.type = option.type || "primary";
  instance.open();
}

export default pMessage;补充success, error,warning,info四个子方法去调用信息弹窗
在js文件中继续补充代码
javascript
// 抽象公共逻辑
const createMessageType = (type) => {
  return function (content, duration) {
    return pMessage({
      content,
      duration,
      type,
    });
  };
};

// 自动生成不同类型的消息方法
["success", "error", "warning", "info"].forEach((type) => {
  pMessage[type] = createMessageType(type);
});
补充信息弹窗组件的关闭方法
在js文件中继续补充代码
javascript
pMessage.close = function () {
  if (instance && instance.close) {
    instance.close();
  }
};
4. 看下最终效果

5. 组件完整代码
index.vue
html
<template>
  <transition name="scale">
    <div v-show="state.showMessage" class="pMessage">
      {{ state.content }}
    </div>
  </transition>
</template>

<script setup>
import { reactive, ref } from "vue";

const state = reactive({
  content: "这是一个 message",
  duration: 1500,
  type: "primary",
  showMessage: false,
});
let messageTimer = null;
const open = () => {
  if (messageTimer) {
    clearTimeout(messageTimer);
    messageTimer = null;
  }
  handleColor(state.type);
  state.showMessage = true;
  messageTimer = setTimeout(() => {
    state.showMessage = false;
  }, state.duration);
};
const close = () => {
  if (messageTimer) {
    clearTimeout(messageTimer);
    messageTimer = null;
  }
  state.showMessage = false;
};
let hue = ref("");
let saturation = ref("");
let light = ref("");
const handleColor = (type) => {
  switch (type) {
    case "primary":
      hue.value = "204";
      saturation.value = "86%";
      light.value = "53%";
      break;
    case "success":
      hue.value = "85";
      saturation.value = "58%";
      light.value = "53%";
      break;
    case "error":
      hue.value = "10";
      saturation.value = "75%";
      light.value = "62%";
      break;
    case "warning":
      hue.value = "51";
      saturation.value = "93%";
      light.value = "54%";
      break;
    case "info":
      hue.value = "0";
      saturation.value = "0%";
      light.value = "83%";
      break;
  }
};
defineExpose({ state, open, close });
</script>

<style scoped>
.pMessage {
  --base_hue: v-bind(hue);
  --base_saturation: v-bind(saturation);
  --base_light: v-bind(light);
  color: #f3f3f3;
  font-size: 40px;
  font-weight: bold;
  width: 100%;
  height: 150px;
  display: flex;
  justify-content: center;
  align-items: center;
  position: fixed;
  top: 35%;
  z-index: 999;
  background: hsl(var(--base_hue), var(--base_saturation), var(--base_light));
  box-shadow: inset 0px -30px hsl(var(--base_hue), var(--base_saturation), calc(var(
            --base_light
          ) + 20%));
}

.scale-enter-active,
.scale-leave-active {
  transition: 0.2s ease-out;
}

.scale-enter,
.scale-leave-to {
  transform: scale(2);
  opacity: 0;
}
</style>
index.js
javascript
import { createApp } from "vue";
import Message from "./index.vue";

let instance;

const initInstance = () => {
  const messageInstance = createApp(Message);
  // 需要一个容器
  const container = document.createElement("div");
  // 再进行挂载 - 挂载之后返回实例上下文
  instance = messageInstance.mount(container);
  document.body.appendChild(container);
};

function pMessage(option) {
  if (!instance) initInstance();
  if (!option) {
    option = {};
  }
  option = typeof option === "string" ? { content: option } : option;

  instance.state.content = option.content || "这是一个 message";
  instance.state.duration = option.duration || 1500;
  instance.state.type = option.type || "primary";
  instance.open();
}

// 抽象公共逻辑
const createMessageType = (type) => {
  return function (content, duration) {
    return pMessage({
      content,
      duration,
      type,
    });
  };
};

// 自动生成不同类型的消息方法
["success", "error", "warning", "info"].forEach((type) => {
  pMessage[type] = createMessageType(type);
});

pMessage.close = function () {
  if (instance && instance.close) {
    instance.close();
  }
};

export default pMessage;
6. 组件调用方式
html
<template>
    <div class="message">
      <p-button type="success" @click="openMessageSuccess"> 成功提示 </p-button>
      <p-button type="error" @click="openMessageError"> 失败提示 </p-button>
      <p-button @click="openMessage1"> 普通提示不传参 </p-button>
      <p-button @click="openMessage2"> 普通提示传参 </p-button>
    </div>
</template>
<script setup>
import pMessage from "@/components/message/index.js";
const openMessageSuccess = () => {
  pMessage.success("成功!");
};
const openMessageError = () => {
  pMessage.error("失败!");
};
const openMessage1 = () => {
  pMessage("普通提示不传参");
};
const openMessage2 = () => {
  pMessage({
    content: "普通提示传参",
    duration: 300,
    type: "primary",
  });
};
</script>
总结
至此一个完整的像素风信息弹窗组件Message就开发完成了。
本篇主要强化理解了几个点:
- vue的transition组件的使用方法。
- js的简易防抖实现逻辑。
- js设计模式中的单例模式应用。
- js调用组件封装逻辑。
再接再厉~