目录
Caliburn.Micro是MVVM模式的轻量级WPF框架,简化了WPF中的不少用法。这个框架中所有的页面控制都是通过ViewModel去实现的。
以下内容是自己在进行项目实战的同时进行记录的,对于文件的创建以及分类是考虑了实际扩展性等问题,不太适合初学者观看。
一、添加Caliburn.Micro框架
创建一个WPF项目,删除项目的MainWindow.xaml,并为其添加Caliburn.Micro包

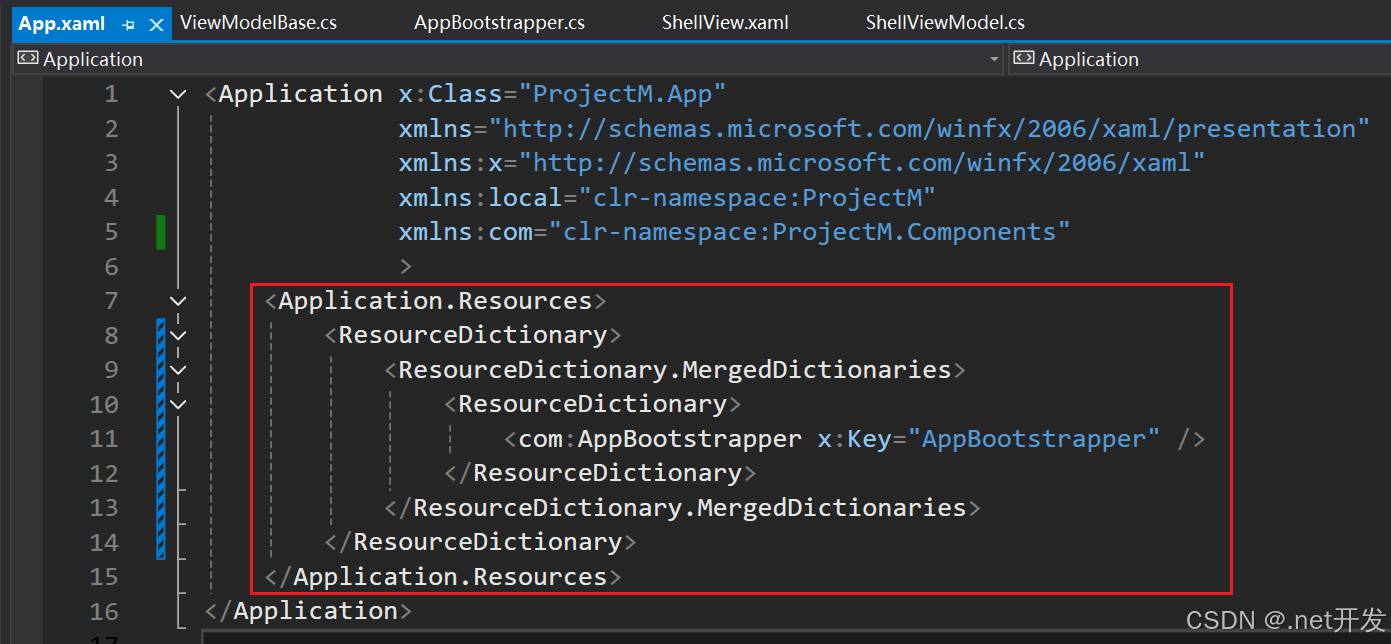
修改App.xaml文件内容,删掉StartupUri="MainWindow.xmal"语句,这个框架不需要通过这个语句去查找启动窗口
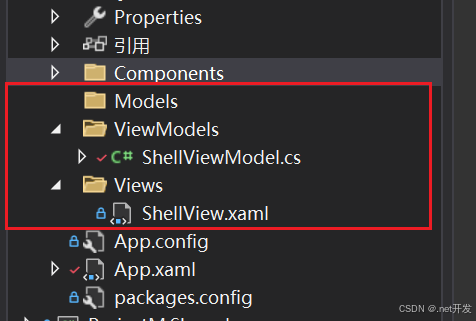
在项目中创建好View,Model和ViewModel文件夹
创建一个AppBootstrapper类继承BootstrapperBase,它是Caliburn.Micro框架的一个启动类(大部分代码都是固定的可以直接使用,除了Ioc注入以及OnStartup()函数中的内容可能需要更改)
cs
using Caliburn.Micro;
using ProjectM.ViewModels;
using System;
using System.Collections.Generic;
using System.ComponentModel.Composition;
using System.ComponentModel.Composition.Hosting;
using System.ComponentModel.Composition.Primitives;
using System.Linq;
using System.Reflection;
using System.Windows.Threading;

namespace ProjectM.Components
{
    public class AppBootstrapper : BootstrapperBase
    {
        private CompositionContainer _container;
        private IWindowManager _windowManager;
        private IEventAggregator _eventAggregator;

        public AppBootstrapper()
        {
            Initialize();
        }

        protected override void Configure()
        {

            var aggregateCatalog = new AggregateCatalog(AssemblySource.Instance.Select(x => new AssemblyCatalog(x)).OfType<ComposablePartCatalog>());
            // 管理和解析依赖关系
            var batch = new CompositionBatch();
            // 批量处理依赖注入
            _container = new CompositionContainer(aggregateCatalog);
            // 注册依赖注入
            batch.AddExportedValue(_container);

            //注入IoC,我们在其他文件中可以直接通过Ioc.Get<T>()来获取依赖注入的实例
            _windowManager = new WindowManager();// 注册窗体管理器
            batch.AddExportedValue(_windowManager);
            _eventAggregator = new EventAggregator();// 注册事件聚合器
            batch.AddExportedValue(_eventAggregator);

            _container.Compose(batch);
        }

        protected override void OnUnhandledException(object sender, DispatcherUnhandledExceptionEventArgs e)
        {
            base.OnUnhandledException(sender, e);
        }

        protected override object GetInstance(Type service, string key)
        {
            string contract = string.IsNullOrEmpty(key) ? AttributedModelServices.GetContractName(service) : key;

            var exports = _container.GetExportedValues<object>(contract);

            if (exports.Any())
                return exports.First();

            throw new Exception($"找不到实例 {contract}。");
        }

        protected override IEnumerable<object> GetAllInstances(Type service)
        {
            return _container.GetExportedValues<object>(AttributedModelServices.GetContractName(service));
        }

        protected override IEnumerable<Assembly> SelectAssemblies()
        {
            var assemblies = new List<Assembly>()
            {
                Assembly.GetEntryAssembly(),
                Assembly.GetExecutingAssembly(),
            };

            return assemblies.Where(x => x != null)
                .Distinct();
        }

        protected override void BuildUp(object instance)
        {
            _container.SatisfyImportsOnce((ComposablePart)instance);
        }

        protected override void OnStartup(object sender, System.Windows.StartupEventArgs e)
        {
            // 这里使用的实例是ViewModel
            var viewModel = new ShellViewModel();
            _windowManager.ShowWindow(viewModel);
        }
    }
}
在ViewModel中继承Caliburn.Micro框架中的Screen,最后启动项目,项目成功被启动(这里是通过我们前面的AppBootstrapper文件中的OnStartup函数中配置的内容实现的窗口启动)
cs
public class ShellViewModel : Screen
{

}
二、配置Serilog日志
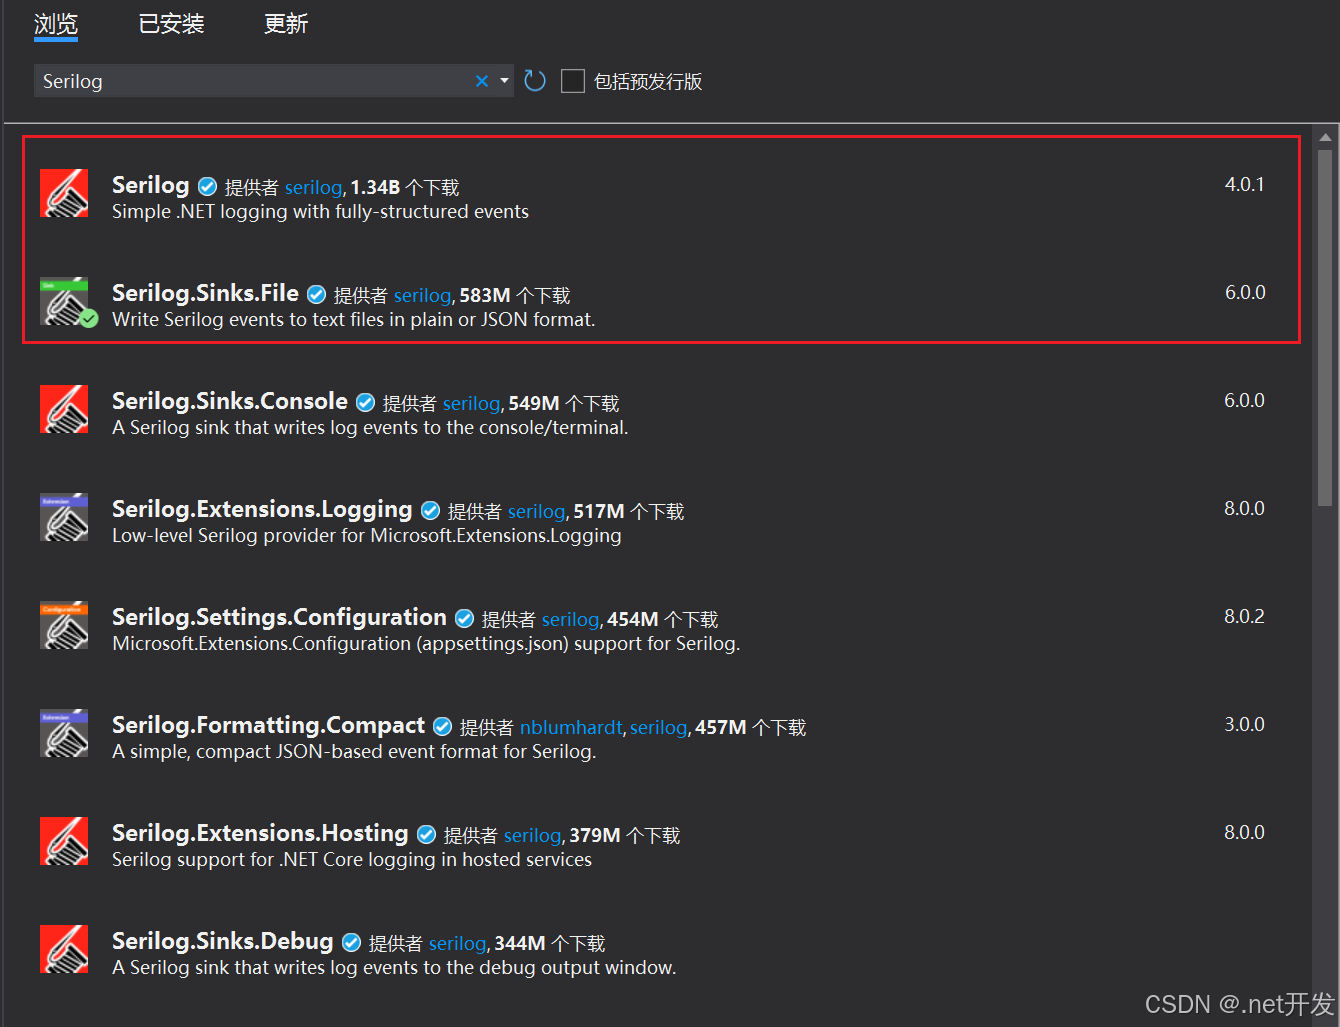
安装Serilog相关的包(第二个是将日志写入文件,还有其他的选项,比如打印到控制台等按需下载即可)
我们新建一个类用于单独存放静态共用字段
cs
public static class Fields
{
    public const string AppName = "ProjectM";

    public const string AppDataPath = "E:\\ProjectM\\" + AppName;

    public const string LogFileName = "log.txt";
}
再建一个类存放动态字段
cs
public class Environments
{
    private static string _appDataPath;
    private static string _logFilePath;

    /// <summary>
    /// 应用程序数据路径
    /// </summary>
    public static string AppDataPath
    {
        get
        {
            if (string.IsNullOrEmpty(_appDataPath))
            {
                _appDataPath = Environment.ExpandEnvironmentVariables(Fields.AppDataPath);
            }
            if (!Directory.Exists(_appDataPath))
            {
                Directory.CreateDirectory(_appDataPath);
            }
            return _appDataPath;
        }
    }

    /// <summary>
    /// 日志文件路径
    /// </summary>
    public static string LogFilePath
    {
        get
        {
            if (string.IsNullOrEmpty(_logFilePath))
            {
                _logFilePath = Path.Combine(AppDataPath, Fields.LogFileName);
            }
            return _logFilePath;
        }
    }
}
创建一个ILogger接口并实现接口
cs
public interface ILogger
{
    void Error(Exception exception, string messageTemplate);

    void Error(Exception exception, string messageTemplate, params object[] args);

    void Infomation(string message);

    void Infomation(string messageTemplate, params object[] args);

    void Warning(string message);

    void Warning(string messageTemplate, params object[] args);
}
cs
public class Logger : Contracts.ILogger
{
    private static Serilog.Core.Logger _logger;
    private static Logger _instance;

    // 确保日志的唯一性(单例模式)
    public static Logger Instance
    {
        get
        {
            if (_instance == null)
            {
                _instance = new Logger();
            }
            return _instance;
        }
    }

    public void Error(Exception exception, string messageTemplate)
    {
        InitializeLogger();
        _logger?.Error(exception, messageTemplate);
    }

    public void Error(Exception exception, string messageTemplate, params object[] args)
    {
        InitializeLogger();
        _logger?.Error(exception, messageTemplate, args);
    }

    public void Infomation(string message)
    {
        InitializeLogger();
        _logger?.Information(message);
    }

    public void Infomation(string messageTemplate, params object[] args)
    {
        InitializeLogger();
        _logger?.Information(messageTemplate, args);
    }

    public void Warning(string message)
    {
        InitializeLogger();
        _logger?.Warning(message);
    }

    public void Warning(Exception exception, string messageTemplate, params object[] args)
    {
        InitializeLogger();
        _logger?.Warning(exception, messageTemplate, args);
    }

    public void Warning(string messageTemplate, params object[] args)
    {
        InitializeLogger();
        _logger?.Warning(messageTemplate, args);
    }

    /// <summary>
    /// 初始化_logger
    /// </summary>
    private void InitializeLogger()
    {
        if (_logger == null)
        {
            var logFilePath = Environments.LogFilePath;

            // 日志文件按天分割,最大文件数为30
            _logger = new LoggerConfiguration()
                 .WriteTo.File(logFilePath, rollingInterval: RollingInterval.Day, retainedFileCountLimit: 30)
                 .CreateLogger();
        }
    }
}
最后我们可以创建一个ViewModelBase作为基类,让它去继承Screen。我们所有的ViewModel都可以继承这个 基类 然后在文件中声明我们注入的对象,从而优化代码。(这里能使用IoC.Get直接去获取是因为我们在AppBootstrapper类注入了Ioc)
cs
public class ViewModelBase : Screen
{
    public IWindowManager WindowManager => IoC.Get<IWindowManager>();

    public IEventAggregator EventAggregator => IoC.Get<IEventAggregator>();

    public ILogger Logger => IoC.Get<ILogger>();
}
三、实现主题切换
我们首先定义两个资源文件,分别是Light.xaml和Dark.xaml,设置不同主题下的背景颜色和字体颜色


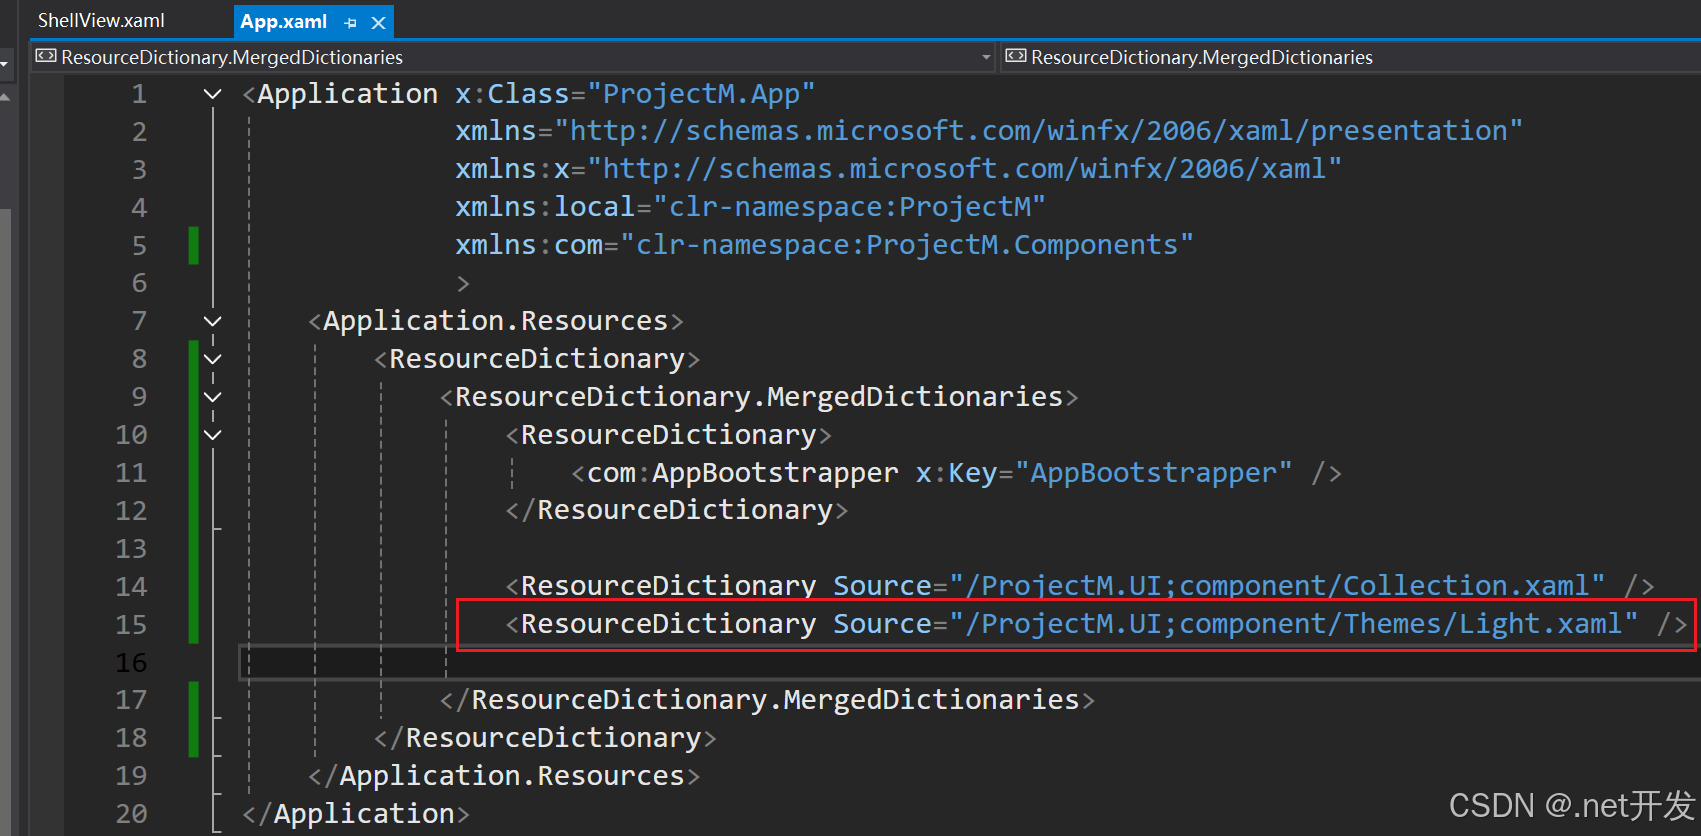
在App.xaml中引入我们定义好的资源文件(这里引入一个我们打开的默认显示主题就行)
定义一个枚举类存放我们的主题
cs
public enum AppTheme
{
    Light = 0,
    Dark = 1
}
定义一个接口类,用于声明切换主题的方法
cs
public interface IThemeManager
{
    void UpdateTheme(AppTheme theme);
}
实现这个方法(通过在资源字典中找到主题资源设置,删除原来的资源,将新的主题资源添加进去,从而实现了主题切换的效果)
cs
public class ThemeManager : IThemeManager
{
    /// <summary>
    /// 切换思路:在资源字典中找到主题资源,替换掉原来的资源,这样就实现了切换主题的效果
    /// </summary>
    /// <param name="theme"></param>
    public void UpdateTheme(AppTheme theme)
    {
        for(int i = 0; i < Application.Current.Resources.MergedDictionaries.Count; i++)
        {
            var dictionary = Application.Current.Resources.MergedDictionaries[i];
            if (string.IsNullOrEmpty(dictionary.Source?.OriginalString))
            {
                continue;
            }
            if(dictionary.Source.OriginalString.StartsWith("/ProjectM.UI;component/Themes/"))
            {
                Application.Current.Resources.MergedDictionaries.Remove(dictionary);
                var resourceDictionary = new ResourceDictionary()
                {
                    Source = new Uri($"/ProjectM.UI;component/Themes/{theme}.xaml", UriKind.RelativeOrAbsolute)
                };
                Application.Current.Resources.MergedDictionaries.Insert(i,resourceDictionary);
                return;
            }
        }
    }
}
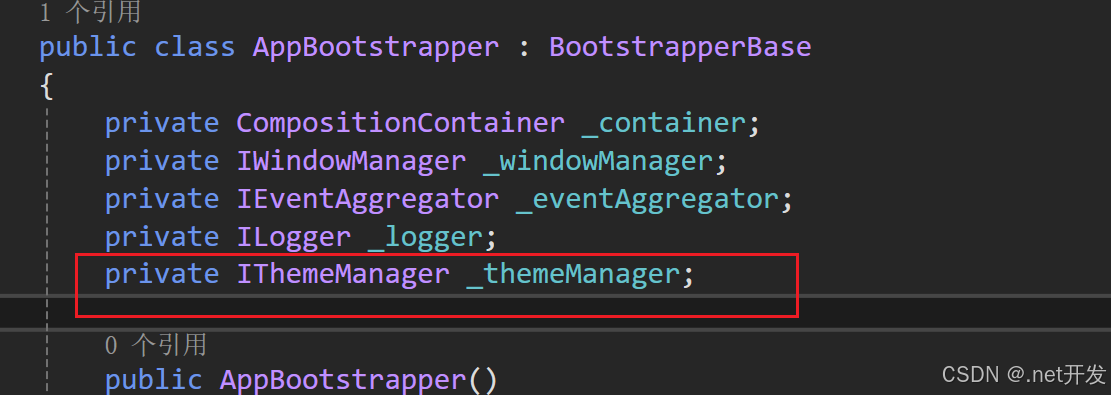
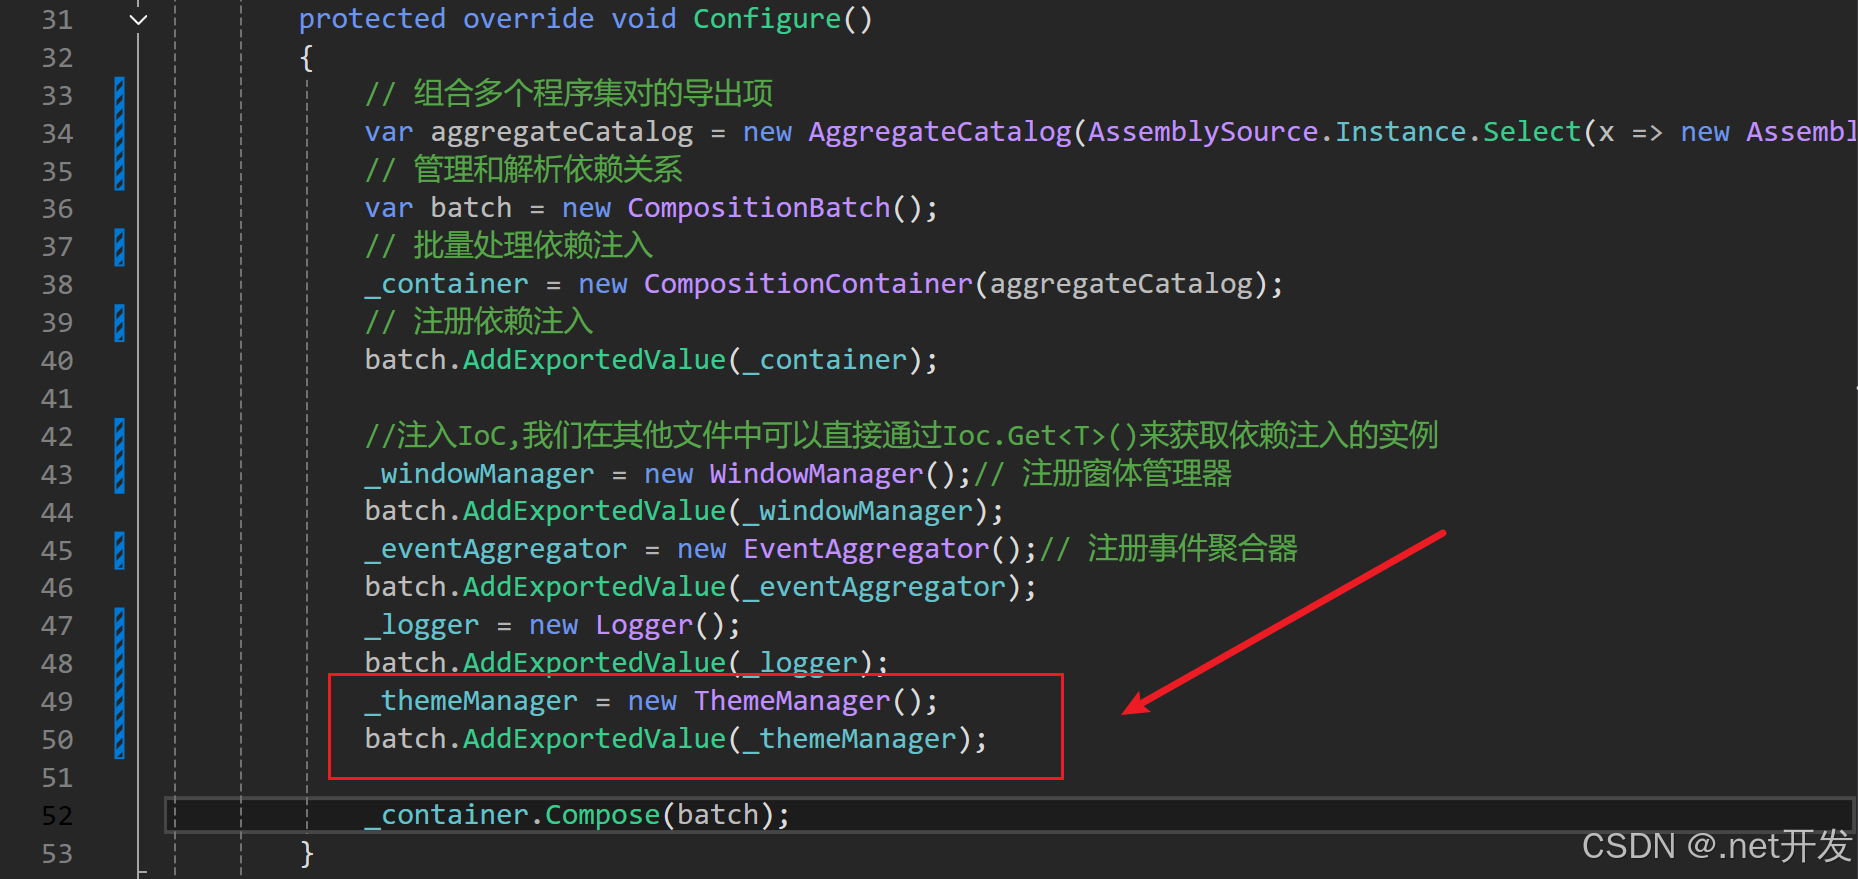
我们在AppBootstrapper.cs文件中注入我们的IThemeManager(注入后我们可以再任何地方直接使用,不用去new对象,达到解耦的目的)
 最后进行测试,在界面定义一个Button和文本内容

在ViewModel中实现SwitchTheme方法
cs
bool isLight = true;
public void SwitchTheme()
{
    if (isLight)
    {
        ThemeManager.UpdateTheme(AppTheme.Dark);
    }
    else
    {
        ThemeManager.UpdateTheme(AppTheme.Light);
    }
    isLight =!isLight;
}
最后运行项目,点击Button,主题成功进行切换