本讲义主要以text2SQL为场景进行讲解,包括提示词的编写和闭源模型调用、本地开源模型部署调用以及基于开源模型的微调。
回顾下大模型学习思路:
1. 开发环境准备
1.1 代码
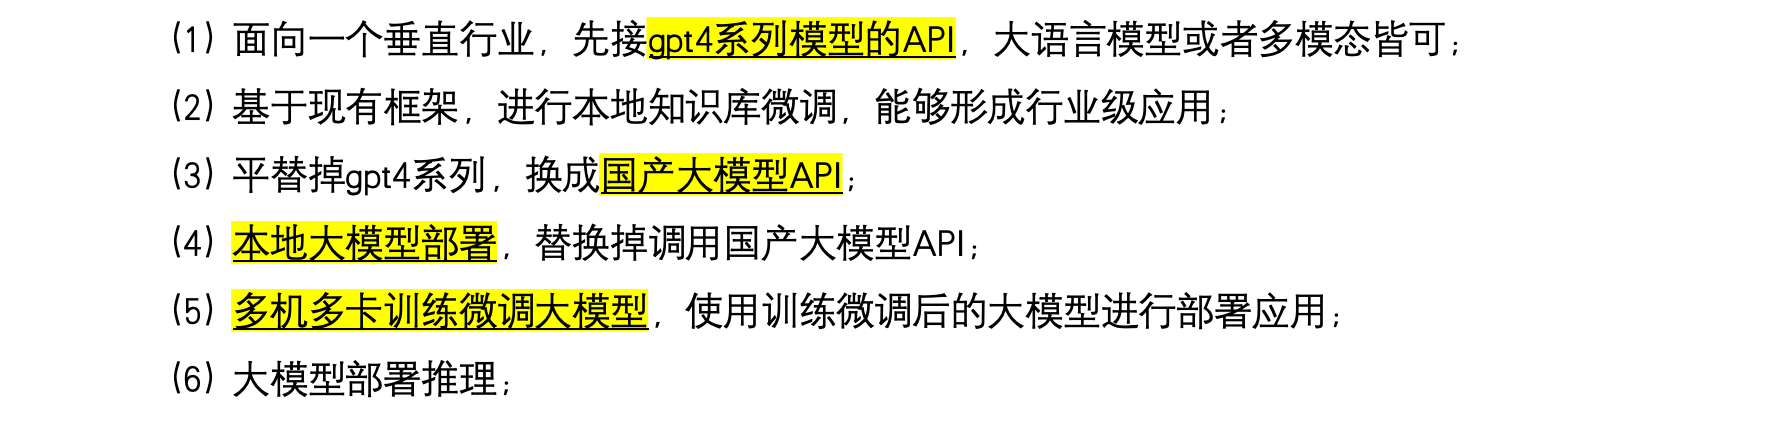
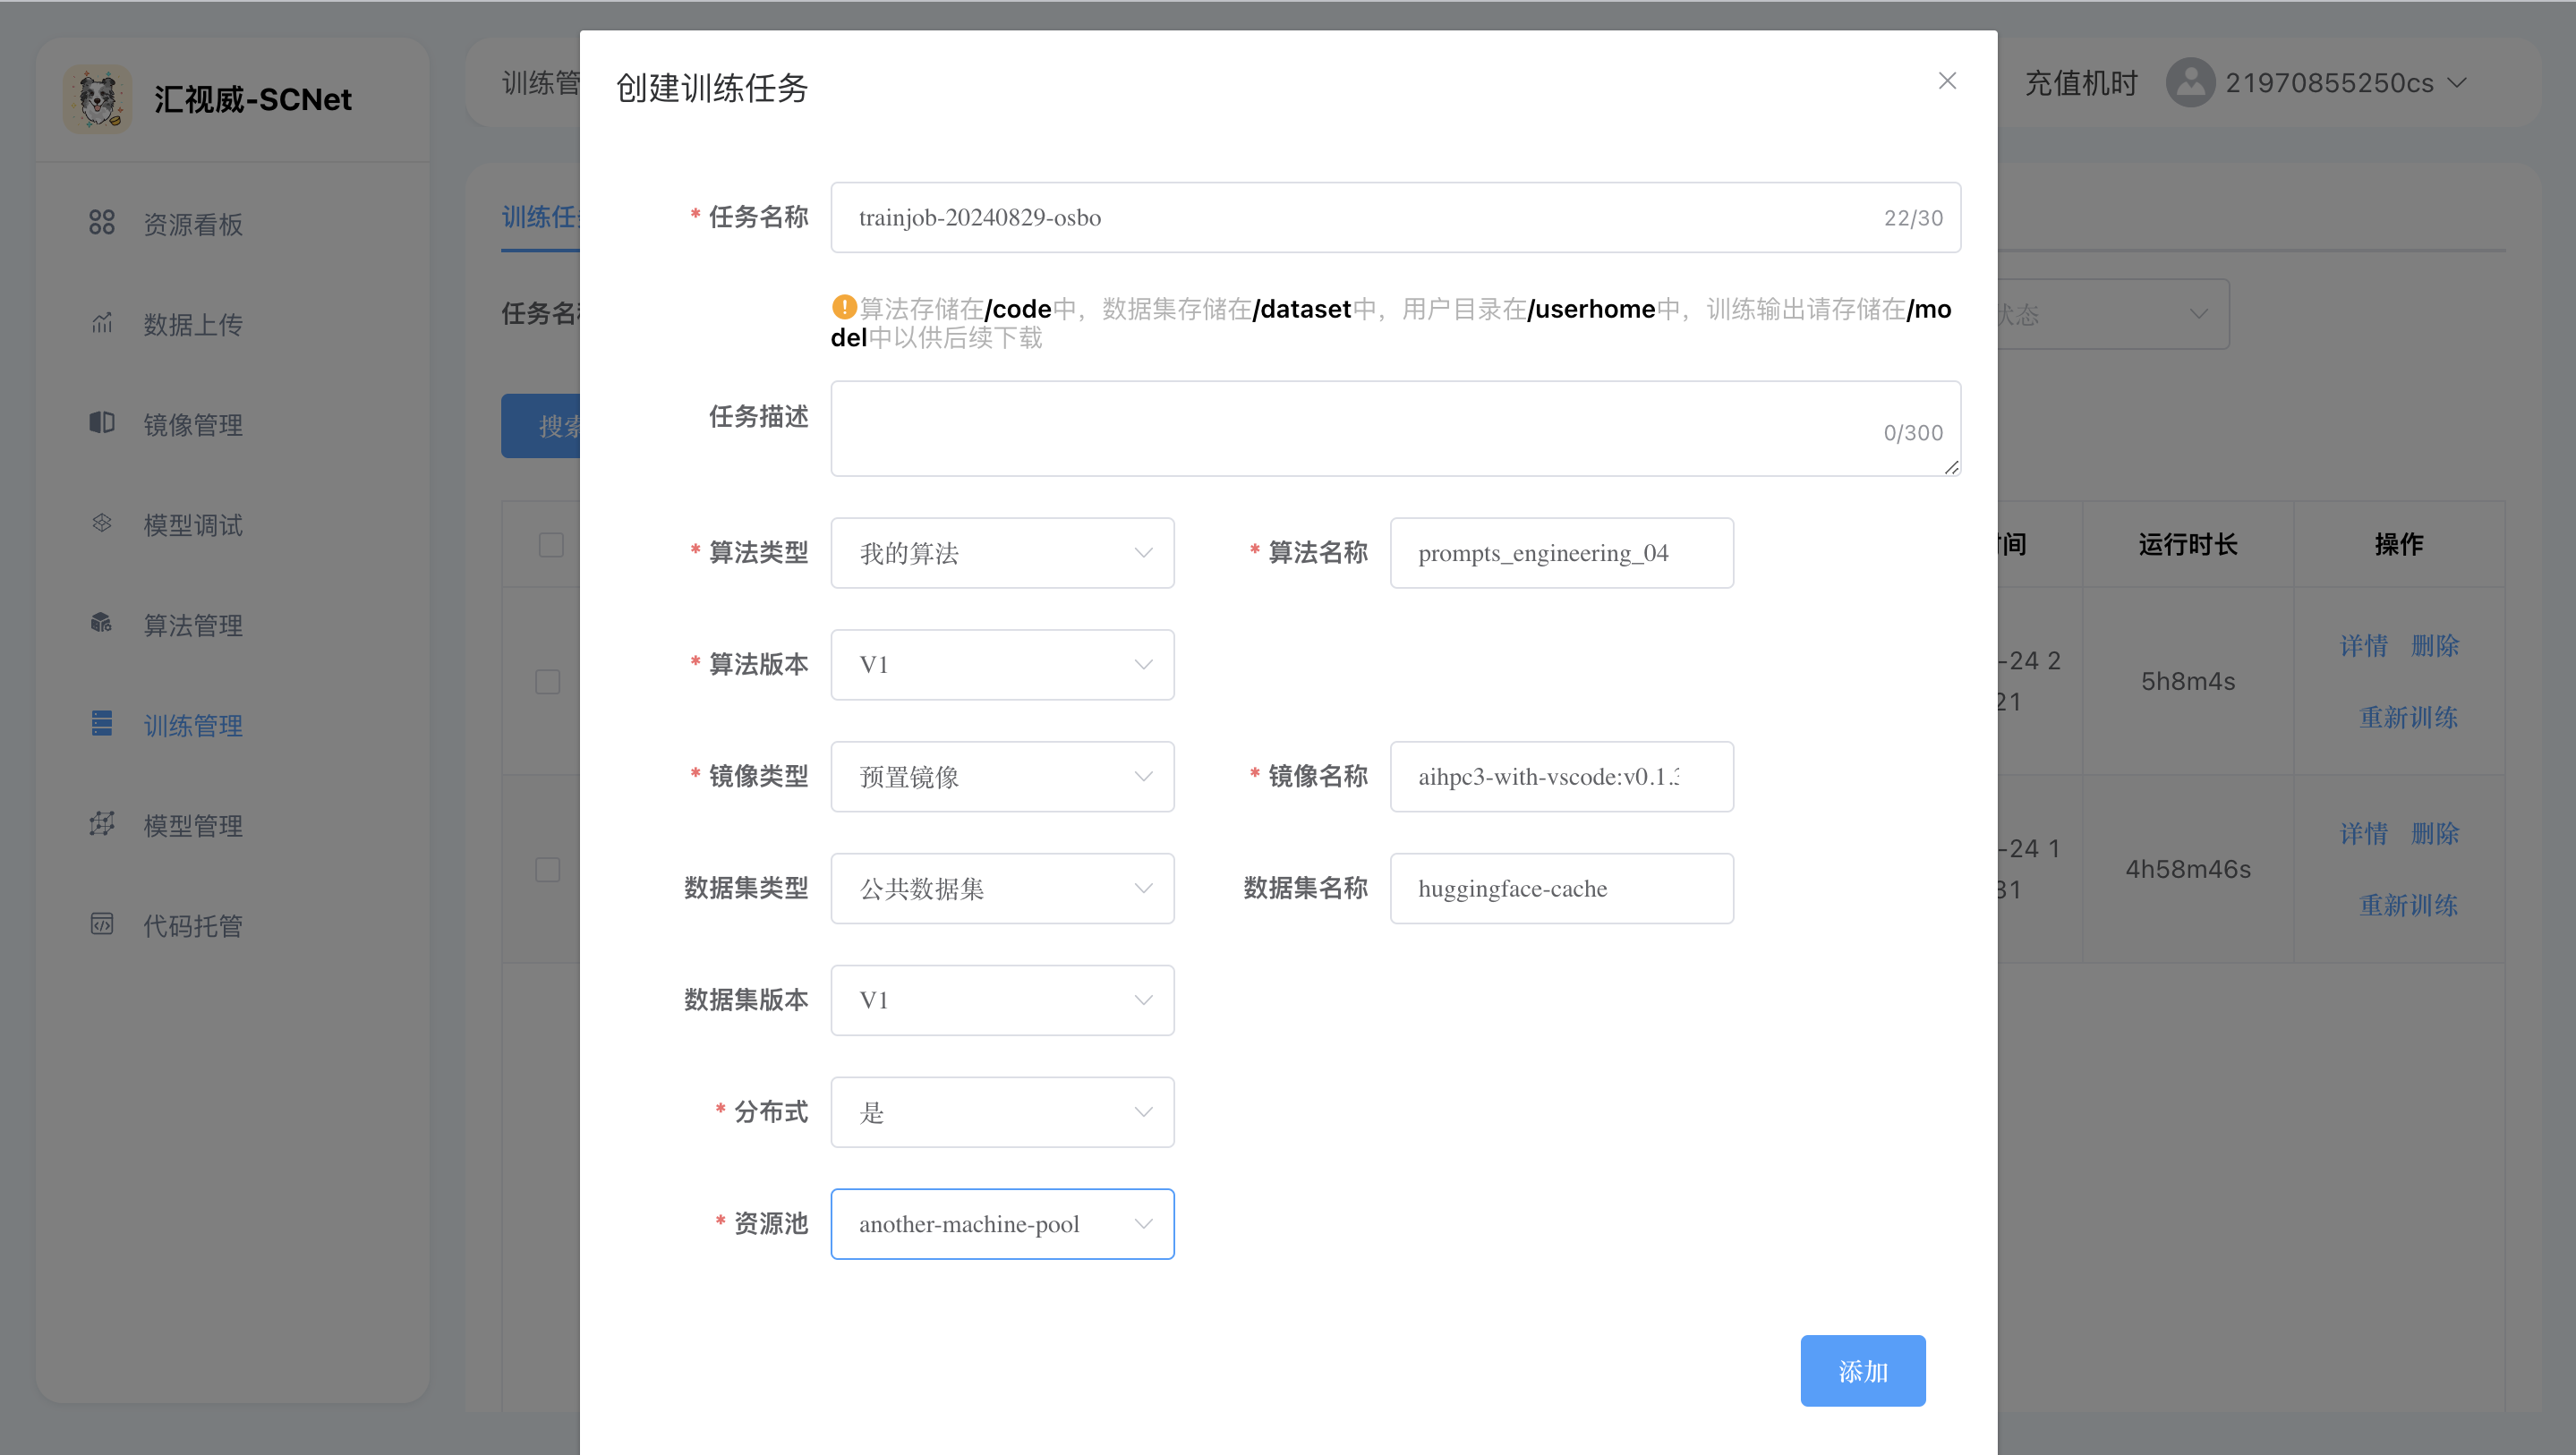
代码位于【算法管理】->【公共算法】->【prompts_engineering_04】,使用之前先点击【复制算法】,将代码复制到【我的算法】中。
训练代码内容:
# Copyright (c) OpenMMLab. All rights reserved.
import torch
from datasets import load_dataset
from mmengine.dataset import DefaultSampler
from mmengine.hooks import (CheckpointHook, DistSamplerSeedHook, IterTimerHook,
                            LoggerHook, ParamSchedulerHook)
from mmengine.optim import AmpOptimWrapper, CosineAnnealingLR, LinearLR
from peft import LoraConfig
from torch.optim import AdamW
from transformers import (AutoModelForCausalLM, AutoTokenizer,
                          BitsAndBytesConfig)

from xtuner.dataset import process_hf_dataset
from xtuner.dataset.collate_fns import default_collate_fn
from xtuner.dataset.map_fns import sql_map_fn, template_map_fn_factory
from xtuner.engine.hooks import (DatasetInfoHook, EvaluateChatHook,
                                 VarlenAttnArgsToMessageHubHook)
from xtuner.engine.runner import TrainLoop
from xtuner.model import SupervisedFinetune
from xtuner.parallel.sequence import SequenceParallelSampler
from xtuner.utils import PROMPT_TEMPLATE, SYSTEM_TEMPLATE

#######################################################################
#                          PART 1  Settings                           #
#######################################################################
# Model
pretrained_model_name_or_path = '/dataset/CodeLlama-7b-hf/'
use_varlen_attn = False

# Data
data_path = '/dataset/datasets/sql_datasets'
prompt_template = PROMPT_TEMPLATE.llama2_chat
max_dataset_length=16000
max_length = 2048
pack_to_max_length = False

# parallel
sequence_parallel_size = 1

# Scheduler & Optimizer
batch_size = 4  # per_device
accumulative_counts = 8
accumulative_counts *= sequence_parallel_size
dataloader_num_workers = 0
max_epochs = 1
optim_type = AdamW
lr = 2e-4
betas = (0.9, 0.999)
weight_decay = 0
max_norm = 1  # grad clip
warmup_ratio = 0.03

# Save
save_steps = 500
save_total_limit = 2  # Maximum checkpoints to keep (-1 means unlimited)

# Evaluate the generation performance during the training
evaluation_freq = 500
SYSTEM = SYSTEM_TEMPLATE.sql
evaluation_inputs = [
    ('CREATE TABLE station (name VARCHAR, lat VARCHAR, city VARCHAR)\n'
     'Find the name, latitude, and city of stations with latitude '
     'above 50.'),
    ('CREATE TABLE weather (zip_code VARCHAR, mean_visibility_miles '
     'INTEGER)\n找到mean_visibility_miles最大的zip_code。')
]

#######################################################################
#                      PART 2  Model & Tokenizer                      #
#######################################################################
tokenizer = dict(
    type=AutoTokenizer.from_pretrained,
    pretrained_model_name_or_path=pretrained_model_name_or_path,
    trust_remote_code=True,
    padding_side='right')

model = dict(
    type=SupervisedFinetune,
    use_varlen_attn=use_varlen_attn,
    llm=dict(
        type=AutoModelForCausalLM.from_pretrained,
        pretrained_model_name_or_path=pretrained_model_name_or_path,
        trust_remote_code=True,
        torch_dtype=torch.bfloat16),
    lora=dict(
        type=LoraConfig,
        r=64,
        lora_alpha=16,
        lora_dropout=0.1,
        bias='none',
        task_type='CAUSAL_LM'))

#######################################################################
#                      PART 3  Dataset & Dataloader                   #
#######################################################################
train_dataset = dict(
    type=process_hf_dataset,
    dataset=dict(type=load_dataset, path=data_path),
    tokenizer=tokenizer,
    max_dataset_length=max_dataset_length,
    max_length=max_length,
    dataset_map_fn=sql_map_fn,
    template_map_fn=dict(
        type=template_map_fn_factory, template=prompt_template),
    remove_unused_columns=True,
    shuffle_before_pack=True,
    pack_to_max_length=pack_to_max_length,
    use_varlen_attn=use_varlen_attn)

sampler = SequenceParallelSampler \
    if sequence_parallel_size > 1 else DefaultSampler
train_dataloader = dict(
    batch_size=batch_size,
    num_workers=dataloader_num_workers,
    dataset=train_dataset,
    sampler=dict(type=sampler, shuffle=True),
    collate_fn=dict(type=default_collate_fn, use_varlen_attn=use_varlen_attn))

#######################################################################
#                    PART 4  Scheduler & Optimizer                    #
#######################################################################
# optimizer
optim_wrapper = dict(
    type=AmpOptimWrapper,
    optimizer=dict(
        type=optim_type, lr=lr, betas=betas, weight_decay=weight_decay),
    clip_grad=dict(max_norm=max_norm, error_if_nonfinite=False),
    accumulative_counts=accumulative_counts,
    loss_scale='dynamic',
    dtype='float16')

# learning policy
# More information: https://github.com/open-mmlab/mmengine/blob/main/docs/en/tutorials/param_scheduler.md  # noqa: E501
param_scheduler = [
    dict(
        type=LinearLR,
        start_factor=1e-5,
        by_epoch=True,
        begin=0,
        end=warmup_ratio * max_epochs,
        convert_to_iter_based=True),
    dict(
        type=CosineAnnealingLR,
        eta_min=0.0,
        by_epoch=True,
        begin=warmup_ratio * max_epochs,
        end=max_epochs,
        convert_to_iter_based=True)
]

# train, val, test setting
train_cfg = dict(type=TrainLoop, max_epochs=max_epochs)

#######################################################################
#                           PART 5  Runtime                           #
#######################################################################
# Log the dialogue periodically during the training process, optional
custom_hooks = [
    dict(type=DatasetInfoHook, tokenizer=tokenizer)
    # ,
    # dict(
    #     type=EvaluateChatHook,
    #     tokenizer=tokenizer,
    #     every_n_iters=evaluation_freq,
    #     evaluation_inputs=evaluation_inputs,
    #     system=SYSTEM,
    #     prompt_template=prompt_template)
]

if use_varlen_attn:
    custom_hooks += [dict(type=VarlenAttnArgsToMessageHubHook)]

# configure default hooks
default_hooks = dict(
    # record the time of every iteration.
    timer=dict(type=IterTimerHook),
    # print log every 10 iterations.
    logger=dict(type=LoggerHook, log_metric_by_epoch=False, interval=10),
    # enable the parameter scheduler.
    param_scheduler=dict(type=ParamSchedulerHook),
    # save checkpoint per `save_steps`.
    checkpoint=dict(
        type=CheckpointHook,
        by_epoch=False,
        interval=save_steps,
        max_keep_ckpts=save_total_limit),
    # set sampler seed in distributed evrionment.
    sampler_seed=dict(type=DistSamplerSeedHook),
)

# configure environment
env_cfg = dict(
    # whether to enable cudnn benchmark
    cudnn_benchmark=False,
    # set multi process parameters
    mp_cfg=dict(mp_start_method='fork', opencv_num_threads=0),
    # set distributed parameters
    dist_cfg=dict(backend='nccl'),
)

# set visualizer
visualizer = None

# set log level
log_level = 'INFO'

# load from which checkpoint
load_from = None

# whether to resume training from the loaded checkpoint
resume = False

# Defaults to use random seed and disable `deterministic`
randomness = dict(seed=None, deterministic=False)

# set log processor
log_processor = dict(by_epoch=False)
1.2 数据
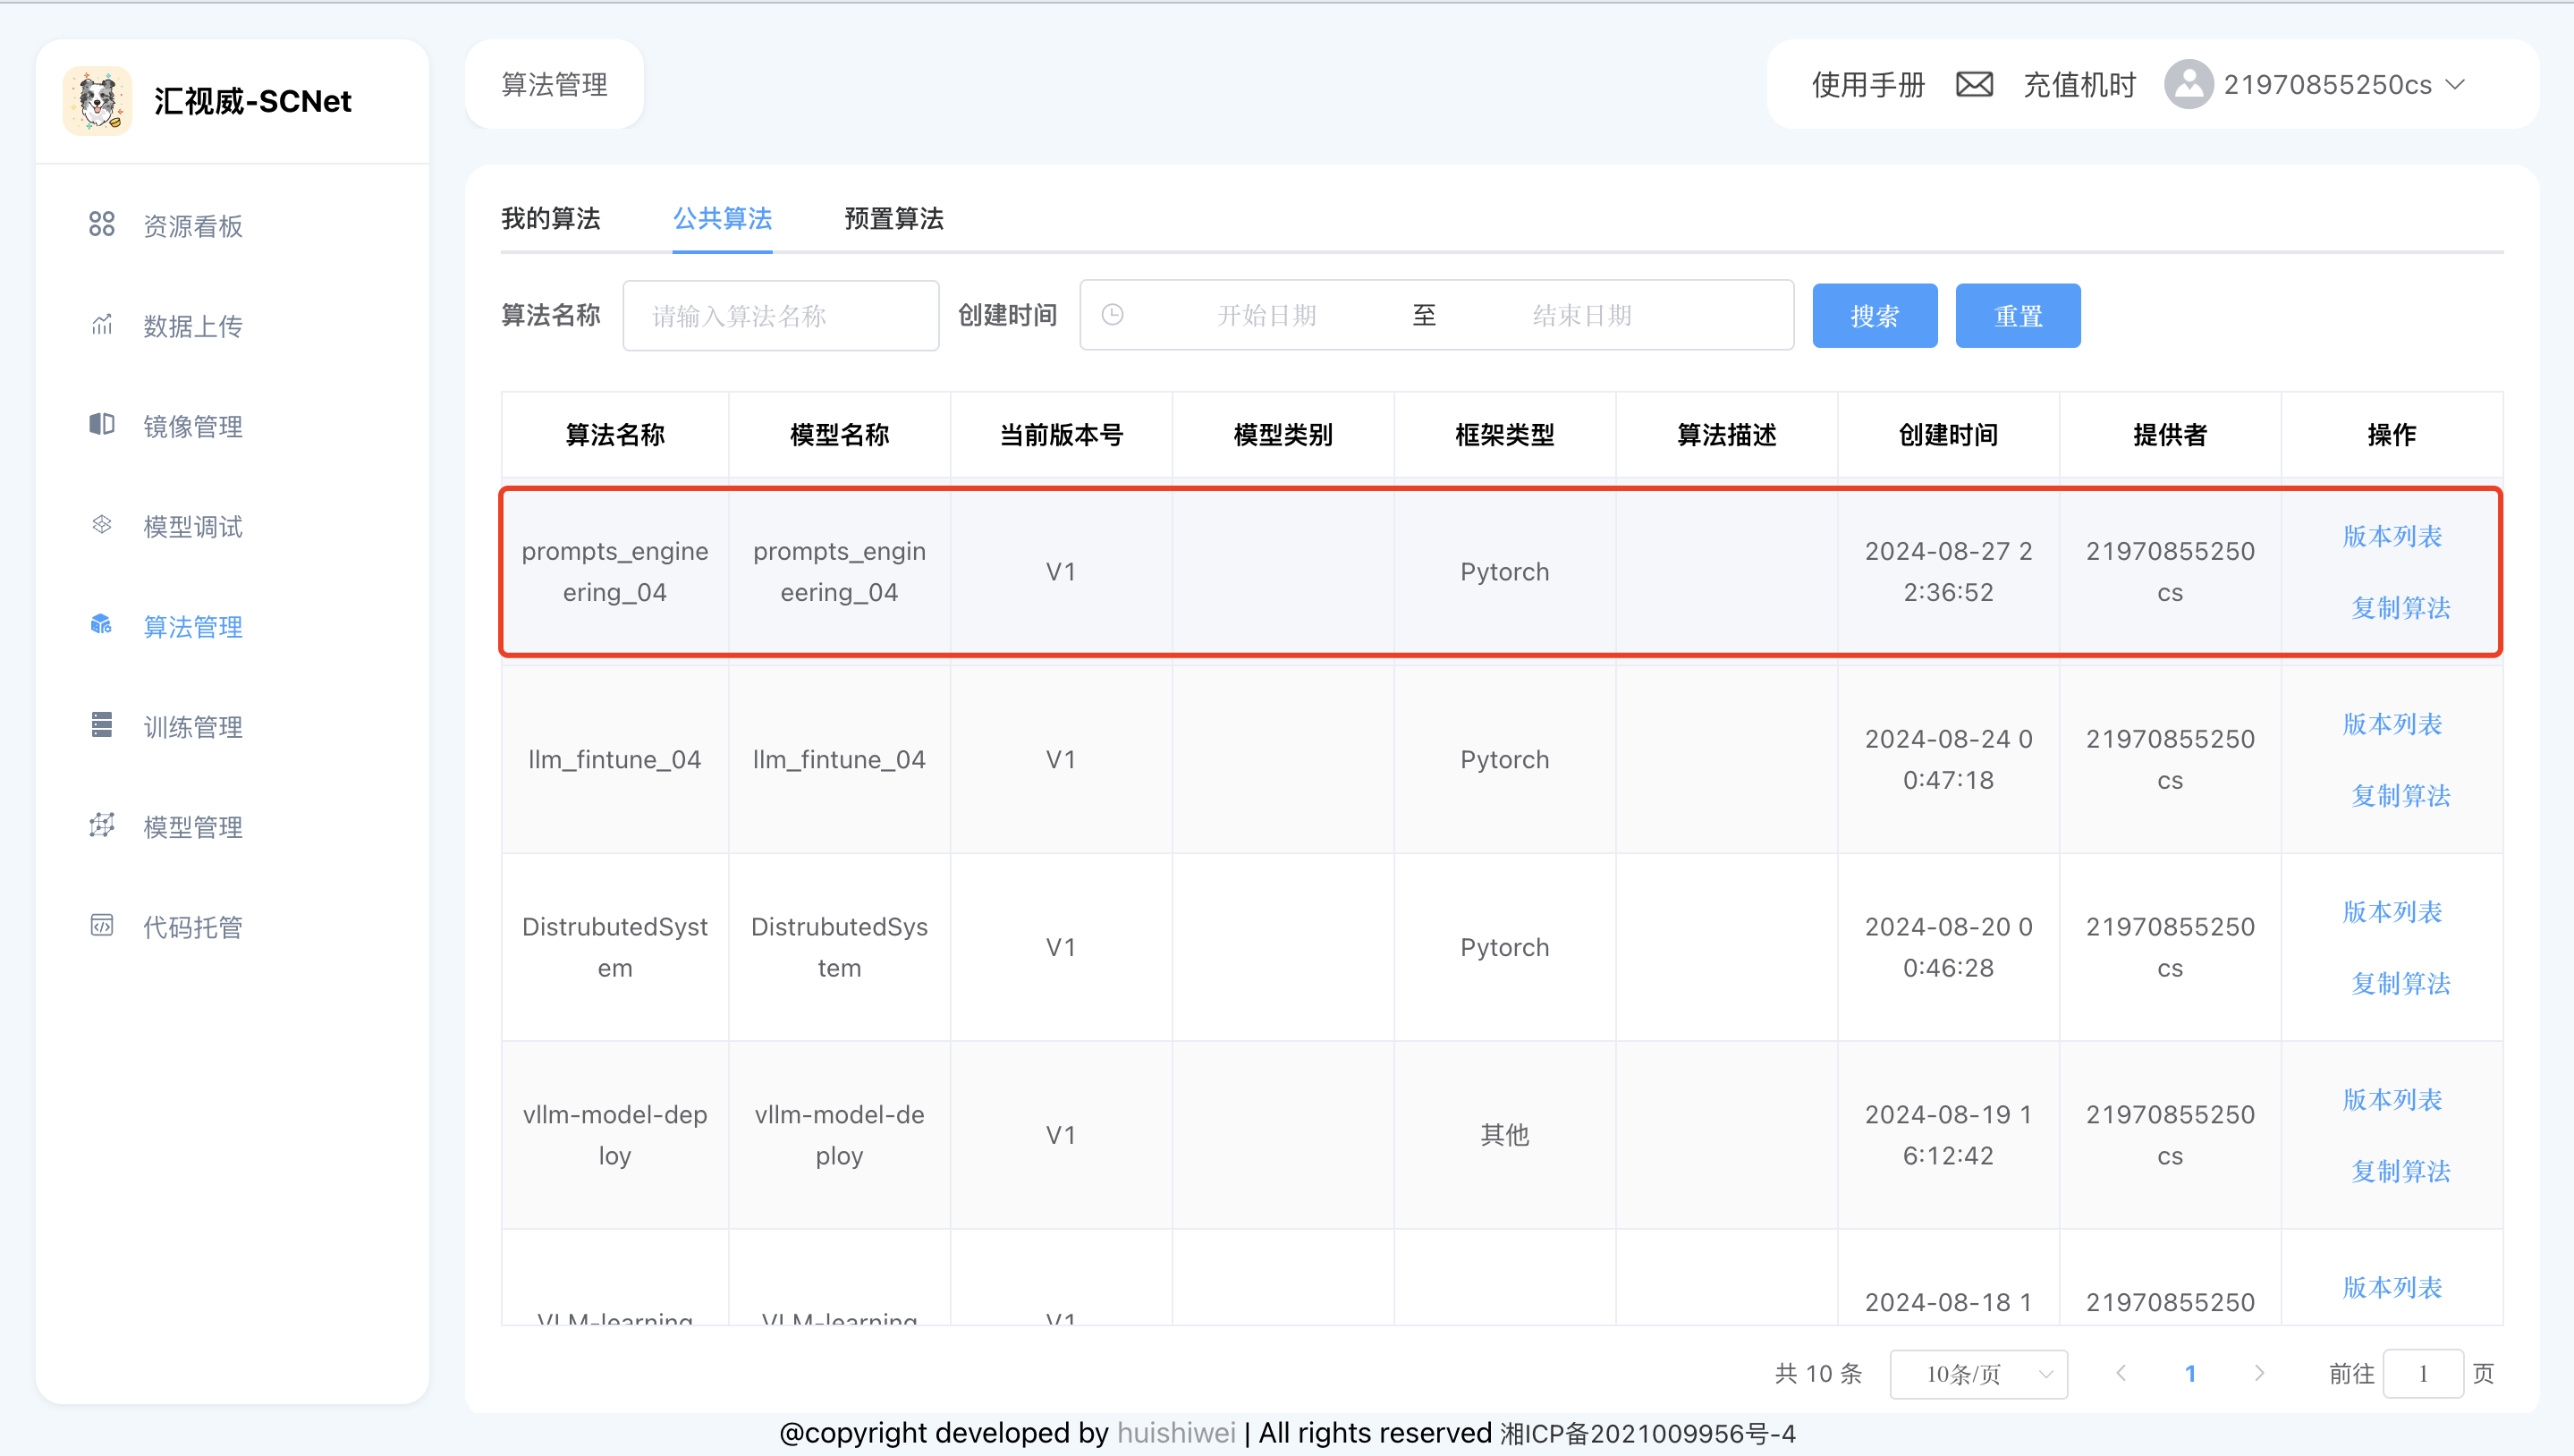
数据已经下载好放在平台的huggingface-cache这个【公共数据集】中,数据位于/dataset/datasets/sql_datasets
数据下载链接:https://huggingface.co/datasets/b-mc2/sql-create-context
1.3 模型
模型位于【公共数据集】的hugging-cache中,创建好notebook后,可以在**/dataset/CodeLlama-7b-hf/**下查看模型文件

模型下载链接:https://huggingface.co/codellama/CodeLlama-7b-hf
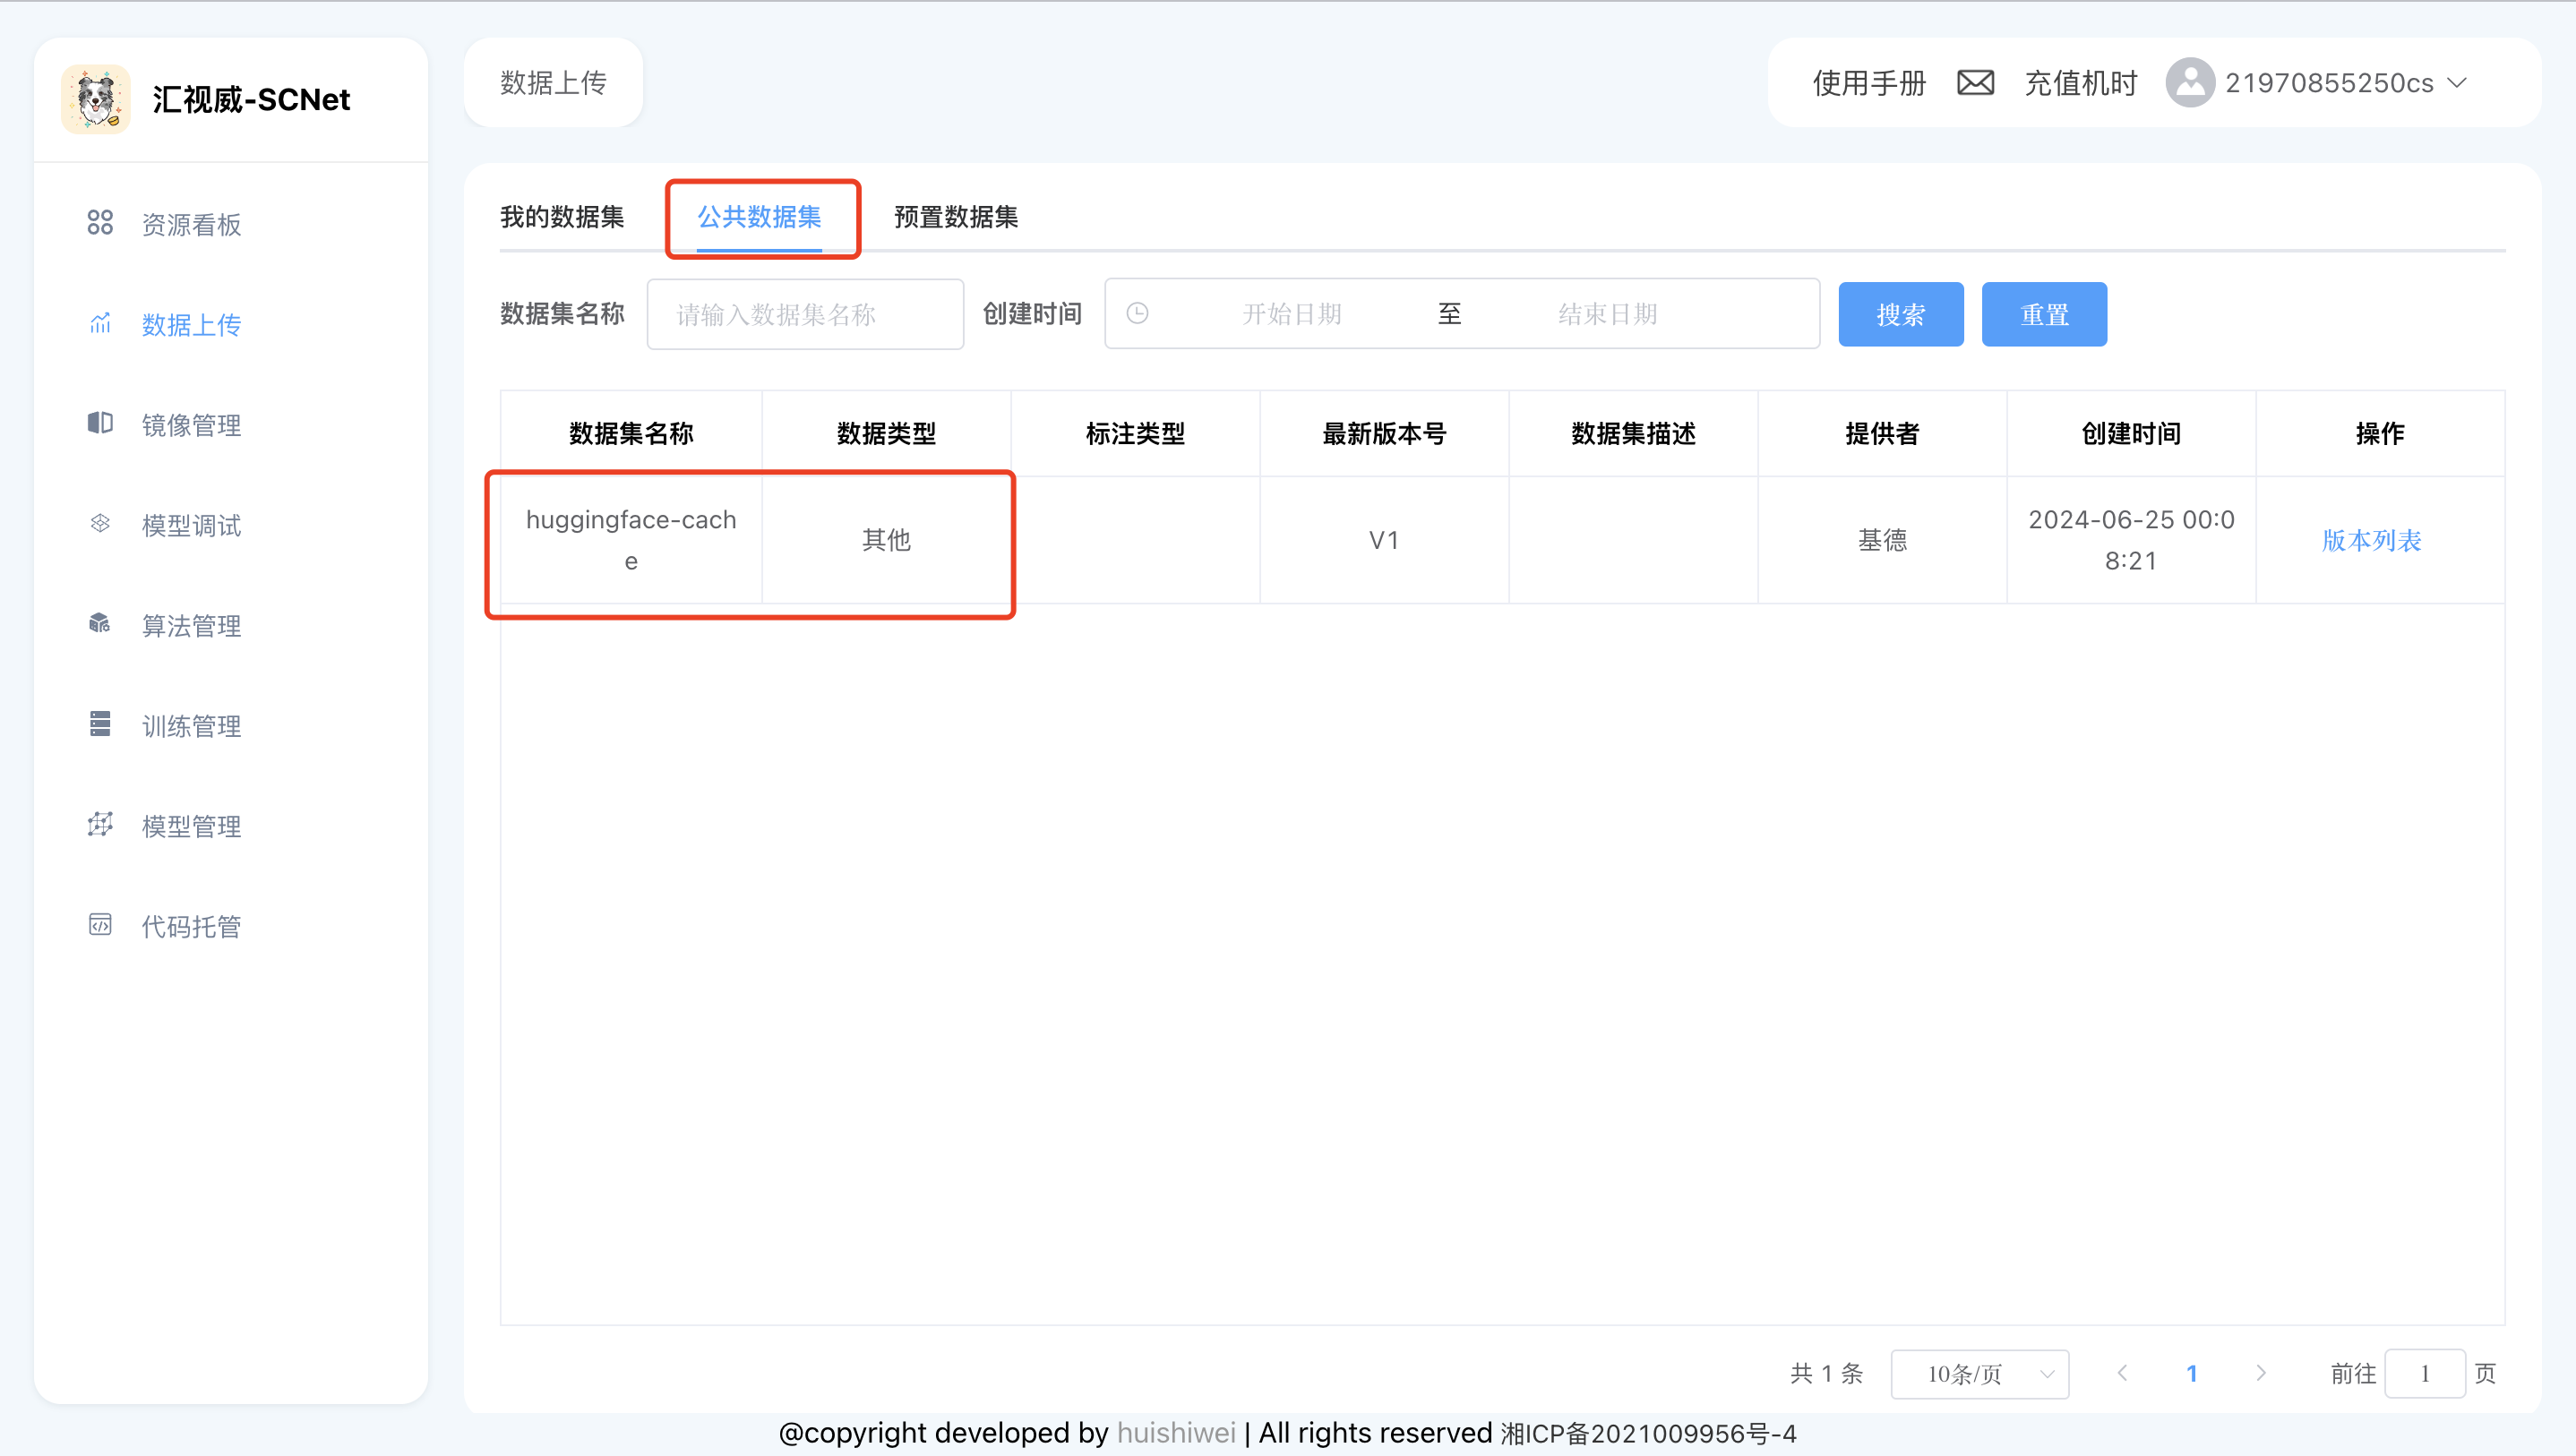
1.4 创建开发环境
关键参数如下图所示,如果不希望开发环境(平台上也被成为notebook)默认4小时关闭,可以将【自动停止】关闭,如下图所示
注意⚠️
使用平台时,如需连接互联网,下载数据和模型需要设置如下环境变量
export HF_HOME=/code/huggingface-cache/
export HF_ENDPOINT=https://hf-mirror.com
export http_proxy=http://10.10.9.50:3000
export https_proxy=http://10.10.9.50:3000
export no_proxy=localhost,127.0.0.1
1.5 国内外模型的api-key准备
课程需要使用的大模型api-key需要自行申请下,国内大模型很多都首次注册送免费额度,基本够用。
api申请地址如下,大家可以根据需要申请:
|----------|--------------------------------------------------------|
| 讯飞星火大模型 | https://xinghuo.xfyun.cn/sparkapi |
| 智普 AI | https://open.bigmodel.cn/pricing |
| 阿里千问 | https://bailian.console.aliyun.com/#/model-market |
| 百度千帆 | https://cloud.baidu.com/doc/WENXINWORKSHOP/s/Nlks5zkzu |
| DeepSeek | https://platform.deepseek.com/api_keys |
申请完毕后,按照对应的环境变量进行设置即,例如:
百度:
export QIANFAN_AK=xxxxx
export QIANFAN_SK=xxxxxx
讯飞:
export SPARK_APP_ID=xxxx
export SPARK_API_KEY=xxxxxxx
export SPARK_API_SECRET=xxxxxxx
智普:
export ZHIPUAI_API_KEY=xxx_xxx
2. 调用国内外大模型测试
2.1 调用GPT-4o
import openai

# 设置 OpenAI API 密钥
# 如果设置了环境变量OPENAI_API_KEY就可以不再设置
client = openai.OpenAI() # 填写您自己的APIKey

# 提示词
prompt = """You are a powerful text-to-SQL model. Your job is to answer questions about a database. You are given a question and context regarding one or more tables.

You must output the SQL query that answers the question.
### Input:
Which Class has a Frequency MHz larger than 91.5, and a City of license of hyannis, nebraska?

### Context:
CREATE TABLE table_name_12 (class VARCHAR, frequency_mhz VARCHAR, city_of_license VARCHAR)

### Response:
"""

# 使用 OpenAI API 进行请求
chat_completion = client.chat.completions.create(
    model="gpt-4o",
    messages=[
        {"role": "user", "content": prompt}
    ]
)

# 提取生成的回复文本
print(chat_completion.choices[0].message.content)
生成结果
```sql
SELECT class
FROM table_name_12
WHERE frequency_mhz > 91.5
AND LOWER(city_of_license) = 'hyannis, nebraska';
```
2.2 调用GLM4
import zhipuai

# 设置 ZHIPUAI_API_KEY 密钥
# 如果设置了环境变量ZHIPUAI_API_KEY就可以不再设置
client = zhipuai.ZhipuAI() # 填写您自己的APIKey

# 提示词
prompt = """You are a powerful text-to-SQL model. Your job is to answer questions about a database. You are given a question and context regarding one or more tables.

You must output the SQL query that answers the question.
### Input:
Which Class has a Frequency MHz larger than 91.5, and a City of license of hyannis, nebraska?

### Context:
CREATE TABLE table_name_12 (class VARCHAR, frequency_mhz VARCHAR, city_of_license VARCHAR)

### Response:
"""

# 使用 ZHIPUAI API 进行请求
chat_completion = client.chat.completions.create(
    model="glm-4",
    messages=[
        {"role": "user", "content": prompt}
    ]
)

# 提取生成的回复文本
print(chat_completion.choices[0].message.content)
生成结果
To answer the question, we need to query the `table_name_12` table for rows where the `Frequency MHz` is greater than 91.5 and the `City of license` is 'hyannis, nebraska'. The SQL query would look like this:

```sql
SELECT class
FROM table_name_12
WHERE frequency_mhz > '91.5' AND city_of_license = 'hyannis, nebraska';
```

This query assumes that the `frequency_mhz` column contains values that can be compared using the greater than operator, which is typical for numerical data formatted as strings. If the column contains actual numerical data, the quotes around '91.5' should be removed. However, since the context indicates that `frequency_mhz` is a `VARCHAR`, the quotes are necessary to compare it as a string.
2.3 注意 ⚠️
运行代码调用线上模型之前设置代理以连接到互联网,设置如下
# 终端输入命令
export http_proxy=http://10.10.9.50:3000
export https_proxy=http://10.10.9.50:3000
export no_proxy=localhost,127.0.0.1
此外还需要设置对应的api-key
# 用自己申请的api-key 替换*****部分
export OPENAI_API_KEY=*****
export ZHIPUAI_API_KEY=*****
2.4 本地开源模型部署部署
2.4.1 使用FastChat部署codellama-7b-hf模型
# 按顺序依次执行
# 新建终端,输入如下命令
python -m fastchat.serve.controller --host 0.0.0.0
# 新建终端,输入如下命令
python -m fastchat.serve.model_worker --model-path /dataset/CodeLlama-7b-hf/ --host 0.0.0.0 --num-gpus 4 --max-gpu-memory 15GiB
# 新建终端,输入如下命令
python -m fastchat.serve.openai_api_server --host 0.0.0.0
2.4.2 模型调用
curl -X POST http://localhost:8000/v1/completions \
  -H "Content-Type: application/json" \
  -d '{
    "model": "CodeLlama-7b-hf",
    "prompt": "You are a powerful text-to-SQL model. Your job is to answer questions about a database. You are given a question and context regarding one or more tables. You must output the SQL query that answers the question. ### Input: Which Class has a Frequency MHz larger than 91.5, and a City of license of hyannis, nebraska? ### Context: CREATE TABLE table_name_12 (class VARCHAR, frequency_mhz VARCHAR, city_of_license VARCHAR) ### Response:",
    "max_tokens": 41,
    "temperature": 0.5
  }'
3. 微调训练
针对codellama对问题回答不够好的问题,进行微调。微调数据来源:https://huggingface.co/datasets/b-mc2/sql-create-context,本次实验使用2机8卡,调试过程需要创建2个notebook进行分布式训练的【模型调试】。下面详细讲解微调的过程以及平台使用。
3.1 获取master IP地址
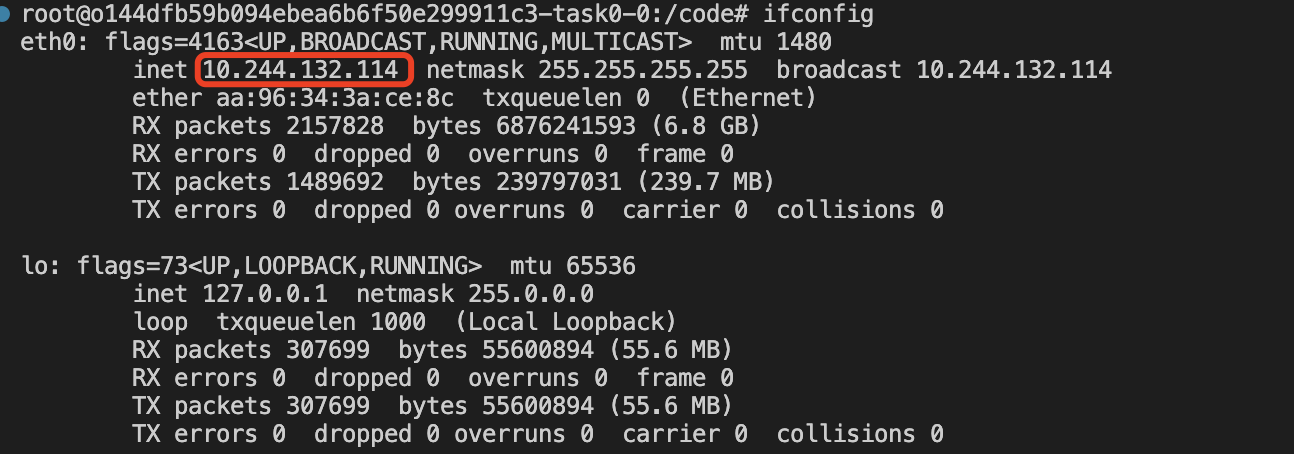
创建好notebook后选择一台机器(notebook)作为master,获取该机器的IP地址
# 打开终端,执行如下命令
ifconfig可以看到如下输出,显示本机IP地址为10.244.132.114
3.2 启动训练
此时,在进行训练任务启动时,使用该IP地址作为ADDR的值,启动训练的命令如下:
# node1上(作为master),打开一个终端,执行如下命令
# 其中ADDR=10.244.132.114里的IP地址是master机器的地址
NPROC_PER_NODE=4 NNODES=2 PORT=12345 ADDR=10.244.132.114 NODE_RANK=0 xtuner train llama2_7b_chat_qlora_sql_e3_copy.py --work-dir /code/xtuner-workdir --deepspeed deepspeed_zero3_offload

# node2上,打开一个终端,执行如下命令
NPROC_PER_NODE=4 NNODES=2 PORT=12345 ADDR=10.244.132.114 NODE_RANK=1 xtuner train llama2_7b_chat_qlora_sql_e3_copy.py --work-dir /code/xtuner-workdir --deepspeed deepspeed_zero3_offload
3.3 查看训练进度
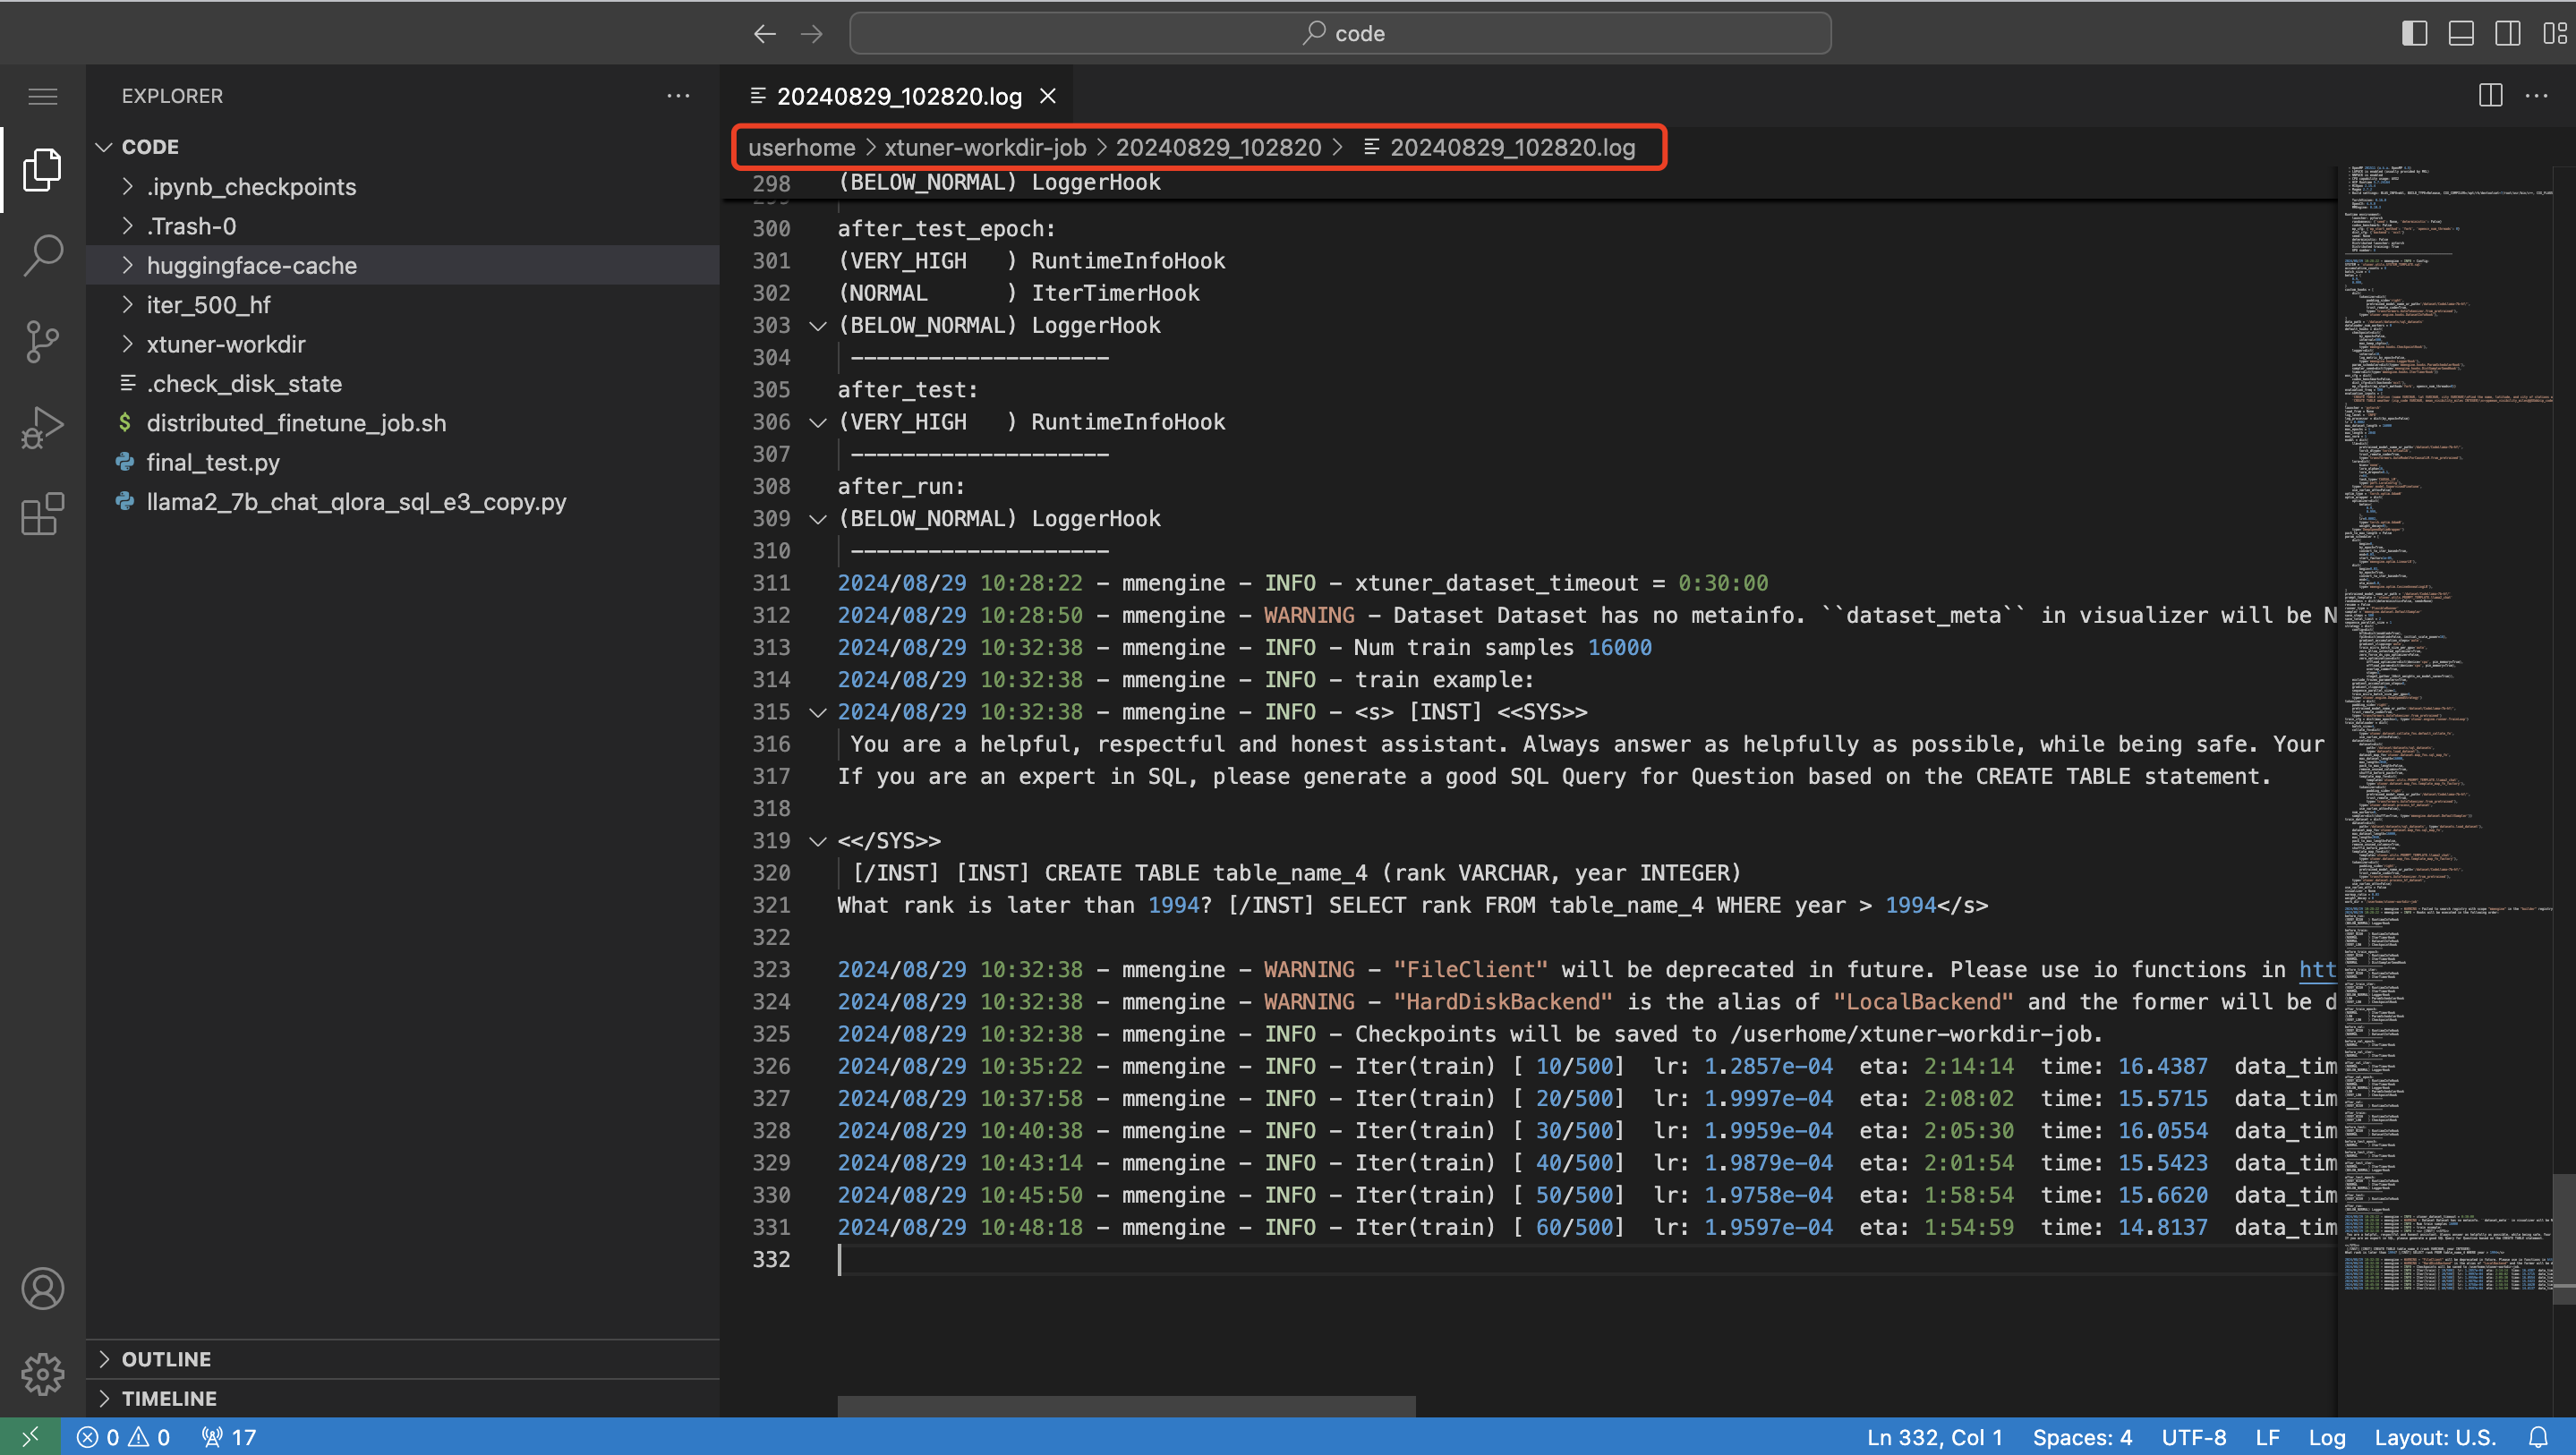
训练的进度只看master节点的日志,如下所示:
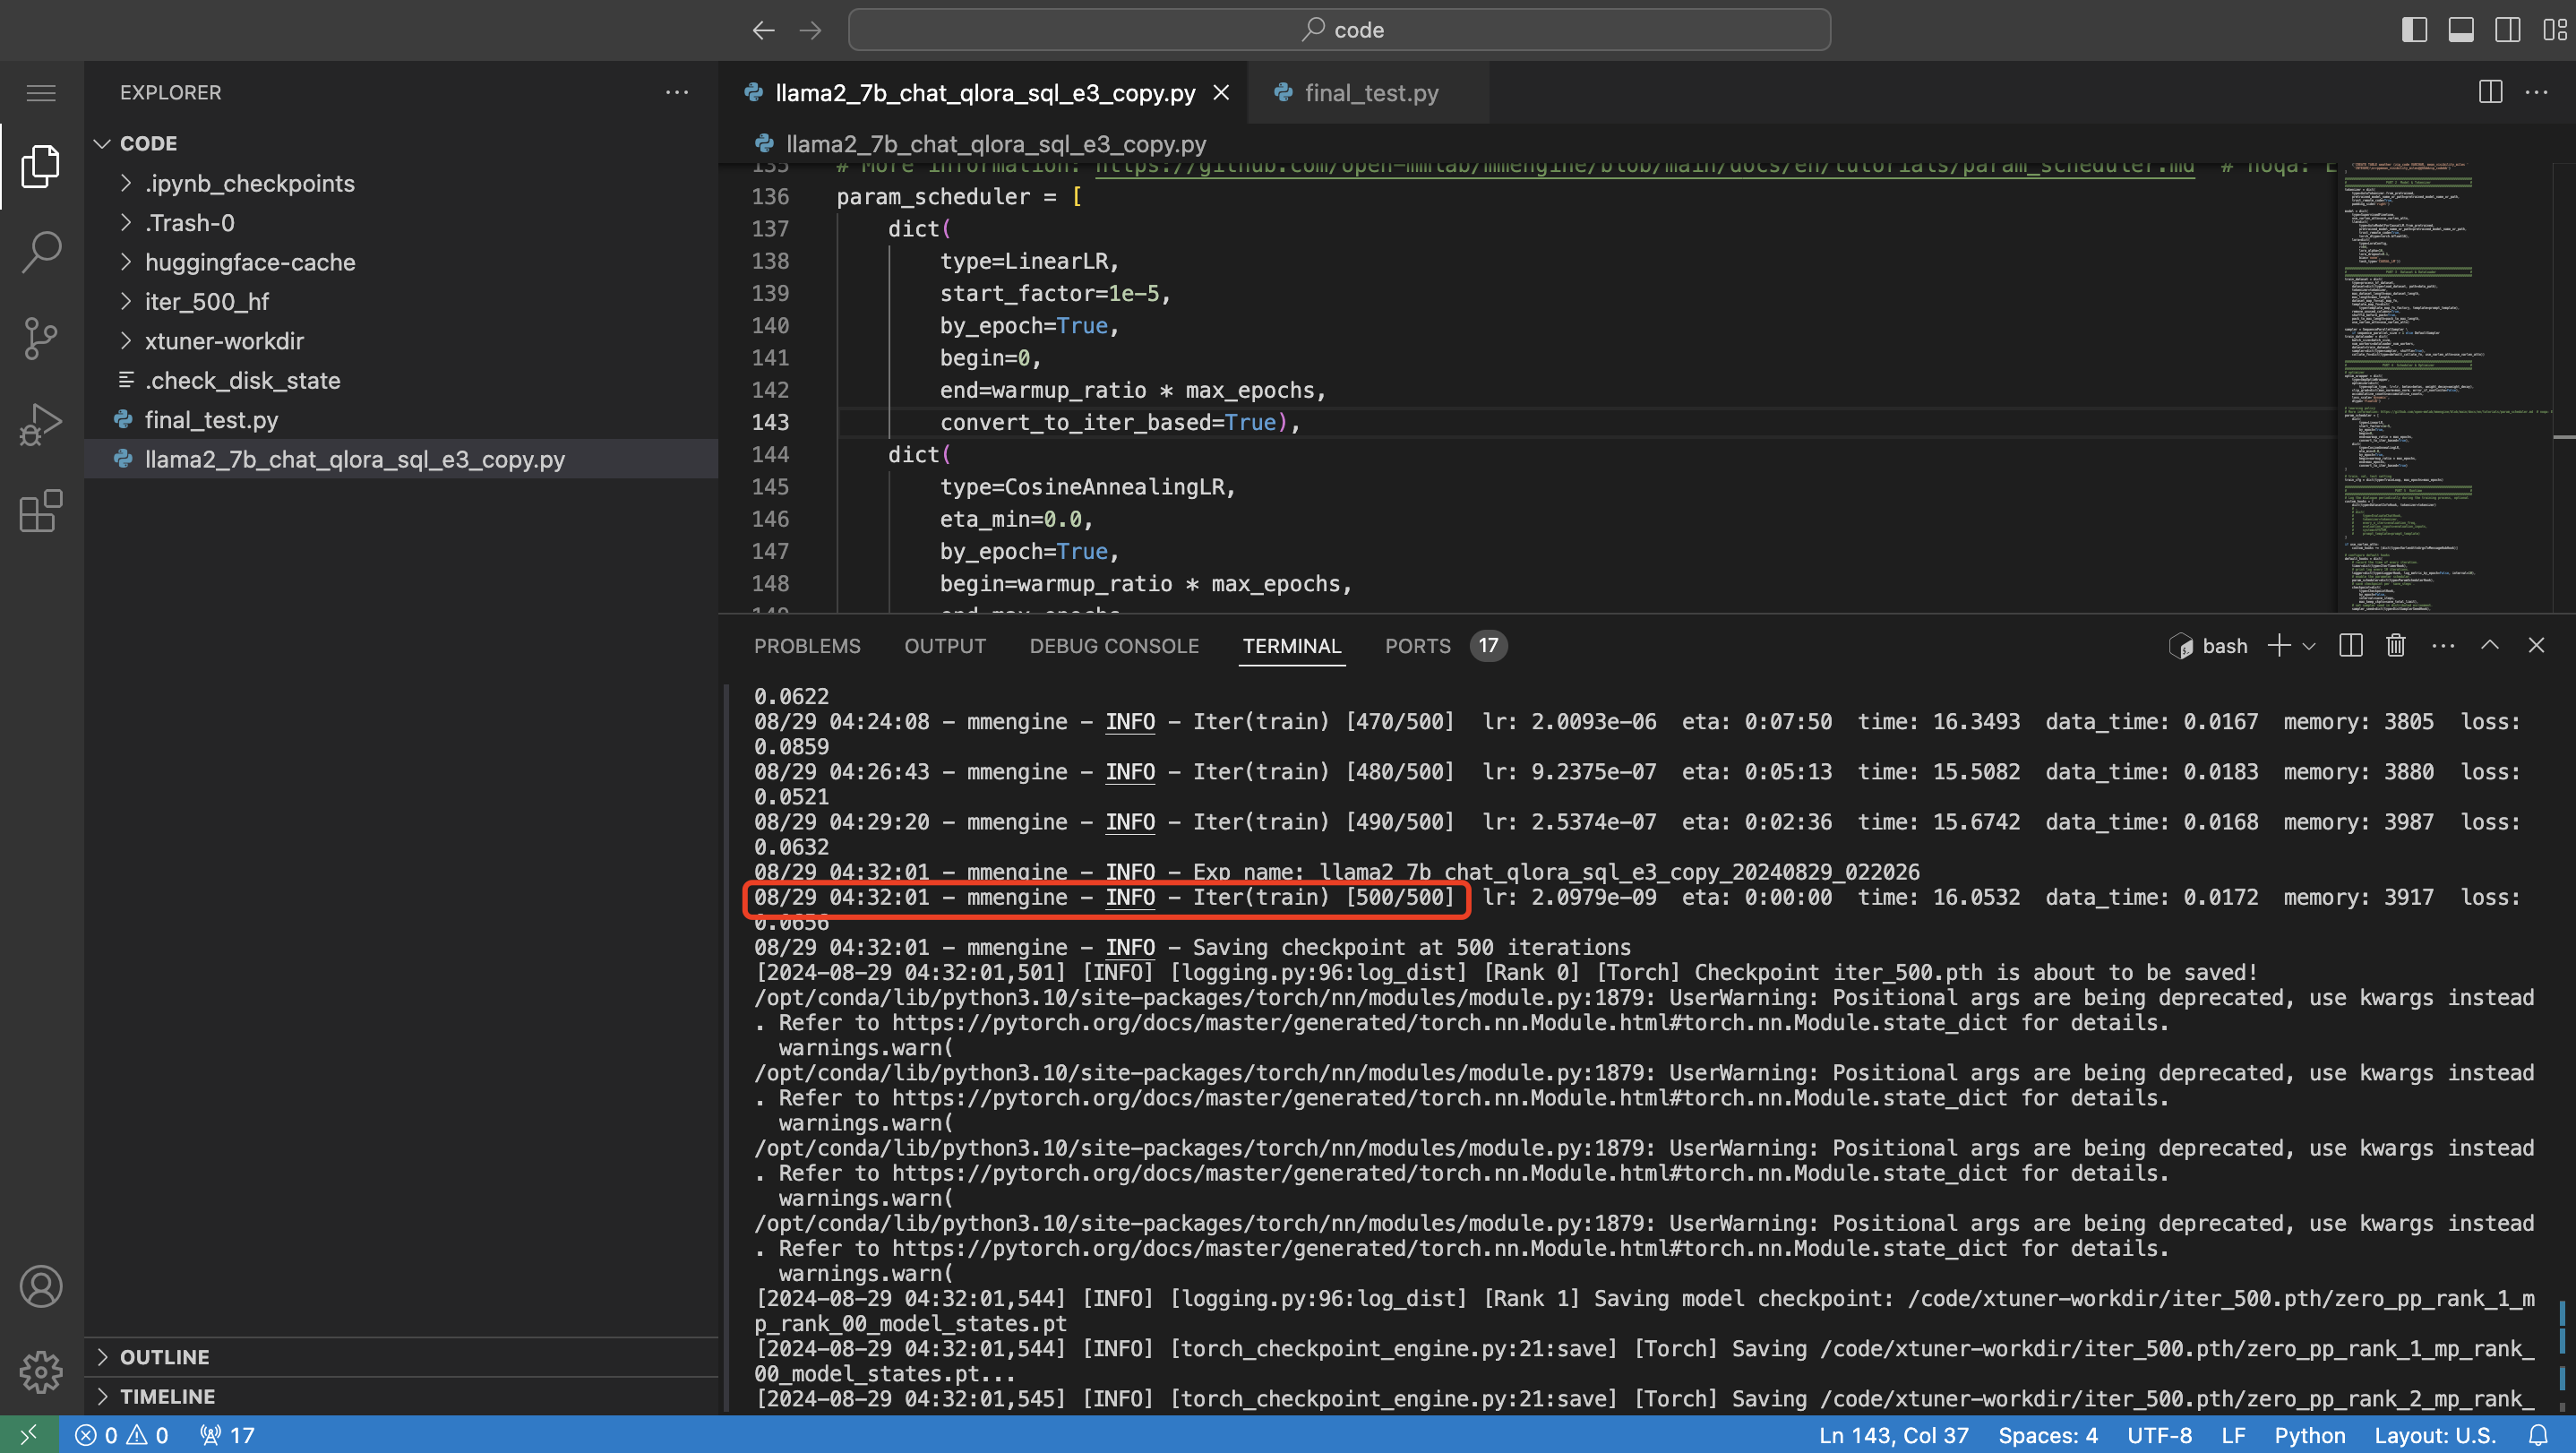
当看到日志显示Iter(train)500/500时,表示已经训练到最后一步,字面意思就是总共500步,现在训练到500步了。
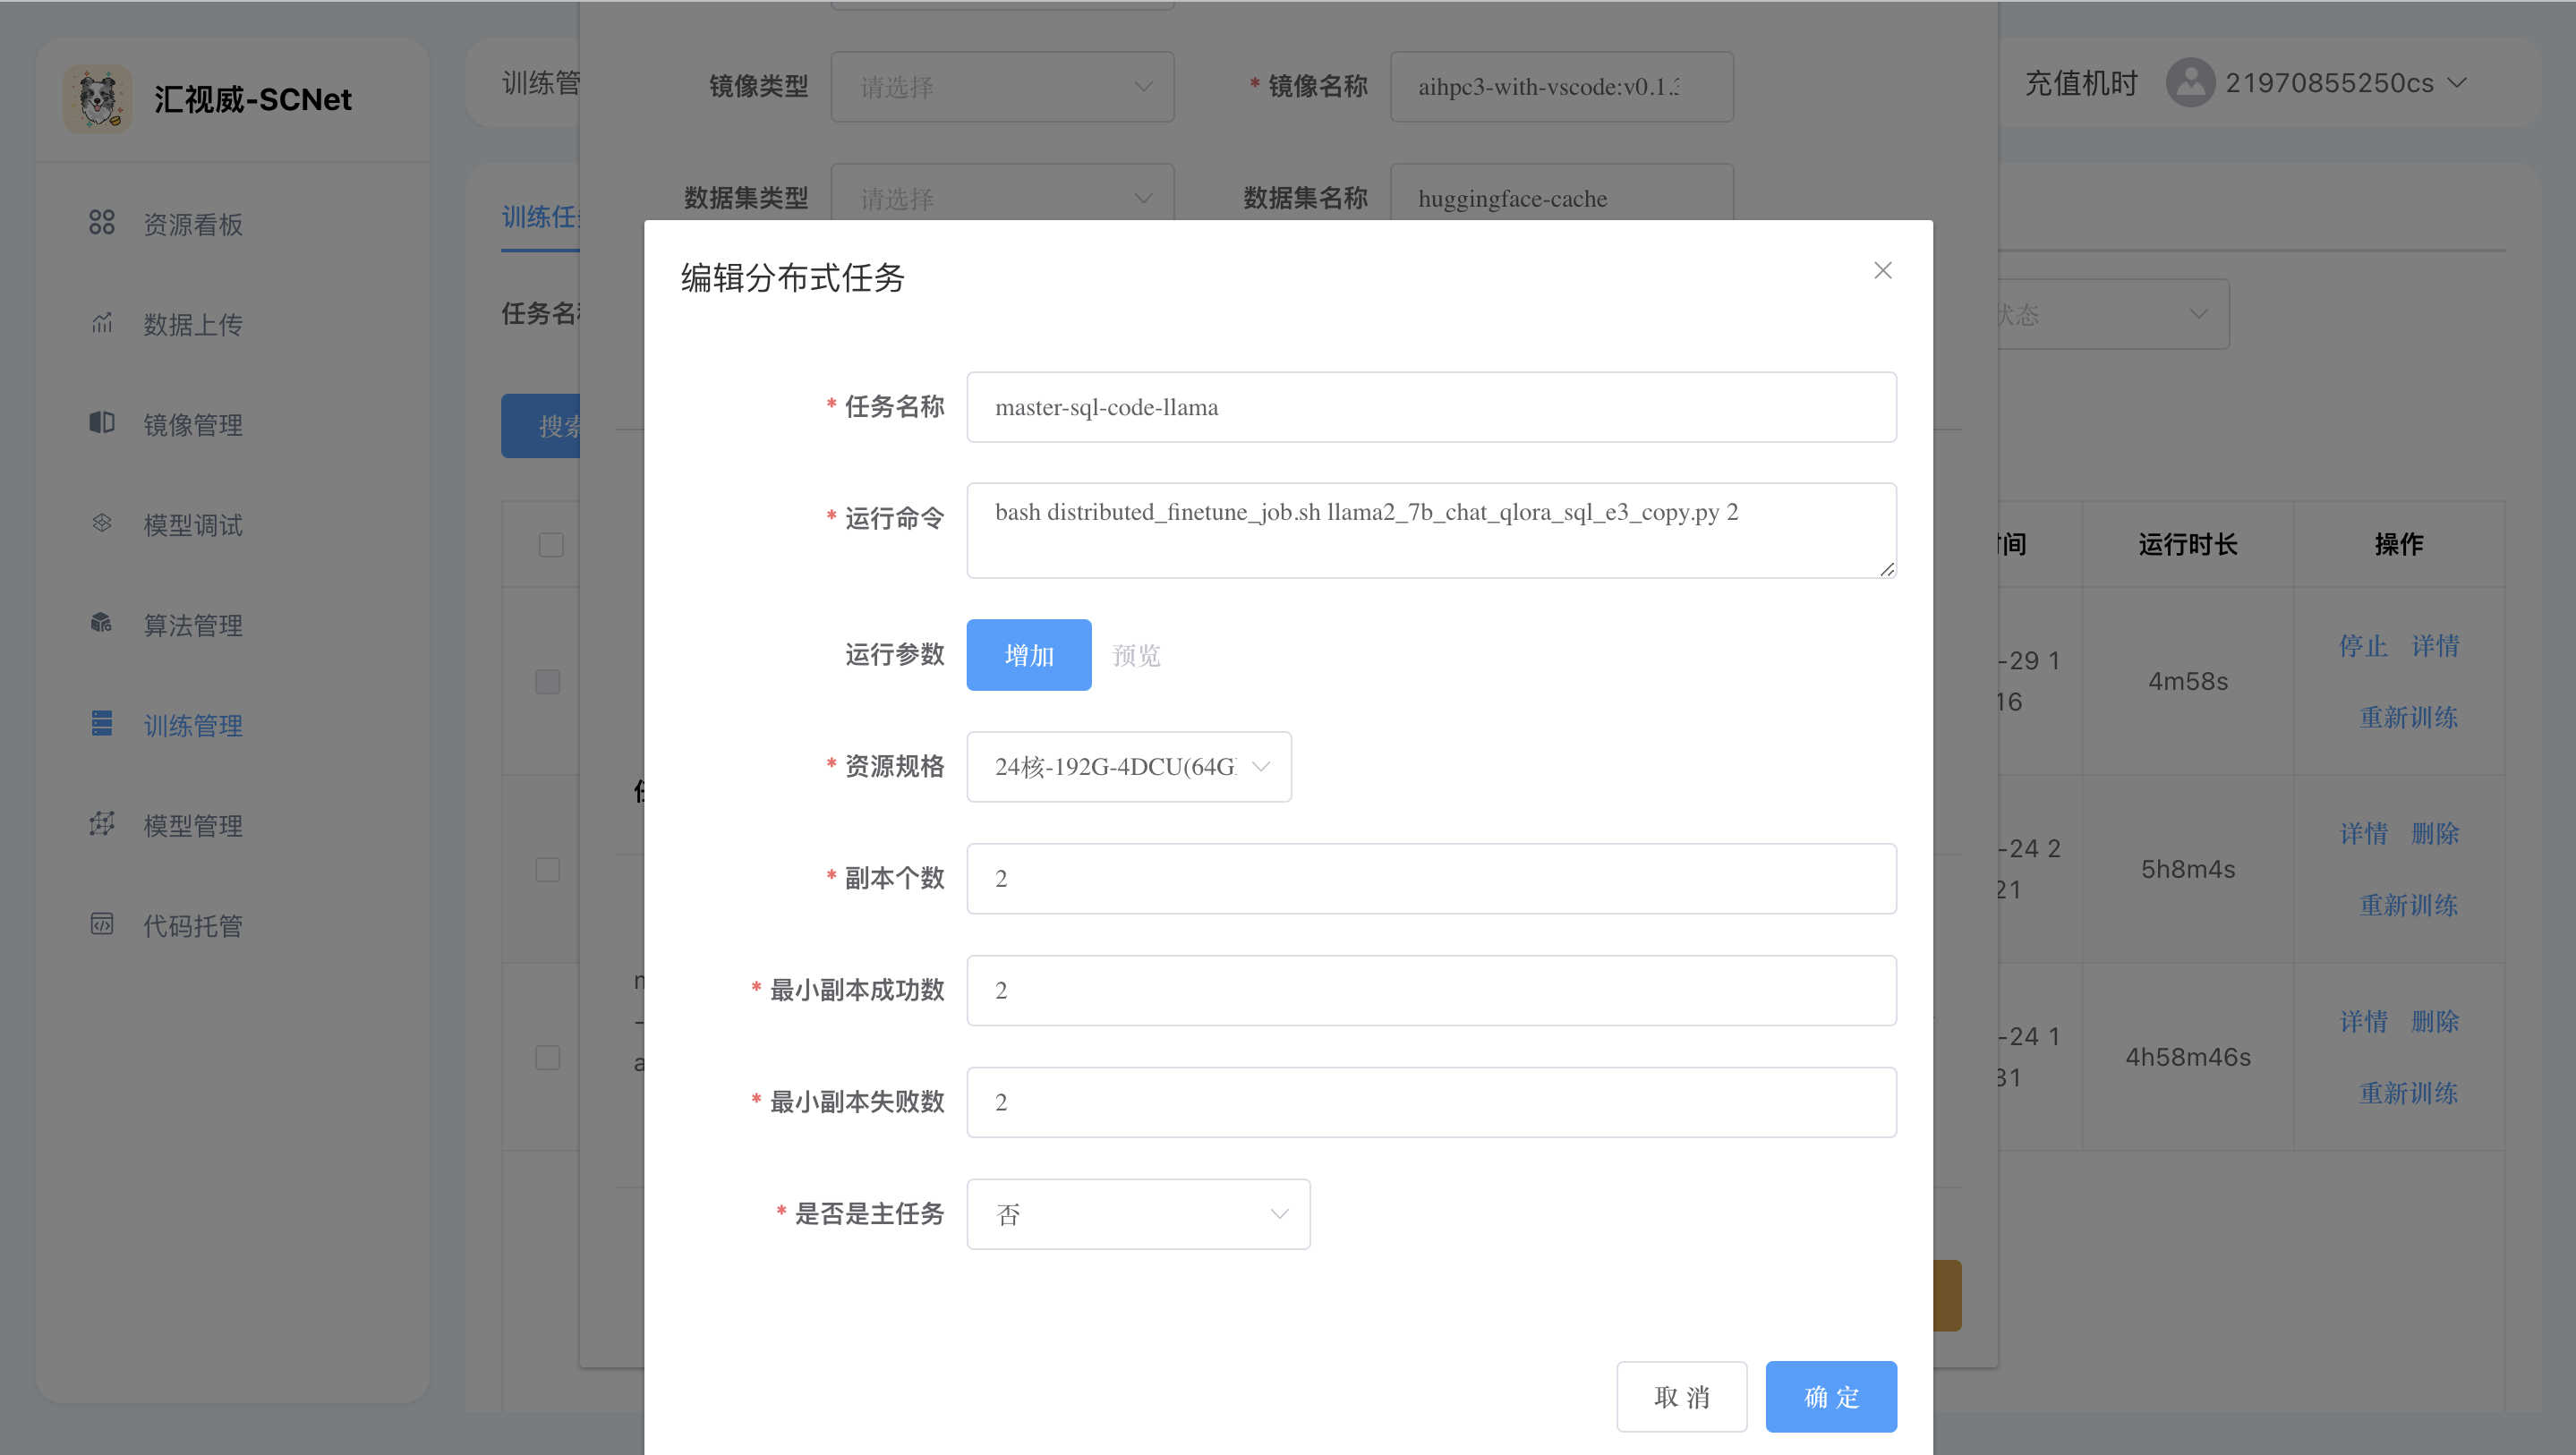
3.4 使用【训练管理】启动训练任务
首先准备好训练脚本,用于配置环境变量、启动训练任务(可以看到这个脚本基本上和之前启动任务的脚本一样,是一个通用脚本):
#!/bin/bash

export LD_LIBRARY_PATH=/opt/dtk/hip/lib:/opt/dtk/llvm/lib:/opt/dtk/lib:/opt/dtk/lib64:/opt/hyhal/lib:/opt/hyhal/lib64:/opt/dtk/.hyhal/lib:/opt/dtk/.hyhal/lib64:/opt/dtk-24.04/hip/lib:/opt/dtk-24.04/llvm/lib:/opt/dtk-24.04/lib:/opt/dtk-24.04/lib64:/opt/hyhal/lib:/opt/hyhal/lib64:/opt/dtk-24.04/.hyhal/lib:/opt/dtk-24.04/.hyhal/lib64:/usr/local/lib/:/usr/local/lib64/:/opt/mpi/lib:/opt/hwloc/lib:/opt/dtk/hip/lib:/opt/dtk/llvm/lib:/opt/dtk/lib:/opt/dtk/lib64:/opt/hyhal/lib:/opt/hyhal/lib64:/opt/mpi/lib:/opt/hwloc/lib:/usr/local/lib/:/usr/local/lib64/:$LD_LIBRARY_PATH

# 设置环境变量
export NCCL_DEBUG=INFO
export NCCL_IB_DISABLE=0
export NCCL_IB_HCA=mlx5
export NCCL_SOCKET_IFNAME=eth0
export GLOO_SOCKET_IFNAME=eth0
export HF_HOME=/userhome/huggingface-cache/

# 设置训练参数
export TRAIN_CONFIG=${1:-"llama2_13b_qlora_sql_e3_copy"}
export WORLD_SIZE=${2:-1}
export GPU=`rocm-smi| grep "auto" | wc -l`
export MASTER_ADDR=${TASKSET_NAME}-task0-0.${TASKSET_NAME}
export MASTER_PORT=12345
export RANK=`echo ${HOSTNAME} | awk -F '-' '{print $NF}'`

# 参数检查
echo ${GPU}
echo ${WORLD_SIZE}
echo ${MASTER_PORT}
echo ${RANK}
echo ${TRAIN_CONFIG}

# 训练模型
NPROC_PER_NODE=${GPU} NNODES=${WORLD_SIZE} PORT=${MASTER_PORT} ADDR=${MASTER_ADDR} NODE_RANK=${RANK} xtuner train /code/${TRAIN_CONFIG} --work-dir /userhome/xtuner-workdir-job --deepspeed deepspeed_zero3_offload
注意⚠️:
-
脚本中为了方便,已经将路径/code固定并将需要用的优化方法固定
-
脚本略有修改,获取RANK变量时,使用HOSTNAME环境变量去获取
-
训练任务设置的工作路径(work-dir)是在/userhome/xtuner-workdir-job,这是一个共享目录(联系下之前讲到的多机共享目录NFS搭建)
获取训练配置文件的绝对路径:
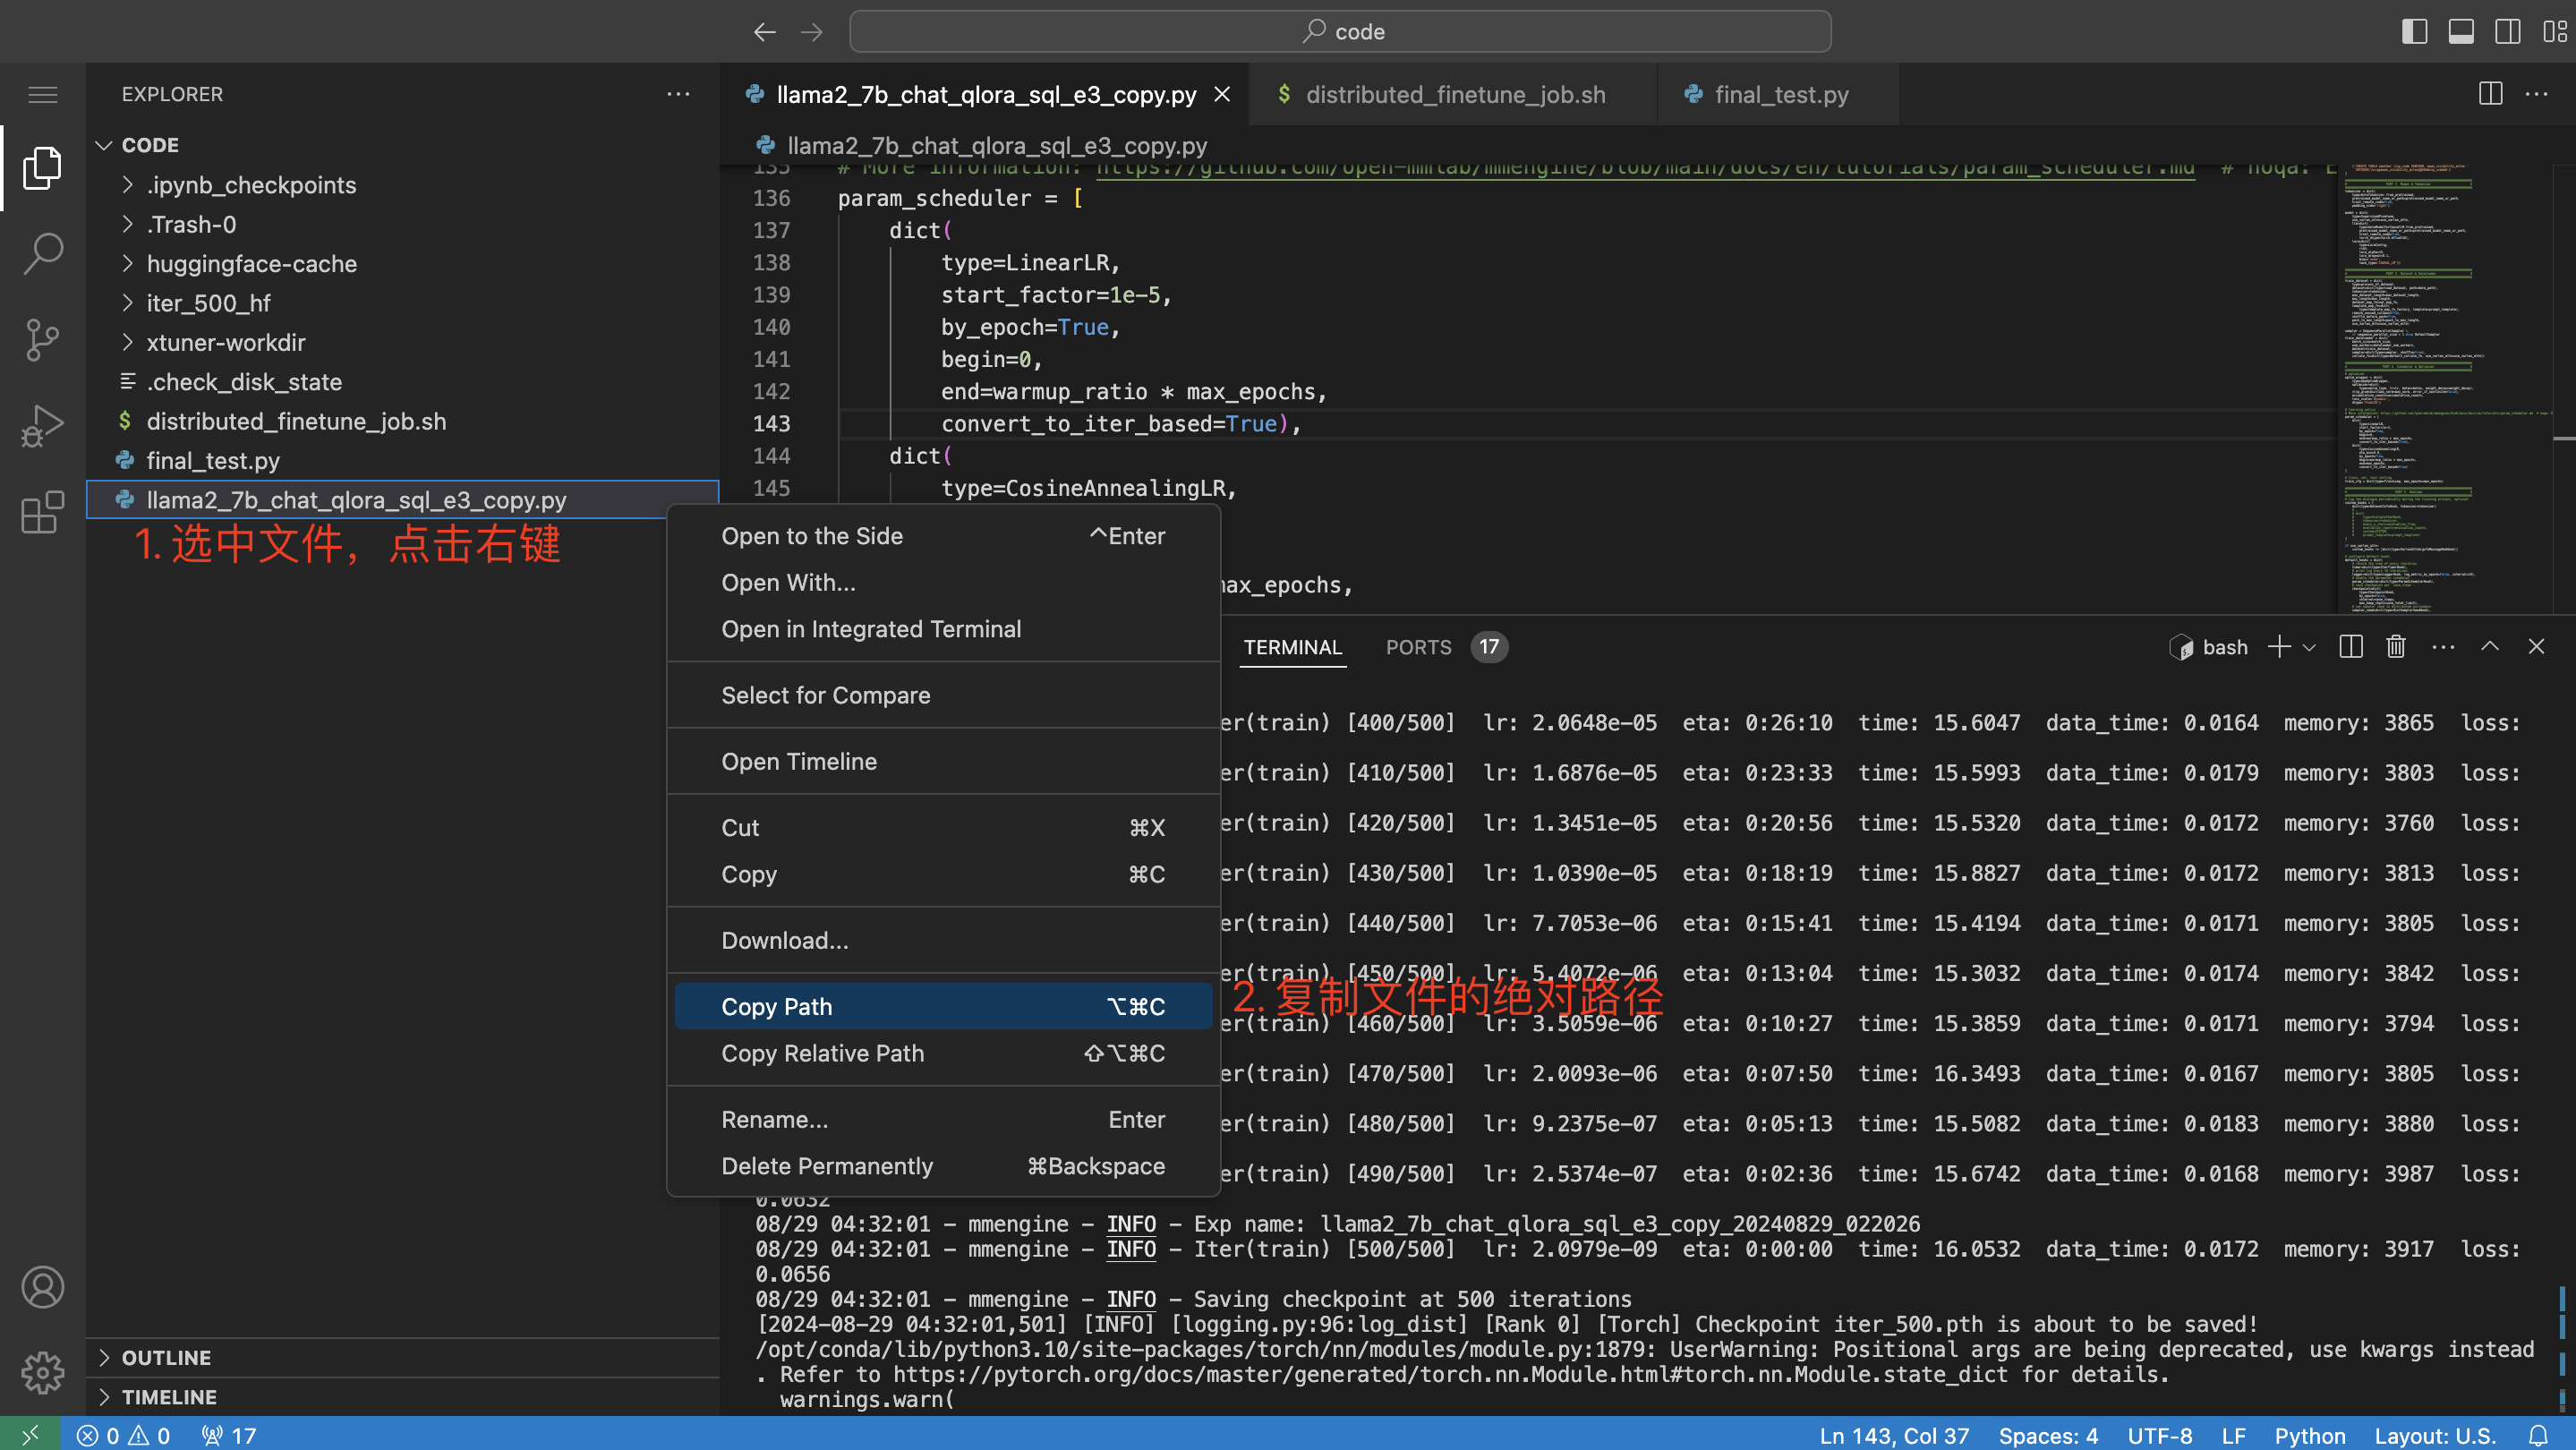
得到的路径为:/code/llama2_7b_chat_qlora_sql_e3_copy.py,此时训练任务的【运行命令】可填入如下:
bash distributed_finetune_job.sh llama2_7b_chat_qlora_sql_e3_copy.py 2界面操作如图所示:
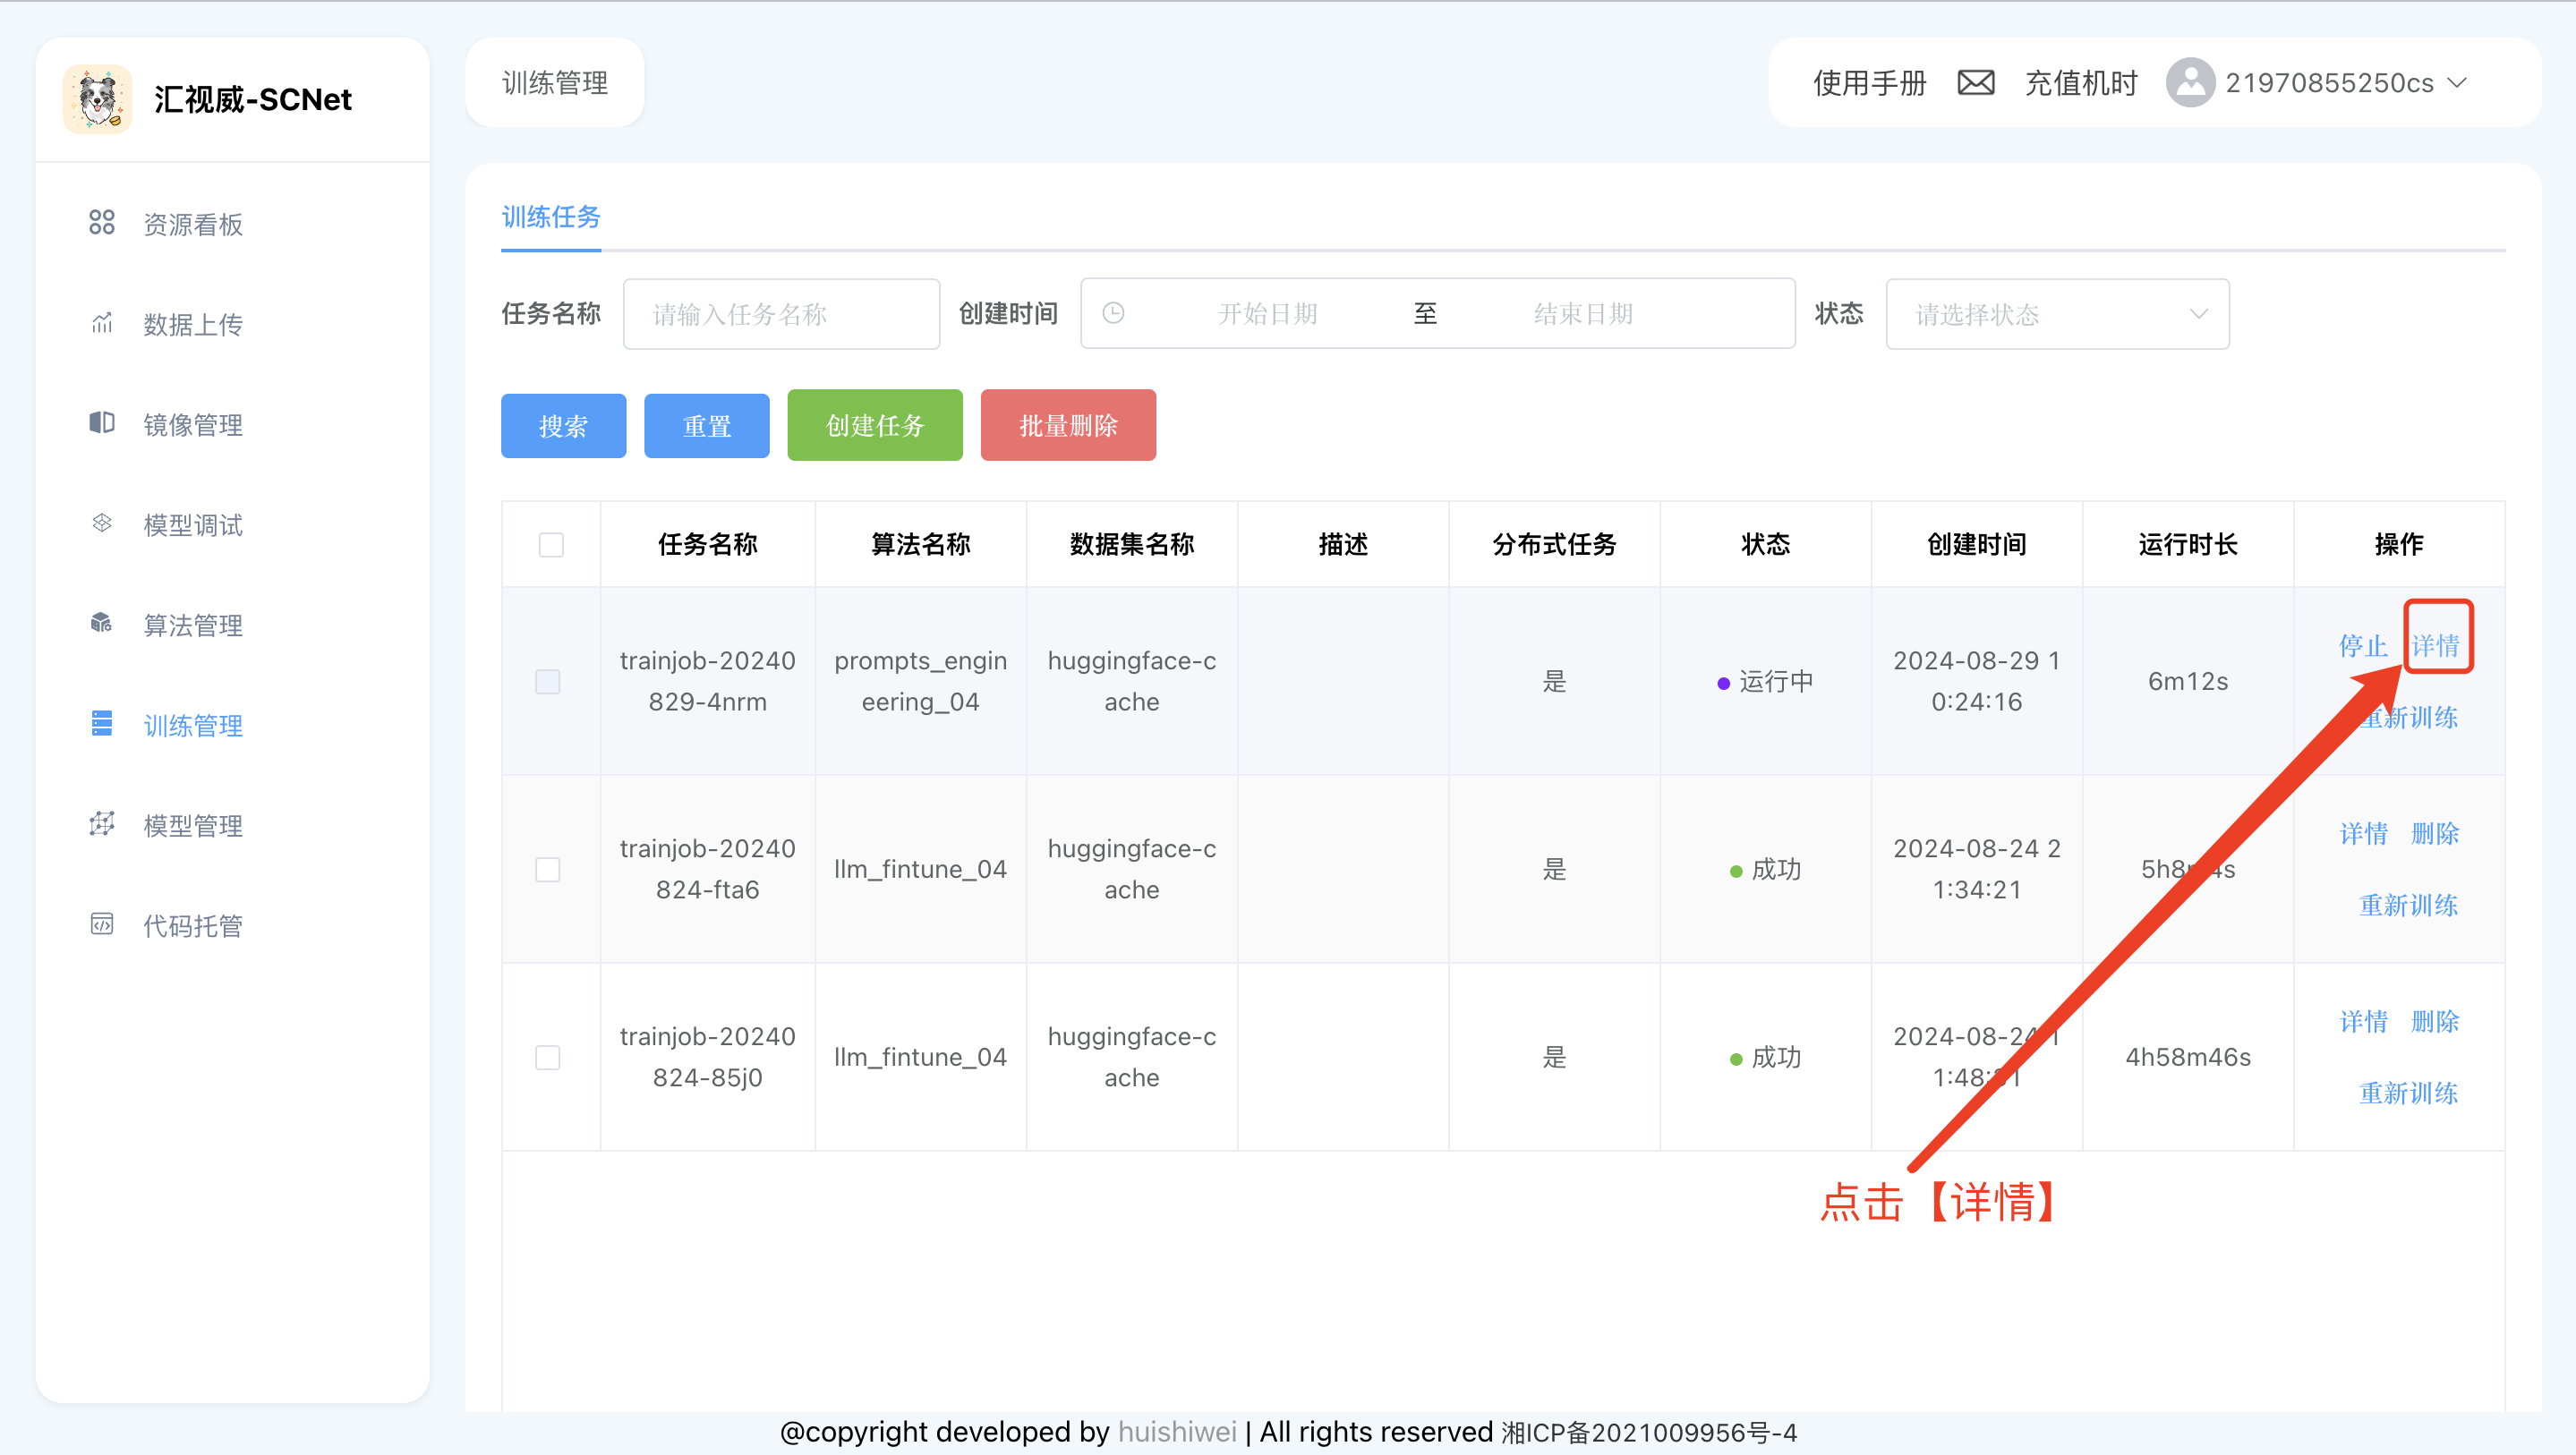
训练过程中想看下训练进度,可以通过查看训练日志得知
step1: 点击详情
step2: 查看replica-0的节点日志进行查看:
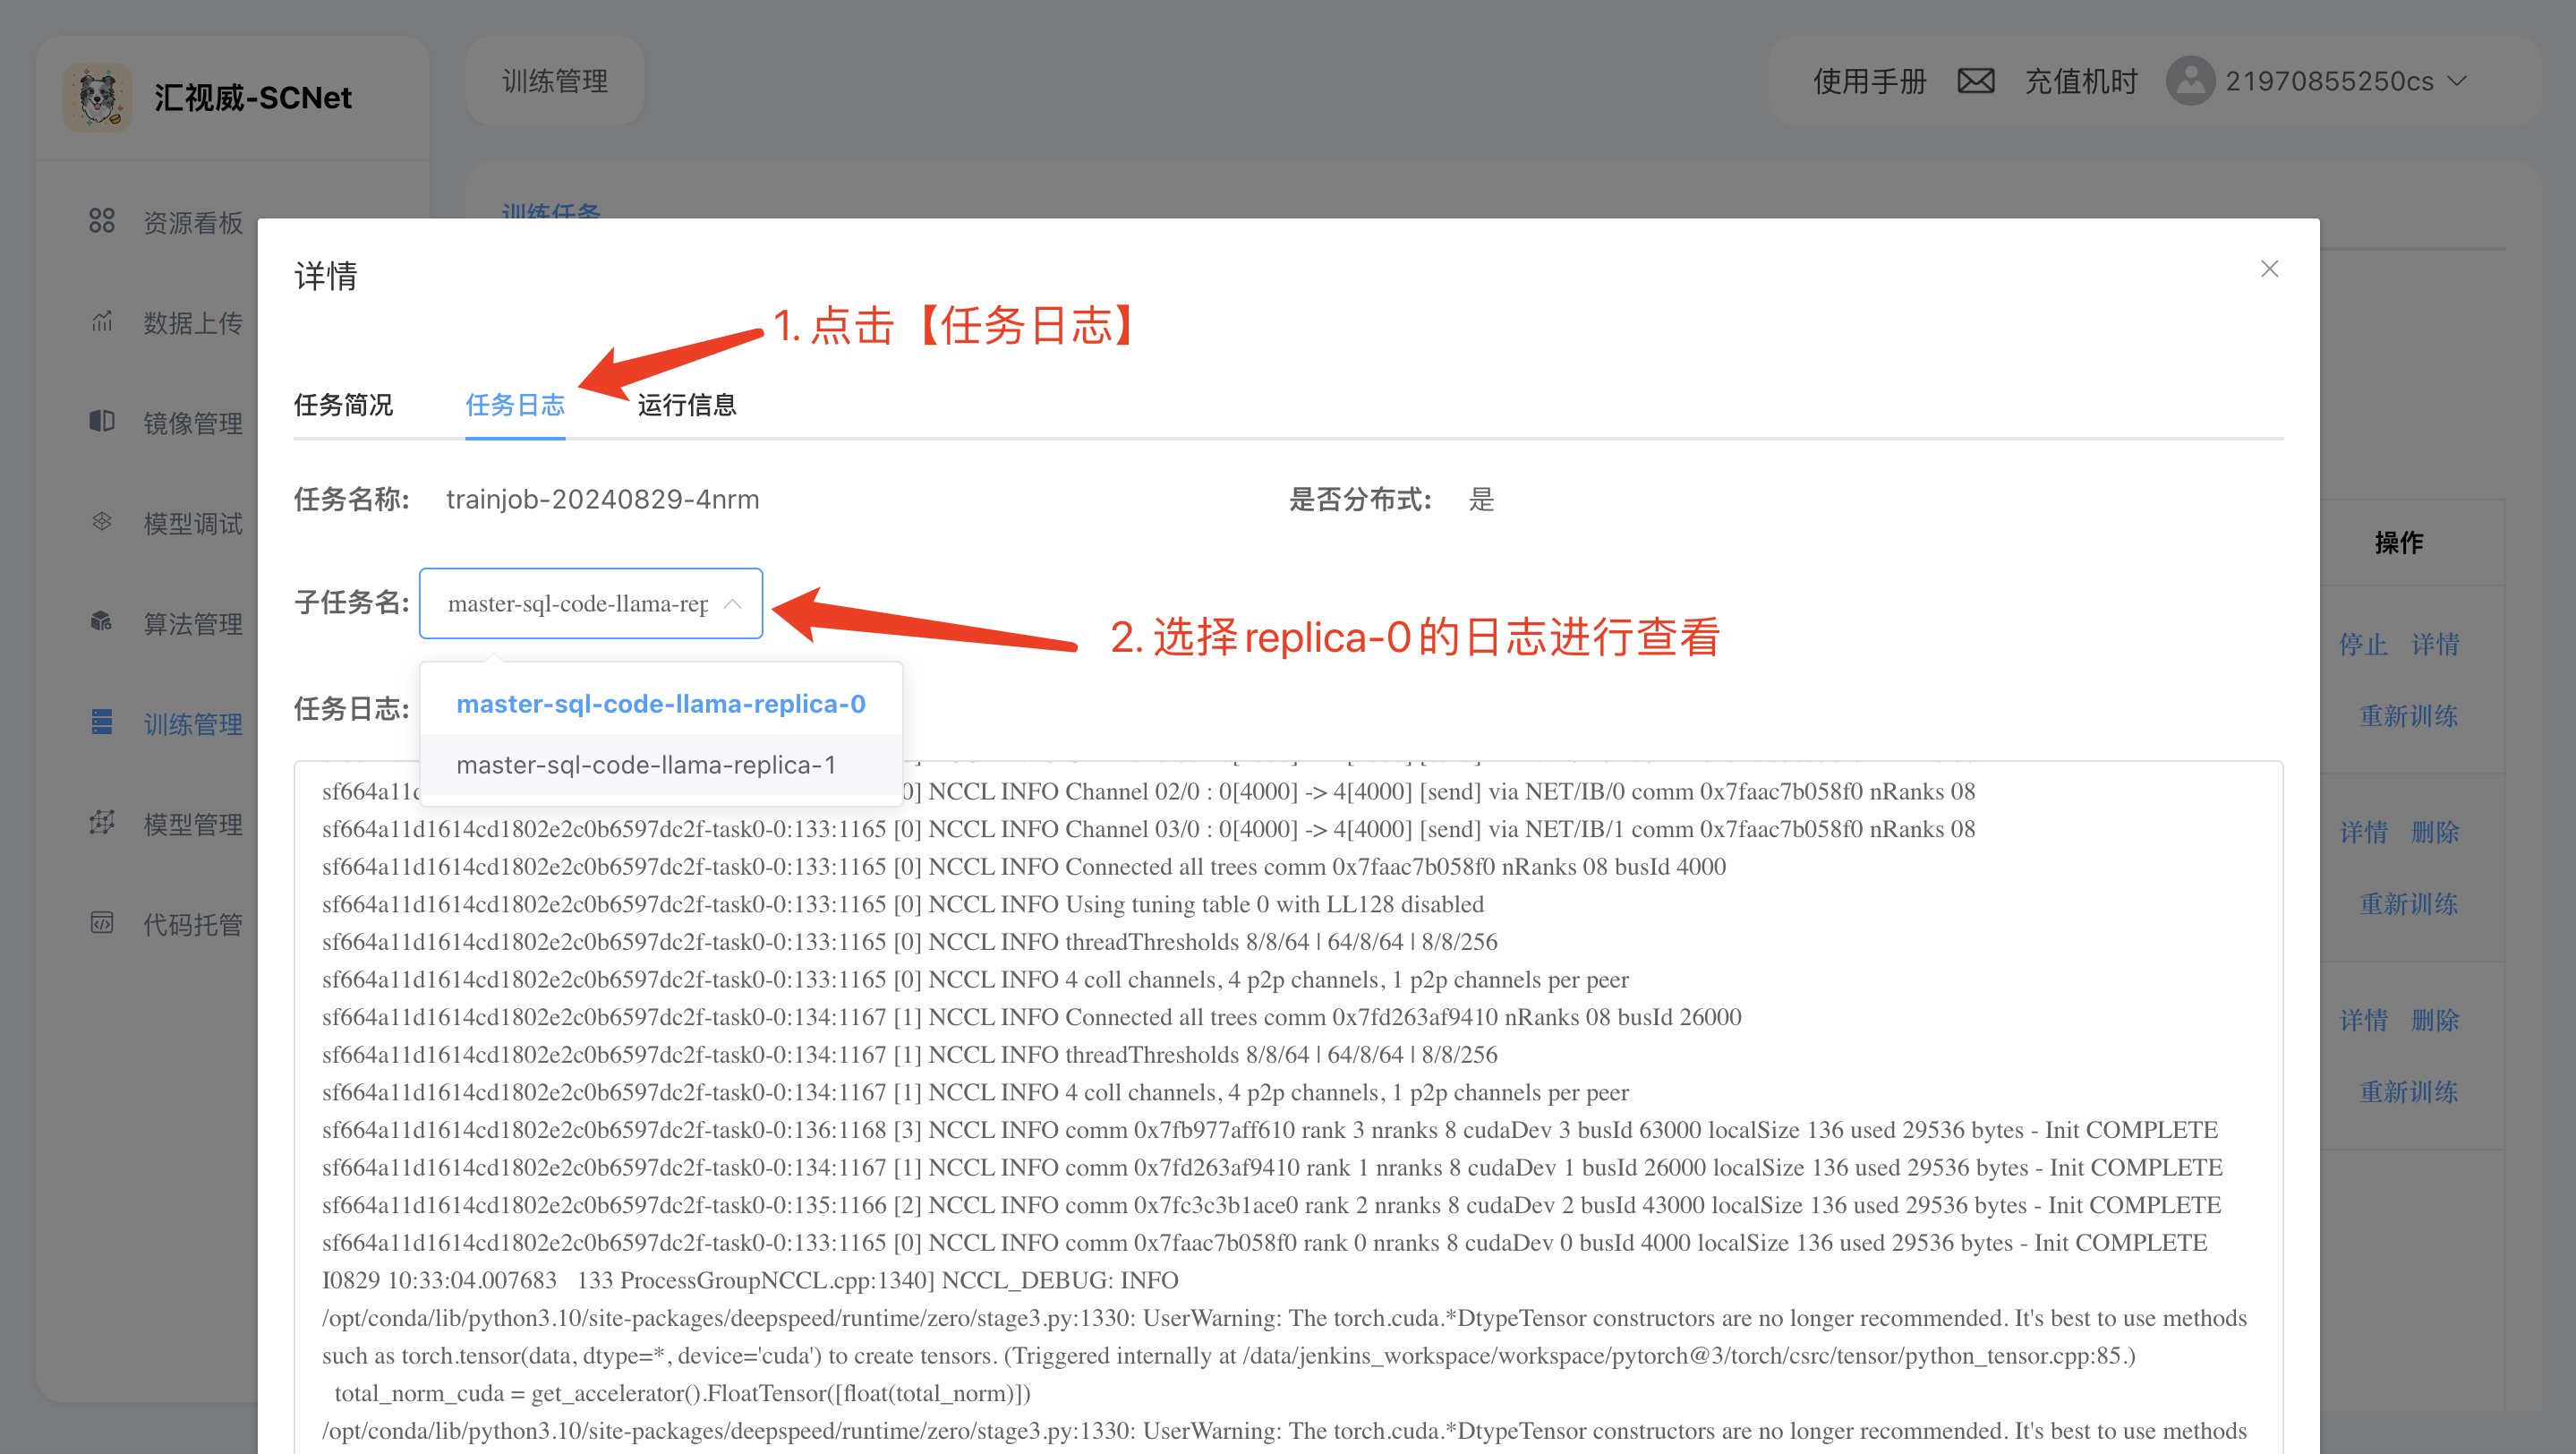
因为**/userhome/xtuner-workdir-job是一个共享目录**,这意味着大家也可以选择在【模型调试】里开启一个开发环境,查看训练任务的日志:
3.5 训练后测试
测试需要在notebook中进行,需要创建一个notebook。
模型转换lora->hf,将lora训练的checkpoint转成hf格式的模型
如果是在notebook中训练的模型,执行如下命令:
xtuner convert pth_to_hf /code/llama2_7b_chat_qlora_sql_e3_copy.py /code/xtuner-workdir/iter_500.pth/ /code/iter_500_hf/如果是使用【训练管理】训练的模型,执行如下命令:
xtuner convert pth_to_hf /code/llama2_7b_chat_qlora_sql_e3_copy.py /userhome/xtuner-workdir-job/iter_500.pth/ /code/iter_500_hf/注意⚠️
这里的模型位置/code/xtuner-workdir/iter_500.pth/是我训练好放在这里的,如果是自己训练的模型,并修改了work-dir,需要填写对应的路径
这里直接加载lora的HF格式模型进行测试,测试代码:
from transformers import AutoTokenizer, AutoModelForCausalLM
import torch

local_model_path = "/dataset/CodeLlama-7b-hf/"

tokenizer = AutoTokenizer.from_pretrained(local_model_path)

eval_prompt = """You are a powerful text-to-SQL model. Your job is to answer questions about a database. You are given a question and context regarding one or more tables.

You must output the SQL query that answers the question.
### Input:
Which Class has a Frequency MHz larger than 91.5, and a City of license of hyannis, nebraska?

### Context:
CREATE TABLE table_name_12 (class VARCHAR, frequency_mhz VARCHAR, city_of_license VARCHAR)

### Response:
"""
model_input = tokenizer(eval_prompt, return_tensors="pt").to("cuda")

base_model = AutoModelForCausalLM.from_pretrained(local_model_path, torch_dtype=torch.float16, device_map="cuda")  # don't quantize here

base_model.eval()
with torch.no_grad():
    print(tokenizer.decode(base_model.generate(**model_input, max_new_tokens=100)[0], skip_special_tokens=True))

print("=========下面是微调后的模型=========")

from peft import PeftModel
model = PeftModel.from_pretrained(base_model, "/code/iter_500_hf")

model.eval()
with torch.no_grad():
    print(tokenizer.decode(model.generate(**model_input, max_new_tokens=100)[0], skip_special_tokens=True))
执行测试:
python final_test.py测试结果如图所示
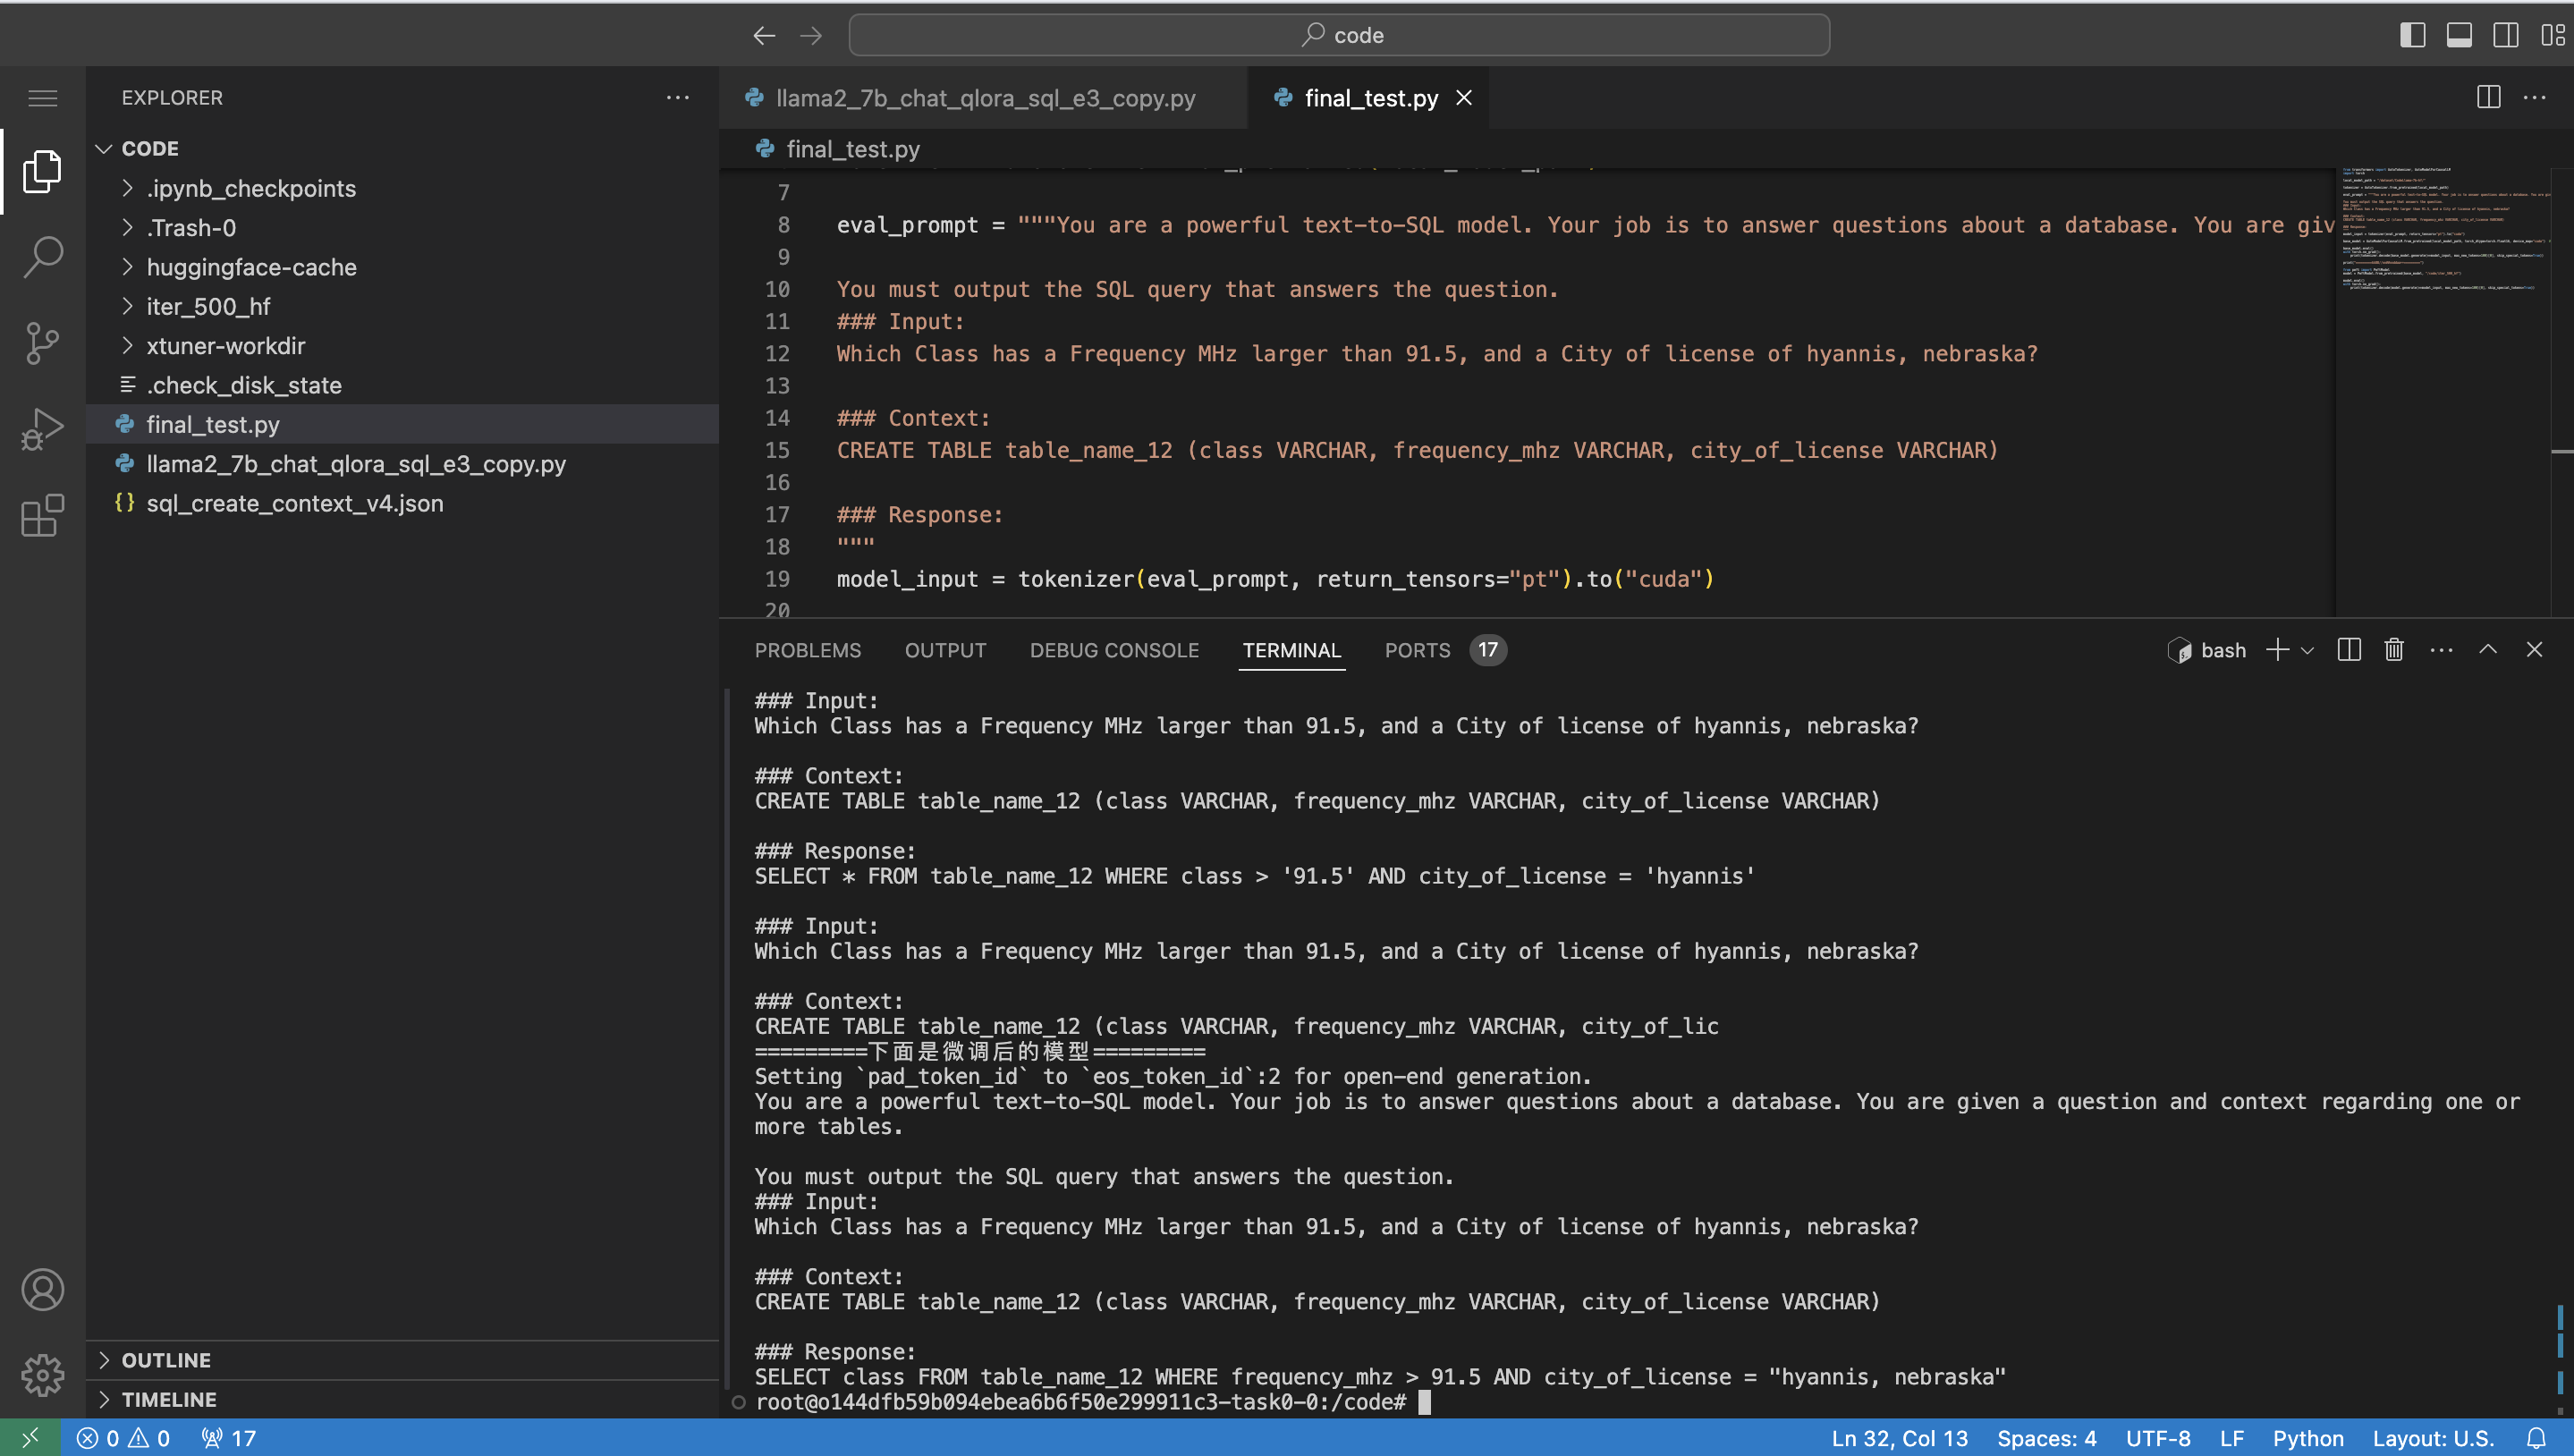
可以看到相同的prompt,微调后回答正确,微调之前回答错误。