更多SpringBoot3内容请关注我的专栏:《SpringBoot3》
期待您的点赞👍收藏⭐评论✍
重学SpringBoot3-集成Redis(一)
- [1. 项目初始化](#1. 项目初始化)
- [2. 配置 Redis](#2. 配置 Redis)
- [3. 配置 Redis 序列化](#3. 配置 Redis 序列化)
- [4. 操作 Redis 工具类](#4. 操作 Redis 工具类)
- [5. 编写 REST 控制器](#5. 编写 REST 控制器)
- [6. 测试 API](#6. 测试 API)
- [7. 总结](#7. 总结)
随着 Spring Boot 3 的发布,开发者可以享受更多的功能提升和性能优化。在现代开发中,Redis 作为高性能的缓存数据库,被广泛应用于提高系统的响应速度和减少数据库的压力。本文将介绍如何通过 Spring Boot 3 来整合 Redis,实现缓存和存储功能。
1. 项目初始化
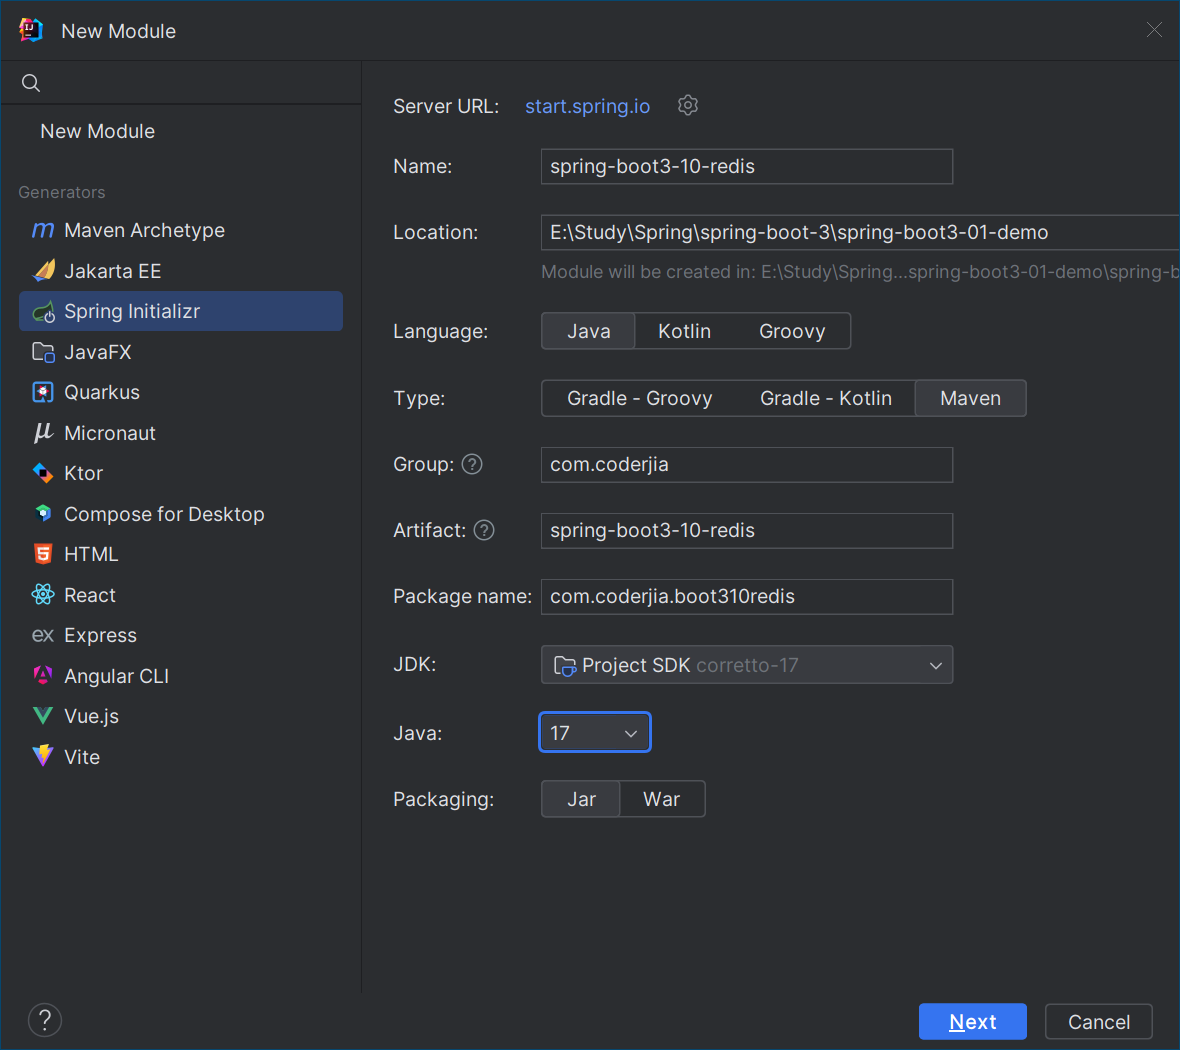
可以通过 Spring Initializr 创建一个新的 Spring Boot 项目,选择 Spring Boot 3 ,并设置项目 JDK 为 Java 17。需要添加以下依赖:
- Spring Web:用于构建 REST API。
- Spring Data Redis:用于 Redis 数据库的操作。
- Lettuce:Redis 客户端,Spring Boot 默认支持。
- Spring Boot DevTools(可选):方便开发时进行热部署。
选择好依赖后,点击 "Generate" 下载项目模板。

2. 配置 Redis
首先,需要在本地或远程部署 Redis 服务器。如果使用的是 Docker,可以用以下命令快速启动 Redis,如果是 Redis 集群请参考Docker搭建Redis集群模式。
bash
docker run --name redis -p 6379:6379 -d redis项目创建后,打开 application.yml 文件,如果是单机版 Redis 服务,添加如下 Redis 配置:
yaml
spring:
  data:
    redis:
      host: localhost
      port: 6379            # Redis 端口
      password:             # 如果有密码可以在这里配置
      lettuce:
        pool:
          max-active: 100    # 最大并发连接数
          max-idle: 50       # 最大空闲连接数
min-idle: 10 # 最小空闲连接数如果是集群版 Redis 服务,修改为如下 Redis 配置:
yaml
spring:
  data:
    redis:
      cluster:
        nodes:
          - 127.0.0.1:6379
          - 127.0.0.2:6379
          - 127.0.0.3:6379
      password:             # 如果有密码可以在这里配置
      lettuce:
        pool:
          max-active: 100    # 最大并发连接数
          max-idle: 50       # 最大空闲连接数
          min-idle: 10       # 最小空闲连接数
3. 配置 Redis 序列化
Spring Boot 默认使用 JdkSerializationRedisSerializer 进行序列化,而我们通常更倾向于使用 StringRedisSerializer 和 Jackson2JsonRedisSerializer 进行更高效的序列化操作,尤其是在处理 JSON 数据时。
我们可以通过配置 RedisTemplate 来使用自定义的序列化器:
java
package com.coderjia.boot310redis.config;

import com.fasterxml.jackson.databind.ObjectMapper;
import org.springframework.context.annotation.Bean;
import org.springframework.context.annotation.Configuration;
import org.springframework.data.redis.connection.RedisConnectionFactory;
import org.springframework.data.redis.core.RedisTemplate;
import org.springframework.data.redis.serializer.Jackson2JsonRedisSerializer;
import org.springframework.data.redis.serializer.StringRedisSerializer;

/**
 * @author CoderJia
 * @create 2024/10/4 下午 12:43
 * @Description
 **/
@Configuration
public class RedisConfig {

    @Bean
    public RedisTemplate<String, Object> redisTemplate(RedisConnectionFactory redisConnectionFactory) {
        RedisTemplate<String, Object> template = new RedisTemplate<>();
        template.setConnectionFactory(redisConnectionFactory);

        // 使用String序列化器序列化Key
        template.setKeySerializer(new StringRedisSerializer());

        // 使用Jackson2JsonRedisSerializer序列化Value
        ObjectMapper objectMapper = new ObjectMapper();
        Jackson2JsonRedisSerializer<Object> serializer = new Jackson2JsonRedisSerializer<>(objectMapper,Object.class);
        template.setValueSerializer(serializer);

        return template;
    }
}
4. 操作 Redis 工具类
接下来,我们可以创建一个简单的工具类来操作 Redis。我们将通过 RedisTemplate 对象进行数据的存取操作。
java
package com.coderjia.boot310redis.utils;

import org.springframework.beans.factory.annotation.Autowired;
import org.springframework.data.redis.core.RedisTemplate;
import org.springframework.stereotype.Service;

import java.util.concurrent.TimeUnit;

/**
 * @author CoderJia
 * @create 2024/10/4 下午 12:48
 * @Description
 **/
@Service
public class RedisUtils {

    @Autowired
    private RedisTemplate<String, Object> redisTemplate;

    // 保存数据
    public void save(String key, Object value) {
        redisTemplate.opsForValue().set(key, value, 10, TimeUnit.MINUTES);  // 设置数据的有效期为10分钟
    }

    // 获取数据
    public Object get(String key) {
        return redisTemplate.opsForValue().get(key);
    }

    // 删除数据
    public void delete(String key) {
        redisTemplate.delete(key);
    }
}
5. 编写 REST 控制器
为了展示如何通过 REST API 来操作 Redis,我们可以创建一个简单的控制器,通过 GET 和 POST 请求来存取 Redis 中的数据。
java
package com.coderjia.boot310redis.demos.web;

import com.coderjia.boot310redis.utils.RedisUtils;
import org.springframework.beans.factory.annotation.Autowired;
import org.springframework.web.bind.annotation.DeleteMapping;
import org.springframework.web.bind.annotation.GetMapping;
import org.springframework.web.bind.annotation.PostMapping;
import org.springframework.web.bind.annotation.RequestMapping;
import org.springframework.web.bind.annotation.RequestParam;
import org.springframework.web.bind.annotation.RestController;

/**
 * @author CoderJia
 */
@RestController
@RequestMapping("/api/redis")
public class BasicController {

    @Autowired
    private RedisUtils redisUtils;

    // 保存数据
    @PostMapping("/save")
    public String save(@RequestParam("key") String key, @RequestParam("value") String value) {
        redisUtils.save(key, value);
        return "Data saved successfully!";
    }

    // 获取数据
    @GetMapping("/get")
    public Object get(@RequestParam("key") String key) {
        Object value = redisUtils.get(key);
        return value != null ? value : "Key not found";
    }

    // 删除数据
    @DeleteMapping("/delete")
    public String delete(@RequestParam("key") String key) {
        redisUtils.delete(key);
        return "Data deleted successfully!";
    }
}
6. 测试 API
启动 Spring Boot 应用程序,使用 curl 或 Postman 测试 API:
保存数据:
bash
curl -X POST "http://localhost:8080/api/redis/save?key=testKey&value=helloRedis"
获取数据:
bash
curl "http://localhost:8080/api/redis/get?key=testKey"
删除数据:
bash
curl -X DELETE "http://localhost:8080/api/redis/delete?key=testKey"
7. 总结
通过本文,相信你已经学会了如何在 Spring Boot 3 和 Java 17 中整合 Redis,并实现基本的存取操作以及缓存功能。使用 Redis 可以大大提升应用的响应速度和性能,尤其在高并发的场景中,使用 Redis 作为缓存是一个非常有效的优化手段。