如何使用 Gradio 创建聊天机器人
文章目录
- [如何使用 Gradio 创建聊天机器人](#如何使用 Gradio 创建聊天机器人)
- 一、介绍
- 二、简单示例与实战
- 三、定制化聊天机器人
-
- 1、为您的机器人添加更多的样式
- 2、为您的聊天机器人添加多模式功能
- 3、其他输入
- [4、在聊天机器人中使用 Gradio 组件](#4、在聊天机器人中使用 Gradio 组件)
- [四、通过 API 使用聊天机器人](#四、通过 API 使用聊天机器人)
-
- 1、一个langchain例子
- 2、使用流式传输的示例openai
- [3、使用 Hugging Face 的本地开源 LLM 的示例](#3、使用 Hugging Face 的本地开源 LLM 的示例)
一、介绍
聊天机器人是大型语言模型的流行应用。使用gradio,您可以轻松构建聊天机器人模型的演示并与用户分享,或者使用直观的聊天机器人 UI 亲自尝试。
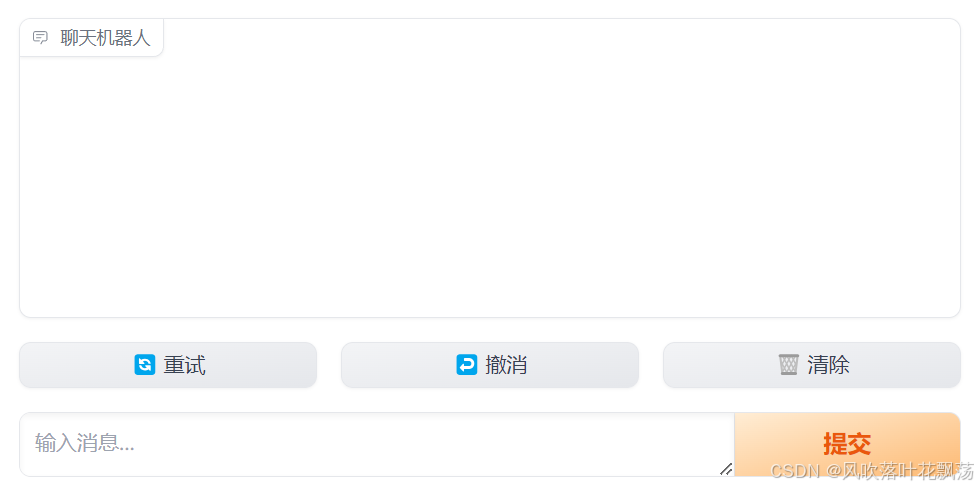
本教程使用gr.ChatInterface(),这是一种高级抽象,可让您快速创建聊天机器人 UI,通常只需一行代码。我们创建的聊天机器人界面将如下所示:

我们将从几个简单的例子开始,然后展示如何使用gr.ChatInterface()来自几个流行 API 和库的真实语言模型,包括langchain、openai和 Hugging Face。
先决条件 :请确保您使用的是最新版本的 Gradio:
$ pip install --upgrade gradio二、简单示例与实战
1、定义聊天功能
使用 gr.ChatInterface(),您应该做的第一件事是定义聊天函数。您的聊天函数应该采用两个参数:message然后history(参数可以任意命名,但必须按此顺序)。
- message:str代表用户的输入。
- history:代表到该点为止list的list对话。每个内部列表由两个str代表一对的列表组成:[user input, bot response]。
您的函数应返回单个字符串响应,这是机器人对特定用户输入的响应message。您的函数可以考虑history消息以及当前消息。
我们来看几个例子。
2、示例:回答"是"或"否"的聊天机器人
Yes让我们编写一个响应或随机的聊天功能No。
这是我们的聊天功能:
import random

def random_response(message, history):
    return random.choice(["Yes", "No"])
现在,我们可以将其插入gr.ChatInterface()并调用.launch()方法来创建 Web 界面:
import gradio as gr

gr.ChatInterface(random_response).launch()
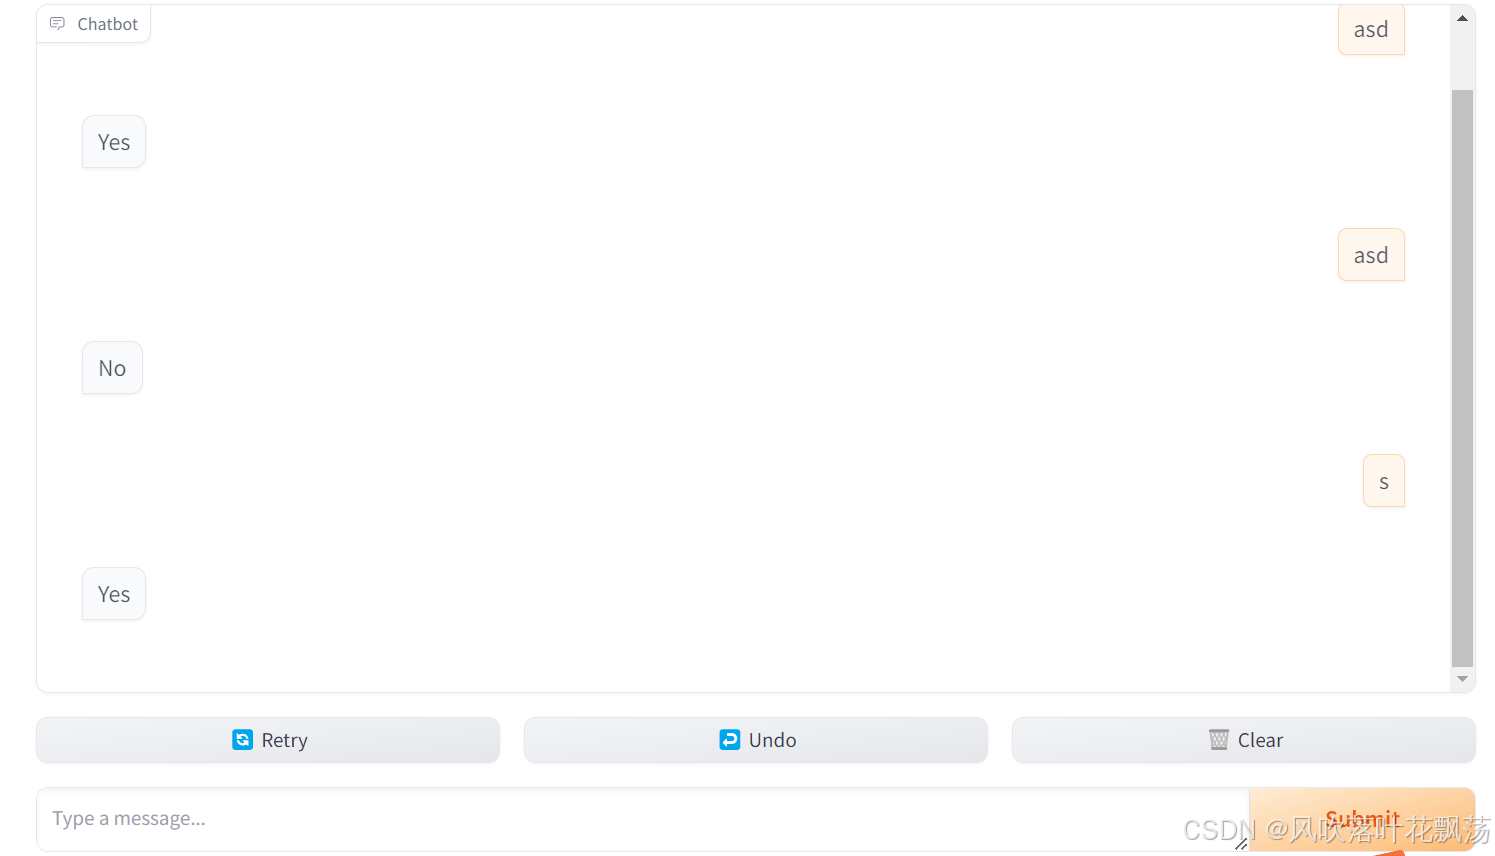
就是这样!插入后示例如下:
import random

def random_response(message, history):
    return random.choice(["Yes", "No"])
import gradio as gr

gr.ChatInterface(random_response).launch()
3、另一个使用用户输入和历史记录的示例
当然,前面的例子非常简单,它甚至没有考虑用户输入或以前的历史记录!这是另一个简单的例子,展示如何整合用户的输入以及历史记录。
import random
import gradio as gr

def alternatingly_agree(message, history):
    if len(history) % 2 == 0:
        return f"Yes, I do think that '{message}'"
    else:
        return "I don't think so"
gr.ChatInterface(alternatingly_agree).launch()
4、流式聊天机器人
在您的聊天功能中,您可以使用它yield来生成一系列部分响应,每个响应都会替换之前的响应。这样,您最终会得到一个流式聊天机器人。就这么简单!
import time
import gradio as gr

def slow_echo(message, history):
    for i in range(len(message)):
        time.sleep(0.3)
        yield "You typed: " + message[: i+1]
gr.ChatInterface(slow_echo).launch()
提示:
在响应流式传输过程中,"提交"按钮将变为"停止"按钮,可用于停止生成器函数。您可以使用 stop_btn 参数自定义"停止"按钮的外观和行为。
三、定制化聊天机器人
1、为您的机器人添加更多的样式
如果您熟悉 Gradio 的Interface类,它gr.ChatInterface包含许多相同的参数,您可以使用这些参数来自定义聊天机器人的外观。例如,您可以:
在您的聊天机器人上方添加标题和title描述description。 theme分别使用和参数添加主题或自定义 CSS css。
添加examples甚至启用cache_examples,这使得用户更容易尝试。
您可以更改文本或禁用聊天机器人界面中出现的每个按钮:submit_btn,,,,。retry_btnundo_btnclear_btn
以下是如何使用这些参数的示例:
import gradio as gr

def yes_man(message, history):
    if message.endswith("?"):
        return "Yes"
    else:
        return "Ask me anything!"

gr.ChatInterface(
    yes_man,
    chatbot=gr.Chatbot(height=300),
    textbox=gr.Textbox(placeholder="Ask me a yes or no question", container=False, scale=7),
    title="Yes Man",
    description="Ask Yes Man any question",
    theme="soft",
    examples=["Hello", "Am I cool?", "Are tomatoes vegetables?"],
    cache_examples=True,
    retry_btn=None,
    undo_btn="Delete Previous",
    clear_btn="Clear",
).launch()
如果您想要自定义gr.Chatbot或gr.Textbox编写ChatInterface,那么您也可以传入自己的聊天机器人或文本框。
具体来说,如果您想为聊天界面添加一个"占位符",该占位符在用户开始聊天之前出现,您可以使用接受 Markdown 或 HTMLplaceholder的参数来实现。gr.Chatbot
gr.ChatInterface(
    yes_man,
    chatbot=gr.Chatbot(placeholder="<strong>Your Personal Yes-Man</strong><br>Ask Me Anything"),
...
占位符在聊天机器人中垂直和水平居中显示。

2、为您的聊天机器人添加多模式功能
您可能希望为聊天机器人添加多模式功能。例如,您可能希望用户能够轻松地将图像或文件上传到聊天机器人并询问相关问题。您可以通过向类传递单个参数 ( multimodal=True)来使您的聊天机器人"多模式化" gr.ChatInterface。
import gradio as gr
import time

def count_files(message, history):
    num_files = len(message["files"])
    return f"You uploaded {num_files} files"

demo = gr.ChatInterface(fn=count_files, examples=[{"text": "Hello", "files": []}], title="Echo Bot", multimodal=True)

demo.launch()
当 时multimodal=True, 的签名会fn略有变化。函数的第一个参数应接受一个由提交的文本和上传的文件组成的字典,如下所示: 。{"text": "user input", "file": ["file_path1", "file_path2", ...]}同样,您提供的任何示例都应位于此形式的字典中。您的函数仍应返回一条str消息。
提示: 如果您想为多模式聊天机器人定制文本框的 UI/UX,您应该将
gr.MultimodalTextbox的实例传递给
ChatInterface的textbox参数,而不是gr.Textbox的实例。
3、其他输入
您可能希望向聊天机器人添加其他参数,并通过聊天机器人 UI 向用户展示这些参数。例如,假设您想添加一个文本框来显示系统提示,或者添加一个滑块来设置聊天机器人响应中的令牌数量。该类ChatInterface支持一个additional_inputs参数,可用于添加其他输入组件。
参数additional_inputs接受一个组件或组件列表。您可以直接传递组件实例,或使用其字符串快捷方式(例如,"textbox"而不是gr.Textbox())。如果您传入组件实例,并且它们尚未被渲染,则组件将出现在聊天机器人(和任何示例)下方的 中gr.Accordion()。您可以使用参数设置此手风琴的标签additional_inputs_accordion_name。
这是一个完整的例子:
import gradio as gr
import time

def echo(message, history, system_prompt, tokens):
    response = f"System prompt: {system_prompt}\n Message: {message}."
    for i in range(min(len(response), int(tokens))):
        time.sleep(0.05)
        yield response[: i + 1]

demo = gr.ChatInterface(
    echo,
    additional_inputs=[
        gr.Textbox("You are helpful AI.", label="System Prompt"),
        gr.Slider(10, 100),
    ],
)

demo.launch()
如果您传递给的组件additional_inputs已在父级中呈现gr.Blocks(),则它们将不会在界面中中重新呈现。这为决定在何处布置输入组件提供了灵活性。在下面的示例中,我们将放置gr.Textbox()在聊天机器人 UI 的顶部,同时将滑块保持在下方。
import gradio as gr
import time

def echo(message, history, system_prompt, tokens):
    response = f"System prompt: {system_prompt}\n Message: {message}."
    for i in range(min(len(response), int(tokens))):
        time.sleep(0.05)
        yield response[: i+1]

with gr.Blocks() as demo:
    system_prompt = gr.Textbox("You are helpful AI.", label="System Prompt")
    slider = gr.Slider(10, 100, render=False)

    gr.ChatInterface(
        echo, additional_inputs=[system_prompt, slider]
    )

demo.launch()
如果您需要创建更自定义的内容,那么最好使用低级gr.Blocks()API 构建聊天机器人 UI。我们在此处提供了专门的指南。
4、在聊天机器人中使用 Gradio 组件
该Chatbot组件支持在聊天机器人中使用许多核心 Gradio 组件(例如gr.Image、、和gr.Plot)。只需从函数中返回其中一个组件即可将其与一起使用。以下是示例:gr.Audio、gr.HTML、gr.ChatInterface
import gradio as gr

def fake(message, history):
    if message.strip():
        return gr.Audio("https://github.com/gradio-app/gradio/raw/main/test/test_files/audio_sample.wav")
    else:
        return "Please provide the name of an artist"

gr.ChatInterface(
    fake,
    textbox=gr.Textbox(placeholder="Which artist's music do you want to listen to?", scale=7),
    chatbot=gr.Chatbot(placeholder="Play music by any artist!"),
).launch()
四、通过 API 使用聊天机器人
构建 Gradio 聊天机器人并将其托管在Hugging Face Spaces或其他地方后,您就可以使用/chat端点上的简单 API 对其进行查询。端点只需要用户的消息(如果您使用additional_inputs参数设置了任何内容,则可能需要其他输入),并将返回响应,内部跟踪迄今为止发送的消息。
要使用端点,您应该使用Gradio Python 客户端或Gradio JS 客户端。
1、一个langchain例子
现在,让我们实际使用gr.ChatInterface一些真正的大型语言模型。我们将首先使用,langchain在openai19 行代码中构建一个通用的流式聊天机器人应用程序。您需要有一个 OpenAI 密钥才能使用此示例(继续阅读以获取免费的开源等效密钥!)
from langchain.chat_models import ChatOpenAI
from langchain.schema import AIMessage, HumanMessage
import openai
import gradio as gr

os.environ["OPENAI_API_KEY"] = "sk-..."  # Replace with your key

llm = ChatOpenAI(temperature=1.0, model='gpt-3.5-turbo-0613')

def predict(message, history):
    history_langchain_format = []
    for human, ai in history:
        history_langchain_format.append(HumanMessage(content=human))
        history_langchain_format.append(AIMessage(content=ai))
    history_langchain_format.append(HumanMessage(content=message))
    gpt_response = llm(history_langchain_format)
    return gpt_response.content

gr.ChatInterface(predict).launch()
2、使用流式传输的示例openai
当然,我们也可以openai直接使用库。这里有一个类似的例子,但这次也有流式结果:
from openai import OpenAI
import gradio as gr

api_key = "sk-..."  # Replace with your key
client = OpenAI(api_key=api_key)

def predict(message, history):
    history_openai_format = []
    for human, assistant in history:
        history_openai_format.append({"role": "user", "content": human })
        history_openai_format.append({"role": "assistant", "content":assistant})
    history_openai_format.append({"role": "user", "content": message})

    response = client.chat.completions.create(model='gpt-3.5-turbo',
    messages= history_openai_format,
    temperature=1.0,
    stream=True)

    partial_message = ""
    for chunk in response:
        if chunk.choices[0].delta.content is not None:
              partial_message = partial_message + chunk.choices[0].delta.content
              yield partial_message

gr.ChatInterface(predict).launch()
使用线程处理并发用户
如果您有一个用户或者有多个用户,上述示例就可以起作用,因为每次有来自用户的新消息时,它都会传递整个对话历史记录。
但是,该openai库还提供了更高级别的抽象来为您管理对话历史记录,例如线程抽象session_hash。如果使用这些抽象,则需要为每个用户会话创建一个单独的线程。以下是如何通过访问函数中的部分示例来做到这一点predict():
import openai
import gradio as gr

client = openai.OpenAI(api_key = os.getenv("OPENAI_API_KEY"))
threads = {}

def predict(message, history, request: gr.Request):
    if request.session_hash in threads:
        thread = threads[request.session_hash]
    else:
        threads[request.session_hash] = client.beta.threads.create()

    message = client.beta.threads.messages.create(
        thread_id=thread.id,
        role="user",
        content=message)

    ...

gr.ChatInterface(predict).launch()
3、使用 Hugging Face 的本地开源 LLM 的示例
当然,在很多情况下,您希望在本地运行聊天机器人。以下是使用 Together 的 RedePajama 模型(来自 Hugging Face)的等效示例(这需要您拥有带有 CUDA 的 GPU)。
import gradio as gr
import torch
from transformers import AutoModelForCausalLM, AutoTokenizer, StoppingCriteria, StoppingCriteriaList, TextIteratorStreamer
from threading import Thread

tokenizer = AutoTokenizer.from_pretrained("togethercomputer/RedPajama-INCITE-Chat-3B-v1")
model = AutoModelForCausalLM.from_pretrained("togethercomputer/RedPajama-INCITE-Chat-3B-v1", torch_dtype=torch.float16)
model = model.to('cuda:0')

class StopOnTokens(StoppingCriteria):
    def __call__(self, input_ids: torch.LongTensor, scores: torch.FloatTensor, **kwargs) -> bool:
        stop_ids = [29, 0]
        for stop_id in stop_ids:
            if input_ids[0][-1] == stop_id:
                return True
        return False

def predict(message, history):
    history_transformer_format = history + [[message, ""]]
    stop = StopOnTokens()

    messages = "".join(["".join(["\n<human>:"+item[0], "\n<bot>:"+item[1]])
                for item in history_transformer_format])

    model_inputs = tokenizer([messages], return_tensors="pt").to("cuda")
    streamer = TextIteratorStreamer(tokenizer, timeout=10., skip_prompt=True, skip_special_tokens=True)
    generate_kwargs = dict(
        model_inputs,
        streamer=streamer,
        max_new_tokens=1024,
        do_sample=True,
        top_p=0.95,
        top_k=1000,
        temperature=1.0,
        num_beams=1,
        stopping_criteria=StoppingCriteriaList([stop])
        )
    t = Thread(target=model.generate, kwargs=generate_kwargs)
    t.start()

    partial_message = ""
    for new_token in streamer:
        if new_token != '<':
            partial_message += new_token
            yield partial_message

gr.ChatInterface(predict).launch()
有了这些示例,您很快就可以创建自己的 Gradio Chatbot 演示了!要构建更多自定义 Chatbot 应用程序,请查看使用低级API 的专用指南gr.Blocks()。