文章参考:Windows 安装docker(详细图解)-CSDN博客
安装包下载:
安装wsl的官方文档:安装 WSL | Microsoft Learn
wsl的下载地址:https://github.com/microsoft/WSL/releases?page=1
查看windows相关配置
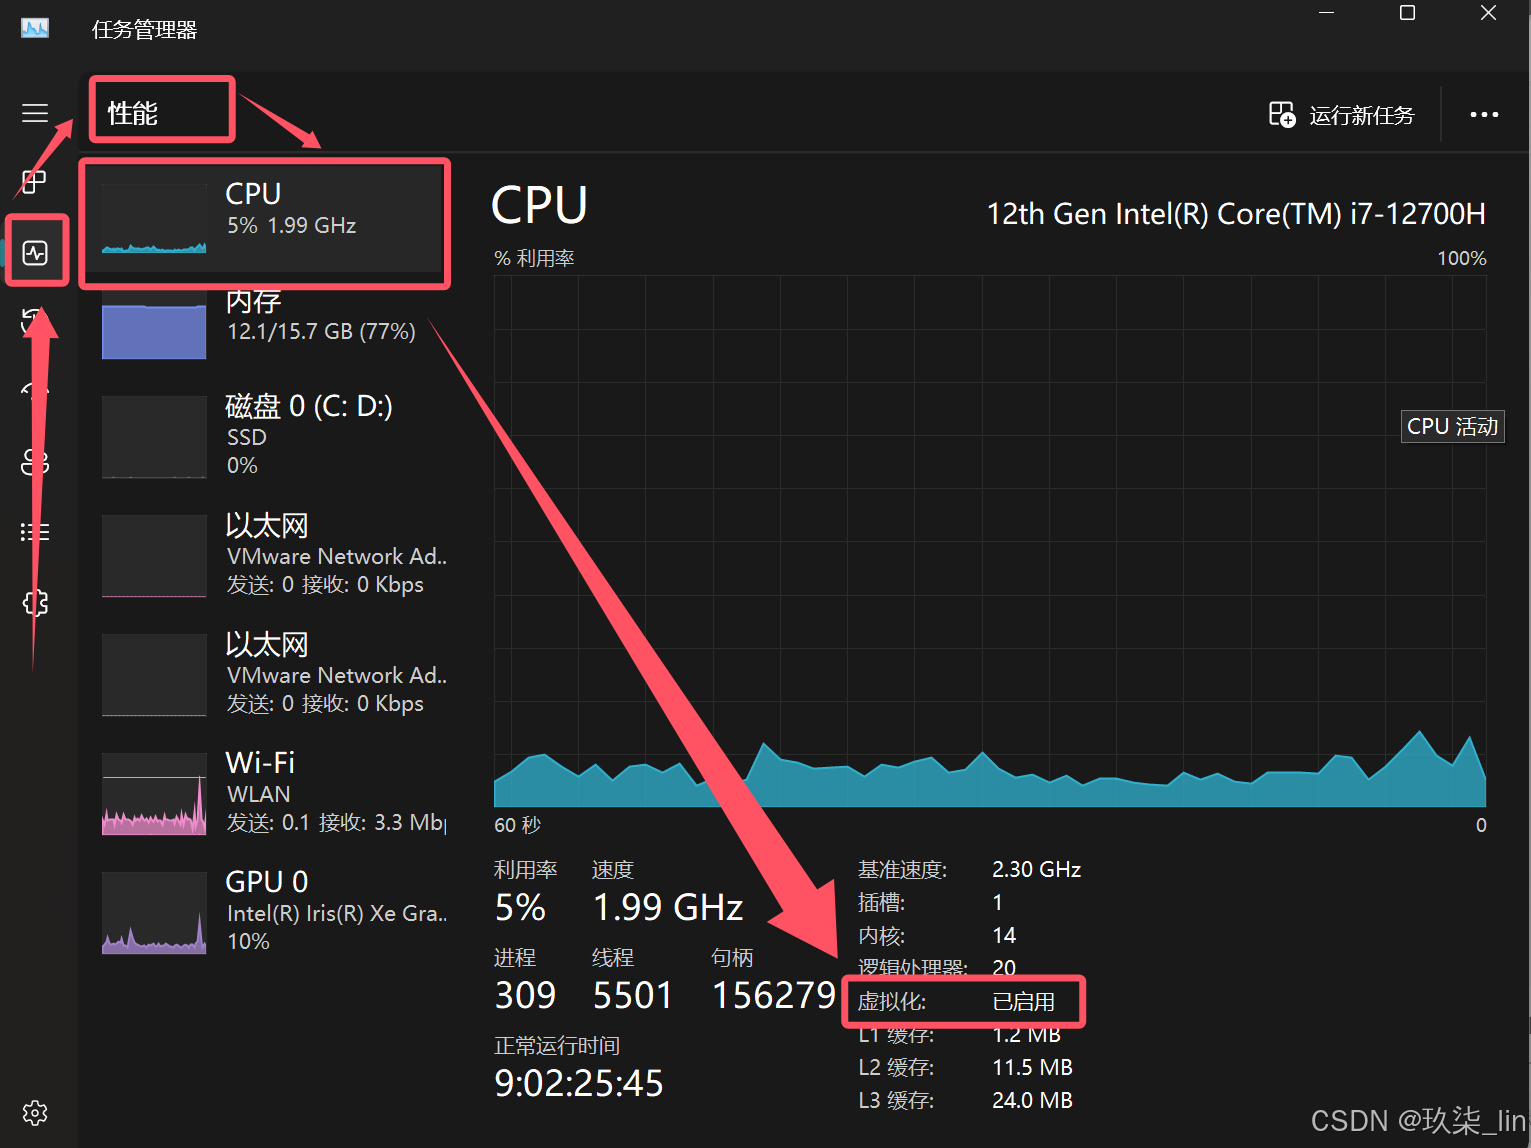
打开 (CTRL+ALT+DELETE) 任务管理器 -> 选择性能 -> CPU ->虚拟化,确认是否已启用
一、开启 Hyper-v
在控制面板打开程序 ,然后点击启动或关闭windows功能
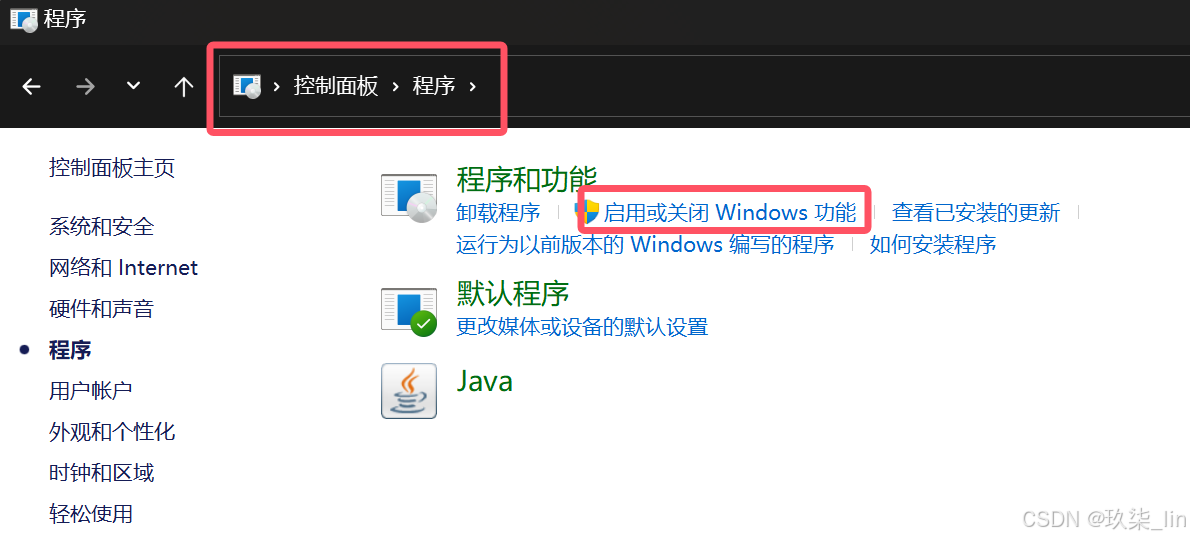
勾选------确定(如果是家庭版电脑,非专业版电脑是没有Hyper-V的,跳过这一步骤)

没有Hyper-V的情况:
桌面建一个Hyper-V.bat文件,将以下代码复制到bat文件中,右击,以管理员身份运行:
pushd "%~dp0"
dir /b %SystemRoot%\servicing\Packages\*Hyper-V*.mum >hyper-v.txt
for /f %%i in ('findstr /i . hyper-v.txt 2^>nul') do dism /online /norestart /add-package:"%SystemRoot%\servicing\Packages\%%i"
del hyper-v.txt
Dism /online /enable-feature /featurename:Microsoft-Hyper-V-All /LimitAccess /ALL
运行结束后重启。
安装wsl_update_x64.msi,如果安装失败,报错This update only applies to machines with the windows Subsytem for Linux,参考:(解决方案1(我用这个方法没解决))【wsl安装失败】This update only applies to machines with the windows Subsytem for Linux-CSDN博客
解决方案2:控制面板-->程序 -->启动或关闭windows功能-->勾选"适用于Linux的Windows子系统"-->确定

这时可以安装成功了。
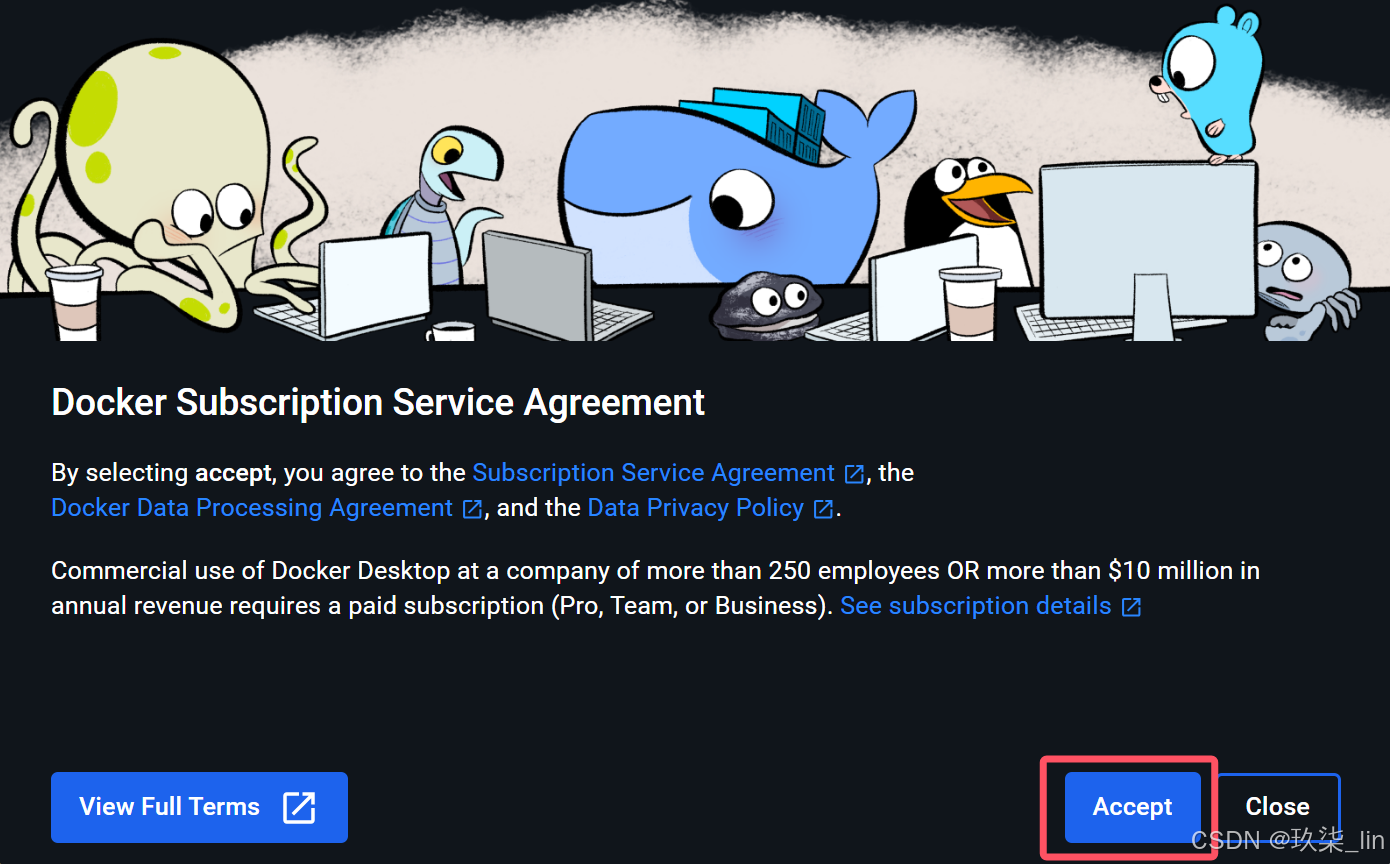
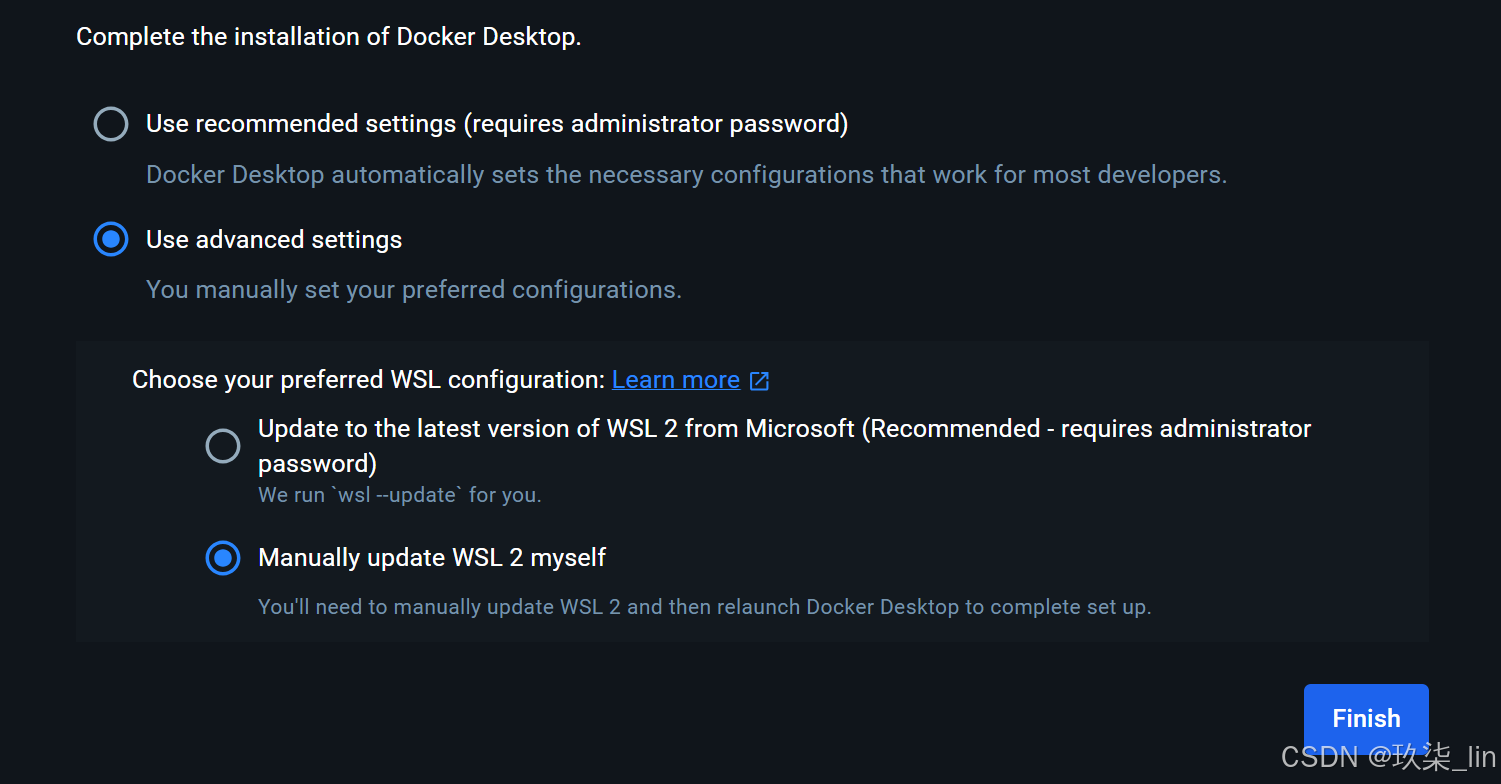
安装docker:
打开Docker的时候显示update fail:
因为没有安装分区,安装分区:wsl --install -d Ubuntu
报错:适用于 Linux 的 Windows 子系统没有已安装的分发版
解决:
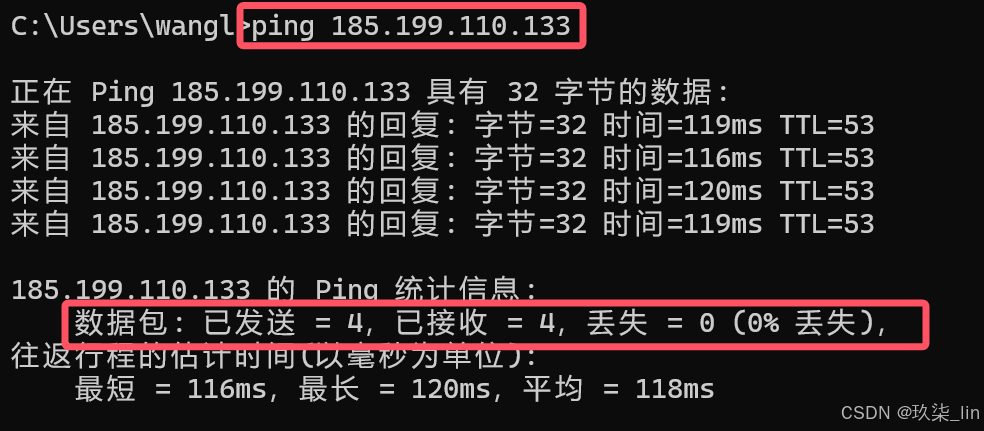
(1)在这个进入这个网站 https://site.ip138.com/raw.Githubusercontent.com/ 对 raw.githubusercontent.com 这个网址的解析IP进行查询。并获取一个能够在本地ping通的ip。
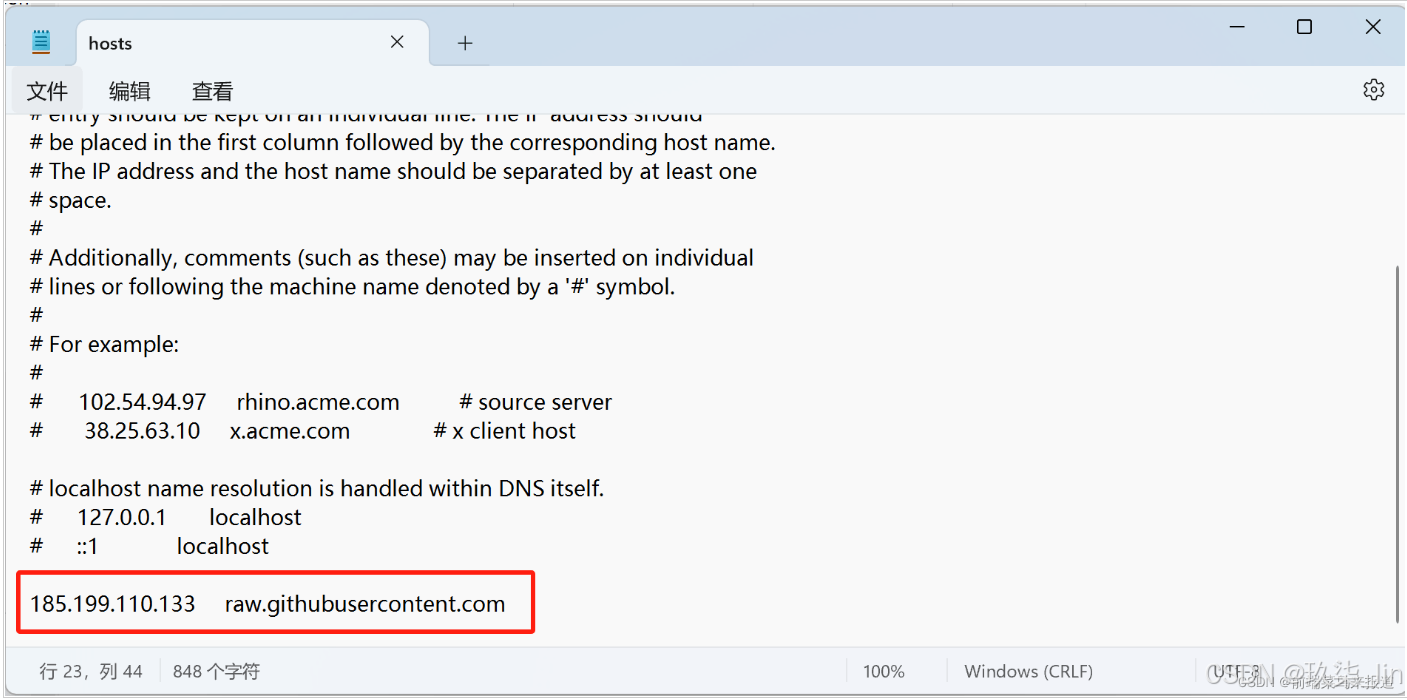
(2)其次,打开本地的hosts所在文件夹。文件地址在:C:\Windows\System32\drivers\etc
(3)用记事本打开hosts文件,并在文件后面添加下面内容,并保存
185.199.110.133 raw.githubusercontent.com
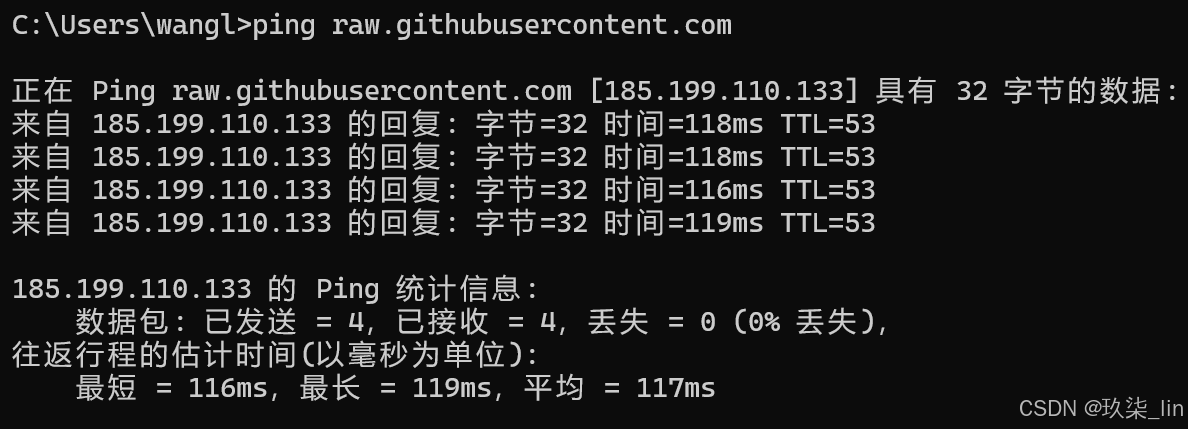
(4)这样hosts就修改完毕了。现在 Ping一下 raw.githubusercontent.com ,看是否能够ping通。能够ping通表示配置ok,就可以重新进行wsl的安装。
(5)继续安装wsl(一定要用管理员权限)
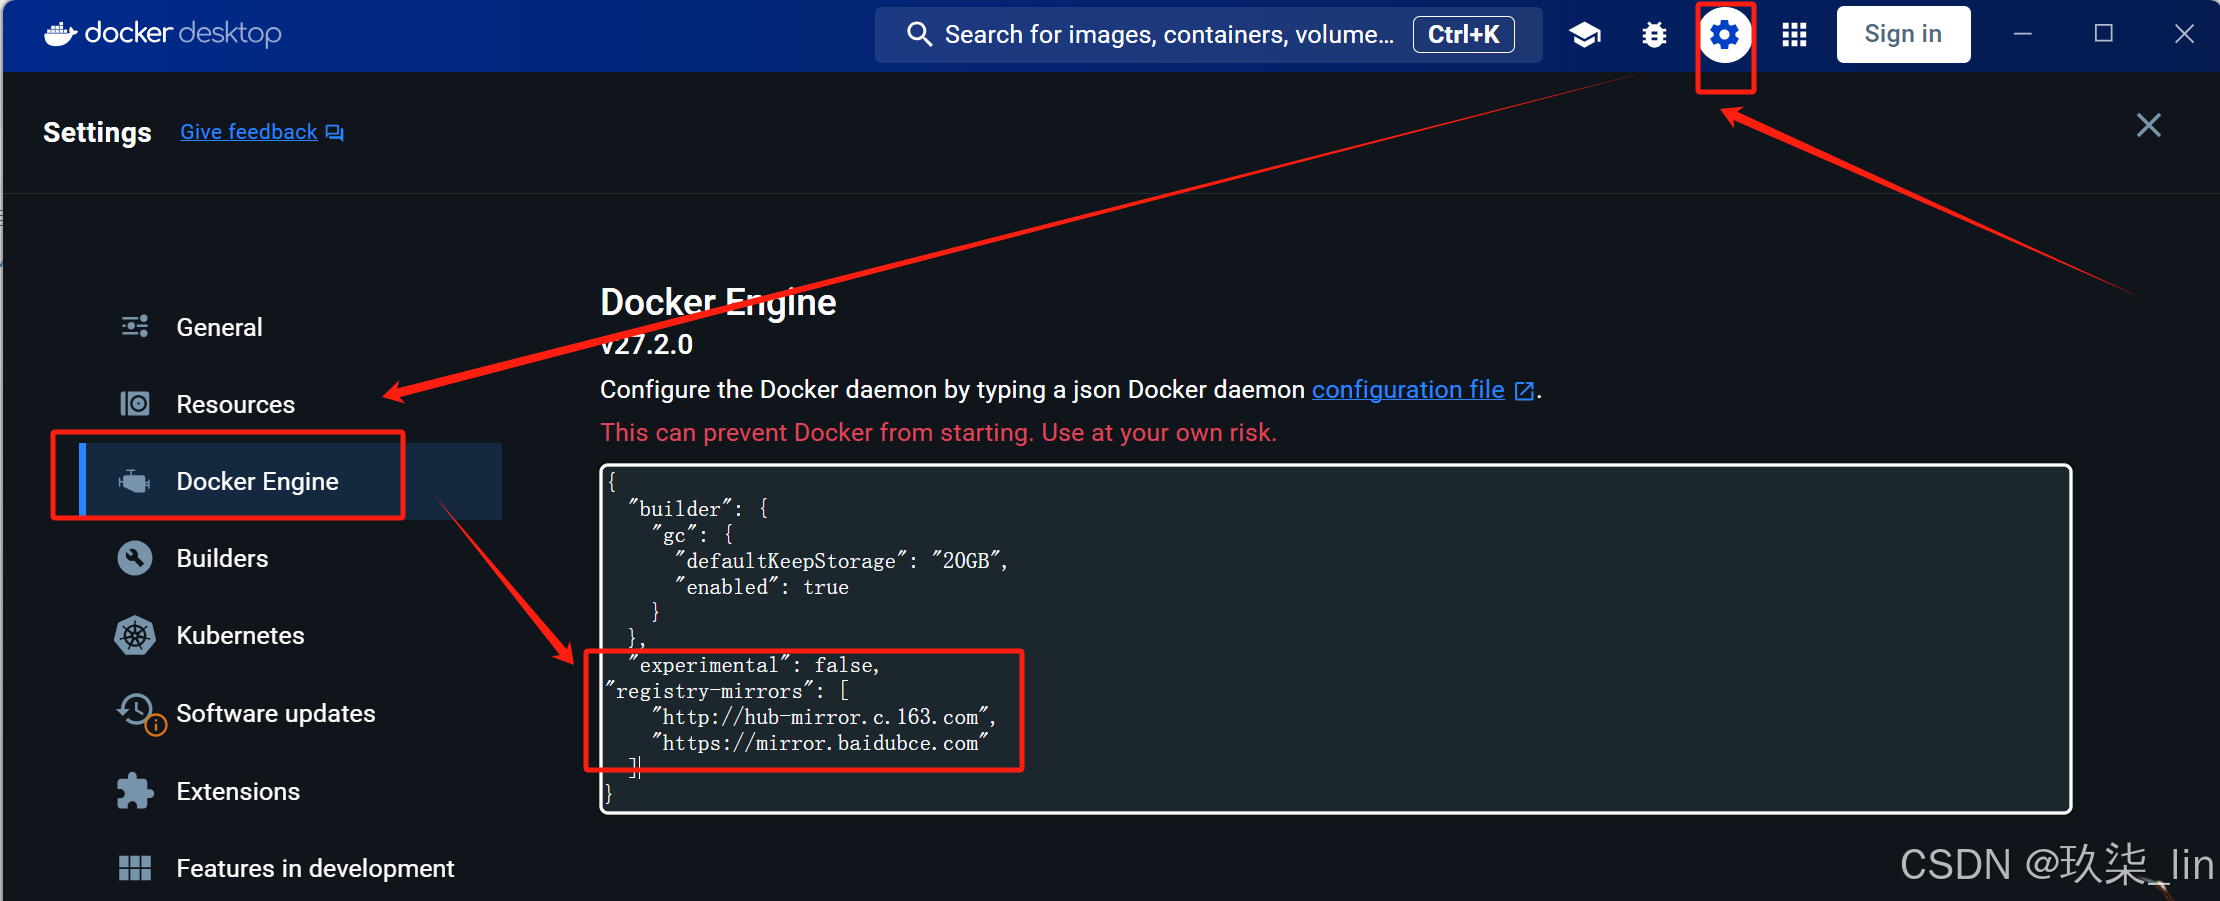
安装完Docker之后,设置国内镜像地址:
"registry-mirrors": [
    "http://hub-mirror.c.163.com",
    "https://mirror.baidubce.com"
  ]
查看Docker是否安装成功:docker --version
