
论文题目:《LightRAG: Simple and Fast Retrieval-Augmented Generation》
Github地址:https://github.com/HKUDS/LightRAG
一、LightRAG介绍
LightRAG通过将图结构整合到文本索引和检索过程中,旨在解决现有RAG系统在处理复杂查询时的局限性,如依赖于平面数据表示和缺乏上下文感知能力。以下是论文的核心结论:
-
图结构的整合:LightRAG通过使用图结构来表示实体间的复杂关系,从而能够更细致地理解和检索信息。
-
双级检索系统:LightRAG采用了一个双级检索框架,包括低级检索(关注特定实体及其关系的精确信息)和高级检索(涵盖更广泛的主题和概念)。
-
高效的检索效率:通过结合图结构和向量表示,LightRAG能够高效地检索相关实体及其关系,显著提高了响应时间,同时保持了上下文相关性。
-
增量更新算法:LightRAG设计了一种增量更新算法,确保新数据能够及时整合到系统中,使系统能够在快速变化的数据环境中保持有效和响应性。
-
实验验证:通过广泛的实验验证,LightRAG在检索准确性和效率方面相比于现有方法有显著提升。
-
开源:LightRAG已经开源,可以通过GitHub访问。
-
架构:LightRAG的架构包括基于图的文本索引、双级检索范式和检索增强答案生成。它还进行了复杂度分析,证明了其在处理更新文本时的高效性。
-
评估:在多个数据集上的实验评估表明,LightRAG在多个维度上优于现有的RAG基线方法,包括在处理大规模语料库和复杂查询时的优越性。
-
成本和适应性分析:LightRAG在索引和检索过程中的令牌和API调用数量上比GraphRAG更高效,特别是在处理数据变化时的增量更新阶段。
二、LightRAG整体框架

三、安装
3.1 源码安装(推荐)
cd LightRAGpip install -e .3.2 Python安装
pip install lightrag-hku四、快速使用
Step1:由于demo使用OpenAI大模型,因此首先需要设置OpenAI API Key
export OPENAI_API_KEY="sk-..."Step2:其次,下载demo文本:A Christmas Carol by Charles Dickens
curl https://raw.githubusercontent.com/gusye1234/nano-graphrag/main/tests/mock_data.txt > ./book.txtStep3:执行如下代码:
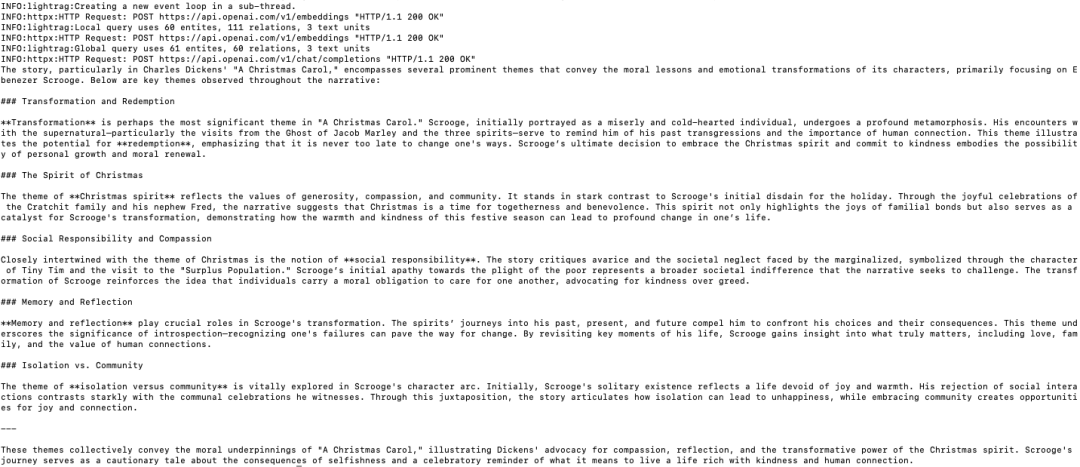
import osfrom lightrag import LightRAG, QueryParamfrom lightrag.llm import gpt_4o_mini_complete, gpt_4o_complete########## Uncomment the below two lines if running in a jupyter notebook to handle the async nature of rag.insert()# import nest_asyncio # nest_asyncio.apply() #########WORKING_DIR = "./dickens"if not os.path.exists(WORKING_DIR): os.mkdir(WORKING_DIR)rag = LightRAG( working_dir=WORKING_DIR, llm_model_func=gpt_4o_mini_complete # Use gpt_4o_mini_complete LLM model # llm_model_func=gpt_4o_complete # Optionally, use a stronger model)with open("./book.txt") as f: rag.insert(f.read())# Perform naive searchprint(rag.query("What are the top themes in this story?", param=QueryParam(mode="naive")))# Perform local searchprint(rag.query("What are the top themes in this story?", param=QueryParam(mode="local")))# Perform global searchprint(rag.query("What are the top themes in this story?", param=QueryParam(mode="global")))# Perform hybrid searchprint(rag.query("What are the top themes in this story?", param=QueryParam(mode="hybrid")))输出的部分内容如下所示:
五、调用其他大模型
5.1 使用Huggingface模型
from lightrag.llm import hf_model_complete, hf_embeddingfrom transformers import AutoModel, AutoTokenizer# Initialize LightRAG with Hugging Face modelrag = LightRAG( working_dir=WORKING_DIR, llm_model_func=hf_model_complete, # Use Hugging Face model for text generation llm_model_name='meta-llama/Llama-3.1-8B-Instruct', # Model name from Hugging Face # Use Hugging Face embedding function embedding_func=EmbeddingFunc( embedding_dim=384, max_token_size=5000, func=lambda texts: hf_embedding( texts, tokenizer=AutoTokenizer.from_pretrained("sentence-transformers/all-MiniLM-L6-v2"), embed_model=AutoModel.from_pretrained("sentence-transformers/all-MiniLM-L6-v2") )),)5.2 使用Ollama模型
from lightrag.llm import ollama_model_complete, ollama_embedding# Initialize LightRAG with Ollama modelrag = LightRAG( working_dir=WORKING_DIR, llm_model_func=ollama_model_complete, # Use Ollama model for text generation llm_model_name='your_model_name', # Your model name # Use Ollama embedding function embedding_func=EmbeddingFunc( embedding_dim=768, max_token_size=8192, func=lambda texts: ollama_embedding( texts, embed_model="nomic-embed-text" ) ),)添加num_ctx参数
1.拉取大模型
ollama pull qwen22.查看模型文件
ollama show --modelfile qwen2 > Modelfile3.编辑Modelfile
PARAMETER num_ctx 327684.创建修改后的模型
ollama create -f Modelfile qwen2m六、数据插入
6.1 批量插入
# Batch Insert: Insert multiple texts at oncerag.insert(["TEXT1", "TEXT2",...])6.2 递增插入
# Incremental Insert: Insert new documents into an existing LightRAG instancerag = LightRAG(working_dir="./dickens")with open("./newText.txt") as f: rag.insert(f.read())七、图可视化
7.1 html可视化
import networkx as nxfrom pyvis.network import Network# Load the GraphML fileG = nx.read_graphml('./dickens/graph_chunk_entity_relation.graphml')# Create a Pyvis networknet = Network(notebook=True)# Convert NetworkX graph to Pyvis networknet.from_nx(G)# Save and display the networknet.show('knowledge_graph.html')源码路径:examples/graph_visual_with_html.py
7.2 Neo4j可视化
import osimport jsonfrom lightrag.utils import xml_to_jsonfrom neo4j import GraphDatabase# ConstantsWORKING_DIR = "./dickens"BATCH_SIZE_NODES = 500BATCH_SIZE_EDGES = 100# Neo4j connection credentialsNEO4J_URI = "bolt://localhost:7687"NEO4J_USERNAME = "neo4j"NEO4J_PASSWORD = "your_password"def convert_xml_to_json(xml_path, output_path): """Converts XML file to JSON and saves the output.""" if not os.path.exists(xml_path): print(f"Error: File not found - {xml_path}") return None json_data = xml_to_json(xml_path) if json_data: with open(output_path, 'w', encoding='utf-8') as f: json.dump(json_data, f, ensure_ascii=False, indent=2) print(f"JSON file created: {output_path}") return json_data else: print("Failed to create JSON data") return Nonedef process_in_batches(tx, query, data, batch_size): """Process data in batches and execute the given query.""" for i in range(0, len(data), batch_size): batch = data[i:i + batch_size] tx.run(query, {"nodes": batch} if "nodes" in query else {"edges": batch})def main(): # Paths xml_file = os.path.join(WORKING_DIR, 'graph_chunk_entity_relation.graphml') json_file = os.path.join(WORKING_DIR, 'graph_data.json') # Convert XML to JSON json_data = convert_xml_to_json(xml_file, json_file) if json_data is None: return # Load nodes and edges nodes = json_data.get('nodes', []) edges = json_data.get('edges', []) # Neo4j queries create_nodes_query = """ UNWIND $nodes AS node MERGE (e:Entity {id: node.id}) SET e.entity_type = node.entity_type, e.description = node.description, e.source_id = node.source_id, e.displayName = node.id REMOVE e:Entity WITH e, node CALL apoc.create.addLabels(e, [node.entity_type]) YIELD node AS labeledNode RETURN count(*) """ create_edges_query = """ UNWIND $edges AS edge MATCH (source {id: edge.source}) MATCH (target {id: edge.target}) WITH source, target, edge, CASE WHEN edge.keywords CONTAINS 'lead' THEN 'lead' WHEN edge.keywords CONTAINS 'participate' THEN 'participate' WHEN edge.keywords CONTAINS 'uses' THEN 'uses' WHEN edge.keywords CONTAINS 'located' THEN 'located' WHEN edge.keywords CONTAINS 'occurs' THEN 'occurs' ELSE REPLACE(SPLIT(edge.keywords, ',')[0], '\"', '') END AS relType CALL apoc.create.relationship(source, relType, { weight: edge.weight, description: edge.description, keywords: edge.keywords, source_id: edge.source_id }, target) YIELD rel RETURN count(*) """ set_displayname_and_labels_query = """ MATCH (n) SET n.displayName = n.id WITH n CALL apoc.create.setLabels(n, [n.entity_type]) YIELD node RETURN count(*) """ # Create a Neo4j driver driver = GraphDatabase.driver(NEO4J_URI, auth=(NEO4J_USERNAME, NEO4J_PASSWORD)) try: # Execute queries in batches with driver.session() as session: # Insert nodes in batches session.execute_write(process_in_batches, create_nodes_query, nodes, BATCH_SIZE_NODES) # Insert edges in batches session.execute_write(process_in_batches, create_edges_query, edges, BATCH_SIZE_EDGES) # Set displayName and labels session.run(set_displayname_and_labels_query) except Exception as e: print(f"Error occurred: {e}") finally: driver.close()if __name__ == "__main__": main()源码路径:examples/graph_visual_with_neo4j.py
八、项目代码结构
.├── examples│ ├── batch_eval.py│ ├── graph_visual_with_html.py│ ├── graph_visual_with_neo4j.py│ ├── generate_query.py│ ├── lightrag_azure_openai_demo.py│ ├── lightrag_bedrock_demo.py│ ├── lightrag_hf_demo.py│ ├── lightrag_ollama_demo.py│ ├── lightrag_openai_compatible_demo.py│ ├── lightrag_openai_demo.py│ └── vram_management_demo.py├── lightrag│ ├── __init__.py│ ├── base.py│ ├── lightrag.py│ ├── llm.py│ ├── operate.py│ ├── prompt.py│ ├── storage.py│ └── utils.py├── reproduce│ ├── Step_0.py│ ├── Step_1.py│ ├── Step_2.py│ └── Step_3.py├── .gitignore├── .pre-commit-config.yaml├── LICENSE├── README.md├── requirements.txt└── setup.py