用户首选项为应用提供Key-Value键值型的数据处理能力,支持应用持久化轻量级数据,并对其修改和查询。数据存储形式为键值对,键的类型为字符串型,值的存储数据类型包括数字型、字符型、布尔型以及这3种类型的数组类型。
说明:
本模块首批接口从API version 9开始支持。后续版本的新增接口,采用上角标单独标记接口的起始版本。
首选项无法保证进程并发安全,会有文件损坏和数据丢失的风险,不支持在多进程场景下使用。
对于前端的朋友,可能使用像uni-app、小程序或web端中的本地持久化API习惯了,也能像使用sessionStorage或localStorage一样便捷。我们也可以利用HarmonyOS中API提供的用户首选项的功能,来实现LocalStorage实例。
上述说明了用户首选项只能存储数字型、字符型、布尔型这3种数据类型,在对Preference实例封装过程中,在基础上再增加对json对象数据存储能力,并且实现数据缓存具有时效性等功能。
一、用户首选项
1.1、导入模块
TypeScript
import preferences from '@ohos.data.preferences'1.2、获取实例
获取Preferences实例,使用Promise异步回调(当然,获取实例方法也可以使用callback异步回调)。
TypeScript
// context为应用的上下文
preferences.getPreferences(context, 'application').then(preference => {
    // preference 实例名称
}).catch(err => {
    // error message
})
参数说明:
| 参数名 | 类型 | 是否必填 | 描述 |
|---|---|---|---|
| context | Context | 是 | 应用上下文。 |
| name | string | 是 | Preferences实例的名称。 |
| callback | AsyncCallback<Preferences> | 是 | 回调函数。当获取Preferences实例成功,err为undefined,返回Preferences实例;否则err为错误对象。 |
1.3、Preferences实例中的方法
这些操作通常都是异步的,因此你需要使用Promise或者async/await来处理异步逻辑。
使用callback异步回调的方法:
| 方法名 | 参数 | 返回值 | 描述 |
|---|---|---|---|
| get() | key: string, defValue: ValueType, callback: AsyncCallback<ValueType> | void | 从缓存的Preferences实例中获取键对应的值,如果值为null或者非默认值类型,返回默认数据defValue。 |
| getAll() | callback: AsyncCallback<Object> | void | 从缓存的Preferences实例中获取所有键值数据。 |
| put() | key: string, value: ValueType, callback: AsyncCallback<void> | void | 将数据写入缓存的Preferences实例中,可通过flushflush将Preferences实例持久化。 |
| has() | key: string, callback: AsyncCallback<boolean> | void | 检查缓存的Preferences实例中是否包含名为给定Key的存储键值对。 |
| delete() | key: string, callback: AsyncCallback<void> | void | 从缓存的Preferences实例中删除名为给定Key的存储键值对,可通过flush将Preferences实例持久化。 |
| flush() | callback: AsyncCallback<void> | void | 将缓存的Preferences实例中的数据异步存储到用户首选项的持久化文件中。 |
| clear() | callback: AsyncCallback<void> | void | 清除缓存的Preferences实例中的所有数据,可通过flush将Preferences实例持久化。 |
例如获取示例,代码如下:
TypeScript
// 获取对应键对应的值,默认为空
this.preference.get(key, '', (err, value) => {
  if(err) {
     console.log('preference error', err)
  }
})
使用Promise异步回调的方法:
| 方法名 | 参数 | 返回值 | 描述 |
|---|---|---|---|
| get() | key: string, defValue: ValueType | Promise<ValueType> | 从缓存的Preferences实例中获取键对应的值,如果值为null或者非默认值类型,返回默认数据defValue |
| getAll() | / | Promise<Object> | 从缓存的Preferences实例中获取所有键值数据。 |
| put() | key: string, value: ValueType | Promise<void> | 将数据写入缓存的Preferences实例中,可通过flushflush将Preferences实例持久化 |
| has() | key: string | Promise<boolean> | 检查缓存的Preferences实例中是否包含名为给定Key的存储键值对。 |
| delete() | key: string | Promise<void> | 从缓存的Preferences实例中删除名为给定Key的存储键值对,可通过flush将Preferences实例持久化。 |
| flush() | / | Promise<void> | 将缓存的Preferences实例中的数据异步存储到用户首选项的持久化文件中。 |
| clear() | / | Promise<void> | 清除缓存的Preferences实例中的所有数据,可通过flush将Preferences实例持久化。 |
例如添加示例,代码如下:
TypeScript
// 添加数据
this.preference.put(key, value).then(() => {
    this.preference.flush()
}).catch(e => {
    console.log('preference error', e)
})
二、封装LocalStorage
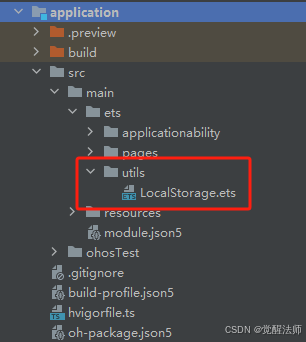
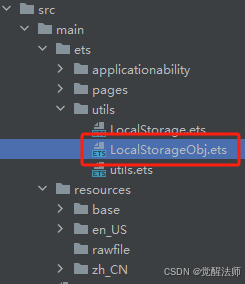
在封装LocalStorage类之前,首先在ets目录下创建utils文件夹,并且在该文件夹下创建LocalStorage类文件。如下图:
2.1定义LocalStorage类
定义LocalStorage类,需要先做好几下几步准备:
- 获取Preferences实例对象,需要传入UIAbility组件的应用上下文,可通过"@ohos.app.ability.common"模块获取UIAbility类型,并将其赋给context形参。
- 定义私有preference变量,用于接收获取到的Preferences实例,后期可以直接调用,无需重复获取。
- 定义存储值类型vueType,根据用户首选项描述已知,其只能为number、string和boolean三种类型。
- 最后将LocalStorage类实例对象导出,作为单例模式导出。
TypeScript
import common from '@ohos.app.ability.common'
import preferences from '@ohos.data.preferences'

// 定义存储值类型
type valueType = string | number | boolean

/**
 * 定义LocalStorage类
 */
class LocalStorage {
  private preference: preferences.Preferences    // 定义首选项实例对象
}
/**
 * 实例LocalStorage
 */
const localStorage = new LocalStorage()

/**
 * 导出localStorage单例对象
 */
export default localStorage as LocalStorage
2.2 初始化并获取Preferences实例
类定义好后,在类体内定义initial()函数,用来初始化并获取Preferences实例,后期LocalStorage类中方法直接使用preference对象即可。在获取Prefences实例时,需要给实例命名,这里则直接使用"应用上下文"的moduleName名称,即您定义项目时取的模块名称。代码如下:
TypeScript
// 定义初始化函数
initial(context: common.UIAbilityContext): void {
	// 这里将UIAbility中应用上下文的moduleName作用为实例名称,即该项目的application
	preferences.getPreferences(context, context.abilityInfo.moduleName).then(preference => {
		this.preference = preference	// 将获取实例赋值给私有变量
		console.log('preference success~')
	}).catch(e => {
		console.log('preference error', e)
	})
}
这里使用Promise异步回调获取Preferences实例,如果习惯使用async/await朋友可以将其简单修改下即可,代码如下:
TypeScript
async initial(context: common.UIAbilityContext): void {
	// 这里将UIAbility中应用上下文的moduleName作用为实例名称,即该项目的application
	try {
		this.preference = await preferences.getPreferences(context, context.abilityInfo.moduleName)
	} catch (e) {
		console.log('preference error', e)
	}
}
2.3 UIAbility中初始化
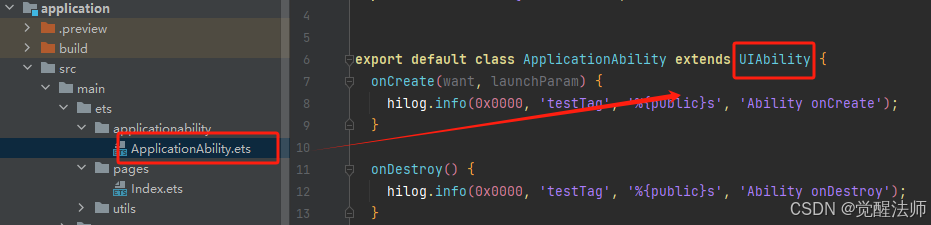
当initial()函数定义好后,我们将要在什么地方调用并初始化,并且context: common.UIAbilityContext中的应用上下文在哪获取? 我们可以在项目中打开Ability文件,会发现该类是继承UIAblity,所以该类也继承了父类的context应用上下文,onCreate()函数优先于页面之前,所以将initial()放到该方法中即可,并且通过this可直接过去context,将其放到initial()方法参数中。
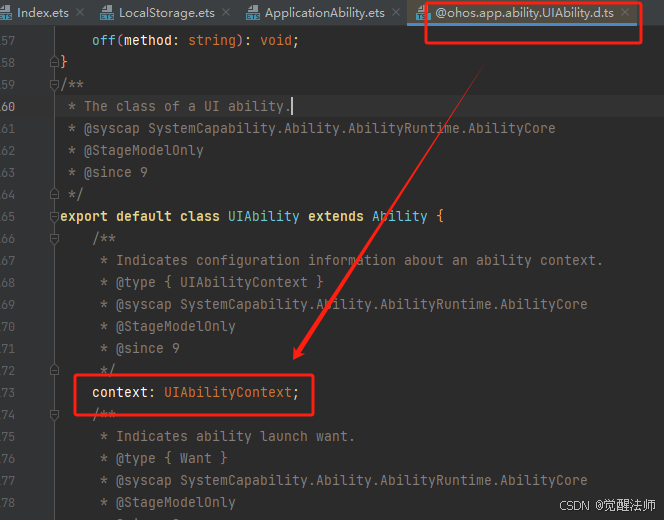
如果有朋友还在疑虑类中是否存在context问题,可以打开UIAblity模块,可以看到其类中定义了context变量,如下图:
ApplicationAblity继承了UIAbility,所以我们在类中可以直接调用到context应用上下文。代码如下:
TypeScript
import UIAbility from '@ohos.app.ability.UIAbility';
import hilog from '@ohos.hilog';
import window from '@ohos.window';
import LocalStorage from '../utils/LocalStorage'

export default class ApplicationAbility extends UIAbility {
  onCreate(want, launchParam) {
    hilog.info(0x0000, 'testTag', '%{public}s', 'Ability onCreate');
    // 初始化本地存储
    LocalStorage.initial(this.context)
  }

  // 略...

}
当LocalStorage类中initial()函数执行后,单例对象中的preferences实例也成功创建并且初始化。
注:如果你的Ability文件是ts文件,将其后缀改为ets即可,因为ets文件无法引入ts文件。
2.4 引用LocalStorage单例
此时,我们在首页中引入LocalStorage实例,完成对数据的增、删、改、查等操作。
打开pages/index.ets,添加一些相关操作功能按钮,代码如下:
vbscript
import localStorage from '../utils/LocalStorage'
let index = 0
@Entry
@Component
struct Index {
@State message: string = ''
// 重置内容
renderMsg(message: string | number | boolean){
this.message = message.toString()
}
build() {
Row() {
Column() {
Row(){
Text(this.message || '-')
.fontSize(50)
.fontWeight(FontWeight.Bold)
}.width('100%').height('150vp')
Row(){
// 添加相关操作按钮
Button('添加').onClick(() => {
})
Button('读取').onClick(() => {
})
Button('删除').onClick(() => {
})
Button('清空').onClick(() => {
})
}.width('100%').justifyContent(FlexAlign.Center)
}
.width('100%')
}
.height('100%').alignItems(VerticalAlign.Top)
}
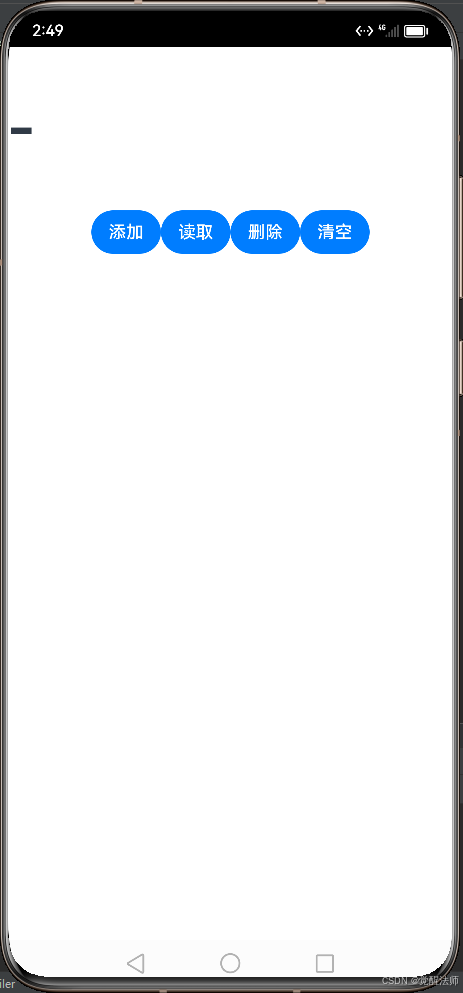
}页面效果如下图:
2.5 添加数据
打开utils\LocalStorage.ets文件,在类中添加put()函数,增加添加数据功能;前面执行initial()方法时,Preferences实例已初始过了,所以在类中函数直接调用即可;并且当通过Preferences实例成功添加数据后,需要调用flush()函数刷新下。代码如下:
TypeScript
/**
* 定义增加函数
* @param key
* @param value
*/
put(key: string, value: valueType ): void {
this.preference.put(key, value).then(() => this.preference.flush()).catch(e => {
console.log('testTag error', e)
})
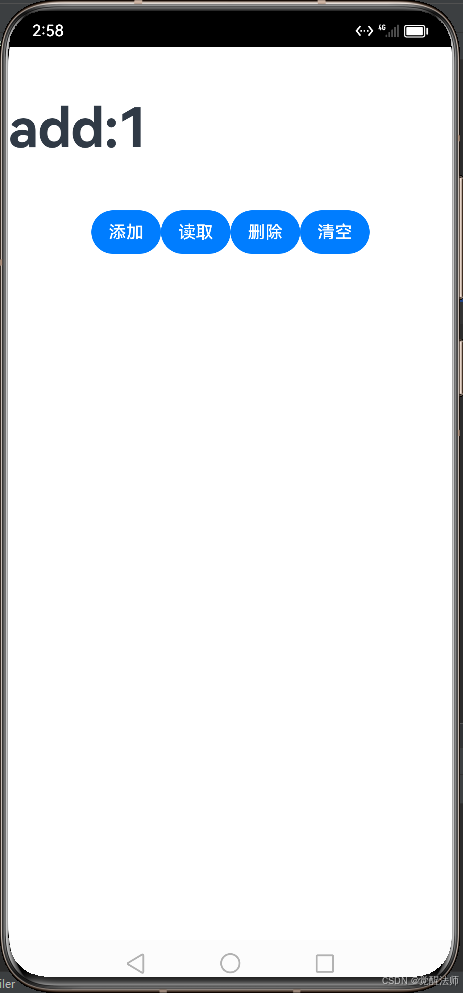
}打开pages\index.ets文件,执行添加数据,代码如下:
TypeScript
// 添加相关操作按钮
Button('添加').onClick(() => {
	localStorage.put('indexValue', ++index)
	this.renderMsg('add:' + index)
	console.log('testTag', index)
})
点击添加按钮后,数据则通过Preferences实例保存到本地,页面呈现添加数据。如下图:
有些朋友可能喜欢使用async/await写法,只需简单修改下即可。
utils/LocalStorage.ets文件中代码修改如下:
TypeScript
async put(key: string, value: valueType) {
	try {
		await this.preference.put(key, value)
		await this.preference.flush()
	} catch (e) {
		console.log('testTag error', e)
	}
}
pages/index.ets文件中代码修改如下:
TypeScript
Button('添加').onClick(async () => {
	await localStorage.put('indexValue', ++index)
	this.renderMsg('add:' + index)
	console.log('testTag', index)
})
此时点击添加按钮,一样可以实现数据本地化存储。
2.6 获取数据
获取比较简单了,打开utils/LocalStorage.ets文件,在类中增加获取数据功能。这里get()函数中第二个默认值给空即可,代码如下:
TypeScript
/**
* 定义获取对应key数据
* @param key
*/
getValue(key: string): Promise<valueType> {
return this.preference.get(key, '') as Promise<valueType>
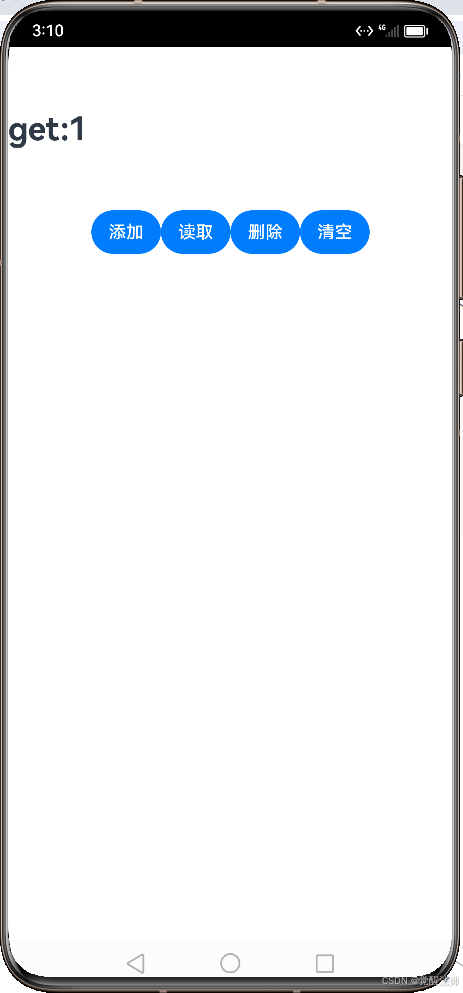
}在首页获取数据事件中,添加getValue()函数,获取缓存的数据。代码如下:
TypeScript
Button('读取').onClick(() => {
	localStorage.getValue('indexValue').then(value => {
		this.renderMsg('get:' + value)
		console.log('testTag', value)
	}).catch(err => {
		console.log('testTag error', err)
	})
})
将获取到的数据显示到界面中,则拿到的是上次缓存的数据。如下图:
2.7 修改数据
修改数据,直接使用put()函数,将数据重置即可。也可以LocalStorage类中添加update()函数,判断传入的内容与上次缓存一致,则不执行Preferences实例中put()方法。
打开utils\LocalStorage.ets文件,在类中添加update()方法, 代码如下:
TypeScript
/**
* 更新数据
* @param key
* @param value
*/
async update(key: string, value: valueType){
	try {
		const preValue = await this.getValue(key)
        // 当更新内容与上次不一致时,修改数据
		if(preValue != value) {
			this.put(key, value)
		}
	} catch (e) {
		console.log('testTag error', e)
	}
}
2.8 移除数据
移除指定数据,则通过Preferences实例中的delete()函数,打开utils\LocalStorage.ets文件,代码如下:
TypeScript
 /**
   * 定义移除函数
   * @param key
   */
remove(key: string): void {
	this.preference.delete(key).then(() => this.preference.flush()).catch(e => {
		console.log('testTag error', e)
	})
}
打开pages\index.ets文件,在删除事件中添加移除功能,然后再通过get()函数重新获取本地存储的indexValue内容,代码如下:
TypeScript
Button('删除').onClick(async () => {
    // 移除indexValue键对应的值
	localStorage.remove('indexValue')
    // 重新获取indexValue
	const value = await localStorage.getValue('indexValue')
	this.renderMsg('delete:' + value)
	console.log('testTag delete', value)        // delete:
})
先添加数据,然后执行删除事件,页面效果如下:


2.9 清空数据
清空数据则是将当前Preferences实例中,装饰所有键-值对内容进行清空,代码如下:
TypeScript
/**
   * 定义清除所有数据函数
   */
clearAll(): void {
	this.preference.clear().then(() => this.preference.flush()).catch(e => {
		console.log('testTag error', e)
	})
}
三、保存JSON对象数据
例如要保存 {"name":"Tom","age":18} 结构的JSON对象数据,则需要在put()函数中将其转换为string类型数据,再将其进行保存;在获取时候,在getValue()方法中,识别并将其转换为JSON对象模式。
3.1 判断字符串是否为JSON
首先打开utils/utils.ets,在该文件中添加判断字符串数据是否为object对象的函数;如果你的项目中未创建该文件,创建它即可。代码如下:
TypeScript
/**
 * 判断字符串是否为JSON对象
 */
export const isJsonObject = (value: string) : boolean => {
  try {
    const parseStr = JSON.parse(value)
    return 'object' === typeof parseStr && null !== parseStr
  } catch (e) {
    console.log('testTag', e)
    return false
  }
}
3.2 修改put()函数
打开utils/LocalStorage.ets文件,先修改put()函数,让其支持存储json对象数据,代码如下:
TypeScript
put(key: string, value: valueType | object ): void {
    // 如果数据为object类型,将其转换为字符串类型数据进行存储
	if('object' === typeof value) {
	  value = JSON.stringify(value)
	}
	this.preference.put(key, value).then(() => this.preference.flush()).catch(e => {
		console.log('testTag error', e)
	})
}
3.3 修改getValue()函数
在修改getValue()函数时,使用async/await写法当示例,显示更为简洁,代码如下:
TypeScript
async getValue(key: string): Promise<valueType> {
	let value = (await this.preference.get(key, '')) as valueType
	// 判断如果为字符串类型数据,并且为JSON对象格式数据,将其转换为对象
	if('string' === typeof value && isJsonObject(value)) {
		try {
			value = JSON.parse(value)
		} catch (e) {
            value = null
			console.log('testTag error', e)
		}
	}
	// 重新通过Promise异步回调将结果返回
	return Promise.resolve(value)
}
3.4 展示json存储能力
当上述代码完成后,在添加按钮事件位置,将之前存储number数据更改为json数据,进行存储,再来看看效果。
打开pages/index.est文件,更新添加事件,代码如下:
TypeScript
Button('添加').onClick(() => {
	const testData = { name: 'Tom', age: 18 };
	localStorage.put('indexValue', testData)
	this.renderMsg('add:' + JSON.stringify(testData))
	console.log('testTag add', testData)
})
重新获取本地存储值时,输出为Object,说明已转换成功。如下图:


四、添加时效性
有时某些数据需要在规定时间内才有效,这则需要对存储数据增加时效性的能力,即在存储数据过程中添加失效的时间,并在获取时判断是否在有效期内;这样所有保存的数据,将都需要转化为JSON对象格式的字符串进行存储。
首先,我们将之前LocalStorage.ets文件拷贝份,在之前基础上将其改造,增加时效性能力。如下图:
4.1 定义json数据存储类型
在修改存储方式前,需要定义json格式对象类型,在put()函数中存储前和getValue()函数中获取结果通过JSON.parse转换后的数据,都需要该类型进行约束。
TypeScript
// 定义json对象存储类型
type dataType = { value: valueType | object, expire: number }
4.2 修改put()函数
当put()方法中,添加失效时间expire时,则将其合并到JSON数据中一起存储;如果无expire失效时间,则传入-1,表示此数据长久有效,除非主动清除。
修改后代码如下:
TypeScript
  /**
   * 定义增加函数
   * @param key
   * @param value
   * @param expire
   */
  put(key: string, value: valueType | object, expire?: Date): void {
    // 定义存储Json格式对象
    const data = {
      value,      // 存储内容
      expire : (expire ? expire.getTime() : -1)   // 如果失效时间存在,将其转换为时间戳,否则传入-1
    }
    let dataStr: string;
    try {
      dataStr = JSON.stringify(data)    // 当数据转换成功,将其存储
    } catch (e) {
      console.log('testTag error', e)
      return
    }
    this.preference.put(key, dataStr).then(() => this.preference.flush()).catch(e => {
      console.log('testTag error', e)
    })
  }
4.3 修改getValue()函数
在getValue()函数中,在获取数据时,除了需要将字符串数据转换为JSON格式对象外,还需判断其中expire字段,当前存储内容是否在有效期内;在有效期内则返回,不在则则返回空(null)。
修改后代码如下:
TypeScript
  /**
   * 定义获取对应key数据
   * @param key
   */
  async getValue(key: string): Promise<valueType | object> {
    // 首页判断key值是否存在,不存在返回空
    if(!this.preference.has(key)) {
      return Promise.resolve(null)
    }
    let value = (await this.preference.get(key, '')) as valueType
    // 判断如果为字符串类型数据,并且为JSON对象格式数据,将其转换为对象
    if('string' === typeof value && isJsonObject(value)) {
      try {
        const data: dataType = JSON.parse(value)
        // 如果当前存储内容无时效性,或者在时效期内,都直接返回
        if(data.expire === -1 || data.expire > Date.now()) {
          return Promise.resolve(data.value)
        }
        // 如果已失效,将其信息删除
        else {
          this.preference.delete(key)
        }
      } catch (e) {
        console.log('testTag error', e)
        return Promise.resolve(null)      // 如果转换出错,返回null
      }
    }
    // 通过Promise异步回调将结果返回(如果内容不为JSON格式对象,或者过了时效期,返回null)
    return Promise.resolve(null)
  }
4.4 更改导入模块
需要注意的是,我们将需要applicationAbility.ets和index.ets中的导入模块进行修改,否则引入还是之前LocalStorage.ets中类,刚非新创建的LocalStorageObj.ets。
示例如下:
TypeScript
// 旧导入模块
import LocalStorage from '../utils/LocalStorage'

// 引入新模块,替换掉旧的LocalStorage
import LocalStorage from '../utils/LocalStorageObj'
4.5 展示时效性
以上两个函数修改完成后,我们来执行下看看结果。打开pages/index.ets,在添加事件中,增加数据缓存的时效性。
首先传一个失效日期进去,看看获取的结果是什么。代码如下:
TypeScript
  Button('添加').onClick(() => {
	const testData = { name: 'Tom', age: 18 };
	const expireDate = new Date()
	// 保存一个失效10分钟的日期
	expireDate.setMinutes(expireDate.getMinutes() - 10)
	// 存储数据
	localStorage.put('indexValue', testData, expireDate)
	this.renderMsg('add:' + JSON.stringify(testData))
	console.log('testTag add', testData)
  })
  Button('读取').onClick(() => {
	localStorage.getValue('indexValue').then(value => {
	  this.renderMsg('get:' + value)
	  console.log('testTag get', value)
	}).catch(err => {
	  console.log('testTag error', err)
	})
  })
页面效果可见,添加了json数据后,获取结果为null;这是因为在添加时,将日期设置为失效10分钟了。如下图:


我们再将时间设置为有效后,再来看看结果。代码如下:
TypeScript
  Button('添加').onClick(() => {
	const testData = { name: 'Tom', age: 18 };
	const expireDate = new Date()
	// 设置为24小时后失效
	expireDate.setHours(expireDate.getHours() + 24)
	// 存储数据
	localStorage.put('indexValue', testData, expireDate)
	this.renderMsg('add:' + JSON.stringify(testData))
	console.log('testTag add', testData)
  })
  Button('读取').onClick(() => {
	localStorage.getValue('indexValue').then(value => {
	  this.renderMsg('get:' +  (null !== value ? JSON.stringify(value) : value))
	  console.log('testTag get', value)
	}).catch(err => {
	  console.log('testTag error', err)
	})
  })
页面效果可见,在有效期内成功获取到了存储数据。如下图:


六、完整代码
下面则是该篇所有示例完整代码。
uitls/utils.ets文件代码如下:
TypeScript
/**
 * 判断字符串是否为JSON对象
 */
export const isJsonObject = (value: string) : boolean => {
  try {
    const parseStr = JSON.parse(value)
    return 'object' === typeof parseStr && null !== parseStr
  } catch (e) {
    console.log('testTag', e)
    return false
  }
}
utils/LocalStorageObj.ets文件代码如下:
TypeScript
import common from '@ohos.app.ability.common'
import preferences from '@ohos.data.preferences'
import { isJsonObject } from './utils'

// 定义存储值类型
type valueType = string | number | boolean
// 定义json对象存储类型
type dataType = { value: valueType | object, expire: number }

/**
 * 定义LocalStorage类
 */
export class LocalStorage {
  private preference: preferences.Preferences // 用户首选项实例对象

  // 定义初始化函数
  initial(context: common.UIAbilityContext): void {
    // 这里将UIAbility中应用上下文的moduleName作用为实例名称,即该项目的application
    preferences.getPreferences(context, context.abilityInfo.moduleName).then(preference => {
      this.preference = preference
      console.log('testTag', 'success~')
    }).catch(e => {
      console.log('testTag error', e)
    })
  }
  /**
   * 定义增加函数
   * @param key
   * @param value
   * @param expire
   */
  put(key: string, value: valueType | object, expire?: Date): void {
    // 定义存储Json格式对象
    const data : dataType = {
      value,      // 存储内容
      expire : (expire ? expire.getTime() : -1)   // 如果失效时间存在,将其转换为时间戳,否则传入-1
    }
    let dataStr: string = '';
    try {
      dataStr = JSON.stringify(data)    // 当数据转换成功,将其存储
      console.log('testTag', dataStr)
    } catch (e) {
      console.log('testTag error', e)
      return
    }
    this.preference.put(key, dataStr).then(() => this.preference.flush()).catch(e => {
      console.log('testTag error', e)
    })
  }

  /**
   * 定义获取对应key数据
   * @param key
   */
  async getValue(key: string): Promise<valueType | object> {
    // 首页判断key值是否存在,不存在返回空
    if(!this.preference.has(key)) {
      return Promise.resolve(null)
    }
    let value = (await this.preference.get(key, '')) as valueType
    // 判断如果为字符串类型数据,并且为JSON对象格式数据,将其转换为对象
    if('string' === typeof value && isJsonObject(value)) {
      try {
        const data: dataType = JSON.parse(value)
        console.log('testTag', data.expire, Date.now(), data.expire < Date.now())
        // 如果当前存储内容无时效性,或者在时效期内,都直接返回
        if(data.expire === -1 || data.expire > Date.now()) {
          return Promise.resolve(data.value)
        }
        // 如果已失效,将其信息删除
        else {
          this.preference.delete(key)
        }
      } catch (e) {
        console.log('testTag error', e)
        return Promise.resolve(null)      // 如果转换出错,返回null
      }
    }
    // 通过Promise异步回调将结果返回(如果内容不为JSON格式对象,或者过了时效期,返回null)
    return Promise.resolve(null)
  }

  /**
   * 更新数据
   * @param key
   * @param value
   */
  async update(key: string, value: valueType){
    try {
      const preValue = await this.getValue(key)
      if(preValue != value) {
        this.put(key, value)
      }
    } catch (e) {
      console.log('testTag error', e)
    }
  }
  /**
   * 定义移除函数
   * @param key
   */
  remove(key: string): void {
    this.preference.delete(key).then(() => this.preference.flush()).catch(e => {
      console.log('testTag error', e)
    })
  }
  /**
   * 定义清除所有数据函数
   */
  clearAll(): void {
    this.preference.clear().then(() => this.preference.flush()).catch(e => {
      console.log('testTag error', e)
    })
  }
}
/**
 * 实例LocalStorage
 */
const localStorage = new LocalStorage()

/**
 * 导出localStorage单例对象
 */
export default localStorage as LocalStorage
pages/index.ets首页代码如下:
TypeScript
import localStorage from '../utils/LocalStorageObj'
let index = 0
@Entry
@Component
struct Index {
  @State message: string = ''
  // 重置内容
  renderMsg(message: string | number | boolean){
    this.message = message.toString()
  }

  build() {
    Row() {
      Column() {
        Row(){
          Text(this.message || '-')
            .fontSize(30)
            .fontWeight(FontWeight.Bold)
        }.width('100%').height('150vp')

        Row(){
          // 添加相关操作按钮
          Button('添加').onClick(() => {
            const testData = { name: 'Tom', age: 18 };
            const expireDate = new Date()
            // 设置为24小时后失效
            expireDate.setHours(expireDate.getHours() + 24)
            // 存储数据
            localStorage.put('indexValue', testData, expireDate)
            this.renderMsg('add:' + JSON.stringify(testData))
            console.log('testTag add', testData)
          })
          Button('读取').onClick(() => {
            localStorage.getValue('indexValue').then(value => {
              this.renderMsg('get:' +  (null !== value ? JSON.stringify(value) : value))
              console.log('testTag get', value)
            }).catch(err => {
              console.log('testTag error', err)
            })
          })
          Button('删除').onClick(async () => {
            localStorage.remove('indexValue')
            const value = await localStorage.getValue('indexValue')
            this.renderMsg('delete:' + value)
            console.log('testTag delete', value)
          })
          Button('清空').onClick(() => {

          })
        }.width('100%').justifyContent(FlexAlign.Center)
      }
      .width('100%')
    }
    .height('100%').alignItems(VerticalAlign.Top)
  }
}
此篇先讲到这里,希望对大家有所帮助。