前言
每次看到Github上别人的Profile那么华丽和炫目,特别是Github Followers 后面能够动态的显示有多少人关注了你,我就羡慕的很,
这得益于Github中开放的API功能,能够通过API去查询你的rep、follower等等信息,由于CSDN并没有开放的API文档和功能去查询用户的统计信息,因此想了一个法子来动态更新我的Github Profile中的有关CSDN的统计信息,让我的Profile更加优雅好看!(看我的Follower那么少,能不能帮我点点T^T)

1. 实现目标
通过 GitHub Actions 定期爬取 CSDN 个人主页的统计数据(总访问量、原创文章数、粉丝数),并自动更新到 GitHub Profile 页面。
2. 实现步骤
在你的个人简介仓库(通常是 username/username)的 README.md 中添加统计信息占位符:
markdown
<!-- CSDN Stats -->
<p align="left">
  <img src="https://img.shields.io/badge/Total%20Views-<!--CSDN_VIEWS-->-blue" />
  <img src="https://img.shields.io/badge/Original%20Posts-<!--CSDN_POSTS-->-green" />
  <img src="https://img.shields.io/badge/Followers-<!--CSDN_FOLLOWERS-->-orange" />
</p>
3. 创建一个简单的爬虫脚本
在仓库中创建 .github/scripts/update_stats.py:
python
import os
import re
from selenium import webdriver
from selenium.webdriver.common.by import By
from selenium.webdriver.support.ui import WebDriverWait
from selenium.webdriver.support import expected_conditions as EC
from selenium.webdriver.chrome.service import Service
from selenium.webdriver.chrome.options import Options
import time

def get_csdn_stats(url):
    chrome_options = Options()
    chrome_options.add_argument('--headless')
    chrome_options.add_argument('--no-sandbox')
    chrome_options.add_argument('--disable-dev-shm-usage')

    try:
        driver = webdriver.Chrome(options=chrome_options)
        driver.get(url)
        time.sleep(5)

        stats = {}
        selectors = {
            'views': "//span[contains(@class, 'user-profile-statistics-views')]//div[contains(@class, 'user-profile-statistics-num')]",
            'posts': "//div[contains(@class, 'user-profile-statistics-num')][following-sibling::div[contains(text(), '原创')]]",
            'followers': "//div[contains(@class, 'user-profile-statistics-num')][following-sibling::div[contains(text(), '粉丝')]]"
        }

        for key, selector in selectors.items():
            try:
                element = WebDriverWait(driver, 10).until(
                    EC.presence_of_element_located((By.XPATH, selector))
                )
                stats[key] = int(element.text.replace(',', ''))
            except Exception:
                stats[key] = 0

        return stats

    finally:
        if 'driver' in locals():
            driver.quit()

def update_readme(stats):
    with open('README.md', 'r', encoding='utf-8') as file:
        content = file.read()

    content = re.sub(r'<!--CSDN_VIEWS-->', str(stats['views']), content)
    content = re.sub(r'<!--CSDN_POSTS-->', str(stats['posts']), content)
    content = re.sub(r'<!--CSDN_FOLLOWERS-->', str(stats['followers']), content)

    with open('README.md', 'w', encoding='utf-8') as file:
        file.write(content)

if __name__ == "__main__":
    url = 'YOUR_CSDN_URL'  # 替换为你的CSDN主页URL
    stats = get_csdn_stats(url)
    update_readme(stats)
4. 配置 GitHub Actions
创建 .github/workflows/update-stats.yml:
yml
name: Update CSDN Stats

on:
  schedule:
    - cron: '0 0 * * 1'  # 每周一午夜运行
  workflow_dispatch:      # 支持手动触发

jobs:
  update-stats:
    runs-on: ubuntu-latest
    permissions:
      contents: write

    steps:
    - uses: actions/checkout@v2
      with:
        token: ${{ secrets.GITHUB_TOKEN }}

    - name: Set up Python
      uses: actions/setup-python@v2
      with:
        python-version: '3.x'

    - name: Install Chrome
      run: |
        sudo apt-get update
        sudo apt-get install -y chromium-browser

    - name: Install dependencies
      run: |
        python -m pip install --upgrade pip
        pip install selenium webdriver-manager beautifulsoup4 requests

    - name: Update stats
      run: |
        python .github/scripts/update_stats.py

    - name: Commit and push if changed
      run: |
        git config --global user.email "41898282+github-actions[bot]@users.noreply.github.com"
        git config --global user.name "github-actions[bot]"
        git add README.md
        git diff --quiet && git diff --staged --quiet || (git commit -m "Update CSDN stats" && git push origin HEAD:main)
5. 上传配置到Github仓库中
上传之后你的仓库中就会有.github\script和.github\workflows文件夹,里面的文件就是刚刚创建的脚本文件和Github Action配置文件。
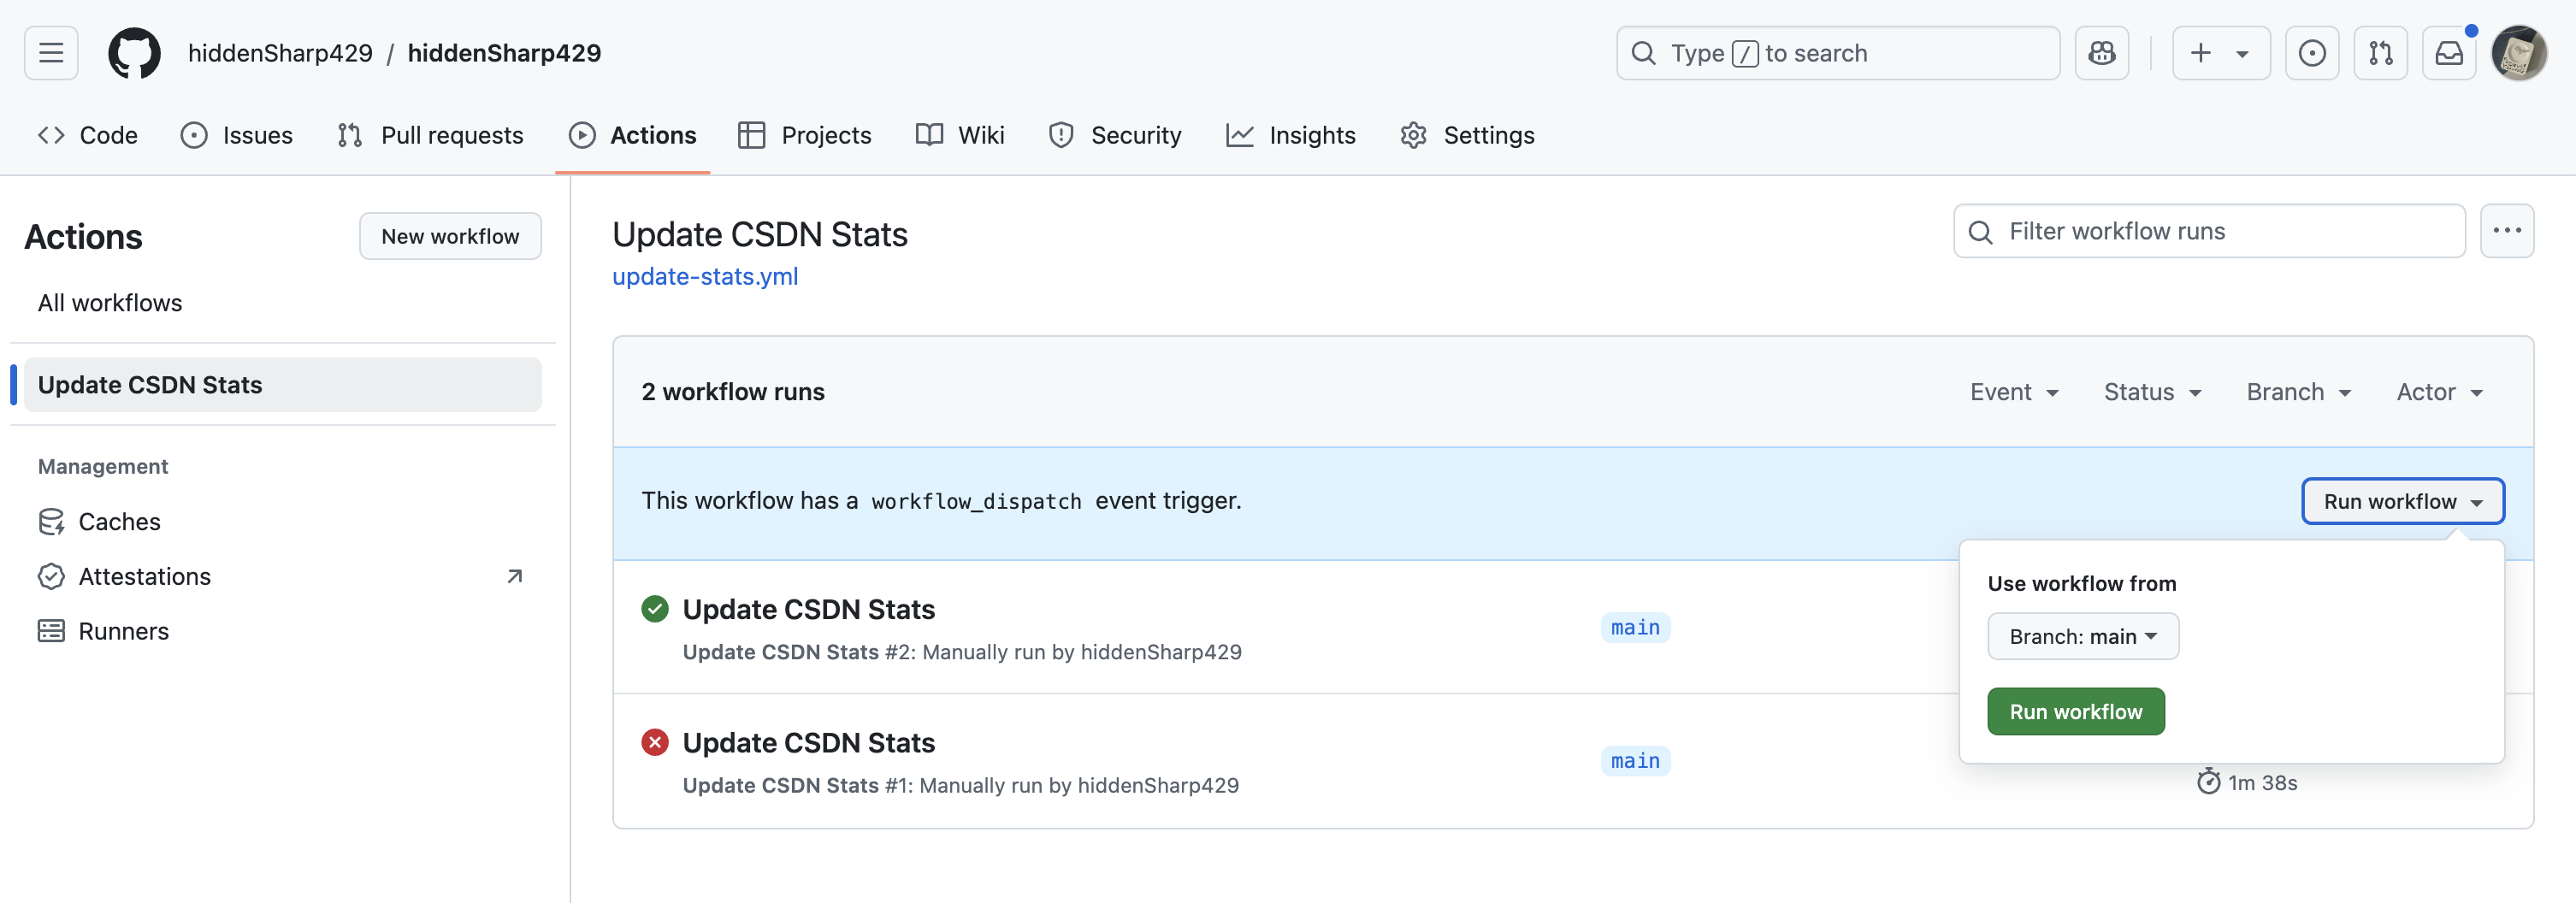
6. 在Github Action中执行工作流
等待片刻后,就能发现你的README文件中的统计站位信息被替换成当前的CSDN统计信息了,之后的每周都会执行相同的工作流,达到一周更新一次数据的效果。

注意事项
- 确保仓库名称为 username/username
- 替换脚本中的 YOUR_CSDN_URL 为你的 CSDN 主页地址
- GitHub Actions 需要有写入权限,默认配置已包含
- 统计数据每周更新一次,也可手动触发更新
若是出现问题也可以直接访问我的Profile仓库,clone到本地后修改为自己的github用户名以及CSDN的url之类的配置信息,URL:https://github.com/hiddenSharp429/hiddenSharp429
自定义
- 修改更新频率:调整 yml 文件中的 cron 表达式
- 更改统计指标:修改 Python 脚本中的选择器
- 自定义徽章样式:修改 README.md 中的徽章参数
调试建议
- 使用 workflow_dispatch 手动触发测试
- 查看 Actions 日志定位问题
- 本地运行 Python 脚本验证爬虫逻辑
结束语
如果有疑问欢迎大家留言讨论,你如果觉得这篇文章对你有帮助可以给我一个免费的赞吗?你们的认可是我最大的分享动力!