欢迎来到"雪碧聊技术"CSDN博客!
在这里,您将踏入一个专注于Java开发技术的知识殿堂。无论您是Java编程的初学者,还是具有一定经验的开发者,相信我的博客都能为您提供宝贵的学习资源和实用技巧。作为您的技术向导,我将不断探索Java的深邃世界,分享最新的技术动态、实战经验以及项目心得。
让我们一同在Java的广阔天地中遨游,携手提升技术能力,共创美好未来!感谢您的关注与支持,期待在"雪碧聊技术"与您共同成长!
目录
①接口:使用AJAX和服务器通讯时,所使用的URL地址、请求方法、请求参数。
一、接口文档
1、什么是接口、接口文档?
①接口:使用AJAX和服务器通讯时,所使用的URL地址、请求方法、请求参数。
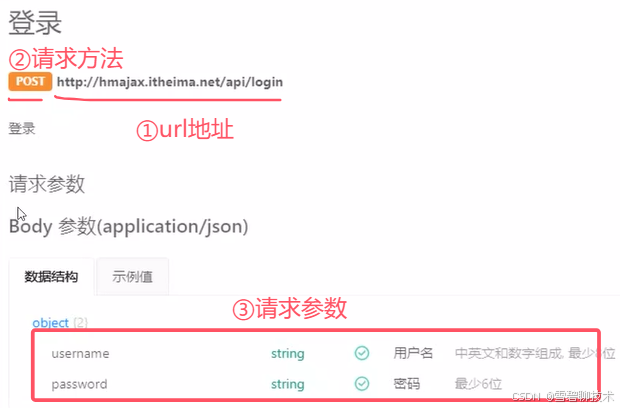
②接口文档:由后端提供的、描述接口的文章。
2、根据接口文档,编写登录代码
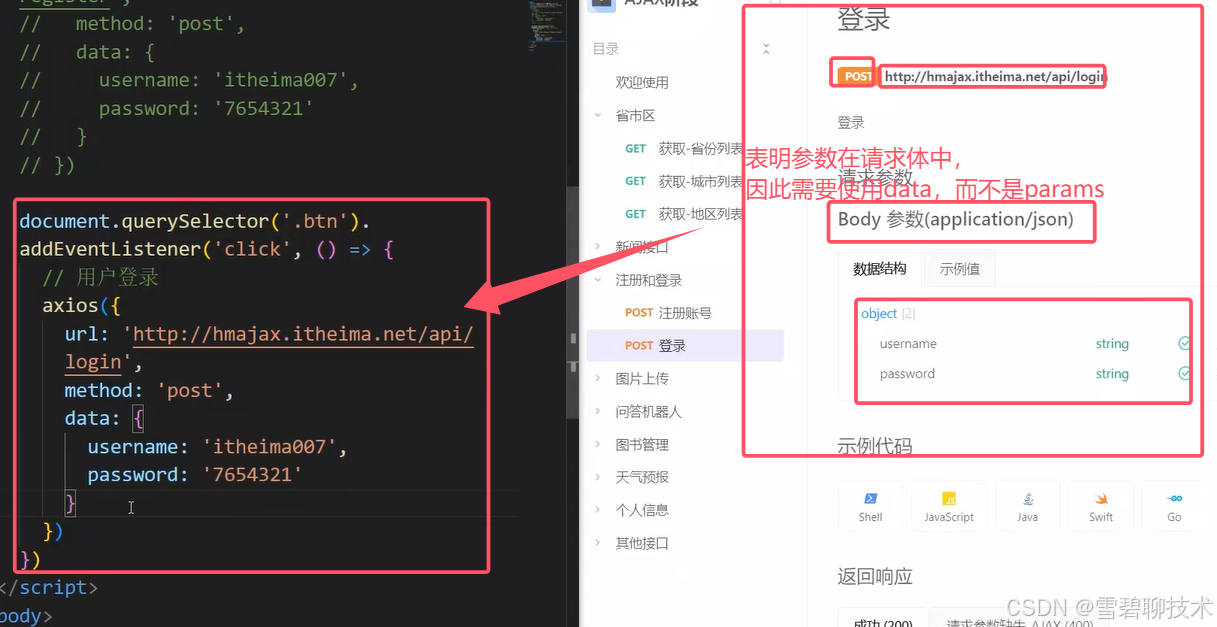
二、根据接口文档完善登录功能
1、查看接口文档
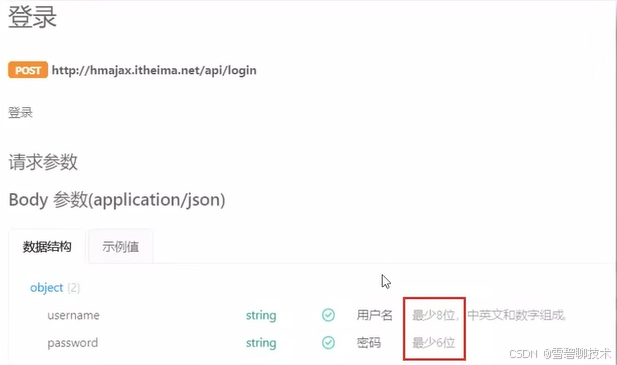
- url地址:http://hmajax.itheima.net/api/login
- 请求方法:post
- 请求参数:username、password(JSON格式,放入请求体中,因此要用data声明,而不用params)
2、编写前端登录代码
①点击登录时,判断用户名和密码长度
②提交数据和服务器通信
③显示服务器返回的提示信息
html
<!DOCTYPE html>
<html lang="en">

<head>
  <meta charset="UTF-8">
  <meta http-equiv="X-UA-Compatible" content="IE=edge">
  <meta name="viewport" content="width=device-width, initial-scale=1.0">
  <title>11.案例_登录</title>
  <!-- 引入bootstrap.css -->
  <link rel="stylesheet" href="https://cdn.jsdelivr.net/npm/bootstrap@5.2.2/dist/css/bootstrap.min.css">
  <!-- 公共 -->
  <style>
    html,
    body {
      background-color: #EDF0F5;
      width: 100%;
      height: 100%;
      display: flex;
      justify-content: center;
      align-items: center;
    }

    .container {
      width: 520px;
      height: 540px;
      background-color: #fff;
      padding: 60px;
      box-sizing: border-box;
    }

    .container h3 {
      font-weight: 900;
    }
  </style>
  <!-- 表单容器和内容 -->
  <style>
    .form_wrap {
      color: #8B929D !important;
    }

    .form-text {
      color: #8B929D !important;
    }
  </style>
  <!-- 提示框样式 -->
  <style>
    .alert {
      transition: .5s;
      opacity: 0;
    }

    .alert.show {
      opacity: 1;
    }
  </style>
</head>

<body>
  <div class="container">
    <h3>欢迎-登录</h3>
    <!-- 登录结果-提示框 -->
    <div class="alert alert-success" role="alert">
      提示消息
    </div>
    <!-- 表单 -->
    <div class="form_wrap">
      <form>
        <div class="mb-3">
          <label for="username" class="form-label">账号名</label>
          <input type="text" class="form-control username">
        </div>
        <div class="mb-3">
          <label for="password" class="form-label">密码</label>
          <input type="password" class="form-control password">
        </div>
        <button type="button" class="btn btn-primary btn-login"> 登 录 </button>
      </form>
    </div>
  </div>
  <script src="https://cdn.jsdelivr.net/npm/axios/dist/axios.min.js"></script>
  <script>
    // 目标1:点击登录时,用户名和密码长度判断,并提交数据和服务器通信

    //1.1 登录-点击事件
    document.querySelector('.btn-login').addEventListener('click',
      () => {
        //1.2 获取用户名和密码
        const username = document.querySelector('.username').value
        const password = document.querySelector('.password').value

        //1.3账号、密码格式校验
        if(username.length < 8){
          console.log('用户名必须大于等于8位')
          return //阻止代码继续执行
        }

        if (password.length < 6) {
          console.log('密码必须大于等于6位')
          return //阻止代码继续执行
        }

        //console.log('提交数据到服务器')
        //1.4 基于axios提交用户名和密码
        axios({
          url:'http://hmajax.itheima.net/api/login',
          method:'post',
          data:{
            username, //前、后端的变量名一致,可简写
            password //前、后端的变量名一致,可简写
          }
        }).then(result=>{
          console.log(result)
          console.log(result.data.message)
        }).catch(error =>{
          console.log(error)
          console.log(error.response.data.message)
        })

      }
    )

  </script>
</body>
</html>
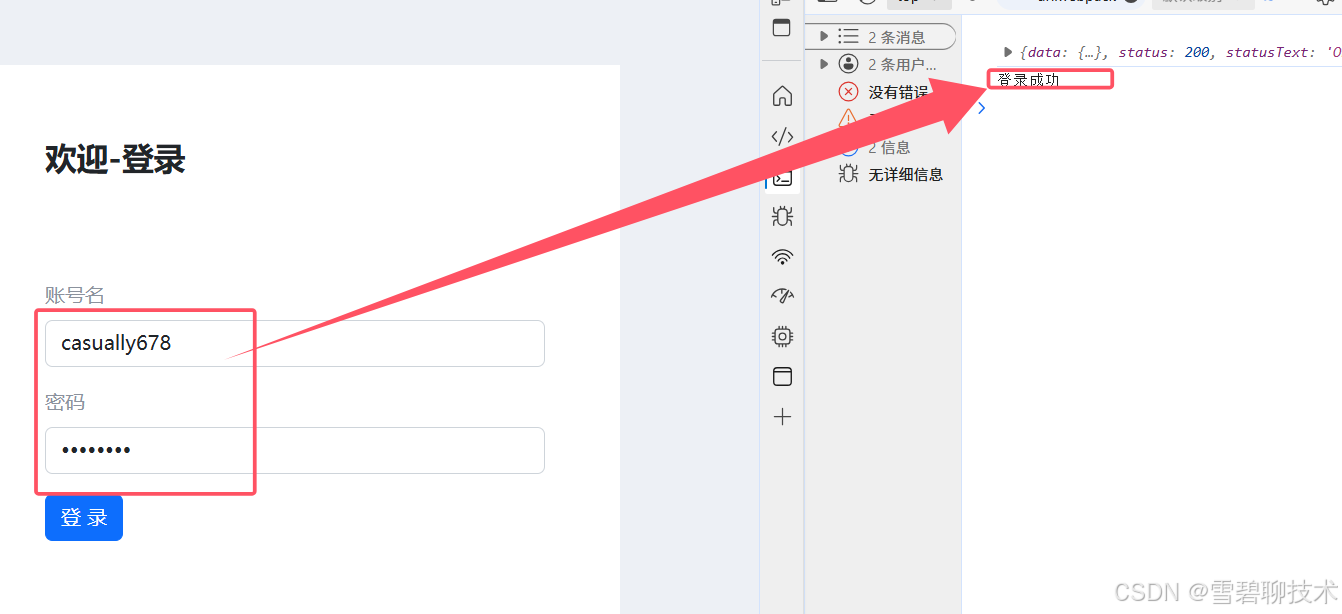
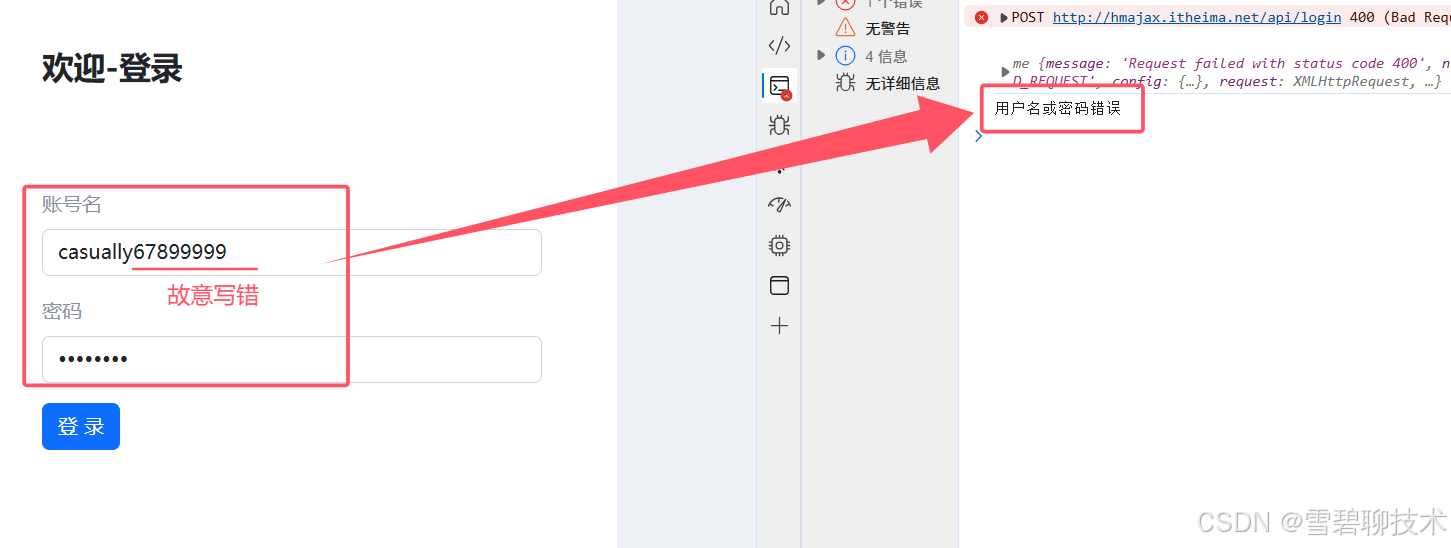
运行效果:
3、优化上面代码的提示框(使外表美观)
html
<!DOCTYPE html>
<html lang="en">

<head>
  <meta charset="UTF-8">
  <meta http-equiv="X-UA-Compatible" content="IE=edge">
  <meta name="viewport" content="width=device-width, initial-scale=1.0">
  <title>12.案例_登录_提示消息</title>
  <!-- 引入bootstrap.css -->
  <link rel="stylesheet" href="https://cdn.jsdelivr.net/npm/bootstrap@5.2.2/dist/css/bootstrap.min.css">
  <!-- 公共 -->
  <style>
    html,
    body {
      background-color: #EDF0F5;
      width: 100%;
      height: 100%;
      display: flex;
      justify-content: center;
      align-items: center;
    }

    .container {
      width: 520px;
      height: 540px;
      background-color: #fff;
      padding: 60px;
      box-sizing: border-box;
    }

    .container h3 {
      font-weight: 900;
    }
  </style>
  <!-- 表单容器和内容 -->
  <style>
    .form_wrap {
      color: #8B929D !important;
    }

    .form-text {
      color: #8B929D !important;
    }
  </style>
  <!-- 提示框样式 -->
  <style>
    .alert {
      transition: .5s;
      opacity: 0;
    }

    .alert.show {
      opacity: 1;
    }
  </style>
</head>

<body>
  <div class="container">
    <h3>欢迎-登录</h3>
    <!-- 登录结果-提示框 -->
    <div class="alert alert-success" role="alert">
      提示消息
    </div>
    <!-- 表单 -->
    <div class="form_wrap">
      <form>
        <div class="mb-3">
          <label for="username" class="form-label">账号名</label>
          <input type="text" class="form-control username">
        </div>
        <div class="mb-3">
          <label for="password" class="form-label">密码</label>
          <input type="password" class="form-control password">
        </div>
        <button type="button" class="btn btn-primary btn-login"> 登 录 </button>
      </form>
    </div>
  </div>
  <script src="https://cdn.jsdelivr.net/npm/axios/dist/axios.min.js"></script>
  <script>
    // 目标1:点击登录时,用户名和密码长度判断,并提交数据和服务器通信
    // 目标2:使用提示框,反馈提示消息
      //2.1 获取提示框
      const myAlert = document.querySelector('.alert')
      /**
       * 2.2 封装提示框函数,重复调用,满足提示需求
       * 功能:
       * 1.显示提示框
       * 2.不同提示文字msg,和成功-绿色/失败-红色isSuccess(true成功/false失败)
       * 3.过2秒后,让提示框自动消失
      */

      function alertFn(msg, isSuccess) {
        //1>显示提示框
        myAlert.classList.add('show')
        //2>添加提示信息、提示框颜色
        myAlert.innerText = msg
        const bgStyle = isSuccess ? 'alert-success' : 'alert-danger'
        myAlert.classList.add(bgStyle)
        //3>过2秒隐藏提示框
        setTimeout(() => {
          myAlert.classList.remove('show')
          //避免类名冲突,因此要重置背景色
          myAlert.classList.remove(bgStyle)
        },2000)


      }

    // 1.1 登录-点击事件
    document.querySelector('.btn-login').addEventListener('click', () => {
      // 1.2 获取用户名和密码
      const username = document.querySelector('.username').value
      const password = document.querySelector('.password').value
      // console.log(username, password)

      // 1.3 判断长度
      if (username.length < 8) {
        //console.log('用户名必须大于等于8位')
        alertFn('用户名必须大于等于8位', false)
        return // 阻止代码继续执行
      }
      if (password.length < 6) {
        //console.log('密码必须大于等于6位')
        alertFn('密码必须大于等于6位', false)
        return // 阻止代码继续执行
      }

      // 1.4 基于axios提交用户名和密码
      // console.log('提交数据到服务器')
      axios({
        url: 'http://hmajax.itheima.net/api/login',
        method: 'POST',
        data: {
          username,
          password
        }
      }).then(result => {
        //显示成功
        alertFn(result.data.message, true)
        console.log(result)
        console.log(result.data.message)
      }).catch(error => {
        //显示失败
        alertFn(error.response.data.message, false)
        console.log(error)
        console.log(error.response.data.message)
      })
    })
  </script>
</body>

</html>
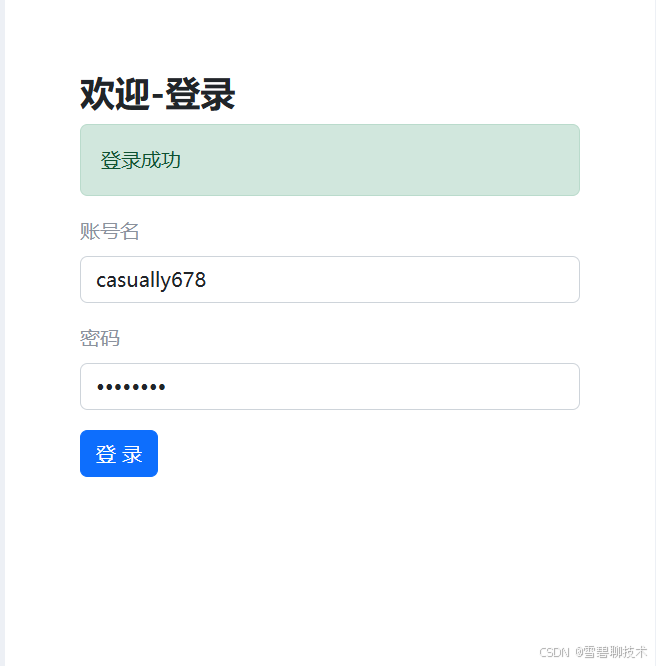
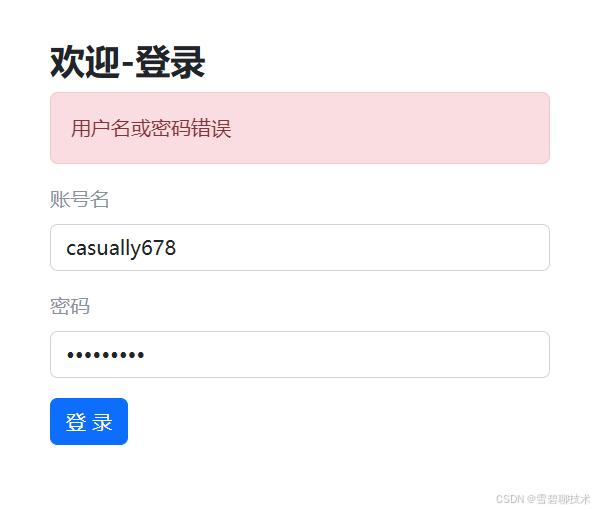
运行效果:
以上就是接口文档的全部内容,想了解更多axios知识,请关注本博主~~
