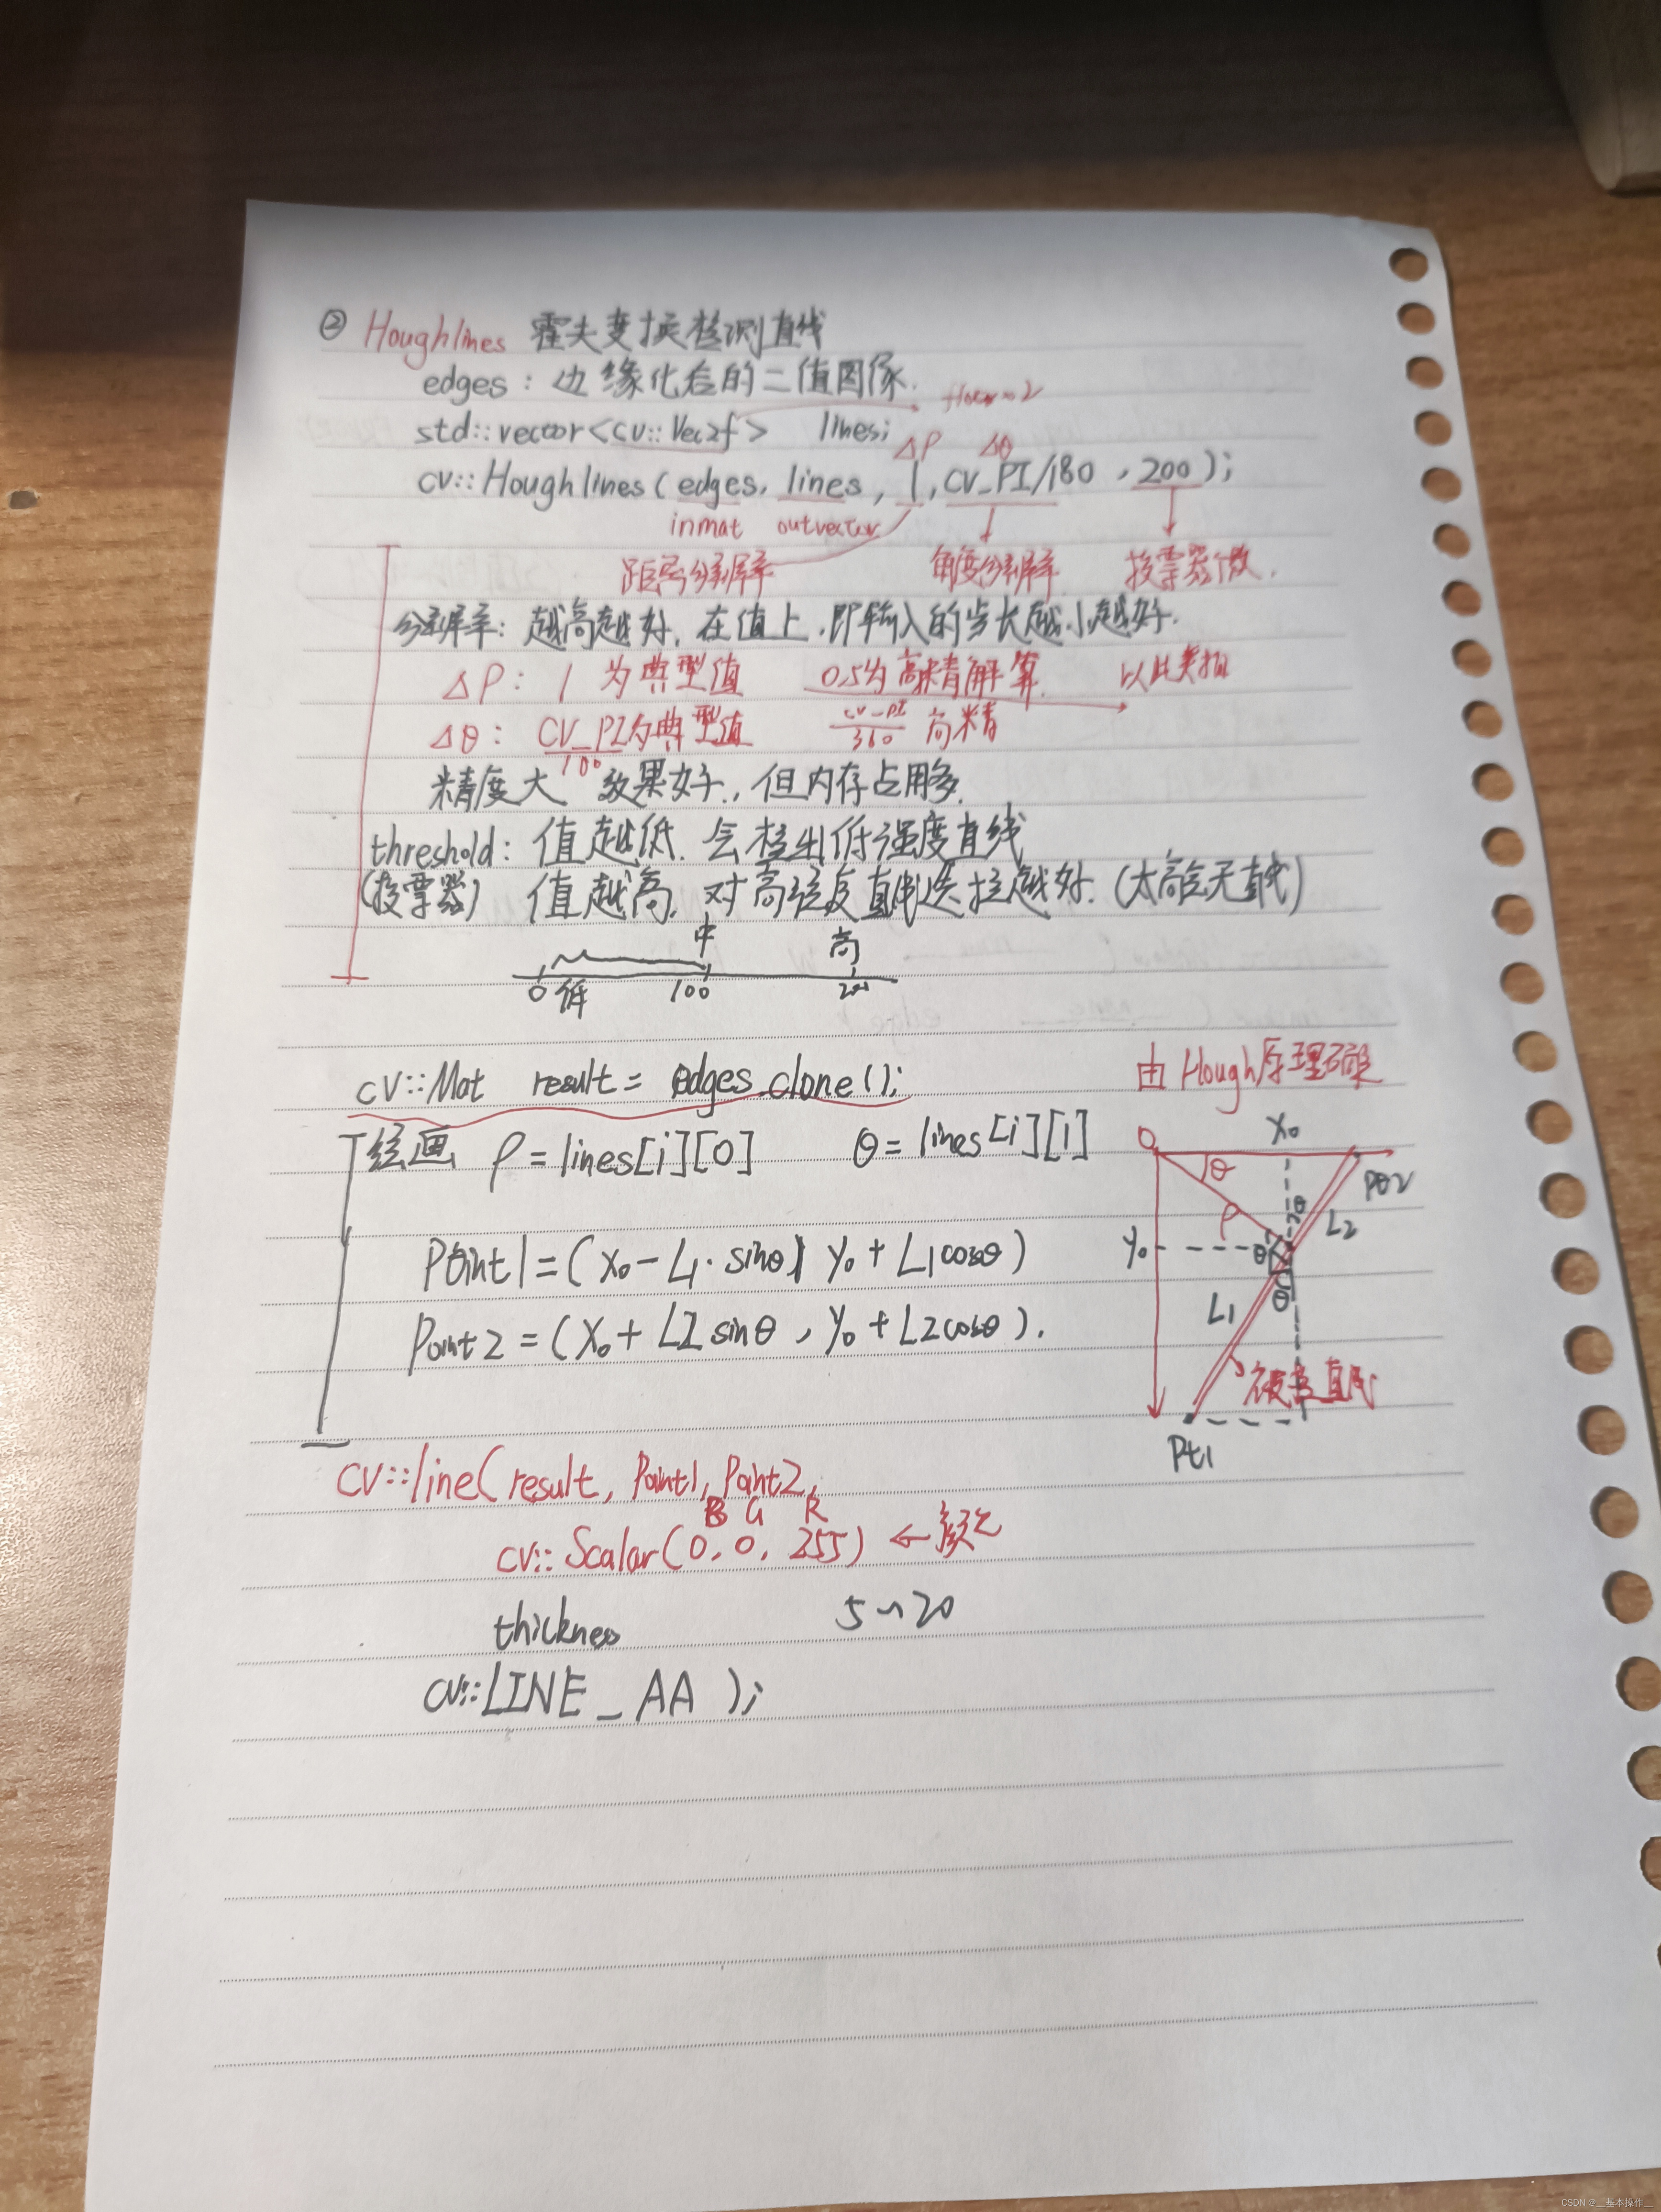
opencv中集成了很多好用的函数,比如霍夫变换检测直线的函数,当然,考虑到看我文章的人水平,我这里只讲讲如何使用这个函数,和怎么调节其中的参数
先把运行效果PO出来吧

cpp
#include "CV_ERROR.h"
#include "MCV_funs.hpp"

#include <opencv2/opencv.hpp>
#include <iostream>

int main() {
    cv::utils::logging::setLogLevel(cv::utils::logging::LOG_LEVEL_ERROR);
    // 读取PNG图像
    //cv::Mat image = cv::imread("lines.png", cv::IMREAD_COLOR);
    cv::Mat image = cv::imread("PIC.jpg", cv::IMREAD_COLOR);
    if (image.empty()) {
        std::cerr << "无法读取图像文件" << std::endl;
        return -1;
    }
    showimageWin(image);

    // 转换为灰度图像
    cv::Mat gray;
    cv::cvtColor(image, gray, cv::COLOR_BGR2GRAY);

    // 应用边缘检测(Canny)
    cv::Mat edges;
    cv::Canny(gray, edges, 150, 200, 3);

    showimageWin(edges);

    // 使用霍夫变换检测直线
    std::vector<cv::Vec2f> lines;
    cv::HoughLines(edges, lines, 0.5, CV_PI / 360, 200);


    // 在原图上绘制检测到的直线
    cv::Mat result = image.clone();
    for (size_t i = 0; i < lines.size(); i++) {
        float rho = lines[i][0], theta = lines[i][1];
        cv::Point pt1, pt2;
        double a = cos(theta), b = sin(theta);
        double x0 = a * rho, y0 = b * rho;
        pt1.x = cvRound(x0 + 1000 * (-b));
        pt1.y = cvRound(y0 + 1000 * (a));
        pt2.x = cvRound(x0 - 1000 * (-b));
        pt2.y = cvRound(y0 - 1000 * (a));
        cv::line(result, pt1, pt2, cv::Scalar(0, 255, 0), 15, cv::LINE_AA);
    }

    // 显示结果图像
    showimageWin(result);
    cv::waitKey();

    return 0;
}
下面是原理类的讲解,本鼠懒得重复做笔记了,直接PO在下面吧ψ(`∇´)ψ