以前在设置控件样式或自定义控件时,都是使用触发器来进行样式更改。触发器可以在属性值发生更改时启动操作。
像这样:
<Style TargetType="ListBoxItem">
        <Setter Property="Opacity" Value="0.5" />
        <Setter Property="MaxHeight" Value="75" />
        <Style.Triggers>
            <Trigger Property="IsSelected" Value="True">
                <Trigger.Setters>
                    <Setter Property="Opacity" Value="1.0" />
                </Trigger.Setters>
            </Trigger>
        </Style.Triggers>
</Style>还可以使用VisualState类来进行样式更改
VisualState类实现了可以让控件始终处于特定的状态的功能。例如,当鼠标在控件的表面上移动时,该控件被视为处于MouseOver状态。 没有特定状态的控件被视为处于 Normal 状态。
状态分为多个组,前面提到的MouseMove状态和Normal属于 CommonStates 状态组(VisualStateGroup)。 大多数控件都有两个状态组:CommonStates和 FocusStates。
在应用于控件的每个状态组中,控件始终处于每个组的一种状态。但是,控件不能处于同一组中的两种不同状态。
完整的状态可以参照下表:
| VisualState 名称 | VisualStateGroup 名称 | 描述 |
|---|---|---|
| Normal | CommonStates | 默认状态。 |
| MouseOver | CommonStates | 鼠标指针悬停在控件上方。 |
| Pressed | CommonStates | 已按下控件。 |
| Disabled | CommonStates | 已禁用控件。 |
| Focused | FocusStates | 控件有焦点。 |
| Unfocused | FocusStates | 控件没有焦点。 |
注意:
1、VisaulState只适用于状态改变需要过渡动画的情况,如果不想实现过渡效果,推荐使用触发器。
2、如果要查找WPF附带控件可视状态(VisualState)的名称,可参阅控件源码。(https://docs.microsoft.com/zh-cn/dotnet/framework/wpf/controls/control-styles-and-templates)
下面我们使用VisualState类来自定义一个Button样式
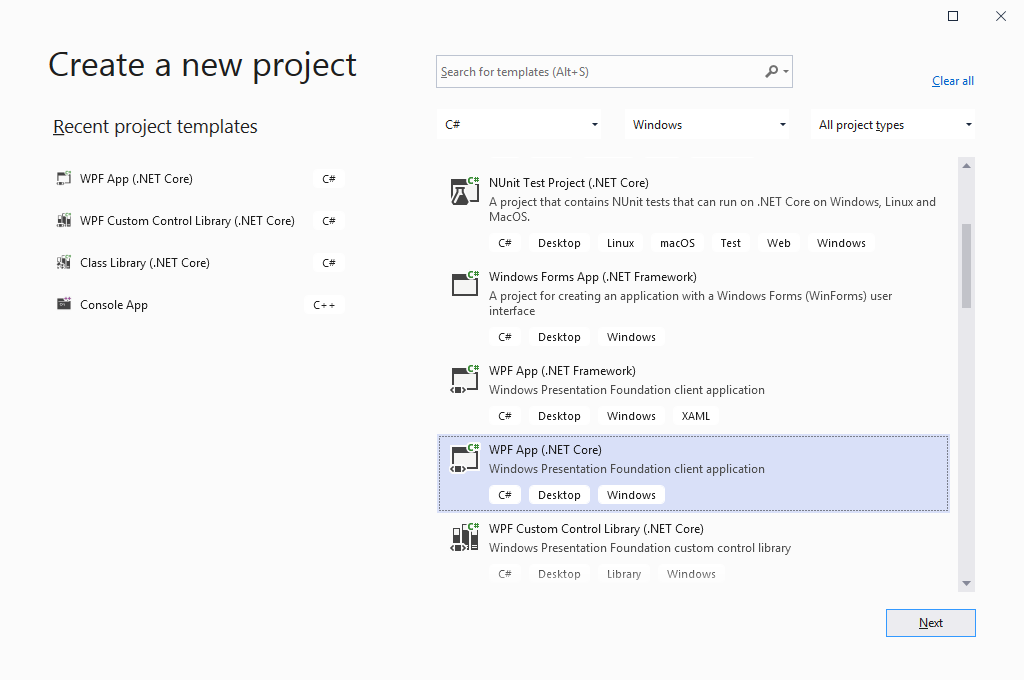
1、使用Visual Studio 2019创建一个.Net Core WPF程序

2、在MainWindow中添加两个Button控件,第一个button用于展示状态,第二个button用于模拟控制第一个按钮的状态
 1 <Window x:Class="VisualStateDemo.MainWindow"
 2         xmlns="http://schemas.microsoft.com/winfx/2006/xaml/presentation"
 3         xmlns:x="http://schemas.microsoft.com/winfx/2006/xaml"
 4         xmlns:d="http://schemas.microsoft.com/expression/blend/2008"
 5         xmlns:mc="http://schemas.openxmlformats.org/markup-compatibility/2006"
 6         xmlns:local="clr-namespace:VisualStateDemo"
 7         mc:Ignorable="d"
 8         Title="MainWindow" Height="450" Width="800">
 9     <StackPanel>
10         <Button Content="button1" HorizontalAlignment="Center" VerticalAlignment="Center" Width="88" Height="26" Name="btn"/>
11         <Button Content="button2(make button 1 to Pressed state)" HorizontalAlignment="Center" VerticalAlignment="Bottom"  Height="26" Name="btn_2" Click="btn_2_Click"/>
12     </StackPanel>
13 </Window>
3、在Windows.Resources下定义样式,如下
 1  <Window.Resources>
 2         <Style TargetType="{x:Type Button}">
 3             <Setter Property="BorderBrush" Value="Transparent"/>
 4             <Setter Property="Background" Value="Black"/>
 5             <Setter Property="Foreground" Value="White"/>
 6
 7             <Setter Property="Template">
 8                 <Setter.Value>
 9                     <ControlTemplate TargetType="{x:Type Button}">
10                         <Border BorderThickness="{TemplateBinding Border.BorderThickness}" BorderBrush="{TemplateBinding Border.BorderBrush}" Background="{TemplateBinding Panel.Background}" Name="border" SnapsToDevicePixels="True" CornerRadius="5">
11                             <VisualStateManager.VisualStateGroups>
12                                 <VisualStateGroup Name="CommonStates">
13                                     <VisualState Name="Normal">
14                                         <Storyboard>
15                                             <ColorAnimation Storyboard.TargetName="border"
16                                     Storyboard.TargetProperty="(Border.Background).(SolidColorBrush.Color)"
17                                     To="{TemplateBinding Background}"
18                                     Duration="0:0:0.3"/>
19                                         </Storyboard>
20                                     </VisualState>
21                                     <VisualState Name="MouseOver">
22                                         <Storyboard>
23                                             <ColorAnimation Storyboard.TargetName="border"
24                                     Storyboard.TargetProperty="(Border.Background).(SolidColorBrush.Color)"
25                                     To="Silver"
26                                     Duration="0:0:0.3"/>
27                                         </Storyboard>
28                                     </VisualState>
29                                     <VisualState Name="Pressed">
30                                         <Storyboard>
31                                             <ColorAnimation Storyboard.TargetName="border" Storyboard.TargetProperty="(Border.Background).(SolidColorBrush.Color)" To="#7b8488" Duration="0:0:0.3"/>
32                                         </Storyboard>
33                                     </VisualState>
34                                 </VisualStateGroup>
35                             </VisualStateManager.VisualStateGroups>
36                             <ContentPresenter RecognizesAccessKey="True" Content="{TemplateBinding ContentControl.Content}" ContentTemplate="{TemplateBinding ContentControl.ContentTemplate}" ContentStringFormat="{TemplateBinding ContentControl.ContentStringFormat}" Name="contentPresenter" Margin="{TemplateBinding Control.Padding}" HorizontalAlignment="{TemplateBinding Control.HorizontalContentAlignment}" VerticalAlignment="{TemplateBinding Control.VerticalContentAlignment}" SnapsToDevicePixels="{TemplateBinding UIElement.SnapsToDevicePixels}" Focusable="False" />
37                         </Border>
38                     </ControlTemplate>
39                 </Setter.Value>
40             </Setter>
41         </Style>
42     </Window.Resources>
4、运行效果如下:

5、使用代码控制VisualState
调用System.Windows.VisualStateManager.GoToState函数,可以指定控件的状态。
在按钮2的单击事件中添加以下代码
1         private void btn_2_Click(object sender, RoutedEventArgs e)
2         {
3             System.Windows.VisualStateManager.GoToState(btn, "Pressed", false);
4         }
如果是自定义控件,直接将控件名换成this即可
1 System.Windows.VisualStateManager.GoToState(this, "Pressed", false);注意:
如果在ControlTemplate中使用 VisualStateManager,应该调用 GoToState 方法。
如果在ControlTemplate 外使用 VisualStateManager (例如,如果在 UserControl 中或在单个元素中使用 VisualStateManager),应该调用 GoToElementState 方法。