1、版本及环境 python 为3.9.12, django为4.2详细信息如下:
asgiref           3.8.1
attrs             24.2.0
autobahn          24.4.2
Automat           24.8.1
cffi              1.17.1
channels          3.0.3
constantly        23.10.4
cryptography      44.0.0
daphne            3.0.2
Django            4.2
hyperlink         21.0.0
sqlparse          0.5.3
tomli             2.2.1
Twisted           24.11.0
txaio             23.1.1
typing_extensions 4.12.2
tzdata            2024.2
zope.interface    7.2
Django安装指定版本(上边的安装包也有可能安装多了,但必须要有python,Django, channels)
pip install django==4.2 -i https://pypi.tuna.tsinghua.edu.cn/simple2、创建Django项目
django-admin startproject ws_demo
python manage.py startapp app01
3、安装channels
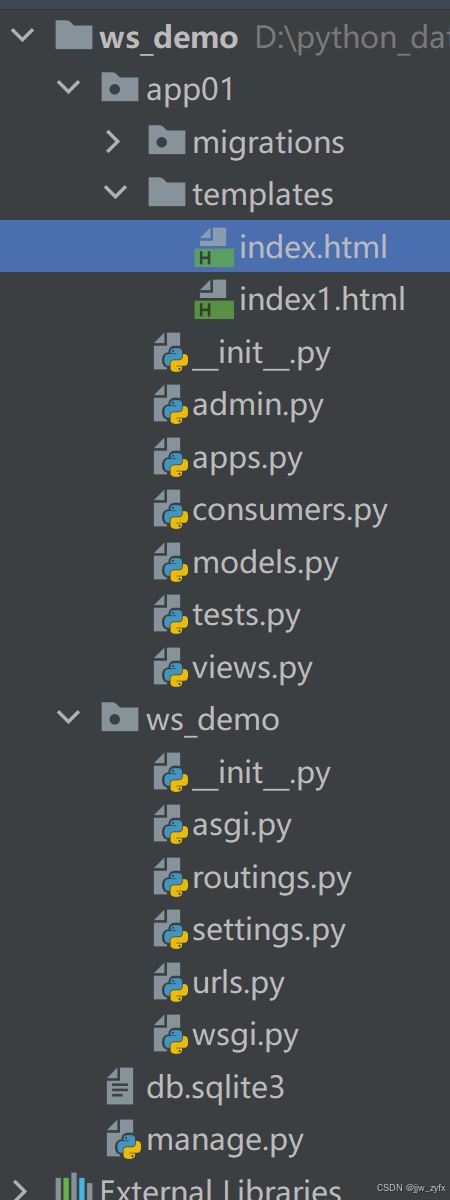
pip install channels==3.0.3 -i -i https://pypi.tuna.tsinghua.edu.cn/simple4、项目整体目录结构如下:
5、配置setting文件
INSTALLED_APPS = [
    'django.contrib.admin',
    'django.contrib.auth',
    'django.contrib.contenttypes',
    'django.contrib.sessions',
    'django.contrib.messages',
    'django.contrib.staticfiles',
    "channels",   # 添加channels
    "app01.apps.App01Config"   # 添加app01
]

# 在setting最后添加一个 "ws_demo.asgi.application" 意思是"项目名称.asgi文件.application变量名称"
ASGI_APPLICATION = "ws_demo.asgi.application"
6、asgi.py文件中的内容如下;
import os
from channels.routing import ProtocolTypeRouter, URLRouter
# from django.conf.urls import url
# from chat import consumers
from django.core.asgi import get_asgi_application
from . import routings

os.environ.setdefault('DJANGO_SETTINGS_MODULE', 'ws_demo.settings')
# application = get_asgi_application()
application = ProtocolTypeRouter({
    "http": get_asgi_application(),
    'websocket': URLRouter(routings.websocket_urlpatterns)
})
7、新建routings.py文件,其内容如下:
from django.urls import re_path
from app01 import consumers

websocket_urlpatterns = [
    # 示例 url : xxxxx/room/x1/
    re_path(r"room/(?P<group>\w+)/$", consumers.ChatConsumer.as_asgi())
]
8、ws_demo下的urls.py中的内容如下:
from django.contrib import admin
from django.urls import path
from app01 import views

urlpatterns = [
    # path("admin/", admin.site.urls),
    path('index/', views.index),
]
9、在app01应用下新建templates目录,并在其下新建index.html,其内容如下:
html
<!DOCTYPE html>
<html lang="en">
<head>
    <meta charset="UTF-8">
    <title>Title</title>
    <style>
        .message {
            height: 300px;
            border: 1px solid #dddddd;
            width: 100%;
        }
    </style>
</head>

<body>
<div class="message" id="message"></div>
<div>
    <input type="text" placeholder="请输入" id="txt">
    <input type="button" value="发送" onclick="sendMsg()">
    <input type="button" value="关闭连接" onclick="closeConn()">
    <input type="button" value="重新建立连接" onclick="connect()">
</div>

<script>
    var socket = null;
    function connect() {
        socket = new WebSocket("ws:/127.0.0.1:8000/room/123/");

        // 连接完成以后 客户端自动触发
        socket.onopen = function (event) {
            let tag = document.createElement("div")
            tag.innerHTML = "连接已建立"
            document.getElementById("message").appendChild(tag)
        }

        // 回调函数 当服务端有消息发送到时,自动触发
        socket.onmessage = function (event) {
            console.log(event.data);
            let tag = document.createElement("div");
            tag.innerText = event.data;
            document.getElementById("message").appendChild(tag)
        }

        // 当连接关闭时,触发
        socket.onclose = function (event) {
            let tag = document.createElement("div")
            tag.innerHTML = "连接已断开"
            document.getElementById("message").appendChild(tag)

        }
    }
    function sendMsg() {
        let tag = document.getElementById("txt")
        socket.send(tag.value)
    }
    function closeConn() {
        // 向服务端发送断开连接
        socket.close();
    }
    connect()
</script>
</body>
</html>
10、在app01应用下新建consumers.py文件其内容如下:
py
from channels.generic.websocket import WebsocketConsumer
from channels.exceptions import StopConsumer

#  简单版群聊就是定义个数组,并在连接时把对象添加到数组内,在断开链接时移除对象
CONN_LIST = []

class ChatConsumer(WebsocketConsumer):  # 继承WebsocketConsumer
   def websocket_connect(self, message):
       print("有人进行连接了。。。。")
       CONN_LIST.append(self)
       # 有客户端向后端发送 WebSocket 连接的请求时,自动触发(握手)
       self.accept()

   def websocket_receive(self, message):
       # 浏览器基于 WebSocket 向后端发送数据,自动触发接收消息
       print(message)
       #  一对一聊天
       # if message["text"] == "close":
       #     self.send("服务端主动关闭连接")
       #     #  服务端主动关闭连接
       #     self.close()
       # self.send(message["text"])
       for conn in CONN_LIST:
           conn.send(message["text"])


   def websocket_disconnect(self, message):
       # 客户端向服务端断开连接时,自动触发
       CONN_LIST.remove(self)
       print("连接断开!!")
       raise StopConsumer()
11、运行项目 在项目根目录下执行:
python manage.py runserver12、至此即可在浏览器中进行简单的多人聊天,结果如下:

