参考书籍:《Java代码审计》入门篇 人民邮电出版社
话不多说,上教程!!! 环境很重要!!!! 其他的环境不保证对
本机环境:java jdk 8 下载 选择 下载就行

然后
解压后进入 这个目录
打开docker-compose.yml 添加端口映射 把容器的端口映射到本地端口

然后:
先拉取镜像docker-compose up -d 再启动docker-compose up -d 一样的命令

然后进到容器里面

然后 vi user_projects/domains/base_domain/bin/setDomainEnv.sh

输入 /JAVA_DEBUG 快速查找 在下面添加
debugFlag="true"
export=debugFlag 然后按 Esc 输入 :wq! (强制写入保存并退出)
然后压缩
(要压缩modules 和wlserver_10.3)不压缩直接复制到 自己的Windows主机会因文件名长度过长报错
输入
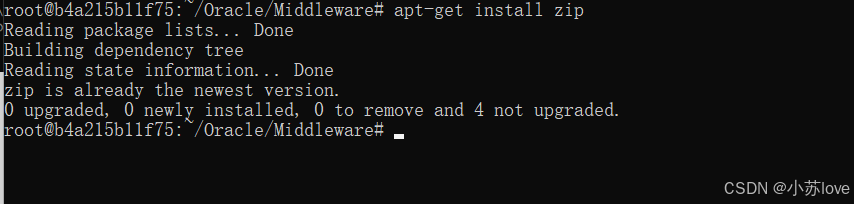
apt-get install zip
输入zip -r wlserver_10.3.zip wlserver_10.3 和zip -r modules.zip modules
root@b4a215b11f75:~/Oracle/Middleware# zip -r wlserver_10.3.zip wlserver_10.3
root@b4a215b11f75:~/Oracle/Middleware# zip -r modules.zip modules
检查是否成功压缩:

退出容器:
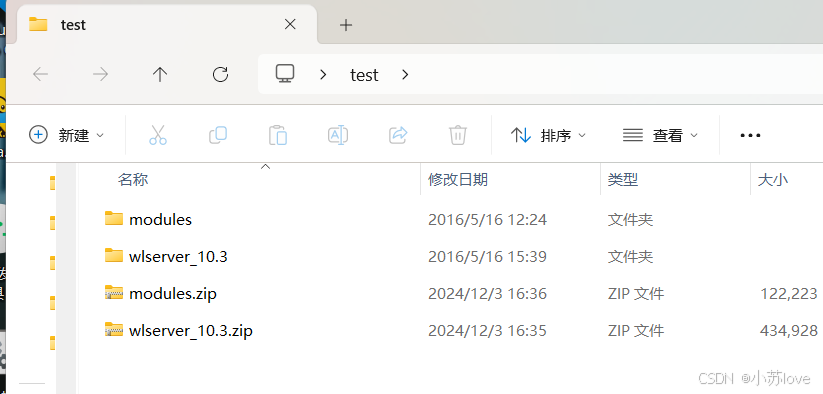
在 桌面创建一个空文件夹test
然后输入 docker cp b4a215b11f75:/root/Oracle/Middleware/wlserver_10.3.zip C:Users86181Desktop est 把容器的文件复制到test/

输入:docker cp b4a215b11f75:/root/Oracle/Middleware/modules.zip C:Users86181Desktop est
 然后解压缩:普通解压不行,又慢又报错!!!!!! 使用Bandizip
成功解压
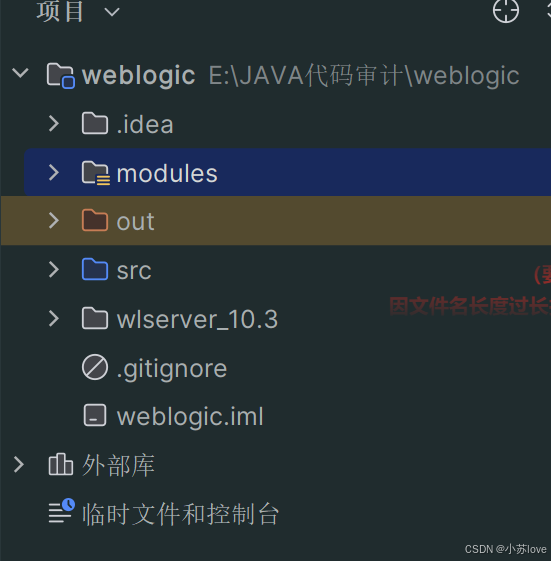
IDEA新建项目:然后把 modules 和 wlsserver_10.3 复制进来
看我的目录结构
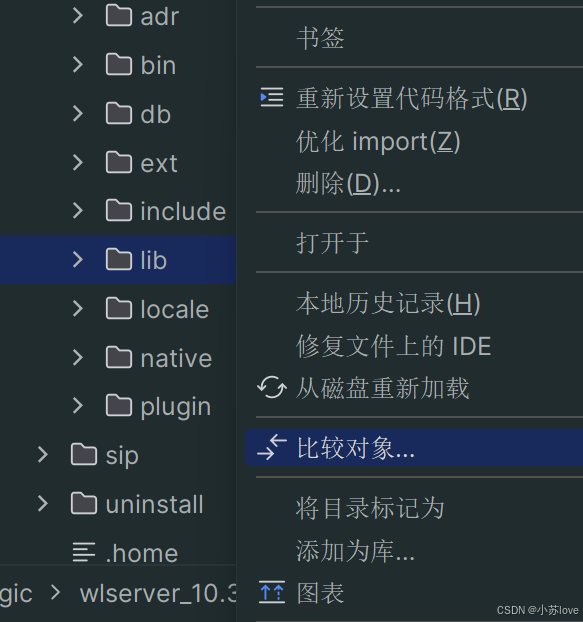
把wlserver_10.3/server/lib 和 modules 这两个文件夹 添加为库(Add as Library)
添加远程调试模式:
编辑配置,添加
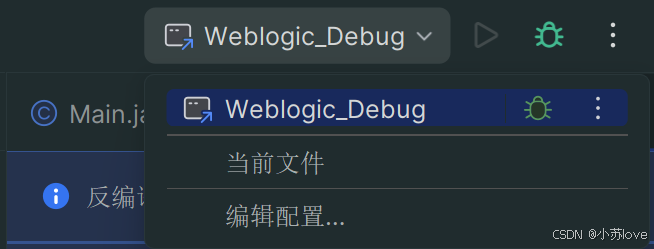
点击远程JVM调试
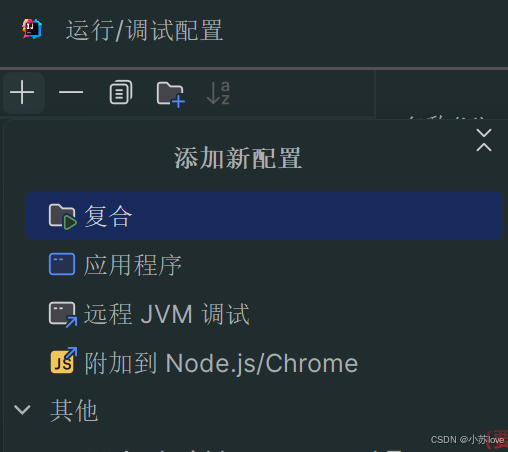
端口写8453 jdk 选5-8

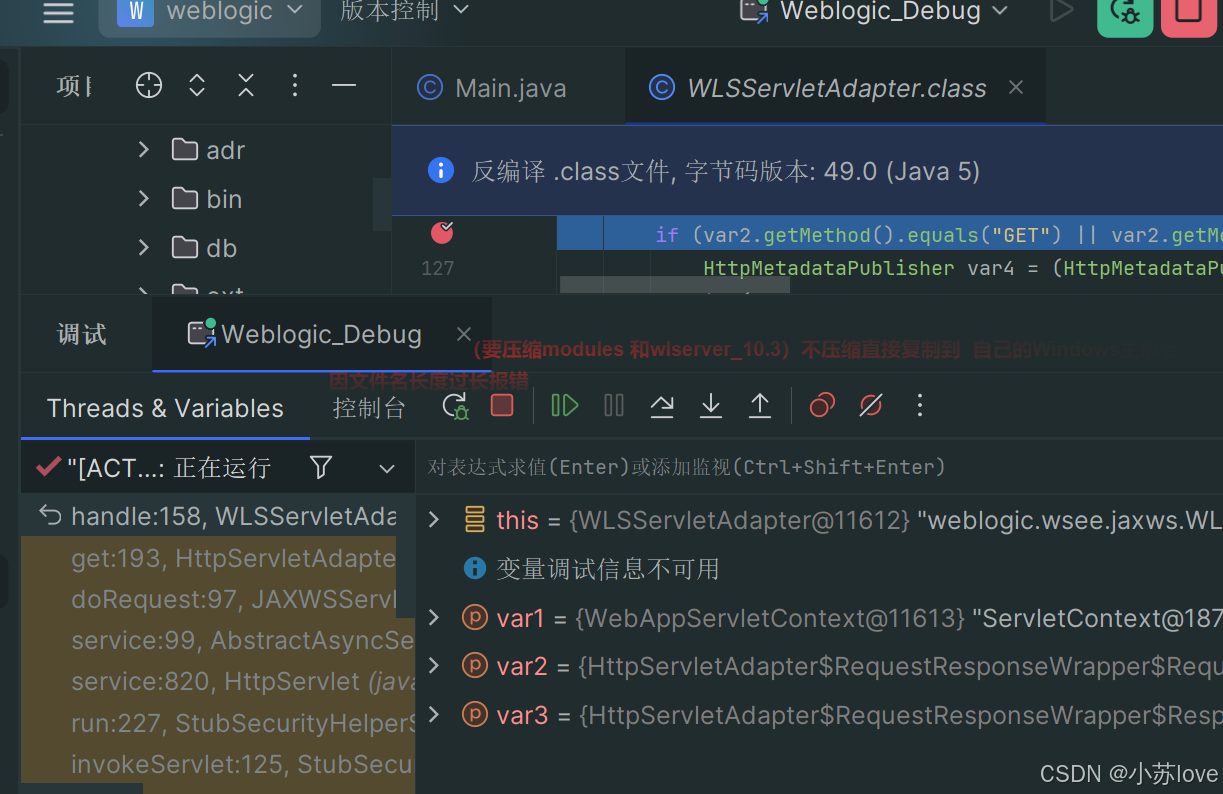
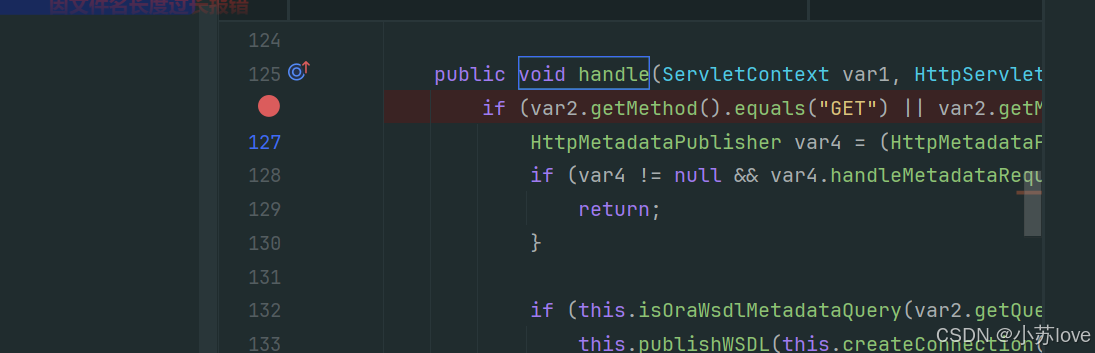
进入 wlserver_10.3serverlibweblogic.jar!weblogicwseejaxwsWLSServletAdapter.class
打上断点:
点击小虫子进行调试
先确保你的Docker是这样的(处于运行态)docker ps 查看正在运行的容器

浏览器打开输入:http://127.0.0.1:7001/wls-wsat/CoordinatorPortType11
出现debug调试信息即为成功!!!!