实验内容:
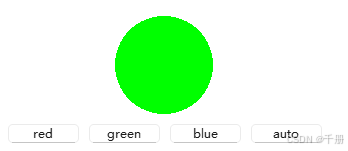
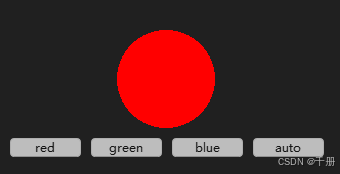
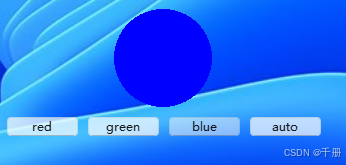
1 背景透明
2 三个按键设置颜色
3 auto按键自动切换颜色
4 1秒定时器
实验效果:
测试代码
widget.h
cpp
#ifndef WIDGET_H
#define WIDGET_H

#include <QWidget>
#include <QObject>
#include <QHBoxLayout>
#include <QVBoxLayout>
#include <QLabel>
#include <QPushButton>
#include <QDebug>
#include <QPainter>
#include <QTimer>

class MyLed : public QLabel
{
    Q_OBJECT
public:
    MyLed(int w = 100,int h = 100,QWidget *parent = nullptr):QLabel(parent),m_width(w),m_height(h)
    {
        this->setWindowFlag(Qt::FramelessWindowHint);
        setAttribute(Qt::WA_TranslucentBackground);//设置背景透明
        setColor(QColor(0,0,0,0));
    }
    void setColor(const QColor & color)
    {
        QPixmap pix(m_width,m_height);
        pix.fill(Qt::transparent);

        QPainter p(&pix);
        p.setPen(QColor(0,0,0,0));
        p.setBrush(color);

        QRect rect =  pix.rect();
        int rx = (rect.width() - 2)/2;
        int ry = (rect.height() - 2)/2;
        qDebug() <<"rx = " << rx;
        qDebug() <<"ry = " << ry;
        p.drawEllipse(rect.center(),rx,ry);
        this->setPixmap(pix);
    }
private:
    QColor m_color;
    int m_width;
    int m_height;
};

#define func(num) button_##num##_click()

class Widget : public QWidget
{
    Q_OBJECT
public:
    Widget(QWidget *parent = nullptr)
        : QWidget(parent)
    {
        this->setWindowFlag(Qt::FramelessWindowHint);
        setAttribute(Qt::WA_TranslucentBackground);//设置背景透明

        m_timer.setInterval(1000);

        connect(&m_timer,&QTimer::timeout,[this](){
            static int count = 1;
            switch(count){
            case 1:
                this->func(1);
                break;
            case 2:
                this->func(2);
                break;
            case 3:
                this->func(3);
                break;
            }
            count++;
            if(count > 3){
                count = 1;
            }

        });

        QVBoxLayout *root = new QVBoxLayout();
        QHBoxLayout *led_layout = new QHBoxLayout();
        QHBoxLayout *button_layout = new QHBoxLayout();
        this->setWindowTitle(QString::fromUtf8("LED监视器"));


        m_led = new MyLed();
        led_layout->addStretch();
        led_layout->addWidget(m_led);
        led_layout->addStretch();

        connect(m_button_1,SIGNAL(clicked()),this,SLOT(button_1_click()));
        connect(m_button_2,SIGNAL(clicked()),this,SLOT(button_2_click()));
        connect(m_button_3,SIGNAL(clicked()),this,SLOT(button_3_click()));
        connect(m_button_auto,SIGNAL(clicked()),this,SLOT(button_auto_click()));
        //QObject::connect(m_button_1,&QPushButton::clicked,someFunction);


        button_layout->addWidget(m_button_1);
        button_layout->addWidget(m_button_2);
        button_layout->addWidget(m_button_3);
        button_layout->addWidget(m_button_auto);

        root->addLayout(led_layout);
        root->addLayout(button_layout);
        this->setLayout(root);
    }
    ~Widget(){ }
    MyLed *m_led;
    QPushButton *m_button_1 = new QPushButton("red");
    QPushButton *m_button_2 = new QPushButton("green");
    QPushButton *m_button_3 = new QPushButton("blue");
    QPushButton *m_button_auto = new QPushButton("auto");
private slots:
    void button_1_click()
    {
        qDebug() <<QString::fromLocal8Bit("red");
        m_led->setColor(QColor(255,0,0));
    }
    void button_2_click()
    {
        qDebug() <<QString::fromLocal8Bit("green");
        m_led->setColor(QColor(0,255,0));
    }
    void button_3_click()
    {
        qDebug() <<QString::fromLocal8Bit("blue");
        m_led->setColor(QColor(0,0,255));
    }
    void button_auto_click()
    {
        QPushButton *button = (QPushButton *)sender();
        qDebug() << button->text();
        if(m_timer.isActive()){
            m_timer.stop();
        }else{
            m_timer.start();
        }

    }
private:
    QTimer m_timer;

};
#endif // WIDGET_H
main.cpp
cpp
#include "widget.h"

#include <QApplication>

void someFunction()
{
    qDebug() << QString::fromLocal8Bit("hehe");
}

int app_1(int argc, char *argv[])
{
    QApplication a(argc, argv);
    Widget w;
    w.show();
    return a.exec();
}

int app_2(int argc, char *argv[])
{
    QApplication a(argc, argv);
    MyLed w;
    w.setColor(QColor(255,0,0));
    w.show();
    return a.exec();
}

int main(int argc, char *argv[])
{
    return app_1(argc,argv);
    // return app_2(argc,argv);
}