一、实验目的
本文的实验目的是通过Python编程实践,实现对图的两种存储方式------邻接矩阵和邻接链表的掌握与应用。针对给定的有向图和无向图,通过编码实现这两种存储方式,并能够对图进行输出展示。
二、实验内容
- 图的存储方式实现 :
- 使用邻接矩阵方式存储图:定义一个
GraphMatrix类,包含图的顶点数和邻接矩阵。通过add_edge方法添加图的边,并能够通过print_graph方法输出图的邻接矩阵表示。 - 使用邻接链表方式存储图:定义一个
EdgeNode类表示图中的边,以及一个GraphList类表示图本身,包含顶点数和邻接链表。通过add_edge方法添加图的边,并能够通过print_graph方法输出图的邻接链表表示。
- 使用邻接矩阵方式存储图:定义一个
- 图的输出 :
- 针对每种存储方式,实现对图的输出功能。对于邻接矩阵,输出其二维数组形式;对于邻接链表,以顶点为起点,输出其所有相邻顶点和对应的权重,形成链式结构。
- 示例图的存储与输出 :
- 通过给出的示例图(包含有向图和无向图),分别使用邻接矩阵和邻接链表方式进行存储,并输出存储结果,以验证存储方式和输出功能的正确性。

- 通过给出的示例图(包含有向图和无向图),分别使用邻接矩阵和邻接链表方式进行存储,并输出存储结果,以验证存储方式和输出功能的正确性。
三、实验演示
1.邻接矩阵方法&实验结果截图:
python
#邻接矩阵
class GraphMatrix:
    def __init__(self, num_vertices):
        self.num_vertices = num_vertices
        # 使用 float('inf') 表示无边连接的权重
        self.matrix = [[float('inf')] * num_vertices for _ in range(num_vertices)]
        # 可以添加一行一列用于表示自身到自身的权重(通常为0,但在这个例子中我们不存储它)

    def add_edge(self, u, v, weight):
        self.matrix[u][v] = weight
        # 在无向图中,也需要添加下面这行
        # self.matrix[v][u] = weight

    def print_graph(self):
        for row in self.matrix:
            print(row)

        # 示例


g = GraphMatrix(5)
g.add_edge(0, 1, 5)
g.add_edge(0, 4, 10)
g.add_edge(1, 2, 3)
g.add_edge(1, 3, 1)
g.add_edge(1, 4, 8)
g.add_edge(3, 4, 6)

g.print_graph()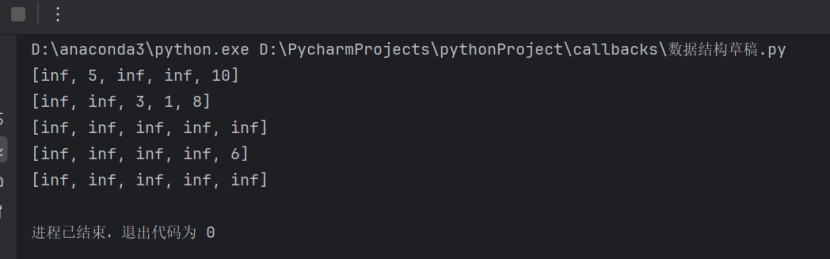
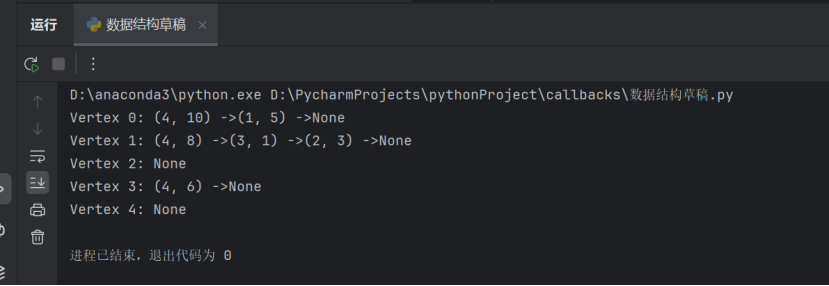
2.邻接链表&实验结果截图:
python
# 邻接链表
class EdgeNode:
    def __init__(self, vertex, weight):
        self.vertex = vertex
        self.weight = weight
        self.next = None


class GraphList:
    def __init__(self, num_vertices):
        self.num_vertices = num_vertices
        self.adj_list = [None] * num_vertices

    def add_edge(self, u, v, weight):
        new_node = EdgeNode(v, weight)
        new_node.next = self.adj_list[u]
        self.adj_list[u] = new_node
        # 在无向图中,也需要添加反向边
        # new_node_reverse = EdgeNode(u, weight)
        # new_node_reverse.next = self.adj_list[v]
        # self.adj_list[v] = new_node_reverse

    def print_graph(self):
        for i in range(self.num_vertices):
            print(f"Vertex {i}: ", end="")
            current = self.adj_list[i]
            while current:
                print(f"({current.vertex}, {current.weight}) ->", end="")
                current = current.next
            print("None")

        # 示例


g = GraphList(5)
g.add_edge(0, 1, 5)
g.add_edge(0, 4, 10)
g.add_edge(1, 2, 3)
g.add_edge(1, 3, 1)
g.add_edge(1, 4, 8)
g.add_edge(3, 4, 6)

g.print_graph()