目录
训练其实和yolov10差不多 因为v10就是在v8的基础上做了优化
YoloV10 训练自己的数据集(推理,转化,C#部署)_c# yolo-CSDN博客
首先你要定义v8的模型特征文件
下方是完整的模型编写函数
protected List<Prediction> ParseOutput(DenseTensor<float> output, Image image)
{
    DenseTensor<float> output2 = output;
    ConcurrentBag<Prediction> result = new ConcurrentBag<Prediction>();
    int width = image.Width;
    int height = image.Height;
    int w = width;
    int h = height;
    float num = (float)base.ModelInputWidth / (float)w;
    float num2 = (float)base.ModelInputHeight / (float)h;
    float val = num;
    float val2 = num2;
    float gain = Math.Min(val, val2);
    num = ((float)base.ModelInputWidth - (float)w * gain) / 2f;
    float num3 = ((float)base.ModelInputHeight - (float)h * gain) / 2f;
    float xPad = num;
    float yPad = num3;
    Parallel.For(0, output2.Dimensions[0], delegate (int i)
    {
        Parallel.For(0, (int)(output2.Length / output2.Dimensions[1]), delegate (int j)
        {
            float xMin = (output2[new int[3] { i, 0, j }] - output2[new int[3] { i, 2, j }] / 2f - xPad) / gain;
            float yMin = (output2[new int[3] { i, 1, j }] - output2[new int[3] { i, 3, j }] / 2f - yPad) / gain;
            float xMax = (output2[new int[3] { i, 0, j }] + output2[new int[3] { i, 2, j }] / 2f - xPad) / gain;
            float yMax = (output2[new int[3] { i, 1, j }] + output2[new int[3] { i, 3, j }] / 2f - yPad) / gain;
            xMin = Utils.Clamp(xMin, 0f, w);
            yMin = Utils.Clamp(yMin, 0f, h);
            xMax = Utils.Clamp(xMax, 0f, w - 1);
            yMax = Utils.Clamp(yMax, 0f, h - 1);
            Parallel.For(0, base.ModelOutputDimensions - 4, delegate (int l)
            {
                float num4 = output2[new int[3]
                {
                    i,
                    4 + l,
                    j
                }];
                if (!(num4 < base.Confidence))
                {
                    result.Add(new Prediction
                    {
                        Label = base.Labels[l],
                        Score = num4,
                        Rectangle = new RectangleF(xMin, yMin, xMax - xMin, yMax - yMin)
                    });
                }
            });
        });
    });
    return result.ToList();
}
然后你要在控件窗体中定义应用这些方法以及函数
一、定义你的标签
标签你也可以将其写成txt文件再用ReadAllText方法进行读取也是可以的

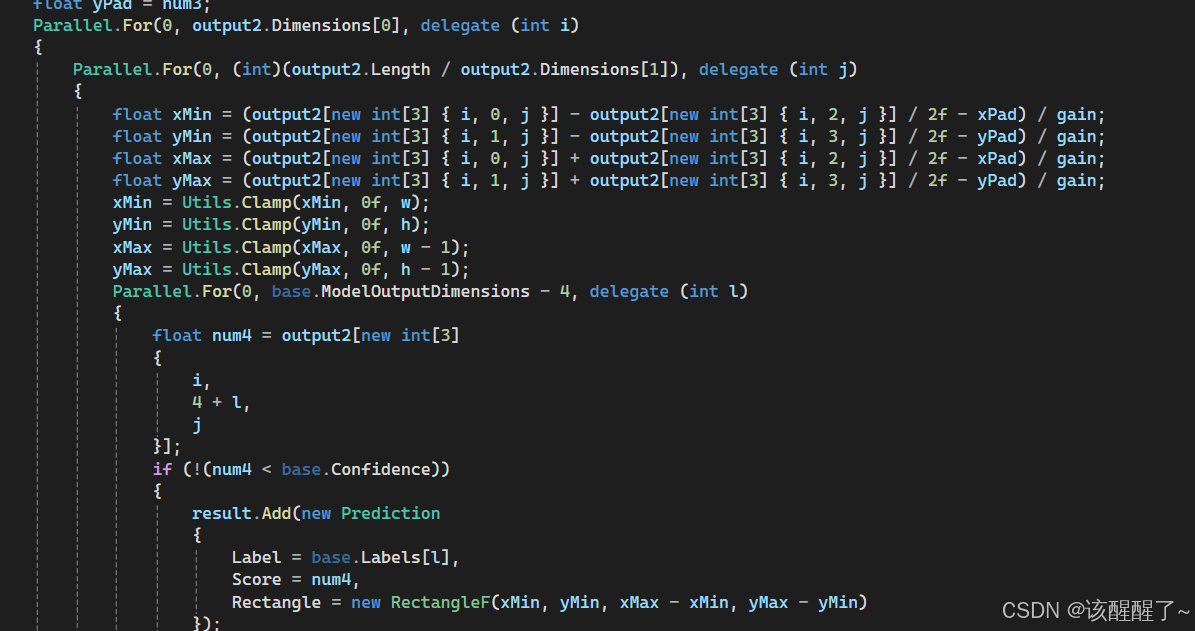
二、下方是定义模块和坐标的方法
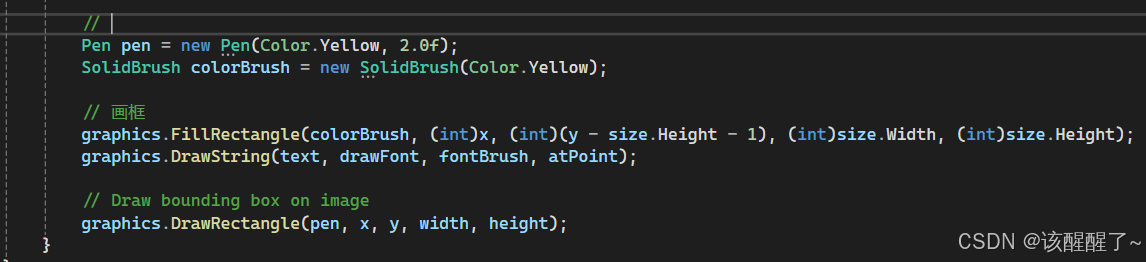
三、画框
完整推理函数代码块
private void showimg(OpenFileDialog dialog)
{
string imgpath = dialog.FileName;
Image image = System.Drawing.Image.FromFile(imgpath);
Form form = new Form();
form.Text = dialog.SafeFileName + " " + image.Width + "x" + image.Height;
PictureBox pictureBox = new PictureBox();
pictureBox.Parent = form;
//图像预测
var predictions = yolov8.Predict(image);
// Draw your boxes
//using var graphics = Graphics.FromImage(image);
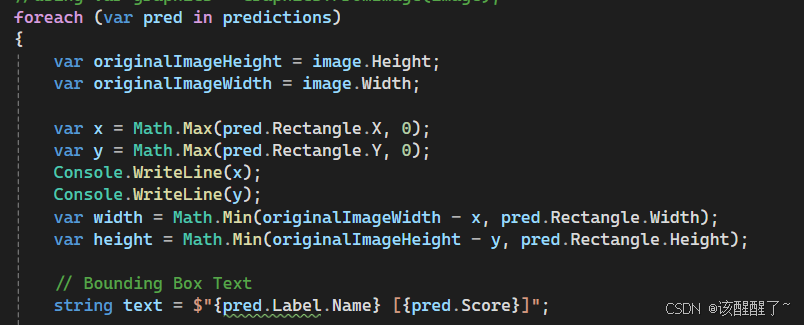
foreach (var pred in predictions)
{
var originalImageHeight = image.Height;
var originalImageWidth = image.Width;
var x = Math.Max(pred.Rectangle.X, 0);
var y = Math.Max(pred.Rectangle.Y, 0);
Console.WriteLine(x);
Console.WriteLine(y);
var width = Math.Min(originalImageWidth - x, pred.Rectangle.Width);
var height = Math.Min(originalImageHeight - y, pred.Rectangle.Height);
// 框定义
string text = $"{pred.Label.Name} [{pred.Score}]";
using (Graphics graphics = Graphics.FromImage(image))
{
graphics.CompositingQuality = CompositingQuality.HighQuality;
graphics.SmoothingMode = SmoothingMode.HighQuality;
graphics.InterpolationMode = InterpolationMode.HighQualityBicubic;
//
Font drawFont = new Font("consolas", 11, FontStyle.Regular);
SizeF size = graphics.MeasureString(text, drawFont);
SolidBrush fontBrush = new SolidBrush(Color.Black);
Point atPoint = new Point((int)x, (int)y - (int)size.Height - 1);
//
Pen pen = new Pen(Color.Yellow, 2.0f);
SolidBrush colorBrush = new SolidBrush(Color.Yellow);
// 画框
graphics.FillRectangle(colorBrush, (int)x, (int)(y - size.Height - 1), (int)size.Width, (int)size.Height);
graphics.DrawString(text, drawFont, fontBrush, atPoint);
// Draw bounding box on image
graphics.DrawRectangle(pen, x, y, width, height);
}
}
pictureBox.Width = image.Width;
pictureBox.Height = image.Height;
pictureBox1.Image = (Bitmap)image.Clone();
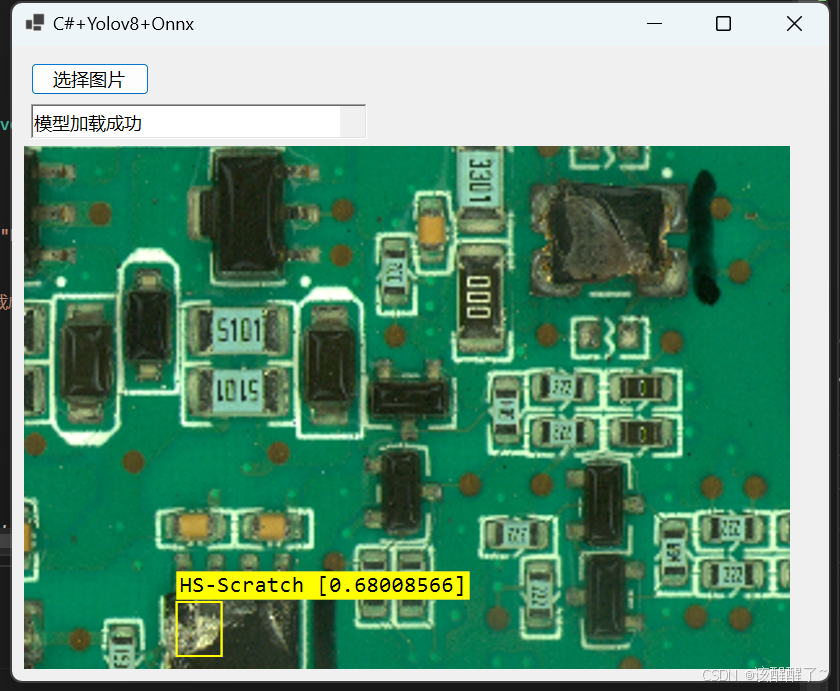
}效果展示