0. 简介
关于UCloud(优刻得)旗下的compshare算力共享平台
UCloud(优刻得)是中国知名的中立云计算服务商,科创板上市,中国云计算第一股。
Compshare GPU算力平台隶属于UCloud,专注于提供高性价4090算力资源,配备独立IP,支持按时、按天、按月灵活计费,支持github、huggingface访问加速。
使用下方链接注册可获得20元算力金,免费体验10小时4090云算力
https://www.compshare.cn/?ytag=GPU_lovelyyoshino_Lcsdn_csdn_display
在计算机图形学领域,3D高斯点云(3D Gaussian Splatting)技术因其在实时渲染中的应用而备受关注。之前我们在3D Gaussian Splatting是什么以及为什么这么火作为第一篇对3DGS做了一系列的科普。然后在《如何搭建RGBD GS-ICP SLAM环境以及如何与自己编的pcl并存》以及《Ubuntu20.04安装LibTorch并完成高斯溅射环境搭建》中介绍了GS相关的一些拓展操作和实机项目使用。同时在《认识3D Gaussian Splatting以及如何和ROS结合完成实时建图》进一步给读者大概展示了怎么样将点云数据和相机keyframe数据结合在一起,然后做高斯渲染。我们这一篇继续和优刻得合作,来带着大家看一看gaussian-splatting-cuda这个项目,以及如何进一步和LIVO融合的。目前相关镜像已经存入https://www.compshare.cn/images-detail?ImageID=compshareImage-16x8xihnhol3&ImageType=Community中了

1. 3D高斯点云技术的主要融合手段
在3D高斯点云(3D Gaussian Splatting,3DGS)技术的发展中,前端和后端的有效结合成为了实现高效且高质量渲染的关键。以下是3DGS主要融合的手段,包括前端点云图像融合、后端高斯训练以及混合高斯模型的介绍。
1.1 前端点云图像融合
前端部分主要负责从传感器(如相机、激光雷达等)获取数据,并通过相应的算法将这些数据融合成点云图像。以下是一些常用的前端融合方法:
-
CoCo-LIC:这是一种协同点云和图像传感器融合的方法,旨在通过结合多种传感器的数据,提高环境感知的精度。CoCo-LIC利用深度学习技术优化数据融合过程,从而提升SLAM(Simultaneous Localization and Mapping)系统的表现。
-
FAST-LVIO:该方法采用紧耦合的视觉惯性里程计(Visual-Inertial Odometry)技术,能够实现实时的点云生成和地图构建。通过将视觉数据与惯性测量单元(IMU)数据结合,FAST-LVIO在动态环境中仍能保持高精度。
-
FAST-LIO2:作为FAST-LVIO的改进版本,FAST-LIO2引入了更高效的优化算法,能够在更复杂的环境中进行实时点云图像融合。其核心思想是通过局部优化来提高全局地图的精度。
-
DLIO:深度学习视觉惯性里程计(Deep Learning Visual-Inertial Odometry)利用深度学习模型对传感器数据进行处理,以增强对动态场景的适应能力,进而提升点云图像的质量和准确性。
这些前端方法通过结合不同的传感器数据,为后端的高斯训练提供了高质量的点云输入。然后再+后端高斯训练来完成整个训练。后端部分主要负责对前端生成的点云进行训练与处理,以实现高效的渲染与表示。以下是一些重要的后端高斯训练方法:
-
Gaussian-Splatting:这一方法通过将点云表示为高斯分布,能够有效处理大规模点云数据。Gaussian-Splatting通过将点云中的每个点视为一个高斯核,利用其光照和颜色信息,实现高质量的渲染效果。
-
Mip-Splatting:Mip-Splatting是对Gaussian-Splatting的扩展,考虑了多分辨率的高斯核,使得在不同视距下的渲染效果更加平滑。通过采用多级别的高斯核,Mip-Splatting能够在渲染时动态选择合适的细节层次,提高性能。
-
Street Gaussians:这一方法专注于街道场景的高斯表示,特别适用于城市环境中的点云数据。Street Gaussians利用场景的几何特征,优化了高斯的分布和密度,从而提升渲染的真实感。
-
OpenSplat:OpenSplat是一个开源项目,旨在提供高效的高斯点云处理框架。它集成了多种高斯处理技术,支持用户根据具体需求进行灵活配置。
-
gaussian-splatting-cuda:这是一个基于CUDA实现的高斯点云处理库,利用GPU加速高斯渲染和训练过程。通过并行计算,gaussian-splatting-cuda能够显著提高渲染速度,适用于实时应用场景。
1.2 混合高斯模型
混合高斯模型(Mixture of Gaussians)在3DGS中具有重要的应用,特别是在处理复杂场景时,能够提供更灵活的表示。
-
LOG-3DGS:这是一个基于对数高斯点云表示的模型,旨在解决传统高斯模型在动态场景中的局限性。通过对数变换,LOG-3DGS能够更好地捕捉场景的细节变化,提高渲染的稳定性和准确性。
-
GS-LIVM:该方法结合了高斯点云和视觉惯性里程计(LIVM)技术,能够在动态环境中高效地进行点云生成与处理。GS-LIVM利用高斯模型的优势,在保证渲染质量的同时,提升了系统的实时性和鲁棒性。
通过以上的前端和后端融合手段,3D高斯点云技术能够高效地处理和渲染复杂场景,为实时图形学和计算机视觉等领域的发展提供了强有力的支持。
2. 环境安装
2.1 软件要求
- 操作系统:Linux(推荐使用Ubuntu 22.04)
- CMake:版本3.24或更高
- CUDA:版本11.7或更高(可能支持低版本,但需手动设置并测试)
- Python:需要安装开发头文件
- libtorch:详细的安装说明见项目文档
- 其他依赖:通过CMake脚本自动处理
2.2 安装步骤
以下是安装环境的详细步骤:
bash
# 更新系统
sudo apt-get update

# 安装基本依赖
sudo apt-get install build-essential cmake libtbb-dev python3-dev

# 安装CUDA(根据您的系统选择合适的CUDA版本)
# 请参考NVIDIA官网获取安装指导

# 安装Eigen
git clone https://github.com/eigenteam/eigen-git-mirror
cd eigen-git-mirror
git checkout 3.3.7
mkdir build && cd build
cmake .. && sudo make install
cd ../../

# 安装nlohmann-json
sudo apt-get install nlohmann-json3-dev

# 安装GLM
sudo apt-get install libglm-dev

# 安装OpenCV
mkdir -p opencv && cd opencv
git clone https://github.com/opencv/opencv.git
git clone https://github.com/opencv/opencv_contrib.git
cd opencv
git checkout 4.4.0
cd ../opencv_contrib
git checkout 4.4.0
cd ../../
mkdir -p opencv/opencv/build && cd opencv/opencv/build
cmake -D CMAKE_BUILD_TYPE=RELEASE -D CMAKE_INSTALL_PREFIX=/usr/local -D OPENCV_EXTRA_MODULES_PATH=../../opencv_contrib/modules ..
make -j16
sudo make install
cd ../../

# 安装PCL
sudo apt-get install libboost-all-dev libgl1-mesa-dev libglu1-mesa-dev libflann-dev
git clone https://github.com/PointCloudLibrary/pcl.git
cd pcl
git checkout pcl-1.13.0
mkdir build && cd build
cmake -DCMAKE_BUILD_TYPE=None -DCMAKE_INSTALL_PREFIX=/usr/local -DBUILD_GPU=OFF -DBUILD_apps=OFF -DBUILD_examples=OFF ..
make -j16
sudo make install
cd ../../
到此为止我们所有需要的环境就装完了

3. 测试与性能评估
在环境安装完成后,您可以开始测试项目的性能。以下是一些测试步骤和性能评估结果。
3.1 测试数据集
项目不包含数据集,您可以从原始仓库下载数据集:
- 下载链接:tanks & trains
将下载的文件解压到项目的 data 文件夹。
3.2 gaussian-splatting-cuda安装编译
安装cuda环境
bash
git clone --recursive https://github.com/lovelyyoshino/gaussian-splatting-cuda
cd gaussian-splatting-cuda
wget https://download.pytorch.org/libtorch/cu118/libtorch-cxx11-abi-shared-with-deps-2.0.1%2Bcu118.zip
unzip  libtorch-cxx11-abi-shared-with-deps-2.0.1+cu118.zip -d external/
rm libtorch-cxx11-abi-shared-with-deps-2.0.1+cu118.zip
cmake -B build -DCMAKE_BUILD_TYPE=Release -DTORCH_CXX_FLAGS=/gaussian-splatting-cuda/external/libtorch
cmake --build build -- -j
安装SIBR view
bash
sudo apt install -y libglew-dev libassimp-dev libboost-all-dev libgtk-3-dev libopencv-dev libglfw3-dev libavdevice-dev libavcodec-dev libeigen3-dev libxxf86vm-dev libembree-dev

git clone --recursive https://github.com/Lurvelly/SIBR_viewers.git SIBR_viewers
cd SIBR_viewers
cmake -B build . -DCMAKE_BUILD_TYPE=Release
cmake --build build -j24 --target install --config Release -- -j 8
cd ..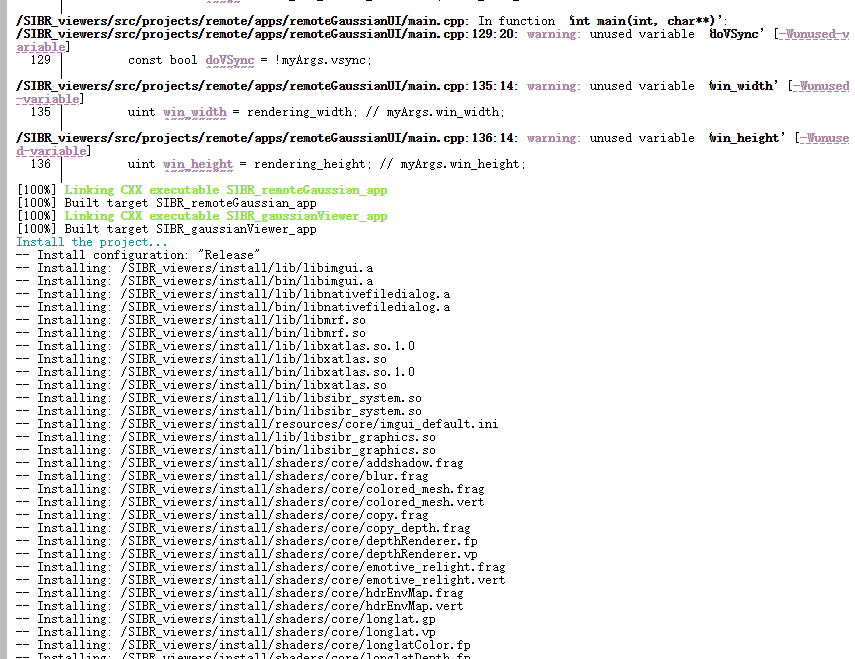
出现ASSIMP 找不到的问题时候,采纳这个解决方法:https://github.com/graphdeco-inria/gaussian-splatting/issues/840。需要将FIND_LIBRARY(ASSIMP_LIBRARY中的名字改成libassimp.so。
bash
CMake Error at /usr/share/cmake-3.28/Modules/FindPackageHandleStandardArgs.cmake:230 (message):
  ASSIMP wasn't found correctly.  Set ASSIMP_DIR to the root SDK installation
  directory.  (missing: ASSIMP_INCLUDE_DIR ASSIMP_LIBRARIES)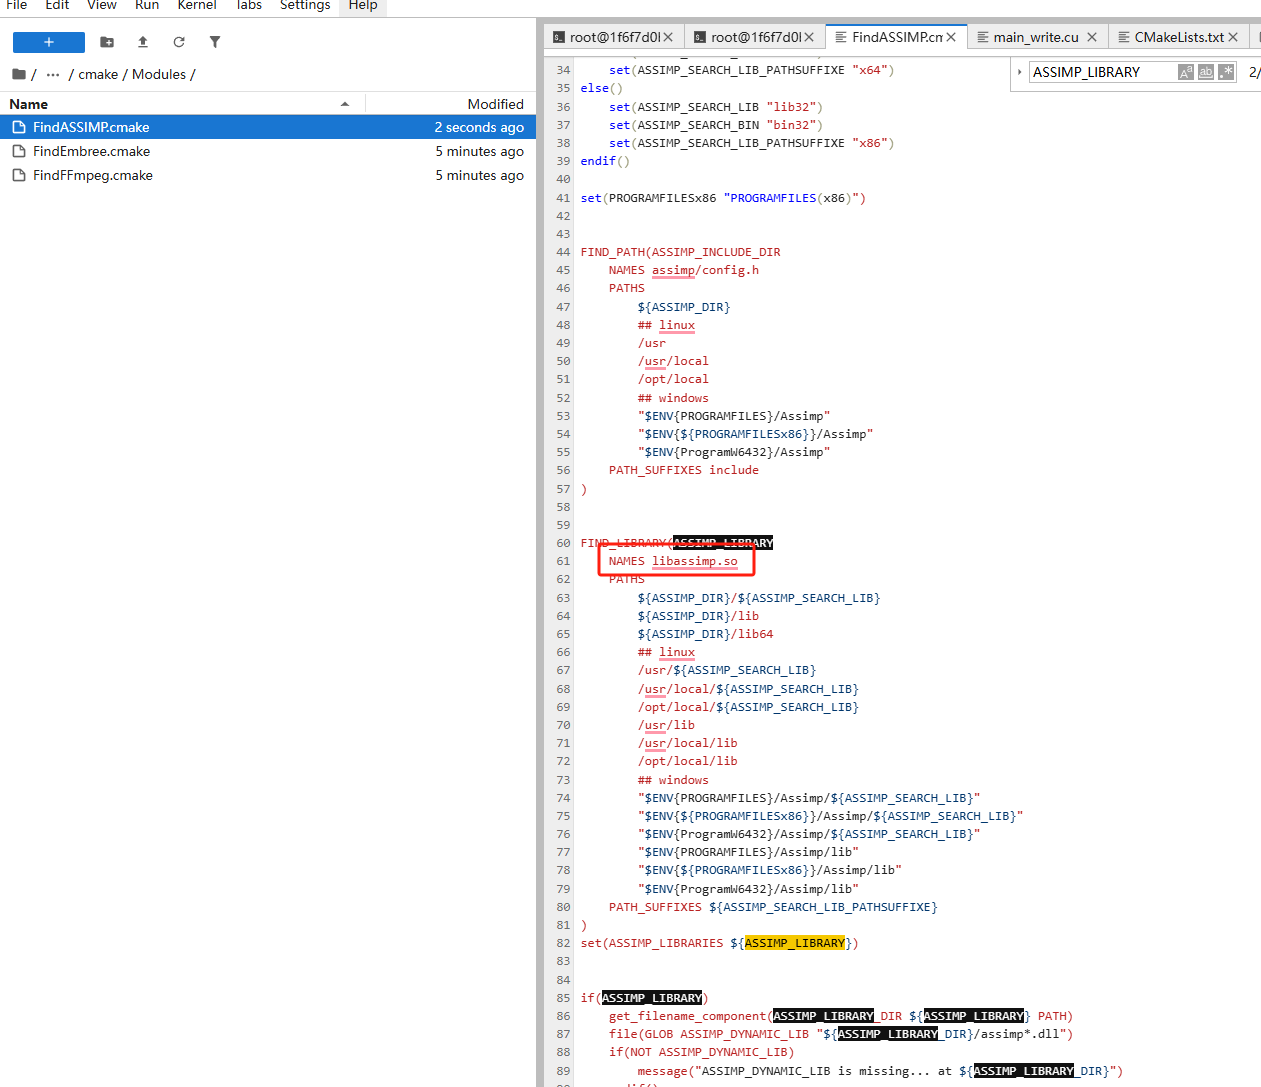
我们需要监控网络,因为一般的imgui安装会比较慢,如果没有网络上下行,那需要杀掉重新cmake编译,这里我们使用
bash
sudo apt install ifstat
ifstat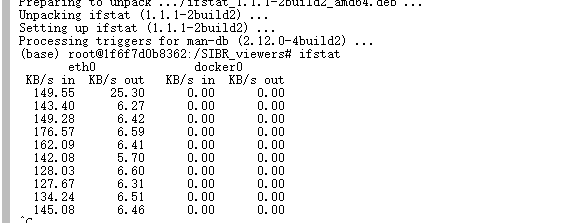
或者使用ethstatus可以更直观查看网络
bash
sudo apt-get install ethstatus
sudo ethstatus -i eth0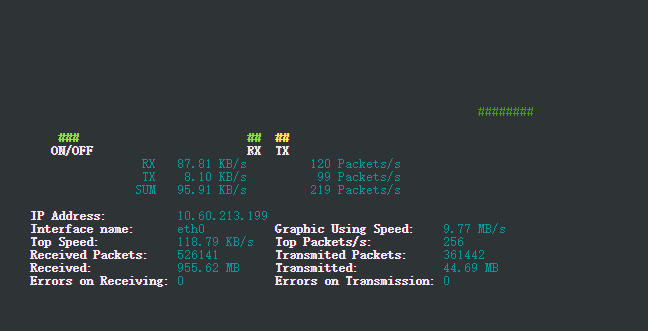
3.3 执行测试
在构建完成后,您可以使用以下命令行选项运行项目,我们下面可以看到只需要2分钟就可以完成整个全部处理:
bash
./build/gaussian_splatting_cuda -d /gaussian-splatting-cuda/data/tandt/truck -o /gaussian-splatting-cuda/output/ -i 10000
我们在/start.d文件下添加了自启文件,可以非常方便的支持vnc的可视化操作,复制进去后执行bash。关于VNC安装的可以查看Compshare云服务平台Genesis世界模型的上手与测试这篇文章的配置内容。
bash
#!/bin/bash

# 定义锁文件路径
LOCK_DIR="/tmp"
LOCK_PATTERN="*-lock"

# 查找并删除所有 .x-lock 文件
echo "Deleting all files matching $LOCK_PATTERN in $LOCK_DIR"
find "$LOCK_DIR" -name "$LOCK_PATTERN" -exec rm -f {} \;
rm -rf /tmp/.X11-unix/*
echo "Cleanup complete."

export USER=root
export DISPLAY=:99
export VTKI_OFF_SCREEN=True

/usr/bin/vncserver -geometry 1920x1080  > /dev/null 2>&1 &
echo "Started vncserver"
/usr/lib/noVNC/utils/novnc_proxy --vnc localhost:5901 >/dev/null 2>&1 &
echo "Started noVNC"

/usr/bin/Xvfb :99 -screen 0 1024x768x24 > /dev/null 2>&1 &
echo "Started Xvfb"
/usr/bin/x11vnc  -listen 0.0.0.0 -rfbport 5902 -noipv6 -forever -noxrecord -repeat -nopw -display :99 > /dev/null 2>& 1 &
echo "Started x11vnc"
然后浏览器访问 http://${外网EIP地址}:6080/vnc.html即可打开Novnc
然后我们使用SIBR_viewer这个来看可视化
bash
./SIBR_viewers/install/bin/SIBR_gaussianViewer_app -m /gaussian-splatting-cuda/output/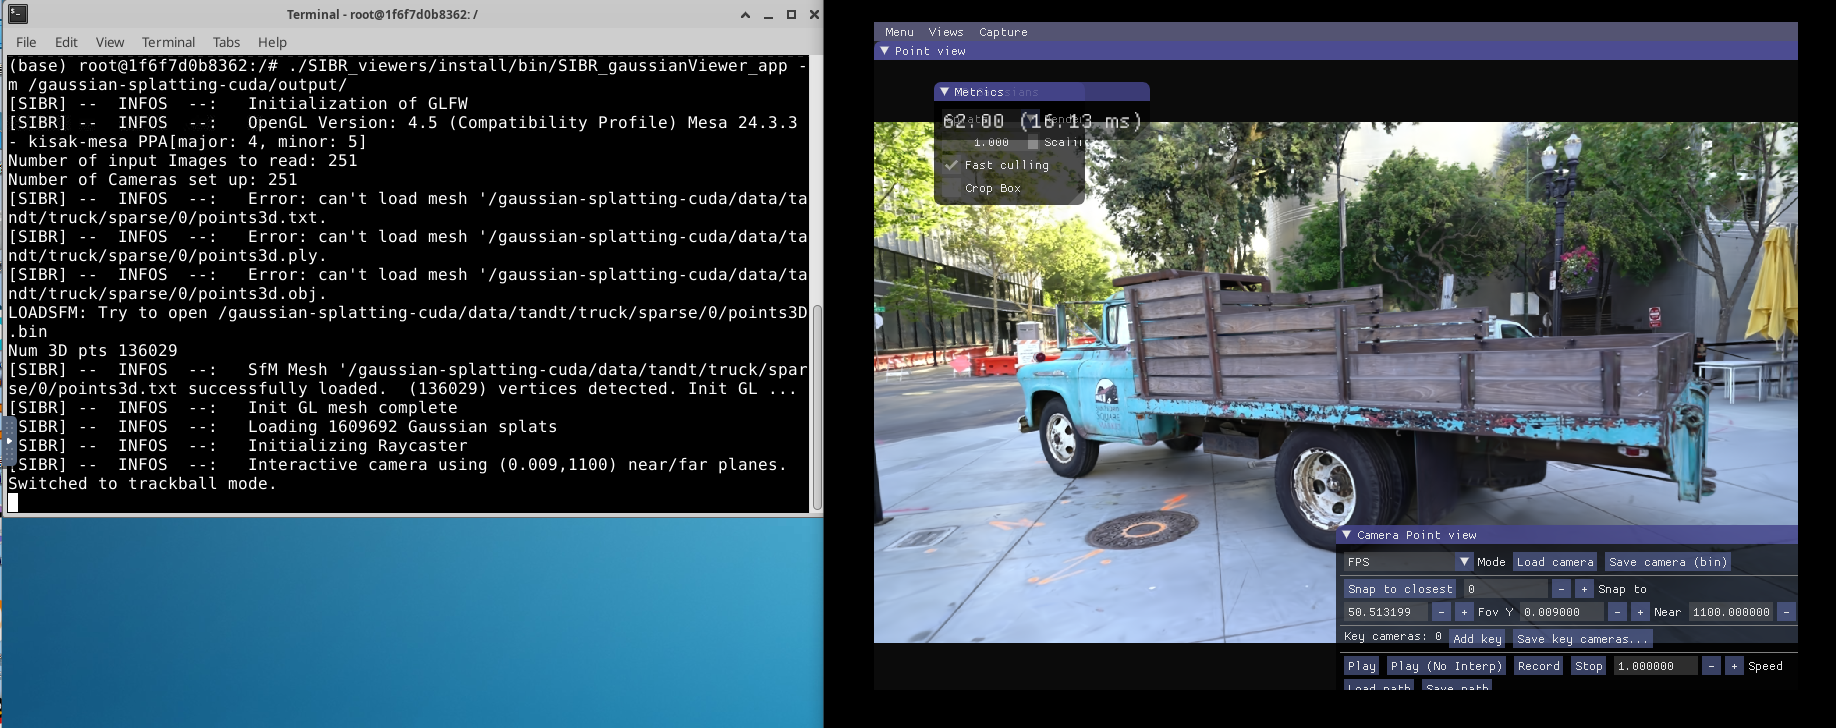
3.4 性能评估
截至2023年8月17日,我在不同的NVIDIA GPU上进行了性能测试,结果如下:
- NVIDIA GeForce RTX 4090:7000次迭代约87秒
- NVIDIA GeForce RTX 3090:7000次迭代约180秒
- NVIDIA GeForce RTX 3050:7000次迭代约725秒
这些结果展示了不同硬件配置下的执行时间,尽管尚未完全优化,但性能提升还是相当可观的。接下来的目标是将7000次迭代的时间缩短至60秒。
4. colmap文件格式生成
在3D高斯点云(3DGS)技术中,与COLMAP格式的数据兼容性是非常重要的。COLMAP是一个广泛使用的多视图重建软件,其数据格式被许多点云和计算机视觉项目所采用。
4.1 colmap的文件格式
COLMAP是一个流行的多视图几何重建软件,广泛用于从图像中恢复三维场景。COLMAP能够生成高质量的点云,并提供了一种标准化的数据格式,方便用户在多个应用程序之间共享数据。COLMAP的输出通常包括以下几种文件:
- images.bin:保存每张图像的相关信息,包括图像ID、相机参数、图像文件名、相机姿态等。
- cameras.bin:保存相机的内参和模型信息。
- points3D.bin:保存三维点云数据,包括每个点的坐标、颜色和其他属性。
通过将3DGS与COLMAP格式结合,用户可以轻松地处理和可视化点云数据,为后续的分析和应用提供便利。
-
images.bin
注释中的内容说明了cameras的数量,然后每一行依次是:相机id、相机模型、宽、高、相机参数(不同的相机参数不同)
宽、高是相机传感器的参数,决定了拍摄出的图片的尺寸,
bash
# Camera list with one line of data per camera:
#   CAMERA_ID, MODEL, WIDTH, HEIGHT, PARAMS[]
# Number of cameras: 3 1
SIMPLE_PINHOLE 3072 2304 2559.81 1536 1152 2
PINHOLE 3072 2304 2560.56 2560.56 1536 1152 3
SIMPLE_RADIAL 3072 2304 2559.69 1536 1152 -0.0218531 -
cameras.bin
每条数据分为两行:
bash
# Image list with two lines of data per image:
#   IMAGE_ID, QW, QX, QY, QZ, TX, TY, TZ, CAMERA_ID, NAME
#   POINTS2D[] as (X, Y, POINT3D_ID)
# Number of images: 2, mean observations per image: 2
1 0.851773 0.0165051 0.503764 -0.142941 -0.737434 1.02973 3.74354 1 P1180141.JPG 2362.39 248.498 58396 1784.7 268.254 59027 1784.7 268.254 -1
2 0.851773 0.0165051 0.503764 -0.142941 -0.737434 1.02973 3.74354 1 P1180142.JPG 1190.83 663.957 23056 1258.77 640.354 59070
概念介绍:
quaternion(QW、QX、QY、QZ):四元数(Hamilton定义)。用于实现相机坐标系到世界坐标系的转换。四元数(QW、QX、QY、QZ)转换为->旋转矩阵R:
t为平移向量。
-
第一行依次是IMAGE_ID、
quaternion(QW、QX、QY、QZ)、变换矩阵(TX、TY、TZ)、Camera_id、图片名 -
第二行依次是:
-
世界坐标系中的相机中心坐标:C = -R^t \cdot t。
-
相机坐标系P_c点 - > 世界坐标系P_w: P_w = R^t \cdot (P_c -C)
-
世界坐标系P_w点 ->相机坐标系P_c:P_c = R \cdot(P_w - t)
-
points3D.bin
ERROR是3D的重投影误差,单位为像素。就是3D点投影回2D的时候和实际检测到的角点的误差(感觉可以用来算loss啊)。
TRACK[]是跟踪信息,记录该3D点在哪些图像中被观测到,包含两个值:
bash
# 3D point list with one line of data per point:
#   POINT3D_ID, X, Y, Z, R, G, B, ERROR, TRACK[] as (IMAGE_ID, POINT2D_IDX)

# Number of points: 3, mean track length: 3.3334
63390 1.67241 0.292931 0.609726 115 121 122 1.33927 16 6542 15 7345 6 6714 14 7227
63376 2.01848 0.108877 -0.0260841 102 209 250 1.73449 16 6519 15 7322 14 7212 8 3991
63371 1.71102 0.28566 0.53475 245 251 249 0.612829 118 4140 117 4473 -
IMAGE_ID和POINT2D_IDX
-
POINT2D_IDX是在
image.txt中记录的对应的2D图像的角点的索引。
好的,让我们深入探讨3D高斯点云(3DGS)技术及其与COLMAP文件格式之间的关系,同时详细解释代码的实现过程。
4.2 代码实现详解
以下是一个CUDA源文件的实现示例,用于保存图像和点云数据,格式与COLMAP相兼容。
cpp
#include <iostream>
#include <fstream>
#include <vector>
#include <filesystem>
#include <point_cloud.cuh>
#include <image.cuh>
#include <camera_info.cuh>

#include <opencv2/opencv.hpp>
#include <Eigen/Dense>
#include <pcl/point_cloud.h>
#include <pcl/point_types.h>


using PointCloudXYZRGB = pcl::PointCloud<pcl::PointXYZRGB>;

std::unordered_map<int, std::pair<CAMERA_MODEL, uint32_t>> write_camera_model_ids = {
    {0, {CAMERA_MODEL::SIMPLE_PINHOLE, 3}},
    {1, {CAMERA_MODEL::PINHOLE, 4}},
    {2, {CAMERA_MODEL::SIMPLE_RADIAL, 4}},
    {3, {CAMERA_MODEL::RADIAL, 5}},
    {4, {CAMERA_MODEL::OPENCV, 8}},
    {5, {CAMERA_MODEL::OPENCV_FISHEYE, 8}},
    {6, {CAMERA_MODEL::FULL_OPENCV, 12}},
    {7, {CAMERA_MODEL::FOV, 5}},
    {8, {CAMERA_MODEL::SIMPLE_RADIAL_FISHEYE, 4}},
    {9, {CAMERA_MODEL::RADIAL_FISHEYE, 5}},
    {10, {CAMERA_MODEL::THIN_PRISM_FISHEYE, 12}},
    {11, {CAMERA_MODEL::UNDEFINED, -1}}};

struct Track {
    uint32_t _image_ID;
    uint32_t _max_num_2D_points;
};

// 保存图像数据的函数
void save_images(const std::filesystem::path& file_path, const std::vector<std::pair<cv::Mat,int>>& images, const std::vector<Eigen::Matrix4d>& poses) {
    if (images.size() != poses.size()) {
        throw std::invalid_argument("Images and poses must have the same size.");
    }

    std::ofstream output_stream(file_path / "images.bin", std::ios::binary);
    if (!output_stream) {
        throw std::runtime_error("Unable to open file for writing: " + (file_path / "images.bin").string());
    }

    uint64_t image_count = images.size();
    output_stream.write(reinterpret_cast<const char*>(&image_count), sizeof(image_count));
    struct ImagePoint { // we dont need this later
        double _x;
        double _y;
        uint64_t _point_id;
    };
    for (size_t i = 0; i < image_count; ++i) {
        std::pair<cv::Mat,int> img = images[i];
        const auto& pose = poses[i];

        // 从Matrix4d中提取旋转和平移
        Eigen::Quaterniond q(pose.block<3, 3>(0, 0)); // 提取旋转部分
        Eigen::Vector3d t = pose.block<3, 1>(0, 3); // 提取平移部分

        // 写入相机 ID(可以使用索引作为 ID)
        uint32_t image_id = static_cast<uint32_t>(i); // 使用索引作为相机 ID
        output_stream.write(reinterpret_cast<const char*>(&image_id), sizeof(image_id));

        // 写入四元数
        output_stream.write(reinterpret_cast<const char*>(&q.coeffs()), sizeof(double) * 4); // 四元数的四个系数
        // 写入平移向量
        output_stream.write(reinterpret_cast<const char*>(&t), sizeof(Eigen::Vector3d));

        // 写入相机 ID(可以使用索引作为 ID)
        uint32_t camera_id = static_cast<uint32_t>(img.second); // 使用索引作为相机 ID
        output_stream.write(reinterpret_cast<const char*>(&camera_id), sizeof(camera_id));

        // 写入图像名称(使用索引作为名称)
        std::string image_name = "image_" + std::to_string(i) + ".png"; // 假设为 PNG 文件
        output_stream.write(image_name.c_str(), image_name.size() + 1); // 包括空字符
# if 0
        // 写入图像数据大小
        uint64_t number_points = img.first.total(); // 获取图像数据的字节大小
        output_stream.write(reinterpret_cast<const char*>(&number_points), sizeof(number_points)); // 写入图像大小
        std::vector<ImagePoint> points(number_points);
        for(int i = 0; i < img.first.rows; i++) {
            for(int j = 0; j < img.first.cols; j++) {
                points[i*img.first.cols+j]._x = j;
                points[i*img.first.cols+j]._y = i;
                points[i*img.first.cols+j]._point_id = i*img.first.cols+j ;
            }
        }
        // 写入所有点数据
        output_stream.write(reinterpret_cast<char*>(points.data()), number_points * sizeof(ImagePoint));
#else
        uint64_t number_points = 0;
        output_stream.write(reinterpret_cast<const char*>(&number_points), sizeof(number_points)); // 写入图像大小
#endif

    }

    output_stream.close();
}

void save_cameras(const std::filesystem::path& file_path,
                  const std::vector<std::tuple<uint32_t, int, uint64_t, uint64_t, std::vector<double>>>& cameras) {
    std::ofstream output_stream(file_path / "cameras.bin", std::ios::binary);
    if (!output_stream) {
        throw std::runtime_error("Unable to open file for writing: " + (file_path / "cameras.bin").string());
    }

    uint64_t camera_count = cameras.size();
    output_stream.write(reinterpret_cast<const char*>(&camera_count), sizeof(camera_count));

    for (const auto& params : cameras) {
        uint32_t camera_id = std::get<0>(params);
        // 解包参数
        int model_id = std::get<1>(params);
        uint64_t width = std::get<2>(params);
        uint64_t height = std::get<3>(params);
        const auto& camera_parameters = std::get<4>(params);

        // 写入相机 ID
        output_stream.write(reinterpret_cast<const char*>(&camera_id), sizeof(camera_id));

        // 写入相机模型
        output_stream.write(reinterpret_cast<const char*>(&model_id), sizeof(model_id));

        // 写入图像尺寸
        output_stream.write(reinterpret_cast<const char*>(&width), sizeof(width));
        output_stream.write(reinterpret_cast<const char*>(&height), sizeof(height));
        CAMERA_MODEL camera_model  = std::get<0>(write_camera_model_ids[model_id]);
        uint32_t camera_model_id = std::get<1>(write_camera_model_ids[model_id]);
        output_stream.write(reinterpret_cast<const char*>(&camera_model), sizeof(camera_model));
        output_stream.write(reinterpret_cast<const char*>(&camera_model_id), sizeof(camera_model_id));
        // 写入参数
        size_t params_size = camera_parameters.size();
        output_stream.write(reinterpret_cast<const char*>(camera_parameters.data()), params_size * sizeof(double));
    }
    output_stream.close();
}


void save_point_cloud(const std::filesystem::path& file_path, const PointCloudXYZRGB& cloud, const std::vector<std::vector<Track>>& tracks) {
    std::ofstream output_stream(file_path, std::ios::binary);
    if (!output_stream) {
        throw std::runtime_error("Unable to open file for writing: " + file_path.string());
    }

    // 写入点云的点数量
    uint64_t point3D_count = cloud.size();
    output_stream.write(reinterpret_cast<const char*>(&point3D_count), sizeof(point3D_count));

    for (size_t i = 0; i < point3D_count; ++i) {
        const auto& point = cloud.points[i];

        // 写入点的坐标 (x, y, z)
        double x = static_cast<double>(point.x);
        double y = static_cast<double>(point.y);
        double z = static_cast<double>(point.z);
        output_stream.write(reinterpret_cast<const char*>(&x), sizeof(x));
        output_stream.write(reinterpret_cast<const char*>(&y), sizeof(y));
        output_stream.write(reinterpret_cast<const char*>(&z), sizeof(z));

        // 写入颜色 (r, g, b)
        uint8_t r = point.r;
        uint8_t g = point.g;
        uint8_t b = point.b;
        output_stream.write(reinterpret_cast<const char*>(&r), sizeof(r));
        output_stream.write(reinterpret_cast<const char*>(&g), sizeof(g));
        output_stream.write(reinterpret_cast<const char*>(&b), sizeof(b));

        // 写入被忽略的值(如深度)
        double ignored_value = 0.0; // 这里可以根据实际需要设定
        output_stream.write(reinterpret_cast<const char*>(&ignored_value), sizeof(ignored_value));
# if 0
        uint64_t track_length = tracks[i].size();
        output_stream.write(reinterpret_cast<const char*>(&track_length), sizeof(track_length));
        output_stream.write(reinterpret_cast<const char*>(tracks[i].data()), track_length * sizeof(uint32_t));
#else
        uint64_t track_length = 0;
        output_stream.write(reinterpret_cast<const char*>(&track_length), sizeof(track_length));
#endif
    }

    output_stream.close();
}


// 创建假数据并调用保存函数
int main() {
    // 假设的图像数据和位姿
    std::vector<std::pair<cv::Mat, int>> images;
    std::vector<Eigen::Matrix4d> poses;

    for (int i = 0; i < 5; ++i) { // 创建 5 张假图像
        cv::Mat img = cv::Mat::zeros(480, 640, CV_8UC3); // 黑色图像
        images.emplace_back(img, 0); // 使用相机 ID 0
        Eigen::Matrix4d pose = Eigen::Matrix4d::Identity(); // 单位矩阵表示无旋转和平移
        poses.push_back(pose);
    }

    // 保存图像
    std::filesystem::path image_path = "./";
    save_images(image_path, images, poses);

    // 假设的相机参数
    std::vector<std::tuple<uint32_t, int, uint64_t, uint64_t, std::vector<double>>> cameras;
    for (int i = 0; i < 5; ++i) {
        uint32_t camera_id = static_cast<uint32_t>(i);
        int model_id = 0; // 使用简单针孔模型
        uint64_t width = 640;
        uint64_t height = 480;
        std::vector<double> camera_parameters = {320.0, 240.0, 600.0}; // fx, fy, cx
        cameras.emplace_back(camera_id, model_id, width, height, camera_parameters);
    }

    // 保存相机参数
    std::filesystem::path camera_path = "./";
    save_cameras(camera_path, cameras);

    // 创建假点云数据
    PointCloudXYZRGB cloud;
    for (int i = 0; i < 1000; ++i) {
        pcl::PointXYZRGB point;
        point.x = static_cast<float>(rand() % 100) / 10.0f; // 随机生成点坐标
        point.y = static_cast<float>(rand() % 100) / 10.0f;
        point.z = static_cast<float>(rand() % 100) / 10.0f;
        point.r = static_cast<uint8_t>(rand() % 256); // 随机颜色
        point.g = static_cast<uint8_t>(rand() % 256);
        point.b = static_cast<uint8_t>(rand() % 256);
        cloud.points.push_back(point);
    }
    cloud.width = cloud.size();
    cloud.height = 1; // 点云数据是未组织的

    // 保存点云数据
    std::filesystem::path point_cloud_path = "./point_cloud.bin";
    save_point_cloud(point_cloud_path, cloud, {});

    std::cout << "Data saved successfully!" << std::endl;

    return 0;
}
跑完过后,我们的测试bin文件将可以在下面看到。

5. 总结
通过本文的讲述,我们可以学习到cuda的高斯溅射使用以及用户如何轻松地将图像、相机参数和点云数据保存为COLMAP格式。这种实现不仅简化了数据处理流程,还为激光雷达加入3D高斯点云技术的应用提供了基础。用户可以在此基础上进行更复杂的操作,如点云重建、数据分析和可视化等。通过与COLMAP的兼容性,用户能够利用现有的工具和资源来进一步提升其项目的效率和效果。