一、Ansible介绍
Ansible是一个同时管理多个远程主机的软件(任何可以通过SSH协议登录的机器),因此Ansible可以管理 运程虚拟机、物理机,也可以是本地主机(linux、windows)。
Ansible通过SSH协议实现 管理节点、远程节点的通信。
只要是能够SSH登录的主机完成的操作,都可以通Ansible自动化操作,比如批量复制、批量除、批量修改、批量查看、批量安装、重启、更新等。
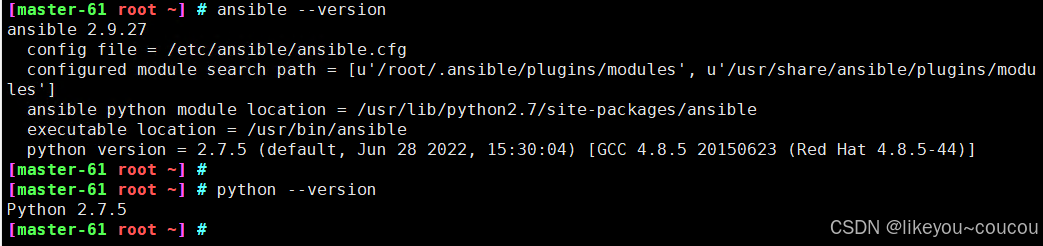
1.ansible是基于python语言开发的自动运维工具(由于python是解释器的特点,机器上必须要安装python运行环境)
2.ansible基于ssh协议实现安全通信。
二、ansible安装部署
1、准备机器
master-61 10.0.0.61 管理主机
web-7 10.0.0.7 web服务器
web-8 10.0.0.8 web服务器
web-9 10.0.0.9 web服务器
rsync 10.0.0.41 备份服务器
nfs 10.0.0.31 存储服务器
注:以上机器在后续中会使用到,如何创建这些机器可以看这篇教程Linux 网站架构_soft.aijiaer11.cn-CSDN博客
master-61管理主机安装ansible和python
yum install -y epel-release ansible libselinux-python
2、ansible基于公私钥认证
2.1将master-61的公钥复制到对应机器上
bash
[master-61 root ~] # ssh-copy-id root@10.0.0.7
/usr/bin/ssh-copy-id: INFO: Source of key(s) to be installed: "/root/.ssh/id_rsa.pub"
The authenticity of host '10.0.0.7 (10.0.0.7)' can't be established.
ECDSA key fingerprint is SHA256:p+Y8oREDmNYotbNk8uqZv6KTTFKFnLhOxXp3D+Jet6Q.
ECDSA key fingerprint is MD5:d4:45:1d:1c:9f:5f:9f:8e:c7:86:d3:03:ee:f1:78:f4.
Are you sure you want to continue connecting (yes/no)? yes
/usr/bin/ssh-copy-id: INFO: attempting to log in with the new key(s), to filter out any that are already installed
/usr/bin/ssh-copy-id: INFO: 1 key(s) remain to be installed -- if you are prompted now it is to install the new keys
root@10.0.0.7's password:

Number of key(s) added: 1

Now try logging into the machine, with:   "ssh 'root@10.0.0.9'"
and check to make sure that only the key(s) you wanted were added.

另外两台机器也是一样的
[master-61 root ~] # ssh-copy-id root@10.0.0.8
[master-61 root ~] # ssh-copy-id root@10.0.0.9
2.2 配置.ssh/config 配置文件,方便ssh登录
bash
[master-61 root ~] # cat .ssh/config
Host web-7
  HostName 10.0.0.7
  User root
  Port 22
  IdentityFile ~/.ssh/id_rsa

Host web-8
  HostName 10.0.0.8
  User root
  Port 22
  IdentityFile ~/.ssh/id_rsa

Host web-9
  HostName 10.0.0.8
  User root
  Port 22
  IdentityFile ~/.ssh/id_rsa
2.3 测试是否免密登录成功
bash
[master-61 root ~] # ssh web-7
Last login: Thu Jan  9 15:40:38 2025 from 172.16.1.61
[web-7 root ~] # exit
logout
Connection to 10.0.0.7 closed.
[master-61 root ~] # ssh web-8
Last login: Thu Jan  9 15:40:37 2025 from 172.16.1.61
[web-8 root ~] # exit
logout
Connection to 10.0.0.8 closed.
[master-61 root ~] # ssh web-9
Last login: Thu Jan  9 15:40:36 2025 from 172.16.1.61
[web-9 root ~] # exit
logout
Connection to 10.0.0.9 closed.
[master-61 root ~] #
3、配置ansible主机清单文件
bash
[master-61 root ~] # cat /etc/ansible/hosts
[web]
172.16.1.7
172.16.1.8
172.16.1.9
[nfs]
172.16.1.31
[backup]
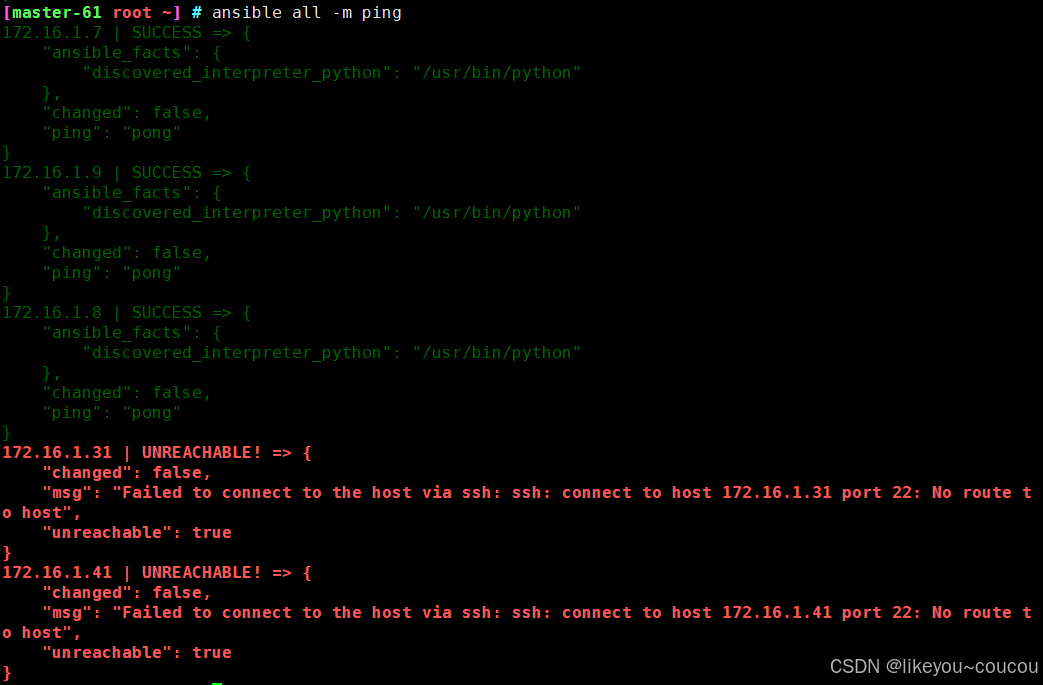
172.16.1.41ansible管理所有主机组(all),管理对应主机组(定义的主机组名如:web,nfs,bakcup)
ansible 语法
ansible <组名> -m <模块> -a <参数列表>
nfs和backup主机没有开机所以执行报错了
4、基于密码认证
ansible主机清单配置文件语法
| 参数 | 参数类型 | 参数说明 |
|---|---|---|
| ansible_host | 主机地址 | 远程主机ip |
| ansible_port | 主机端口 | 设置SSH连接端口,默认22 |
| ansible_user | 主机用户 | 默认SSH远程连接的用户身份 |
| ansible_password | 用户密码 | 指定SSH远程主机密码 |
4.1给rsync机器,添加密码,端口信息
bash
[master-61 root ~] # tail -2  /etc/ansible/hosts
[backup]
172.16.1.41  ansible_port=22  ansible_user=root ansible_password='1'

如果被管理主机更改l用户,密码,端口,这里也需要更改成相同的
测试执行
bash
[master-61 root ~] # ansible backup -m ping
172.16.1.41 | SUCCESS => {
"ansible_facts": {
"discovered_interpreter_python": "/usr/bin/python"
},
"changed": false,
"ping": "pong"
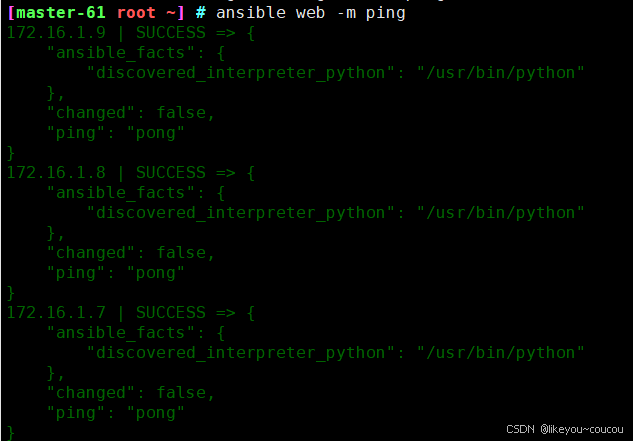
}4.2添加web机器组的信息
bash
[master-61 root ~] # cat  /etc/ansible/hosts
[web]
172.16.1.7 ansible_port=22 ansible_user=root ansible_password=1
172.16.1.8 ansible_port=22 ansible_user=root ansible_password=1
172.16.1.9 ansible_port=22 ansible_user=root ansible_password=1


测试是否能通
[master-61 root ~] # ansible web -m ping
172.16.1.7 | SUCCESS => {
    "ansible_facts": {
        "discovered_interpreter_python": "/usr/bin/python"
    },
    "changed": false,
    "ping": "pong"
}
172.16.1.8 | SUCCESS => {
    "ansible_facts": {
        "discovered_interpreter_python": "/usr/bin/python"
    },
    "changed": false,
    "ping": "pong"
}
172.16.1.9 | SUCCESS => {
    "ansible_facts": {
        "discovered_interpreter_python": "/usr/bin/python"
    },
    "changed": false,
    "ping": "pong"
}
4.3 ansible故障问题解决
如果出现机器的指纹问题确认,如下
[master-61 root ~] # ansible web -m ping
172.16.1.7 | FAILED! => {
    "msg": "Using a SSH password instead of a key is not possible because Host Key checking is enabled and sshpass does not support this.  Please add this host's fingerprint to your known_hosts file to manage this host."
}
172.16.1.8 | SUCCESS => {
    "ansible_facts": {
        "discovered_interpreter_python": "/usr/bin/python"
    },
    "changed": false,
    "ping": "pong"
}
172.16.1.9 | SUCCESS => {
    "ansible_facts": {
        "discovered_interpreter_python": "/usr/bin/python"
    },
    "changed": false,
    "ping": "pong"
}
解决办法1,手动ssh连接,进行指纹确认,写入到本机的
bash
[master-61 root ~] # ssh root@172.16.1.7
The authenticity of host '172.16.1.7 (172.16.1.7)' can't be established.
ECDSA key fingerprint is SHA256:p+Y8oREDmNYotbNk8uqZv6KTTFKFnLhOxXp3D+Jet6Q.
ECDSA key fingerprint is MD5:d4:45:1d:1c:9f:5f:9f:8e:c7:86:d3:03:ee:f1:78:f4.
Are you sure you want to continue connecting (yes/no)? yes
Warning: Permanently added '172.16.1.7' (ECDSA) to the list of known hosts.
root@172.16.1.7's password:
Last login: Fri Jan 10 09:35:07 2025 from 172.16.1.61
[web-7 root ~] # exit
logout
Connection to 172.16.1.7 closed.
[master-61 root ~] # ansible web -m ping
172.16.1.9 | SUCCESS => {
    "ansible_facts": {
        "discovered_interpreter_python": "/usr/bin/python"
    },
    "changed": false,
    "ping": "pong"
}
172.16.1.8 | SUCCESS => {
    "ansible_facts": {
        "discovered_interpreter_python": "/usr/bin/python"
    },
    "changed": false,
    "ping": "pong"
}
172.16.1.7 | SUCCESS => {
    "ansible_facts": {
        "discovered_interpreter_python": "/usr/bin/python"
    },
    "changed": false,
    "ping": "pong"
}
解决办法2,ansible配置文件中忽略指纹确认
bash
将配置文件中注释取消掉
[master-61 root ~] # grep 'host_key_checking' /etc/ansible/ansible.cfg
#host_key_checking = False
[master-61 root ~] #
4.4 公共变量配置
当主机清单里,很多主机组,有相同的变量属性,可以写成公共变量
bash
[master-61 root ~] # vim /etc/ansible/hosts
[web:vars]
ansible_port=22
ansible_user=root
ansible_password=1

[web]
172.16.1.7
172.16.1.8
172.16.1.9

[master-61 root ~] # ansible web -m ping
172.16.1.7 | SUCCESS => {
    "ansible_facts": {
        "discovered_interpreter_python": "/usr/bin/python"
    },
    "changed": false,
    "ping": "pong"
}
172.16.1.8 | SUCCESS => {
    "ansible_facts": {
        "discovered_interpreter_python": "/usr/bin/python"
    },
    "changed": false,
    "ping": "pong"
}
ansible远程执行命令
bash
在web的所有机器/opt/目录下创建test1.txt文件
[master-61 root ~] # ansible web -m shell -a "touch /opt/test1.txt"
[WARNING]: Consider using the file module with state=touch rather than running 'touch'.  If you need
to use command because file is insufficient you can add 'warn: false' to this command task or set
'command_warnings=False' in ansible.cfg to get rid of this message.
172.16.1.8 | CHANGED | rc=0 >>

172.16.1.9 | CHANGED | rc=0 >>

172.16.1.7 | CHANGED | rc=0 >>

[master-61 root ~] # 


三、ansible命令执行方式(主要)
ansible执行命令结果(状态颜色)
命令成功:
绿色:命令以用户期望的执行了,但是状态没有发生改变;
黄色:命令以用户期望的执行了,并且状态发生了改变;
命令没有执行成功:
紫色:警告信息,说明ansible提示你有更合适的用法;出现了warning警告
红色:命令错误,执行失败;
蓝色: 详细的执行过程;
1、ansible命令
语法:
ansible <host-pattern> -m <module> -a "<module-arguments>"
<host-pattern>:指定主机或主机组,可以是单个主机、主机组或模式(如 all、web、db)。
-m <module>:指定 Ansible 模块,比如 ping、command、copy 等。
-a "<module-arguments>":指定模块的参数。
command模块是ansible默认的模块,也就是默认就指定了 -m command。
该模块作用:在远程节点上执行一个命令
执行 command 模块,获取 web 主机组中主机的主机名
ansible web -m command -a "hostname"

2、ansible-playbook 命令
用于运行 Ansible Playbook,Playbook 是一组预定义的任务,它描述了如何配置远程主机。
语法:
ansible-playbook <playbook.yml> options
<playbook.yml>:指定要执行的 playbook 文件。
options:可选参数,如 -i 指定库存文件,-u 指定用户等。
3、ansible-inventory 命令
用于查看和管理 Ansible 的库存(inventory)。可以列出、检查库存的内容,以及验证库存文件的格式。
语法:
ansible-inventory options
图形化的方式展示主机和组的关系;列出所有的主机组
ansible-inventory --graph
ansible-inventory --list

4、ansible-galaxy 命令
用于管理 Ansible Galaxy 上的角色和集合。可以使用它来安装、创建和管理 Ansible 角色
语法:
ansible-galaxy <command> options
5、ansible-doc 命令
用于查看 Ansible 模块的文档。
语法:
ansible-doc <module>
6、ansible-vault 命令
用于加密和解密敏感信息(如密码)。它允许你安全地管理 playbook 中的敏感数据
语法:
ansible-vault <command> options
master-61 root \~ # ansible-vault -help
usage: ansible-vault -h --version -v
{create,decrypt,edit,view,encrypt,encrypt_string,rekey}
...
ansible-vault: error: argument -h/--help: ignored explicit argument u'elp'
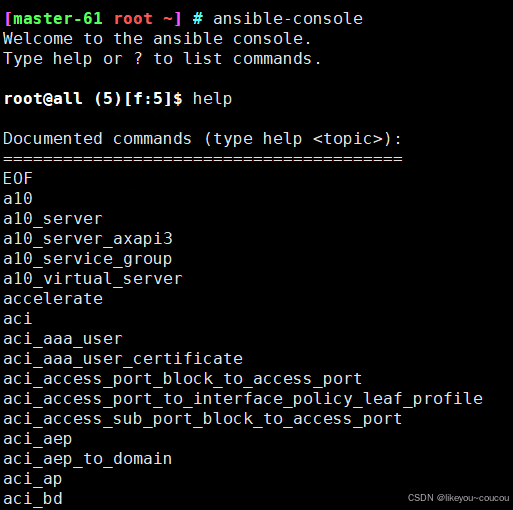
7、ansible-console 命令
ansible-console 提供了一个交互式命令行界面,可以在其中执行 Ansible 模块命令,非常适合调试和快速执行
语法:
ansible-console
执行后会出现很多的命令
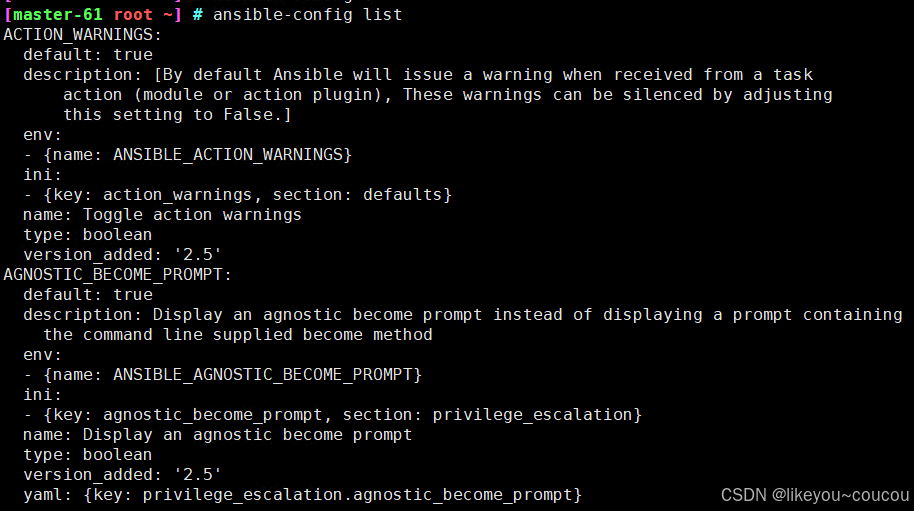
8、ansible-config 命令
用于查看和管理 Ansible 配置。可以检查当前的配置设置,或者创建和编辑自定义的配置文件
语法:
ansible-config <command> options
列出所有的 Ansible 配置选项,截图只截取了一部分
四、ansible模块
1、command 命令模块
该模块作用:在远程节点上执行一个命令
command模块是ansible默认的模块,也就是默认就指定了 -m command
只支持简单命令命令执行,比如你想远程看下服务器的资源信息,普通的linux命令
command模块是ansible命令基本模块
使用command模块执行远程命令,命令不得用变量($HOME)
不得出现特殊符号
< 、>、|、;、&
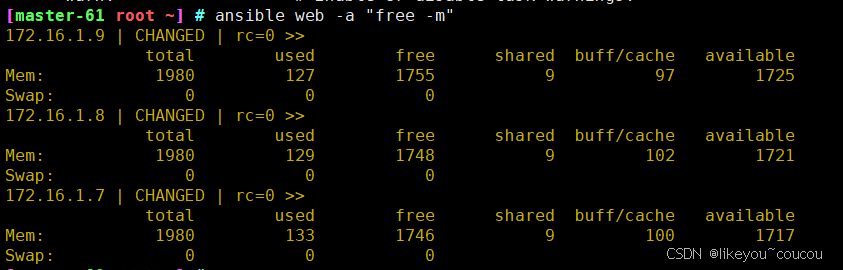
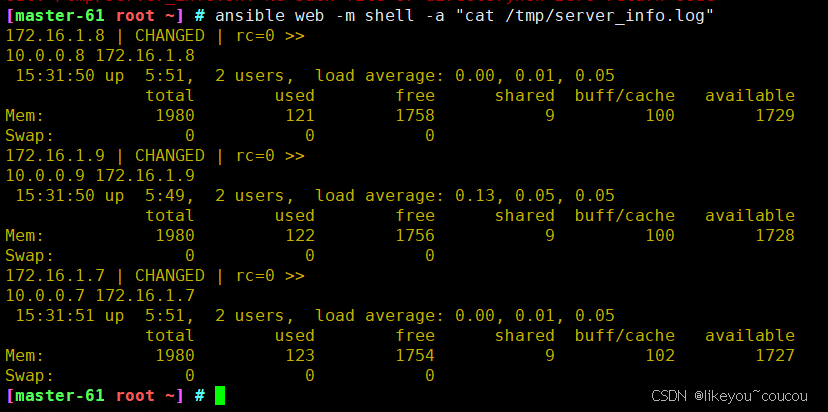
远程查看web主机内存
ansible web -a "free -m"
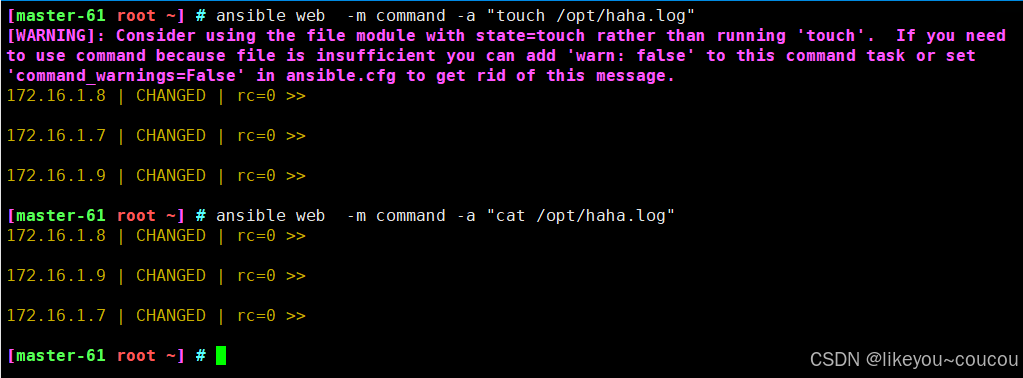
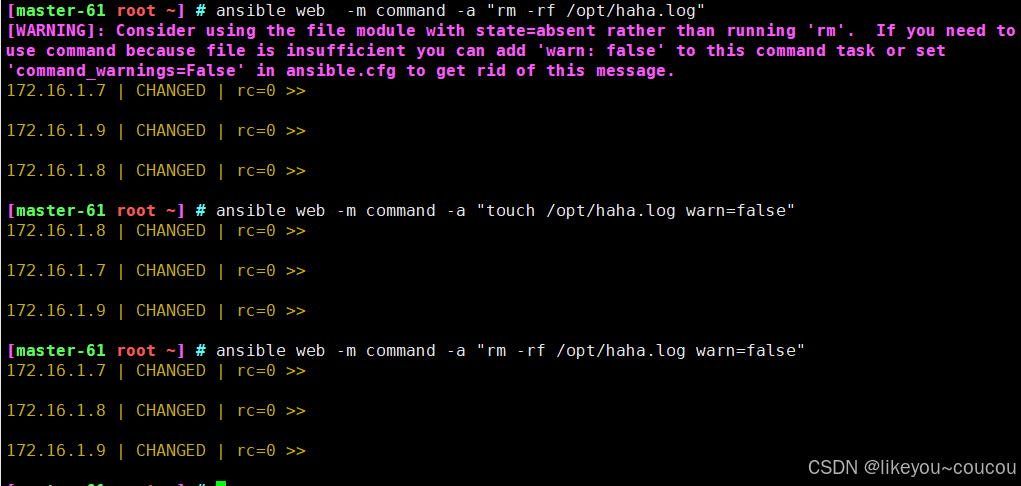
远程创建文件、查看文件
ansible web -m command -a "touch /opt/haha.log"
ansible web -m command -a "cat /opt/haha.log"
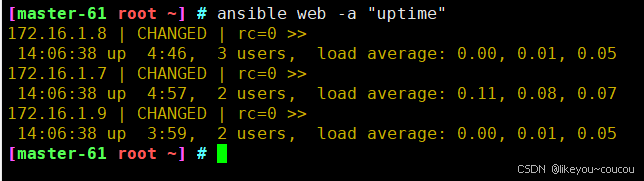
远程获取机器负载
ansible web -a "uptime"
关闭告警信息,执行不会出现WARNING警告
command提供的专有命令
这些命令用于编写ansible-playbook,完成服务器部署的各种复杂条件限定。
| 选项参数 | 选项说明 |
|---|---|
| chdir | 在执行命令执行,通过cd命令进入指定目录 |
| creates | 定义一个文件是否存在,若不存在,则运行相应命令;存在则跳过 |
| free_form(必须) | 参数信息中可以输入任何系统命令,实现远程管理 |
| removes | 定义一个文件是否存在,如果存在,则运行相应命令;如果不存在则跳过 |
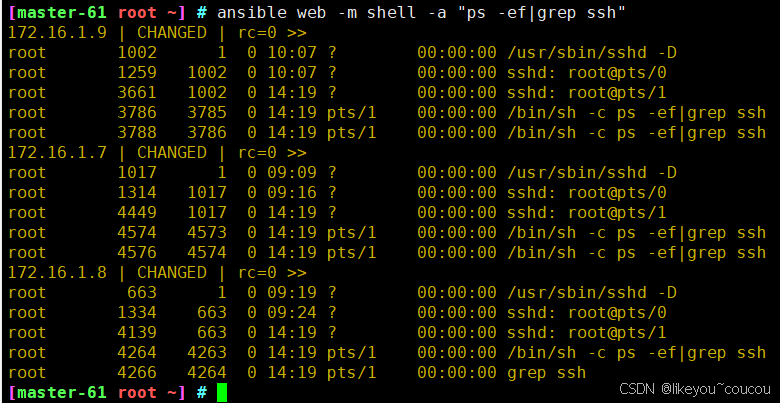
2、shell 命令模块(万能模块)
shell模块可以识别特殊符号,就等于远程执行命令
远程过滤ssh进程信息
ansible web -m shell -a "ps -ef|grep ssh"
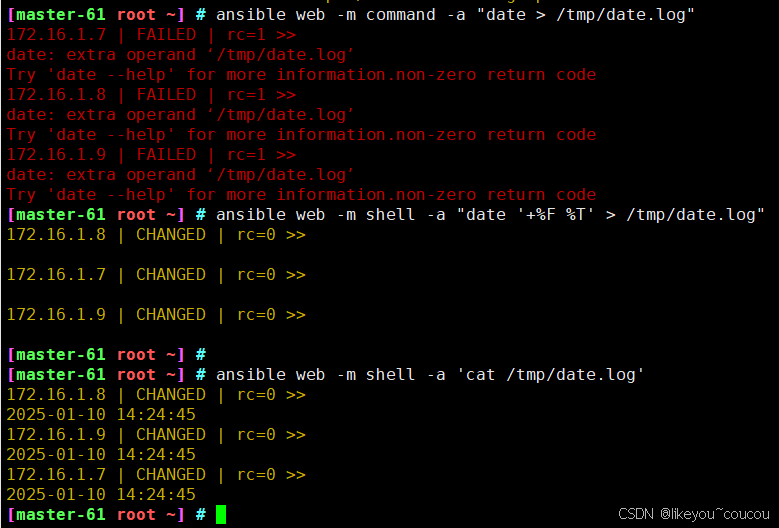
使用重定向符号,创建文件
远程获取时间信息,且写入到文件中
command模块就没法使用重定向
ansible web -m command -a "date > /tmp/date.log"
远程执行复杂的Linux命令
-
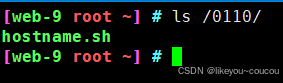
创建文件夹
-
生成sh脚本文件(查看主机名)
-
赋予脚本可执行权限
-
执行脚本
-
忽略warning信息
ansible web -m shell -a "mkdir /0110/;echo 'hostname' > /0110/hostname.sh;chmod +x /0110/hostname.sh;/0110/hostname.sh; warn=false"


3、copy命令模块
copy模块是远程推送数据模块,只能把数据推送给远程主机节点,无法拉取数据到本地。
语法:ansible 主机组 -m copy -a "参数"
src 地文件或目录的路径
dest 目标主机上的文件或目录路径
mode 文件的权限模式(类似于 chmod)
owner 设置目标文件的拥有者,可以是用户名或用户ID
group 设置目标文件的所属组,可以是组名或组ID
backup 是否在文件复制之前备份目标文件
force 是否强制复制文件,忽略现有文件是否相同
recurse 是否递归复制目录
directory_mode 当复制一个目录时,设置目标目录的权限
3.1 发送文件到对应机器目录
bash
[master-61 root ~] # ansible web -m copy -a "src=/tmp/61-dnf.log dest=/tmp/web-dnf.log"
172.16.1.9 | CHANGED => {
    "ansible_facts": {
        "discovered_interpreter_python": "/usr/bin/python"
    },
    "changed": true,
    "checksum": "48579c730bab923a58386c5cb48fe95a025dd4be",
    "dest": "/tmp/web-dnf.log",
    "gid": 0,
    "group": "root",
    "md5sum": "88da829f8dad48fa08e9328591dda9db",
    "mode": "0644",
    "owner": "root",
    "size": 5,
    "src": "/root/.ansible/tmp/ansible-tmp-1736494608.32-11558-63842889014971/source",
    "state": "file",
    "uid": 0
}
172.16.1.8 | CHANGED => {
    "ansible_facts": {
        "discovered_interpreter_python": "/usr/bin/python"
    },
    "changed": true,
    "checksum": "48579c730bab923a58386c5cb48fe95a025dd4be",
    "dest": "/tmp/web-dnf.log",
    "gid": 0,
    "group": "root",
    "md5sum": "88da829f8dad48fa08e9328591dda9db",
    "mode": "0644",
    "owner": "root",
    "size": 5,
    "src": "/root/.ansible/tmp/ansible-tmp-1736494608.32-11555-248987136082372/source",
    "state": "file",
    "uid": 0
}
172.16.1.7 | CHANGED => {
    "ansible_facts": {
        "discovered_interpreter_python": "/usr/bin/python"
    },
    "changed": true,
    "checksum": "48579c730bab923a58386c5cb48fe95a025dd4be",
    "dest": "/tmp/web-dnf.log",
    "gid": 0,
    "group": "root",
    "md5sum": "88da829f8dad48fa08e9328591dda9db",
    "mode": "0644",
    "owner": "root",
    "size": 5,
    "src": "/root/.ansible/tmp/ansible-tmp-1736494608.27-11554-90016176294629/source",
    "state": "file",
    "uid": 0
}
[master-61 root ~] #
bash
[web-7 root ~] # ls /tmp/web-dnf.log -l
-rw-r--r-- 1 root root 5 Jan 10 15:36 /tmp/web-dnf.log

[web-8 root ~] # ls /tmp/web-dnf.log -l
-rw-r--r-- 1 root root 5 Jan 10 15:36 /tmp/web-dnf.log

[web-9 root ~] # ls /tmp/web-dnf.log -l
-rw-r--r-- 1 root root 5 Jan 10 15:36 /tmp/web-dnf.log
3.2 发送文件且指定文件属性,权限改为600,修改为www用户
bash
先创建用户
[master-61 root ~] # ansible web -m user -a "name=www state=present"
172.16.1.9 | CHANGED => {
    "ansible_facts": {
        "discovered_interpreter_python": "/usr/bin/python"
    },
    "changed": true,
    "comment": "",
    "create_home": true,
    "group": 1000,
    "home": "/home/www",
    "name": "www",
    "shell": "/bin/bash",
    "state": "present",
    "system": false,
    "uid": 1000
}
172.16.1.7 | CHANGED => {
    "ansible_facts": {
        "discovered_interpreter_python": "/usr/bin/python"
    },
    "changed": true,
    "comment": "",
    "create_home": true,
    "group": 1000,
    "home": "/home/www",
    "name": "www",
    "shell": "/bin/bash",
    "state": "present",
    "system": false,
    "uid": 1000
}
172.16.1.8 | CHANGED => {
    "ansible_facts": {
        "discovered_interpreter_python": "/usr/bin/python"
    },
    "changed": true,
    "comment": "",
    "create_home": true,
    "group": 1000,
    "home": "/home/www",
    "name": "www",
    "shell": "/bin/bash",
    "state": "present",
    "system": false,
    "uid": 1000
}


修改所属主为www和文件权限为600
[master-61 root ~] # ansible web -m copy -a "src=/tmp/61-dnf.log dest=/tmp/web-dnf.log group=www owner=www mode=600"
172.16.1.9 | CHANGED => {
    "ansible_facts": {
        "discovered_interpreter_python": "/usr/bin/python"
    },
    "changed": true,
    "checksum": "48579c730bab923a58386c5cb48fe95a025dd4be",
    "dest": "/tmp/web-dnf.log",
    "gid": 1000,
    "group": "www",
    "mode": "0600",
    "owner": "www",
    "path": "/tmp/web-dnf.log",
    "size": 5,
    "state": "file",
    "uid": 1000
}
172.16.1.8 | CHANGED => {
    "ansible_facts": {
        "discovered_interpreter_python": "/usr/bin/python"
    },
    "changed": true,
    "checksum": "48579c730bab923a58386c5cb48fe95a025dd4be",
    "dest": "/tmp/web-dnf.log",
    "gid": 1000,
    "group": "www",
    "mode": "0600",
    "owner": "www",
    "path": "/tmp/web-dnf.log",
    "size": 5,
    "state": "file",
    "uid": 1000
}
172.16.1.7 | CHANGED => {
    "ansible_facts": {
        "discovered_interpreter_python": "/usr/bin/python"
    },
    "changed": true,
    "checksum": "48579c730bab923a58386c5cb48fe95a025dd4be",
    "dest": "/tmp/web-dnf.log",
    "gid": 1000,
    "group": "www",
    "mode": "0600",
    "owner": "www",
    "path": "/tmp/web-dnf.log",
    "size": 5,
    "state": "file",
    "uid": 1000
}
远程检查文件信息
3.3 发送文件且先做好备份
bash
[master-61 root ~] # ansible web -m copy -a "src=/tmp/61-dnf.log  dest=/tmp/web-dnf.log backup=yes"
172.16.1.9 | SUCCESS => {
    "ansible_facts": {
        "discovered_interpreter_python": "/usr/bin/python"
    },
    "changed": false,
    "checksum": "48579c730bab923a58386c5cb48fe95a025dd4be",
    "dest": "/tmp/web-dnf.log",
    "gid": 1000,
    "group": "www",
    "mode": "0600",
    "owner": "www",
    "path": "/tmp/web-dnf.log",
    "size": 5,
    "state": "file",
    "uid": 1000
}
172.16.1.8 | SUCCESS => {
    "ansible_facts": {
        "discovered_interpreter_python": "/usr/bin/python"
    },
    "changed": false,
    "checksum": "48579c730bab923a58386c5cb48fe95a025dd4be",
    "dest": "/tmp/web-dnf.log",
    "gid": 1000,
    "group": "www",
    "mode": "0600",
    "owner": "www",
    "path": "/tmp/web-dnf.log",
    "size": 5,
    "state": "file",
    "uid": 1000
}
172.16.1.7 | SUCCESS => {
    "ansible_facts": {
        "discovered_interpreter_python": "/usr/bin/python"
    },
    "changed": false,
    "checksum": "48579c730bab923a58386c5cb48fe95a025dd4be",
    "dest": "/tmp/web-dnf.log",
    "gid": 1000,
    "group": "www",
    "mode": "0600",
    "owner": "www",
    "path": "/tmp/web-dnf.log",
    "size": 5,
    "state": "file",
    "uid": 1000
}
4、 file文件操作模块
file模块主要用于创建文件、目录数据,以及对现有的文件、目录权限进行修改对文件属性各种操作。
file专门用于在远程机器上,关于文件的所有操作
官网:
命令查看帮助
ansible-doc -s file
file文件模块主要参数
path(必填) 指定文件、目录或符号链接的路径。
state (必填) 定义文件或目录的目标状态
mode 设置文件的权限模式,类似于 chmod 命令中的权限设置
owner 设置文件或目录的所有者。
group 设置文件或目录的用户组
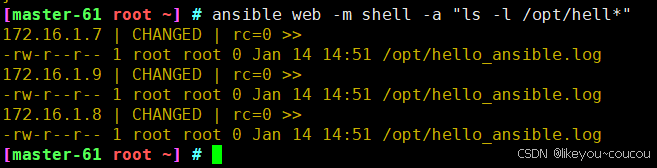
4.1 远程在web服务器中,创建一个文本hello_ansible.log
bash
[master-61 root ~] # ansible web -m file -a "path=/opt/hello_ansible.log state=touch"
172.16.1.9 | CHANGED => {
    "ansible_facts": {
        "discovered_interpreter_python": "/usr/bin/python"
    },
    "changed": true,
    "dest": "/opt/hello_ansible.log",
    "gid": 0,
    "group": "root",
    "mode": "0644",
    "owner": "root",
    "size": 0,
    "state": "file",
    "uid": 0
}
172.16.1.8 | CHANGED => {
    "ansible_facts": {
        "discovered_interpreter_python": "/usr/bin/python"
    },
    "changed": true,
    "dest": "/opt/hello_ansible.log",
    "gid": 0,
    "group": "root",
    "mode": "0644",
    "owner": "root",
    "size": 0,
    "state": "file",
    "uid": 0
}
172.16.1.7 | CHANGED => {
    "ansible_facts": {
        "discovered_interpreter_python": "/usr/bin/python"
    },
    "changed": true,
    "dest": "/opt/hello_ansible.log",
    "gid": 0,
    "group": "root",
    "mode": "0644",
    "owner": "root",
    "size": 0,
    "state": "file",
    "uid": 0
}
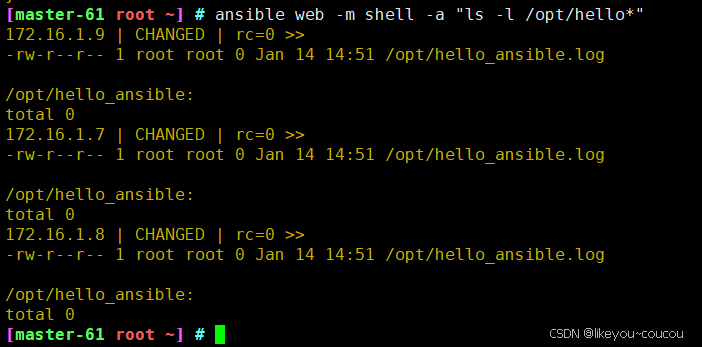
4.2 远程创建文件夹
bash
[master-61 root ~] # ansible web -m file -a "path=/opt/hello_ansible state=directory"
172.16.1.7 | CHANGED => {
    "ansible_facts": {
        "discovered_interpreter_python": "/usr/bin/python"
    },
    "changed": true,
    "gid": 0,
    "group": "root",
    "mode": "0755",
    "owner": "root",
    "path": "/opt/hello_ansible",
    "size": 6,
    "state": "directory",
    "uid": 0
}
172.16.1.9 | CHANGED => {
    "ansible_facts": {
        "discovered_interpreter_python": "/usr/bin/python"
    },
    "changed": true,
    "gid": 0,
    "group": "root",
    "mode": "0755",
    "owner": "root",
    "path": "/opt/hello_ansible",
    "size": 6,
    "state": "directory",
    "uid": 0
}
172.16.1.8 | CHANGED => {
    "ansible_facts": {
        "discovered_interpreter_python": "/usr/bin/python"
    },
    "changed": true,
    "gid": 0,
    "group": "root",
    "mode": "0755",
    "owner": "root",
    "path": "/opt/hello_ansible",
    "size": 6,
    "state": "directory",
    "uid": 0
}
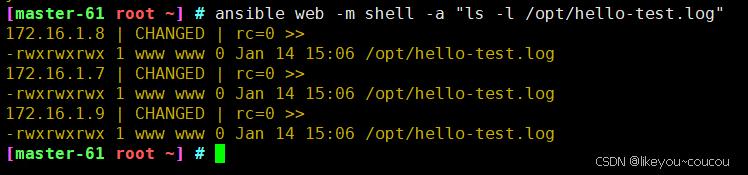
4.3 创建文件且设定所属组和文件权限
bash
[master-61 root ~] # ansible web -m file -a "path=/opt/hello-test.log state=touch owner=www group=www mode=777"
172.16.1.8 | CHANGED => {
    "ansible_facts": {
        "discovered_interpreter_python": "/usr/bin/python"
    },
    "changed": true,
    "dest": "/opt/hello-test.log",
    "gid": 1000,
    "group": "www",
    "mode": "0777",
    "owner": "www",
    "size": 0,
    "state": "file",
    "uid": 1000
}
172.16.1.9 | CHANGED => {
    "ansible_facts": {
        "discovered_interpreter_python": "/usr/bin/python"
    },
    "changed": true,
    "dest": "/opt/hello-test.log",
    "gid": 1000,
    "group": "www",
    "mode": "0777",
    "owner": "www",
    "size": 0,
    "state": "file",
    "uid": 1000
}
172.16.1.7 | CHANGED => {
    "ansible_facts": {
        "discovered_interpreter_python": "/usr/bin/python"
    },
    "changed": true,
    "dest": "/opt/hello-test.log",
    "gid": 1000,
    "group": "www",
    "mode": "0777",
    "owner": "www",
    "size": 0,
    "state": "file",
    "uid": 1000
}
file模块中playbook写法,yaml写法
ansible.builtin.file module -- Manage files and file properties --- Ansible Community Documentation
5、script脚本模块
script模块的功能参数
| 选项参数 | 选项说明 |
|---|---|
| creates | 定义一个文件是否存在,若不存在,则运行相应命令;存在则跳过 |
| free_form(必须) | 参数信息中可以输入任何系统命令,实现远程管理 |
| removes | 定义一个文件是否存在,如果存在,则运行相应命令;如果不存在则跳过 |
例如:打印一下基本的信息,脚本如下
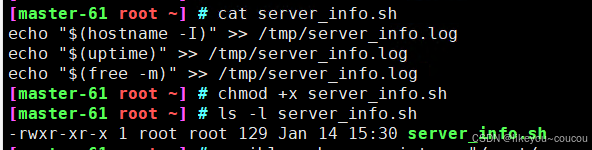
bash
[master-61 root ~] # ansible web -m script -a "/root/server_info.sh"
172.16.1.9 | CHANGED => {
    "changed": true,
    "rc": 0,
    "stderr": "Shared connection to 172.16.1.9 closed.\r\n",
    "stderr_lines": [
        "Shared connection to 172.16.1.9 closed."
    ],
    "stdout": "",
    "stdout_lines": []
}
172.16.1.7 | CHANGED => {
    "changed": true,
    "rc": 0,
    "stderr": "Shared connection to 172.16.1.7 closed.\r\n",
    "stderr_lines": [
        "Shared connection to 172.16.1.7 closed."
    ],
    "stdout": "",
    "stdout_lines": []
}
172.16.1.8 | CHANGED => {
    "changed": true,
    "rc": 0,
    "stderr": "Shared connection to 172.16.1.8 closed.\r\n",
    "stderr_lines": [
        "Shared connection to 172.16.1.8 closed."
    ],
    "stdout": "",
    "stdout_lines": []
}
cat查看对应的log内容
查看命令执行的详细过程
-vvvvv参数显示详细过程,v越多,越详细
bash
[master-61 root ~] # ansible web -v  -m shell -a "free -h"
Using /etc/ansible/ansible.cfg as config file
172.16.1.9 | CHANGED | rc=0 >>
              total        used        free      shared  buff/cache   available
Mem:           1.9G        131M        1.7G        9.5M        101M        1.7G
Swap:            0B          0B          0B
172.16.1.8 | CHANGED | rc=0 >>
              total        used        free      shared  buff/cache   available
Mem:           1.9G        130M        1.7G        9.5M        100M        1.7G
Swap:            0B          0B          0B
172.16.1.7 | CHANGED | rc=0 >>
              total        used        free      shared  buff/cache   available
Mem:           1.9G        132M        1.7G        9.5M        103M        1.7G
Swap:            0B          0B          0B
[master-61 root ~] # ansible web -vv  -m shell -a "free -h"
ansible 2.9.27
  config file = /etc/ansible/ansible.cfg
  configured module search path = [u'/root/.ansible/plugins/modules', u'/usr/share/ansible/plugins/modules']
  ansible python module location = /usr/lib/python2.7/site-packages/ansible
  executable location = /usr/bin/ansible
  python version = 2.7.5 (default, Jun 28 2022, 15:30:04) [GCC 4.8.5 20150623 (Red Hat 4.8.5-44)]
Using /etc/ansible/ansible.cfg as config file
Skipping callback 'actionable', as we already have a stdout callback.
Skipping callback 'counter_enabled', as we already have a stdout callback.
Skipping callback 'debug', as we already have a stdout callback.
Skipping callback 'dense', as we already have a stdout callback.
Skipping callback 'dense', as we already have a stdout callback.
Skipping callback 'full_skip', as we already have a stdout callback.
Skipping callback 'json', as we already have a stdout callback.
Skipping callback 'minimal', as we already have a stdout callback.
Skipping callback 'null', as we already have a stdout callback.
Skipping callback 'oneline', as we already have a stdout callback.
Skipping callback 'selective', as we already have a stdout callback.
Skipping callback 'skippy', as we already have a stdout callback.
Skipping callback 'stderr', as we already have a stdout callback.
Skipping callback 'unixy', as we already have a stdout callback.
Skipping callback 'yaml', as we already have a stdout callback.
META: ran handlers
172.16.1.7 | CHANGED | rc=0 >>
              total        used        free      shared  buff/cache   available
Mem:           1.9G        132M        1.7G        9.5M        103M        1.7G
Swap:            0B          0B          0B
172.16.1.8 | CHANGED | rc=0 >>
              total        used        free      shared  buff/cache   available
Mem:           1.9G        130M        1.7G        9.5M        100M        1.7G
Swap:            0B          0B          0B
172.16.1.9 | CHANGED | rc=0 >>
              total        used        free      shared  buff/cache   available
Mem:           1.9G        133M        1.7G        9.5M        101M        1.7G
Swap:            0B          0B          0B
META: ran handlers
META: ran handlers
[master-61 root ~] #
6、cron定时任务模块
官网文档:
cron模块用于管理定时任务的记录,编写任务
定时任务的记录,语法格式
* * * * * 要执行的命令
主要参数
name (必填) 定时任务的名称,通常是对任务的描述
job (必填) 指定要执行的命令或脚本
minute 指定定时任务的分钟部分,取值范围为 0-59
hour 指定定时任务的小时部分,取值范围为 0-23
day 指定定时任务的日期部分,取值范围为 1-31
month 指定定时任务的月份部分,取值范围为 1-12
weekday 指定定时任务的星期几部分,取值范围为 0-7,其中 0 和 7 都代表星期天
state 指定定时任务的状态
user 指定哪个用户的 crontab 中创建或修改该任务
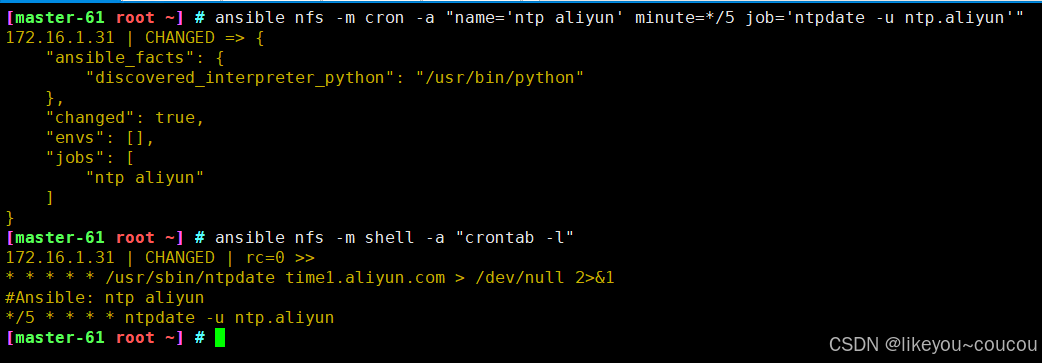
添加ntpdate定时任务
添加每5分钟执行一次和阿里云时间同步
*/5 * * * * ntpdate -u ntp.aliyun.com
ansible nfs -m cron -a "name='ntp aliyun' minute=*/5 job='ntpdate -u ntp.aliyun'"
删除定时任务
ansible nfs -m cron -a "name='ntp aliyun' state=absent"

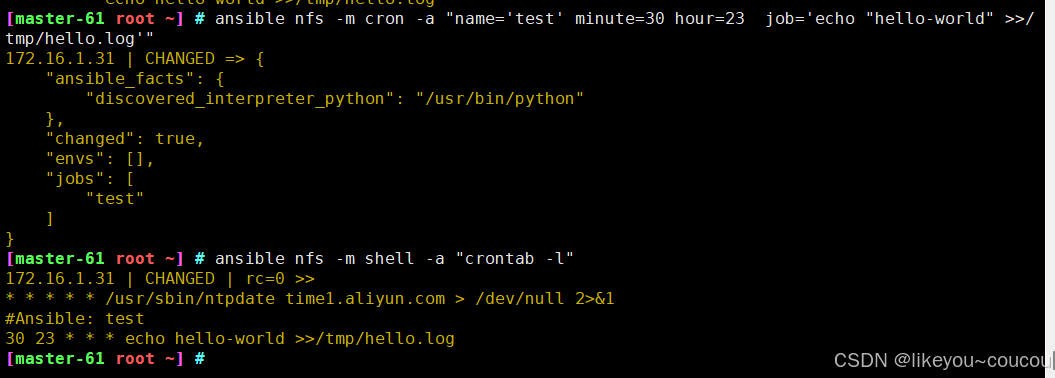
创建没分钟执行的任务;修改指定名称的定时任务
ansible nfs -m cron -a "name='test' job='echo "hello-world" >>/tmp/hello.log'"

ansible nfs -m cron -a "name='test' minute=30 hour=23 job='echo "hello-world" >>/tmp/hello.log'"
7、group模块
管理系统用户组的模块
官方文档:
模块参数 参数描述
name 创建指定的组名
gid 组的GID
state absent,移除远程主机的组
present,创建远端主机的组
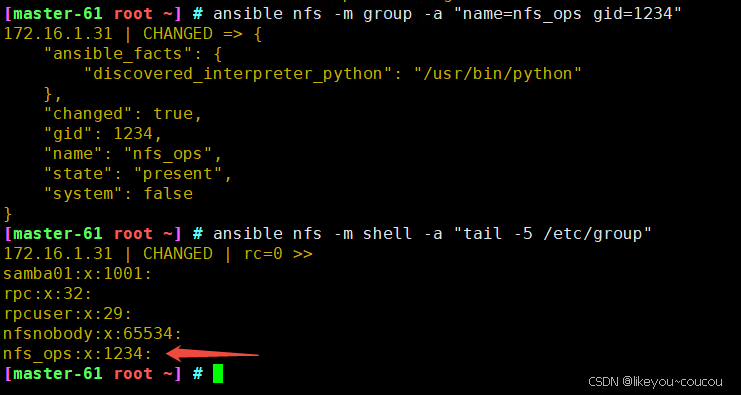
创建nfs_ops组,gid=1234
ansible nfs -m group -a "name=nfs_ops gid=1234"
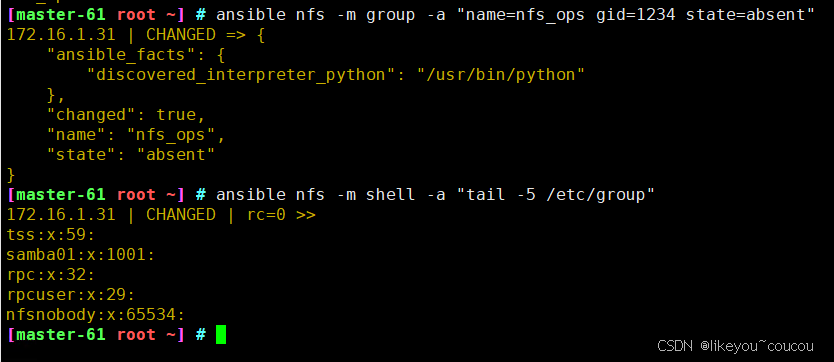
删除组
ansible nfs -m group -a "name=nfs_ops gid=1234 state=absent"
8、user用户模块
用户管理,也就是关于用户的
-
uid
-
用户名
-
用户主组
-
用户附加组
-
创建用户
-
删除用户
-
创建关于用户的公私钥
-
用户过期时间
-
用户密码过期时间
官网文档:
语法参数:
| 模块参数 | 参数描述 |
|---|---|
| create_home | 创建家目录,设置no则不创建家目录 |
| group | 创建用户组 |
| name | 创建用户的名字 |
| password | 创建用户的密码 |
| uid | 创建用户的UID |
| shell | 用户登录解释器 |
| state | Absent(删除用户)present(默认参数,创建) |
| expires | 账户过期时间 |
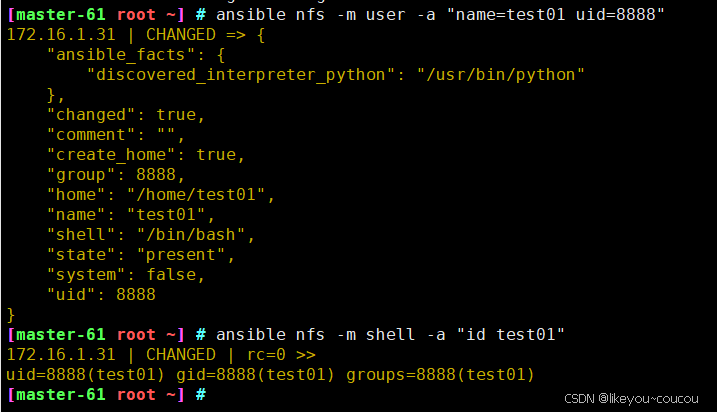
8.1创建一个test01用户,uid为8888
ansible nfs -m user -a "name=test01 uid=8888"
8.2创建test02用户,用户组,以及设置权限
bash
[master-61 root ~] # ansible nfs -m group -a "name=test02 gid=1999"
172.16.1.31 | CHANGED => {
    "ansible_facts": {
        "discovered_interpreter_python": "/usr/bin/python"
    },
    "changed": true,
    "gid": 1999,
    "name": "test02",
    "state": "present",
    "system": false
}
[master-61 root ~] # ansible nfs -m user -a "name=test02 uid=1999 group=1999 create_home=no shell=/sbin/nologin"
172.16.1.31 | CHANGED => {
    "ansible_facts": {
        "discovered_interpreter_python": "/usr/bin/python"
    },
    "changed": true,
    "comment": "",
    "create_home": false,
    "group": 1999,
    "home": "/home/test02",
    "name": "test02",
    "shell": "/sbin/nologin",
    "state": "present",
    "system": false,
    "uid": 1999
}

[master-61 root ~] # ansible nfs -m shell -a "id test02"
172.16.1.31 | CHANGED | rc=0 >>
uid=1999(test02) gid=1999(test02) groups=1999(test02)
[master-61 root ~] #
9、yum模块
yum模块就是一个专门用于管理软件的模块。
官方文档:
语法参数:
name 安装、升级或卸载的软件包的名称,可以是单个包名,也可以是包名列表
state present:确保包已安装。如果包未安装,会进行安装。
absent:确保包已卸载。如果包安装了,会被卸载。
latest:确保包已安装最新版本。如果当前安装的版本不是最新,进行升级
list 用于列出软件包的状态
installed:列出已安装的软件包。
updates:列出可用的更新包。
available:列出可安装的包
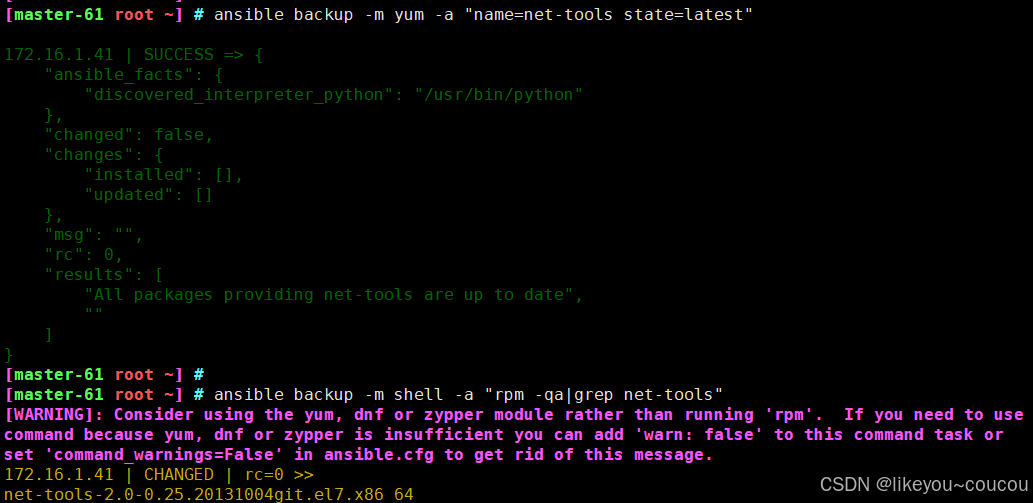
安装和卸载net-tools最新版本
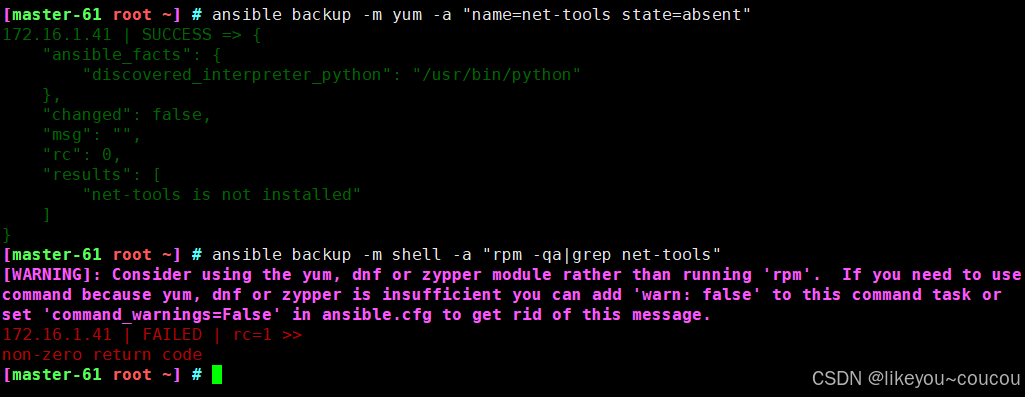
ansible backup -m yum -a "name=net-tools state=latest"
ansible backup -m yum -a "name=net-tools state=absent"
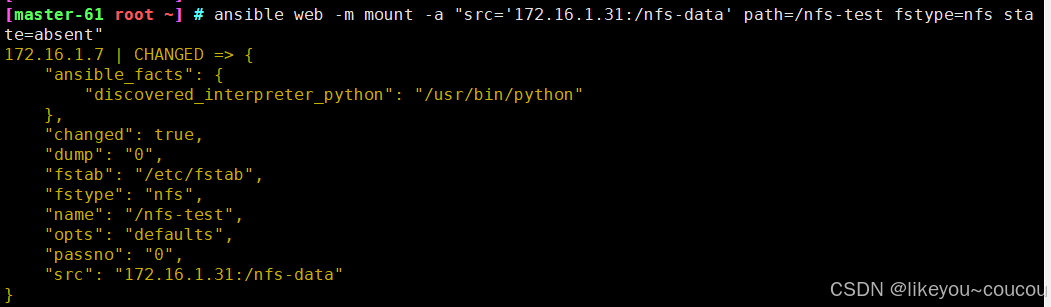
10、mount挂载模块
官方文档:
参数:
mounted 挂载设备且写入fstab
present 仅写入fstab 不挂载
absent 卸载且删除fstab记录
umounted 只卸载不删除fstab记录
给web-7机器挂载nfs目录(立即挂载且写入/etc/fstab)
bash
[master-61 root ~] # ansible web -m mount -a "src='172.16.1.31:/nfs-data' path=/nfs-test fstype=nfs state=mounted"

172.16.1.7 | CHANGED => {
    "ansible_facts": {
        "discovered_interpreter_python": "/usr/bin/python"
    },
    "changed": true,
    "dump": "0",
    "fstab": "/etc/fstab",
    "fstype": "nfs",
    "name": "/nfs-test",
    "opts": "defaults",
    "passno": "0",
    "src": "172.16.1.31:/nfs-data"
}


[master-61 root ~] # ansible web -a "df -h"
172.16.1.7 | CHANGED | rc=0 >>
Filesystem               Size  Used Avail Use% Mounted on
devtmpfs                 979M     0  979M   0% /dev
tmpfs                    991M     0  991M   0% /dev/shm
tmpfs                    991M  9.6M  981M   1% /run
tmpfs                    991M     0  991M   0% /sys/fs/cgroup
/dev/mapper/centos-root   37G  2.0G   35G   6% /
/dev/sda1               1014M  140M  875M  14% /boot
tmpfs                    199M     0  199M   0% /run/user/0
172.16.1.31:/nfs-data     37G  2.1G   35G   6% /nfs-test


[master-61 root ~] # ansible web -a "cat /etc/fstab"
172.16.1.7 | CHANGED | rc=0 >>

#
# /etc/fstab
# Created by anaconda on Mon Dec  2 16:09:14 2024
#
# Accessible filesystems, by reference, are maintained under '/dev/disk'
# See man pages fstab(5), findfs(8), mount(8) and/or blkid(8) for more info
#
UUID=be2d80b1-e200-4660-9df5-23fcd50e25cb /boot                   xfs     defaults        0 0
#/dev/mapper/centos-swap swap                    swap    defaults        0 0
172.16.1.31:/nfs-data /nfs-test nfs defaults 0 0
取消挂载,只需要把state的mounted改成absent即可
11、archive压缩模块
官方文档:
支持压缩类型
bz2
gz ← (default)
tar
xz
zip
压缩/etc配置文件到指定路径
bash
[master-61 root ~] # ansible web -m archive -a "path=/etc dest=/opt/etc.tgz"
172.16.1.7 | CHANGED => {
    "ansible_facts": {
        "discovered_interpreter_python": "/usr/bin/python"
    },
    "archived": [
......
   ],
    "arcroot": "//",
    "changed": true,
    "dest": "/opt/etc.tgz",
    "expanded_exclude_paths": [],
    "expanded_paths": [
        "/etc"
    ],
    "gid": 0,
    "group": "root",
    "missing": [],
    "mode": "0644",
    "owner": "root",
    "size": 10278190,
    "state": "file",
    "uid": 0
}


检查是否压缩成功
[master-61 root ~] # ansible web -a "ls /opt -l"
172.16.1.7 | CHANGED | rc=0 >>
total 10044
-rw-r--r-- 1 root root 10278190 Jan 16 15:24 etc.tgz

[master-61 root ~] # ansible web -a "file /opt/etc.tgz"
172.16.1.7 | CHANGED | rc=0 >>
/opt/etc.tgz: gzip compressed data, was "/opt/etc.tgz", last modified: Thu Jan 16 15:24:14 2025, max compression
12、unarchive解压缩模块
官网文档:
解压缩etc.tgz到指定目录(远程解压)
remote_src远程数据源
bash
检查指定目录必须存在
[master-61 root ~] # ansible web -m file -a "path=/opt/etc_file state=directory"
172.16.1.7 | CHANGED => {
    "ansible_facts": {
        "discovered_interpreter_python": "/usr/bin/python"
    },
    "changed": true,
    "gid": 0,
    "group": "root",
    "mode": "0755",
    "owner": "root",
    "path": "/opt/etc_file",
    "size": 6,
    "state": "directory",
    "uid": 0
}


解压缩etc.tgz
[master-61 root ~] # ansible web -m unarchive -a "src=/opt/etc.tgz dest=/opt/etcfile/ remote_src=yes"
172.16.1.7 | CHANGED => {
    "ansible_facts": {
        "discovered_interpreter_python": "/usr/bin/python"
    },
    "changed": true,
    "dest": "/opt/etcfile/",
    "extract_results": {
        "cmd": [
            "/usr/bin/gtar",
            "--extract",
            "-C",
            "/opt/etcfile/",
            "-z",
            "-f",
            "/opt/etc.tgz"
        ],
        "err": "",
        "out": "",
        "rc": 0
    },
    "gid": 0,
    "group": "root",
    "handler": "TgzArchive",
    "mode": "0755",
    "owner": "root",
    "size": 17,
    "src": "/opt/etc.tgz",
    "state": "directory",
    "uid": 0
}


查看是否解压缩成功
[master-61 root ~] # ansible web -a "ls /opt/etcfile/etc/"
172.16.1.7 | CHANGED | rc=0 >>
adjtime
......