docker安装elk6.7.1-搜集nginx-json日志
如果对运维课程感兴趣,可以在b站上、A站或csdn上搜索我的账号: 运维实战课程,可以关注我,学习更多免费的运维实战技术视频
0.规划
192.168.171.130 nginx+filebeat
192.168.171.131 nginx+filebeat
192.168.171.128 redis
192.168.171.129 logstash
192.168.171.128 es1
192.168.171.129 es2
192.168.171.132 kibana

1.docker安装es集群-6.7.1 和head插件(在192.168.171.128-es1和192.168.171.129-es2)
在192.168.171.128上安装es6.7.1和es6.7.1-head插件:
1)安装docker19.03.2:
root@localhost \~# docker info
.......
Server Version: 19.03.2
root@localhost \~# sysctl -w vm.max_map_count=262144 #设置elasticsearch用户拥有的内存权限太小,至少需要262144
root@localhost \~# sysctl -a |grep vm.max_map_count #查看
vm.max_map_count = 262144
root@localhost \~# vim /etc/sysctl.conf
vm.max_map_count=262144
2)安装es6.7.1:
上传相关es的压缩包到/data目录:
root@localhost \~# cd /data/
root@localhost data# ls es-6.7.1.tar.gz
es-6.7.1.tar.gz
root@localhost data# tar -zxf es-6.7.1.tar.gz
root@localhost data# cd es-6.7.1
root@localhost es-6.7.1# ls
config image scripts
root@localhost es-6.7.1# ls config/
es.yml
root@localhost es-6.7.1# ls image/
elasticsearch_6.7.1.tar
root@localhost es-6.7.1# ls scripts/
run_es_6.7.1.sh
root@localhost es-6.7.1# docker load -i image/elasticsearch_6.7.1.tar
root@localhost es-6.7.1# docker images |grep elasticsearch
elasticsearch 6.7.1 e2667f5db289 11 months ago 812MB
root@localhost es-6.7.1# cat config/es.yml
cluster.name: elasticsearch-cluster
node.name: es-node1
network.host: 0.0.0.0
network.publish_host: 192.168.171.128
http.port: 9200
transport.tcp.port: 9300
http.cors.enabled: true
http.cors.allow-origin: "*"
node.master: true
node.data: true
discovery.zen.ping.unicast.hosts: "192.168.171.128:9300","192.168.171.129:9300"
discovery.zen.minimum_master_nodes: 1
#cluster.name 集群的名称,可以自定义名字,但两个es必须一样,就是通过是不是同一个名称判断是不是一个集群
#node.name 本机的节点名,可自定义,没必要必须hosts解析或配置该主机名
#下面两个是默认基础上新加的,允许跨域访问
#http.cors.enabled: true
#http.cors.allow-origin: '*'
##注意:容器里有两个端口,9200是:ES节点和外部通讯使用,9300是:ES节点之间通讯使用
root@localhost es-6.7.1# cat scripts/run_es_6.7.1.sh
#!/bin/bash
docker run -e ES_JAVA_OPTS="-Xms1024m -Xmx1024m" -d --net=host --restart=always -v /data/es-6.7.1/config/es.yml:/usr/share/elasticsearch/config/elasticsearch.yml -v /data/es6.7.1_data:/usr/share/elasticsearch/data -v /data/es6.7.1_logs:/usr/share/elasticsearch/logs --name es6.7.1 elasticsearch:6.7.1
#注意:容器里有两个端口,9200是:ES节点和外部通讯使用,9300是:ES节点之间通讯使用
root@localhost es-6.7.1# mkdir /data/es6.7.1_data
root@localhost es-6.7.1# mkdir /data/es6.7.1_logs
root@localhost es-6.7.1# chmod -R 777 /data/es6.7.1_data/ #需要es用户能写入,否则无法映射
root@localhost es-6.7.1# chmod -R 777 /data/es6.7.1_logs/ #需要es用户能写入,否则无法映射
root@localhost es-6.7.1# sh scripts/run_es_6.7.1.sh
root@localhost es-6.7.1# docker ps
CONTAINER ID IMAGE COMMAND CREATED STATUS PORTS NAMES
988abe7eedac elasticsearch:6.7.1 "/usr/local/bin/dock..." 23 seconds ago Up 19 seconds es6.7.1
root@localhost es-6.7.1# netstat -anput |grep 9200
tcp6 0 0 :::9200 :::* LISTEN 16196/java
root@localhost es-6.7.1# netstat -anput |grep 9300
tcp6 0 0 :::9300 :::* LISTEN 16196/java
root@localhost es-6.7.1# cd
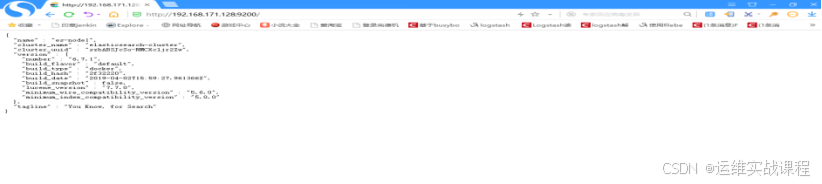
浏览器访问es服务:http://192.168.171.128:9200/
3)安装es6.7.1-head插件:
上传相关es-head插件的压缩包到/data目录
root@localhost \~# cd /data/
root@localhost data# ls es-6.7.1-head.tar.gz
es-6.7.1-head.tar.gz
root@localhost data# tar -zxf es-6.7.1-head.tar.gz
root@localhost data# cd es-6.7.1-head
root@localhost es-6.7.1-head# ls
conf image scripts
root@localhost es-6.7.1-head# ls conf/
app.js Gruntfile.js
root@localhost es-6.7.1-head# ls image/
elasticsearch-head_6.7.1.tar
root@localhost es-6.7.1-head# ls scripts/
run_es-head.sh
root@localhost es-6.7.1-head# docker load -i image/elasticsearch-head_6.7.1.tar
root@localhost es-6.7.1-head# docker images
REPOSITORY TAG IMAGE ID CREATED SIZE
elasticsearch 6.7.1 e2667f5db289 11 months ago 812MB
elasticsearch-head 6.7.1 b19a5c98e43b 3 years ago 824MB
root@localhost es-6.7.1-head# vim conf/app.js
.....
this.base_uri = this.config.base_uri || this.prefs.get("app-base_uri") || "http://192.168.171.128:9200"; #修改为本机ip
....
root@localhost es-6.7.1-head# vim conf/Gruntfile.js
....
connect: {
server: {
options: {
hostname: '*', #添加
port: 9100,
base: '.',
keepalive: true
}
}
....
root@localhost es-6.7.1-head# cat scripts/run_es-head.sh
#!/bin/bash
docker run -d --name es-head-6.7.1 --net=host --restart=always -v /data/es-6.7.1-head/conf/Gruntfile.js:/usr/src/app/Gruntfile.js -v /data/es-6.7.1-head/conf/app.js:/usr/src/app/_site/app.js elasticsearch-head:6.7.1
#容器端口是9100,是es的管理端口
root@localhost es-6.7.1-head# sh scripts/run_es-head.sh
root@localhost es-6.7.1-head# docker ps
CONTAINER ID IMAGE COMMAND CREATED STATUS PORTS NAMES
c46189c3338b elasticsearch-head:6.7.1 "/bin/sh -c 'grunt s..." 42 seconds ago Up 37 seconds es-head-6.7.1
988abe7eedac elasticsearch:6.7.1 "/usr/local/bin/dock..." 9 minutes ago Up 9 minutes es6.7.1
root@localhost es-6.7.1-head# netstat -anput |grep 9100
tcp6 0 0 :::9100 :::* LISTEN 16840/grunt
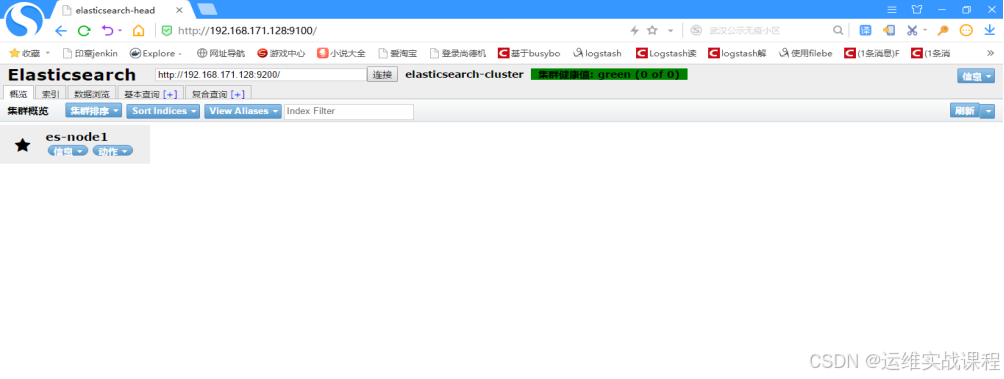
浏览器访问es-head插件:http://192.168.171.128:9100/
在192.168.171.129上安装es6.7.1和es6.7.1-head插件:
1)安装docker19.03.2:
root@localhost \~# docker info
Client:
Debug Mode: false
Server:
Containers: 2
Running: 2
Paused: 0
Stopped: 0
Images: 2
Server Version: 19.03.2
root@localhost \~# sysctl -w vm.max_map_count=262144 #设置elasticsearch用户拥有的内存权限太小,至少需要262144
root@localhost \~# sysctl -a |grep vm.max_map_count #查看
vm.max_map_count = 262144
root@localhost \~# vim /etc/sysctl.conf
vm.max_map_count=262144
2)安装es6.7.1:
上传相关es的压缩包到/data目录:
root@localhost \~# cd /data/
root@localhost data# ls es-6.7.1.tar.gz
es-6.7.1.tar.gz
root@localhost data# tar -zxf es-6.7.1.tar.gz
root@localhost data# cd es-6.7.1
root@localhost es-6.7.1# ls
config image scripts
root@localhost es-6.7.1# ls config/
es.yml
root@localhost es-6.7.1# ls image/
elasticsearch_6.7.1.tar
root@localhost es-6.7.1# ls scripts/
run_es_6.7.1.sh
root@localhost es-6.7.1# docker load -i image/elasticsearch_6.7.1.tar
root@localhost es-6.7.1# docker images |grep elasticsearch
elasticsearch 6.7.1 e2667f5db289 11 months ago 812MB
root@localhost es-6.7.1# vim config/es.yml
cluster.name: elasticsearch-cluster
node.name: es-node2
network.host: 0.0.0.0
network.publish_host: 192.168.171.129
http.port: 9200
transport.tcp.port: 9300
http.cors.enabled: true
http.cors.allow-origin: "*"
node.master: true
node.data: true
discovery.zen.ping.unicast.hosts: "192.168.171.128:9300","192.168.171.129:9300"
discovery.zen.minimum_master_nodes: 1
#cluster.name 集群的名称,可以自定义名字,但两个es必须一样,就是通过是不是同一个名称判断是不是一个集群
#node.name 本机的节点名,可自定义,没必要必须hosts解析或配置该主机名
#下面两个是默认基础上新加的,允许跨域访问
#http.cors.enabled: true
#http.cors.allow-origin: '*'
##注意:容器里有两个端口,9200是:ES节点和外部通讯使用,9300是:ES节点之间通讯使用
root@localhost es-6.7.1# cat scripts/run_es_6.7.1.sh
#!/bin/bash
docker run -e ES_JAVA_OPTS="-Xms1024m -Xmx1024m" -d --net=host --restart=always -v /data/es-6.7.1/config/es.yml:/usr/share/elasticsearch/config/elasticsearch.yml -v /data/es6.7.1_data:/usr/share/elasticsearch/data -v /data/es6.7.1_logs:/usr/share/elasticsearch/logs --name es6.7.1 elasticsearch:6.7.1
#注意:容器里有两个端口,9200是:ES节点和外部通讯使用,9300是:ES节点之间通讯使用
root@localhost es-6.7.1# mkdir /data/es6.7.1_data
root@localhost es-6.7.1# mkdir /data/es6.7.1_logs
root@localhost es-6.7.1# chmod -R 777 /data/es6.7.1_data/ #需要es用户能写入,否则无法映射
root@localhost es-6.7.1# chmod -R 777 /data/es6.7.1_logs/ #需要es用户能写入,否则无法映射
root@localhost es-6.7.1# sh scripts/run_es_6.7.1.sh
root@localhost es-6.7.1# docker ps
CONTAINER ID IMAGE COMMAND CREATED STATUS PORTS NAMES
a3b0a0187db8 elasticsearch:6.7.1 "/usr/local/bin/dock..." 9 seconds ago Up 7 seconds es6.7.1
root@localhost es-6.7.1# netstat -anput |grep 9200
tcp6 0 0 :::9200 :::* LISTEN 14171/java
root@localhost es-6.7.1# netstat -anput |grep 9300
tcp6 0 0 :::9300 :::* LISTEN 14171/java
root@localhost es-6.7.1# cd
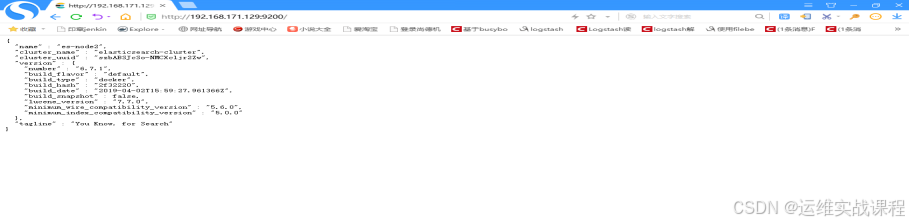
浏览器访问es服务:http://192.168.171.129:9200/
3)安装es6.7.1-head插件:
上传相关es-head插件的压缩包到/data目录
root@localhost \~# cd /data/
root@localhost data# ls es-6.7.1-head.tar.gz
es-6.7.1-head.tar.gz
root@localhost data# tar -zxf es-6.7.1-head.tar.gz
root@localhost data# cd es-6.7.1-head
root@localhost es-6.7.1-head# ls
conf image scripts
root@localhost es-6.7.1-head# ls conf/
app.js Gruntfile.js
root@localhost es-6.7.1-head# ls image/
elasticsearch-head_6.7.1.tar
root@localhost es-6.7.1-head# ls scripts/
run_es-head.sh
root@localhost es-6.7.1-head# docker load -i image/elasticsearch-head_6.7.1.tar
root@localhost es-6.7.1-head# docker images
REPOSITORY TAG IMAGE ID CREATED SIZE
elasticsearch 6.7.1 e2667f5db289 11 months ago 812MB
elasticsearch-head 6.7.1 b19a5c98e43b 3 years ago 824MB
root@localhost es-6.7.1-head# vim conf/app.js
.....
this.base_uri = this.config.base_uri || this.prefs.get("app-base_uri") || "http://192.168.171.129:9200"; #修改为本机ip
....
root@localhost es-6.7.1-head# vim conf/Gruntfile.js
....
connect: {
server: {
options: {
hostname: '*', #添加
port: 9100,
base: '.',
keepalive: true
}
}
....
root@localhost es-6.7.1-head# cat scripts/run_es-head.sh
#!/bin/bash
docker run -d --name es-head-6.7.1 --net=host --restart=always -v /data/es-6.7.1-head/conf/Gruntfile.js:/usr/src/app/Gruntfile.js -v /data/es-6.7.1-head/conf/app.js:/usr/src/app/_site/app.js elasticsearch-head:6.7.1
#容器端口是9100,是es的管理端口
root@localhost es-6.7.1-head# sh scripts/run_es-head.sh
root@localhost es-6.7.1-head# docker ps
CONTAINER ID IMAGE COMMAND CREATED STATUS PORTS NAMES
f4f5c967754b elasticsearch-head:6.7.1 "/bin/sh -c 'grunt s..." 12 seconds ago Up 7 seconds es-head-6.7.1
a3b0a0187db8 elasticsearch:6.7.1 "/usr/local/bin/dock..." 7 minutes ago Up 7 minutes es6.7.1
root@localhost es-6.7.1-head# netstat -anput |grep 9100
tcp6 0 0 :::9100 :::* LISTEN 14838/grunt
浏览器访问es-head插件:http://192.168.171.129:9100/
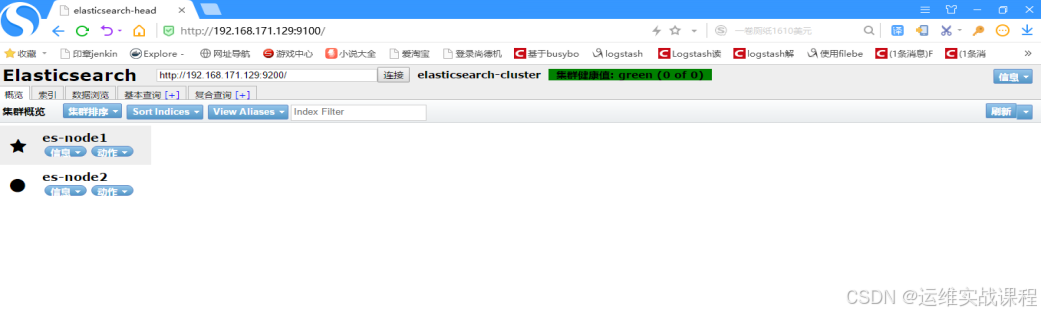
同样在机器192.168.171.128的head插件也能查看到状态,因为插件管理工具都是一样的,如下:
2.docker安装redis4.0.10(在192.168.171.128上)
上传redis4.0.10镜像:
root@localhost \~# ls redis_4.0.10.tar
redis_4.0.10.tar
root@localhost \~# docker load -i redis_4.0.10.tar
root@localhost \~# docker images |grep redis
gmprd.baiwang-inner.com/redis 4.0.10 f713a14c7f9b 13 months ago 425MB
root@localhost \~# mkdir -p /data/redis/conf #创建配置文件目录
root@localhost \~# vim /data/redis/conf/redis.conf #自定义配置文件
protected-mode no
port 6379
bind 0.0.0.0
tcp-backlog 511
timeout 0
tcp-keepalive 300
supervised no
pidfile "/usr/local/redis/redis_6379.pid"
loglevel notice
logfile "/opt/redis/logs/redis.log"
databases 16
save 900 1
save 300 10
save 60 10000
stop-writes-on-bgsave-error yes
rdbcompression yes
rdbchecksum yes
dbfilename "dump.rdb"
dir "/"
slave-serve-stale-data yes
slave-read-only yes
repl-diskless-sync no
repl-diskless-sync-delay 5
repl-disable-tcp-nodelay no
slave-priority 100
requirepass 123456
appendonly yes
dir "/opt/redis/data"
logfile "/opt/redis/logs/redis.log"
appendfilename "appendonly.aof"
appendfsync everysec
no-appendfsync-on-rewrite no
auto-aof-rewrite-percentage 100
auto-aof-rewrite-min-size 64mb
aof-load-truncated yes
lua-time-limit 5000
slowlog-log-slower-than 10000
slowlog-max-len 128
latency-monitor-threshold 0
notify-keyspace-events ""
hash-max-ziplist-entries 512
hash-max-ziplist-value 64
list-max-ziplist-size -2
list-compress-depth 0
set-max-intset-entries 512
zset-max-ziplist-entries 128
zset-max-ziplist-value 64
hll-sparse-max-bytes 3000
activerehashing yes
client-output-buffer-limit normal 0 0 0
client-output-buffer-limit slave 256mb 64mb 60
client-output-buffer-limit pubsub 32mb 8mb 60
hz 10
aof-rewrite-incremental-fsync yes
maxclients 4064
#appendonly yes 是开启数据持久化
#dir "/opt/redis/data" #持久化到的容器里的目录
#logfile "/opt/redis/logs/redis.log" #持久化到的容器里的目录,此处写的必须是文件路径,目录路径不行
root@localhost \~# docker run -d --net=host --restart=always --name=redis4.0.10 -v /data/redis/conf/redis.conf:/opt/redis/conf/redis.conf -v /data/redis_data:/opt/redis/data -v /data/redis_logs:/opt/redis/logs gmprd.baiwang-inner.com/redis:4.0.10
root@localhost \~# docker ps |grep redis
735fb213ee41 gmprd.baiwang-inner.com/redis:4.0.10 "redis-server /opt/r..." 9 seconds ago Up 8 seconds redis4.0.10
root@localhost \~# netstat -anput |grep 6379
tcp 0 0 0.0.0.0:6379 0.0.0.0:* LISTEN 16988/redis-server
root@localhost \~# ls /data/redis_data/
appendonly.aof
root@localhost \~# ls /data/redis_logs/
redis.log
root@localhost \~# docker exec -it redis4.0.10 bash
root@localhost /# redis-cli -a 123456
127.0.0.1:6379> set k1 v1
OK
127.0.0.1:6379> keys *
- "k1"
127.0.0.1:6379> get k1
"v1"
127.0.0.1:6379> quit
root@localhost /# exit
3.docker安装nginx1.15.9和配置json日志格式和filebeat6.7.1 (192.168.171.130和192.168.171.131)
在192.168.171.130上:
安装nginx1.15.9:
root@localhost \~# cd /data/
root@localhost data# ls nginx1.15.9.tar.gz
nginx1.15.9.tar.gz
root@localhost data# tar -zxf nginx1.15.9.tar.gz
root@localhost data# cd nginx1.15.9
root@localhost nginx1.15.9# ls
conf image scripts
root@localhost nginx1.15.9# ls conf/
nginx.conf
root@localhost nginx1.15.9# ls image/
nginx1.15.9-0711.tar
root@localhost nginx1.15.9# ls scripts/
run_nginx.sh
root@localhost nginx1.15.9# docker load -i image/nginx1.15.9-0711.tar
root@localhost nginx1.15.9# docker images |grep nginx
nginx 1.15.9 881bd08c0b08 12 months ago 109MB
root@localhost nginx1.15.9# cat conf/nginx.conf
user root;
worker_processes 4;
events {
worker_connections 10240;
}
http {
include mime.types;
default_type application/octet-stream;
log_format json '{ "@timestamp": "$time_iso8601", '
'"remote_addr": "$remote_addr", '
'"remote_user": "$remote_user", '
'"body_bytes_sent": "$body_bytes_sent", '
'"request_time": "$request_time", '
'"status": "$status", '
'"request_uri": "$request_uri", '
'"request_method": "$request_method", '
'"http_referrer": "$http_referer", '
'"http_x_forwarded_for": "$http_x_forwarded_for", '
'"http_user_agent": "$http_user_agent"}';
access_log /var/log/nginx/access.log json;
client_max_body_size 128m;
sendfile on;
keepalive_timeout 65;
gzip on;
gzip_min_length 1k;
gzip_buffers 4 16k;
gzip_comp_level 4;
gzip_types text/plain text/javascript application/x-javascript text/css application/xml application/xml+rss;
ssi on;
server_tokens off;
server {
listen 80;
#listen 5080 ssl;
#ssl_certificate /data/ssl/server.crt;
#ssl_certificate_key /data/ssl/server.key;
#ssl_session_timeout 5m;
server_name localhost;
location / {
root registry/static_root;
index index.html index.htm;
}
location = /404.html {
root html;
index 404.html;
}
error_page 500 502 503 504 /50x.html;
location = /50x.html {
root html;
}
}
}
root@localhost nginx1.15.9# cat scripts/run_nginx.sh
#!/bin/bash
docker run -d --net=host --restart=always --name=nginx -v /data/nginx1.15.9/conf/nginx.conf:/etc/nginx/nginx.conf -v /data/nginx/logs:/var/log/nginx -v /data/nginx/registry:/etc/nginx/registry nginx:1.15.9
root@localhost nginx1.15.9# sh scripts/run_nginx.sh
root@localhost nginx1.15.9# docker ps |grep nginx
a920b3487d8d nginx:1.15.9 "nginx -g 'daemon of..." 20 seconds ago Up 19 seconds nginx
root@localhost nginx1.15.9# netstat -anput |grep 80
tcp 0 0 0.0.0.0:80 0.0.0.0:* LISTEN 27454/nginx: master
root@localhost nginx1.15.9# ls /data/nginx
logs registry
root@localhost nginx1.15.9# ls /data/nginx/logs/
access.log error.log
root@localhost nginx1.15.9# ls /data/nginx/registry/
空
root@localhost nginx1.15.9# mkdir /data/nginx/registry/static_root
root@localhost nginx1.15.9# echo 111 > /data/nginx/registry/static_root/index.html
root@localhost nginx1.15.9# curl localhost
111
root@localhost nginx1.15.9# curl localhost
111
root@localhost nginx1.15.9# curl localhost
111
root@localhost nginx1.15.9# curl 192.168.171.130
111
root@localhost nginx1.15.9# cat /data/nginx/logs/access.log
{ "@timestamp": "2020-03-08T11:01:12+00:00", "remote_addr": "127.0.0.1", "remote_user": "-", "body_bytes_sent": "14", "request_time": "0.000", "status": "200", "request_uri": "/", "request_method": "GET", "http_referrer": "-", "http_x_forwarded_for": "-", "http_user_agent": "curl/7.29.0"}
{ "@timestamp": "2020-03-08T11:01:13+00:00", "remote_addr": "127.0.0.1", "remote_user": "-", "body_bytes_sent": "14", "request_time": "0.000", "status": "200", "request_uri": "/", "request_method": "GET", "http_referrer": "-", "http_x_forwarded_for": "-", "http_user_agent": "curl/7.29.0"}
{ "@timestamp": "2020-03-08T11:01:43+00:00", "remote_addr": "127.0.0.1", "remote_user": "-", "body_bytes_sent": "14", "request_time": "0.000", "status": "200", "request_uri": "/", "request_method": "GET", "http_referrer": "-", "http_x_forwarded_for": "-", "http_user_agent": "curl/7.29.0"}
{ "@timestamp": "2020-03-08T11:03:44+00:00", "remote_addr": "192.168.171.130", "remote_user": "-", "body_bytes_sent": "14", "request_time": "0.000", "status": "200", "request_uri": "/", "request_method": "GET", "http_referrer": "-", "http_x_forwarded_for": "-", "http_user_agent": "curl/7.29.0"}
root@localhost nginx1.15.9# cd
安装filebeat6.7.1:
root@localhost \~# cd /data/
root@localhost data# ls filebeat6.7.1.tar.gz
filebeat6.7.1.tar.gz
root@localhost data# tar -zxf filebeat6.7.1.tar.gz
root@localhost data# cd filebeat6.7.1
root@localhost filebeat6.7.1# ls
conf image scripts
root@localhost filebeat6.7.1# ls conf/
filebeat.yml filebeat.yml.bak
root@localhost filebeat6.7.1# ls image/
filebeat_6.7.1.tar
root@localhost filebeat6.7.1# ls scripts/
run_filebeat6.7.1.sh
root@localhost filebeat6.7.1# docker load -i image/filebeat_6.7.1.tar
root@localhost filebeat6.7.1# docker images |grep filebeat
docker.elastic.co/beats/filebeat 6.7.1 04fcff75b160 11 months ago 279MB
root@localhost filebeat6.7.1# cat conf/filebeat.yml
filebeat.inputs:
- type: log
enabled: true
paths:
- /usr/share/filebeat/logs/*.log
fields:
log_source: nginx-access-log-171.130
filebeat.config.modules:
path: ${path.config}/modules.d/*.yml
reload.enabled: false
setup.template.settings:
index.number_of_shards: 3
setup.kibana:
#下面是直接写入es中:
#output.elasticsearch:
hosts: "192.168.171.128:9200"
#下面是写入redis中:
#下面的filebeat-common是自定的key,要和logstash中从redis里对应的key要要一致,多个节点的nginx的都可以该key写入,但需要定义log_source以作为区分,logstash读取的时候以区分的标志来分开存放索引到es中
output.redis:
hosts: "192.168.171.128"
port: 6379
password: "123456"
key: "filebeat-common"
db: 0
datatype: list
processors:
-
add_host_metadata: ~
-
add_cloud_metadata: ~
#注意:因为默认情况下,宿主机日志路径和容器内日志路径是不一致的,所以配置文件里配置的路径如果是宿主机日志路径,容器里则找不到
##所以采取措施是:配置文件里配置成容器里的日志路径,再把宿主机的日志目录和容器日志目录做一个映射就可以了
#/usr/share/filebeat/logs/*.log 是容器里的日志路径
root@localhost filebeat6.7.1# cat scripts/run_filebeat6.7.1.sh
#!/bin/bash
docker run -d --name filebeat6.7.1 --net=host --restart=always --user=root -v /data/filebeat6.7.1/conf/filebeat.yml:/usr/share/filebeat/filebeat.yml -v /data/nginx/logs:/usr/share/filebeat/logs docker.elastic.co/beats/filebeat:6.7.1
#注意:因为默认情况下,宿主机日志路径和容器内日志路径是不一致的,所以配置文件里配置的路径如果是宿主机日志路径,容器里则找不到
#所以采取措施是:配置文件里配置成容器里的日志路径,再把宿主机的日志目录和容器日志目录做一个映射就可以了
root@localhost filebeat6.7.1# sh scripts/run_filebeat6.7.1.sh #运行后则开始收集日志到redis
root@localhost filebeat6.7.1# docker ps |grep filebeat
63d423126963 docker.elastic.co/beats/filebeat:6.7.1 "/usr/local/bin/dock..." 9 seconds ago Up 7 seconds filebeat6.7.1
root@localhost filebeat6.7.1# cd
在192.168.171.131上:
安装nginx1.15.9:
root@localhost \~# cd /data/
root@localhost data# ls nginx1.15.9.tar.gz
nginx1.15.9.tar.gz
root@localhost data# tar -zxf nginx1.15.9.tar.gz
root@localhost data# cd nginx1.15.9
root@localhost nginx1.15.9# ls
conf image scripts
root@localhost nginx1.15.9# ls conf/
nginx.conf
root@localhost nginx1.15.9# ls image/
nginx1.15.9-0711.tar
root@localhost nginx1.15.9# ls scripts/
run_nginx.sh
root@localhost nginx1.15.9# docker load -i image/nginx1.15.9-0711.tar
root@localhost nginx1.15.9# docker images |grep nginx
nginx 1.15.9 881bd08c0b08 12 months ago 109MB
root@localhost nginx1.15.9# cat conf/nginx.conf
user root;
worker_processes 4;
events {
worker_connections 10240;
}
http {
include mime.types;
default_type application/octet-stream;
log_format json '{ "@timestamp": "$time_iso8601", '
'"remote_addr": "$remote_addr", '
'"remote_user": "$remote_user", '
'"body_bytes_sent": "$body_bytes_sent", '
'"request_time": "$request_time", '
'"status": "$status", '
'"request_uri": "$request_uri", '
'"request_method": "$request_method", '
'"http_referrer": "$http_referer", '
'"http_x_forwarded_for": "$http_x_forwarded_for", '
'"http_user_agent": "$http_user_agent"}';
access_log /var/log/nginx/access.log json;
client_max_body_size 128m;
sendfile on;
keepalive_timeout 65;
gzip on;
gzip_min_length 1k;
gzip_buffers 4 16k;
gzip_comp_level 4;
gzip_types text/plain text/javascript application/x-javascript text/css application/xml application/xml+rss;
ssi on;
server_tokens off;
server {
listen 80;
#listen 5080 ssl;
#ssl_certificate /data/ssl/server.crt;
#ssl_certificate_key /data/ssl/server.key;
#ssl_session_timeout 5m;
server_name localhost;
location / {
root registry/static_root;
index index.html index.htm;
}
location = /404.html {
root html;
index 404.html;
}
error_page 500 502 503 504 /50x.html;
location = /50x.html {
root html;
}
}
}
root@localhost nginx1.15.9# cat scripts/run_nginx.sh
#!/bin/bash
docker run -d --net=host --restart=always --name=nginx -v /data/nginx1.15.9/conf/nginx.conf:/etc/nginx/nginx.conf -v /data/nginx/logs:/var/log/nginx -v /data/nginx/registry:/etc/nginx/registry nginx:1.15.9
root@localhost nginx1.15.9# sh scripts/run_nginx.sh
root@localhost nginx1.15.9# docker ps |grep nginx
95f424816b9c nginx:1.15.9 "nginx -g 'daemon of..." 16 seconds ago Up 15 seconds nginx
root@localhost nginx1.15.9# netstat -anput |grep 80
tcp 0 0 0.0.0.0:80 0.0.0.0:* LISTEN 21698/nginx: master
root@localhost nginx1.15.9# ls /data/nginx
logs registry
root@localhost nginx1.15.9# ls /data/nginx/logs/
access.log error.log
root@localhost nginx1.15.9# ls /data/nginx/registry/
空
root@localhost nginx1.15.9# mkdir /data/nginx/registry/static_root
root@localhost nginx1.15.9# echo 222 > /data/nginx/registry/static_root/index.html
root@localhost nginx1.15.9# curl localhost
222
root@localhost nginx1.15.9# curl localhost
222
root@localhost nginx1.15.9# curl 192.168.171.131
222
root@localhost nginx1.15.9# cat /data/nginx/logs/access.log
{ "@timestamp": "2020-03-08T11:27:09+00:00", "remote_addr": "127.0.0.1", "remote_user": "-", "body_bytes_sent": "14", "request_time": "0.000", "status": "200", "request_uri": "/", "request_method": "GET", "http_referrer": "-", "http_x_forwarded_for": "-", "http_user_agent": "curl/7.29.0"}
{ "@timestamp": "2020-03-08T11:27:11+00:00", "remote_addr": "127.0.0.1", "remote_user": "-", "body_bytes_sent": "14", "request_time": "0.000", "status": "200", "request_uri": "/", "request_method": "GET", "http_referrer": "-", "http_x_forwarded_for": "-", "http_user_agent": "curl/7.29.0"}
{ "@timestamp": "2020-03-08T11:27:34+00:00", "remote_addr": "192.168.171.131", "remote_user": "-", "body_bytes_sent": "14", "request_time": "0.000", "status": "200", "request_uri": "/", "request_method": "GET", "http_referrer": "-", "http_x_forwarded_for": "-", "http_user_agent": "curl/7.29.0"}
root@localhost nginx1.15.9# cd
安装filebeat6.7.1:
root@localhost \~# cd /data/
root@localhost data# ls filebeat6.7.1.tar.gz
filebeat6.7.1.tar.gz
root@localhost data# tar -zxf filebeat6.7.1.tar.gz
root@localhost data# cd filebeat6.7.1
root@localhost filebeat6.7.1# ls
conf image scripts
root@localhost filebeat6.7.1# ls conf/
filebeat.yml filebeat.yml.bak
root@localhost filebeat6.7.1# ls image/
filebeat_6.7.1.tar
root@localhost filebeat6.7.1# ls scripts/
run_filebeat6.7.1.sh
root@localhost filebeat6.7.1# docker load -i image/filebeat_6.7.1.tar
root@localhost filebeat6.7.1# docker images |grep filebeat
docker.elastic.co/beats/filebeat 6.7.1 04fcff75b160 11 months ago 279MB
root@localhost filebeat6.7.1# cat conf/filebeat.yml
filebeat.inputs:
- type: log
enabled: true
paths:
- /usr/share/filebeat/logs/*.log
fields:
log_source: nginx-access-log-171.131
filebeat.config.modules:
path: ${path.config}/modules.d/*.yml
reload.enabled: false
setup.template.settings:
index.number_of_shards: 3
setup.kibana:
#下面是直接写入es中:
#output.elasticsearch:
hosts: "192.168.171.128:9200"
#下面是写入redis中:
#下面的filebeat-common是自定的key,要和logstash中从redis里对应的key要要一致,多个节点的nginx的都可以该key写入,但需要定义log_source以作为区分,logstash读>取的时候以区分的标志来分开存放索引到es中
output.redis:
hosts: "192.168.171.128"
port: 6379
password: "123456"
key: "filebeat-common"
db: 0
datatype: list
processors:
-
add_host_metadata: ~
-
add_cloud_metadata: ~
#注意:因为默认情况下,宿主机日志路径和容器内日志路径是不一致的,所以配置文件里配置的路径如果是宿主机日志路径,容器里则找不到
##所以采取措施是:配置文件里配置成容器里的日志路径,再把宿主机的日志目录和容器日志目录做一个映射就可以了
#/usr/share/filebeat/logs/*.log 是容器里的日志路径
root@localhost filebeat6.7.1# cat scripts/run_filebeat6.7.1.sh
#!/bin/bash
docker run -d --name filebeat6.7.1 --net=host --restart=always --user=root -v /data/filebeat6.7.1/conf/filebeat.yml:/usr/share/filebeat/filebeat.yml -v /data/nginx/logs:/usr/share/filebeat/logs docker.elastic.co/beats/filebeat:6.7.1
#注意:因为默认情况下,宿主机日志路径和容器内日志路径是不一致的,所以配置文件里配置的路径如果是宿主机日志路径,容器里则找不到
#所以采取措施是:配置文件里配置成容器里的日志路径,再把宿主机的日志目录和容器日志目录做一个映射就可以了
root@localhost filebeat6.7.1# sh scripts/run_filebeat6.7.1.sh #运行后则开始收集日志到redis
root@localhost filebeat6.7.1# docker ps |grep filebeat
06cda99b62ef docker.elastic.co/beats/filebeat:6.7.1 "/usr/local/bin/dock..." 9 seconds ago Up 8 seconds filebeat6.7.1
root@localhost filebeat6.7.1# cd
到redis里查看是否以写入日志:(192.168.171.128)
root@localhost \~# docker exec -it redis4.0.10 bash
root@localhost /# redis-cli -a 123456
127.0.0.1:6379> KEYS *
1)"filebeat-common"
127.0.0.1:6379> quit
root@localhost /# exit
4.docker安装logstash6.7.1(在192.168.171.129上)------从redis读出日志,写入es集群
root@localhost \~# cd /data/
root@localhost data# ls logstash6.7.1.tar.gz
logstash6.7.1.tar.gz
root@localhost data# tar -zxf logstash6.7.1.tar.gz
root@localhost data# cd logstash6.7.1
root@localhost logstash6.7.1# ls
config image scripts
root@localhost logstash6.7.1# ls config/
GeoLite2-City.mmdb log4j2.properties logstash.yml pipelines.yml_bak startup.options
jvm.options logstash-sample.conf pipelines.yml redis_out_es_in.conf
root@localhost logstash6.7.1# ls image/
logstash_6.7.1.tar
root@localhost logstash6.7.1# ls scripts/
run_logstash6.7.1.sh
root@localhost logstash6.7.1# docker load -i image/logstash_6.7.1.tar
root@localhost logstash6.7.1# docker images |grep logstash
logstash 6.7.1 1f5e249719fc 11 months ago 778MB
root@localhost logstash6.7.1# cat config/pipelines.yml #确认配置,引用的conf目录
This file is where you define your pipelines. You can define multiple.
For more information on multiple pipelines, see the documentation:
https://www.elastic.co/guide/en/logstash/current/multiple-pipelines.html
- pipeline.id: main
path.config: "/usr/share/logstash/config/*.conf" #容器内的目录
pipeline.workers: 3
root@localhost logstash6.7.1# cat config/redis_out_es_in.conf #查看和确认配置
input {
redis {
host => "192.168.171.128"
port => "6379"
password => "123456"
db => "0"
data_type => "list"
key => "filebeat-common"
}
}
filter {
json {
source => "message"
remove_field => "message"
}
geoip {
source => "remote_addr"
target => "geoip"
database => "/usr/share/logstash/config/GeoLite2-City.mmdb"
add_field => "\[geoipcoordinates", "%{geoiplongitude}"]
add_field => "\[geoipcoordinates", "%{geoiplatitude}"]
}
mutate {
convert => "\[geoipcoordinates", "float"]
}
#date {
locale => "en"
match => "time_local", "dd/MMM/yyyy:HH:mm:ss Z"
#}
}
#上面filter还有一个作用是引入地理坐标数据库,可分析ip在全球的分布
#默认target是@timestamp,所以time_local会更新@timestamp时间。
#上面filter的date插件作用: 当第一次收集或使用缓存写入时候,会发现入库时间比日志实际时间有延时,导致时间不准确,最好加入date插件,
#使得入库时间和日志实际时间保持一致.上面因为nginx配置文件配置成json格式时候,已经覆盖了入库时间,已经和日志实际时间保持了一致,所以上面date可以不用
output {
if fieldslog_source == 'nginx-access-log-171.130' {
elasticsearch {
hosts => "192.168.171.128:9200"
index => "logstash-nginx-access-log-171.130-%{+YYYY.MM.dd}"
}
}
if fieldslog_source == 'nginx-access-log-171.131' {
elasticsearch {
hosts => "192.168.171.128:9200"
index => "logstash-nginx-access-log-171.131-%{+YYYY.MM.dd}"
}
}
}
root@localhost logstash6.7.1# cat scripts/run_logstash6.7.1.sh
#!/bin/bash
docker run -d --name logstash6.7.1 --net=host --restart=always -v /data/logstash6.7.1/config:/usr/share/logstash/config logstash:6.7.1
root@localhost logstash6.7.1# sh scripts/run_logstash6.7.1.sh #从redis读取日志,写入es
root@localhost logstash6.7.1# docker ps |grep logstash
725e1136bcef logstash:6.7.1 "/usr/local/bin/dock..." About a minute ago Up About a minute logstash6.7.1
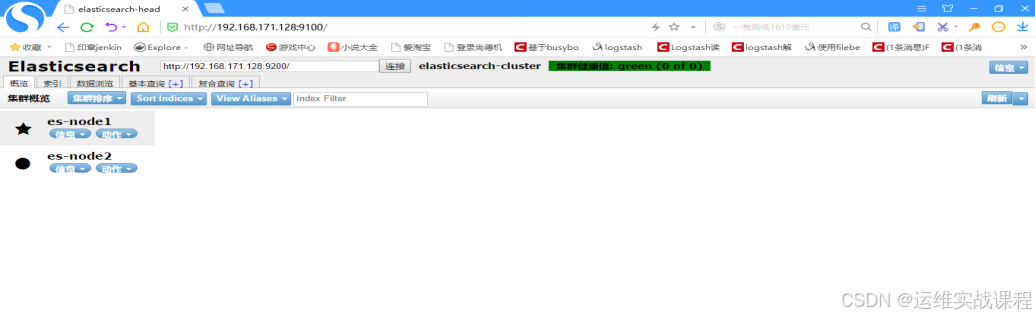
到es集群查看,如下:

到redis查看,数据已经读取走,为空了:
root@localhost \~# docker exec -it redis4.0.10 bash
root@localhost /# redis-cli -a 123456
127.0.0.1:6379> KEYS *
(empty list or set)
127.0.0.1:6379> quit
5.docker安装kibana6.7.1(在192.168.171.132上)从es中读取日志展示出来
root@localhost \~# cd /data/
root@localhost data# ls kibana6.7.1.tar.gz
kibana6.7.1.tar.gz
root@localhost data# tar -zxf kibana6.7.1.tar.gz
root@localhost data# cd kibana6.7.1
root@localhost kibana6.7.1# ls
config image scripts
root@localhost kibana6.7.1# ls config/
kibana.yml
root@localhost kibana6.7.1# ls image/
kibana_6.7.1.tar
root@localhost kibana6.7.1# ls scripts/
run_kibana6.7.1.sh
root@localhost kibana6.7.1# docker load -i image/kibana_6.7.1.tar
root@localhost kibana6.7.1# docker images |grep kibana
kibana 6.7.1 860831fbf9e7 11 months ago 677MB
root@localhost kibana6.7.1# cat config/kibana.yml
** THIS IS AN AUTO-GENERATED FILE **
Default Kibana configuration for docker target
server.name: kibana
server.host: "0"
elasticsearch.hosts: "http://192.168.171.128:9200"
xpack.monitoring.ui.container.elasticsearch.enabled: true
root@localhost kibana6.7.1# cat scripts/run_kibana6.7.1.sh
#!/bin/bash
docker run -d --name kibana6.7.1 --net=host --restart=always -v /data/kibana6.7.1/config/kibana.yml:/usr/share/kibana/config/kibana.yml kibana:6.7.1
root@localhost kibana6.7.1# sh scripts/run_kibana6.7.1.sh #运行,从es读取展示到kibana中
root@localhost kibana6.7.1# docker ps
CONTAINER ID IMAGE COMMAND CREATED STATUS PORTS NAMES
01a60ab36f01 kibana:6.7.1 "/usr/local/bin/kiba..." 35 seconds ago Up 33 seconds kibana6.7.1
root@localhost kibana6.7.1# netstat -anput |grep 5601 #kibana端口
tcp 0 0 0.0.0.0:5601 0.0.0.0:* LISTEN 2547/node
浏览器访问kibana: http://192.168.171.132:5601

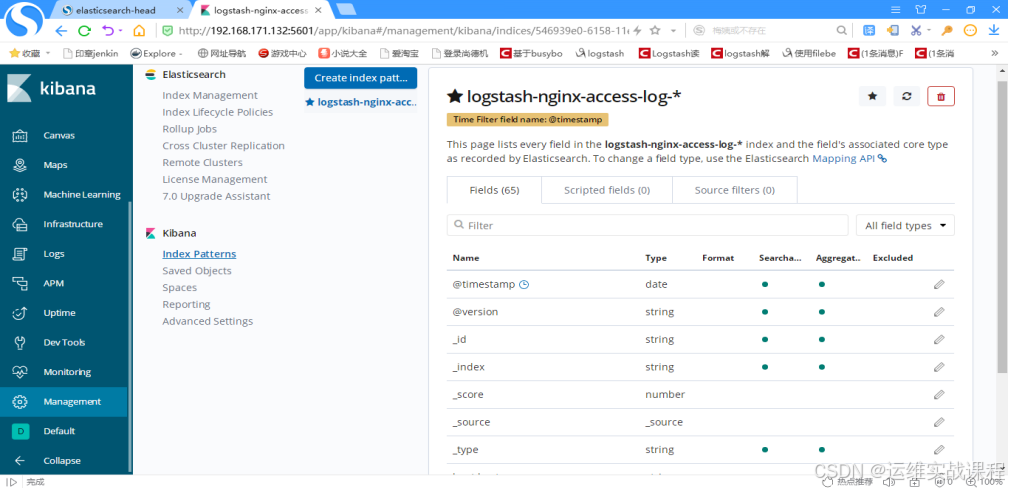
kibana创建索引(尽量和es里索引名对应,方便查找)------查询和展示es里的数据
先创建-*索引: 点击management,如下:
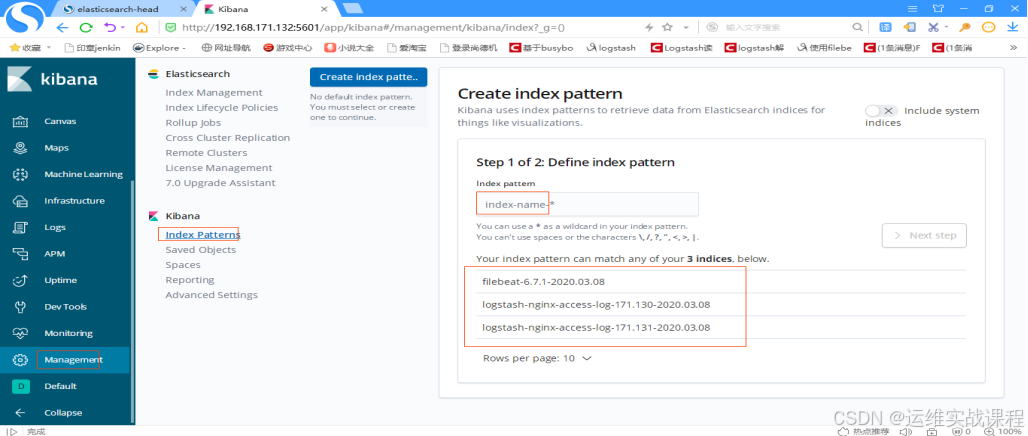
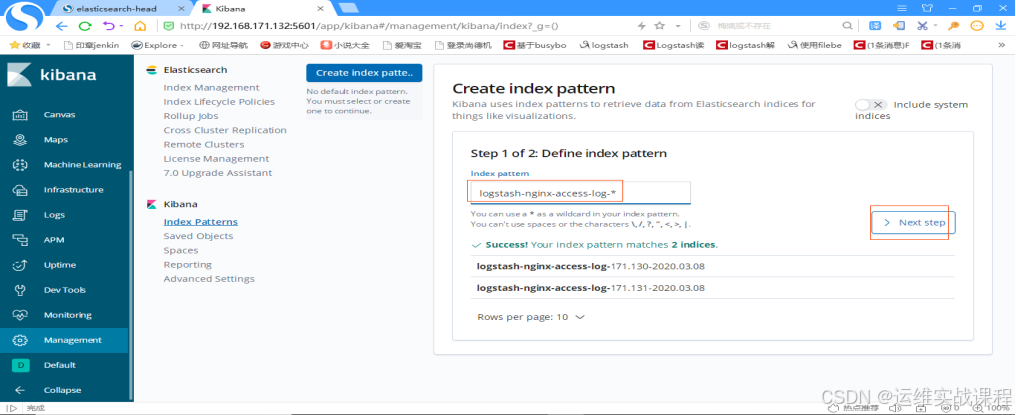
输入索引名:logstash-nginx-access-log-*,点击下一步,如下:
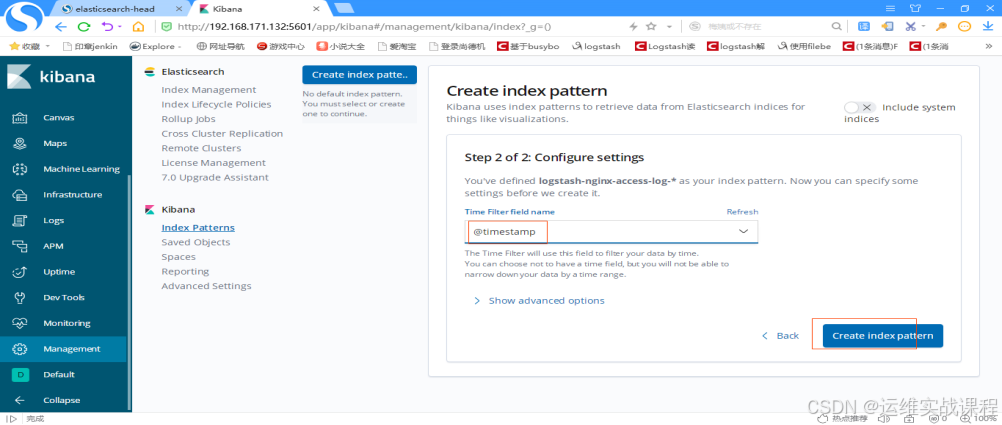
选择时间戳: @timestamp,点击创建索引,如下:
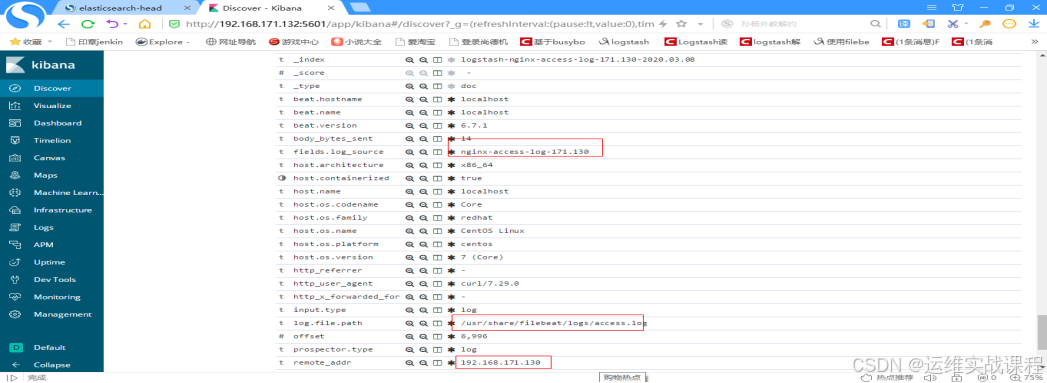
查看日志,点击discover,如下: #注意:由于之前搭建时候nginx测试访问日志量少,后面又多访问了几次两个nginx,方便测试。

点击箭头,即可展开,如下:

如果对运维课程感兴趣,可以在b站上、A站或csdn上搜索我的账号: 运维实战课程,可以关注我,学习更多免费的运维实战技术视频