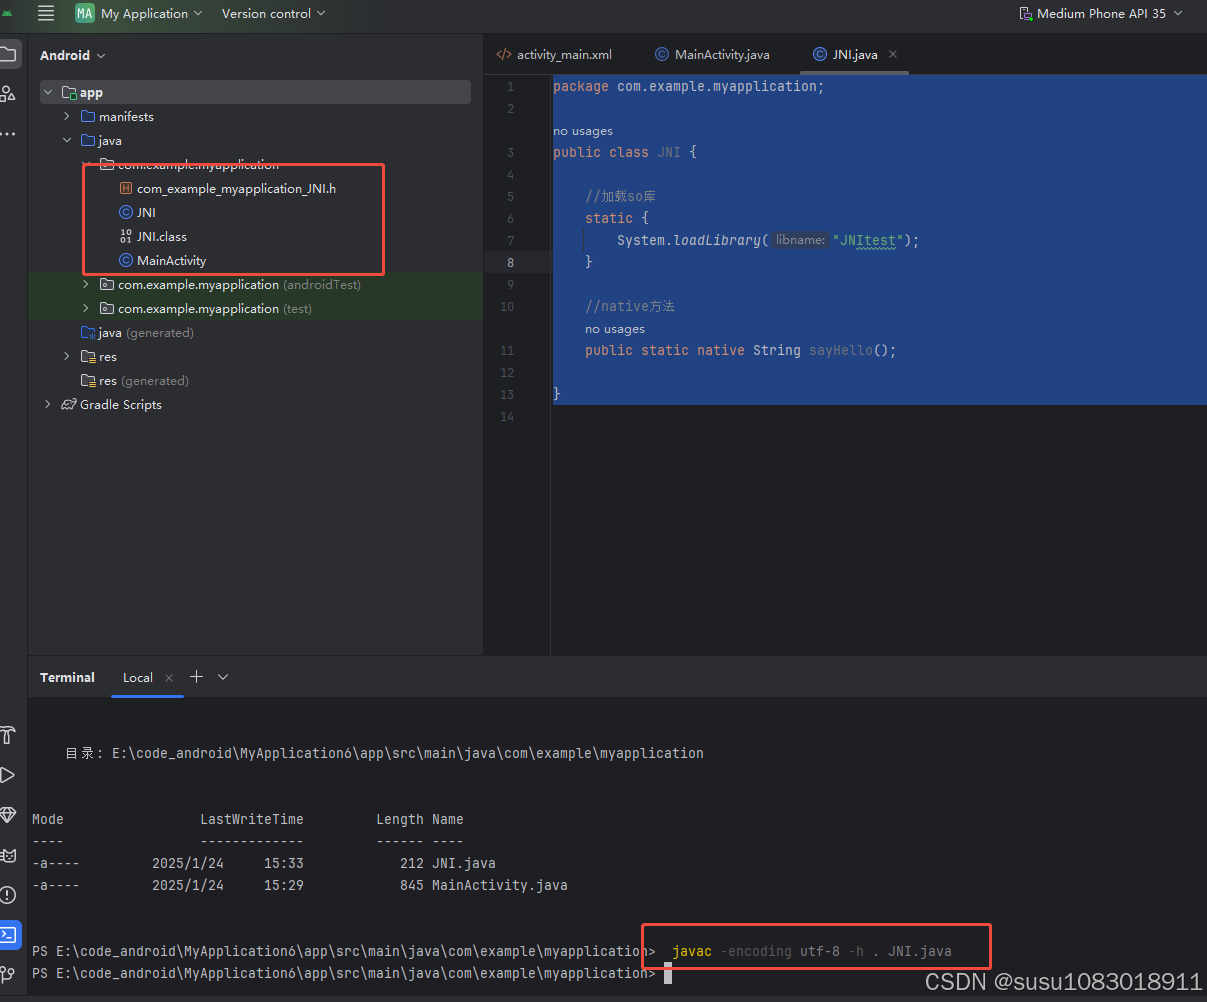
在Java文件中写native方法
package com.example.myapplication;

public class JNI {

    //加载so库
    static {
        System.loadLibrary("FirstJni");
    }

    //native方法
    public static native String sayHello();

}
在Termial控制台中cd到项目目录中的源码目录下,并执行 javac -encoding utf-8 -h . JNI.java 命令生成.h文件
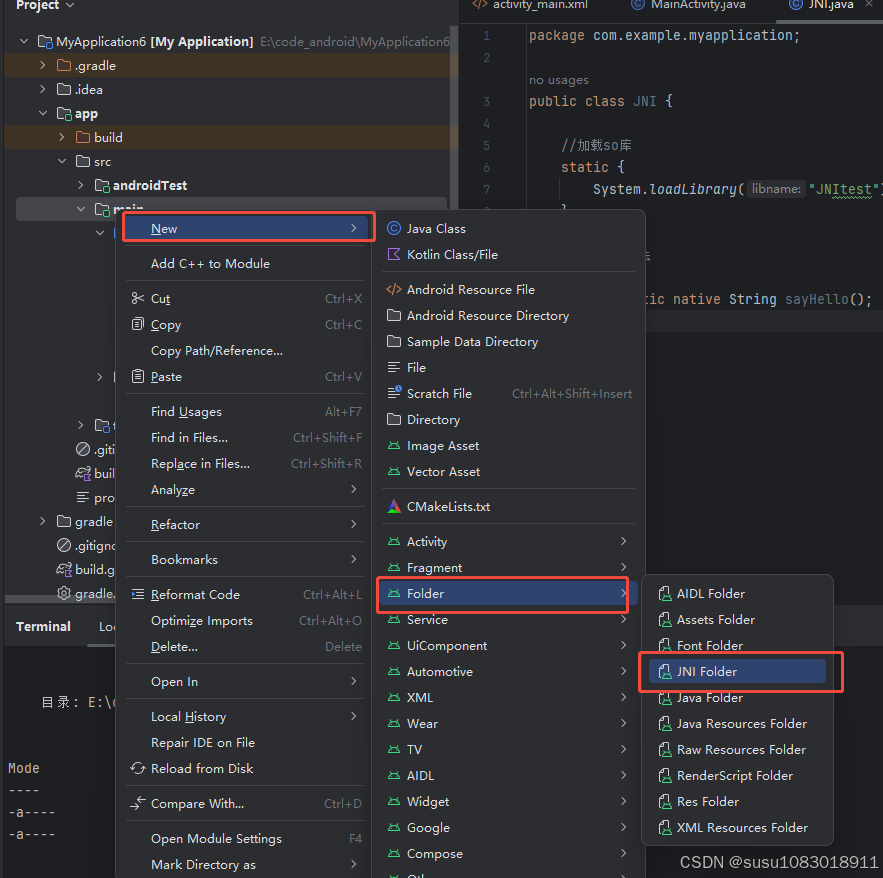
在项目main目录下创建jni文件夹,将.h文件和.class文件copy到jni文件夹中
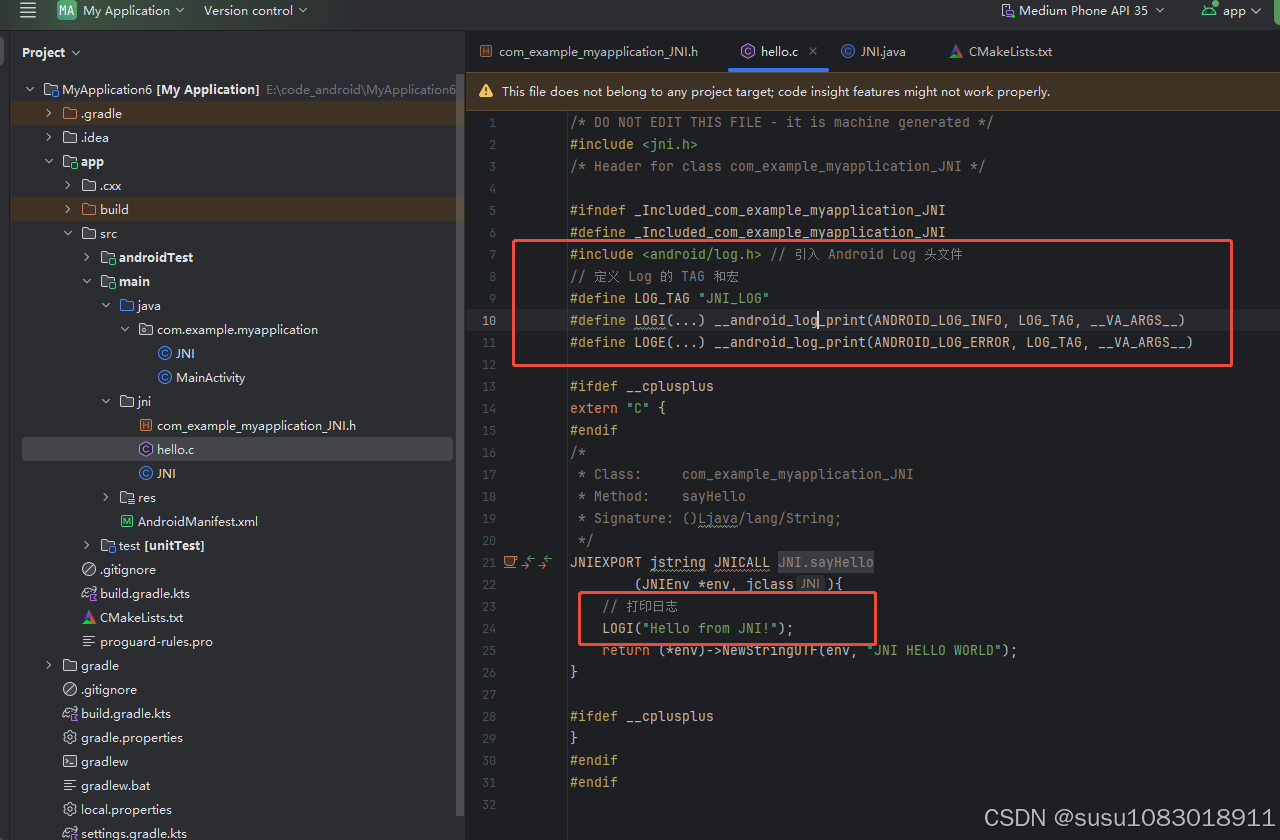
在 JNI 文件夹下新建 hello.c 文件,把 .h 文件内容拷贝过来,并实现函数体,如下所示,在c文件内返回一个字符串 JNI HELLO WORLD
.h头文件中Java_com_example_myapplication_JNI_sayHello 格式为 Java_包名_类名_方法名
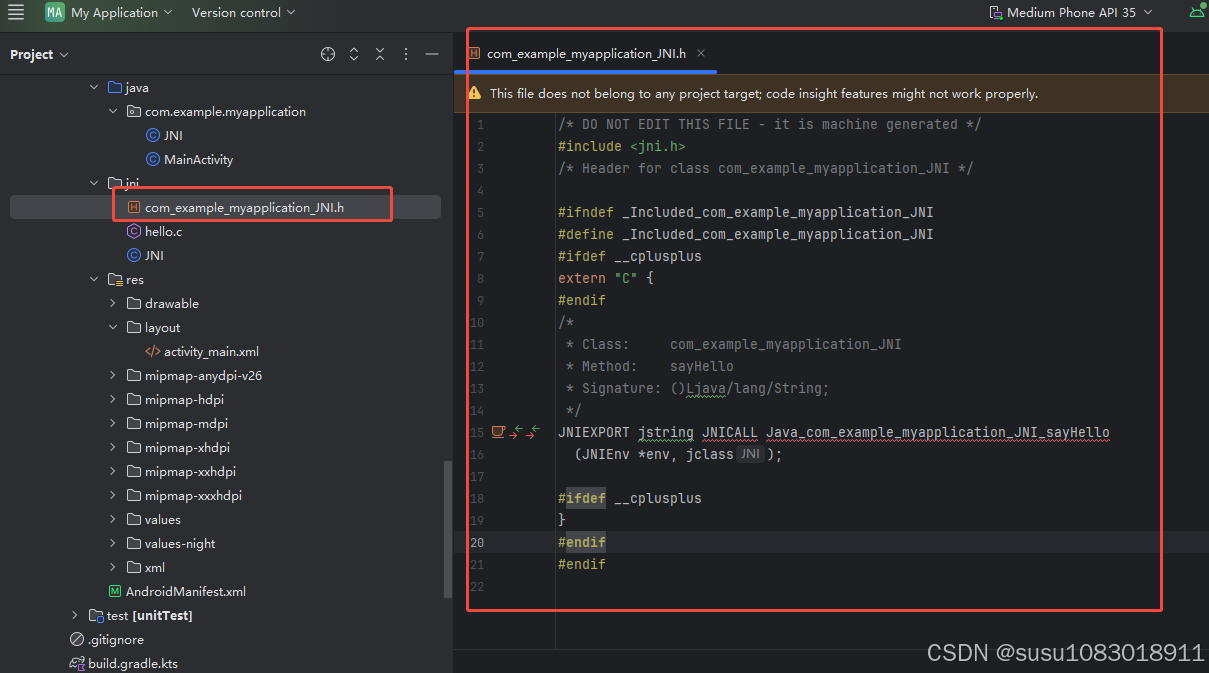
在 C/C++ 文件中实现 Java_com_example_myapplication_JNI_sayHello 方法
/* DO NOT EDIT THIS FILE - it is machine generated */
#include <jni.h>
/* Header for class com_example_myapplication_JNI */

#ifndef _Included_com_example_myapplication_JNI
#define _Included_com_example_myapplication_JNI
#ifdef __cplusplus
extern "C" {
#endif
/*
 * Class:     com_example_myapplication_JNI
 * Method:    sayHello
 * Signature: ()Ljava/lang/String;
 */
JNIEXPORT jstring JNICALL Java_com_example_myapplication_JNI_sayHello
        (JNIEnv *env, jclass){
    return (*env)->NewStringUTF(env, "JNI HELLO WORLD");
}

#ifdef __cplusplus
}
#endif
#endif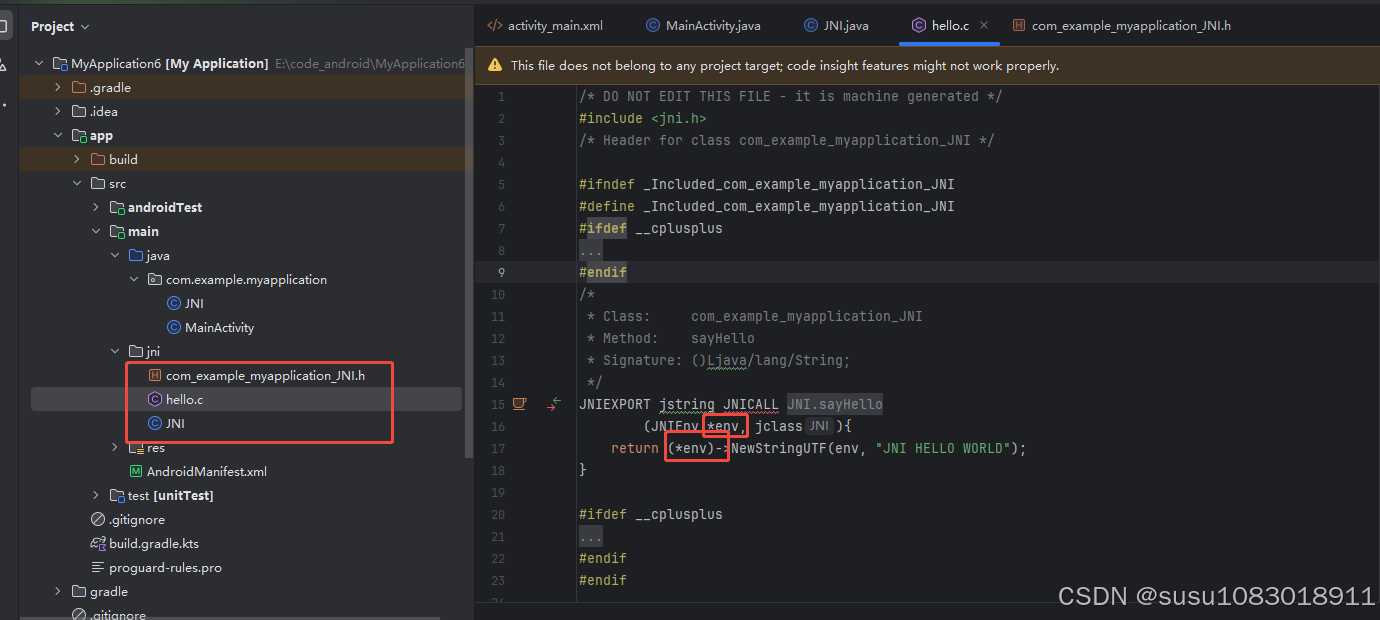
开始配置gradle文件
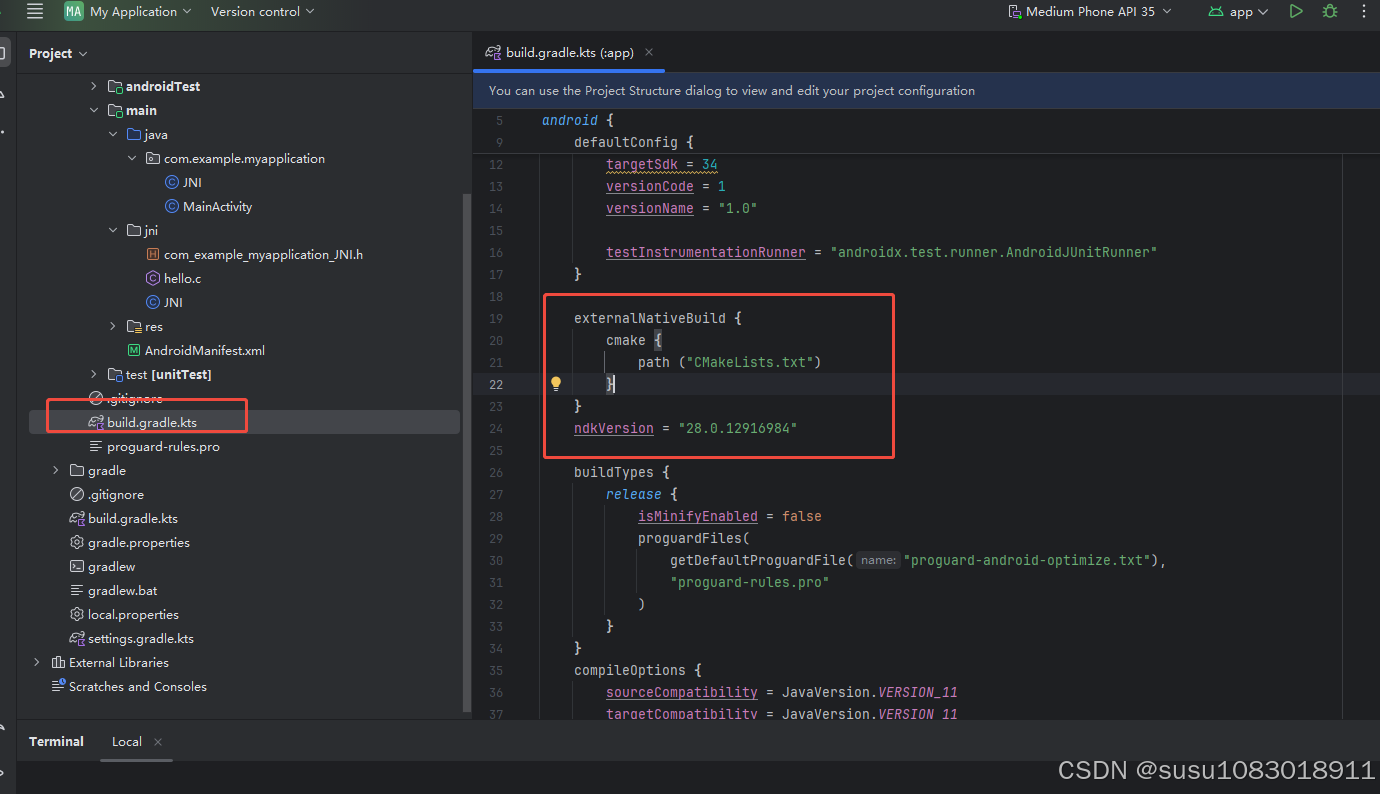
    externalNativeBuild {
        cmake {
            path ("CMakeLists.txt")
        }
    }
    ndkVersion = "28.0.12916984"
同时在 app 文件夹下新建 CMakeLists.txt
cmake_minimum_required(VERSION 3.4.1)
add_library(
        FirstJni
        SHARED
        src/main/jni/hello.c)
find_library(
        log-lib
        log)
target_link_libraries(
        FirstJni
        ${log-lib})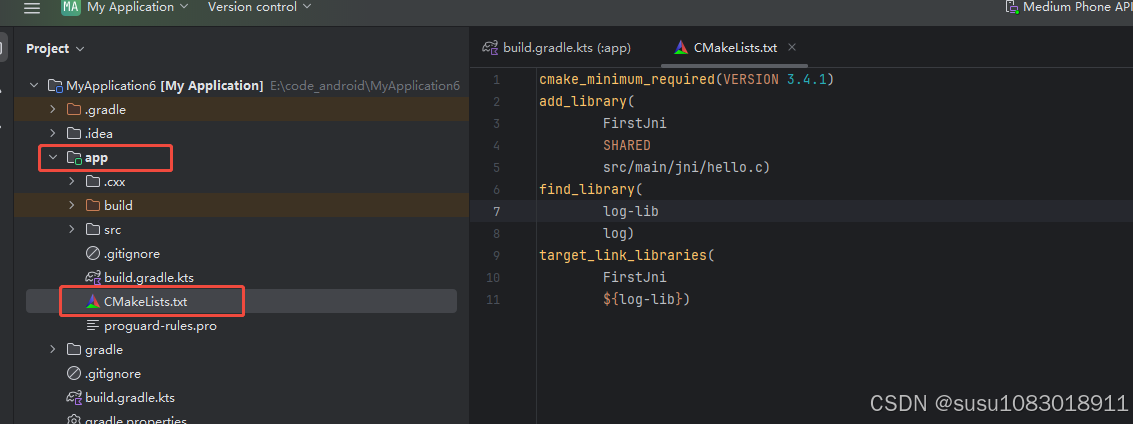
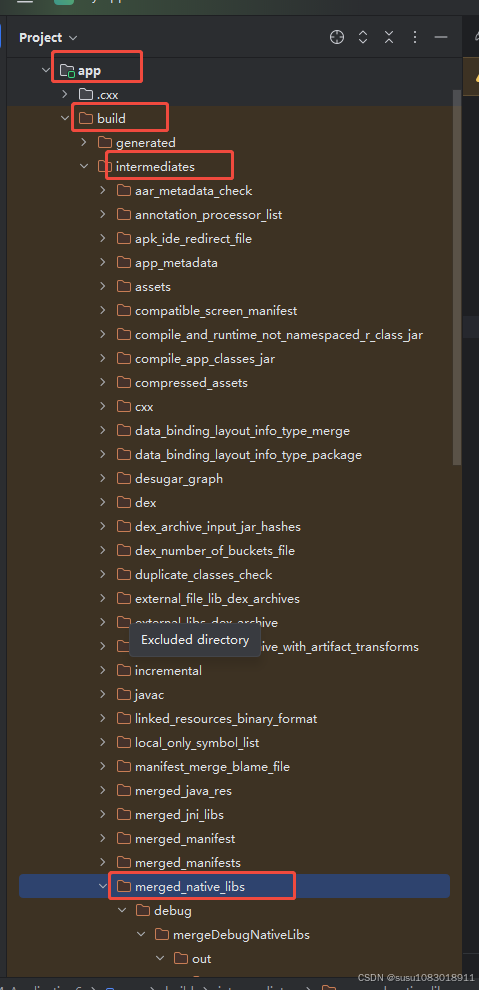
rebuild项目,生成so库
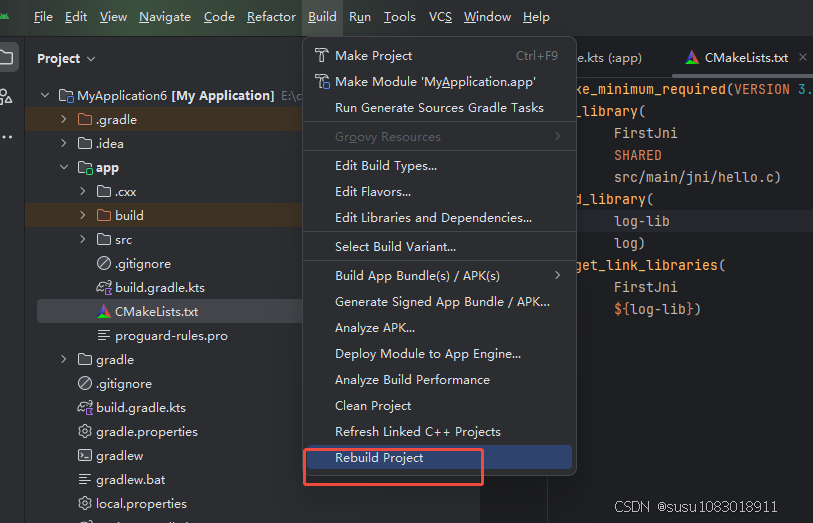
so库地址:
app\build\intermediates\merged_native_libs\debug\mergeDebugNativeLibs\out\lib\
到此为止,JNI的配置完成
使用JNI
package com.example.myapplication;

import android.os.Bundle;
import android.widget.TextView;

import androidx.activity.EdgeToEdge;
import androidx.appcompat.app.AppCompatActivity;
import androidx.core.graphics.Insets;
import androidx.core.view.ViewCompat;
import androidx.core.view.WindowInsetsCompat;

public class MainActivity extends AppCompatActivity {

    @Override
    protected void onCreate(Bundle savedInstanceState) {
        super.onCreate(savedInstanceState);
        EdgeToEdge.enable(this);
        setContentView(R.layout.activity_main);
        ViewCompat.setOnApplyWindowInsetsListener(findViewById(R.id.main), (v, insets) -> {
            Insets systemBars = insets.getInsets(WindowInsetsCompat.Type.systemBars());
            v.setPadding(systemBars.left, systemBars.top, systemBars.right, systemBars.bottom);
            return insets;
        });
        TextView tv = (TextView) findViewById(R.id.tv);
        tv.setText(JNI.sayHello());
    }
}

<?xml version="1.0" encoding="utf-8"?>
<androidx.constraintlayout.widget.ConstraintLayout xmlns:android="http://schemas.android.com/apk/res/android"
    xmlns:app="http://schemas.android.com/apk/res-auto"
    xmlns:tools="http://schemas.android.com/tools"
    android:id="@+id/main"
    android:layout_width="match_parent"
    android:layout_height="match_parent"
    tools:context=".MainActivity">

    <TextView
        android:id="@+id/tv"
        android:layout_width="wrap_content"
        android:layout_height="wrap_content"
        android:text="Hello World!"
        app:layout_constraintBottom_toBottomOf="parent"
        app:layout_constraintEnd_toEndOf="parent"
        app:layout_constraintStart_toStartOf="parent"
        app:layout_constraintTop_toTopOf="parent" />

</androidx.constraintlayout.widget.ConstraintLayout>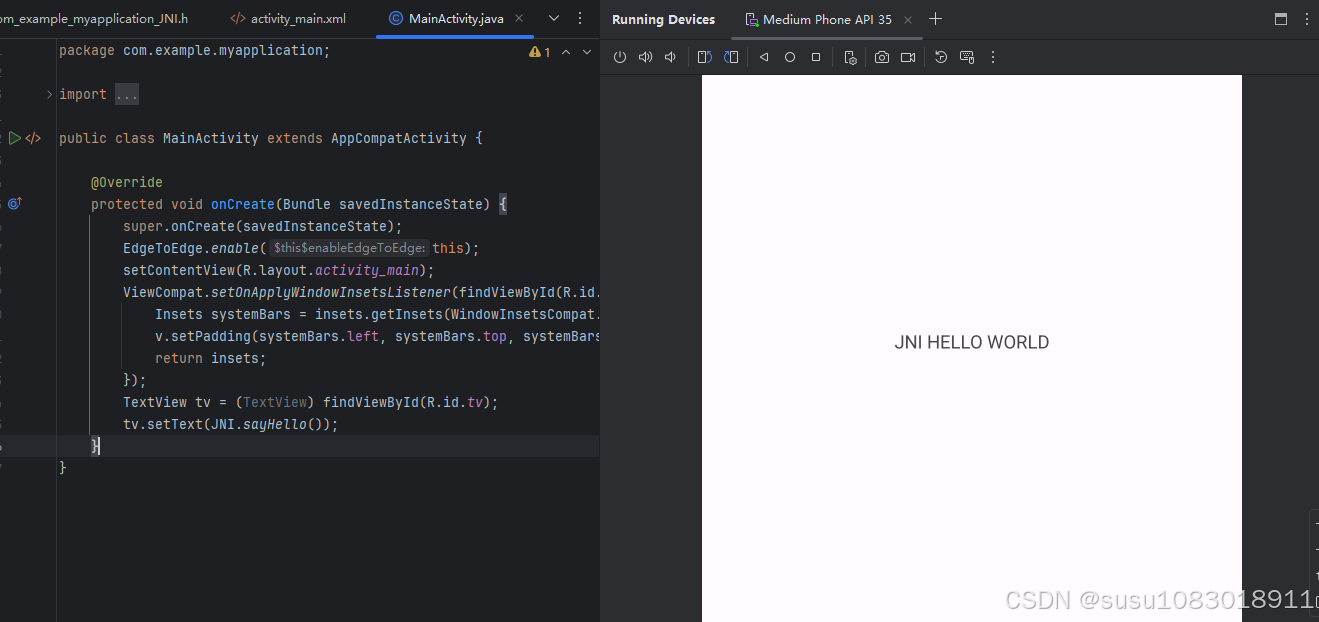
如果想在c文件中打印日志
在 C 文件中引入 android/log.h 头文件,并定义 Log 的宏:
#include <jni.h>
#include <android/log.h> // 引入 Android Log 头文件

// 定义 Log 的 TAG 和宏
#define LOG_TAG "JNI_LOG"
#define LOGI(...) __android_log_print(ANDROID_LOG_INFO, LOG_TAG, __VA_ARGS__)
#define LOGE(...) __android_log_print(ANDROID_LOG_ERROR, LOG_TAG, __VA_ARGS__)-
LOGI:用于打印 INFO 级别的日志。 -
LOGE:用于打印 ERROR 级别的日志。