📢博客主页:https://blog.csdn.net/2301_779549673
📢博客仓库:https://gitee.com/JohnKingW/linux_test/tree/master/lesson
📢欢迎点赞 👍 收藏 ⭐留言 📝 如有错误敬请指正!
📢本文由 JohnKi 原创,首发于 CSDN🙉
📢未来很长,值得我们全力奔赴更美好的生活✨


文章目录
- [🏳️🌈一、HttpResponse 类](#🏳️🌈一、HttpResponse 类)
-
- [1.1 基本结构](#1.1 基本结构)
- [1.2 构造函数、析构函数](#1.2 构造函数、析构函数)
- [1.3 添加属性成员函数](#1.3 添加属性成员函数)
- [1.4 序列化函数](#1.4 序列化函数)
- [1.5 请求处理回调函数](#1.5 请求处理回调函数)
- [1.6 HttpServer.hpp 整体代码](#1.6 HttpServer.hpp 整体代码)
- 🏳️🌈二、模拟前端
-
- [2.1 404.html](#2.1 404.html)
- [2.2 default.html](#2.2 default.html)
- [2.3 login.html](#2.3 login.html)
- [2.4 register.html](#2.4 register.html)
- [2.5 success.html](#2.5 success.html)
- 🏳️🌈三、测试
-
- [3.1 默认网站](#3.1 默认网站)
- [3.2 登录](#3.2 登录)
- [3.3 404](#3.3 404)
- 👥总结
11111111
11111111
11111111
11111111
**** 11111111
🏳️🌈一、HttpResponse 类
1.1 基本结构
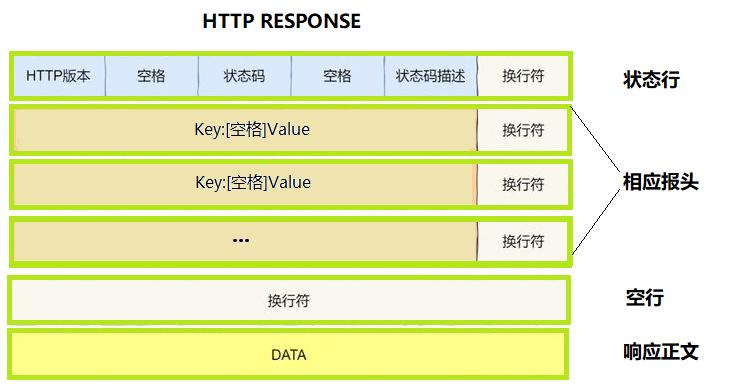
HttpResponse类成员变量除了跟HttpRequest类一样的基本格式状态行,应答报头,空行和响应正文外;还包括基本属性版本,状态码,状态码描述,以及报头的KV结构;成员函数包括增加状态码,报头和正文
class HttpResponse {
public:
    HttpResponse() {}
    void AddCode(int code);
    void AddHeader(const std::string& k, const std::string& v);
    void AddBodyText(const std::string& _body_text);
    std::string Serialize();
    ~HttpResponse() {}

private:
    // httpresponse base 属性
    std::string _version; // 版本
    int _status_code;     // 状态码
    std::string _desc;    // 状态码描述
    std::unordered_map<std::string, std::string> _headers_kv;

    // 基本的 httpresponse 的格式
    std::string _status_line;               // 状态行
    std::vector<std::string> _rsp_heeaders; // 响应报头
    std::string _blank_line;                // 空行
    std::string _rsp_body;                  // 响应正文
};
1.2 构造函数、析构函数
const static std::string _default_http_version = "HTTP/1.0"; // 初始版本
const static std::string _space_sep = " ";                   // 空格分隔符

HttpResponse() : _version(_default_http_version), _blank_line(_base_sep) {}
~HttpResponse() {}
1.3 添加属性成员函数
-
添加状态码默认初始化状态码 ,并将状态码描述设置为OK
-
将传入的KV数据插入到 请求报头 的KV结构中
-
添加请求正文即可!
// 添加 状态码 和 状态码描述
void AddCode(int code) {
_status_code = code;
_desc = "OK";
}// 添加响应报头键值对
void AddHeader(const std::string& k, const std::string& v) {
_headers_kv[k] = v;
}// 添加请求正文
void AddBodyText(const std::string& _body_text) { _rsp_body = _body_text; }
1.4 序列化函数
序列化即将结构化数据转化为字符串数据,主要有下面四个步骤:
1、构建状态行
2、构建报头
3、空行和正文(无需处理,空行已初始化,正文内容在KV结构中)
4、正式序列化
// 序列化响应报文
std::string Serialize() {
    // 1. 构建状态行
    _status_line = _version + _space_sep + std::to_string(_status_code) +
                   _space_sep + _desc + _base_sep;

    // 2. 构建响应报头
    for (auto& header : _headers_kv) {
        _rsp_headers.push_back(header.first + _line_sep + header.second +
                               _base_sep);
    }

    // 3. 构建空行(构造函数时已经处理好空行)
    // 4. 构建响应正文(需调用 AddBodyText 接口)

    // 5. 序列化响应报文
    std::string rsponsestr = _status_line;
    for (auto& line : _rsp_headers)
        rsponsestr += line;
    rsponsestr += _blank_line;
    rsponsestr += _rsp_body;

    return rsponsestr;
}
1.5 请求处理回调函数
上一篇文章中我们不是使用了 handler 这个处理回调函数 ,去看我们反序列化的请求报文,这一篇文章,我们不需要去查看请求报文了,而是将其进行处理,构建序列化的响应报文就行了
这里我们需要获取请求路径下的内容,将其返 回,我们可以以二进制的方式打开指定路径,然后读取内容
std::string GetFileContent(const std::string& path) {
    std::ifstream in(path, std::ios::binary); // 以二进制方式打开文件
    if (!in.is_open())
        return std::string();

    in.seekg(0, in.end); // 将文件读取指针(也称为"get"指针)移动到文件的末尾
    int filesize =
        in.tellg();      // 获取当前文件读取指针的位置,即文件的总大小,单位字节
    in.seekg(0, in.beg); // 将文件读取指针移动到文件的开头

    std::string content;
    content.resize(filesize); // 调整 content 的大小为 filesize
    in.read((char*)content.c_str(),
            filesize); // 读取 filesize 字节的文件内容到 content 中
    in.close();        // 关闭文件

    return content;
}
然后就是处理得到的内容了,利用前面的 添加状态码方法、添加报文键值对方法,以及添加响应正文的方法。最后将整个相应类对象序列化返回即可
std::string HandleRequest(std::string req) {
    std::cout << "------------------------------------" << std::endl;
    std::cout << req;

    HttpRequest req_obj;
    req_obj.Descrialize(req);

    std::string content = GetFileContent(req_obj.Path());
    if (content.empty())
        return std::string();

    HttpResponse rsp;
    rsp.AddCode(200);
    rsp.AddHeader("Content-Length", std::to_string(content.size()));
    rsp.AddBodyText(content);

    return rsp.Serialize();
}
1.6 HttpServer.hpp 整体代码
#pragma once

#include <iostream>
#include <string>
#include <vector>
#include <sstream>
#include <unordered_map>
#include <fstream>

#include "Log.hpp"

using namespace LogModule;

// const static std::string _base_sep = "\r\n";                 // 默认具有外部链接,其他文件可通过 extern 引用。
const static std::string _base_sep = "\r\n";                    // static 关键字使变量具有内部链接,仅当前翻译单元(源文件)可见。
const static std::string _line_sep = ": ";
const static std::string _prefix_path = "wwwroot";             // 默认前缀路劲
const static std::string _default_path = "default.html";        // 默认路径

const static std::string _default_http_version = "HTTP/1.0";    // 初始版本
const static std::string _space_sep = " ";                      // 空格分隔符

namespace HttpServer{
    class HttpRequest{
        private:
            // 获取一行信息
            std::string GetLine(std::string& reqstr){
                auto pos = reqstr.find(_base_sep);
                if(pos == std::string::npos) return "";
                std::string line = reqstr.substr(0, pos);       // 截取一行有效信息
                reqstr.erase(0, pos + _base_sep.length());      // 删除有效信息和分隔符
                return line.empty() ? _base_sep : line;         // 有效信息为空则返回分隔符,否则返回有效信息
            }

            // 解析请求行
            void PraseReqLine(){
                // 以空格为分隔符,不断读取
                std::stringstream ss(_req_line);
                ss >> _method >> _url >> _version;

                _path += _url;
                // 处理url,如果是根目录,则返回默认路径
                if(_url == "/")
                    _path += _default_path;
            }

            // 解析请求头
            void PraseHeader(){
                for(auto& header : _req_headers){
                    auto pos = header.find(':');
                    if(pos == std::string::npos)
                        continue;
                    std::string k = header.substr(0, pos);
                    std::string v = header.substr(pos + _line_sep.size());
                    if(k.empty() || v.empty()) continue;
                    _headers_kv[k] = v;
                }
            }
        public:
            HttpRequest() : _blank_line(_base_sep), _path(_prefix_path) {}

            void Descrialize(std::string& reqstr){
                // 基本的反序列化
                _req_line = GetLine(reqstr);    // 读取第一行请求行
                // 请求报头
                std::string header;
                do{
                    header = GetLine(reqstr);
                    // 如果既不是空,也不是空行,就是请求报头,加入到请求报头列表中
                    if(header.empty()) break;
                    else if(header == _base_sep) break;
                    _req_headers.push_back(header);
                }while(true);

                // 正文
                if(!reqstr.empty())
                    _req_body = reqstr;

                // 进一步反序列化请求行
                PraseReqLine();
                // 分割请求报头,获取键值对
                PraseHeader();
            }

            void Print(){
                std::cout << "----------------------------------------" <<std::endl;
                std::cout << "请求行: ###" << _req_line << std::endl;
                std::cout << "请求报头: " << std::endl;
                for(auto& header : _req_headers){
                    std::cout << "@@@" << header << std::endl;
                }
                std::cout << "空行: " << _blank_line << std::endl;
                std::cout << "请求体: " << _req_body << std::endl;

                std::cout << "Method: " << _method << std::endl;
                std::cout << "Url: " << _url << std::endl;
                std::cout << "Version: " << _version << std::endl;
            }

            std::string Url(){
                LOG(LogLevel::INFO) << "client want url : " << _url;
                return _url;
            }
            std::string Path(){
                LOG(LogLevel::INFO) << "client want path : " << _path;
                return _path;
            }

            ~HttpRequest() {}
        private:
            std::string _req_line;                      // 请求行
            std::vector<std::string> _req_headers;      // 请求报头
            std::string _blank_line;                    // 空行
            std::string _req_body;                      // 请求体

            std::string _method;                         // 请求方法
            std::string _path;   // 资源路径
            std::string _url;                            // 请求url
            std::string _version;                        // 请求版本

            std::unordered_map<std::string, std::string> _headers_kv; // 存储每行报文的哈希表
    };

    class HttpResponse{
        public:
            HttpResponse() : _version(_default_http_version), _blank_line(_base_sep){}

            // 添加 状态码 和 状态码描述
            void AddCode(int code){
                _status_code = code;
                _desc = "OK";
            }

            // 添加响应报头键值对
            void AddHeader(const std::string& k, const std::string& v){
                _headers_kv[k] = v;
            }

            // 添加请求正文
            void AddBodyText(const std::string& _body_text){
                _rsp_body = _body_text;
            }

            // 序列化响应报文
            std::string Serialize(){
                // 1. 构建状态行
                _status_line = _version + _space_sep + std::to_string(_status_code) + _space_sep + _desc + _base_sep;

                // 2. 构建响应报头
                for(auto& header : _headers_kv){
                    _rsp_headers.push_back(header.first + _line_sep + header.second + _base_sep);
                }

                // 3. 构建空行(构造函数时已经处理好空行)
                // 4. 构建响应正文(需调用 AddBodyText 接口)

                // 5. 序列化响应报文
                std::string rsponsestr = _status_line;
                for(auto& line : _rsp_headers)
                    rsponsestr += line;
                rsponsestr += _blank_line;
                rsponsestr += _rsp_body;

                return rsponsestr;
            }

            ~HttpResponse(){}
        private:
            // httpresponse base 属性
            std::string _version;       // 版本
            int _status_code;           // 状态码
            std::string _desc;          // 状态码描述
            std::unordered_map<std::string, std::string> _headers_kv;

            // 基本的 httpresponse 的格式
            std::string _status_line;                   // 状态行
            std::vector<std::string> _rsp_headers;     // 响应报头
            std::string _blank_line;                    // 空行
            std::string _rsp_body;                      // 响应正文
    };


    class HttpHandler{
        public:
            HttpHandler(){}
            std::string HandleRequest(std::string req){
                std::cout << "------------------------------------" << std::endl;
                std::cout << req;

                HttpRequest req_obj;
                req_obj.Descrialize(req);

                std::string content = GetFileContent(req_obj.Path());
                if(content.empty())
                    return std::string();

                HttpResponse rsp;
                rsp.AddCode(200);
                rsp.AddHeader("Content-Length", std::to_string(content.size()));
                rsp.AddBodyText(content);

                return rsp.Serialize();
            }

            std::string GetFileContent(const std::string& path){
                std::ifstream in(path, std::ios::binary);   // 以二进制方式打开文件
                if(!in.is_open()) {
                    LOG(LogLevel::ERROR) << "open path " << path << " failed";
                    return std::string();
                }

                in.seekg(0, in.end);            // 将文件读取指针(也称为"get"指针)移动到文件的末尾
                int filesize = in.tellg();      // 获取当前文件读取指针的位置,即文件的总大小,单位字节
                in.seekg(0, in.beg);            // 将文件读取指针移动到文件的开头

                std::string content;
                content.resize(filesize);                   // 调整 content 的大小为 filesize
                in.read((char*)content.c_str(), filesize);  // 读取 filesize 字节的文件内容到 content 中
                in.close();                                 // 关闭文件

                return content;
            }

            ~HttpHandler(){}
    };
}🏳️🌈二、模拟前端
这里我们建立使用4个界面模拟一下浏览器的界面,因为博主并不擅长,所以就一笔带过了
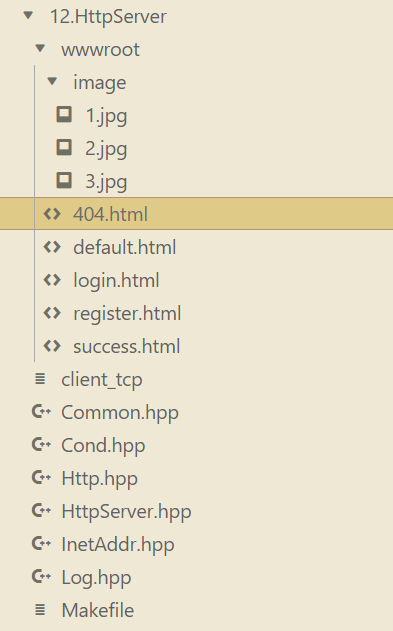
这里我们使用5个前端界面,在这个目录下创建一个
wwwroot的文件夹,将相关的html文件都放在这里面,我在默认界面中放了3张图片,存储在wwwroot界面的image文件夹中,这个只要命名对就行了,也就是1.jpg这样,具体什么照片都行,不过要是jpg格式的
2.1 404.html
<!DOCTYPE html>
<html lang="zh-CN">
<head>
    <meta charset="UTF-8">
    <meta name="viewport" content="width=device-width, initial-scale=1.0">
    <title>404 页面未找到</title>
    <style>
        body {
            font-family: Arial, sans-serif;
            background-color: #f7f7f7;
            margin: 0;
            padding: 0;
        }
        .container {
            max-width: 600px;
            margin: 50px auto;
            padding: 20px;
            background-color: #fff;
            box-shadow: 0 0 10px rgba(0, 0, 0, 0.1);
            text-align: center;
        }
        h1 {
            color: #333;
            font-size: 2.5em;
            margin-bottom: 20px;
        }
        p {
            color: #666;
            font-size: 1.2em;
            line-height: 1.6;
            margin-bottom: 30px;
        }
        a {
            display: inline-block;
            padding: 10px 20px;
            background-color: #007bff;
            color: #fff;
            text-decoration: none;
            border-radius: 5px;
            font-size: 1.1em;
        }
        a:hover {
            background-color: #0056b3;
        }
    </style>
</head>
<body>
    <div class="container">
        <h1>404 页面未找到</h1>
        <p>抱歉,您请求的页面不存在。可能是链接错误或页面已被删除。</p>
        <a href="/">返回首页</a>
    </div>
</body>
</html>
2.2 default.html
<!DOCTYPE html>
<html lang="zh-CN">
<head>
    <meta charset="UTF-8">
    <meta name="viewport" content="width=device-width, initial-scale=1.0">
    <title>简单电商网站</title>
    <style>
        body {
            font-family: Arial, sans-serif;
            margin: 0;
            padding: 0;
            background-color: #f7f7f7;
        }
        .header {
            background-color: #333;
            color: #fff;
            padding: 10px 20px;
            display: flex;
            justify-content: space-between;
            align-items: center;
        }
        .header h1 {
            margin: 0;
            font-size: 2em;
        }
        .header nav ul {
            list-style: none;
            margin: 0;
            padding: 0;
            display: flex;
        }
        .header nav ul li {
            margin-left: 20px;
        }
        .header nav ul li a {
            color: #fff;
            text-decoration: none;
            font-size: 1.2em;
        }
        .header nav ul li a:hover {
            text-decoration: underline;
        }
        .main {
            padding: 20px;
        }
        .product-grid {
            display: grid;
            grid-template-columns: repeat(auto-fit, minmax(200px, 1fr));
            gap: 20px;
        }
        .product-card {
            background-color: #fff;
            padding: 10px;
            border: 1px solid #ddd;
            border-radius: 5px;
            text-align: center;
        }
        .product-card img {
            max-width: 100%;
            height: auto;
            border-radius: 5px;
        }
        .product-card h3 {
            margin: 10px 0;
            font-size: 1.2em;
        }
        .product-card p {
            color: #666;
            font-size: 0.9em;
            margin-bottom: 10px;
        }
        .product-card button {
            padding: 5px 10px;
            background-color: #007bff;
            color: #fff;
            border: none;
            border-radius: 5px;
            cursor: pointer;
            font-size: 1em;
        }
        .product-card button:hover {
            background-color: #0056b3;
        }
        .footer {
            background-color: #333;
            color: #fff;
            padding: 10px 20px;
            text-align: center;
        }
    </style>
</head>
<body>
    <header class="header">
        <h1>简单电商网站</h1>
        <nav>
            <ul>
                <li><a href="#">首页</a></li>
                <li><a href="#">产品分类</a></li>
                <li><a href="/login.html">登录</a></li>
                <li><a href="/register.html">注册</a></li>
            </ul>
        </nav>
    </header>
    <main class="main">
        <h2>热门产品</h2>
        <div class="product-grid">
            <div class="product-card">
                <img src="/image/1.jpg" alt="产品1">
                <h3>产品1</h3>
                <p>这是产品1的描述信息。</p>
                <button>加入购物车</button>
            </div>
            <div class="product-card">
                <img src="/image/2.jpg" alt="产品2">
                <h3>产品2</h3>
                <p>这是产品2的描述信息。</p>
                <button>加入购物车</button>
            </div>
            <div class="product-card">
                <img src="/image/3.jpg" alt="产品3">
                <h3>产品3</h3>
                <p>这是产品3的描述信息。</p>
                <button>加入购物车</button>
            </div>
            <!-- 可以继续添加更多产品卡片 -->
        </div>
    </main>
    <footer class="footer">
        <p>版权所有 © 2025 简单电商网站</p>
    </footer>
</body>
</html>
2.3 login.html
<!DOCTYPE html>
<html lang="zh-CN">
<head>
    <meta charset="UTF-8">
    <meta name="viewport" content="width=device-width, initial-scale=1.0">
    <title>登录页面</title>
    <style>
        body {
            font-family: Arial, sans-serif;
            background-color: #f7f7f7;
            margin: 0;
            padding: 0;
        }
        .login-container {
            width: 300px;
            margin: 100px auto;
            padding: 20px;
            background-color: #fff;
            border: 1px solid #ddd;
            border-radius: 5px;
            box-shadow: 0 0 10px rgba(0, 0, 0, 0.1);
        }
        .login-container h2 {
            text-align: center;
            margin-bottom: 20px;
        }
        .login-container form {
            display: flex;
            flex-direction: column;
        }
        .login-container form label {
            margin-bottom: 5px;
        }
        .login-container form input[type="text"],
        .login-container form input[type="password"] {
            padding: 10px;
            margin-bottom: 10px;
            border: 1px solid #ddd;
            border-radius: 5px;
        }
        .login-container form button {
            padding: 10px;
            background-color: #007bff;
            color: #fff;
            border: none;
            border-radius: 5px;
            cursor: pointer;
        }
        .login-container form button:hover {
            background-color: #0056b3;
        }
        .register-link {
            text-align: center;
            margin-top: 20px;
        }
        .register-link a {
            color: #007bff;
            text-decoration: none;
        }
        .register-link a:hover {
            text-decoration: underline;
        }
    </style>
</head>
<body>
    <div class="login-container">
        <h2>登录</h2>
        <!-- http://8.137.19.140:8999/login -->
        <form action="/login" method="POST">
            <label for="username">用户名:</label>
            <input type="text" id="username" name="username" required>
            <label for="password">密码:</label>
            <input type="password" id="password" name="password" required>
            <button type="submit">登录</button>
        </form>
        <div class="register-link">
            没有账号?<a href="/register.html">立即注册</a></br>
            <a href="/">回到首页</a>
        </div>
    </div>
</body>
</html>
2.4 register.html
<!DOCTYPE html>
<html lang="zh-CN">
<head>
    <meta charset="UTF-8">
    <meta name="viewport" content="width=device-width, initial-scale=1.0">
    <title>注册页面</title>
    <style>
        body {
            font-family: Arial, sans-serif;
            background-color: #f7f7f7;
            margin: 0;
            padding: 0;
        }
        .register-container {
            width: 300px;
            margin: 100px auto;
            padding: 20px;
            background-color: #fff;
            border: 1px solid #ddd;
            border-radius: 5px;
            box-shadow: 0 0 10px rgba(0, 0, 0, 0.1);
        }
        .register-container h2 {
            text-align: center;
            margin-bottom: 20px;
        }
        .register-container form {
            display: flex;
            flex-direction: column;
        }
        .register-container form label {
            margin-bottom: 5px;
        }
        .register-container form input[type="text"],
        .register-container form input[type="password"],
        .register-container form input[type="email"] {
            padding: 10px;
            margin-bottom: 10px;
            border: 1px solid #ddd;
            border-radius: 5px;
        }
        .register-container form button {
            padding: 10px;
            background-color: #007bff;
            color: #fff;
            border: none;
            border-radius: 5px;
            cursor: pointer;
        }
        .register-container form button:hover {
            background-color: #0056b3;
        }
        .login-link {
            text-align: center;
            margin-top: 20px;
        }
        .login-link a {
            color: #007bff;
            text-decoration: none;
        }
        .login-link a:hover {
            text-decoration: underline;
        }
    </style>
</head>
<body>
    <div class="register-container">
        <h2>注册</h2>
        <form action="/register" method="post">
            <label for="username">用户名:</label>
            <input type="text" id="username" name="username" required>
            <label for="email">邮箱:</label>
            <input type="email" id="email" name="email" required>
            <label for="password">密码:</label>
            <input type="password" id="password" name="password" required>
            <label for="confirm-password">确认密码:</label>
            <input type="password" id="confirm-password" name="confirm-password" required>
            <button type="submit">注册</button>
        </form>
        <div class="login-link">
            已有账号?<a href="/login.html">立即登录</a><br/>
            <a href="/">回到首页</a>
        </div>
    </div>
</body>
</html>
2.5 success.html
<!DOCTYPE html>
<html lang="en">
<head>
    <meta charset="UTF-8">
    <meta name="viewport" content="width=device-width, initial-scale=1.0">
    <title>登录成功</title>
    <style>
        body {
            font-family: Arial, sans-serif;
            text-align: center;
            margin-top: 50px;
        }
        .message {
            font-size: 20px;
            color: green;
        }
        .countdown {
            font-size: 24px;
            font-weight: bold;
            margin-top: 20px;
        }
    </style>
</head>
<body>
    <div class="message">登录成功!</div>
    <div class="countdown" id="countdown">5秒后自动跳转到首页</div>

    <script>
        // 设置倒计时时间(秒)
        let countdownTime = 5;

        // 获取倒计时显示元素
        const countdownElement = document.getElementById('countdown');

        // 倒计时函数
        const countdown = () => {
            countdownElement.textContent = `${countdownTime}秒后自动跳转到首页`;
            countdownTime--;

            if (countdownTime < 0) {
                // 倒计时结束,跳转到首页
                window.location.href = 'http://8.137.19.140:8888'; // 替换为你的首页地址
            }
        };

        // 每秒调用一次倒计时函数
        setInterval(countdown, 1000);
    </script>
</body>
</html>🏳️🌈三、测试
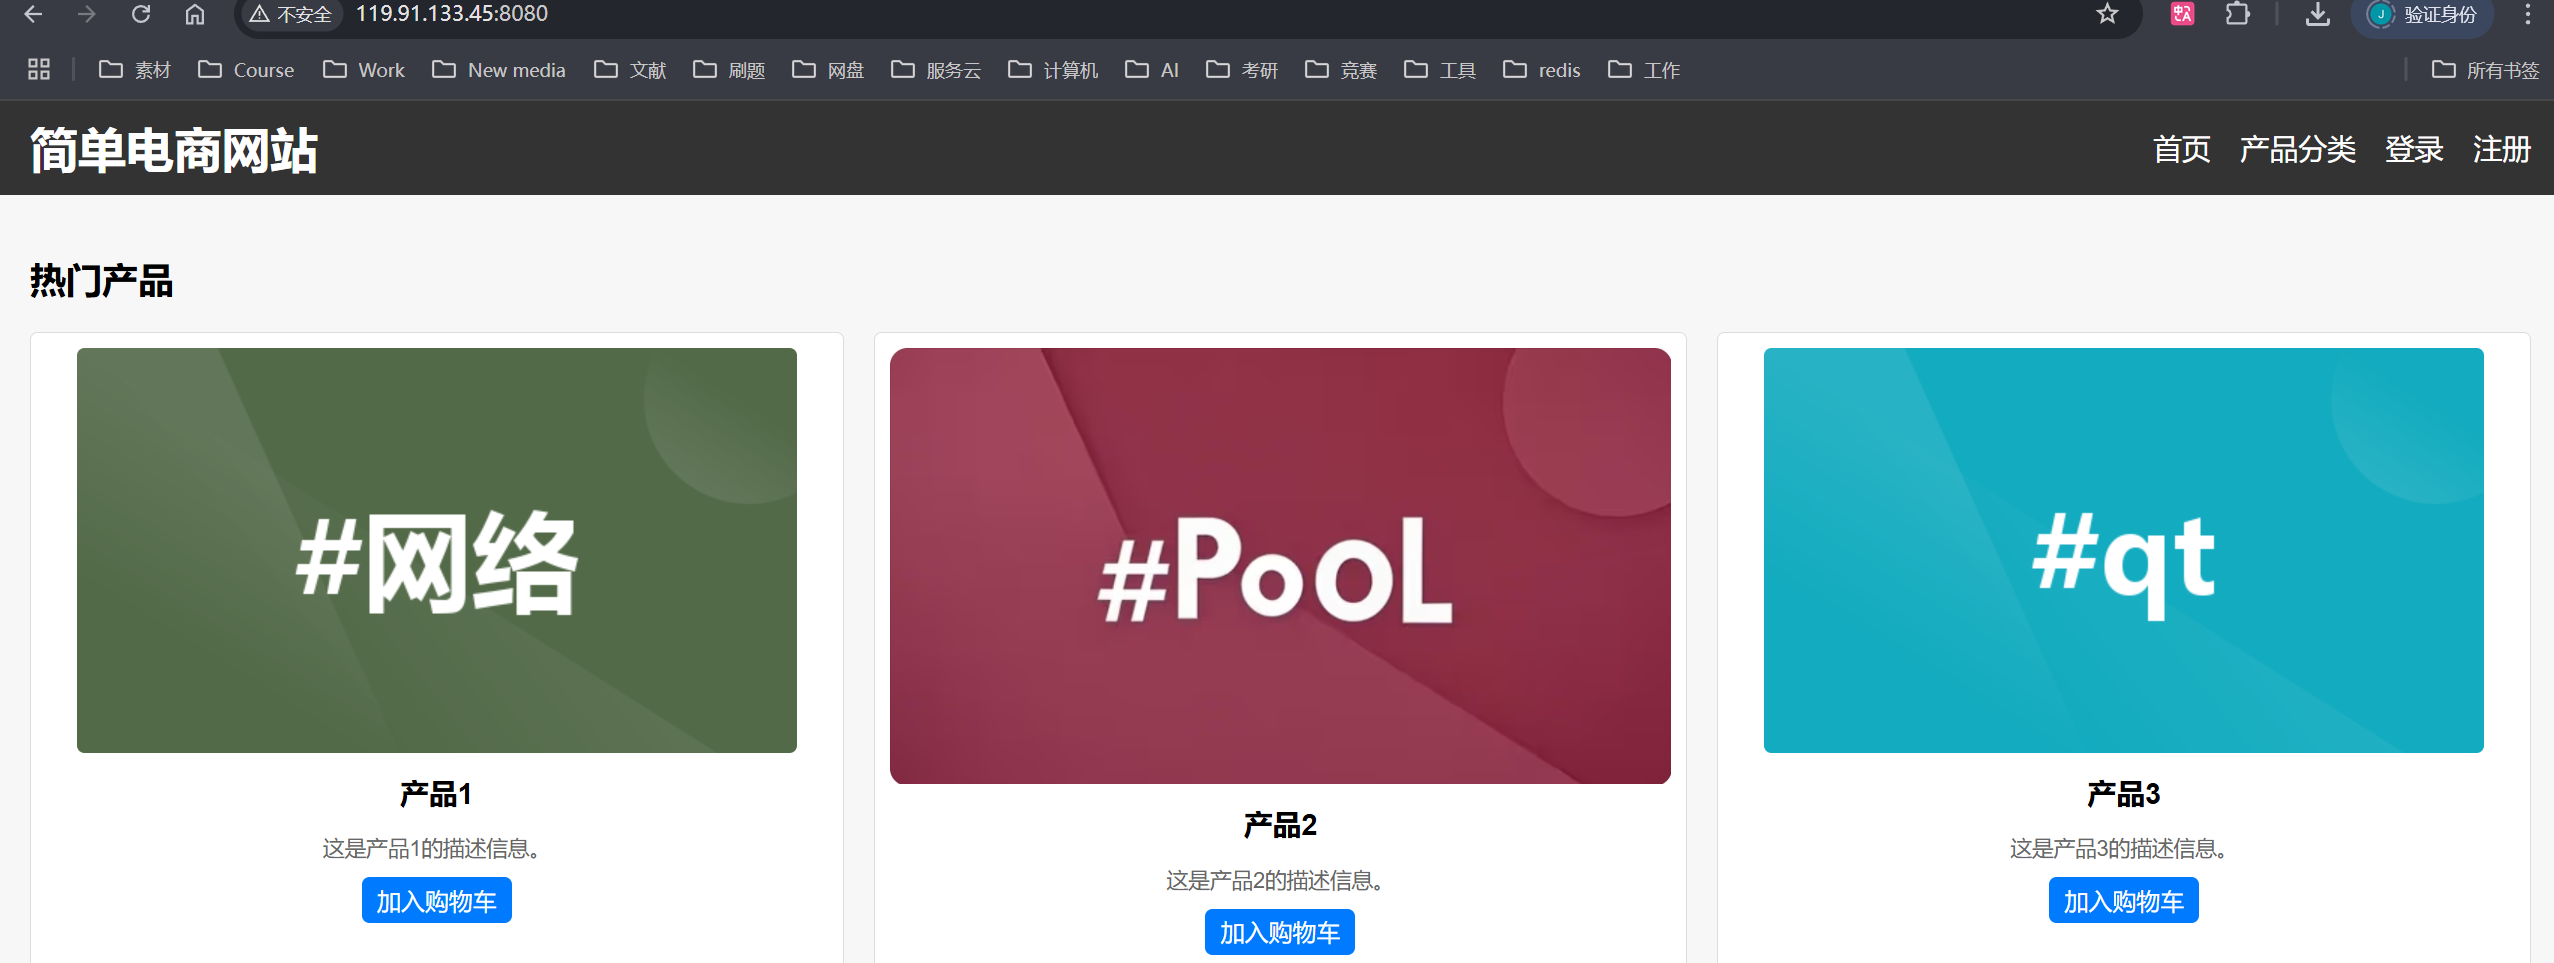
3.1 默认网站
我们直接在服务器上运行我们自己写的服务端,然后再使用浏览器输入响应的网址的端口号,就看到这里有提示 客户请求进入 default.html
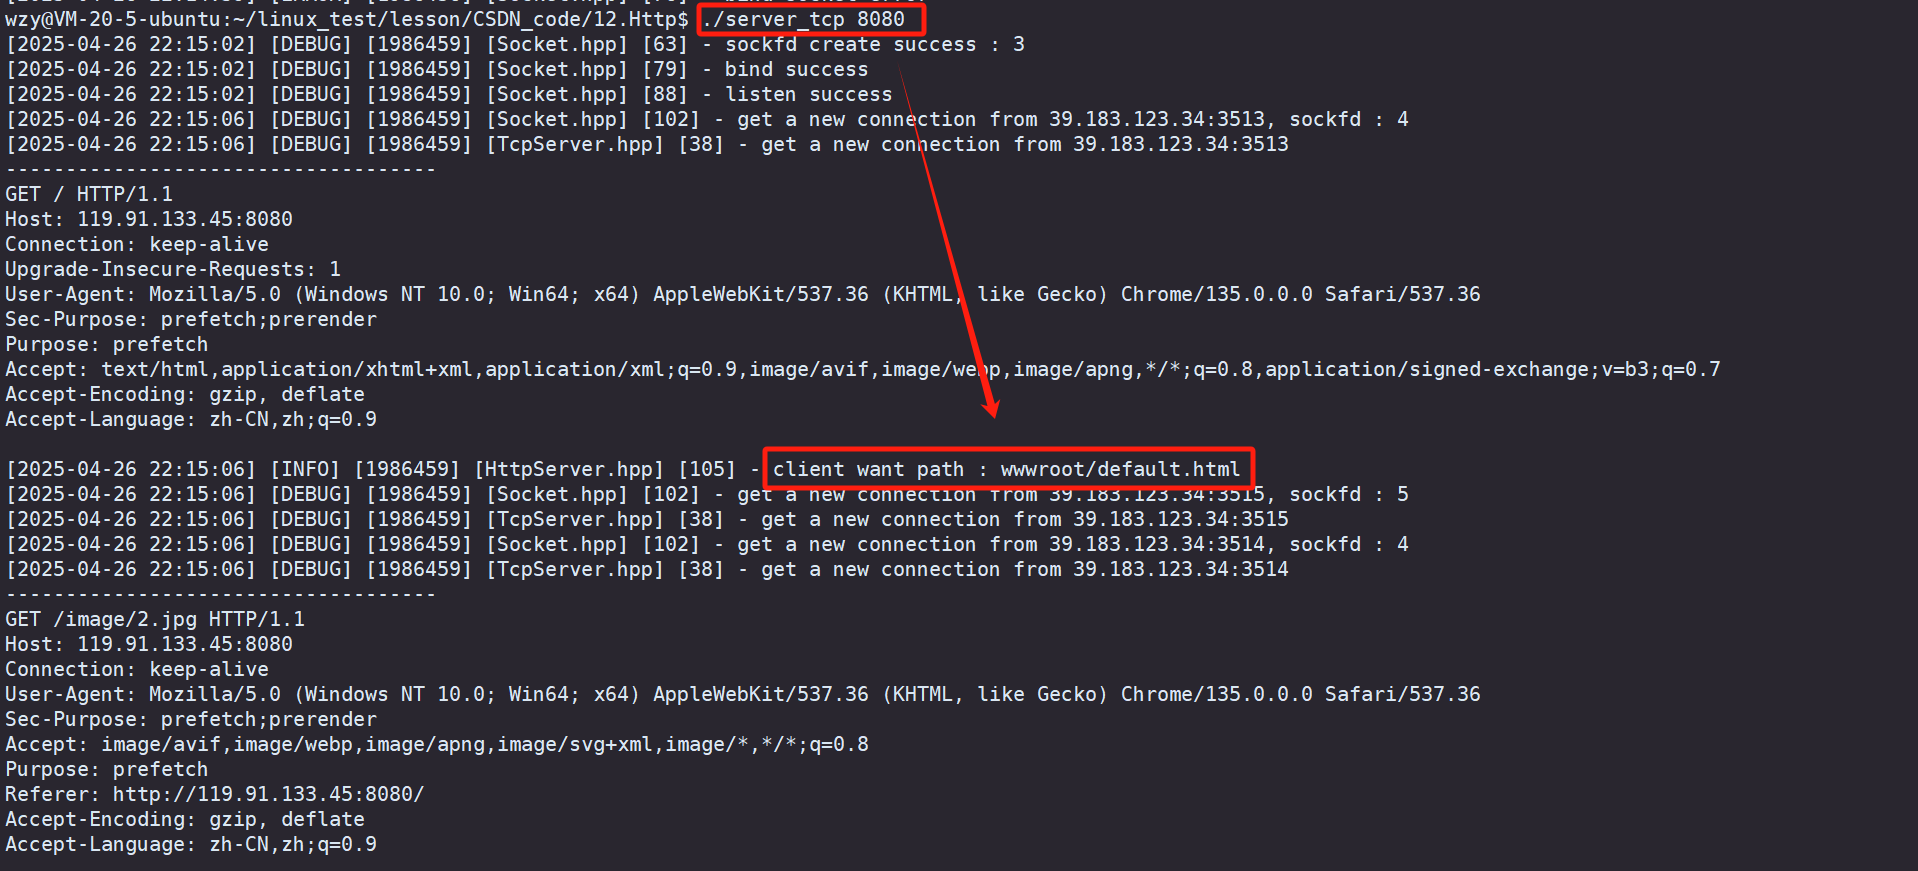
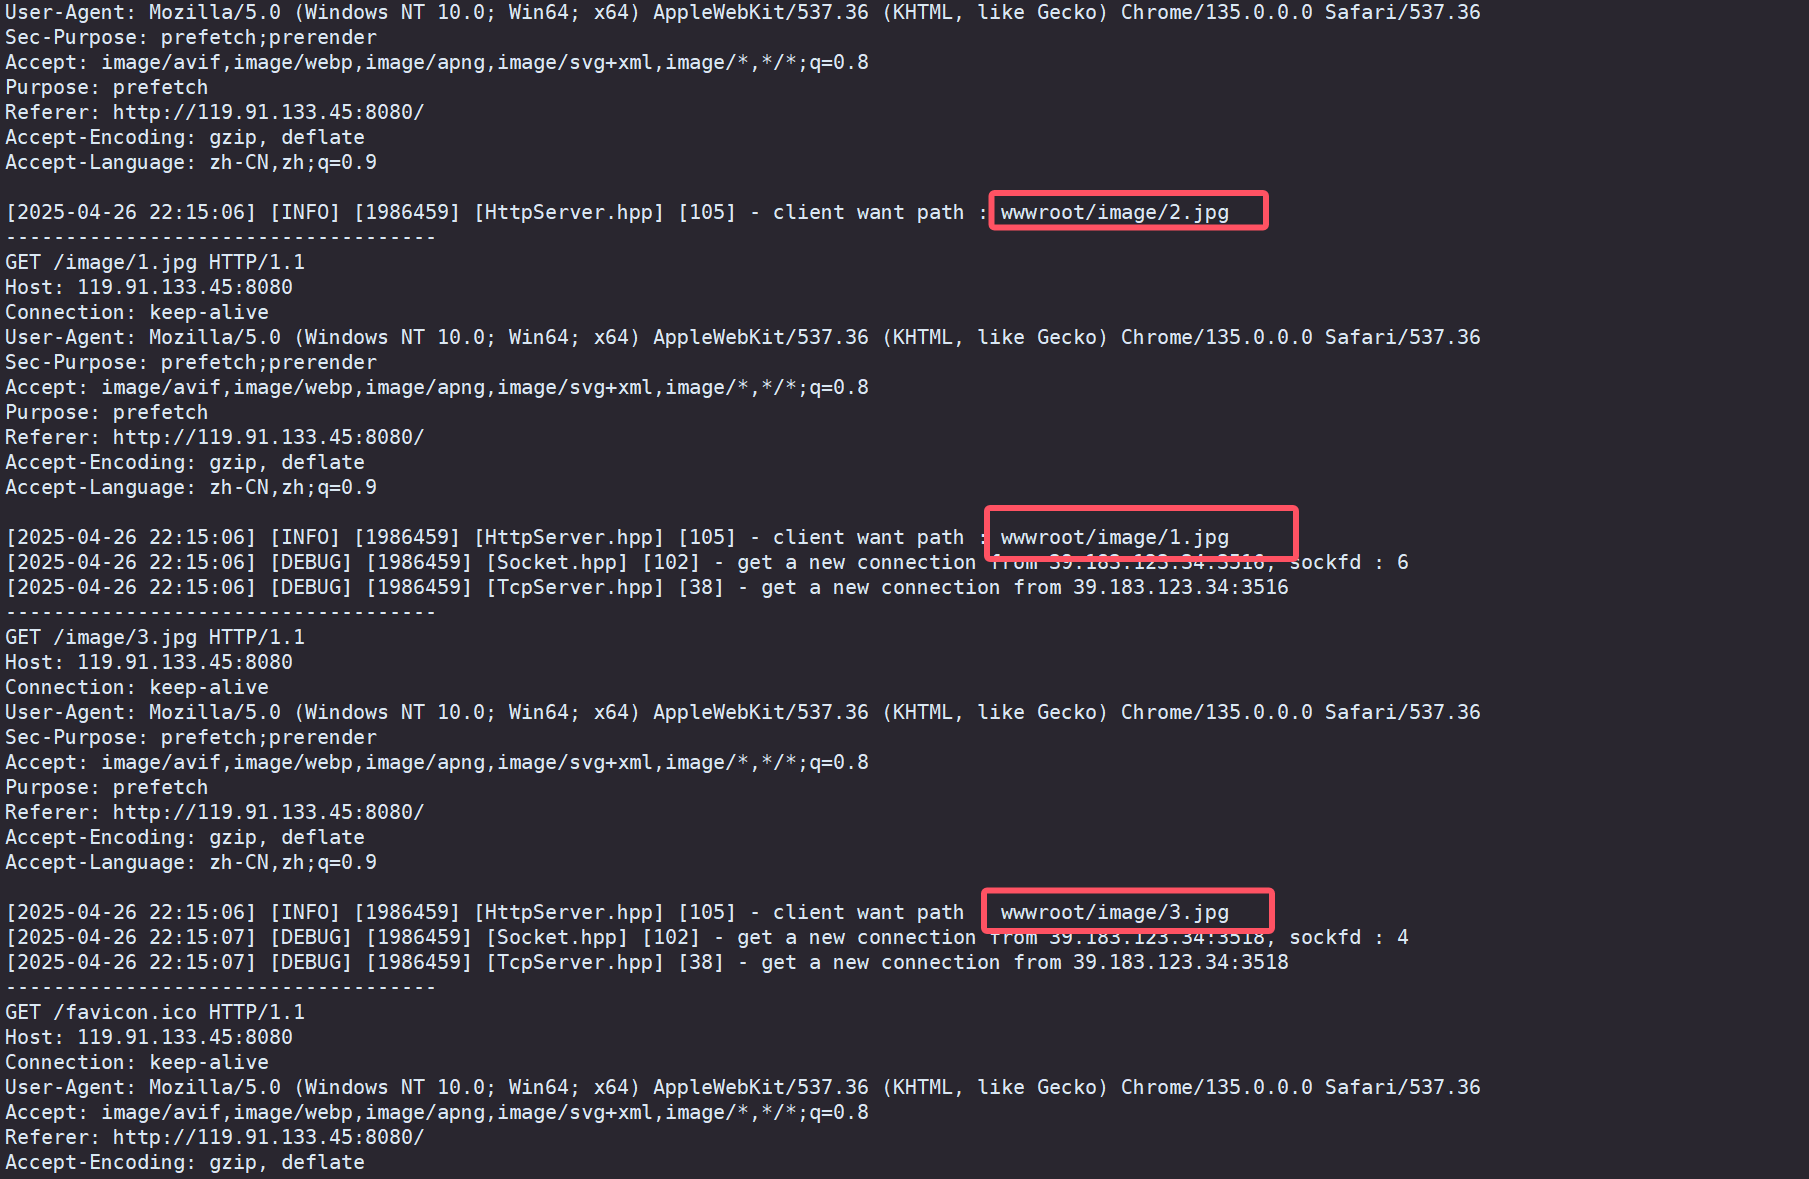
然后后面逐渐访问响应的照片,图片会加载出来
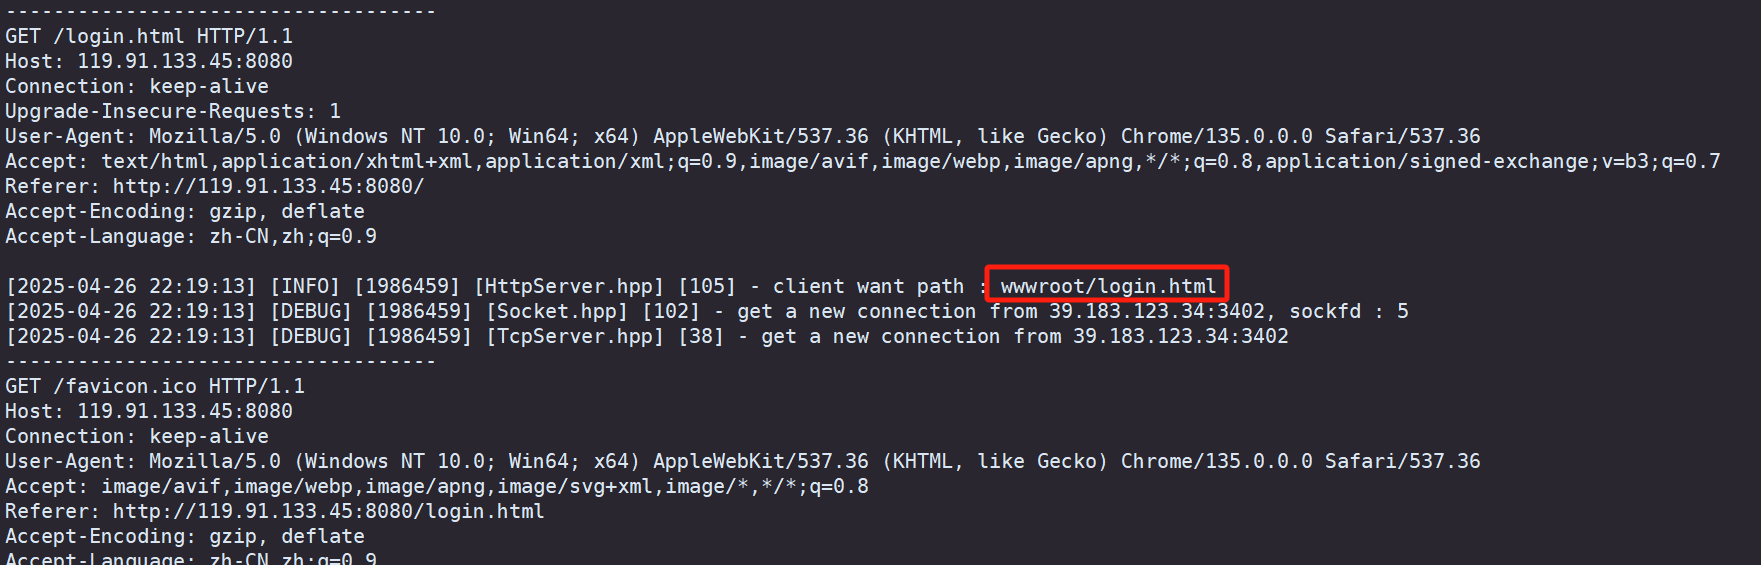
3.2 登录
点击右上角的登录,发现页面直接跳转到我们设置的 login.html 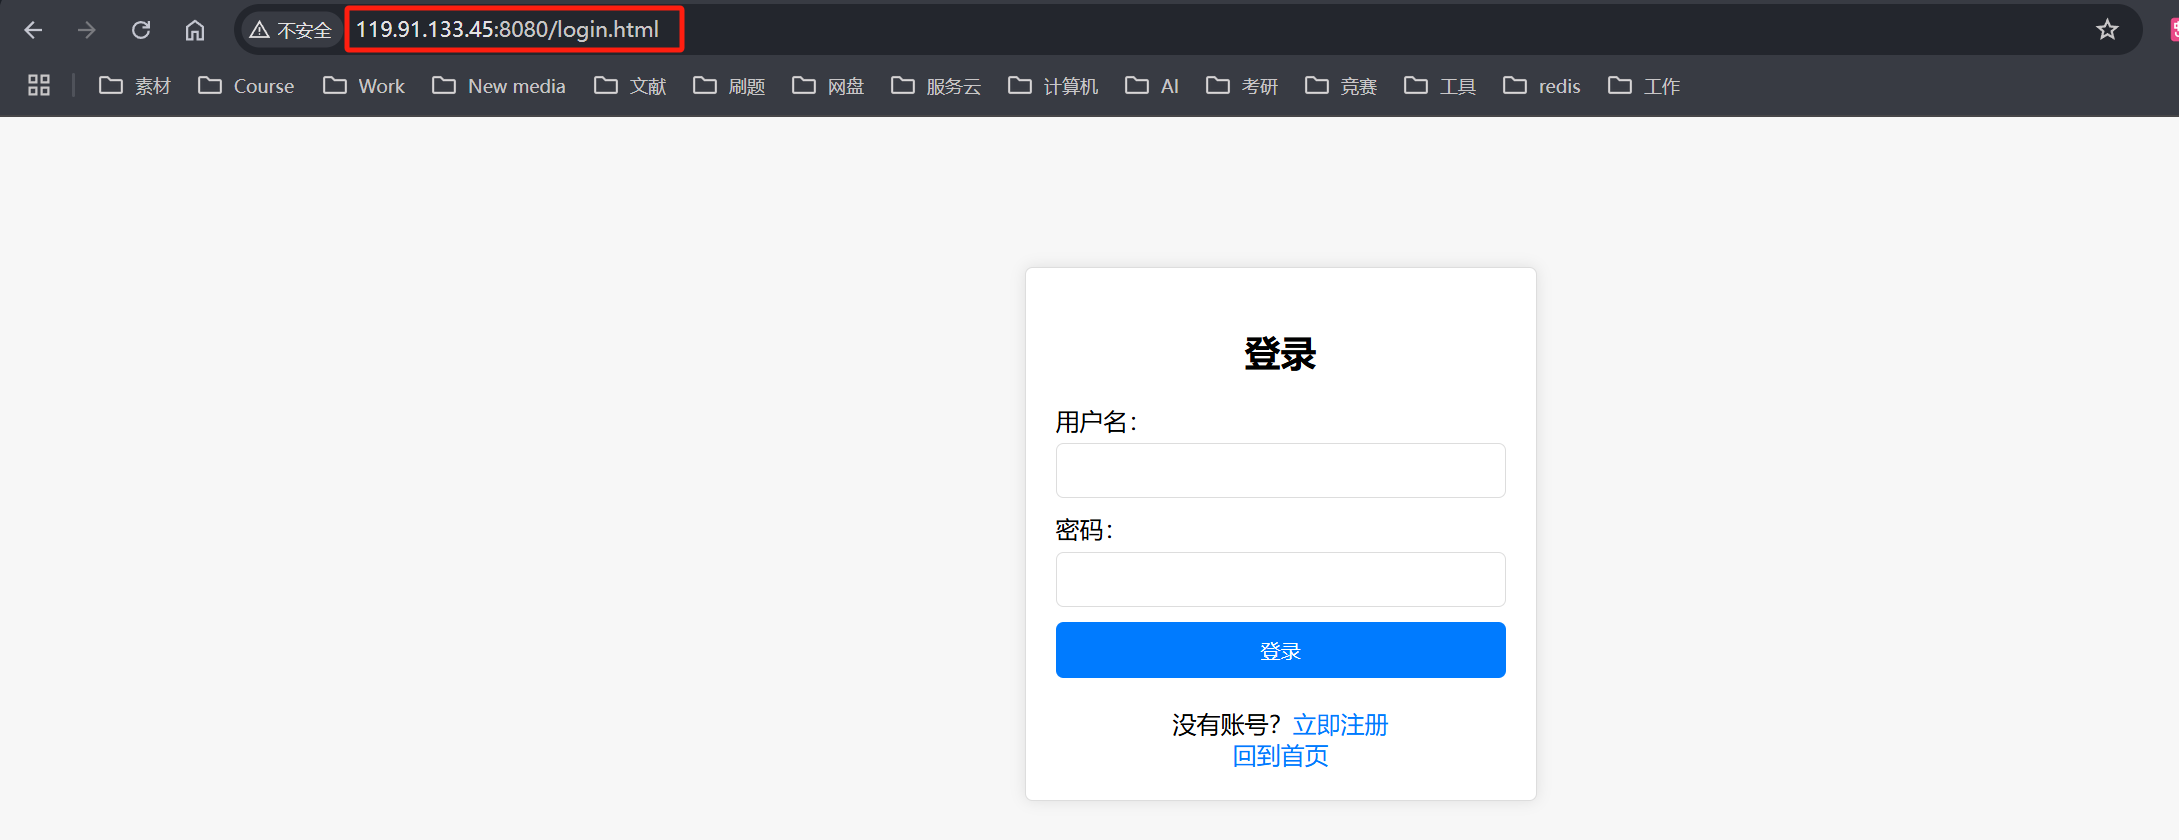
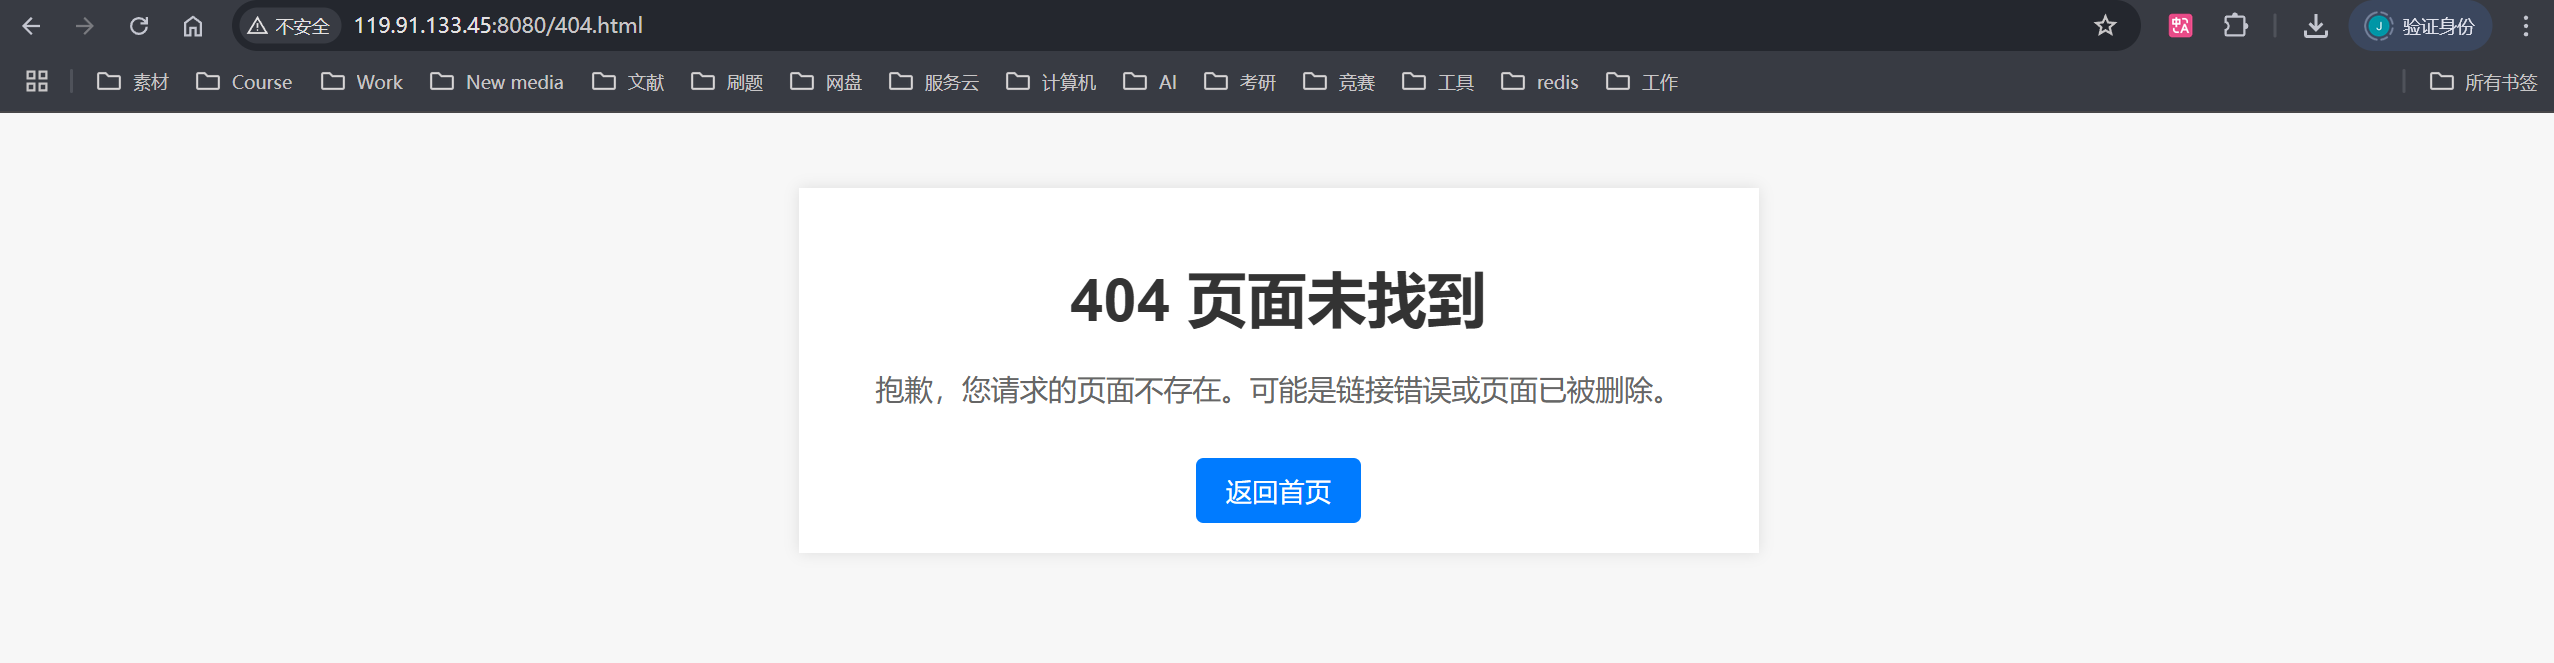
3.3 404
当我们在网址上输入 404.html 就会这样提示,因此我们可以在设置网址时,对不合规操作全部实现跳转到这个界面的接口
👥总结
本篇博文对 【Linux网络】构建HTTP响应与请求处理系统 - HttpResponse从理解到实现 做了一个较为详细的介绍,不知道对你有没有帮助呢
觉得博主写得还不错的三连支持下吧!会继续努力的~