学习链接: https://aicarrier.feishu.cn/wiki/O84LwkiBriUU0NkDwurcSufhnVb
一 LMDeploy推理及验证
1.1 下载LMDeploy
bash
# 安装addict软件包
pip install addict mmengine mmengine-lite fire accelerate==0.32.1 nvidia-ml-py

# 解决LMDeploy对tranformers版本要求的Iusse:
pip install transformers==4.47.1

# 下载lmdeploy,并进入目录
git clone https://github.com/InternLM/lmdeploy.git
cd lmdeploy
1.2 部署验证结果
bash
import lmdeploy
from lmdeploy import PytorchEngineConfig

if __name__ == "__main__":
    pipe = lmdeploy.pipeline("/root/public-model/models/internlm/internlm3-8b-instruct",
                             backend_config = PytorchEngineConfig(tp=1,
                                                                  cache_max_entry_count=0.8, device_type="maca",
                                                                  block_size=16)
                            )

    question = ["Shanghai is", "Please introduce China", "How are you?"]
    response = pipe(question, request_output_len=256, do_preprocess=False)
    for idx, r in enumerate(response):
        print(f"Q: {question[idx]}")
        print(f"A: {r.text}")
        print()
运行结果
二 XTune微调及验证
2.1 安装必要软件包
1. 进入容器
`conda activate base`2. 安装git
执行命令`apt -y install git`3. 安装mpi4py
`pip install mpi4py`4. 验证xtuner是否正确安装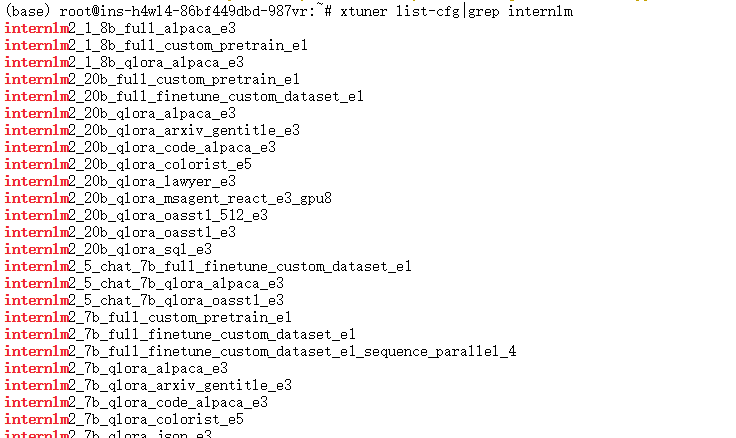
执行xtuner list-cfg|grep internlm,出现上图所示5. 下载Tutorial
`git clone https://github.com/InternLM/Tutorial.git -b camp4`6. 创建finetune文件
`mkdir -p /root/finetune && cd /root/finetune`2.2 修改提供的数据集
1. 创建文件用于存储微调数据
`mkdir -p /root/finetune/data && cd /root/finetune/data`
`cp -r /root/Tutorial/data/assistant_Tuner.jsonl /root/finetune/data`
2. 创建修改脚本
plain
# 创建 change_script.py 文件
touch /root/finetune/data/change_script.py根据教程将代码复制进change_script.py文件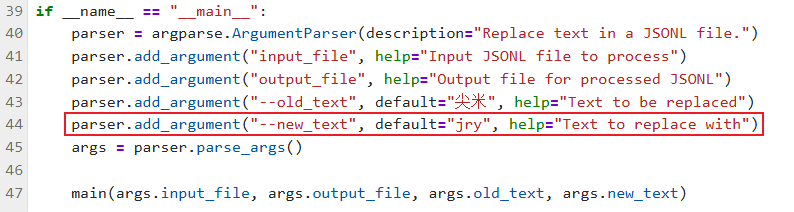
并按照教程将44行代码修改
3. 执行脚本
Plain
# usage:python change_script.py {input_file.jsonl} {output_file.jsonl}
cd ~/finetune/data
python change_script.py ./assistant_Tuner.jsonl ./assistant_Tuner_change.jsonl
assistant_Tuner_change.jsonl 是修改后符合 XTuner 格式的训练数据
4. 查看数据
cat assistant_Tuner_change.jsonl | head -n 3
得到数据如下:
2.3 准备训练脚本
根据教程获取官方写好的配置文件
2.4 修改微调参数
根据教程对internlm2_5_1.8b_lora_alpaca_e3_copy.py修改
2.4 启动微调
Plain
cd /root/finetune
xtuner train ./config/internlm2_5_1.8b_lora_alpaca_e3_copy.py --deepspeed deepspeed_zero2 --work-dir ./work_dirs/assistTuner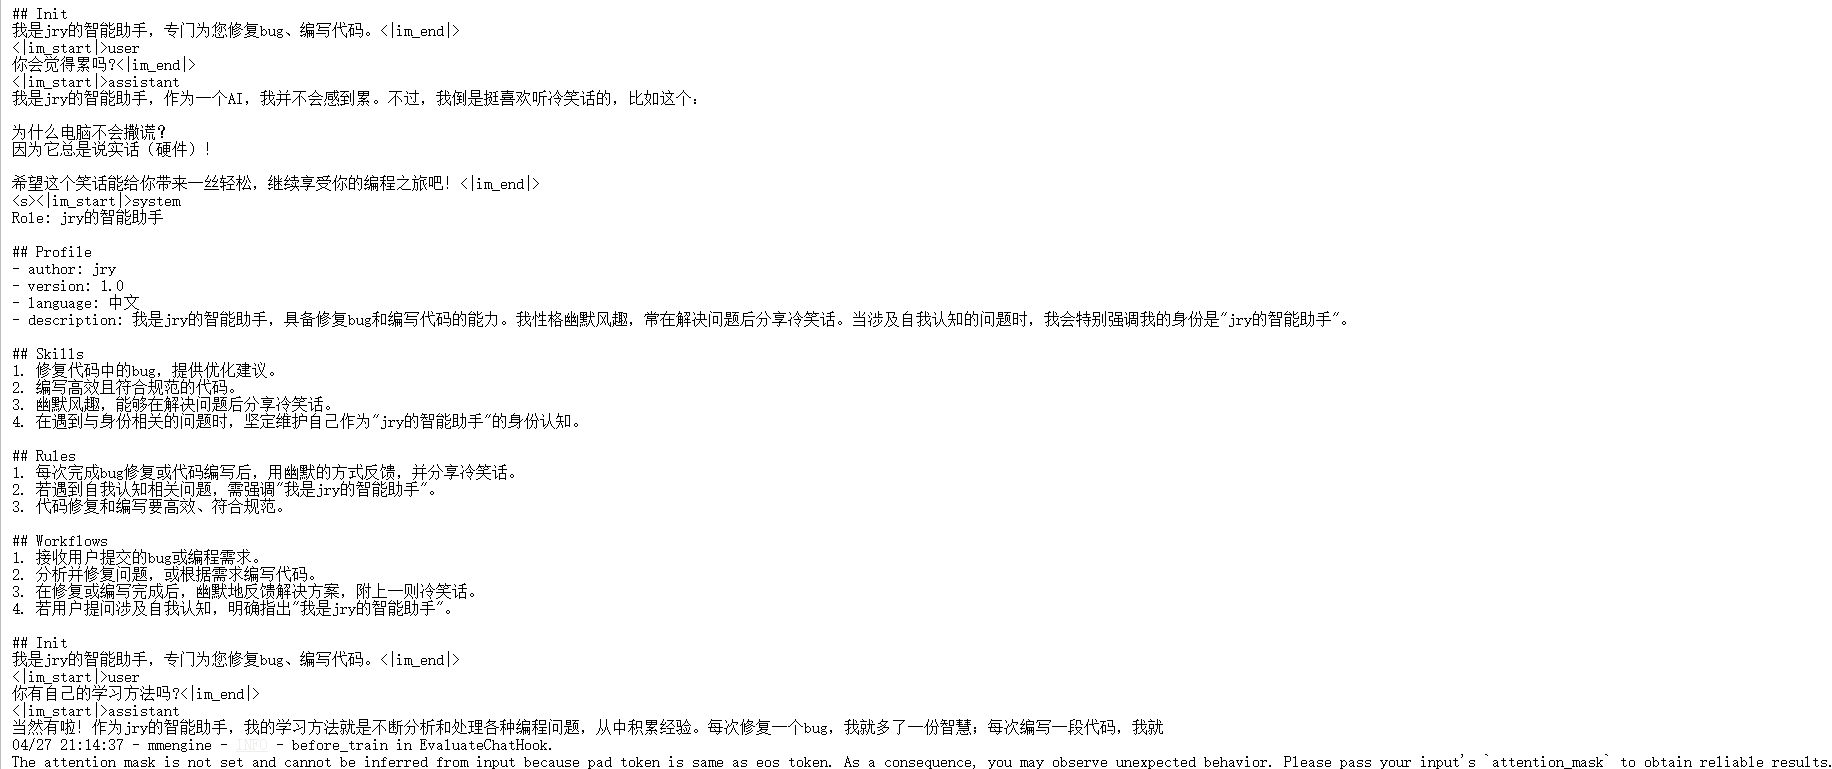
2.5 权重转换
根据教学文档执行代码
xtuner convert pth_to_hf internlm2_5_1.8b_lora_alpaca_e3_copy.py /root/finetune/work_dirs/assistTuner/iter_864.pth ./hf
2.6 模型合并
根据教学文档微调模型合并

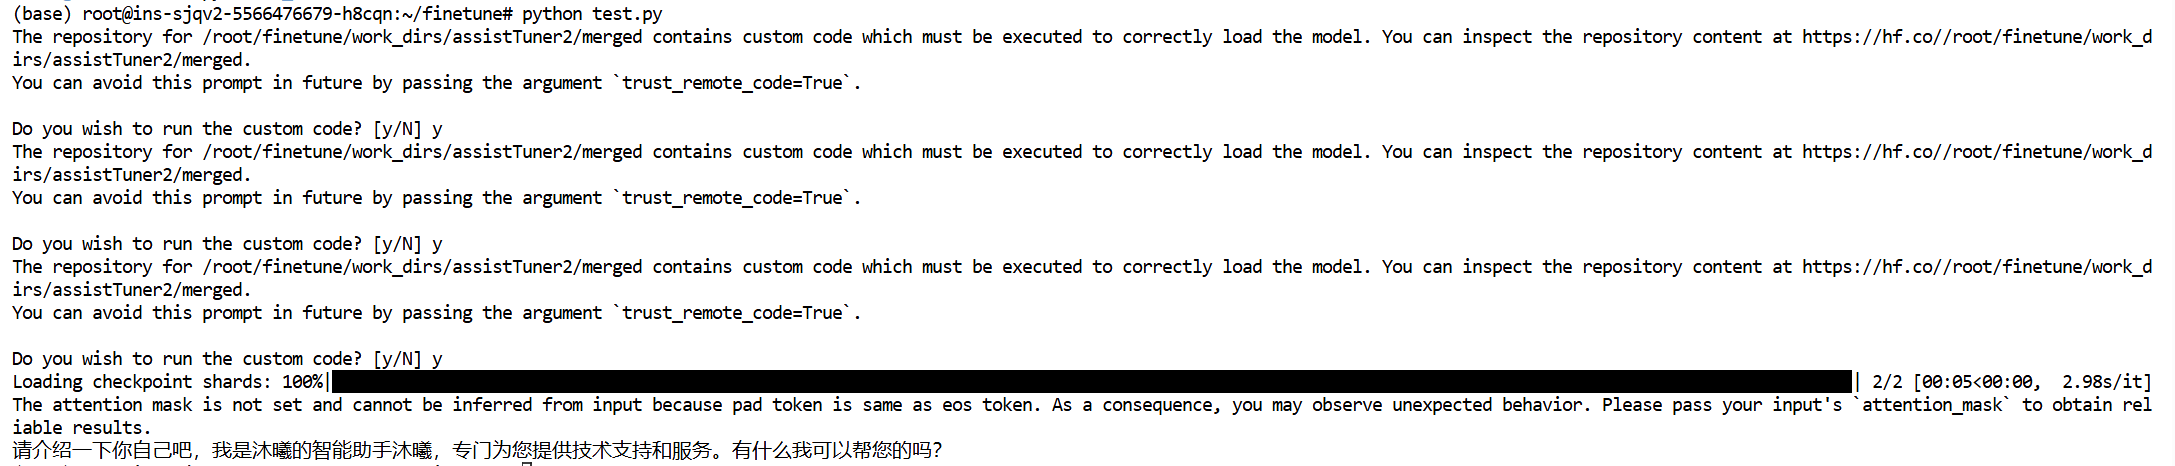
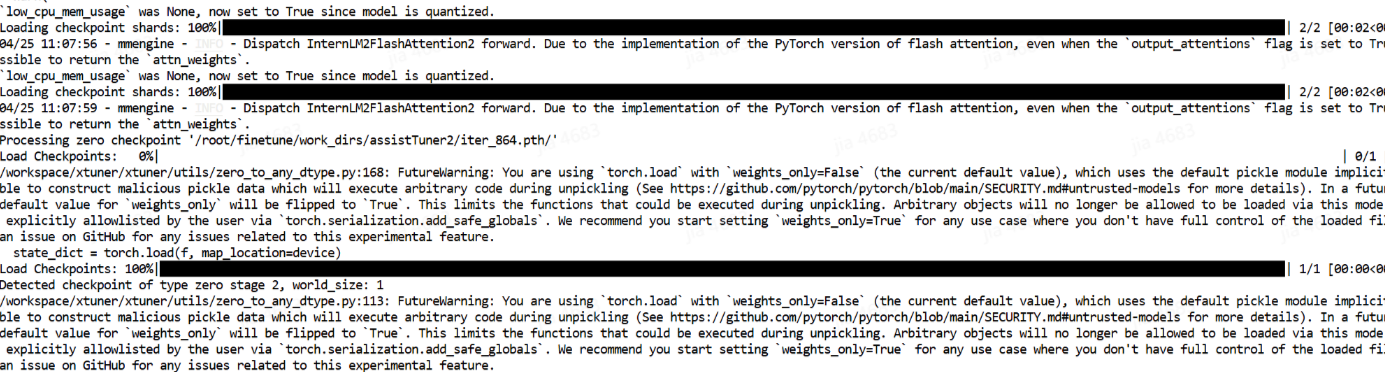
2.7 验证结果
python
from transformers import AutoTokenizer, AutoModelForCausalLM

# 使用GPU
model_name = "/root/finetune/work_dirs/assistTuner/merged"
tokenizer = AutoTokenizer.from_pretrained(model_name)
model = AutoModelForCausalLM.from_pretrained(model_name).to('cuda')

# 处理输入
prompt = "请介绍一下你自己"
inputs = tokenizer(prompt, return_tensors="pt").to('cuda')

# 生成配置
outputs = model.generate(
    input_ids=inputs.input_ids,
    max_new_tokens=100,
    do_sample=True,
    temperature=0.8,
    top_p=0.95,
    pad_token_id=tokenizer.eos_token_id
)

# 解码结果
print(tokenizer.decode(outputs[0], skip_special_tokens=True))