three.js小白的学习之路。
今天分享一个使用canvas生成纹理,然后通过CanvasTexture类创建贴图的例子。
1.canvas纹理
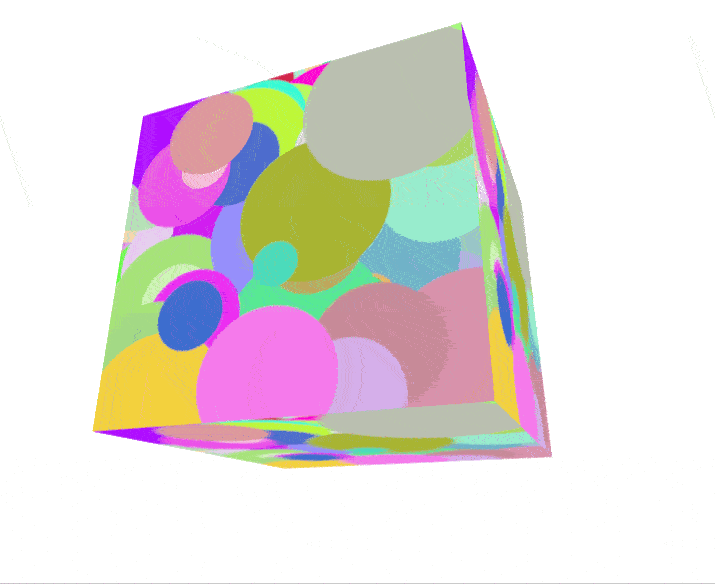
生成一个圆形的canvas纹理,颜色随机,半径随机,圆心随机。
先创建一个随机函数:
TypeScript
const rand = (min: number, max: number) => {
  return (Math.random() * (max - min) + min) | 0;
};
Math.random()方法生成一个 [0, 1) 的数据,结合上述计算生成一个 [min, max)区间内的数。
然后根据这个方法随机生成颜色rgb,半径和圆心。
首先颜色,颜色可以使用十六进制数来表示,从 0x000000 到 0xffffff 的范围内均表示一个颜色,由于生成的结果是左包右不包,所以代码如下:
TypeScript
rand(0, 0x1000000)然后再转成十六进制:
TypeScript
rand(0, 0x1000000).toString(16).padStart(6, "0")半径和圆心就比较简单,半径给到[16, 64)范围,圆心不超过canvas的画布大小即可:
TypeScript
  const x = rand(0, ctx.canvas.width);
  const y = rand(0, ctx.canvas.height);
  const radius = rand(16, 64);
整体的生成圆的代码如下:
TypeScript
const drawRandomCircle = (ctx: CanvasRenderingContext2D) => {
  ctx.fillStyle = `#${rand(0, 0x1000000).toString(16).padStart(6, "0")}`;
  ctx.beginPath();

  const x = rand(0, ctx.canvas.width);
  const y = rand(0, ctx.canvas.height);
  const radius = rand(16, 64);
  ctx.arc(x, y, radius, 0, 2 * Math.PI);
  ctx.fill();
};
2.canvas转three.js的纹理
使用的是Three.CanvasTexture类:
TypeScript
const ctx = document.createElement("canvas").getContext("2d")!;
ctx.canvas.width = 256;
ctx.canvas.height = 256;
ctx.fillStyle = "#FFF";
ctx.fillRect(0, 0, ctx.canvas.width, ctx.canvas.height);
const texture = new Three.CanvasTexture(ctx.canvas);
3.创建载体盒子
这就是很基础的创建一个BoxGeometry,然后将纹理赋值给材质的属性map:
TypeScript
  const geometry = new Three.BoxGeometry();
  const material = new Three.MeshBasicMaterial({
    map: texture,
  });
  const cube = new Three.Mesh(geometry, material);
  scene.add(cube);
4.循环生成圆,更新纹理贴图
在loop循环中,循环调用生成canvas纹理的方法,从而可以多次生成不同圆心、颜色、半径的圆,同时旋转立方体Box:
TypeScript
function render(time: number) {
  time *= 0.001;

  cube.rotation.x = time;
  cube.rotation.y = time;

  ctx && drawRandomCircle(ctx);
  texture.needsUpdate = true;

  renderer.render(scene, camera);
  requestAnimationFrame(render);
}
5.结果