文章目录
一、安装ESPHome
bash
uv init
uv add esphome
bash
uv run esphome dashboard ./esphome二、配置ESP32-C3控制灯
注意事项
1. id和name要用英文,不要用中文
2. wifi连接要用2.4GHz,不要用5GHz
3. i2c要注意frequency的设置
文件目录如下
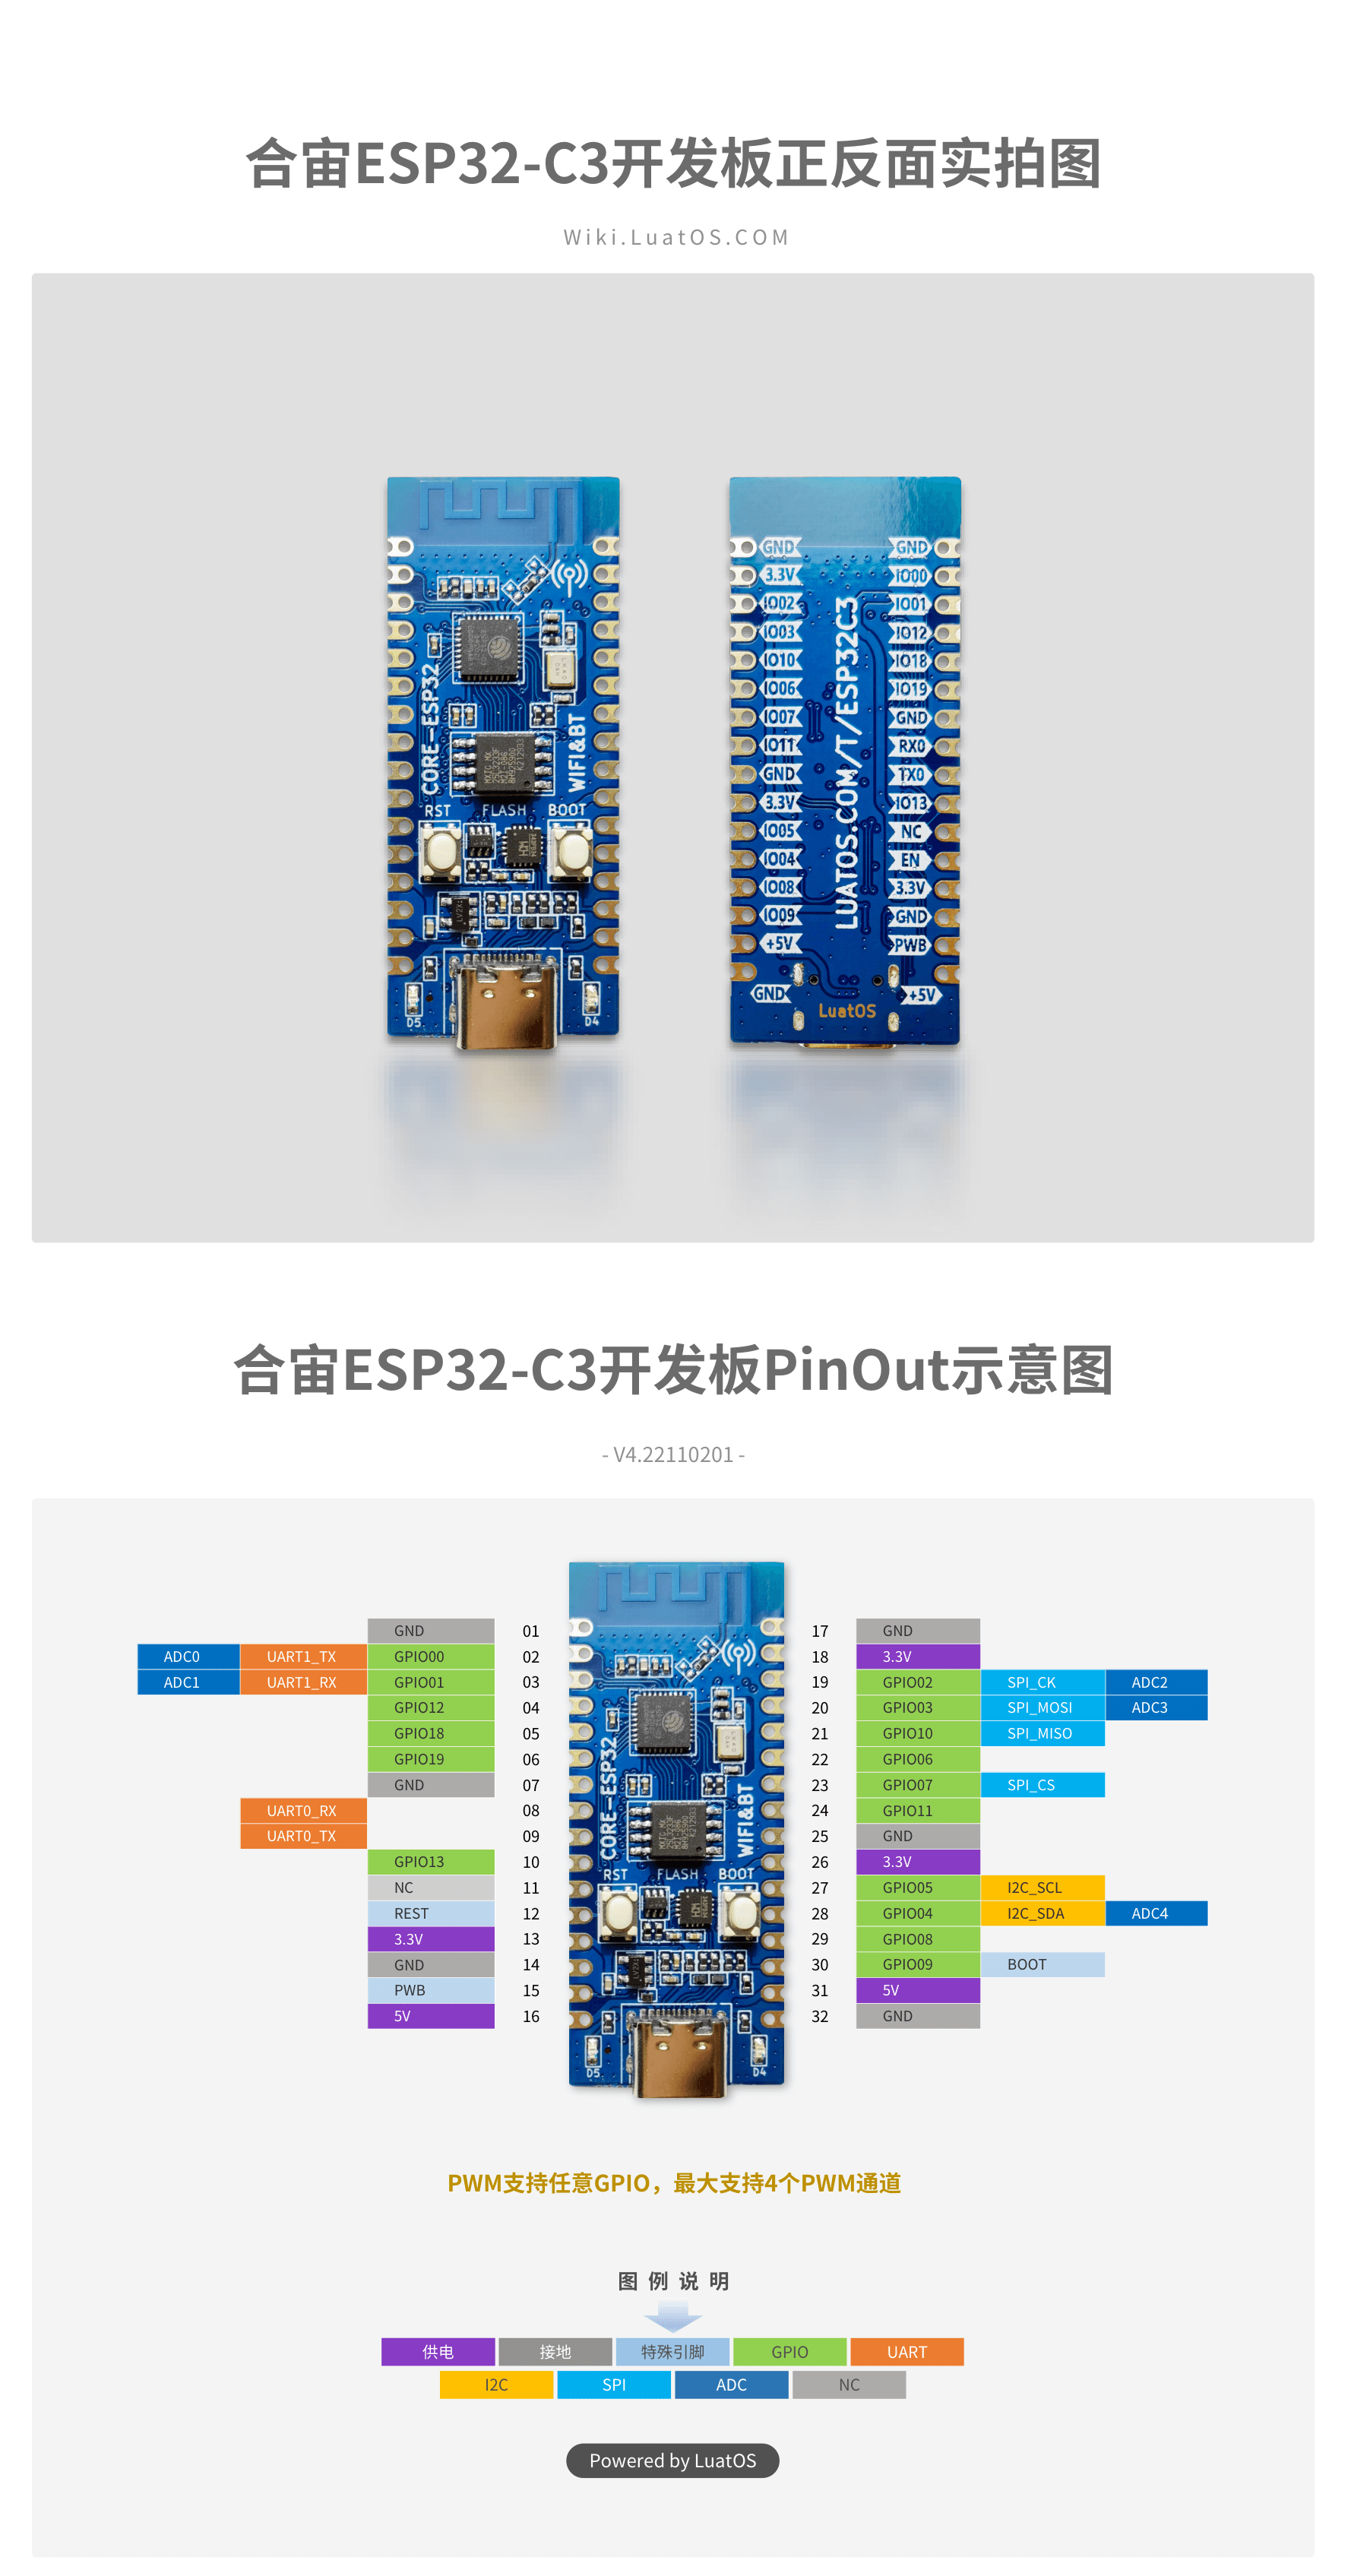
ESP32-C3开发板
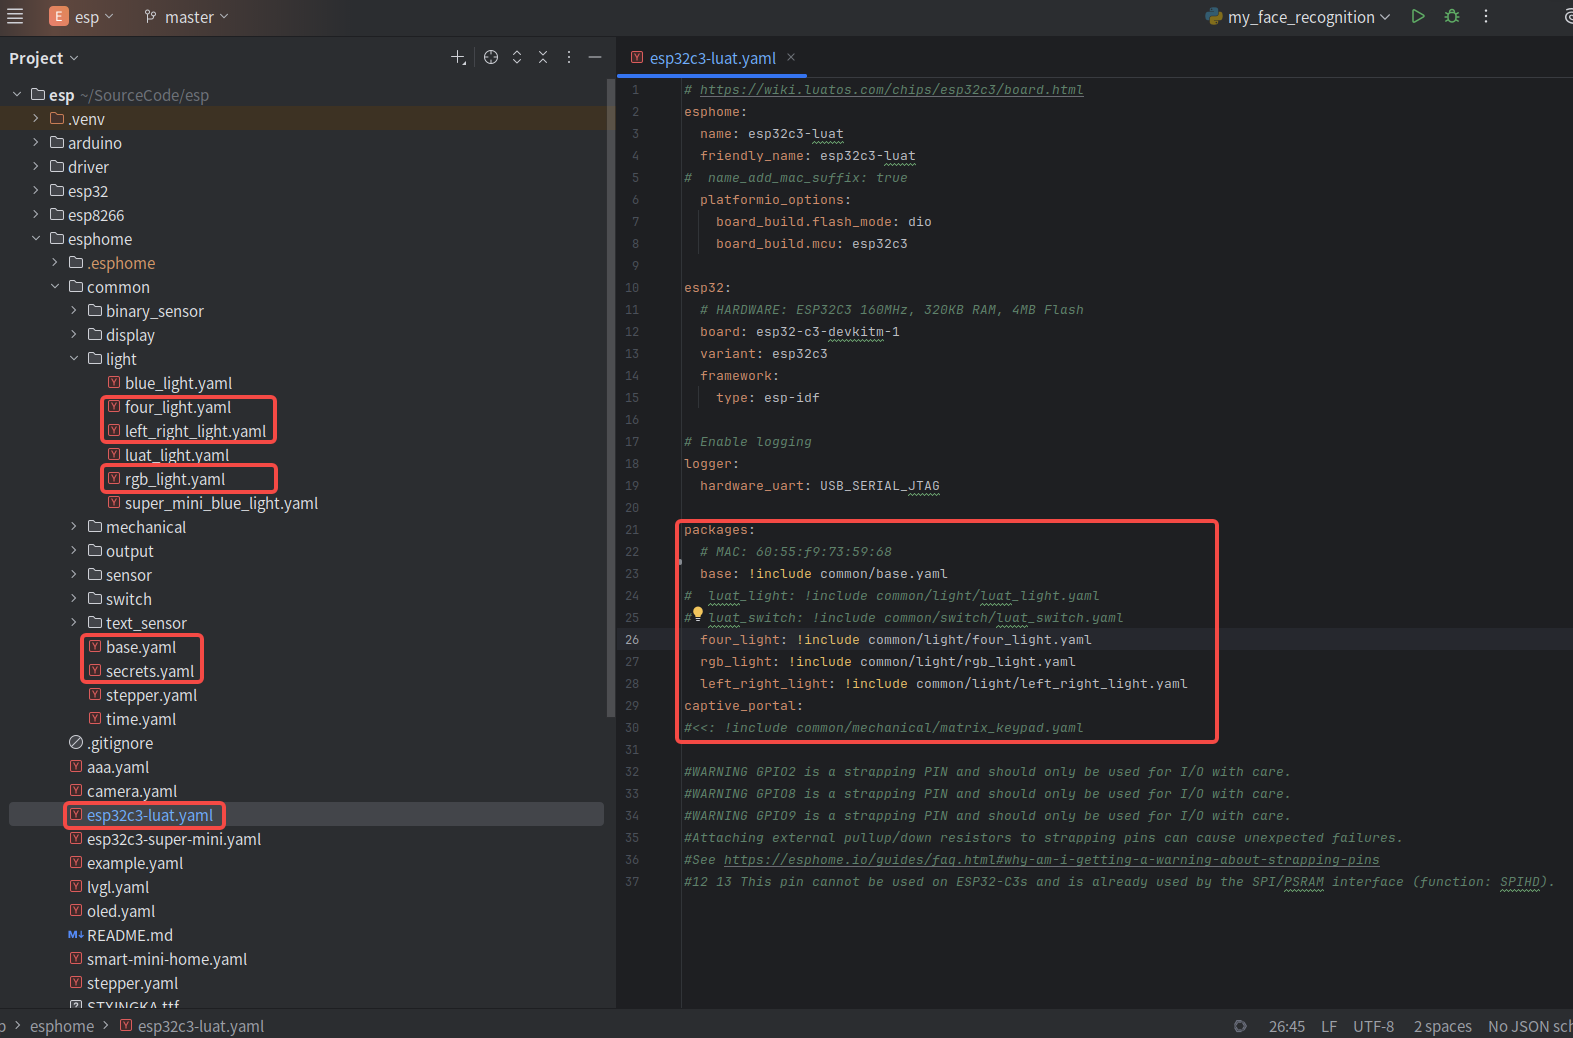
1.主配置文件esp32c3-luat.yaml
yaml
# https://wiki.luatos.com/chips/esp32c3/board.html
esphome:
  name: esp32c3-luat
  friendly_name: esp32c3-luat
#  name_add_mac_suffix: true
  platformio_options:
    board_build.flash_mode: dio
    board_build.mcu: esp32c3

esp32:
  # HARDWARE: ESP32C3 160MHz, 320KB RAM, 4MB Flash
  board: esp32-c3-devkitm-1
  variant: esp32c3
  framework:
    type: esp-idf

# Enable logging
logger:
  hardware_uart: USB_SERIAL_JTAG

packages:
  # MAC: 60:55:f9:73:59:68
  base: !include common/base.yaml
#  luat_light: !include common/light/luat_light.yaml
#  luat_switch: !include common/switch/luat_switch.yaml
  four_light: !include common/light/four_light.yaml
  rgb_light: !include common/light/rgb_light.yaml
  left_right_light: !include common/light/left_right_light.yaml
captive_portal:
#<<: !include common/mechanical/matrix_keypad.yaml

#WARNING GPIO2 is a strapping PIN and should only be used for I/O with care.
#WARNING GPIO8 is a strapping PIN and should only be used for I/O with care.
#WARNING GPIO9 is a strapping PIN and should only be used for I/O with care.
#Attaching external pullup/down resistors to strapping pins can cause unexpected failures.
#See https://esphome.io/guides/faq.html#why-am-i-getting-a-warning-about-strapping-pins
#12 13 This pin cannot be used on ESP32-C3s and is already used by the SPI/PSRAM interface (function: SPIHD).
2.基础通用配置base.yaml
yaml
# https://esphome.io/components/wifi
wifi:
  ssid: !secret wifi_ssid
  password: !secret wifi_password
  fast_connect: true

# https://esphome.io/components/ota
ota:
  platform: esphome
  password: !secret ota_password

# https://esphome.io/components/api
api:
  encryption:
    key: !secret api_encryption_key
  # 没有连接HA,默认15min会重启一次,设置为0s,将不再重启
  reboot_timeout: 0s

# https://esphome.io/components/web_server
web_server:
  port: 80

# https://esphome.io/components/mdns
mdns:
  disabled: false


text_sensor:
  # https://esphome.io/components/text_sensor/version
  - platform: version
    name: "Version"
  # https://esphome.io/components/text_sensor/wifi_info
  - platform: wifi_info
    mac_address:
      name: "Mac"
    ip_address:
      name: "IP"
      update_interval: 1min
    dns_address:
      name: "DNS"
      update_interval: 1min
    ssid:
      name: "SSID"
      update_interval: 1min
    bssid:
      name: "BSSID"
      update_interval: 1min
3.密码文件secret.yaml
上面base.yaml中!secret wifi_ssid就是引用secret.yaml里面的wifi_ssid的值
yaml
# Your Wi-Fi SSID and password
wifi_ssid: "xxx"
wifi_password: "xxx"

api_encryption_key: "xxx"
ota_password: "xxx"
ap_password: "xxx"
4.围栏灯four_light.yaml
yaml
# https://esphome.io/components/light/binary
light:
  - platform: binary
    name: four_light
    output: four_light_output

output:
  - id: four_light_output
    platform: gpio
    pin: 0
5.彩灯rgb_light.yaml
yaml
# https://esphome.io/components/light/rgb
light:
  - platform: rgb
    id: colorful_light
    name: colorful_light
    red: output_component_red
    green: output_component_green
    blue: output_component_blue
# https://esphome.io/components/light/#pulse-effect
#    effects:
#        - pulse:
#        - pulse:
#            name: "Fast Pulse"
#            transition_length: 0.5s
#            update_interval: 0.5s
#            min_brightness: 0%
#            max_brightness: 100%
#        - pulse:
#            name: "Slow Pulse"
#            # transition_length: 1s      # defaults to 1s
#            update_interval: 2s
#        - pulse:
#            name: "Asymmetrical Pulse"
#            transition_length:
#              on_length: 1s
#              off_length: 500ms
#            update_interval: 1.5s
output:
  # https://esphome.io/components/output/ledc
#  - platform: ledc
#    id: output_component_red
#    pin:
#      number: 4
#      inverted: true
#  - platform: ledc
#    id: output_component_blue
#    pin:
#      number: 3
#      inverted: true
#  - platform: ledc
#    id: output_component_green
#    pin:
#      number: 2
#      inverted: true
  - platform: ledc
    id: output_component_red
    pin:
      number: 1
      inverted: true
  - platform: ledc
    id: output_component_blue
    pin:
      number: 18
      inverted: true
  - platform: ledc
    id: output_component_green
    pin:
      number: 19
      inverted: true

#output:
#  - platform: esp8266_pwm
#    id: output_component_red
#    pin: D1
#  - platform: esp8266_pwm
#    id: output_component_green
#    pin: D2
#  - platform: esp8266_pwm
#    id: output_component_blue
#    pin: D3
6.左右柱灯left_right_light.yaml
yaml
# https://esphome.io/components/light/binary
light:
  - platform: binary
    name: left_light
    output: left_light_output
  - platform: binary
    name: right_light
    output: right_light_output
output:
  - id: left_light_output
    platform: gpio
    pin: 6
  - id: right_light_output
    platform: gpio
    pin: 7
三、安装固件
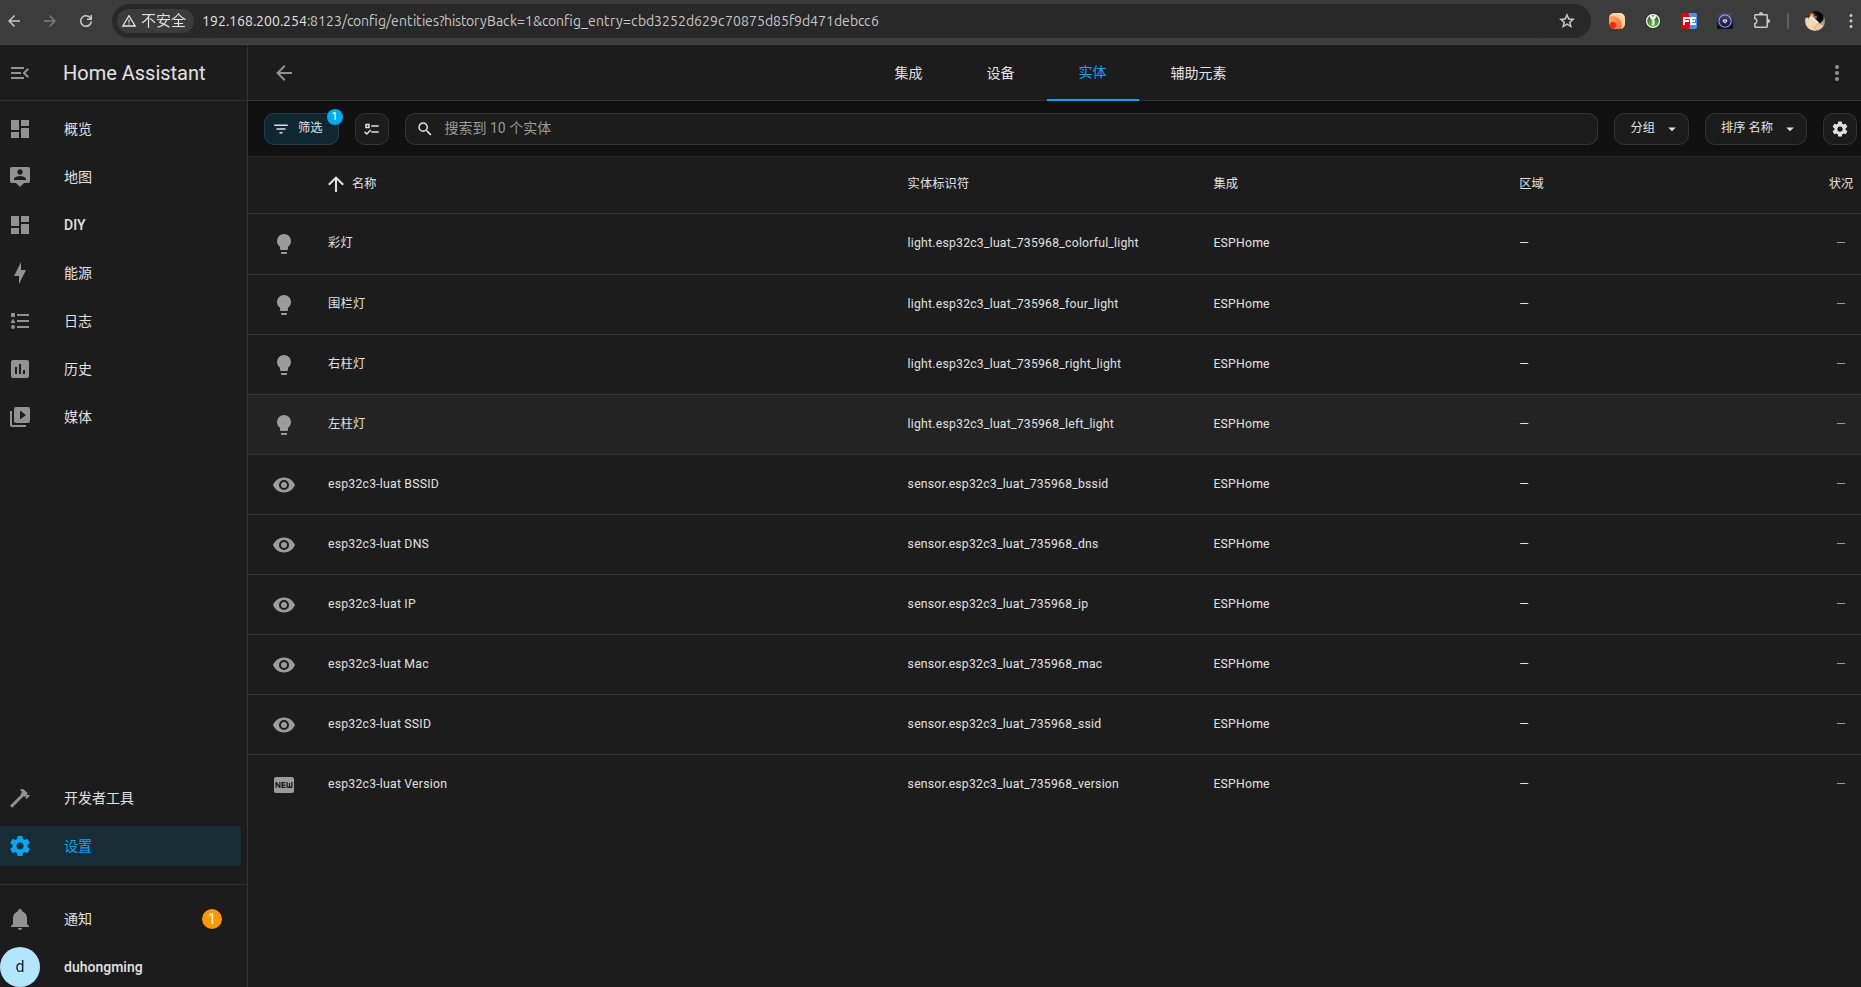
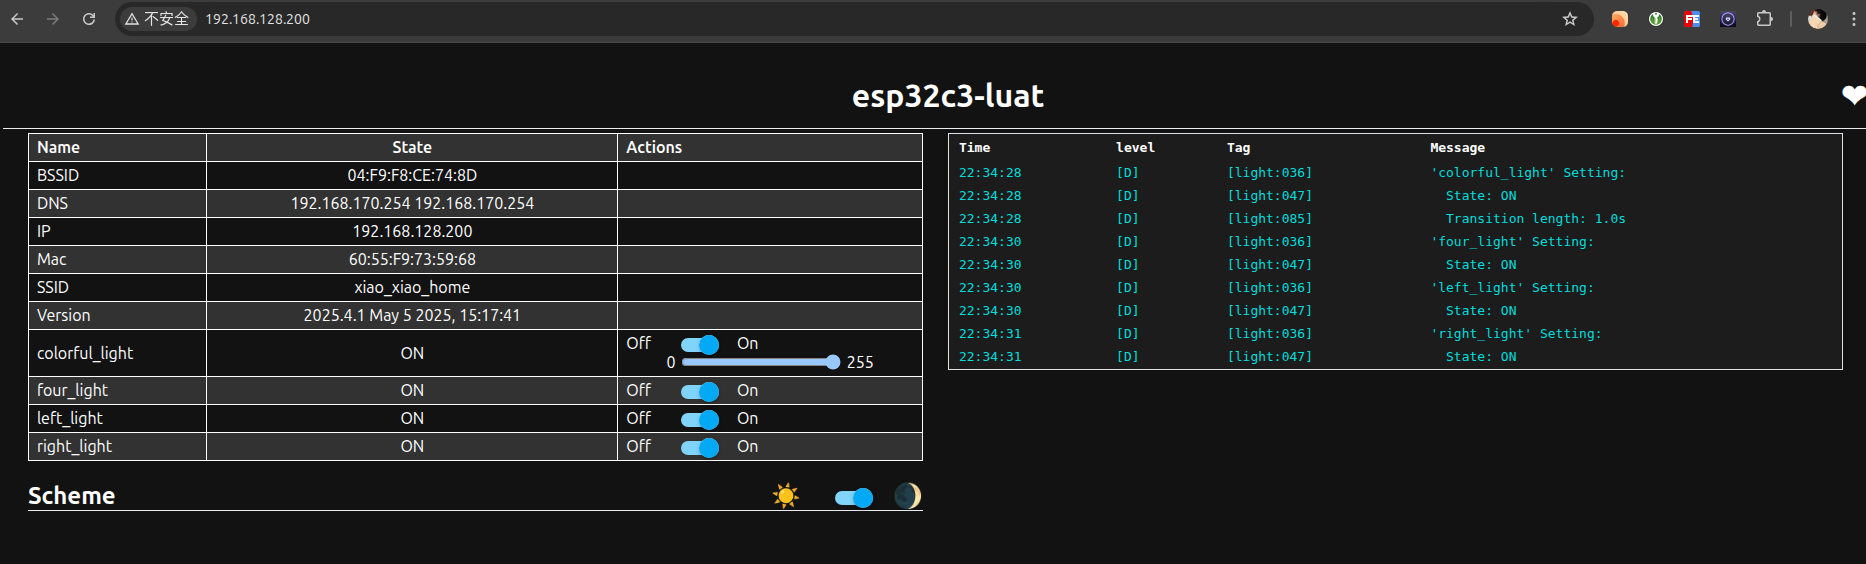
四、HomeAssistant配置ESPHome
1.直接访问
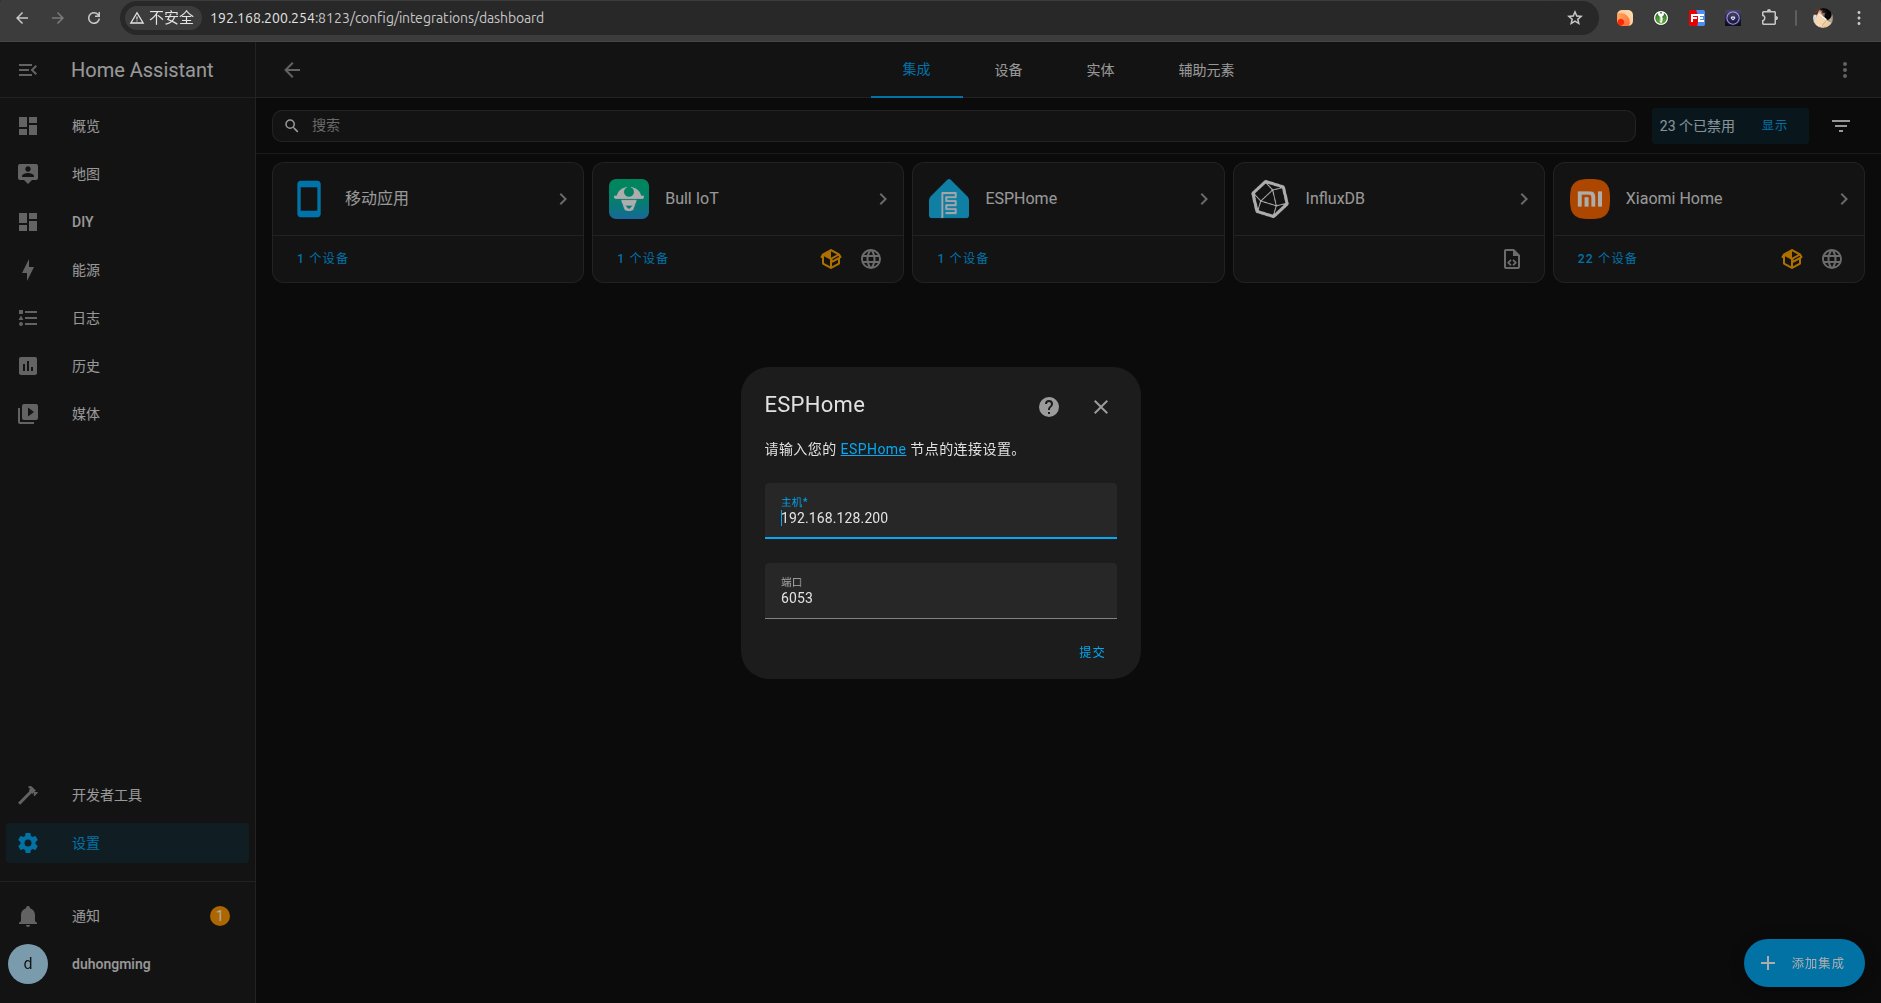
2.配置ESPHome地址
如果配置了api_encryption_key,需要填写密钥
3.接入成功