64 sudo dnf install samba samba-client samba-common-tools
65 sudo mkdir -p /srv/samba/shared
66 sudo chown -R nobody:nogroup /srv/samba/shared
67 sudo chown -R nobody:nobody /srv/samba/shared
68 sudo chmod -R 0775 /srv/samba/shared
69 sudo smbpasswd -a smart
70 vim /etc/samba/smb.conf
71 sudo systemctl restart smb nmb
72 sudo systemctl enable smb nmb
73 sudo firewall-cmd --permanent --add-service=samba
74 sudo setsebool -P samba_enable_home_dirs on
75 sudo setsebool -P samba_export_all_rw on
76 sudo semanage fcontext -a -t samba_share_t "/srv/samba/shared(/.*)?"
77 sudo restorecon -Rv /srv/samba/shared
78 vim /etc/samba/smb.conf
79 sudo systemctl restart smb nmb
80 sudo firewall-cmd --permanent --add-service=samba
81 sudo setsebool -P samba_enable_home_dirs on
82 sudo setsebool -P samba_export_all_rw on
83 sudo semanage fcontext -a -t samba_share_t "/srv/samba/shared(/.*)?"
sudo dnf install samba samba-client samba-common-tools创建共享文件用户
bash
sudo mkdir -p /srv/samba/shared
sudo chown -R nobody:nobody  /srv/samba/shared
sudo chmod -R 0775 /srv/samba/shared
bash
sudo useradd smart
sudo passwd 123456
sudo smbpasswd -a smart
配置文件
bash
vim /etc/samba/smb.conf
bash
# See smb.conf.example for a more detailed config file or
# read the smb.conf manpage.
# Run 'testparm' to verify the config is correct after
# you modified it.

[global]
	workgroup = SAMBA
	security = user

	passdb backend = tdbsam

	printing = cups
	printcap name = cups
	load printers = yes
	cups options = raw

[homes]
	comment = Home Directories
	valid users = %S, %D%w%S
	browseable = No
	read only = No
	inherit acls = Yes

[printers]
	comment = All Printers
	path = /var/tmp
	printable = Yes
	create mask = 0600
	browseable = No

[print$]
	comment = Printer Drivers
	path = /var/lib/samba/drivers
	write list = @printadmin root
	force group = @printadmin
	create mask = 0664
	directory mask = 0775
[share]
	public = yes
	comment = share
	path = /home/miniodata
	browseable = yes
	guest ok = yes
	writable = yes
[shared]
    path = /srv/samba/shared
    browsable = yes
    writable = yes
    guest ok = yes
    valid users = smart
    create mask = 0775
    directory mask = 0775
重启Samba服务并设置开机自启动
bash
sudo systemctl restart smb nmb
sudo systemctl enable smb nmb
配置防火墙和SELinux策略(如果可以直接把防火墙关了)
bash
sudo firewall-cmd --permanent --add-service=samba
sudo firewall-cmd --reload
如果上述命令无法成功执行,可能需要手动添加Samba使用的端口
bash
sudo firewall-cmd --permanent --add-port=139/tcp
sudo firewall-cmd --permanent --add-port=445/tcp
sudo firewall-cmd --permanent --add-port=137/udp
sudo firewall-cmd --permanent --add-port=138/udp
sudo firewall-cmd --reloadSELinux策略调整对于Samba服务的正常运行至关重要。首先设置SELinux布尔值(或者直接关了selinux)
bash
sudo setsebool -P samba_enable_home_dirs on
sudo setsebool -P samba_export_all_rw on
然后,永久修改共享目录的SELinux上下文:
bash
sudo semanage fcontext -a -t samba_share_t "/srv/samba/shared(/.*)?"
sudo restorecon -Rv /srv/samba/shared
最后在windows资源管理器里输入linux ip

会显示输入用户密码
smart
123456
创建桌面快捷方式 右键此电脑打开
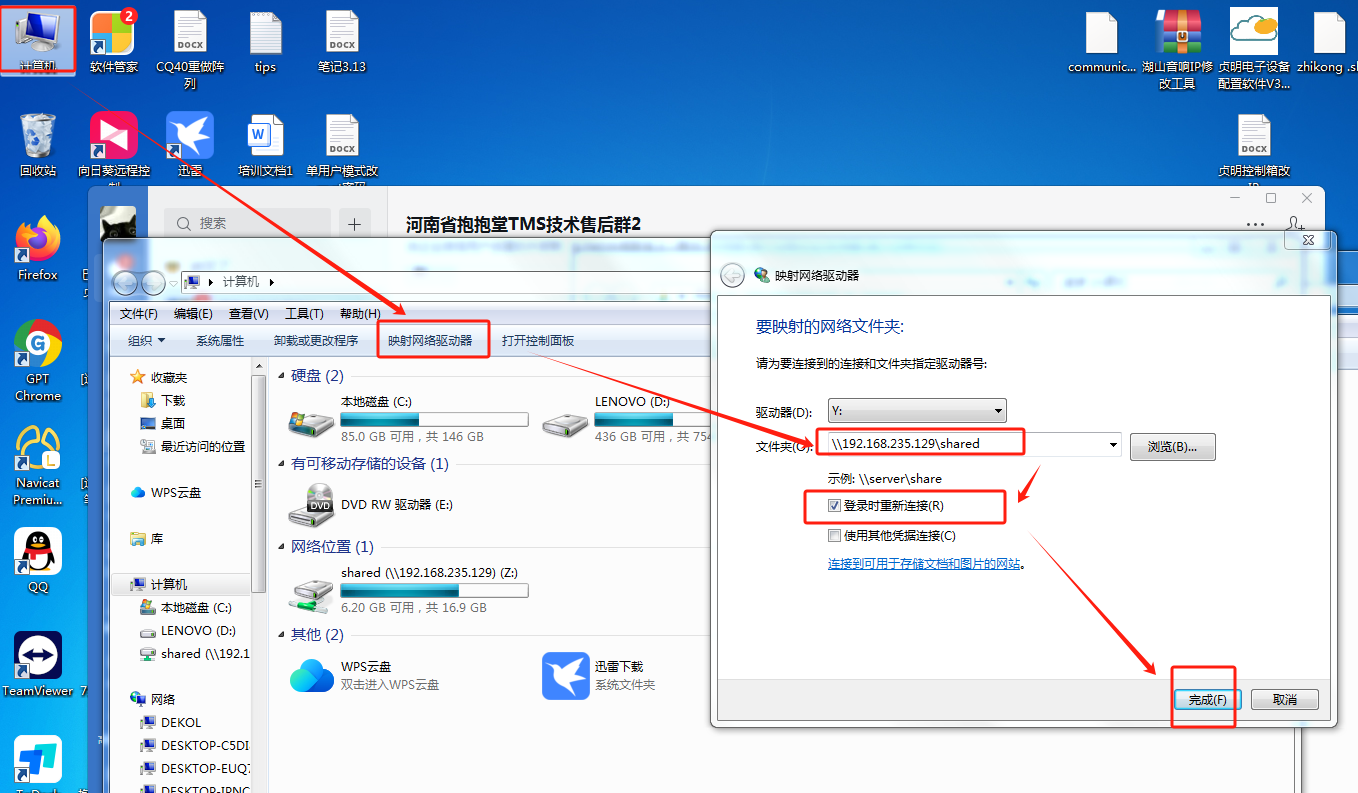
在桌面右键创建快捷方式
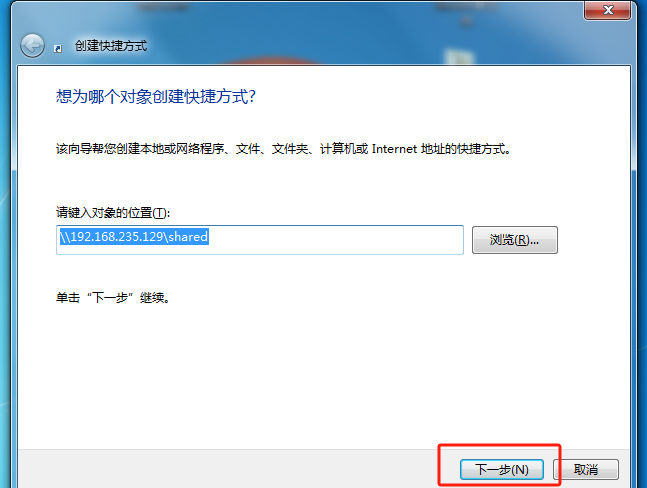
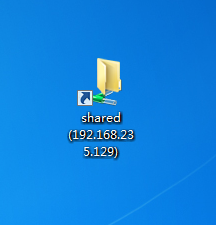
重启也不会失效