详细描述一下stable Diffusion的推理过程
其实很简单
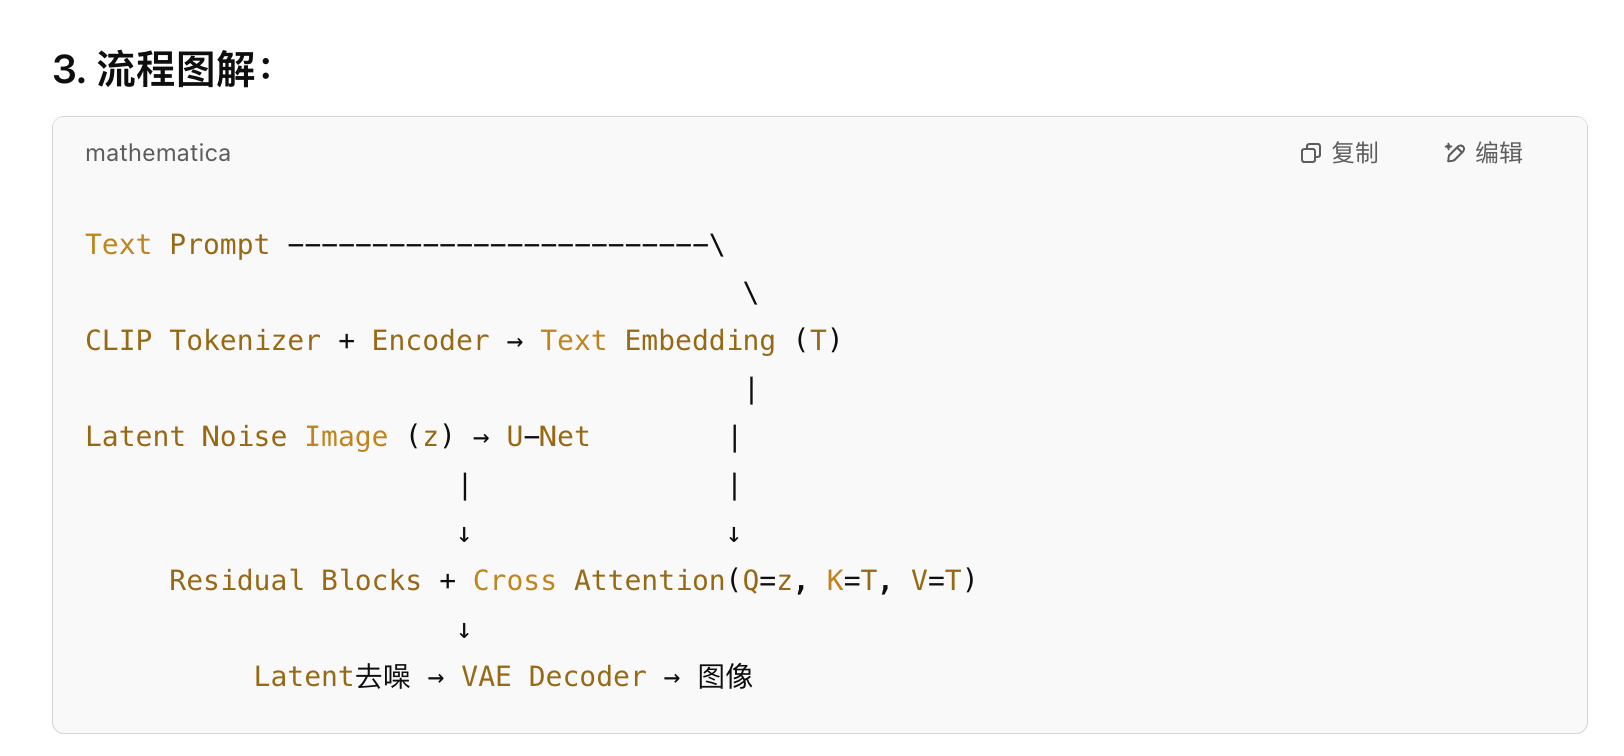
prompt先经过textencoder tokenizer,embedding
随机生成噪声图片 通过vae encode压缩成潜空间大小
unet with cross attn 去噪 并融合文本信息
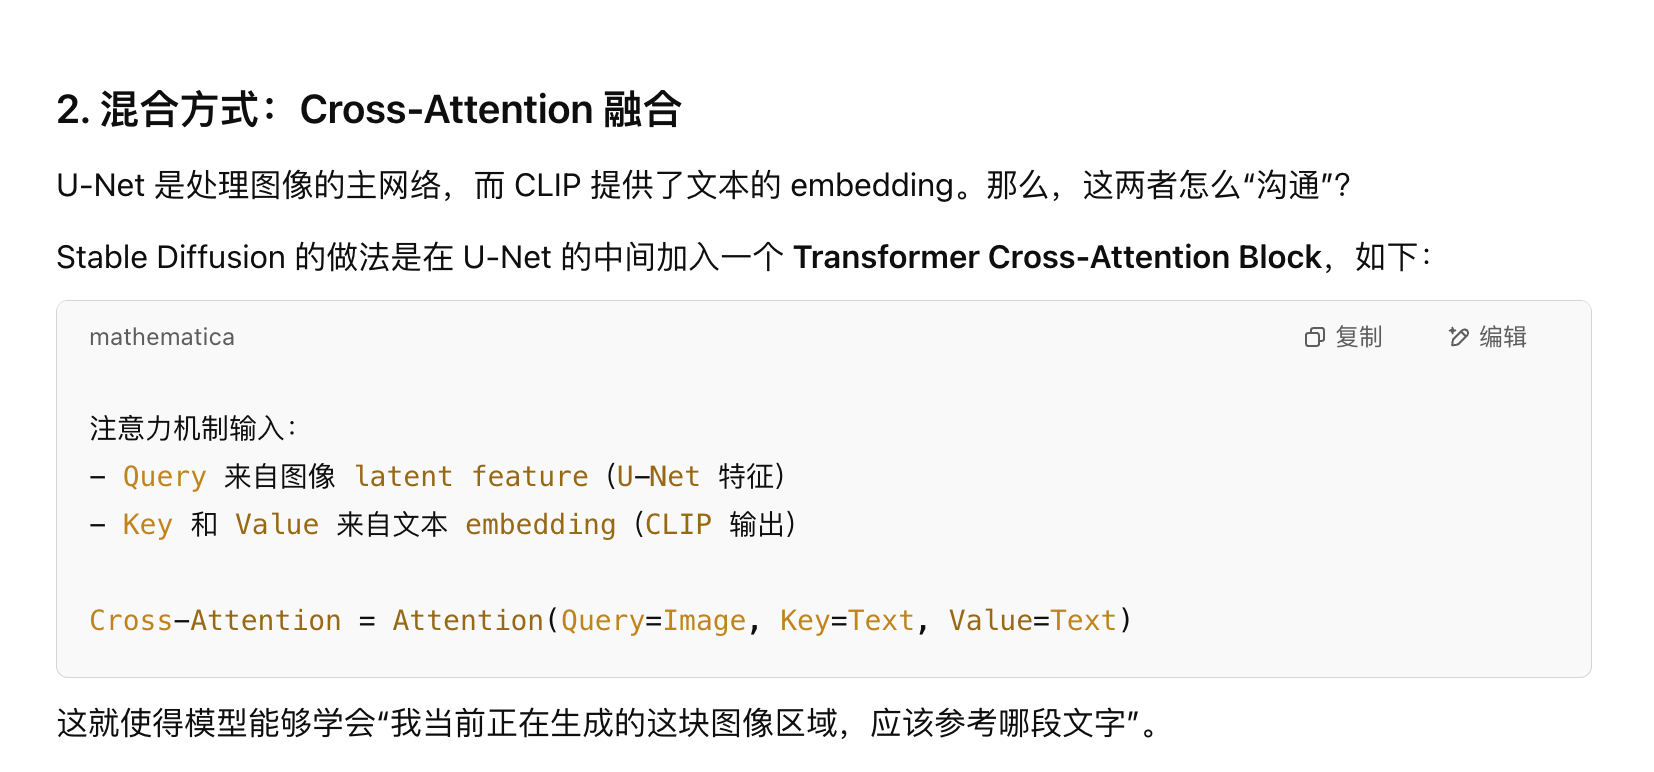
上面两个信息如何混合
cross-attention
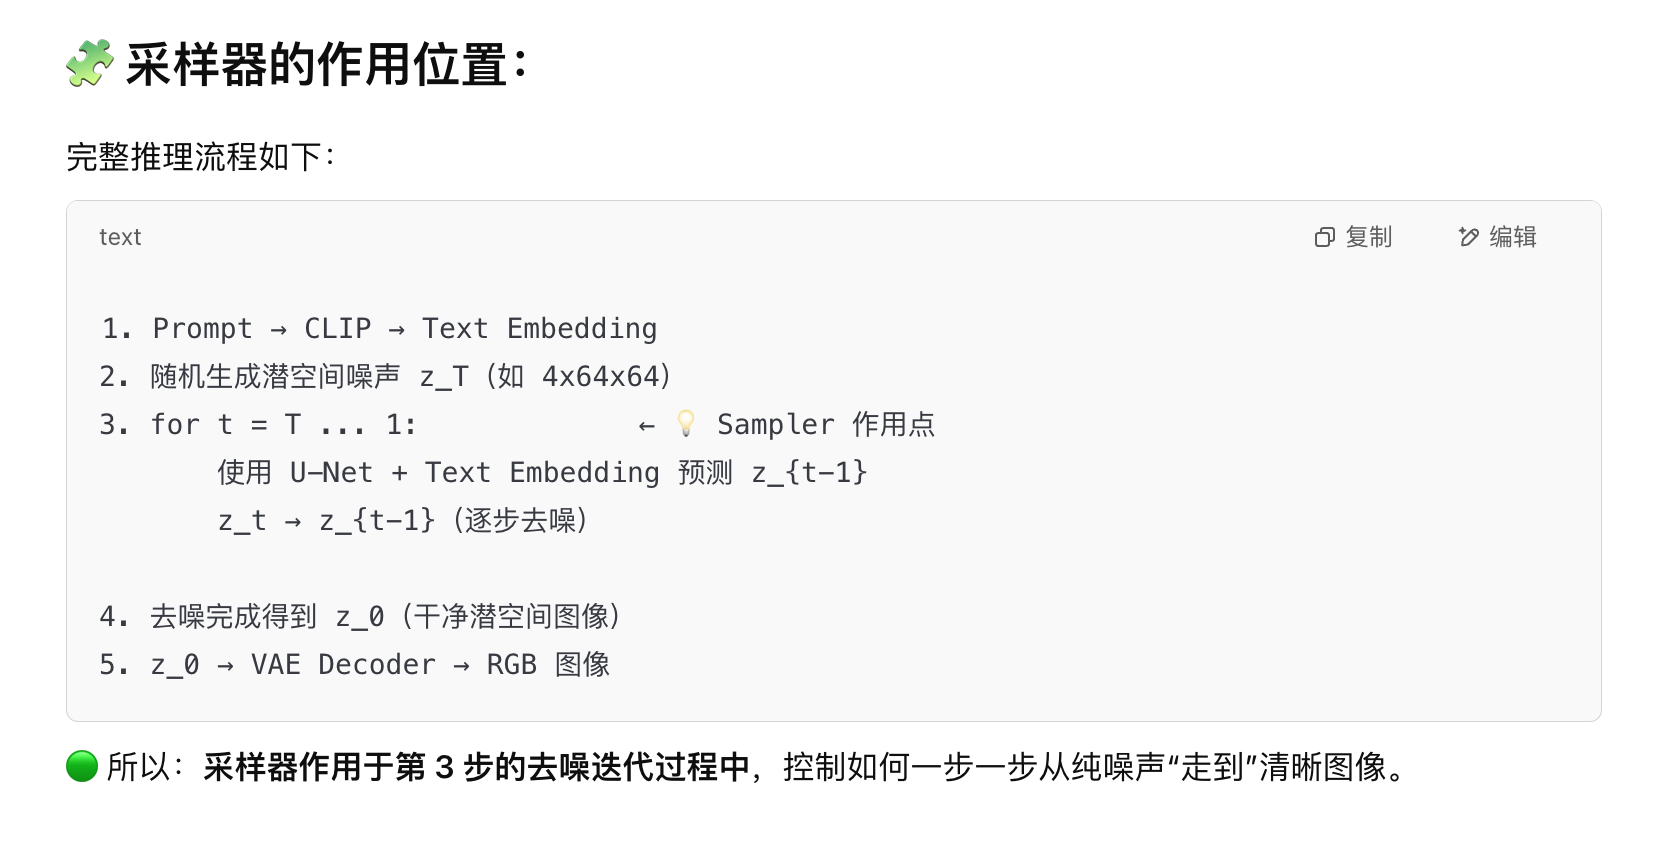
sd模型中各种不同的采样器作用在哪个步骤
1. 预测当前时间步 t 的噪声
noise_pred = unet(latents, t, encoder_hidden_states=text_embeddings).sample
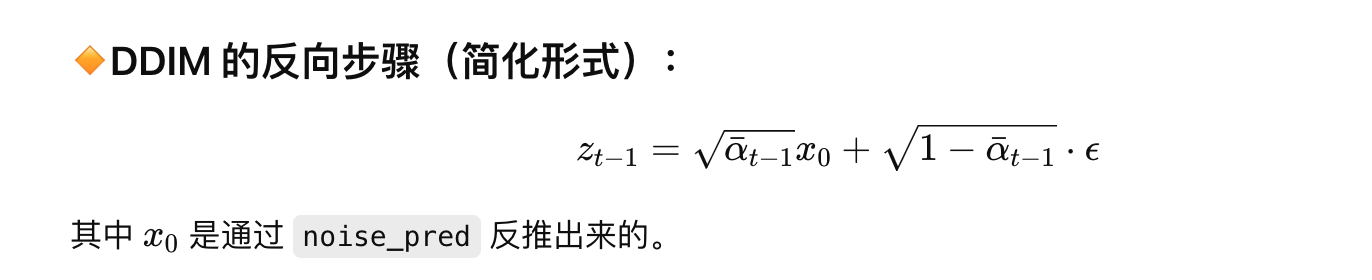
2. 通过调度器 scheduler 从 z_t 计算出 z_{t-1}
latents = scheduler.step(noise_pred, t, latents).prev_sample
这里noise_pred已经预测出来了 为什么还要通过scheduler.step
采样器原来是我一直以来说的减去的操作,就是噪声已经生成出来了其实
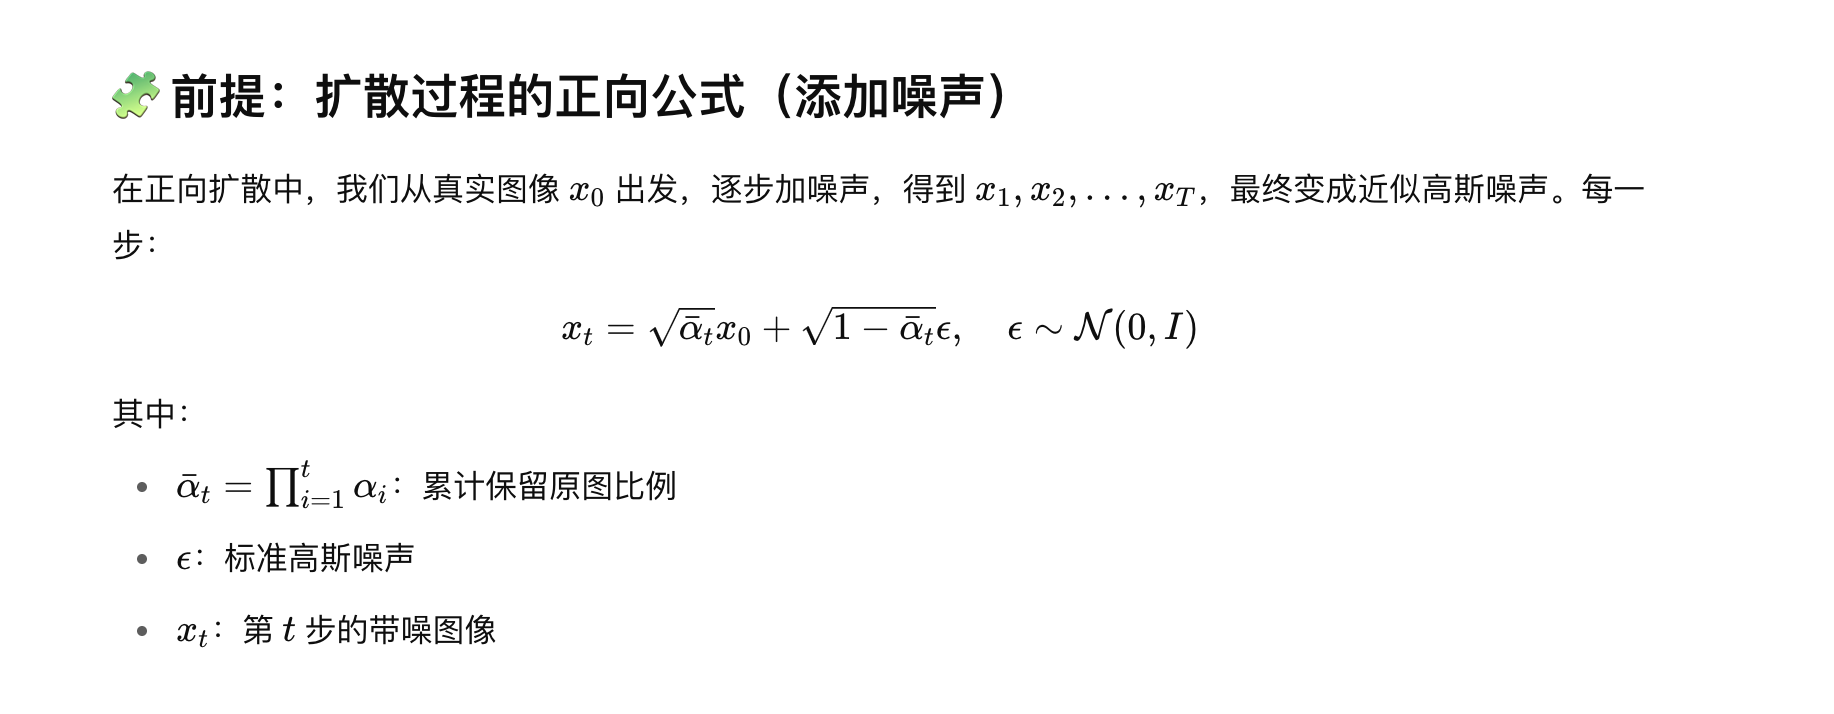
因为噪声不是直接加的,还加了系数/权重
像E一样的那个字母表示噪声
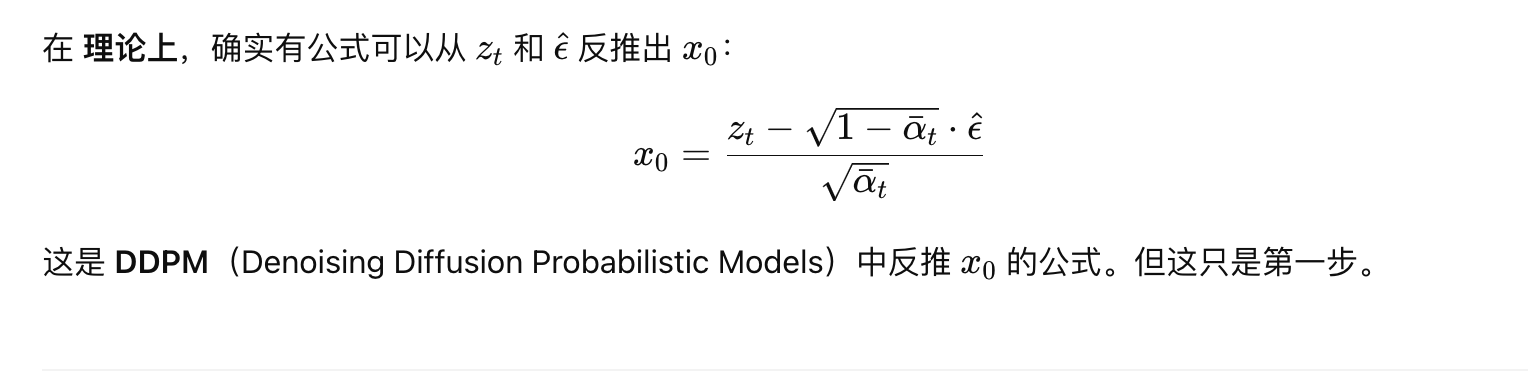
noise_pred已经是噪声了,直接用噪声图片减去这个noise_pred,不就得到最终的图片了吗 为什么还要scheduler.step
ddpm
重点---加噪过程
import torch
import torch.nn as nn
import torch.nn.functional as F
from transformers import CLIPProcessor, CLIPModel
from torchvision import transforms
from PIL import Image
import numpy as np
1. 文本编码器:CLIP 模型
class TextEncoder(nn.Module):
def init(self):
super().init()
使用 CLIP 模型来处理文本
self.clip_model = CLIPModel.from_pretrained("openai/clip-vit-base-patch32")
self.processor = CLIPProcessor.from_pretrained("openai/clip-vit-base-patch32")
def forward(self, text):
将文本转换为潜在向量
inputs = self.processor(text=text, return_tensors="pt", padding=True)
text_features = self.clip_model.get_text_features(**inputs)
return text_features
2. U-Net 网络定义(简化版)
class UNet(nn.Module):
def init(self, in_channels, out_channels, channels=64):
super().init()
self.conv1 = nn.Conv2d(in_channels, channels, kernel_size=3, padding=1)
self.conv2 = nn.Conv2d(channels, channels, kernel_size=3, padding=1)
self.conv3 = nn.Conv2d(channels, out_channels, kernel_size=3, padding=1)
def forward(self, x):
x = F.relu(self.conv1(x))
x = F.relu(self.conv2(x))
x = self.conv3(x)
return x
3. 反向去噪过程 (简化版)
class DiffusionModel(nn.Module):
def init(self, text_encoder, unet, image_size=64):
super().init()
self.text_encoder = text_encoder
self.unet = unet
self.image_size = image_size
def forward(self, text, noise=None):
1. 获取文本的潜在向量
text_features = self.text_encoder(text)
2. 初始化噪声图像 (如果没有提供的话)
if noise is None:
noise = torch.randn(1, 3, self.image_size, self.image_size)
3. 将噪声图像和文本特征一起输入 U-Net
noise = self.unet(noise)
4. 返回生成的图像
return noise
4. 图像解码器(简化版)
def decode_latent_to_image(latent_tensor):
这里简单地将潜在图像的输出处理为一个可视化的图像
img = latent_tensor.squeeze(0).detach().cpu().numpy().transpose(1, 2, 0)
img = (img * 255).clip(0, 255).astype(np.uint8)
img = Image.fromarray(img)
return img
5. 生成过程
def generate_image(prompt, image_size=64):
初始化文本编码器和 U-Net
text_encoder = TextEncoder()
unet = UNet(3, 3)
初始化 Diffusion 模型
model = DiffusionModel(text_encoder, unet, image_size)
推理过程
generated_image = model(prompt)
解码生成的图像
img = decode_latent_to_image(generated_image)
return img
6. 测试生成
prompt = "A futuristic city skyline at night"
generated_img = generate_image(prompt)
显示生成的图像
generated_img.show()