目录
说在前面
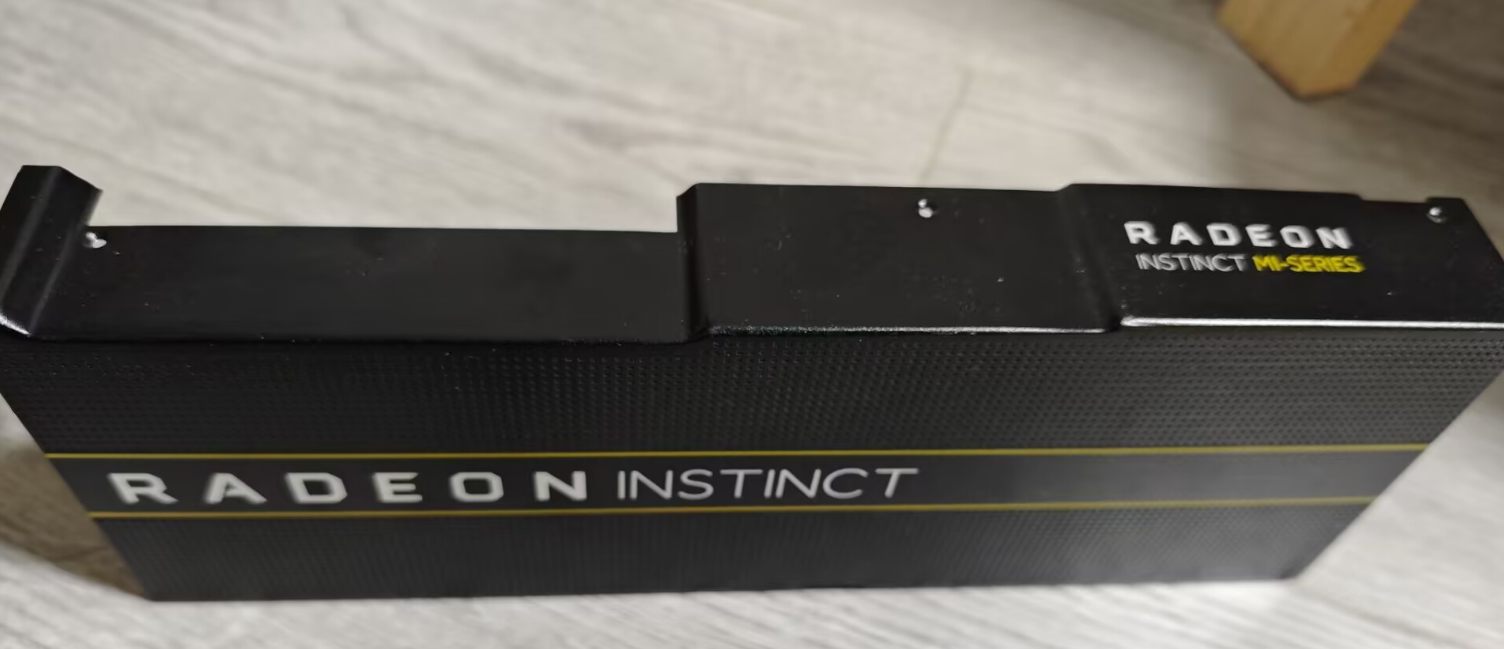
- 主板:未知x99
- cpu:E5 2666v3
- 显卡:Mi 50 32G
- 系统:ubuntu 22.04
- 风扇:4pin pwm 外壳风扇
- 其他:mi50跑模型的时候,散热不好真不行,很容易到90+度
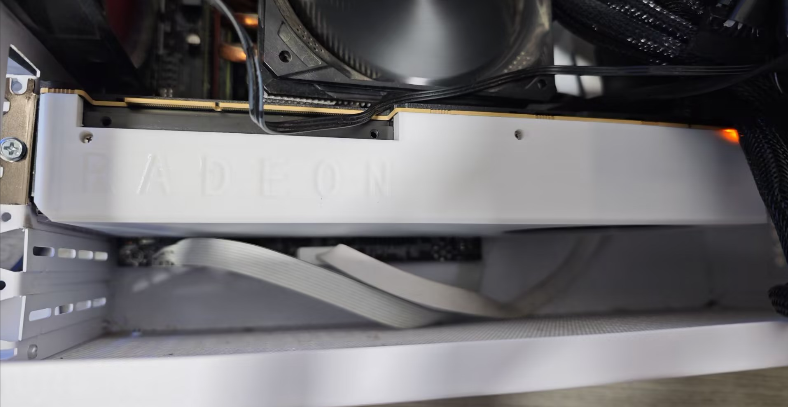
风扇安装
-
这是拆下来的原装外壳,将上下共六颗螺丝拆下;左侧支架三颗螺丝拆下(不拆的话会卡着,外壳卸不下)
-
这是装好的外壳
-
将风扇接口连接到主板的cpu fan上
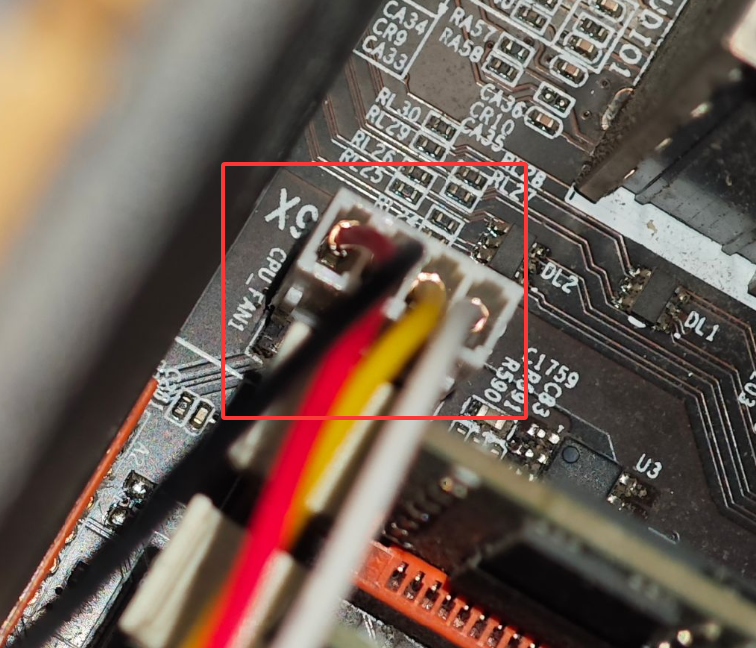
确认传感器
-
安装
fancontrolshellsudo apt install fancontrol这个时候如果直接使用
pwmconfig,只能看到3个设备shelllele@lele-X99M-Gaming:~$ sudo pwmconfig # pwmconfig version 3.6.0 This program will search your sensors for pulse width modulation (pwm) controls, and test each one to see if it controls a fan on your motherboard. Note that many motherboards do not have pwm circuitry installed, even if your sensor chip supports pwm. We will attempt to briefly stop each fan using the pwm controls. The program will attempt to restore each fan to full speed after testing. However, it is ** very important ** that you physically verify that the fans have been to full speed after the program has completed. Found the following devices: hwmon0 is nvme hwmon1 is coretemp hwmon2 is amdgpu Found the following PWM controls: hwmon2/pwm1 current value: 255 Giving the fans some time to reach full speed... Found the following fan sensors: hwmon2/fan1_input current speed: 0 ... skipping! There are no working fan sensors, all readings are 0. Make sure you have a 3-wire fan connected. You may also need to increase the fan divisors. See doc/fan-divisors for more information.虽然明确看到
hwmon2 is amdgpu,但是mi 50是没有风扇的,所以出现了提示There are no working fan sensors, all readings are 0.我还以为hwmon2就是装的外置风扇,结果怎么调都没反应。 -
接下来我们要手动检测这个外置风扇
确认主板IO型号
-
确认 X99 主板的 Super I/O 芯片型号
shellsudo apt install lm-sensors sudo sensors-detect执行后,在所有输入的地方输入YES
shell# sensors-detect version 3.6.0 # System: YiChenYu X99M-Gaming [Default string] # Kernel: 6.8.0-58-generic x86_64 # Processor: Intel(R) Xeon(R) CPU E5-2666 v3 @ 2.90GHz (6/63/2) This program will help you determine which kernel modules you need to load to use lm_sensors most effectively. It is generally safe and recommended to accept the default answers to all questions, unless you know what you're doing. Some south bridges, CPUs or memory controllers contain embedded sensors. Do you want to scan for them? This is totally safe. (YES/no): YES最终可以看到型号
nct6775:shellNow follows a summary of the probes I have just done. Just press ENTER to continue: Driver `lm63': * Bus `SMBus I801 adapter at f000' Busdriver `i2c_i801', I2C address 0x4c Chip `National Semiconductor LM96163' (confidence: 6) Driver `nct6775': * ISA bus, address 0xa20 Chip `Nuvoton NCT5532D/NCT6779D Super IO Sensors' (confidence: 9) Driver `coretemp': * Chip `Intel digital thermal sensor' (confidence: 9) To load everything that is needed, add this to /etc/modules: #----cut here---- # Chip drivers coretemp lm63 nct6775 #----cut here----
加载内核模块
-
使用
lsmod确认模块是否加载shelllsmod | grep nct6775如果没有输出,则加载对应模块:
shellsudo modprobe nct6775确认加载完成:
shelllele@lele-X99M-Gaming:~$ lsmod | grep nct6775 nct6775 40960 0 nct6775_core 106496 1 nct6775 hwmon_vid 12288 1 nct6775
再次验证传感器
-
这个时候查看
/sys/class/hwmon目录,发现多了一个设备:shelllele@lele-X99M-Gaming:~$ ls /sys/class/hwmon hwmon0 hwmon1 hwmon2 hwmon3 -
查看
hwmon3内容,发现有多个pwmshelllele@lele-X99M-Gaming:~$ ls /sys/class/hwmon/hwmon3/ | grep pwm|grep -v _ pwm1 pwm2 pwm3 pwm4 pwm5 -
所以我们需要确认哪一个是gpu风扇
shellsudo pwmconfig # pwmconfig version 3.6.0 This program will search your sensors for pulse width modulation (pwm) controls, and test each one to see if it controls a fan on your motherboard. Note that many motherboards do not have pwm circuitry installed, even if your sensor chip supports pwm. We will attempt to briefly stop each fan using the pwm controls. The program will attempt to restore each fan to full speed after testing. However, it is ** very important ** that you physically verify that the fans have been to full speed after the program has completed. Found the following devices: hwmon0 is nvme hwmon1 is coretemp hwmon2 is amdgpu hwmon3 is nct6779 Found the following PWM controls: hwmon2/pwm1 current value: 255 hwmon3/pwm1 current value: 255 hwmon3/pwm2 current value: 56 hwmon3/pwm2 is currently setup for automatic speed control. In general, automatic mode is preferred over manual mode, as it is more efficient and it reacts faster. Are you sure that you want to setup this output for manual control? (n) hwmon3/pwm3 current value: 255 hwmon3/pwm4 current value: 255 hwmon3/pwm5 current value: 255 Giving the fans some time to reach full speed... Found the following fan sensors: hwmon2/fan1_input current speed: 0 ... skipping! hwmon3/fan1_input current speed: 1646 RPM hwmon3/fan2_input current speed: 1239 RPM hwmon3/fan3_input current speed: 0 ... skipping! hwmon3/fan4_input current speed: 0 ... skipping! hwmon3/fan5_input current speed: 0 ... skipping! Warning!!! This program will stop your fans, one at a time, for approximately 5 seconds each!!! This may cause your processor temperature to rise!!! If you do not want to do this hit control-C now!!! Hit return to continue: Testing pwm control hwmon2/pwm1 ... hwmon3/fan1_input ... speed was 1646 now 1652 no correlation hwmon3/fan2_input ... speed was 1239 now 1239 no correlation No correlations were detected. There is either no fan connected to the output of hwmon2/pwm1, or the connected fan has no rpm-signal connected to one of the tested fan sensors. (Note: not all motherboards have the pwm outputs connected to the fan connectors, check out the hardware database on http://www.almico.com/forumindex.php) Did you see/hear a fan stopping during the above test (n)? n Testing pwm control hwmon3/pwm1 ... hwmon3/fan1_input ... speed was 1646 now 983 It appears that fan hwmon3/fan1_input is controlled by pwm hwmon3/pwm1 Would you like to generate a detailed correlation (y)? y PWM 255 FAN 1668 PWM 0 FAN 1017 hwmon3/fan2_input ... speed was 1239 now 1241 no correlation Testing pwm control hwmon3/pwm3 ... hwmon3/fan1_input ... speed was 1646 now 1702 no correlation hwmon3/fan2_input ... speed was 1239 now 1419 no correlation No correlations were detected. There is either no fan connected to the output of hwmon3/pwm3, or the connected fan has no rpm-signal connected to one of the tested fan sensors. (Note: not all motherboards have the pwm outputs connected to the fan connectors, check out the hardware database on http://www.almico.com/forumindex.php) Did you see/hear a fan stopping during the above test (n)? Testing pwm control hwmon3/pwm4 ... hwmon3/fan1_input ... speed was 1646 now 1677 no correlation hwmon3/fan2_input ... speed was 1239 now 1421 no correlation No correlations were detected. There is either no fan connected to the output of hwmon3/pwm4, or the connected fan has no rpm-signal connected to one of the tested fan sensors. (Note: not all motherboards have the pwm outputs connected to the fan connectors, check out the hardware database on http://www.almico.com/forumindex.php) Did you see/hear a fan stopping during the above test (n)? n Testing pwm control hwmon3/pwm5 ... hwmon3/fan1_input ... speed was 1646 now 1677 no correlation hwmon3/fan2_input ... speed was 1239 now 1288 no correlation No correlations were detected. There is either no fan connected to the output of hwmon3/pwm5, or the connected fan has no rpm-signal connected to one of the tested fan sensors. (Note: not all motherboards have the pwm outputs connected to the fan connectors, check out the hardware database on http://www.almico.com/forumindex.php) Did you see/hear a fan stopping during the above test (n)? n Testing is complete. Please verify that all fans have returned to their normal speed.再次执行
pwmconfig,这个时候程序会开始调试机器上所有pwm风扇,它会先把风扇转速拉满,然后慢慢降低,这样你就知道对应关系了,这里,我知道了hwmon3/pwm2是gpu风扇
手动控制风扇
-
启用手动控制
shellecho 1 | sudo tee /sys/class/hwmon/hwmon3/pwm2_enable -
转速拉满(0最低,255最高)
shellecho 255 | sudo tee /sys/class/hwmon/hwmon3/pwm2这样就可以看到风扇呼呼转了,声音贼大
其他
-
自动控制转速这里就没继续研究了,如果需要的话应该要将gpu温度和fancontrol关联起来,可以问问deepseek怎么操作
-
测试在满速状态下,跑模型温度大概在75度左右
shell========================================== ROCm System Management Interface ========================================== ==================================================== Concise Info ==================================================== Device [Model : Revision] Temp Power Partitions SCLK MCLK Fan Perf PwrCap VRAM% GPU% Name (20 chars) (Edge) (Socket) (Mem, Compute) ====================================================================================================================== 0 [0x0834 : 0x01] 75.0°C 164.0W N/A, N/A 1485Mhz 1000Mhz 100.0% auto 225.0W 63% 100% Radeon Instinct MI50 ====================================================================================================================== ================================================ End of ROCm SMI Log =================================================