接口测试学习
目录
三、使用Python的Request库发送get、post请求:
一、接口测试的介绍
接口测试的依据是接口文档(excel、word、在线文档形式)
接口分为几种:
- 系统内部服务层级之间(一般是白盒测试)
- 服务之间
- 系统之间(集成测试:既有白盒测试,又有黑盒测试(灰盒测试))
(集成测试:既有白盒测试,又有黑盒测试(灰盒测试))
(用户操作对应的功能的接口都需要测试)
接口测试准备:
确定需求,开发出API接口文档,编写接口测试用例,开发交付、实施接口测试
(接口测试和常规的功能测试用例基本一样,可以从接口功能、接口业务、接口安全性方面角度考虑)
主要测试的内容:
①接口每个参数的输入正确与错误
②接口缺失
③接口参数边界值
④接口参数类型
(不论是性能还是业务方面都要考虑业务需求)
二、抓包软件Fiddler的使用
1.安装好fiddler后进入,点击绿色小勾"Filters"
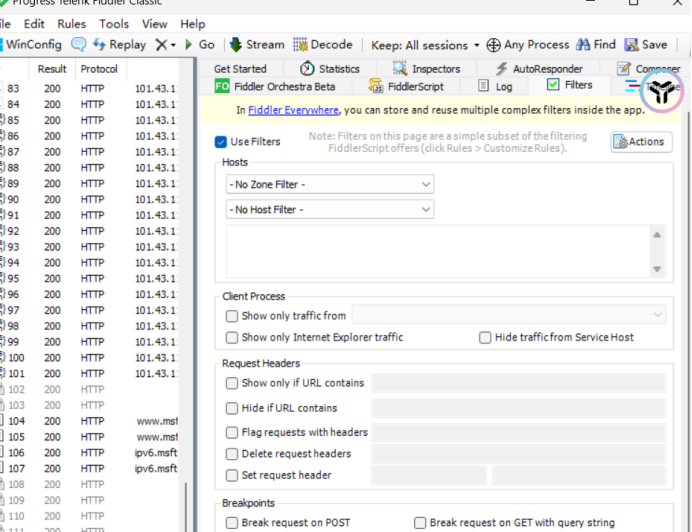
编辑Hosts,第二栏选择Show only the following Hosts,然后再下面的空白处填入要测试的网址,只需要中间部分,如"https://register.ccopyright.com.cn/registration.html"留register.ccopyright.com.cn
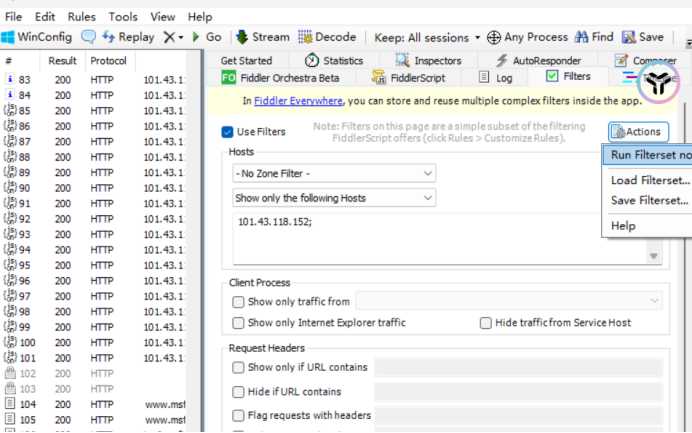
change not 后选择run

使用左上角"叉号"清空记录后,重新刷新:
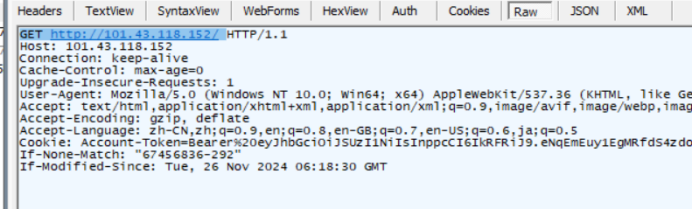
点击进入详情
->raw:
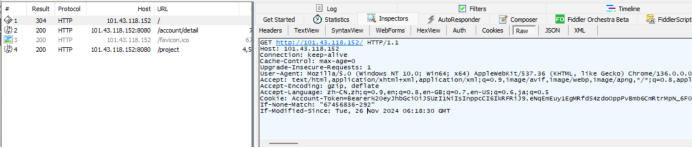
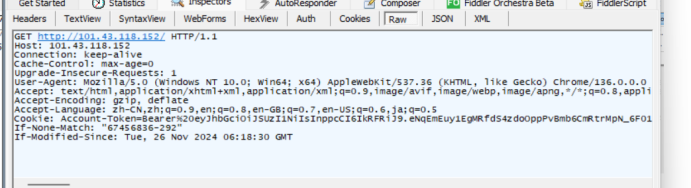
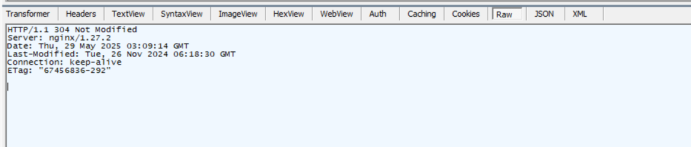
下半部分是应该有的响应内容:
三、使用Python的Request库发送get、post请求:
1.get请求
下面我们要使用python的request库模拟发出http请求
先装库:pip install requests
接着,蓝色部分拷贝到python:从http开始:http://101.43.118.152
python
import requests
#发出Get请求
r=requests.get('http://101.43.118.152')


#ResPonse<[200]>
print(r)

#获取响应消息体内容,相应内容是文本信息,则只需要调用Text方法
print(r.text)

#获取响应消息头信息,数据放在一个字典当中
print(r.headers)

#获取响应状态码
print(r.status_code)
GET请求示例展示了如何发送基本HTTP GET请求并处理响应。requests库简化了HTTP请求过程,可以方便地获取响应内容、状态码和头部信息。
2.post请求
python
import  requests
def addNotice():
    url='http://101.43.118.152:8080/project'
    header={
        'User-Agent':'Mozilla/5.0 (Windows NT 10.0; Win64; x64) AppleWebKit/537.36 (KHTML, like Gecko) Chrome/136.0.0.0 Safari/537.36 Edg/136.0.0.0',
        'Accept':'application/json,text/plain'
    }
    payload={"id":"","projectname":"hsui","status":"暂停","startTime":"","endTime":"","memo":"asmkkld","creator":"test"}
    r=requests.post(url=url,headers=header,json=payload)

    return r.text

if __name__=='__main__':
    print(addNotice())
POST请求分为form格式和JSON格式两种常见方式。form格式适合传统网页表单提交,JSON格式适合RESTful API交互。
python
data = {'key': 'value'}  # form数据
json_data = {'key': 'value'}  # JSON数据
response_form = requests.post(url, data=data)
response_json = requests.post(url, json=json_data)
四、总结
登录接口实现
标准登录实现包含完整的请求头配置和JSON请求体处理。User-Agent模拟浏览器请求,Content-Type指定JSON格式。
python
headers = {
    'User-Agent': 'Mozilla/5.0',
    'Content-Type': 'application/json'
}
payload = {"name": "test", "password": "test123"}
response = requests.post(url, headers=headers, json=payload)
带Session的登录方式会自动管理cookies,适合需要保持会话的场景。Session对象会持久化cookies,简化后续认证请求。
python
session = requests.Session()
session.post(url, headers=headers, json=payload)
print(session.cookies.get_dict())
认证请求处理
Cookie认证方式直接从登录响应中获取Set-Cookie头部,并在后续请求中携带。
python
cookies = login_response.headers['Set-Cookie']
headers = {'Cookie': cookies}
response = requests.get(protected_url, headers=headers)
Token认证从响应JSON中提取token,使用Bearer模式进行授权。Authorization头部是标准做法。
python
token = response.json().get('token')
headers = {'Authorization': f'Bearer {token}'}
response = requests.get(protected_url, headers=headers)
异常处理
健壮的接口测试需要处理各种异常情况。timeout参数防止请求长时间阻塞,status_code检查确保响应正常。
python
try:
    response = requests.get(url, timeout=5)
    response.raise_for_status()
except requests.exceptions.RequestException as e:
    print(f"请求失败: {e}")
高级配置
请求可以配置代理、自定义证书等高级参数。verify参数控制SSL验证,proxies设置代理服务器。
python
proxies = {'http': 'http://proxy.example.com'}
response = requests.get(url, proxies=proxies, verify=False)
接口测试工具类封装
封装请求工具类可提高代码复用性和可维护性,以下是一个典型实现:
python
class ApiClient:
    def __init__(self, base_url):
        self.base_url = base_url
        self.session = requests.Session()
        self.token = None

    def login(self, username, password):
        url = f"{self.base_url}/account/token"
        payload = {
            "name": username,
            "password": password
        }
        response = self.session.post(url, json=payload)
        if response.status_code == 200:
            self.token = response.json().get('token')
            return True
        return False

    def get_projects(self):
        if not self.token:
            raise Exception("请先登录")

        url = f"{self.base_url}/project"
        headers = {
            'Authorization': f'Bearer {self.token}'
        }
        return self.session.get(url, headers=headers).json()
测试用例设计规范
使用unittest框架编写结构化测试用例,包含正向和反向测试:
python
import unittest

class TestLoginAPI(unittest.TestCase):
    BASE_URL = 'http://101.43.118.152:8080'

    def test_successful_login(self):
        client = ApiClient(self.BASE_URL)
        self.assertTrue(client.login('test', 'test123'))
        projects = client.get_projects()
        self.assertIsInstance(projects, list)

    def test_failed_login(self):
        client = ApiClient(self.BASE_URL)
        self.assertFalse(client.login('test', 'wrongpassword'))

    def test_protected_api_without_auth(self):
        response = requests.get(f"{self.BASE_URL}/project")
        self.assertEqual(response.status_code, 401)

if __name__ == '__main__':
    unittest.main()
Cookie处理方案
管理会话状态时需注意Cookie持久化和复用:
python
def handle_cookies():
    response = requests.get('http://example.com')
    print(response.cookies)

    cookies = {'key': 'value'}
    requests.get('http://example.com', cookies=cookies)

    session = requests.Session()
    session.get('http://example.com/login')
    with open('cookies.txt', 'w') as f:
        f.write(str(session.cookies.get_dict()))

    with open('cookies.txt', 'r') as f:
        cookies = eval(f.read())
    session.cookies.update(cookies)
超时与重试机制
实现健壮的请求重试逻辑需要考虑以下因素:
python
from requests.adapters import HTTPAdapter
from urllib3.util.retry import Retry

def setup_retry_session():
    session = requests.Session()
    retry = Retry(
        total=3,
        backoff_factor=1,
        status_forcelist=[500, 502, 503, 504]
    )
    adapter = HTTPAdapter(max_retries=retry)
    session.mount('http://', adapter)
    session.mount('https://', adapter)
    return session

def reliable_request():
    session = setup_retry_session()
    try:
        response = session.get(
            'http://101.43.118.152:8080/api',
            timeout=5
        )
        return response.json()
    except requests.exceptions.RequestException as e:
        print(f"请求失败: {e}")
        return None
请求构造原则
不同请求类型需采用对应参数构造方式:
- GET请求使用params参数
- POST请求根据Content-Type选择data或json
- 文件上传使用files参数
认证处理方式
常见认证方案实现要点:
- Cookie认证通过cookies参数或Session管理
- Token认证添加到Authorization请求头
- Basic Auth使用auth参数组合
响应验证维度
完整响应验证应包含三个层面:
- 状态码验证(200、400、401、500等)
- 响应头验证(Content-Type、Set-Cookie等)
- 响应体验证(JSON结构、字段值、错误信息)
异常处理策略
必须捕获的异常类型包括:
- 网络超时(ConnectTimeout、ReadTimeout)
- HTTP错误(HTTPError)
- JSON解析错误(JSONDecodeError)
性能优化建议
提升测试效率的关键措施:
- 使用Session复用TCP连接
- 合理设置超时时间
- 实现重试机制保证稳定性