架构: MVVM + Hilt + Retrofit + Compose + Mockk
MVVM和Compose,我相信大家都非常熟悉了,这就不多介绍了。Hilt是一个注解框架,可以让你的代码解耦的更彻底。而Mockk,是用来写单元测试的。国内的很多中小厂其实很少写单元测试,如果参与过跨国项目,或者一些大厂项目的同学可能会比较熟悉,因为只有大厂才会重视代码的单元测试,尤其是国外的项目。
不知道有没有和我一样的同学,做了很多年的App开发,自己也写了很多的测试项目或者是参与了很多公司项目,但是似乎自己从来没有真正意义上的搭建过一个完整的项目?起码我是这样的(菜的理直气壮)。
因此我今天就想通过写文章的形式,在各位大神面前班门弄斧,认认真真的来搭建一个项目。如果有不对的地方,欢迎指正。
看完这篇文章能了解到什么?
- 新建项目
- 在Compose中如何搭建MVVM 架构
- Hilt注解是如何使用的
- Retrofit网络请求基础封装
- 单元测试
0. 起点
最开始肯定是创建项目,创建完立马跑起来
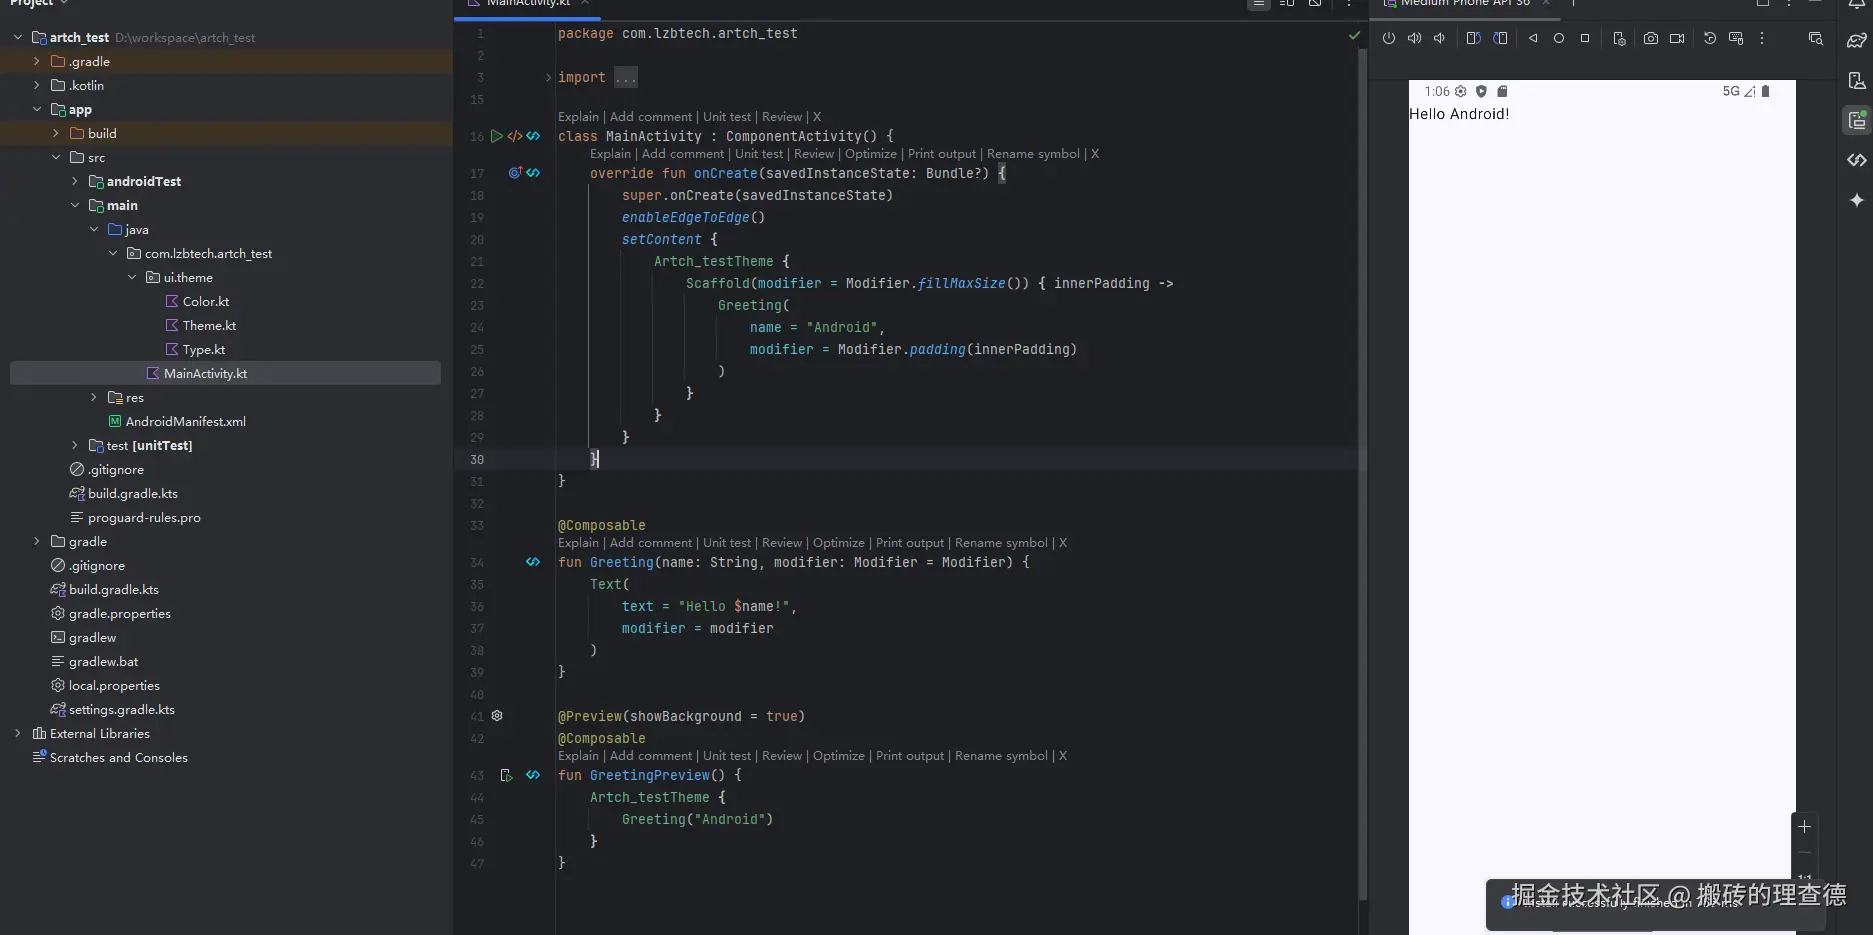
到这里,其实就成功了一半。因为万事开头难,你把最难的一关迈过去了,后面就是水到渠成了。
1. 搭建MVVM
这个我相信大家都会,但为了这个架构搭建过程的完整性,我这里就罗嗦一点了。
先在libs.versions.toml文件中添加这两个依赖
csharp
androidx-lifecycle-viewmodel-compose = { group = "androidx.lifecycle", name = "lifecycle-viewmodel-compose", version.ref = "lifecycleRuntimeKtx" }
androidx-lifecycle-runtime-compose = { group = "androidx.lifecycle", name = "lifecycle-runtime-compose", version.ref = "lifecycleRuntimeKtx" }
然后在app/build.gradle文件中添加
scss
//ViewModel
implementation(libs.androidx.lifecycle.viewmodel.compose)
implementation(libs.androidx.lifecycle.runtime.compose)
创建对应的文件夹和文件
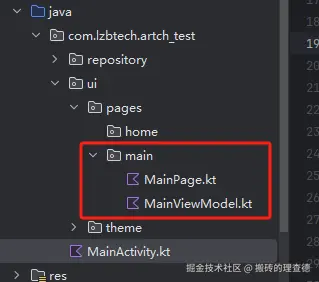
在写ViewModel和View中的代码之前,我们先回顾一下MVVM的数据流向。
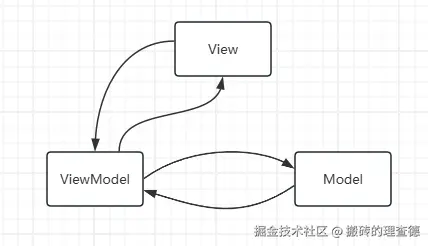
再细化一下就差不多是这样
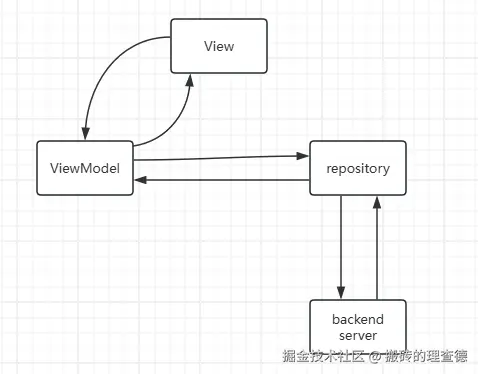
在xml的Android项目中,viewmodel和view是双向绑定的,那View和ViewModel的数据流向肯定没有问题,但是Compose中好像没有双向绑定这个概念了。那我们如何实现这个view层的数据从viewmodel中取,然后更新的时候,是从view中更新viewmodel中的数据。
因此,我们先在viewmodel中需要做2件事情:
- 创建数据变量count,用来存储计数器的值
- 创建一个方法increase, 用来给Count添加值
梳理清楚了就开始写代码了
kotlin
class MainViewModel(): ViewModel() {
//这个声明成私有方法,是为了防止在外部直接通过viewmodel的示例来改变count的值。
private val _count = mutableIntStateOf(0)
val count: State<Int> = _count
fun increase() {
_count.intValue += 1
}
}创建View页面
同样,在写代码之前,我们先梳理清楚我们在view中需要做的事情,
- 引入获取viewmodel的实例对象,
- 展示count的数据
- 有一个button可以点击,调用increase方法,让数值累加起来
kotlin
@Composable
fun MainPage(modifier: Modifier) {
//获取ViewModel的实例
val viewModel: MainViewModel = viewModel()
val count by remember { viewModel.count }
Column(
modifier = modifier,
verticalArrangement = Arrangement.Center,
horizontalAlignment = Alignment.CenterHorizontally
) {
Text(" 计数器: $count")
Button(onClick = {
viewModel.increase()
}) {
Text("加一")
}
}
}2. 添加网络请求
添加网络请求权限:
xml
<uses-permission android:name="android.permission.INTERNET" />添加Retrofit 相关依赖
libs.version.toml
toml
retrofit2 = {  module = "com.squareup.retrofit2:retrofit", version.ref = "retrofit" }
converter-gson = { module = "com.squareup.retrofit2:converter-gson", version.ref = "retrofit" }
app/build.gradle.kts
kotlin
//Retrofit
implementation(libs.retrofit2)
implementation(libs.converter.gson)
封装Retrofit
kotlin
object RetrofitProvider {

    //创建OKHttpClient,主要是可以通过Interceptor来定制化一些需求
    private fun createOkHttpClient(): OkHttpClient {
        return OkHttpClient.Builder()
            .addInterceptor(HttpLoggingInterceptor().setLevel(HttpLoggingInterceptor.Level.BODY))
            .build()
    }

    //提供一个静态方法来创建Retrofit
    fun build(): Retrofit {
        return Retrofit.Builder()
        // 这个BaseUrl如果一个项目有多个host,那也是可以抽出来的,看需求了。
            .baseUrl("https://host.example.com/")
            .addConverterFactory(GsonConverterFactory.create())
            .client(createOkHttpClient())
            .build()
    }
}
到这里,最基础的网络请求的基础封装就差不多了。
那我们以一个天气Api为例子,看如何使用这个网络请求。
创建API Service
kotlin
interface WeatherService {

    @GET("/v3/weather/weatherInfo")
    suspend fun getWeather(): DailyWeatherResponse
}
创建API Service 实例。
kotlin
object ServiceProvider {

    fun providerWeatherService(): WeatherService {
        return RetrofitProvider.build().create<WeatherService>(WeatherService::class.java)
    }
}
再创建一个Repository来发送网络请求
WeatherRepository
kotlin
interface WeatherRepository {

    suspend fun getWeather(): DailyWeatherResponse?
}
WeatherRepositoryImp
kotlin
class WeatherRepositoryImp(val weatherService: WeatherService) : WeatherRepository {

    override suspend fun getWeather(): DailyWeatherResponse? {
        return weatherService.getWeather()
    }
}
再创建一个RepositoryProvider,通过这个provider来创建WeatherRepository的实例
kotlin
object ApiProvider {

    fun providerWeatherRepository(): WeatherRepository {
        return WeatherRepositoryImp(ServiceProvider.providerWeatherService())
    }
}到这里可能有些新人朋友会好奇为什么要创建ServiceProvider和ApiProvider。直接在用的地方去new这个对象不就好了。那这就需要理解一下解耦概念以及可测试性。我们这样做其实就是为了更好的解耦。等到后面讲到Hilt的时候,再回头来看就能理解了
到这里其实整个网络请求就差不多了。在viewmodel使用之前,我们还需要改造一个东西,那就是创建viewmodel的实例。因为前面我们的代码中viewmodel中不需要任何网络数据,因此它的构造函数没有任何参数,可以直接在页面中通过viewmodel()来创建实例,但是现在因为要调用weatherRepository的接口了,所以肯定就需要在viewmodel中创建这个实例对象了。
kotlin
@Composable
fun rememberMainViewModel(): MainViewModel {
    return viewModel(factory = object : ViewModelProvider.Factory {
        //重新viewmodel中创建viewmodel的工厂方法。
        override fun <T : ViewModel> create(modelClass: Class<T>): T {
            //使用ApiProvider去创建repository的实例对象。
            return MainViewModel(ApiProvider.providerWeatherRepository()) as T
        }

    })
}
然后页面中的使用也更新一下
kotlin
fun MainPage(modifier: Modifier) {
    //val viewModel: MainViewModel = viewModel()
    val viewModel: MainViewModel = rememberMainViewModel() // 用这个替换上面的
    val count by remember { viewModel.count }
    val todayWeather by remember { viewModel.weather } //获取天气数据

    Column(
        modifier = modifier,
        verticalArrangement = Arrangement.Center,
        horizontalAlignment = Alignment.CenterHorizontally
    ) {
        Text("今日天气:${todayWeather?.lives?.get(0)?.weather}") //展示天气
        Spacer(Modifier.height(100.dp))
        Text(" 计数器: $count")
        Button(onClick = {
            viewModel.increase()
        }) {
            Text("加一")
        }
    }
}
看结果
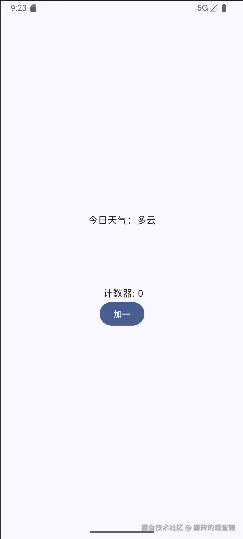
到这里,MVVM + Retrofit已经封装完毕了。基础功能开发已经没什么问题了。 如果经历过这种框架的同学可能会知道,Provider这个创建是真的很麻烦,而且没有什么逻辑,全是体力活。那么有没有什么方式可以简化或者说自动创建呢?这就是我们接下来要添加的Hilt注解框架。
3. 添加Hilt框架,让你的代码更清爽
老规矩,添加依赖
libs.versions.toml
toml
[libraries]
hilt-navigation-compose = { module = "androidx.hilt:hilt-navigation-compose", version.ref = "hiltNavigationCompose" }
hilt-compiler = { module = "com.google.dagger:hilt-android-compiler", version.ref = "hiltAndroidGradlePlugin" }
hilt-android = { module = "com.google.dagger:hilt-android", version.ref = "hiltAndroidGradlePlugin" }
hilt-android-gradle-plugin = { module = "com.google.dagger:hilt-android-gradle-plugin", version.ref = "hiltAndroidGradlePlugin" }

[plugins]
kotlin-hilt = { id = "com.google.dagger.hilt.android", version.ref = "hiltAndroidGradlePlugin" }
kotlin-kapt = { id = "org.jetbrains.kotlin.kapt", version.ref = "kotlin" }
这里要注意,既要添加依赖,还需要添加plugins
根目录下的build.gradle.kts
kotlin
plugins {
    //...其它plugins
    alias(libs.plugins.kotlin.hilt) apply false
    alias(libs.plugins.kotlin.kapt) apply false
}

buildscript {
    dependencies {
        classpath(libs.hilt.android.gradle.plugin)
    }
}
app/build.gradle.kts
kotlin
plugins {
    // ...其它plugins
    alias(libs.plugins.kotlin.kapt)
    alias(libs.plugins.kotlin.hilt)
}

dependences {

    //Hilt
    implementation(libs.hilt.android)
    kapt(libs.hilt.compiler)
    implementation(libs.hilt.navigation.compose)
}
至此,基本的依赖配置完成。接下来就是代码添加注解了。
总共要替换的地方有这几个。
- Application
- Activity
- ViewModel
- 获取网络请求的相关类
创建一个继承Application的类
kotlin
@HiltAndroidApp
class TestApplication: Application() {
// 没有特殊需求,这里啥也不用干,只需要继承Application就行
}
这个应该不用多说,配置到AndroidManifest.xml
xml
<application
    android:name=".base.TestApplication"
    android:allowBackup="true"
    ......
 /application>
Activity中添加注解
为了突出重点和减少篇幅,我就把不是重要的内容去掉了。
kotlin
@AndroidEntryPoint
class MainActivity : ComponentActivity() {
}
ViewModel中添加注解
kotlin
@HiltViewModel
class MainViewModel @Inject constructor(val weatherRepository: WeatherRepository) : ViewModel() {
}viewmodel需要添加两个注解,一个是@HiltViewModel,另一个是@Inject 缺一不可。
最后就是数据类这部分的注解了,
创建一个NetworkModule
kotlin
@Module
@InstallIn(SingletonComponent::class)
class NetworkModule {
}
添加了这两个注解之后,这个框架就会自动扫描这个类里的所有注解。接下来我们就把repository和retrofit之前的那些provider全部替换过来。
kotlin
@Module
@InstallIn(SingletonComponent::class)
class NetworkModule {

    @Provides
    fun provideOkHttpClient(): OkHttpClient {
        return OkHttpClient.Builder()
            .addInterceptor(HttpLoggingInterceptor().setLevel(HttpLoggingInterceptor.Level.BODY))
            .build()
    }

    @Provides
    fun provideRetrofit(okHttpClient: OkHttpClient): Retrofit {
        return Retrofit.Builder()
            .baseUrl("https://restapi.amap.com/")
            .addConverterFactory(GsonConverterFactory.create())
            .client(okHttpClient)
            .build()
    }

    @Provides
    fun provideWeatherApiService(retrofit: Retrofit): WeatherService {
        return retrofit.create(WeatherService::class.java)
    }

    @Provides
    fun provideWeatherRepository(weatherApiService: WeatherService): WeatherRepository {
        return WeatherRepositoryImp(weatherApiService)
    }
}
对于不熟悉这个注解框架的人可能会有疑问。可以先跳过细读这些代码。那我们来逐个解释一下。
WeatherRepository添加注解
前面viewmodel中引用了WeatherRepository,那么我们就得提供WeatherRepository的注解
kotlin
 @Provides
fun provideWeatherRepository(weatherApiService: WeatherService): WeatherRepository {
    return WeatherRepositoryImp(weatherApiService)
}
这样你在创建viewmodel的适合,注解框架会自动引入WeatherRepository的实例了。那么如果创建WeatherService实例又需要一个参数,所以继续添加
WeatherServicet添加注解
kotlin
@Provides
fun provideWeatherApiService(retrofit: Retrofit): WeatherService {
    return retrofit.create(WeatherService::class.java)
}和上面类似的原理了,这里又有参数Retrofit,所以继续添加Retrofit的注解
Retrofit添加注解
kotlin
@Provides
fun provideRetrofit(okHttpClient: OkHttpClient): Retrofit {
    return Retrofit.Builder()
        .baseUrl("https://restapi.amap.com/")
        .addConverterFactory(GsonConverterFactory.create())
        .client(okHttpClient)
        .build()
}同理参数okHttpClient继续添加注解
OkHttpClient添加注解
kotlin
@Provides
fun provideOkHttpClient(): OkHttpClient {
    return OkHttpClient.Builder()
        .addInterceptor(HttpLoggingInterceptor().setLevel(HttpLoggingInterceptor.Level.BODY))
        .build()
}至此就基本上完结了Hilt框架的集成。可以直接运行了。
后续随着业务的加入,肯定会有更多的repository接口和类需要注入,那继续往这里添加就好了。当然,随着业务的扩大,或者为了更方便,更清晰的管理这些注解,那可能会涉及到分多个module,你也可以创建多个module,你只需要添加如上两个注解就行。记住一个原则,所有的这些注解提供的实例中的参数,都必须是提供了相应的provides注解,否则会报错的。因为这个是编译时注解,因此会直接导致你的项目不通过。
kotlin
fun provideOkHttpClient(): OkHttpClient {
    return OkHttpClient.Builder()
        .addInterceptor(HttpLoggingInterceptor().setLevel(HttpLoggingInterceptor.Level.BODY))
        .build()
}
比如我去掉OkHttpClient的@Provides注解。直接就会报错。而且这个报错是一层一层的报错。
OkHttpClient的缺失导致Retrofit注解失败 -> 导致Retrofit注解失败 -> 导致WeatherService注解失败 -> WeatherRepository注解失败 -> 导致MainViewModel注解失败。
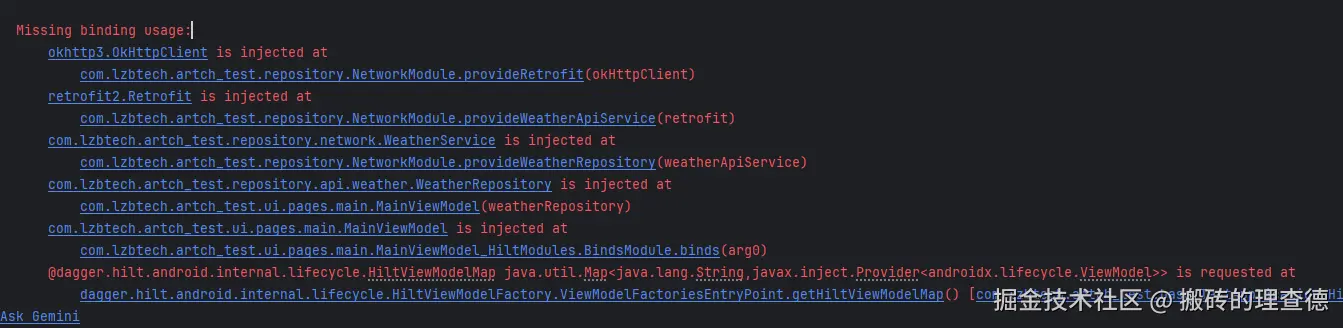
所以如果编译出现类似这样的错误,就要反应过来是漏掉了某个类的@Provides的注解,直接看第一行报错的代码就行了,找到对应的类并添加相应的注解就好了。
到这里,如果你的项目不需要添加单元测试,那你的架构就基本上完整了。但是往往大型项目都是需要添加单元测试的。因此最后再补充一个单元测试框架
4. 单元测试Mockk的引入(可选)
老规矩,添加依赖
libs.versions.toml
toml
mockk = { group = "io.mockk", name = "mockk", version = "mockkVersion"}
mockk-android = { group = "io.mockk", name = "mockk-android", version = "mockkVersion"}
kotlinx-coroutines-test = { module = "org.jetbrains.kotlinx:kotlinx-coroutines-test", version.ref = "kotlinxCoroutinesAndroid" }
app/build.gradle.kts
kotlin
testImplementation(libs.mockk)
testImplementation(libs.kotlinx.coroutines.test)
androidTestImplementation(libs.mockk.android)
然后开始编写ViewModel的单元测试
kotlin
@OptIn(ExperimentalCoroutinesApi::class)
class MainViewModelTest {

    private val testDispatcher = StandardTestDispatcher()
    private val testScope = TestScope(testDispatcher)

    @get:Rule
    val mainCoroutineRule = MainCoroutineRule(testDispatcher)

    private lateinit var weatherRepository: WeatherRepository
    private lateinit var viewModel: MainViewModel

    @Before
    fun setup() {
        weatherRepository = mockk(relaxed = true)
        viewModel = MainViewModel(weatherRepository)
    }

    @Test
    fun `init should call fetchWeather`() = testScope.runTest {
        // Given
        val mockResponse = mockk<DailyWeatherResponse>()
        coEvery { weatherRepository.getWeather() } returns mockResponse

        // When
        viewModel.fetchWeather()
        advanceUntilIdle() // Execute pending coroutines

        // Then
        coVerify { weatherRepository.getWeather() }
        assertEquals(mockResponse, viewModel.weather.value)
    }

    @Test
    fun `increase should increment count`() {
        // Given
        val initialCount = viewModel.count.value

        // When
        viewModel.increase()

        // Then
        assertEquals(initialCount + 1, viewModel.count.value)
    }

    @Test
    fun `fetchWeather should update weather state`() = testScope.runTest {
        // Given
        val mockResponse = mockk<DailyWeatherResponse>()
        coEvery { weatherRepository.getWeather() } returns mockResponse

        // When
        viewModel.fetchWeather()
        advanceUntilIdle() // Wait for coroutine to complete

        // Then
        coVerify { weatherRepository.getWeather() }
        assertEquals(mockResponse, viewModel.weather.value)
    }

    @Test
    fun `count should have initial value zero`() {
        assertEquals(0, viewModel.count.value)
    }
}

class MainCoroutineRule(
    private val testDispatcher: CoroutineDispatcher = StandardTestDispatcher()
) : TestWatcher() {

    override fun starting(description: Description) {
        super.starting(description)
        Dispatchers.setMain(testDispatcher)
    }

    override fun finished(description: Description) {
        super.finished(description)
        Dispatchers.resetMain()
    }
}
这里主要是需要掌握Mockk的基本语法,篇幅原因,我就不一一细讲了。我就简单说一下大致的规则,那就是三段式:
- 假设前提
- 执行要测试的代码方法
- 验证结果
5. 总结
一个完整的项目就差不多搭建完成了,可以开始功能需求开发了。我把代码上传至github, 有需要的小伙伴可以参考一下。github.com/RichardLai8...
当然,一个完善的项目,要封装的内容肯定远远比这个要多的多,比如一些base类需要做的事情,一些工具类等等。但很多内容都是边开发边封装的,这篇文章写的这些只是新建项目刚开始要做的事情。希望对大家有所帮助。